Buenas noches amigos artesanos y creativos de #hivediy, espero hayan tenido un excelente inicio de semana, les deseo muchas bendiciones y abundancia en los días por venir; bienvenidos a un nuevo post, dónde les compartiré como realizar un hermoso Porta Útiles escolares con figuras de lápices, hecho a partir de un envase de cartón de leche y foami.
Good evening crafty and creative friends of #hivediy, I hope you have had an excellent start of the week, I wish you many blessings and abundance in the days to come; welcome to a new post, where I will share with you how to make a beautiful school supplies holder with pencils figures, made from a milk carton and foami.
Ya falta poco para el regreso a clases y me pareció buena idea realizar ésta manualidad muy útil para nuestros pequeños, para tener organizados y visibles parte de sus útiles escolares al momento de realizar las tareas para el hogar, particularmente en mi caso, mi pequeña tiene lápices, crayones, marcadores, reglas, tijeras entre otros, en diferentes cartucheras y a veces ni las consigue, por lo que fué un motivo más para realizar este porta útiles escolares, a continuación les muestro el paso a paso de su elaboración.
It's almost time for back to school and I thought it was a good idea to make this very useful craft for our little ones and have organized and visible part of their school supplies when doing homework, particularly in my case, my little one has pencils, crayons, markers, rulers, scissors and others, in different pencil cases and sometimes she doesn't even get them, so I was more motivated to make this school supplies holder, then I show you the step by step of its elaboration.
Materiales
Materials
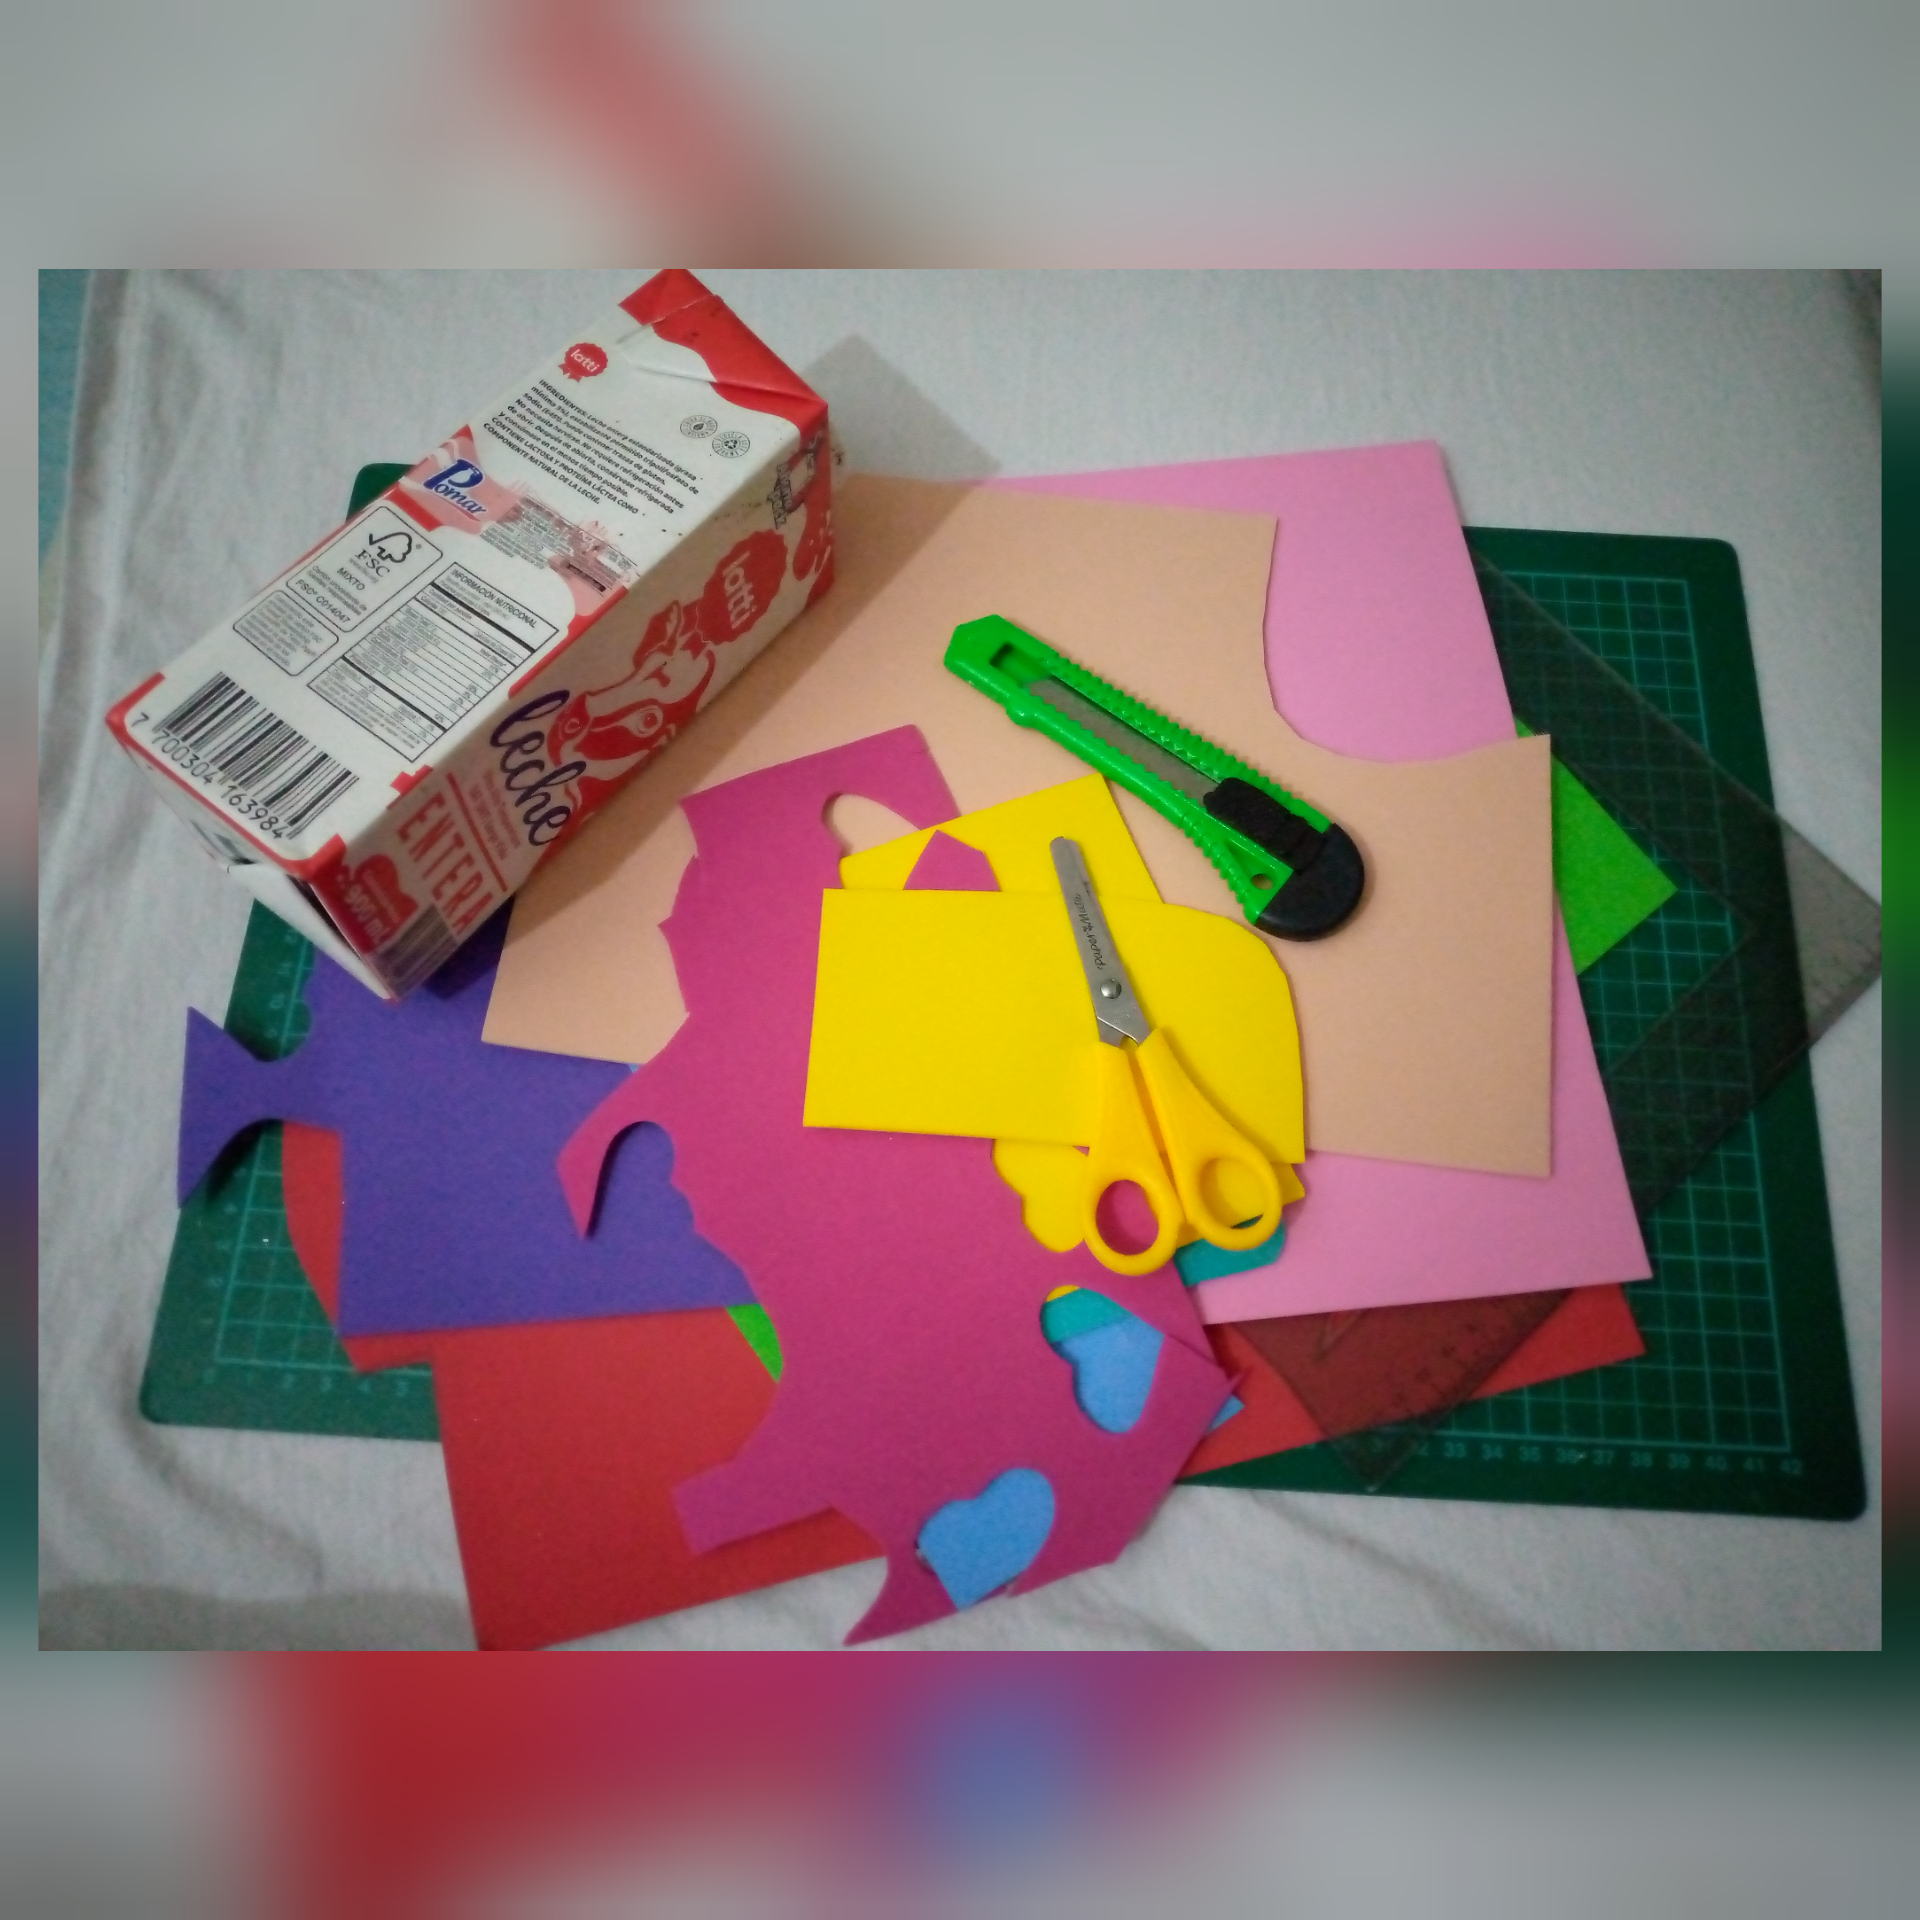
✓ Envase de cartón de leche
✓ Foami colores varios ( Rosado, celeste, morado, amarillo, rojo, fucsia, verde)
✓ Silicón liquido
✓ Tijera
✓ Regla
✓ Cutter
✓ Milk carton container.
✓ Foami various colors ( pink, light blue, purple, yellow, red, fuchsia, green).
✓ Liquid silicone
✓ Scissors
✓ Ruler
✓ Cutter
Paso a paso
Step by step
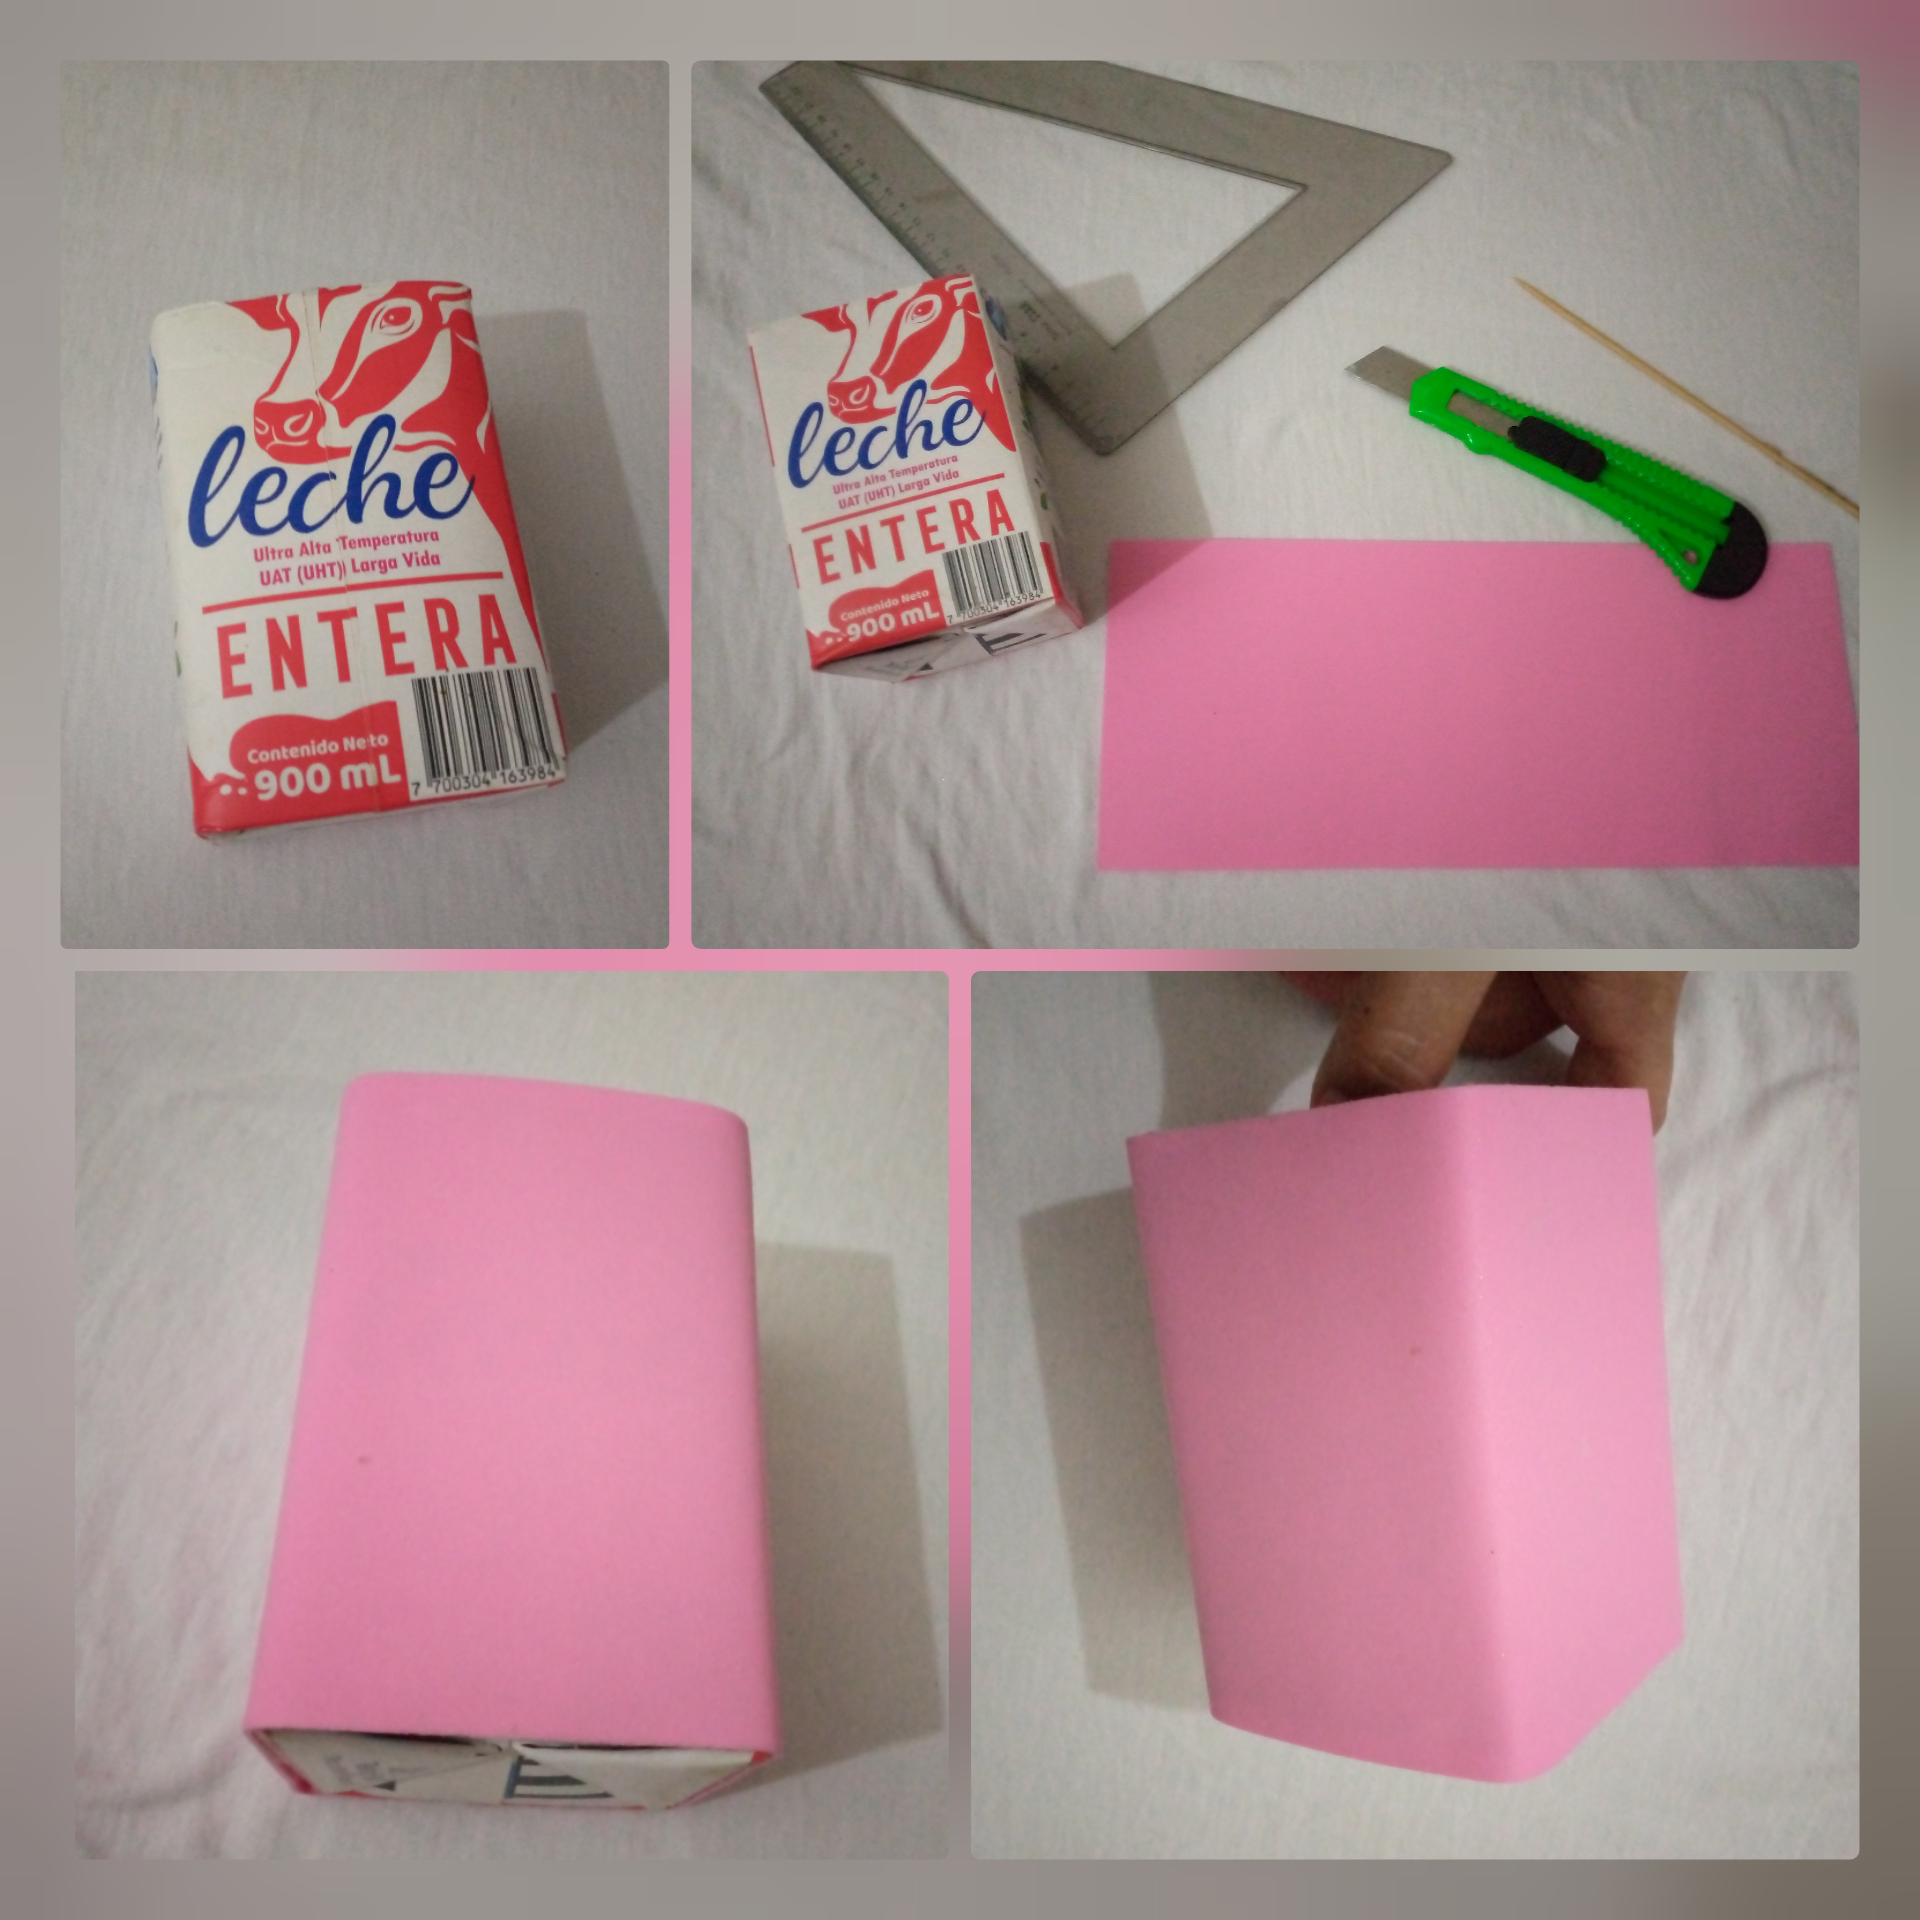
1- Corté el envase del cartón de leche a una altura de 11.5 cm, luego corté una tira de foami color rosado de 29x12cm y cubrí el envase dejando 1/2 cm sobrante en la parte superior.
1- I cut the milk carton to a height of 11.5 cm, then cut a strip of pink foami 29x12cm and covered the carton leaving 1/2 cm left over at the top.
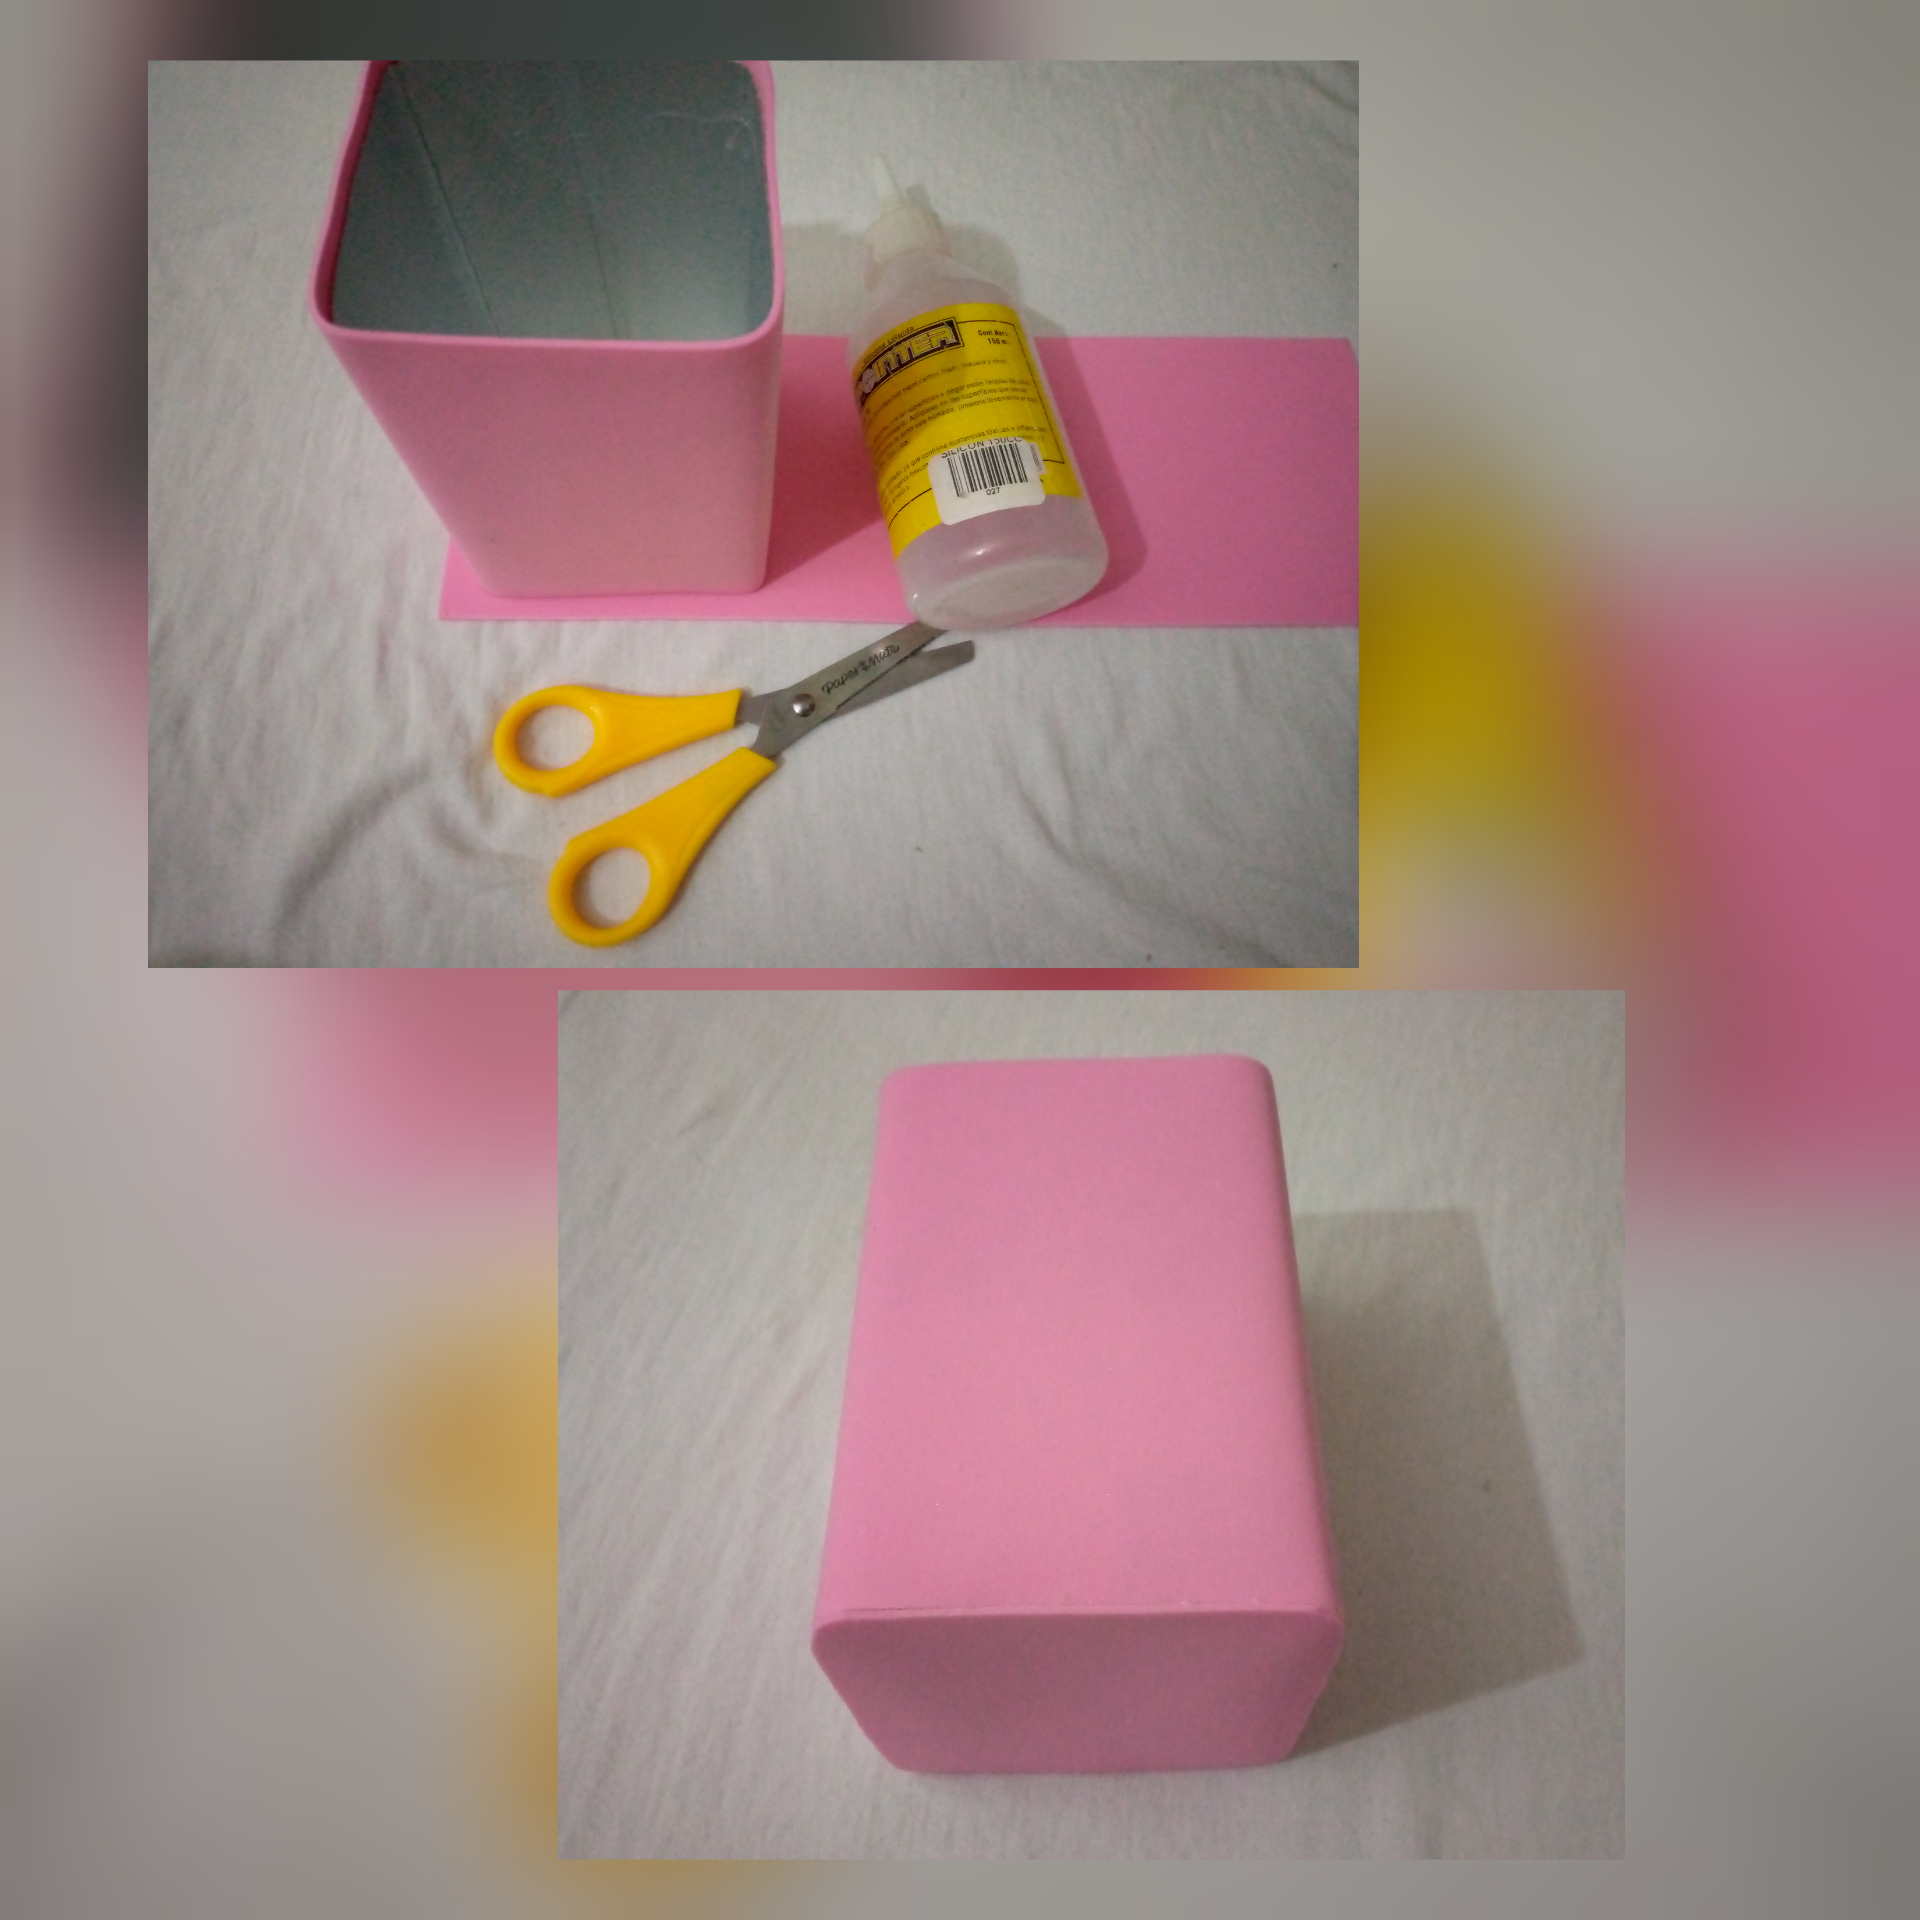
2- Pegué la parte inferior sobre foami rosado y recorté.
2- I glued the lower part on pink foami and cut it out.
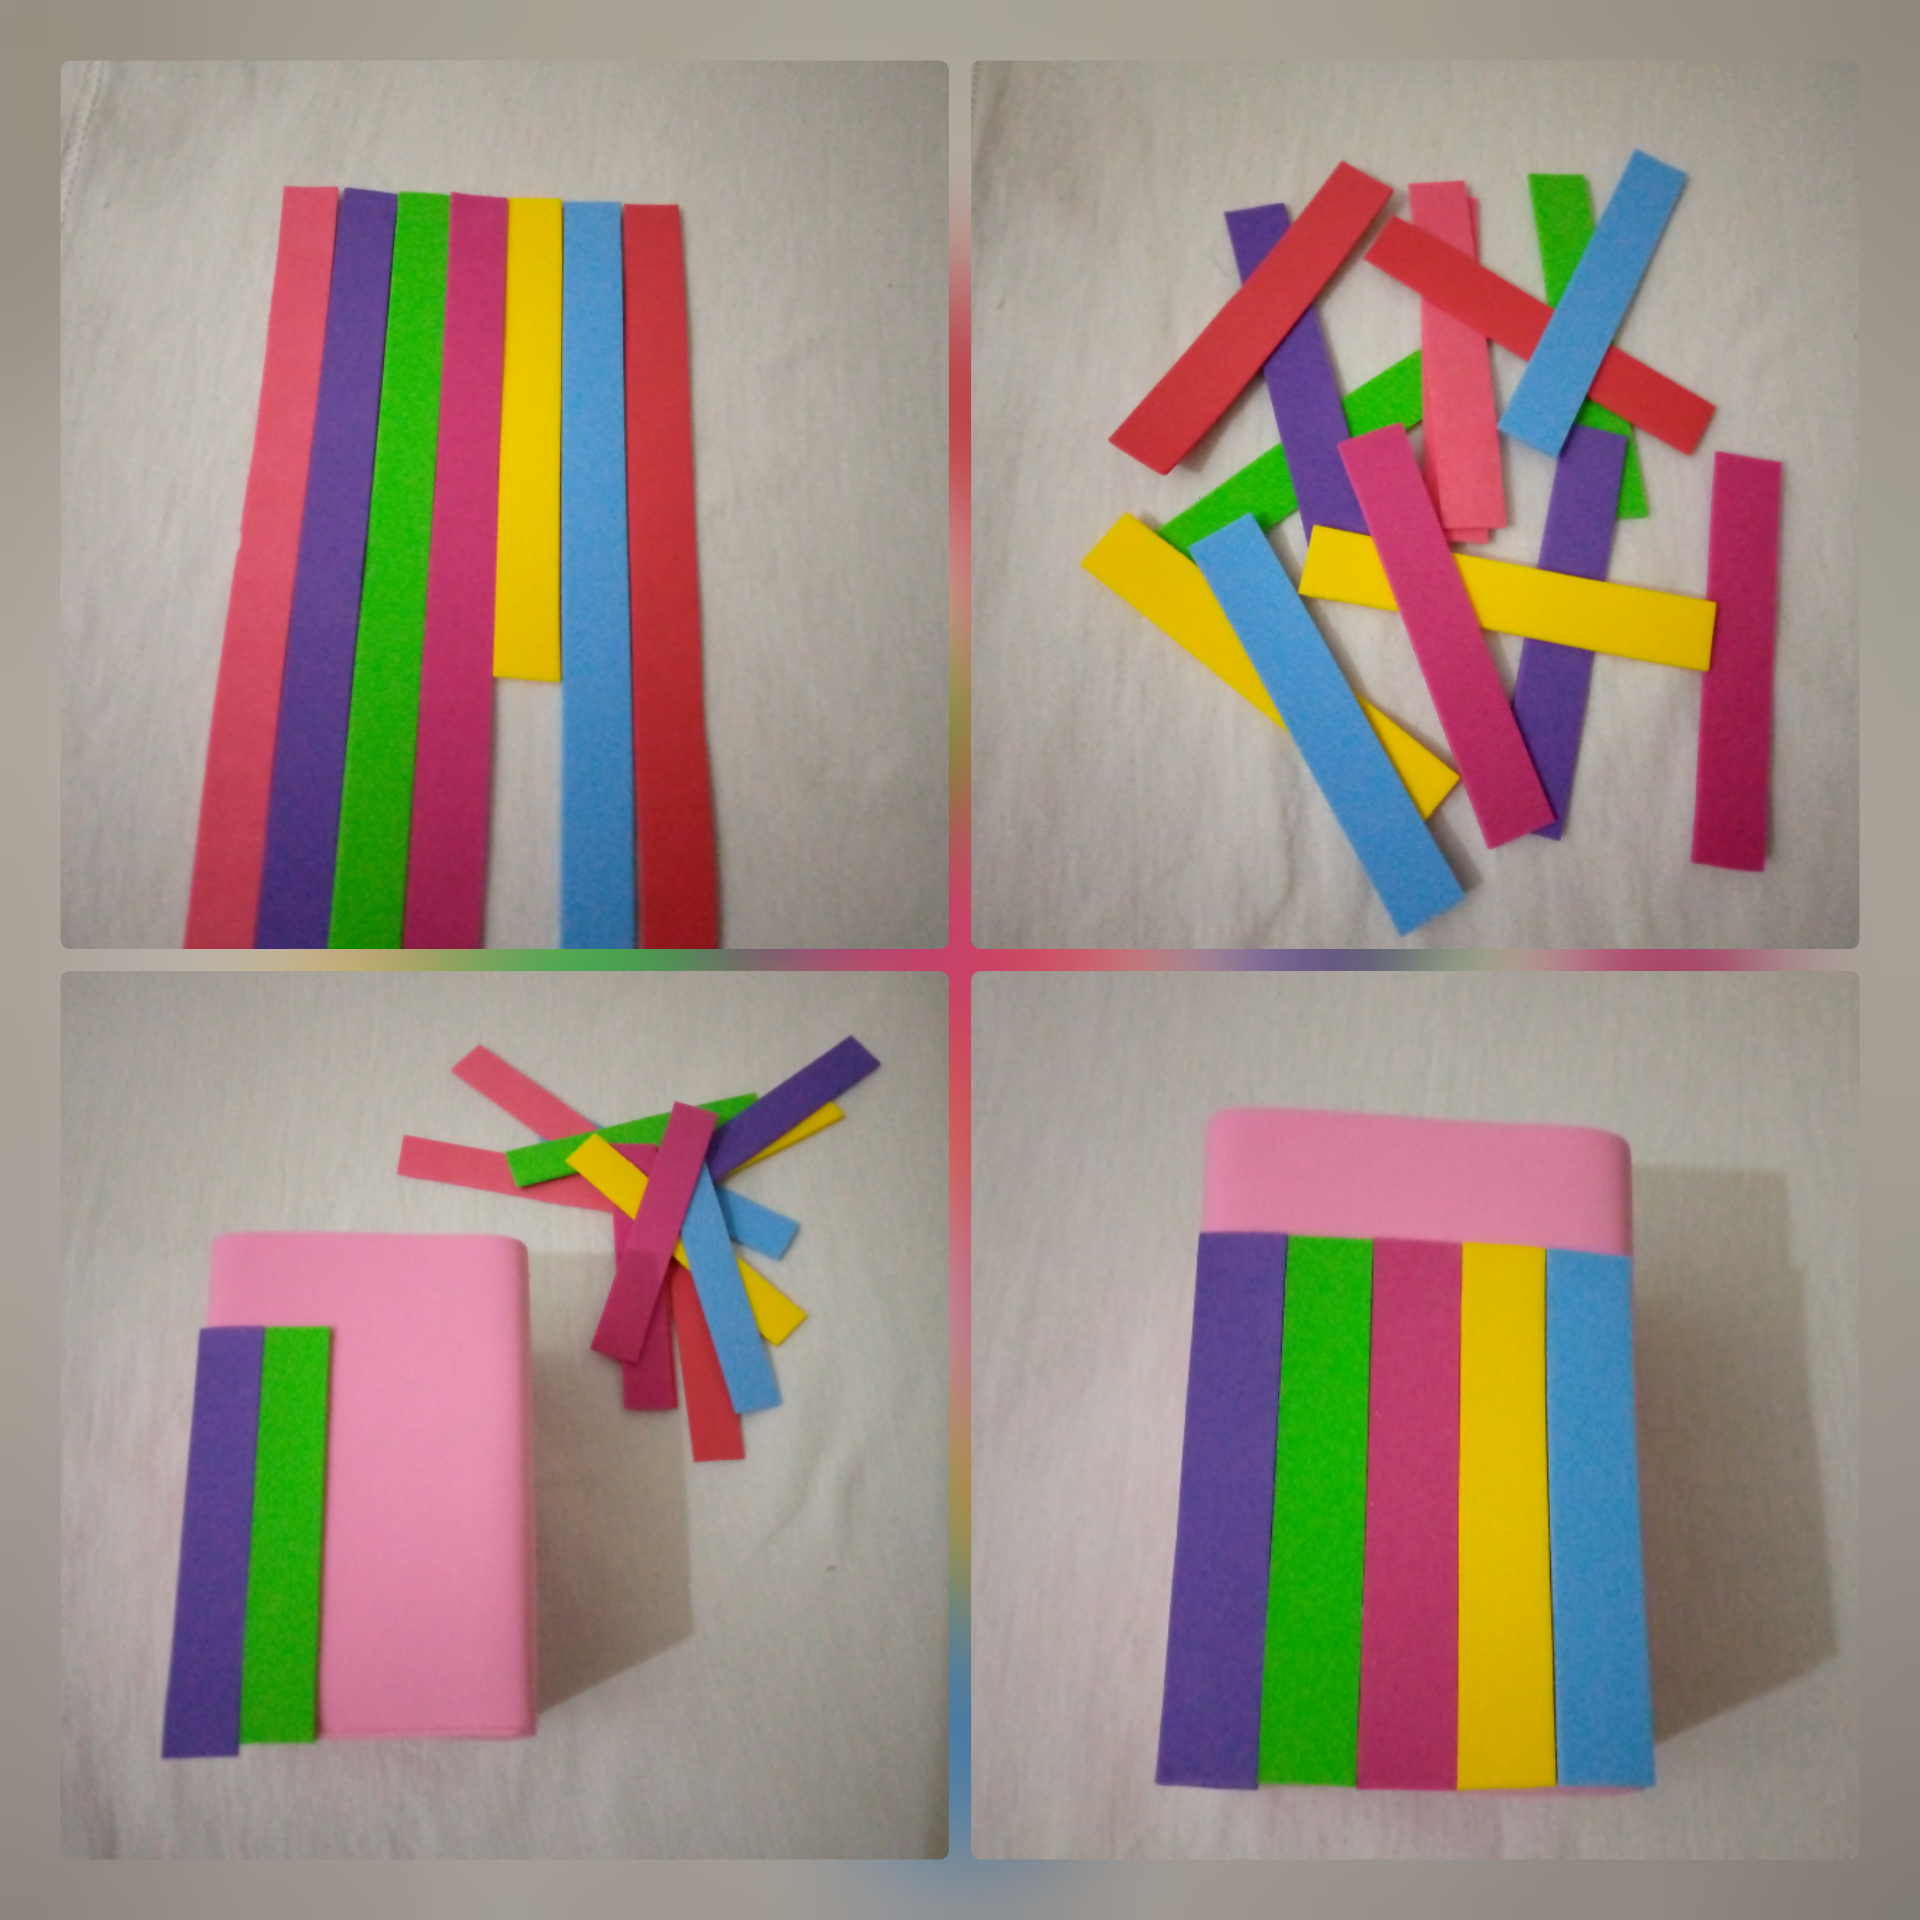
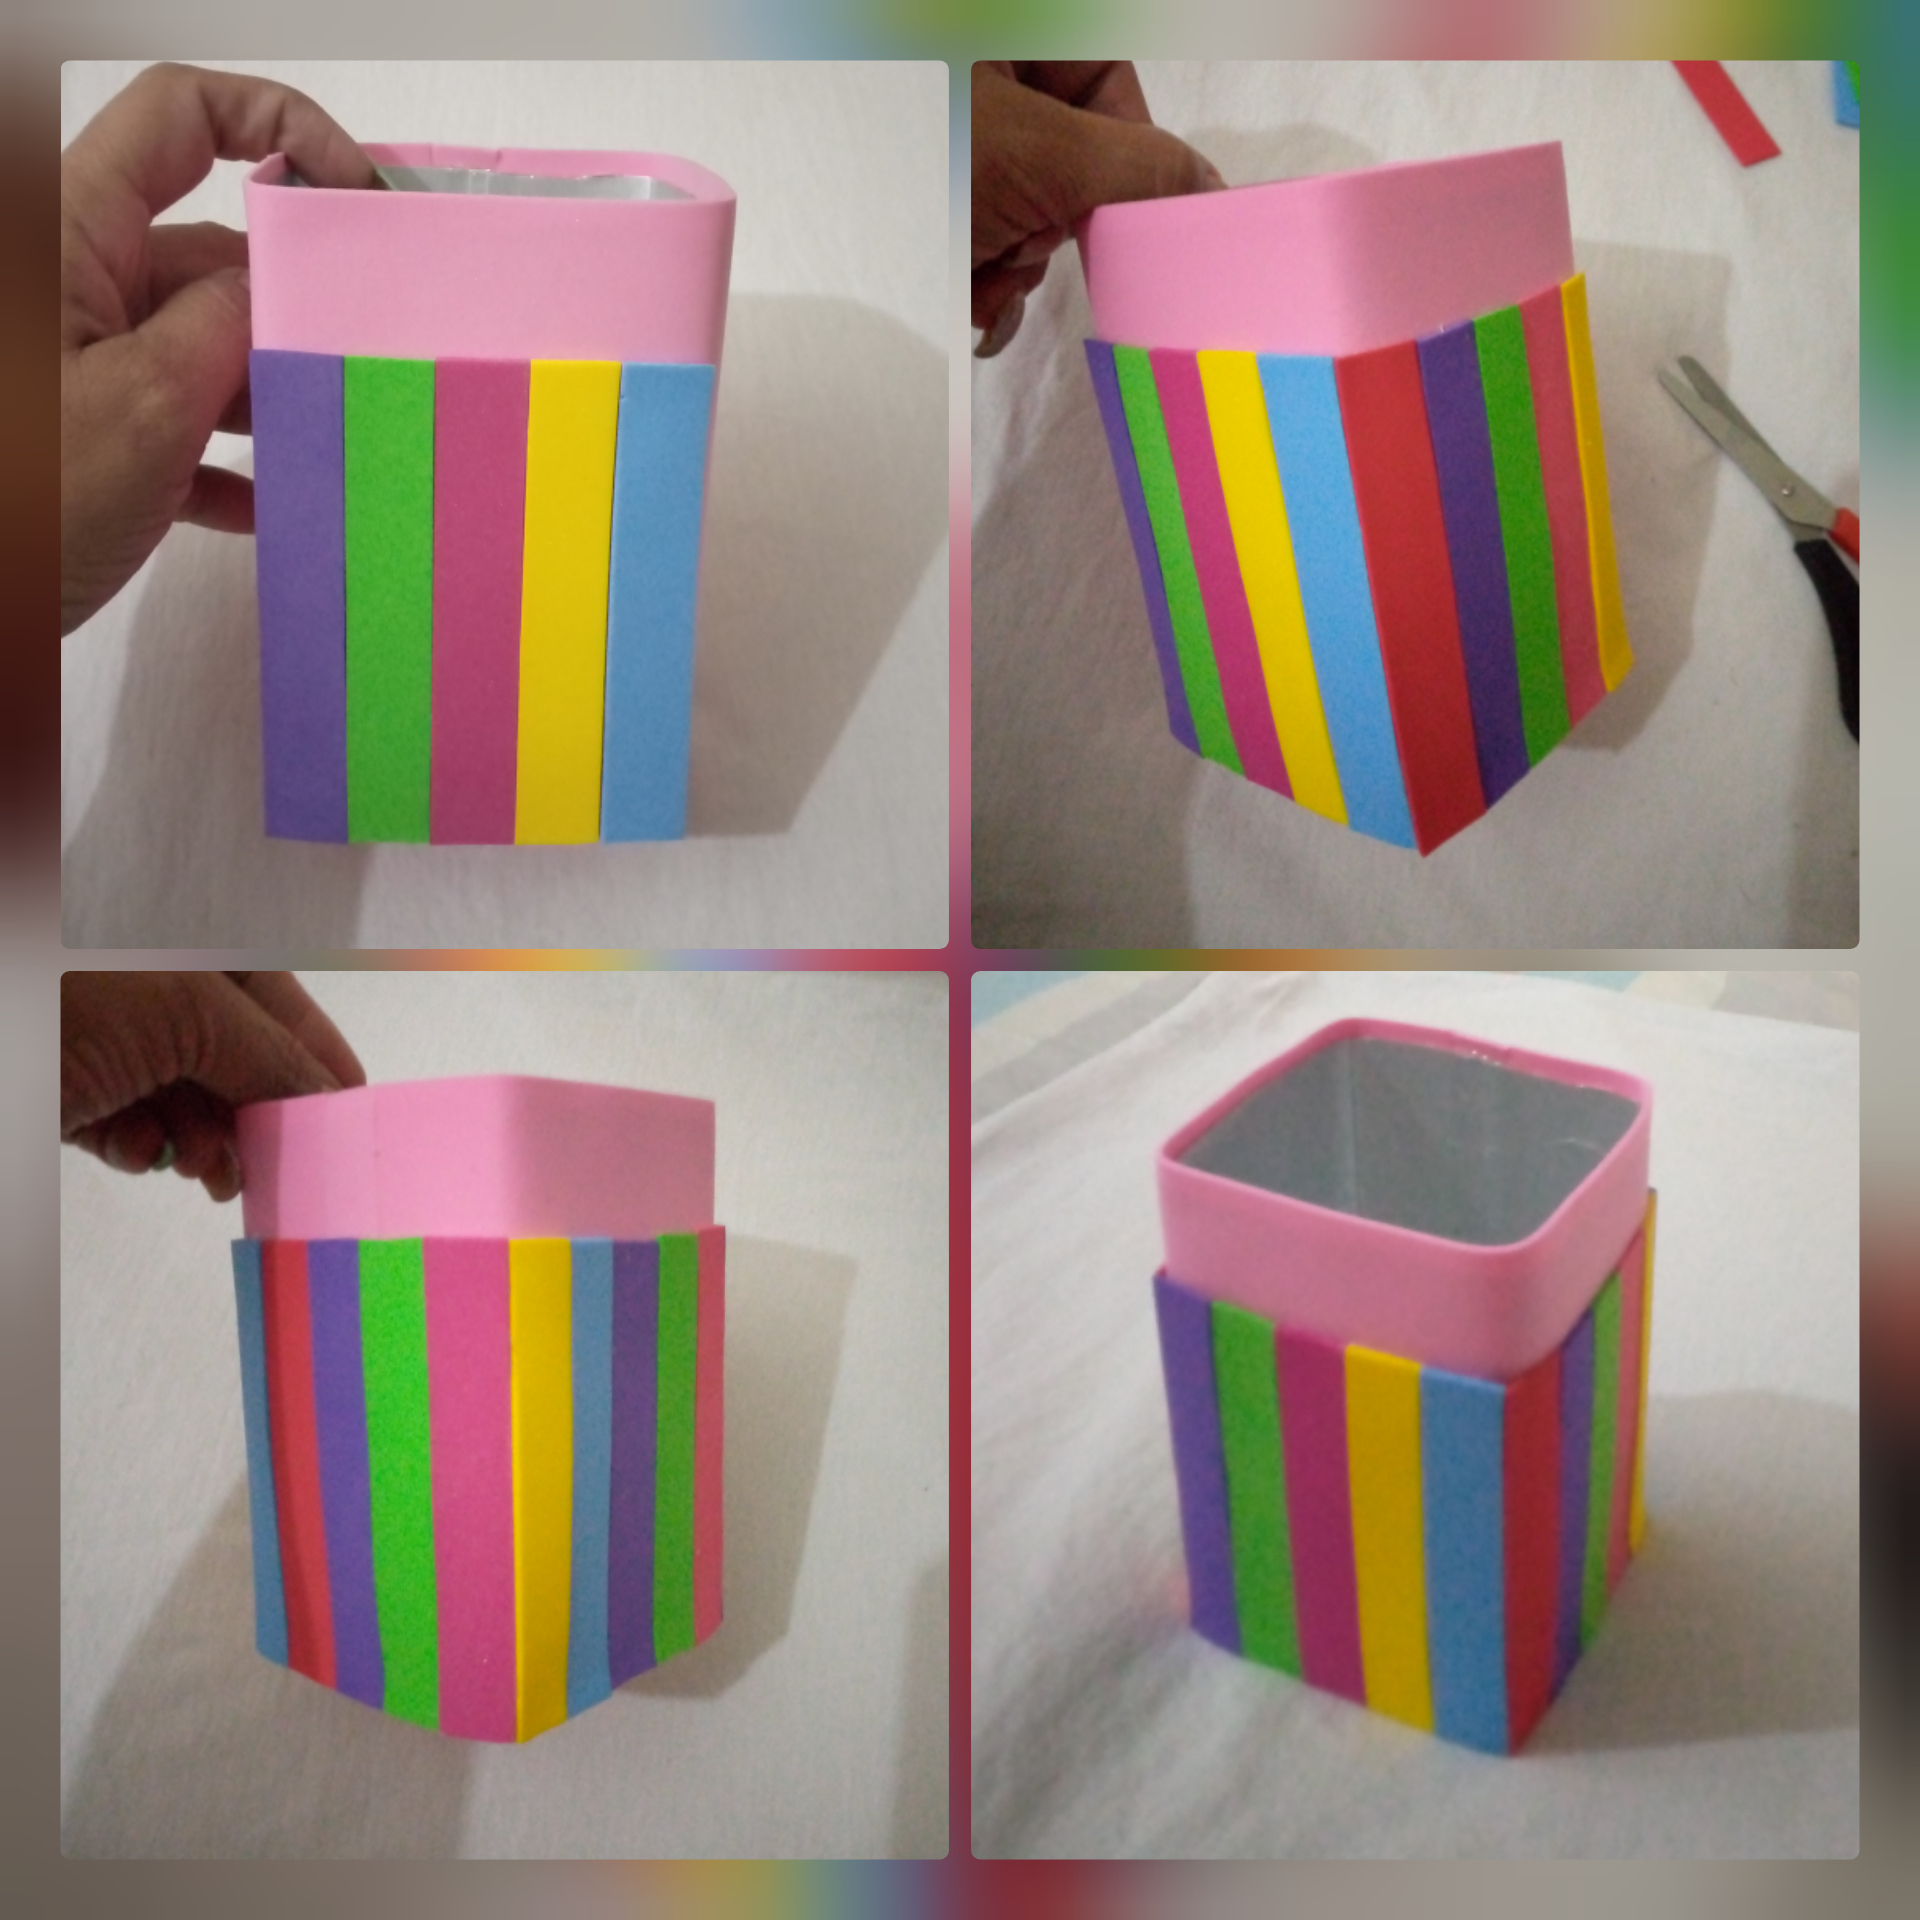
3- Recorté varias tiras de foami de colores varios de 1.5cm de ancho para la parte delantera y trasera, y 1.4cm para los laterales, las empecé a pegar alineando muy bien, cubrí todos los lados y luego corté el excedente en la parte inferior, estos serán el cuerpo de los lápices.
3- I cut several strips of foami of various colors of 1.5cm wide for the front and back, and 1.4 for the sides, I started to glue them aligning them very well, I covered all the sides and then I cut the excess at the bottom, these will be the body of the pencils.
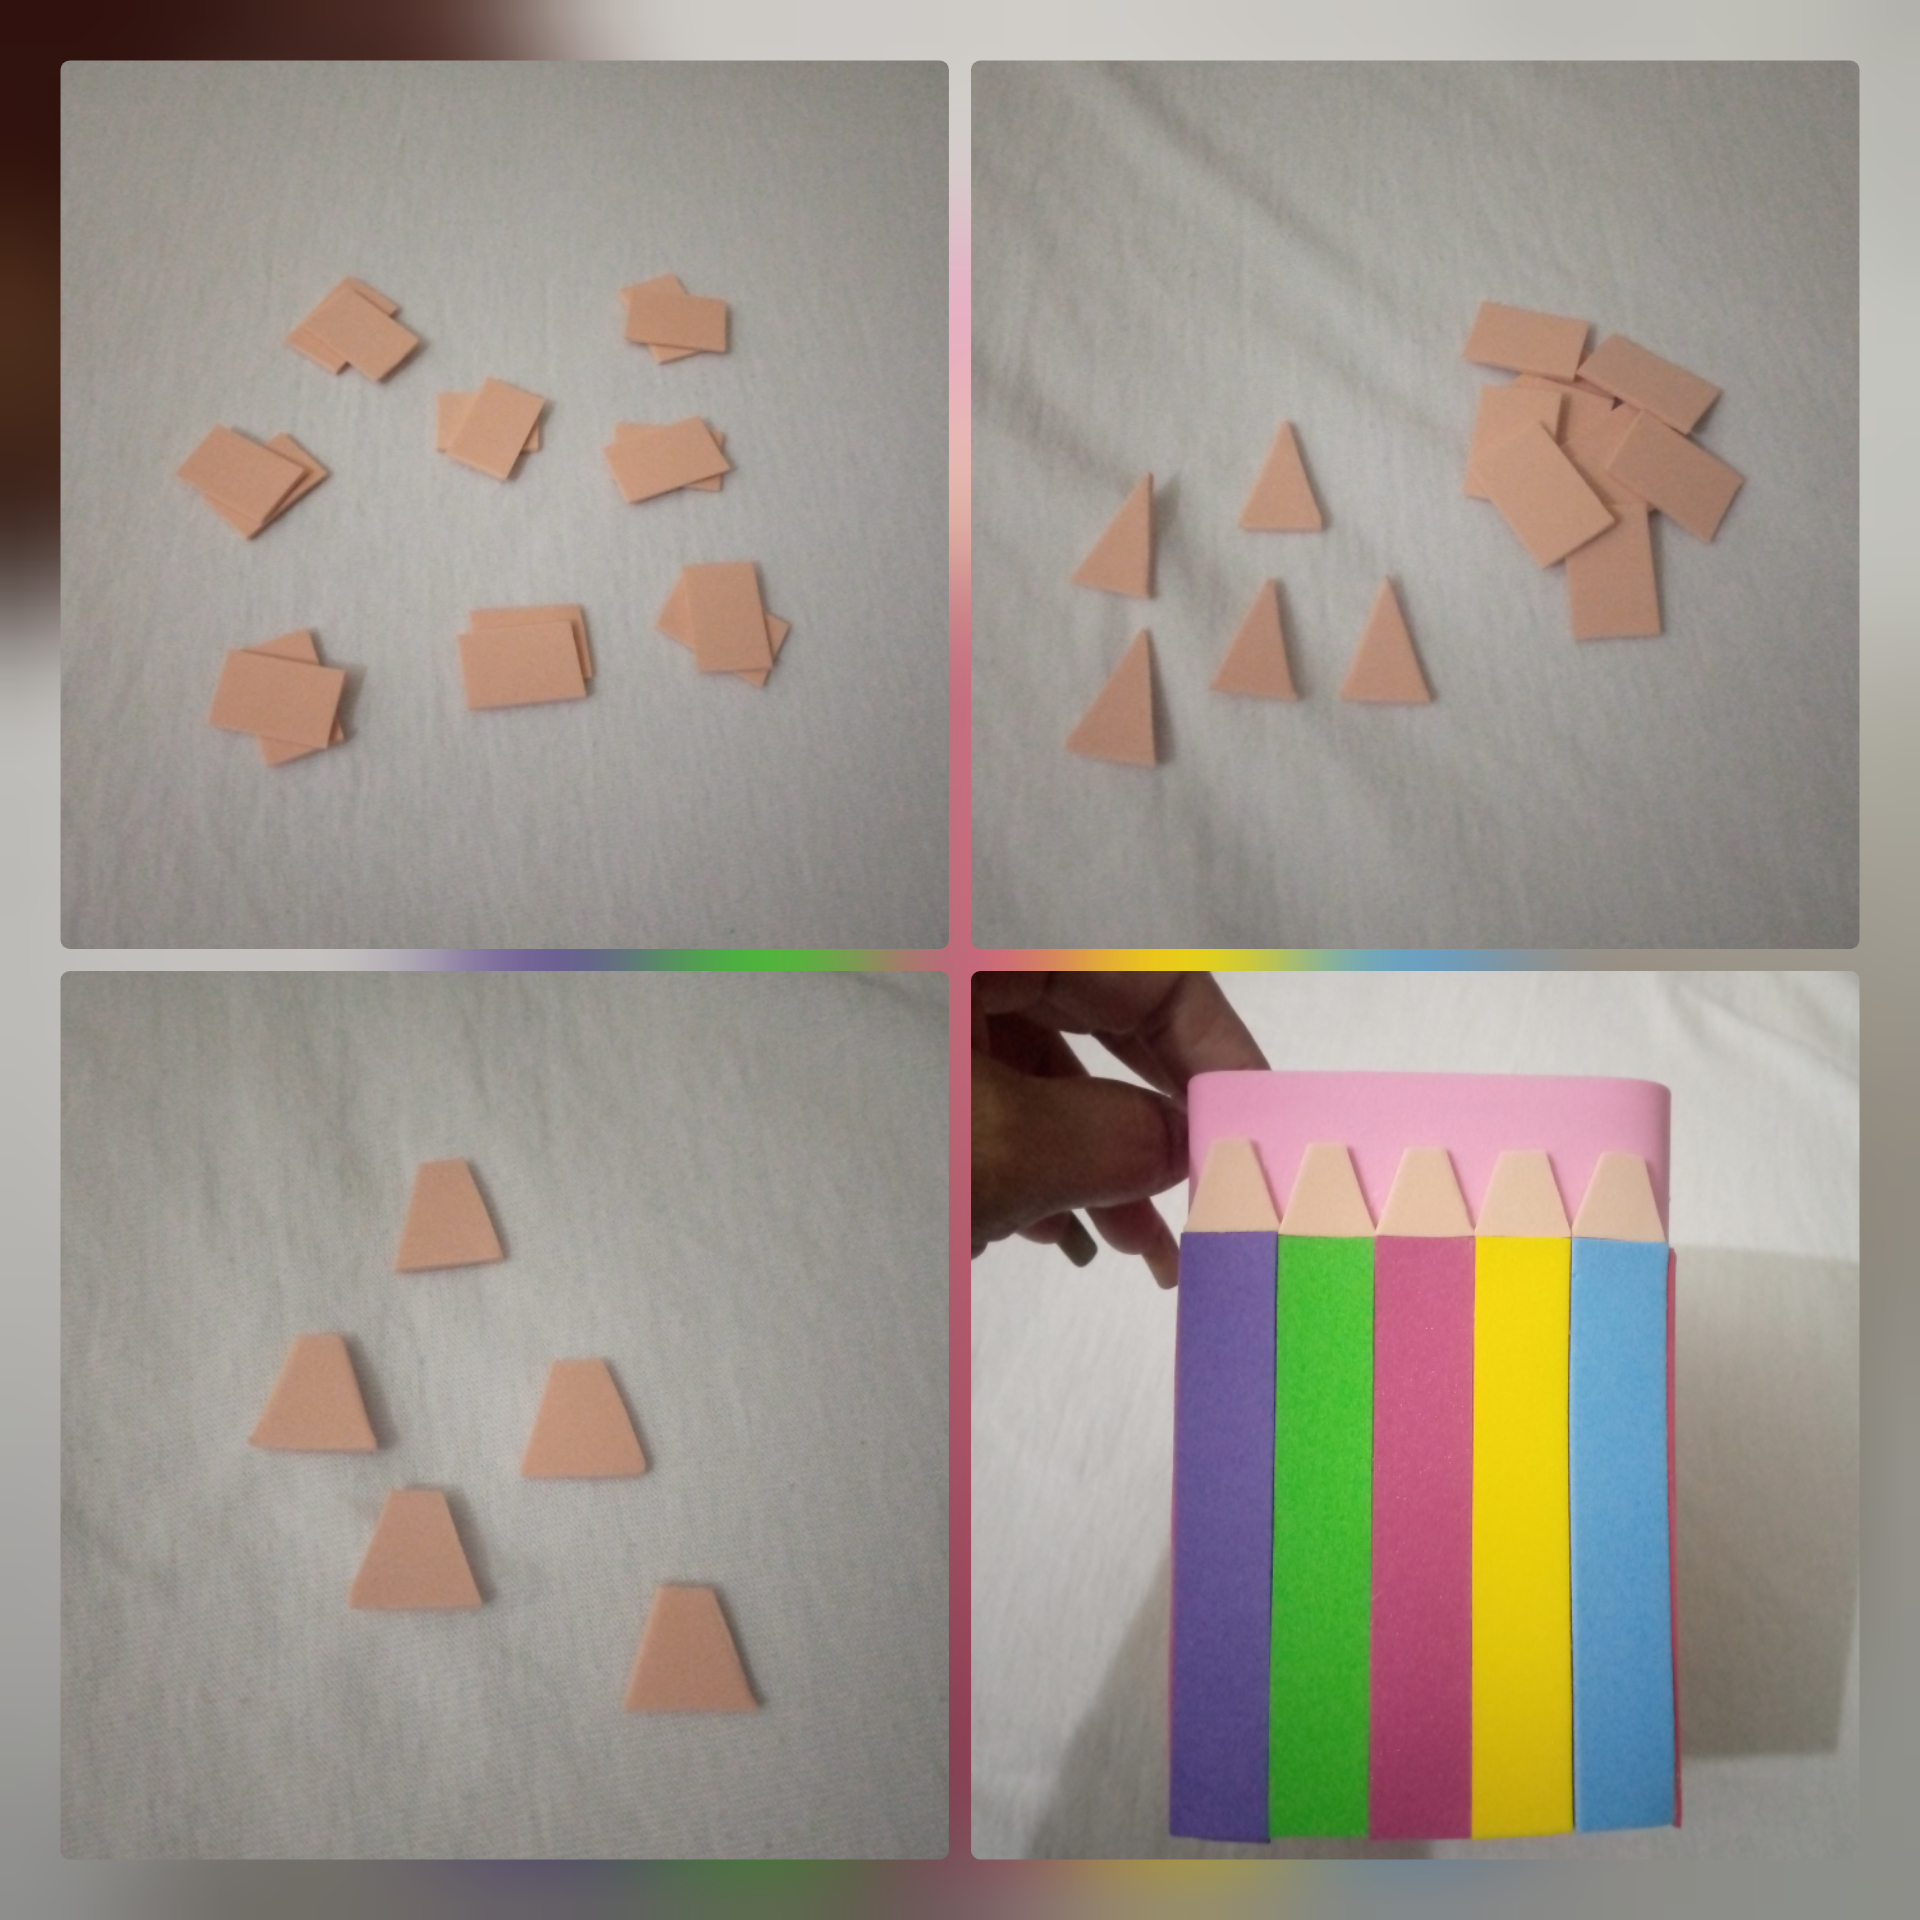
4- Para realizar parte de las puntas recorté foami de color piel, primero en pequeños rectángulos, luego marqué el centro y los convertí en triángulos y después corte la punta superior y los pegue arriba de cada tira de color.
4- To make part of the tips I cut out skin-colored foami, first in small rectangles, then I marked the center and turned them into triangles and then I cut the upper tip and glued them on top of each colored strip.
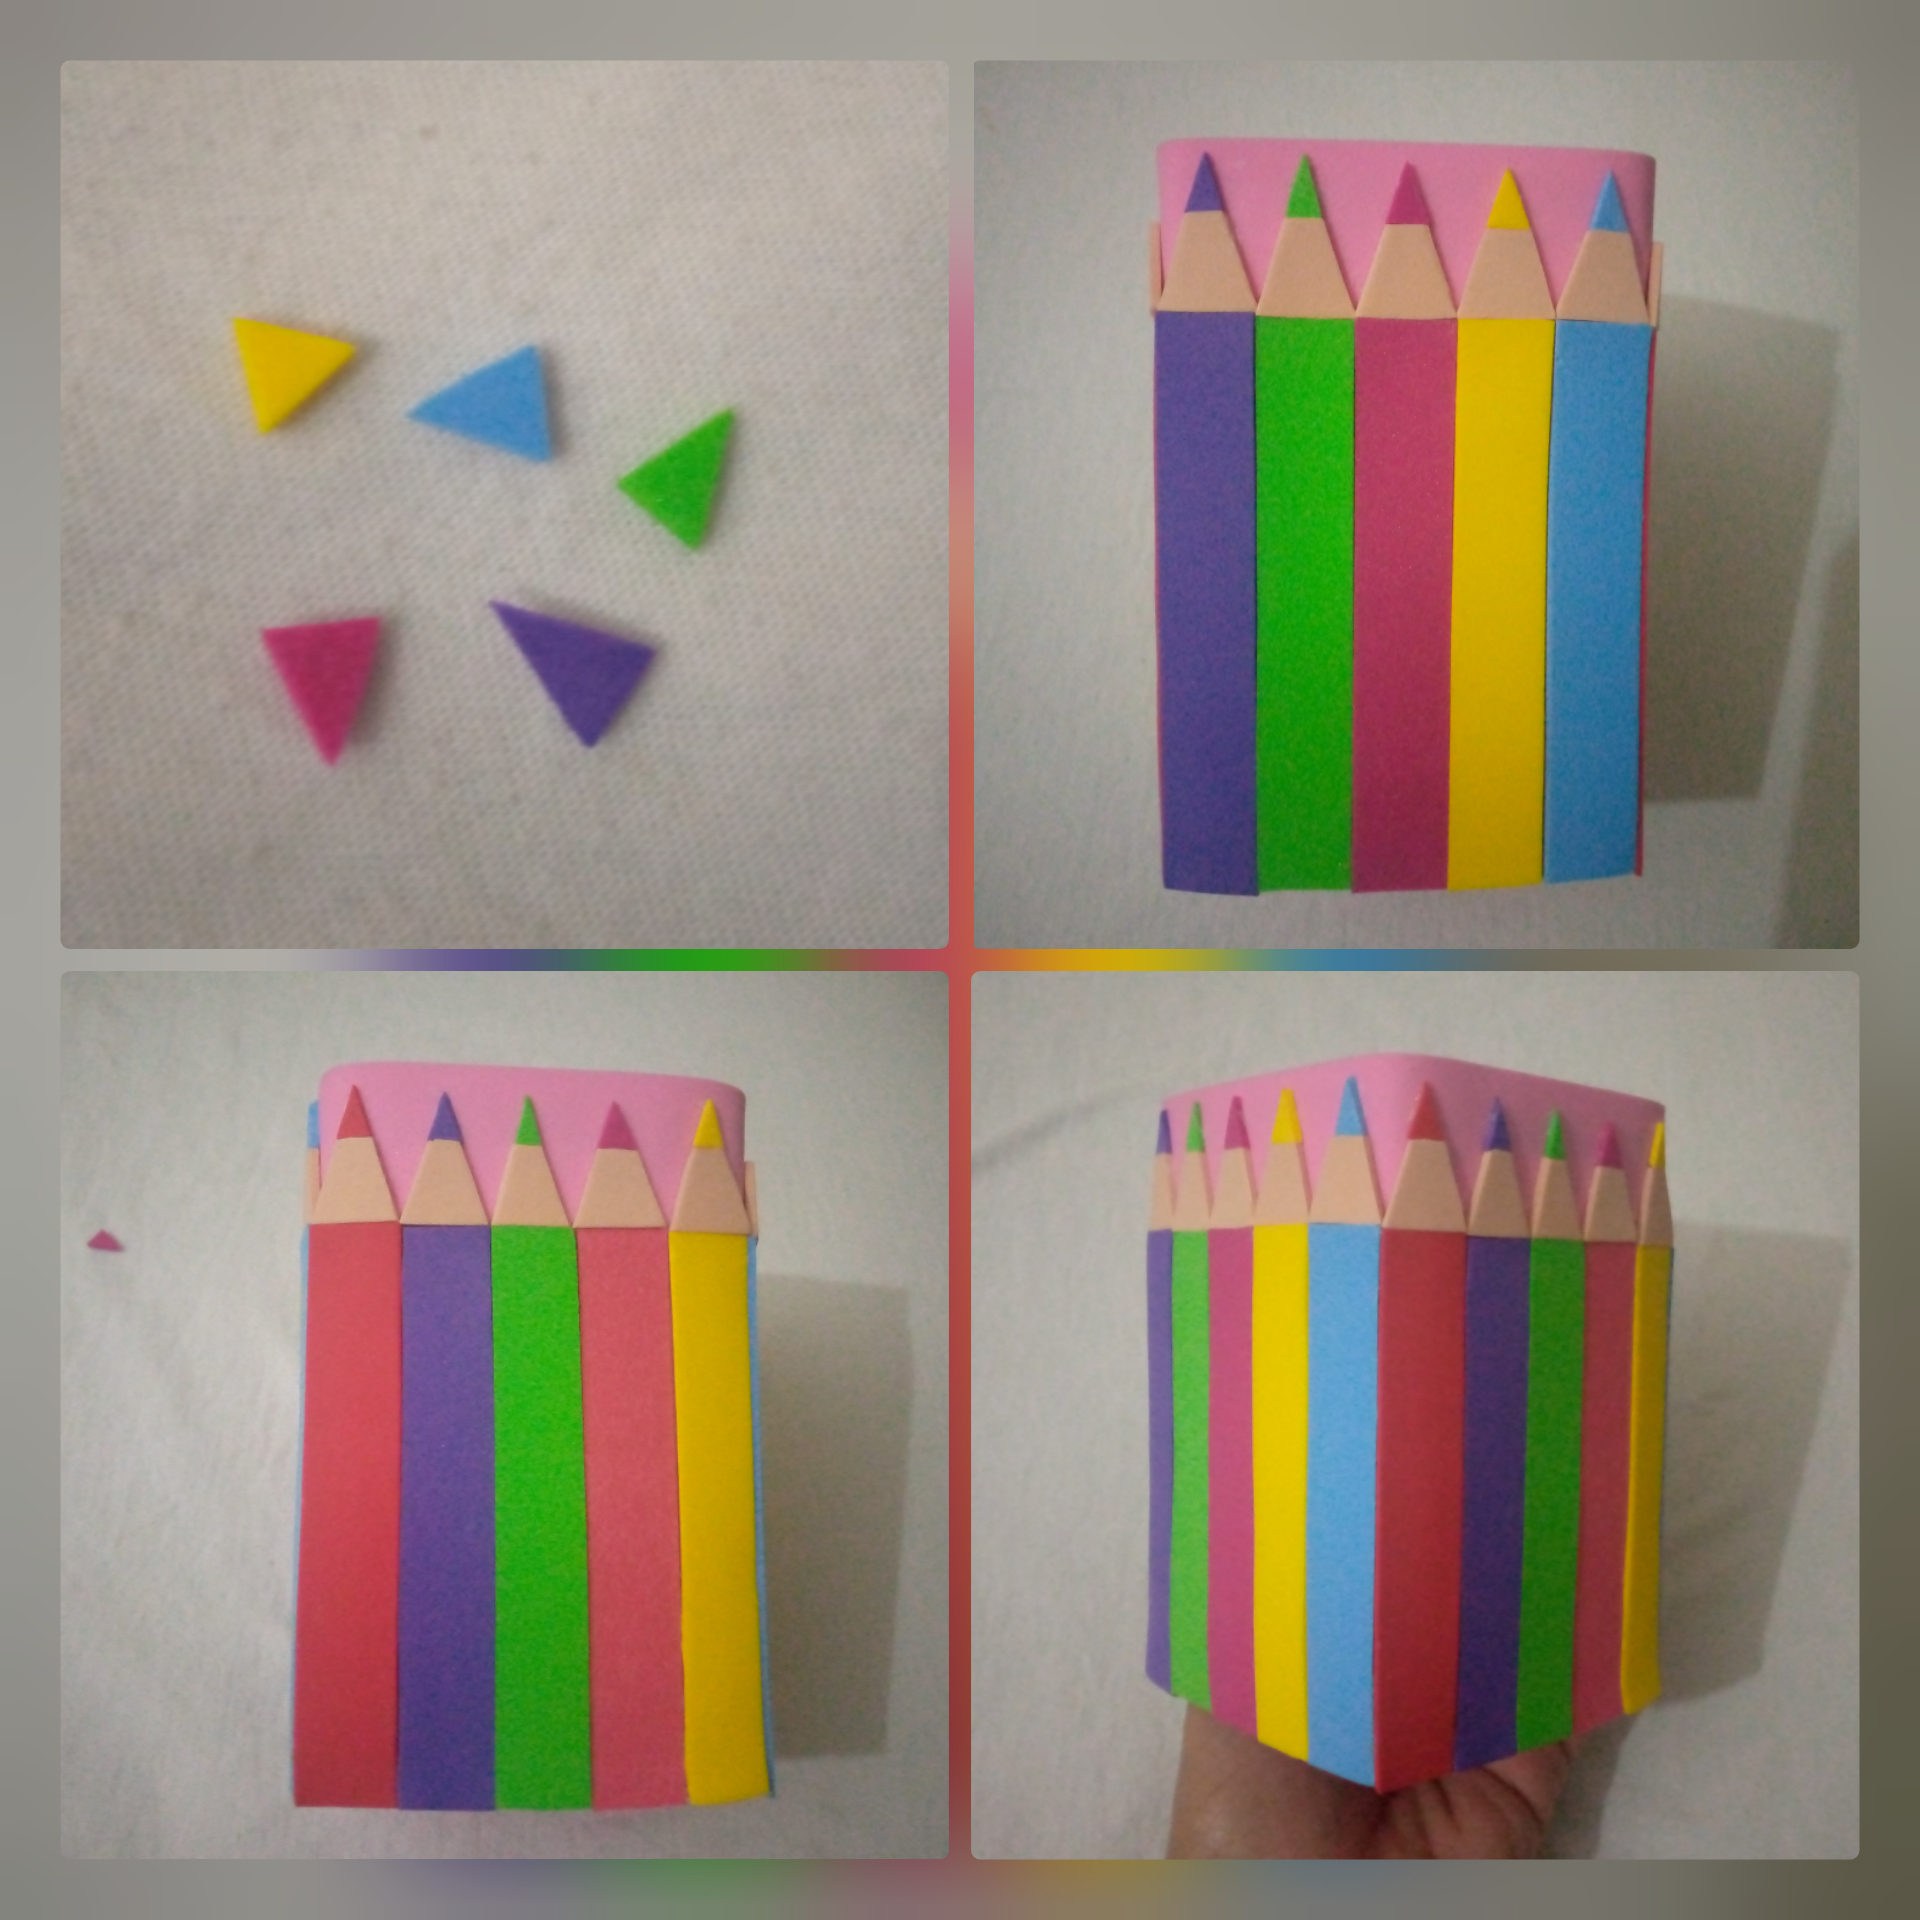
5- Luego para terminar completamente las puntas recorté triángulos pequeñitos de los colores de las tiras y las pegué sobre las piezas anteriormente hechas en su color correspondiente.
5- Then to completely finish the ends I cut out small triangles of the colors of the strips and glued them on top of the pieces previously made in their corresponding color.
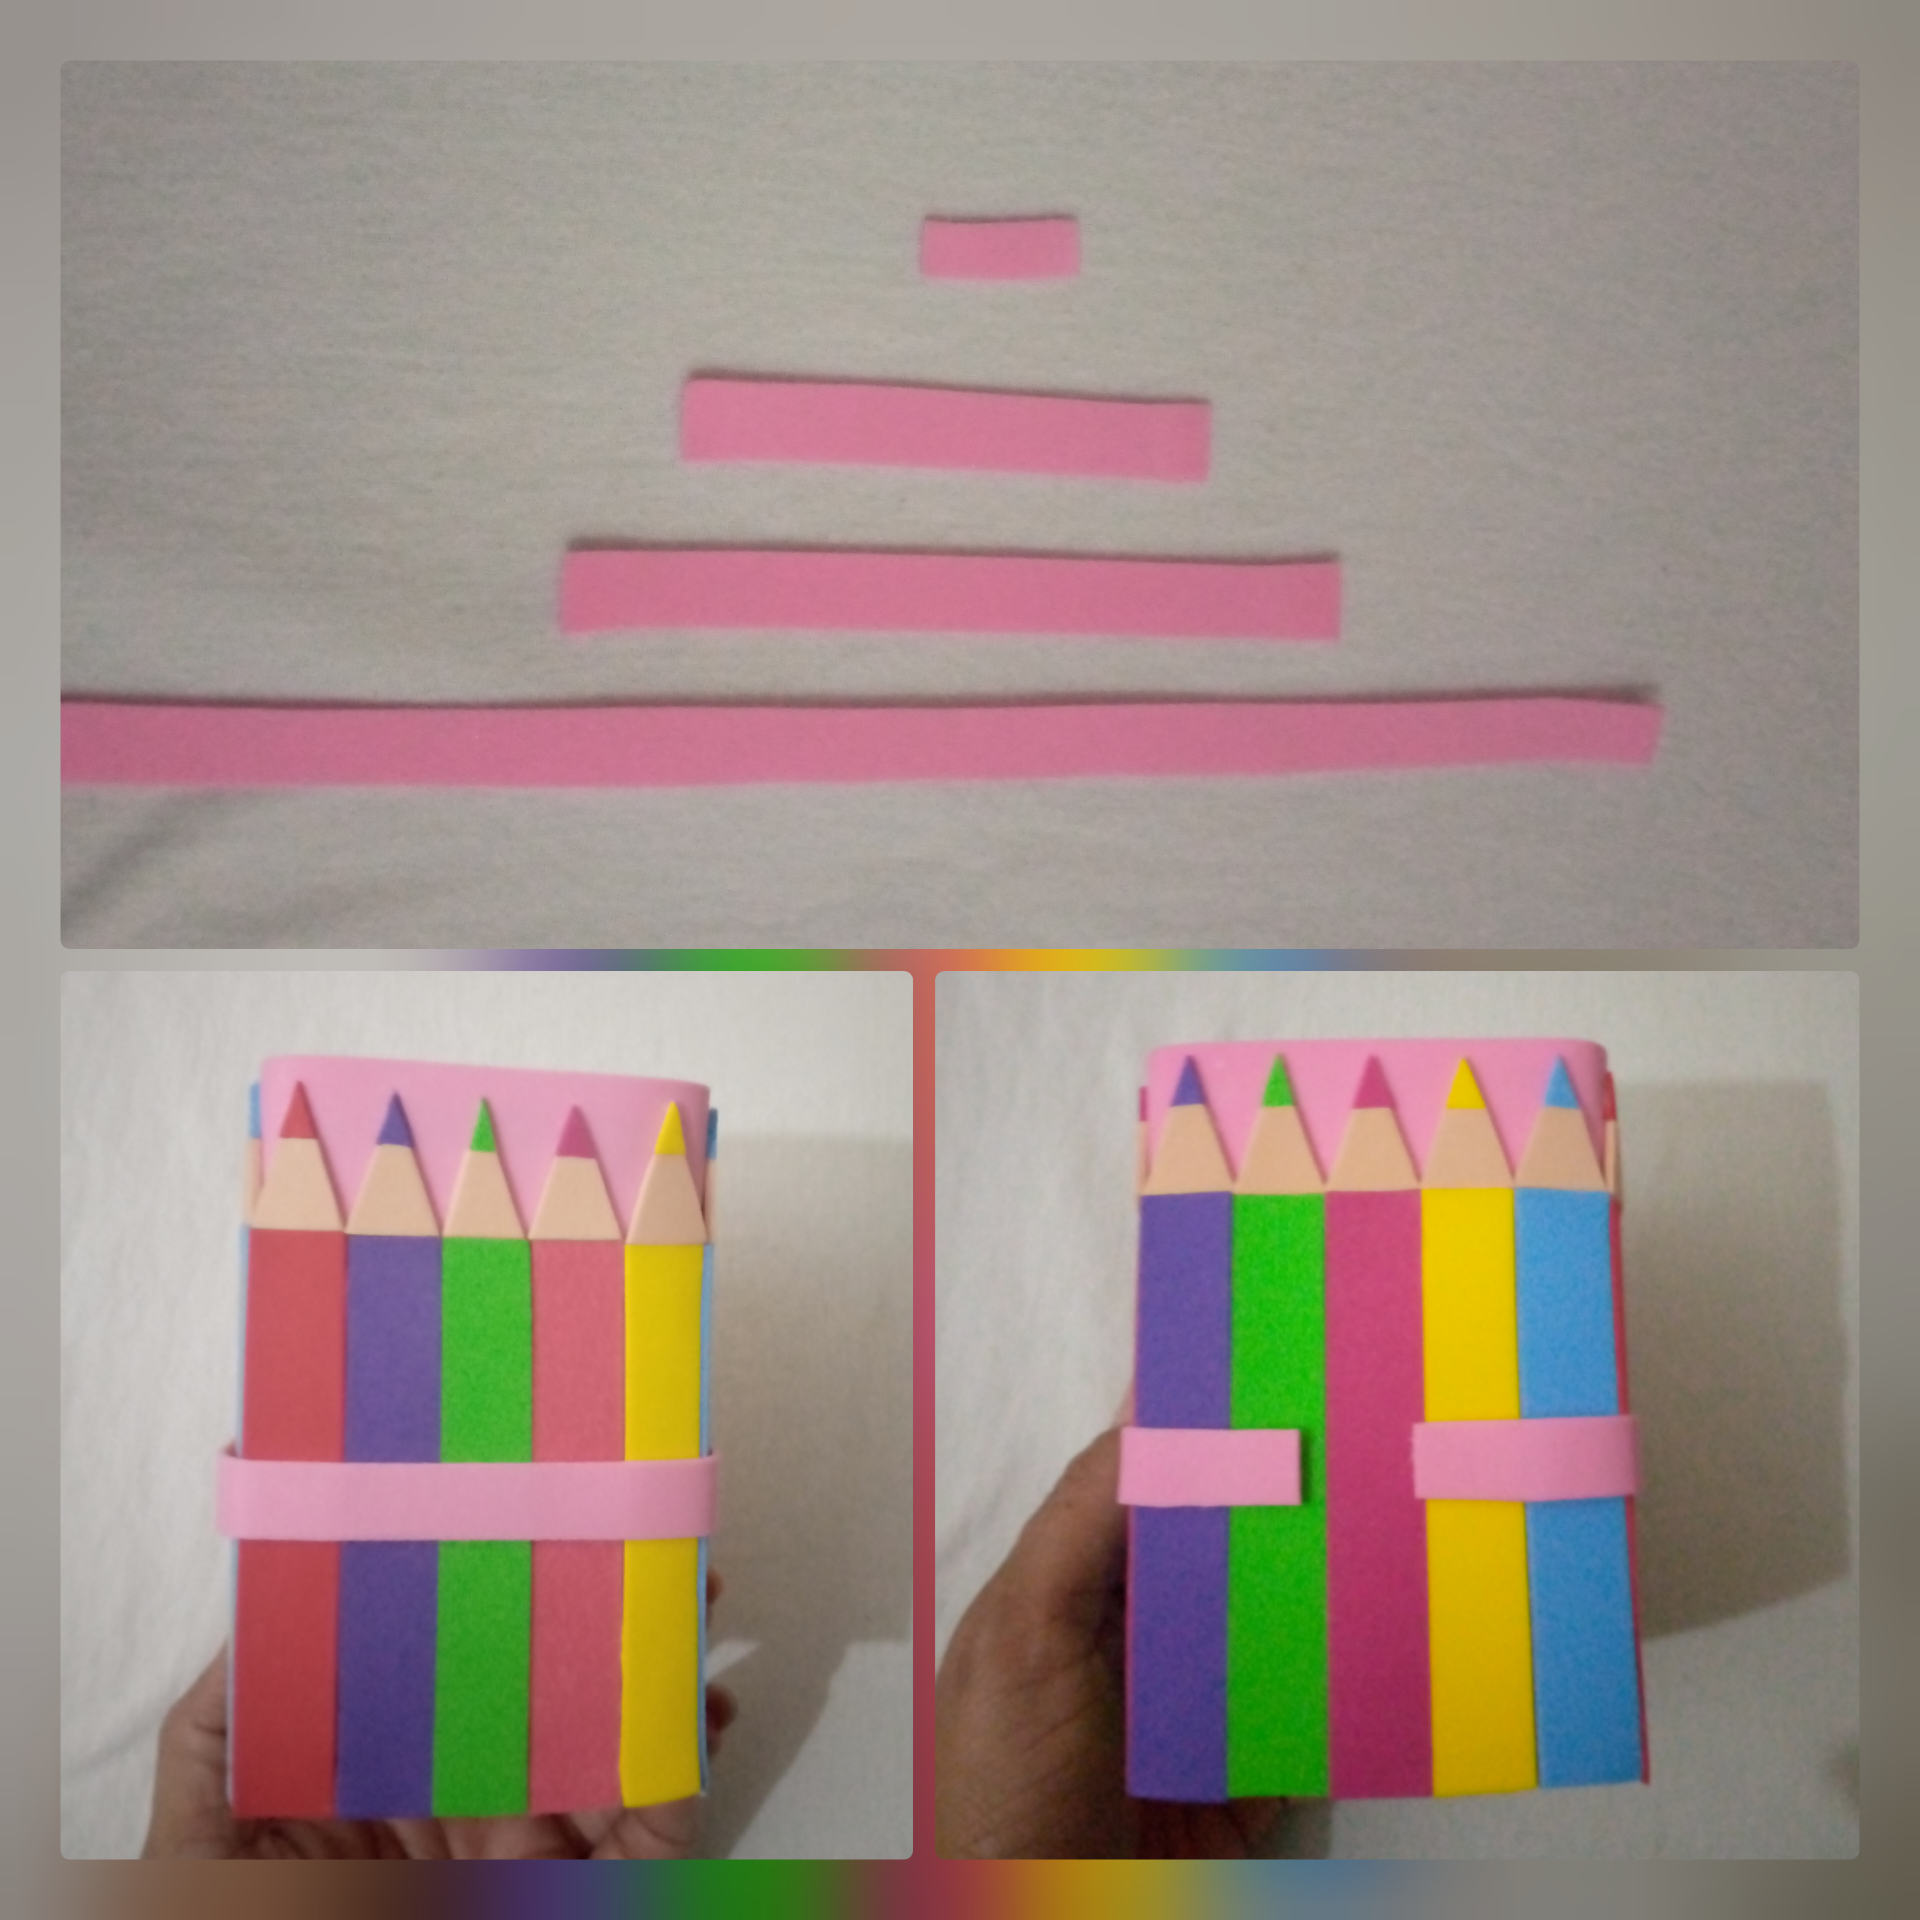
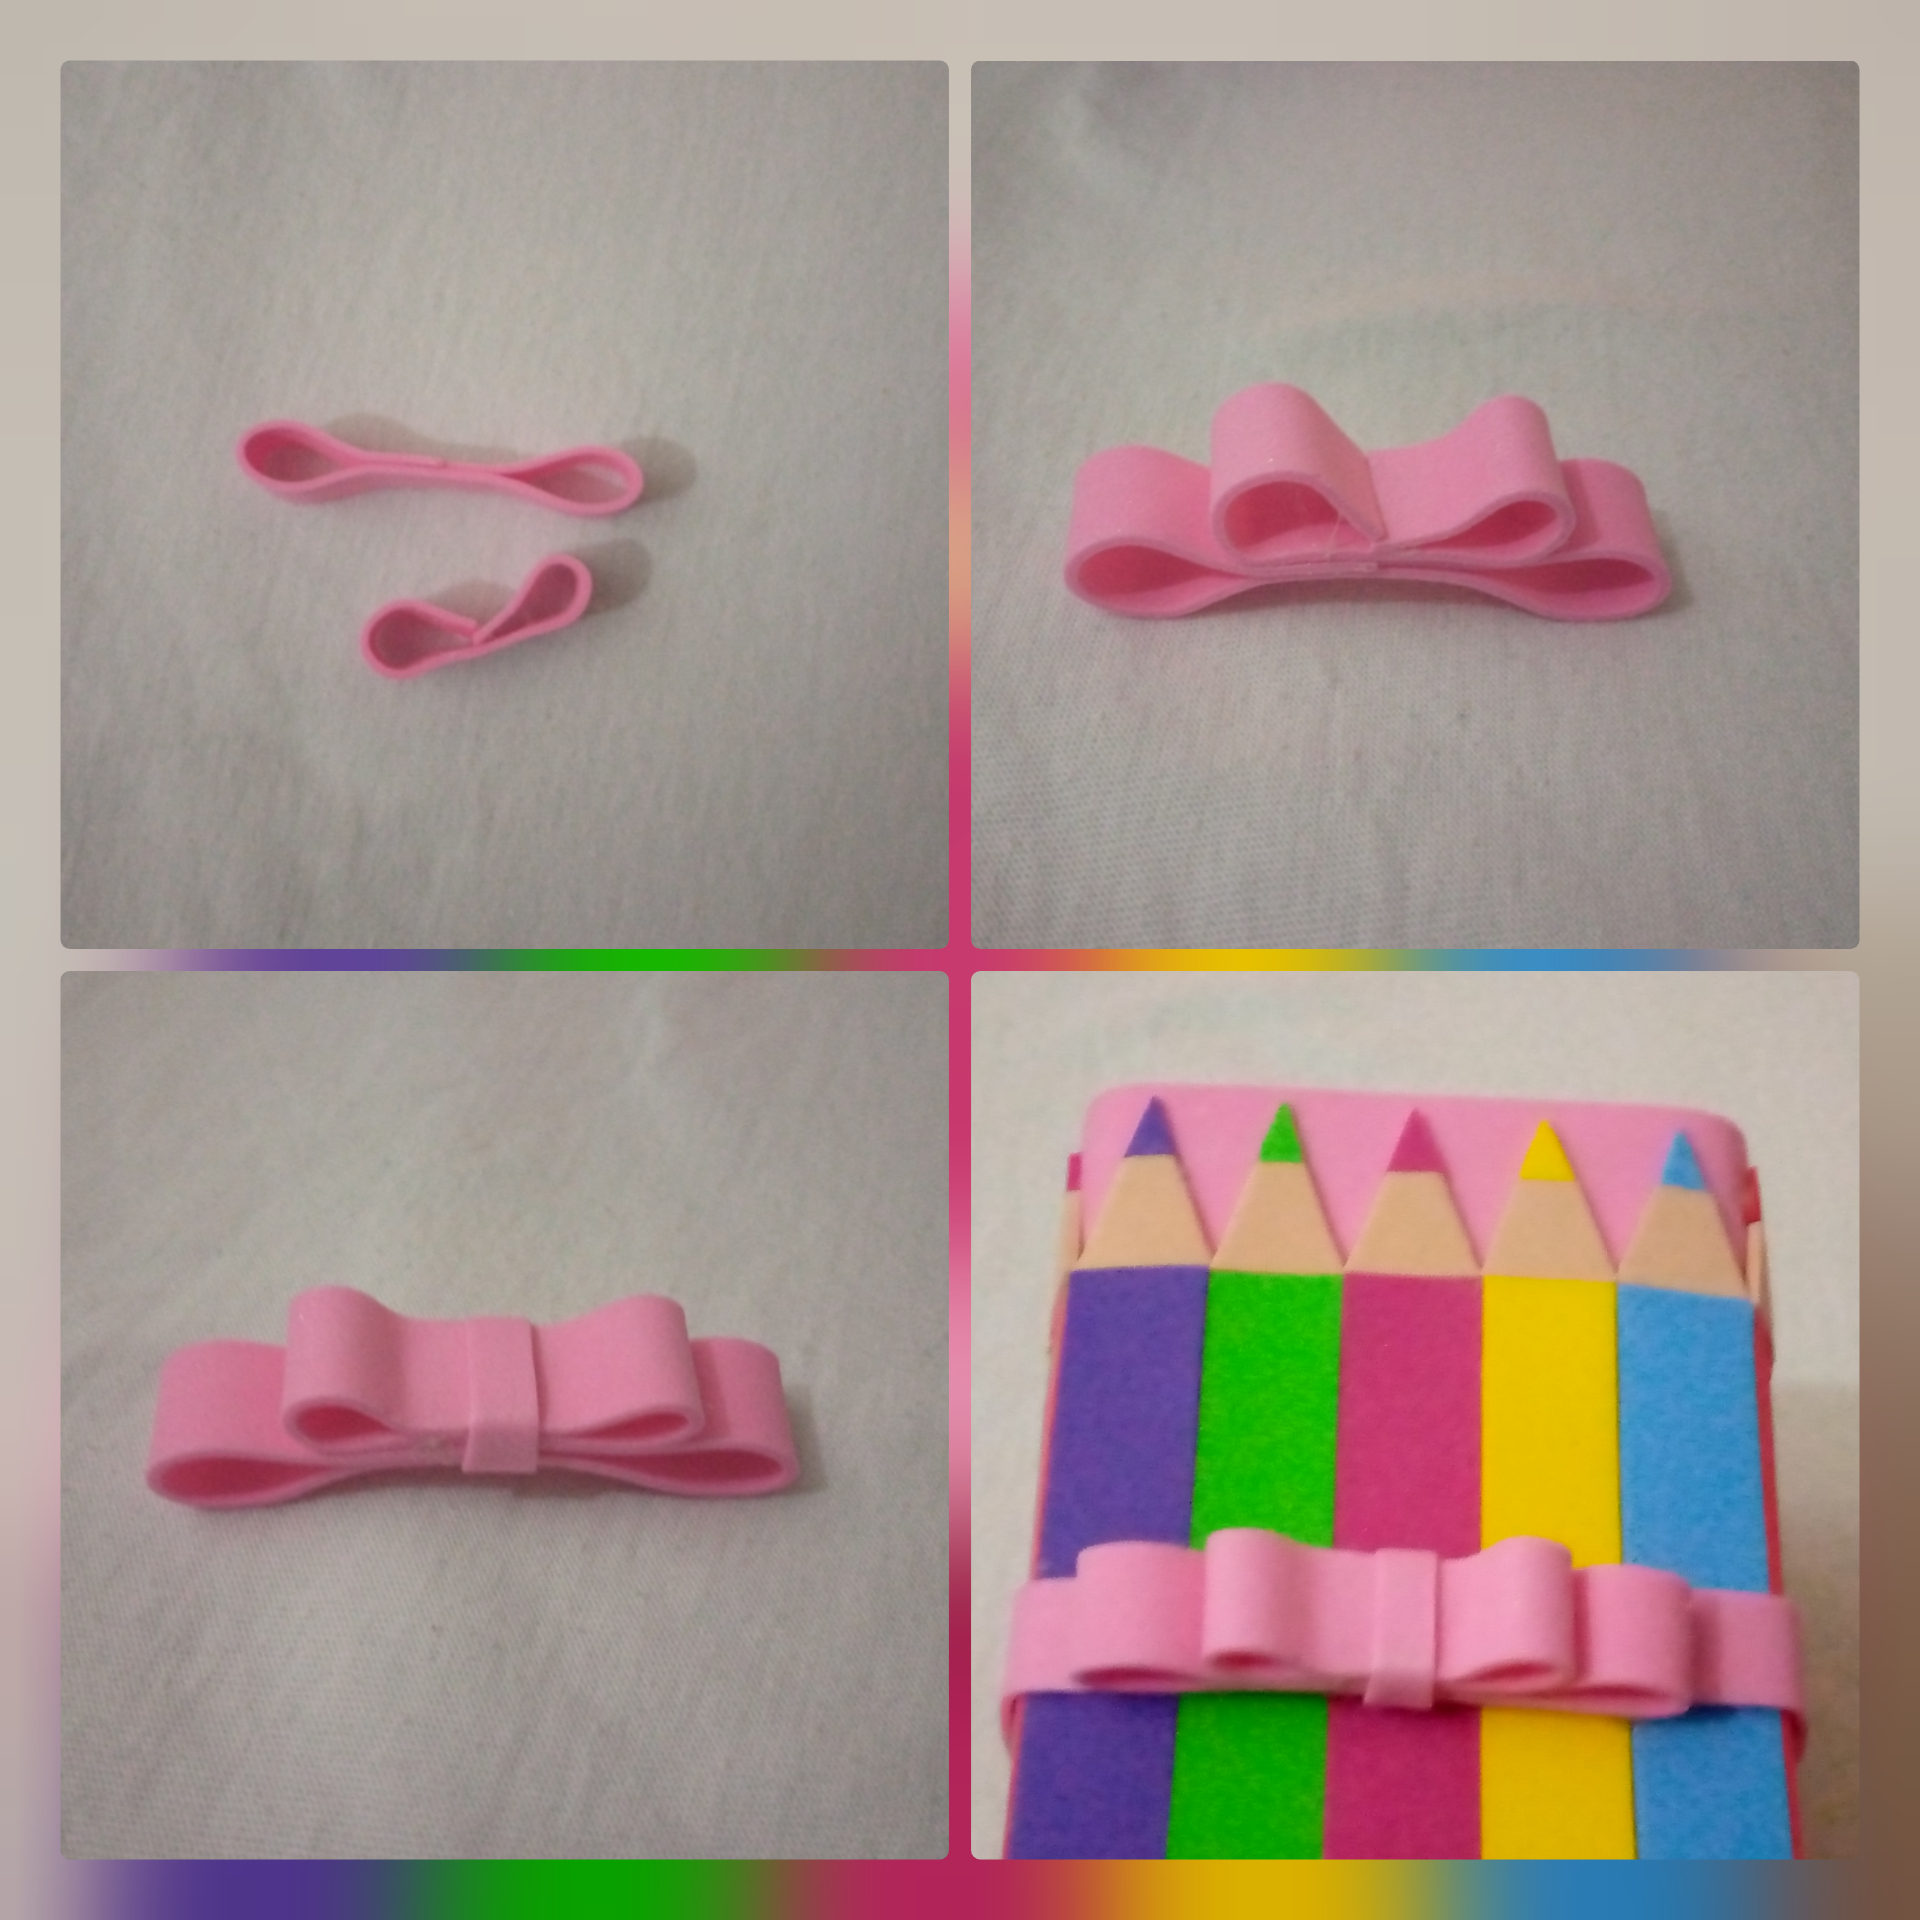
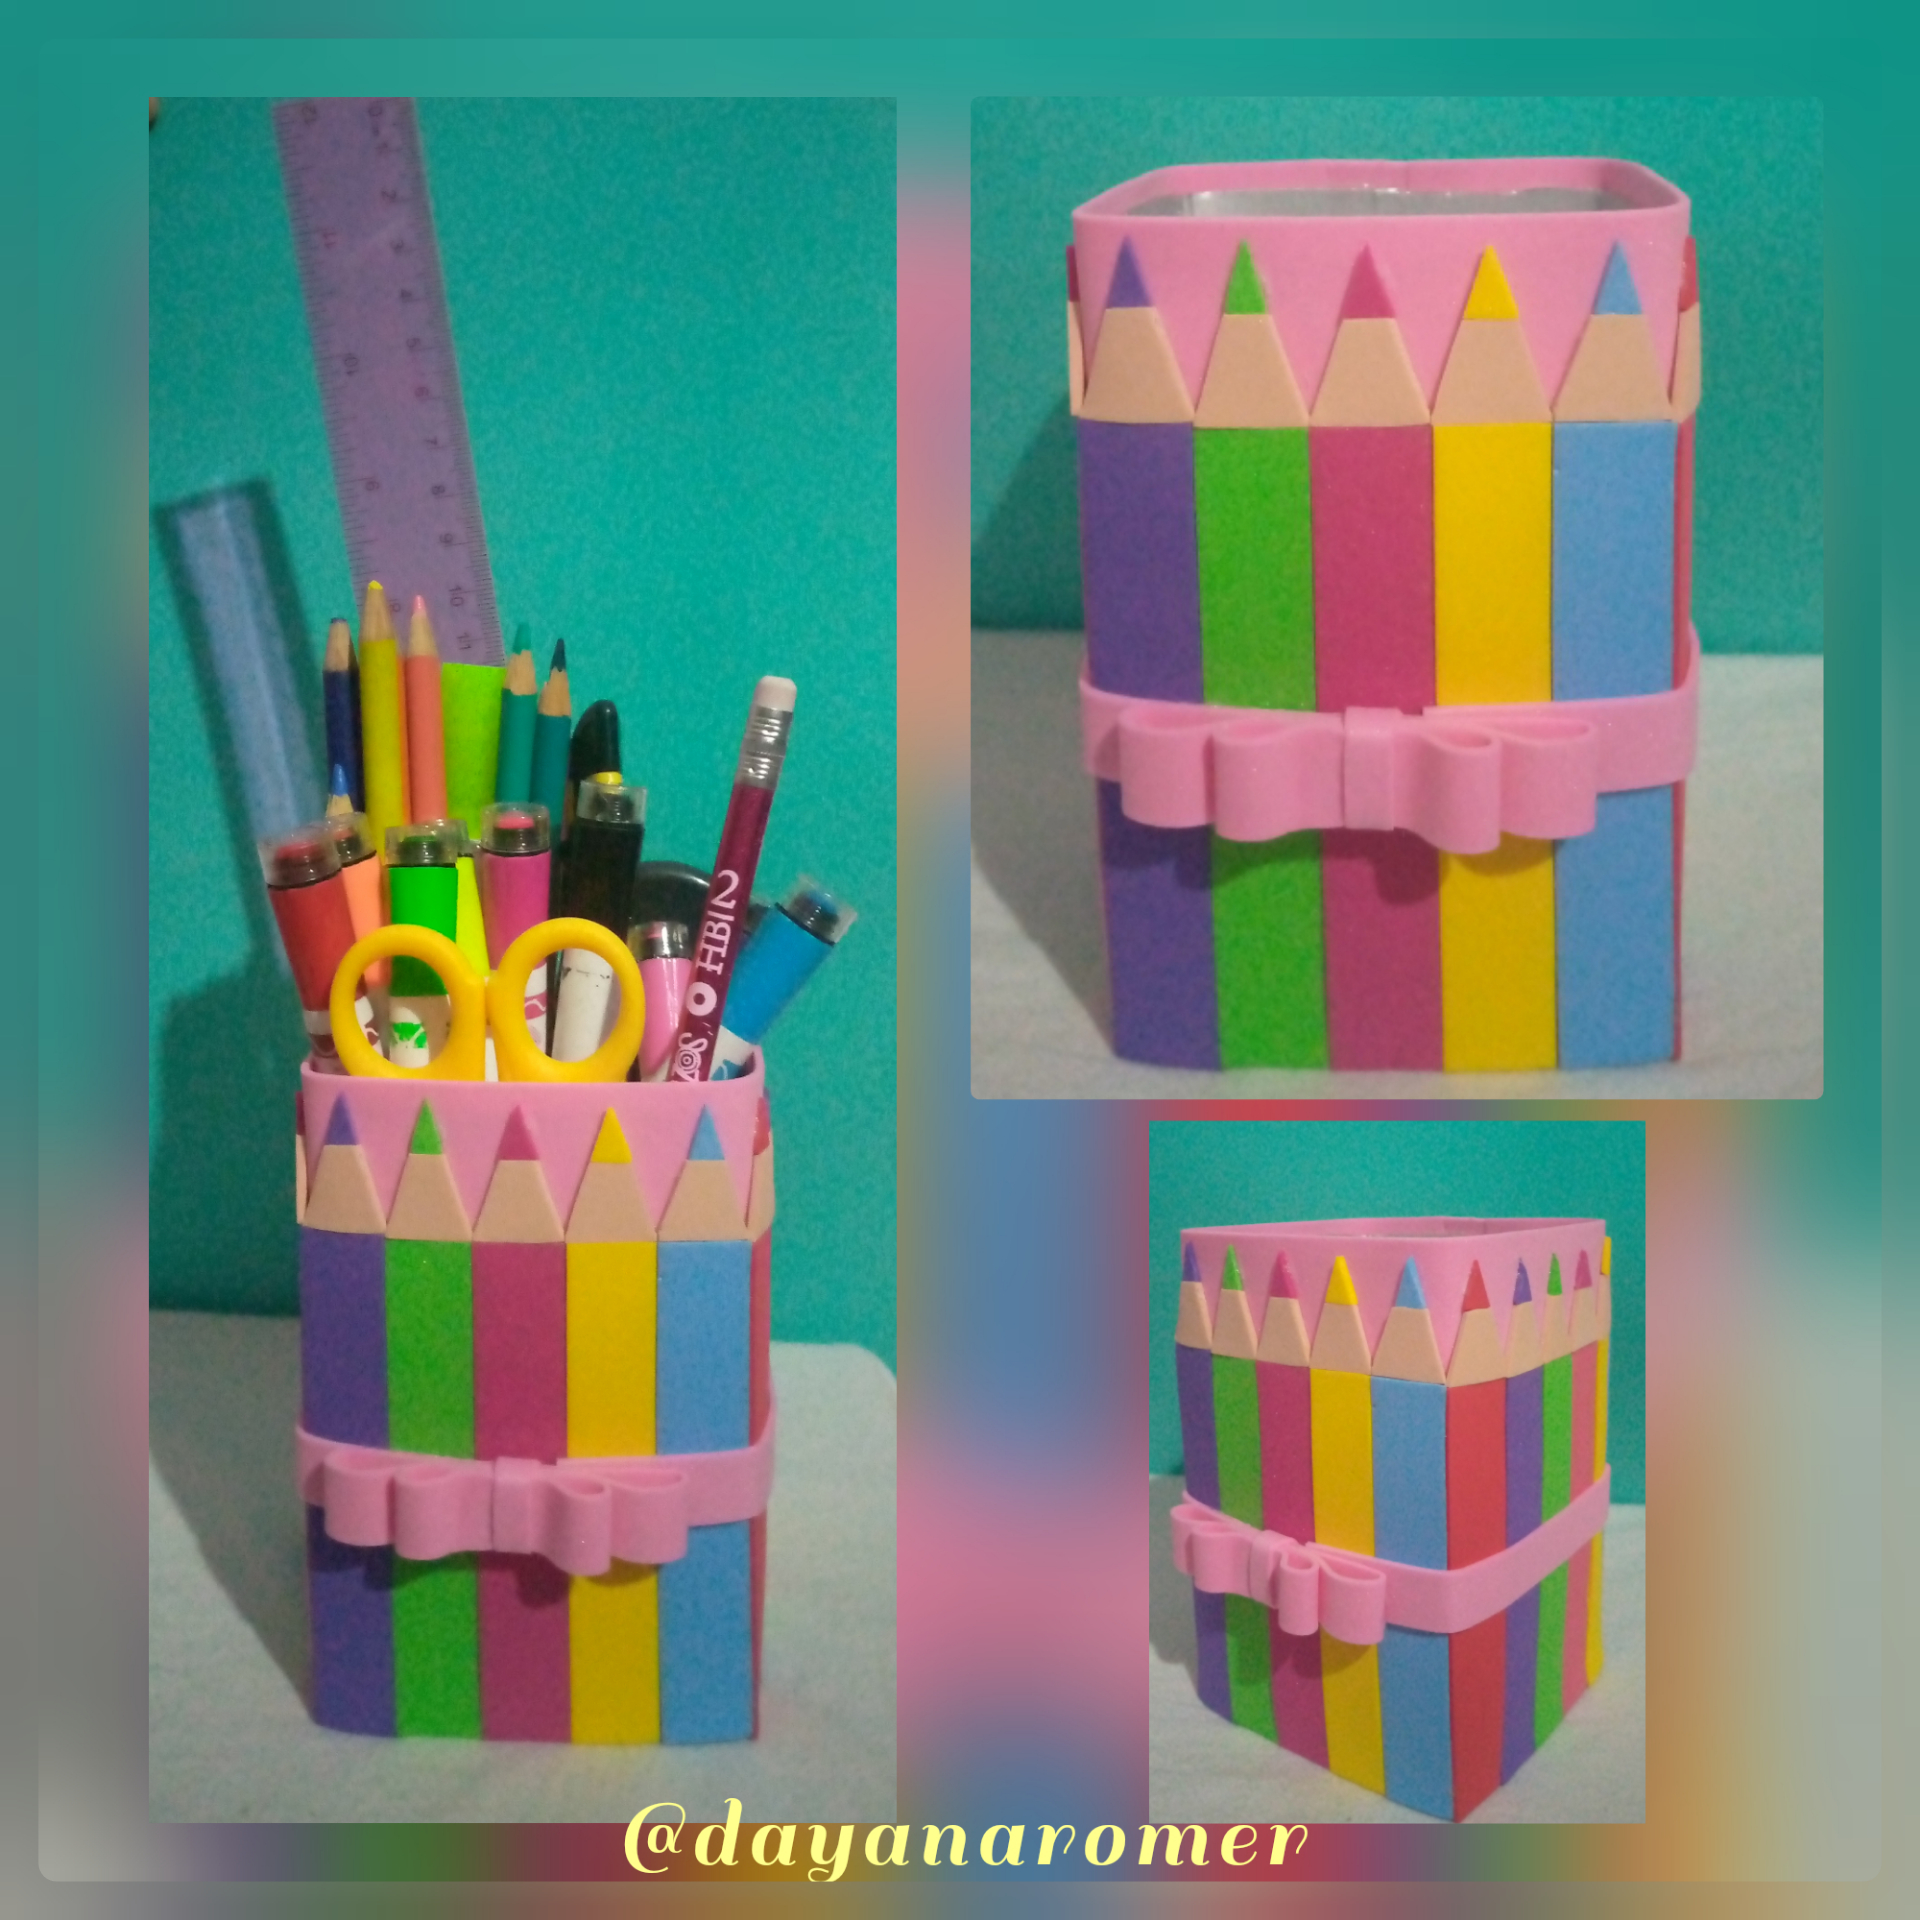
6- Para finalizar, recorté 3 tiras de foami rosado de 1cm de ancho y una de 1/2cm, con la más larga rodeé el envase justo a la mitad, con las dos siguientes realicé un lindo lazo uniendo los extremos de cada una hacia el centro y pegué una sobre otra, luego coloqué la más pequeña en el centro de ambas, posteriormente pegué el lazo en la parte central delantera del envase sobre la cinta anterior.
6- To finish, I cut 3 strips of pink foami of 1cm wide and one of 1/2cm, with the longest one I surrounded the container right in the middle, with the next two I made a nice bow joining the ends of each one towards the center and glued one over the other, then I placed the smallest one in the center of both, later I glued the bow in the central front part of the container over the previous ribbon.
Resultado
Result
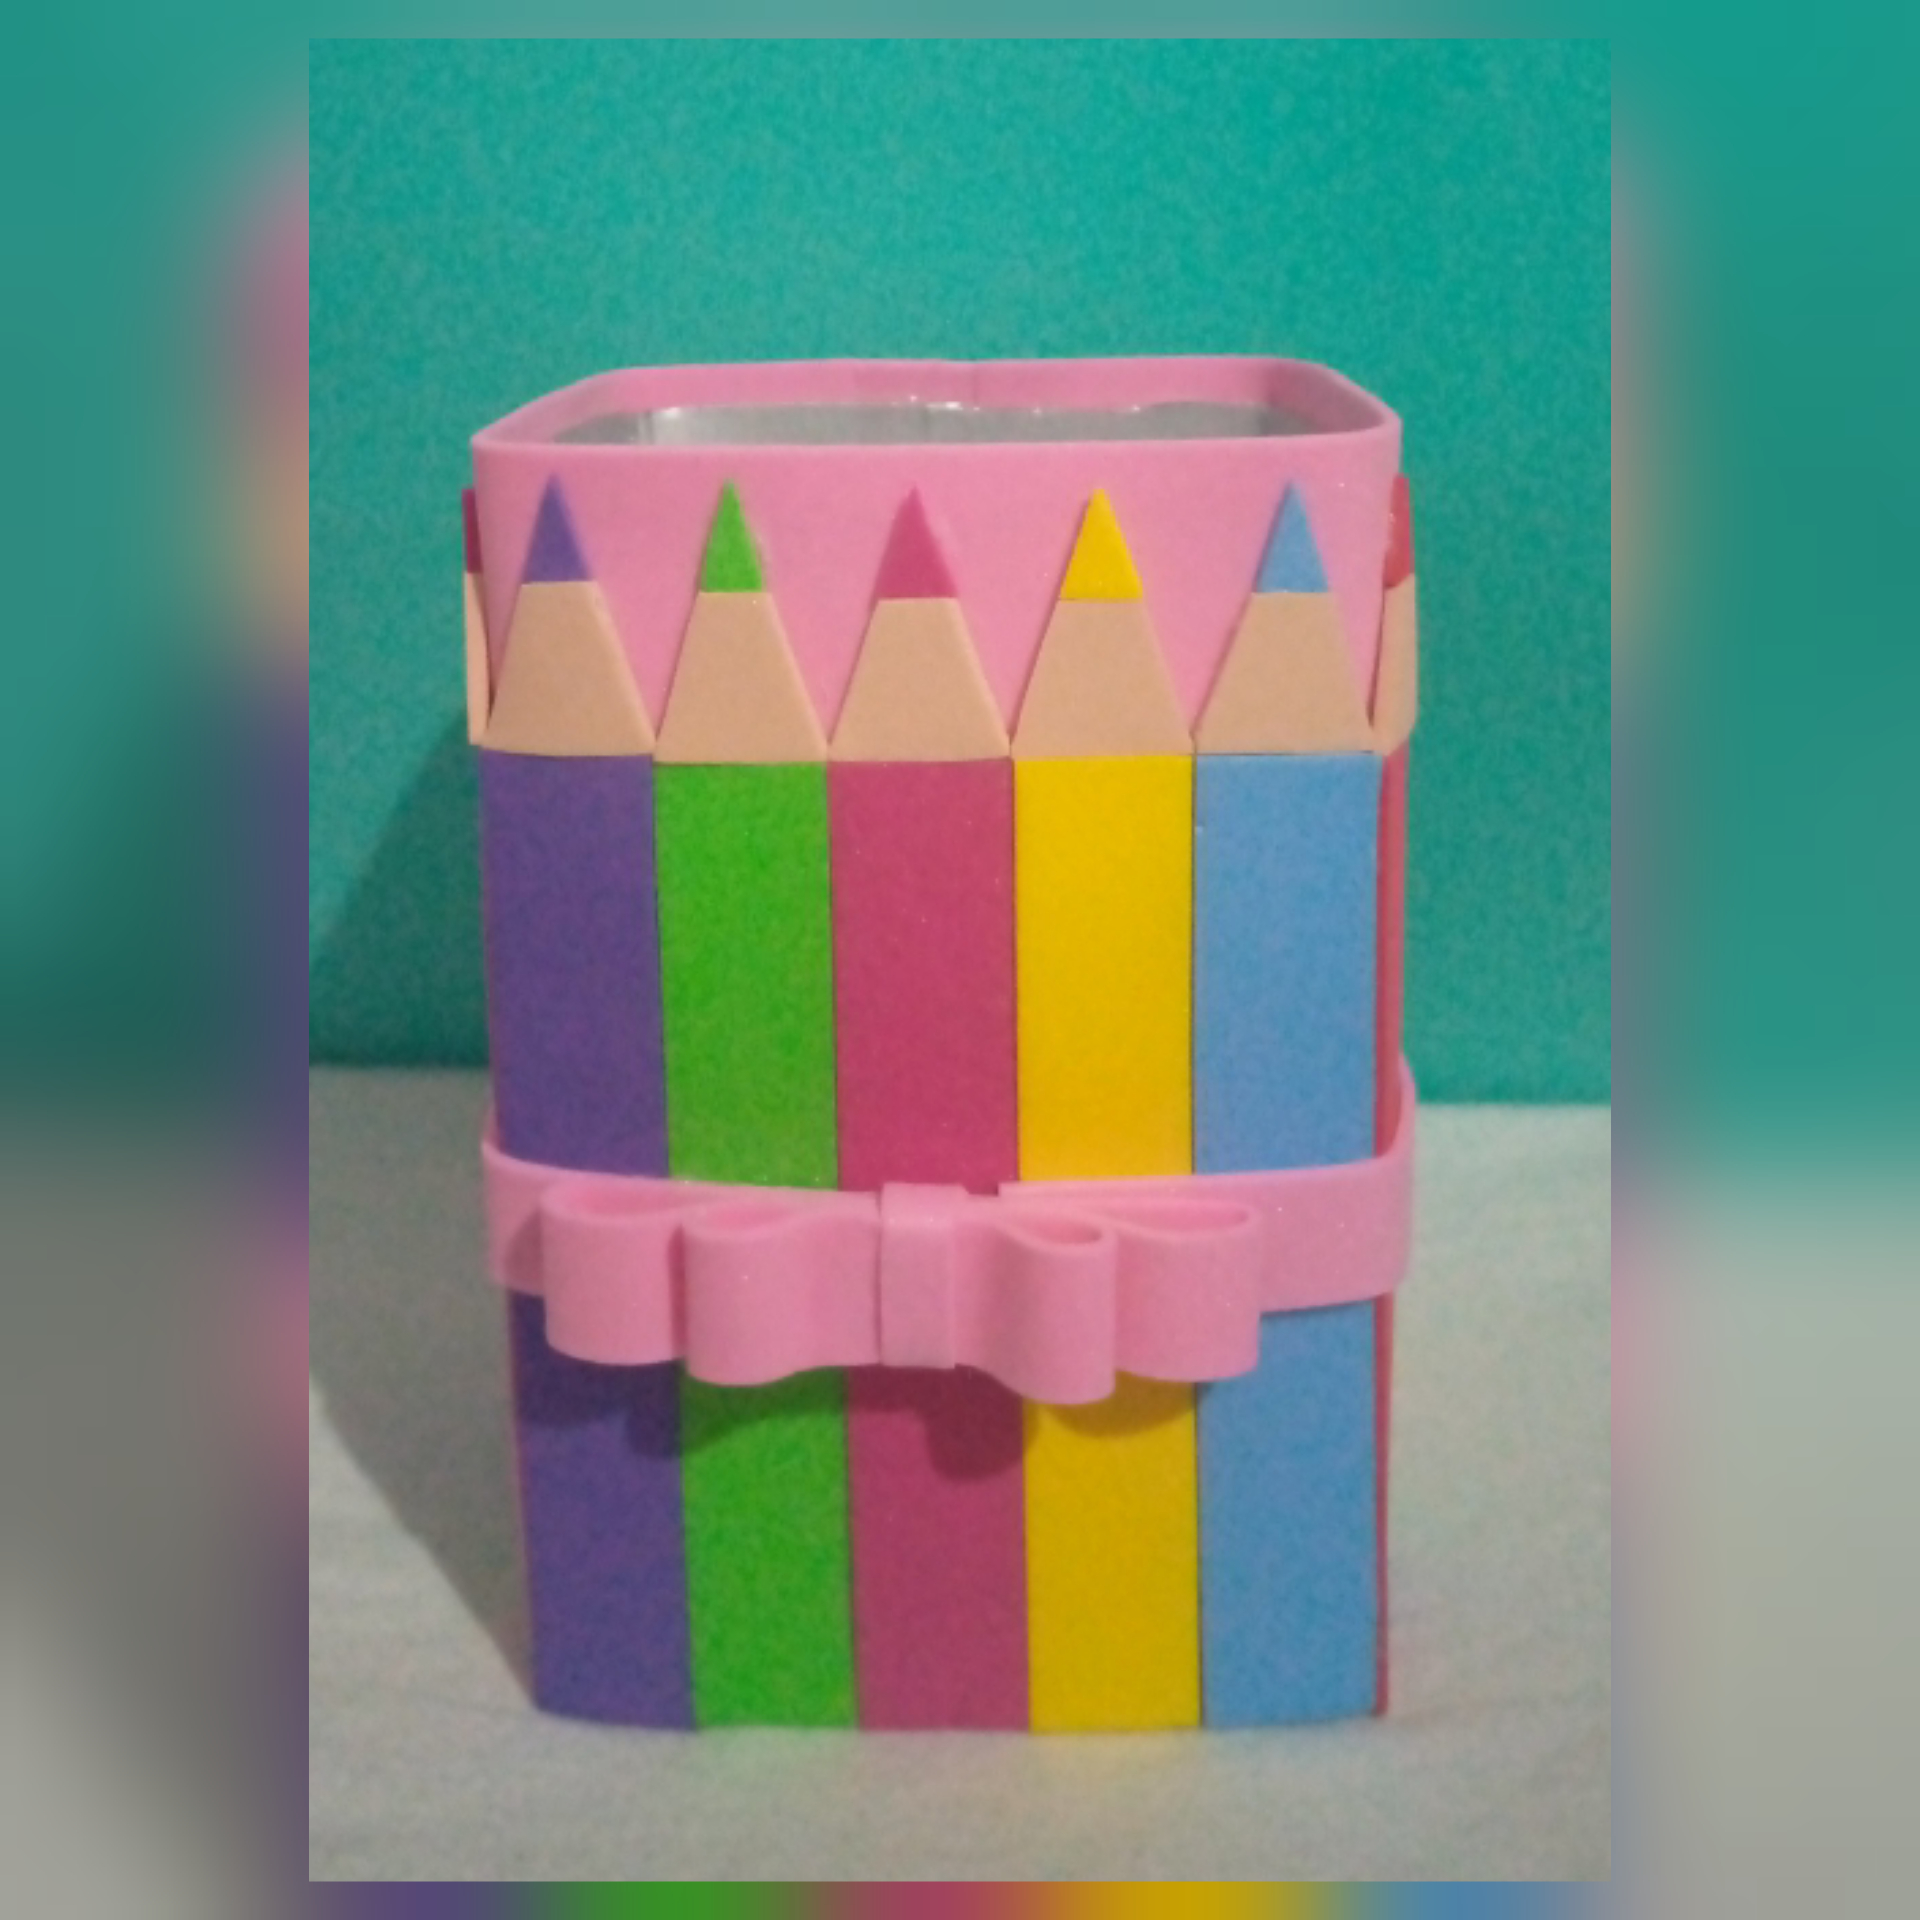
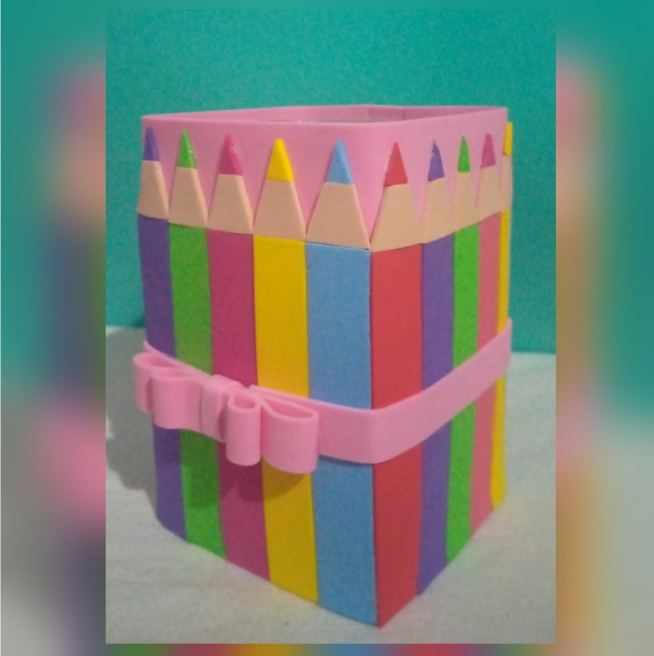
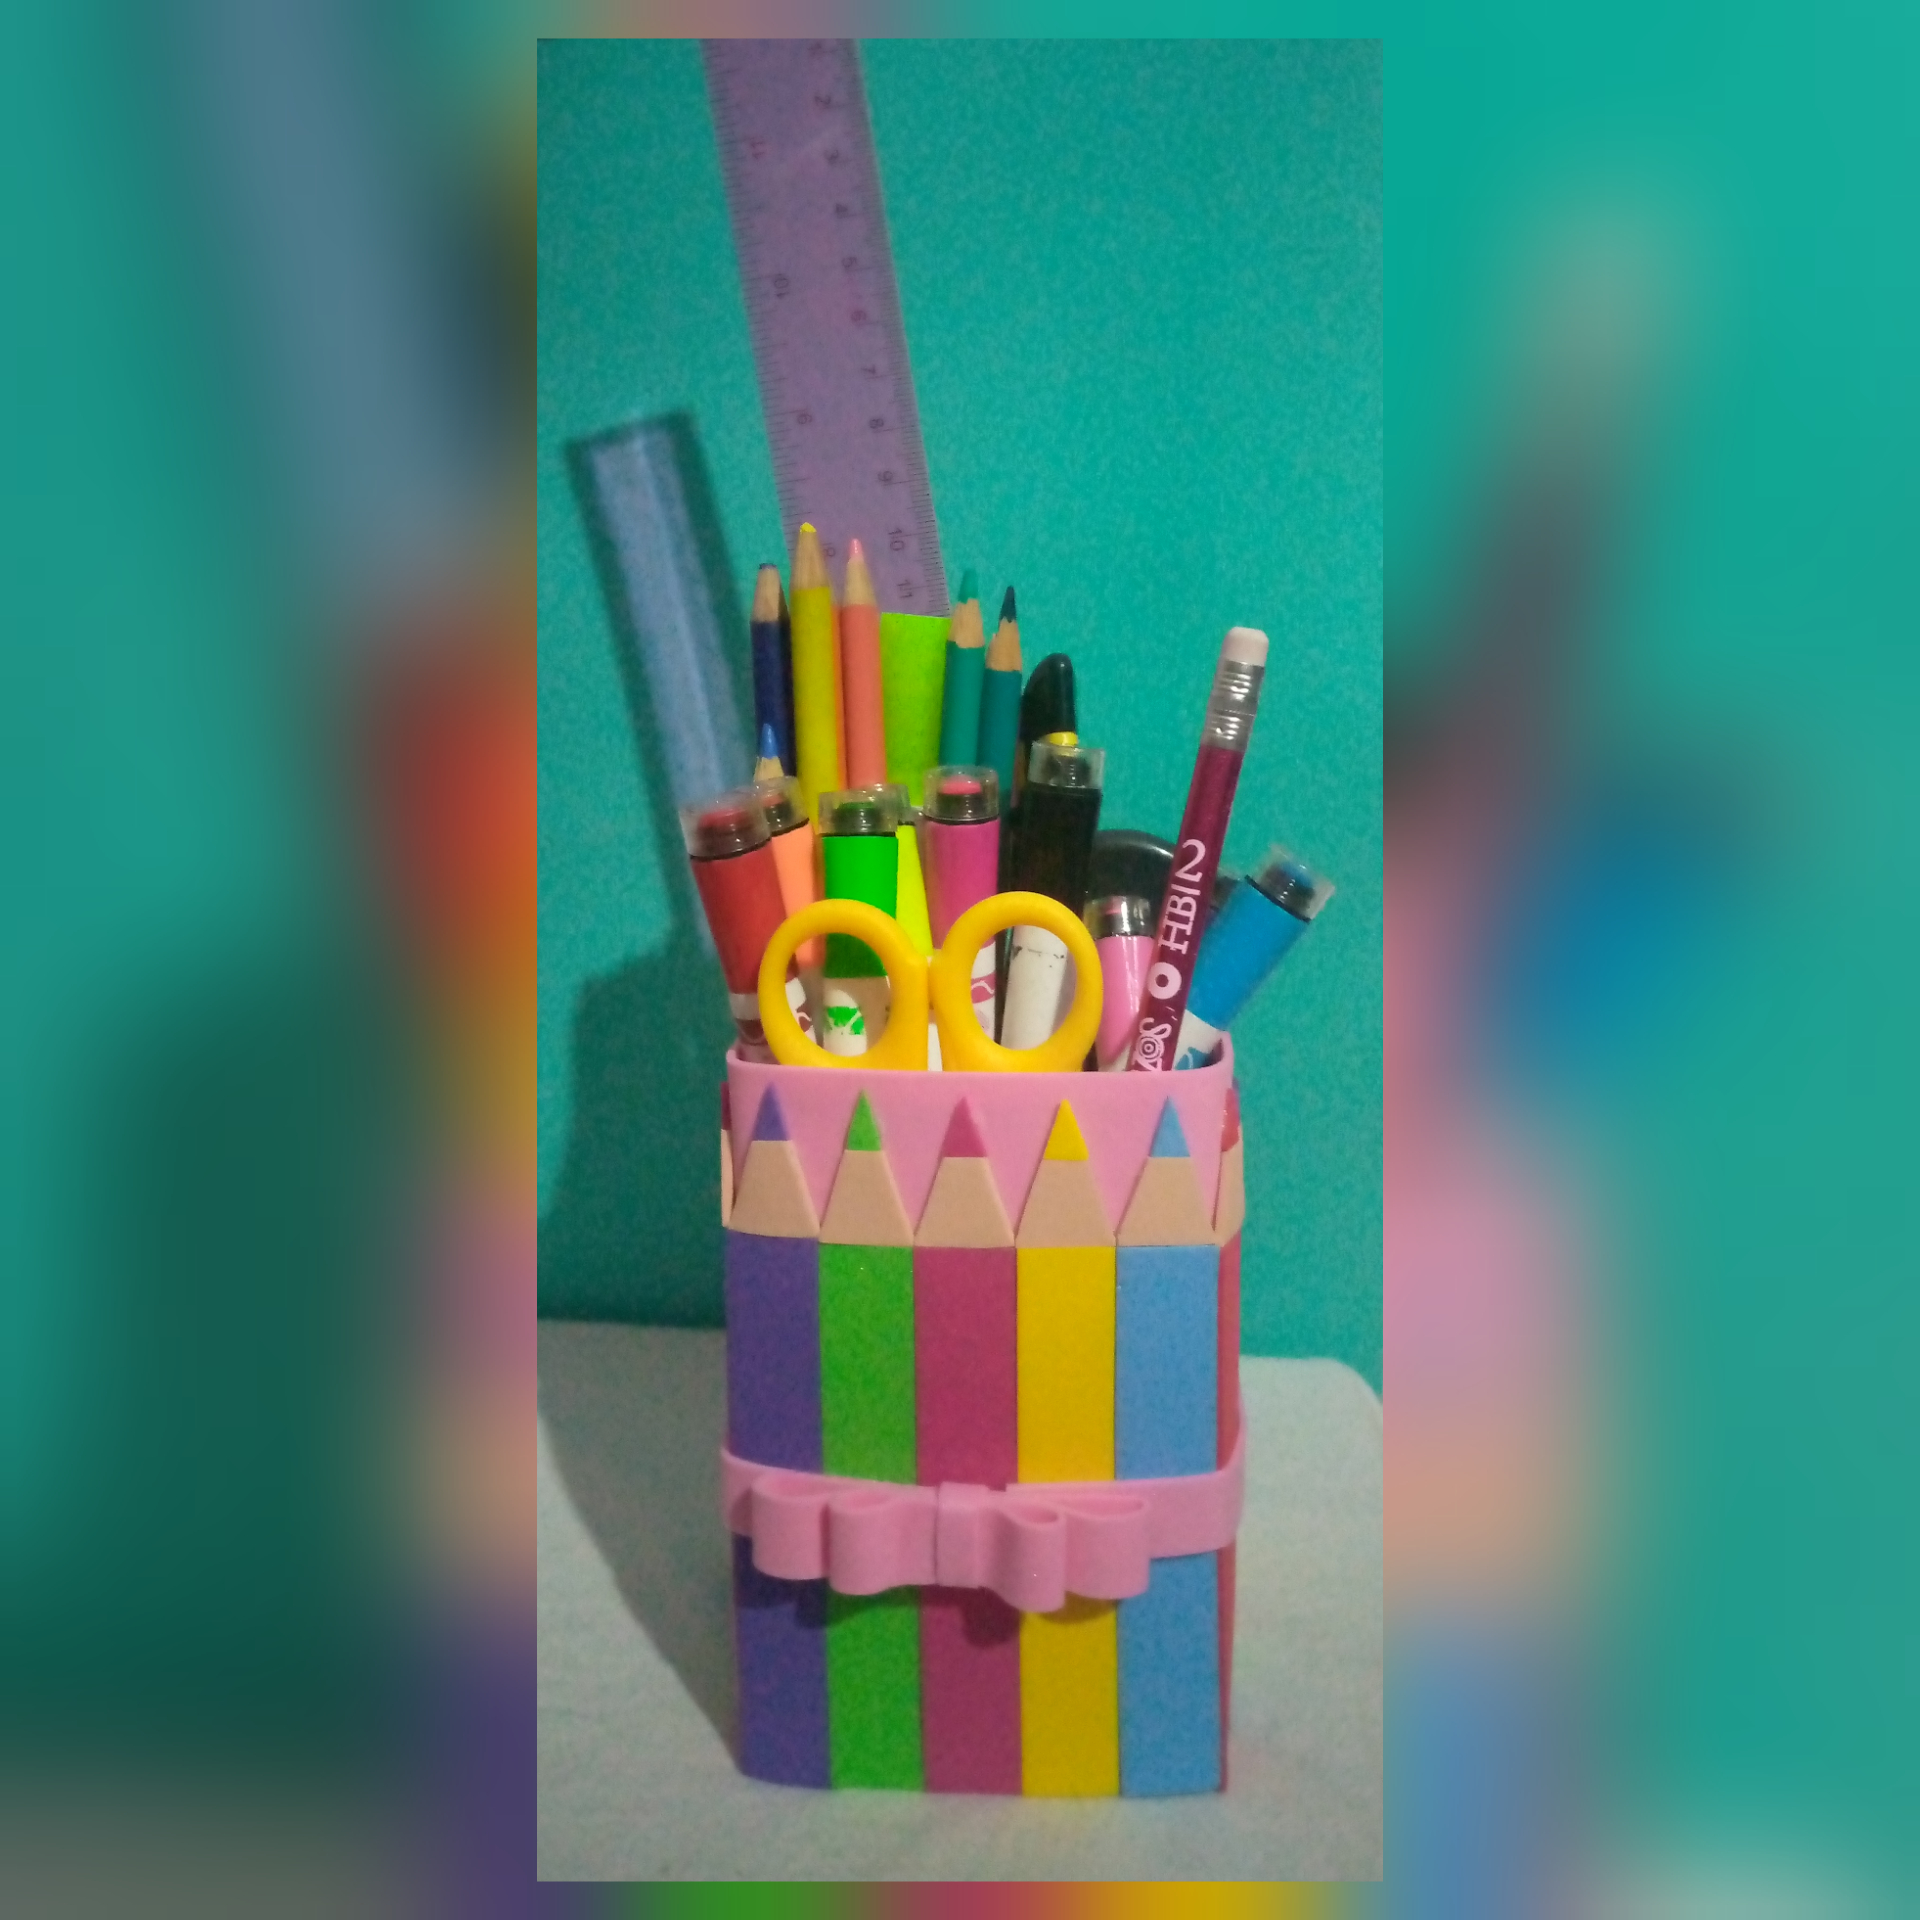
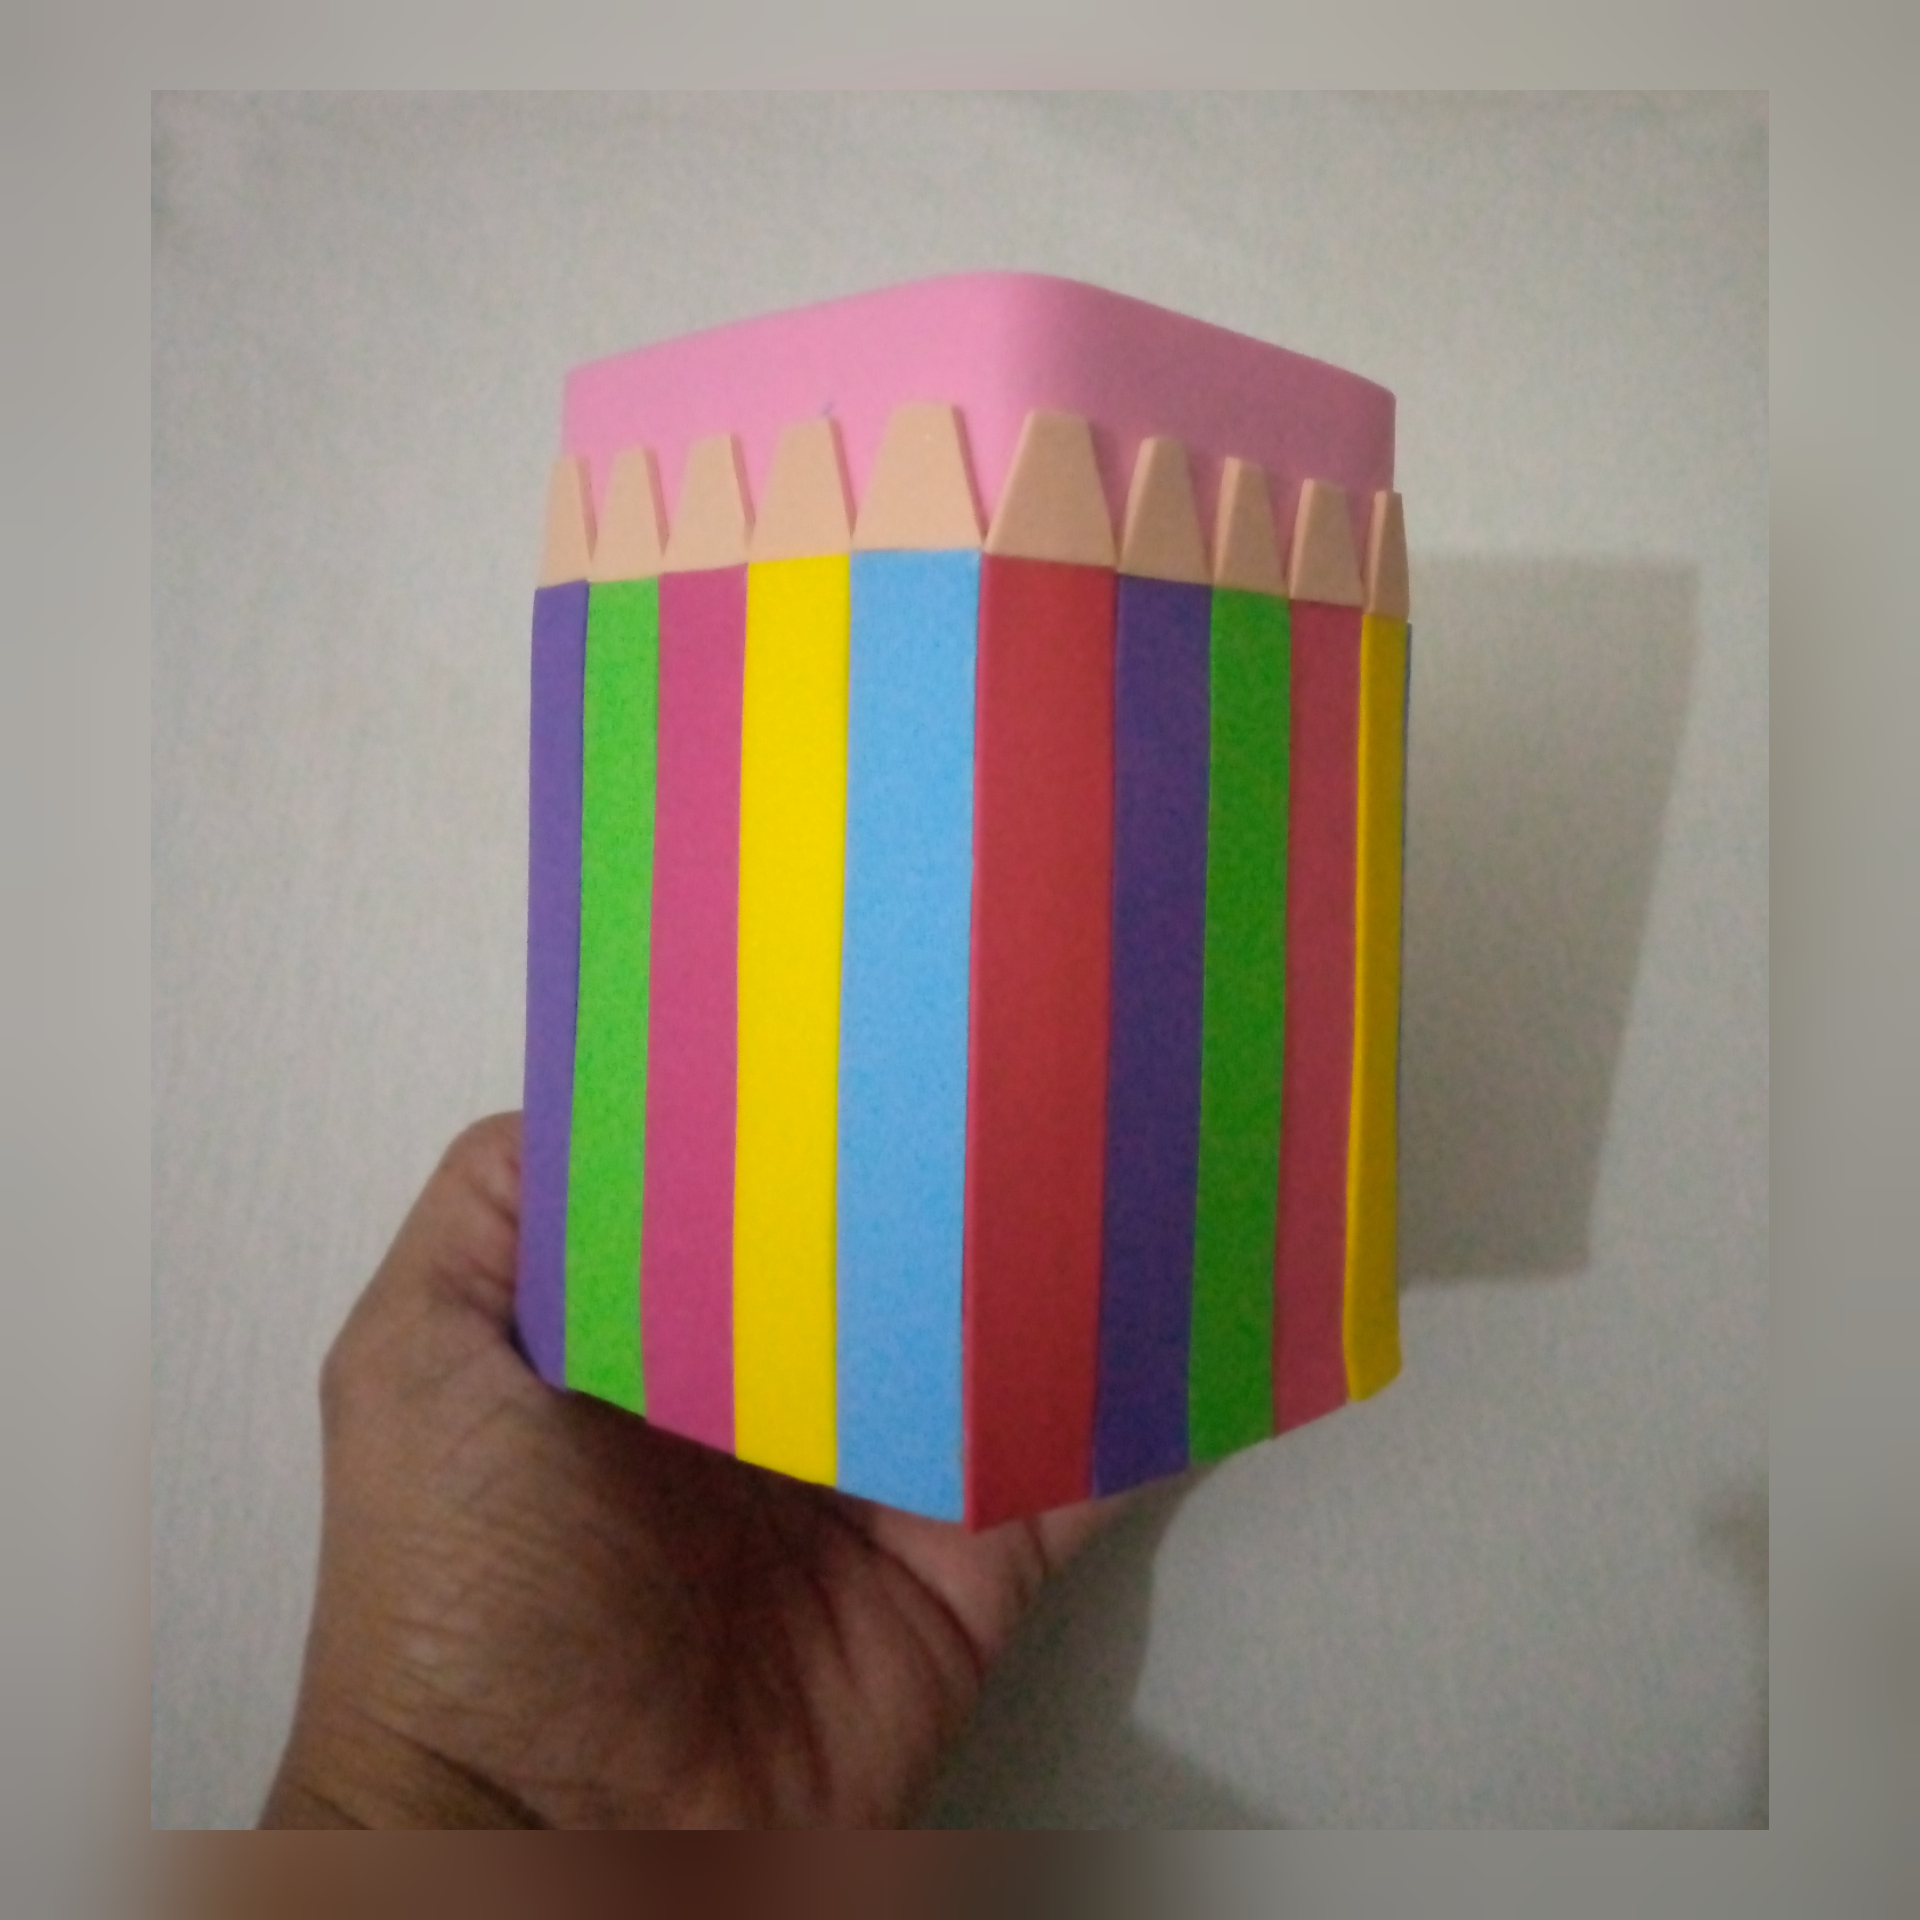
Y así he culminado ésta hermosa manualidad mis estimados amigos, fácil de hacer con muy pocos materiales, reciclando y creando, yo la hice para niñas, para mí pequeña, pero si tu caso es el contrario solo tienes que combinar los colores y cambiar el detalle del lazo a tu gusto.
And so I have completed this beautiful craft my dear friends, easy to do with very few materials, recycling and creating, I made it for girls, for my little one, but if your case is the opposite you just have to combine colors and theme to your liking.
Espero que les haya gustado y éste post les sea de gran utilidad, muchas gracias por visitar mi blog, espero verlos pronto, que pasen una linda noche, Infinitas Bendiciones para todos!
I hope you liked it and this post will be very useful, thank you very much for visiting my blog, I hope to see you soon, have a nice evening, Infinite Blessings to all!
@dayanaromer
<>Todas las fotografías son de mi propiedad, captadas con mi léfono móvil Tecno Spark 6 go.
Editadas con inShop.
Traducido con Deepl traductor.
All photos are my own, taken with my Tecno Spark 6 go cell phone.
Edited with inShop.
Translated with Deepl translator.
Está muy muy lindo, me encanta lo colorido que es, muy útil ✨✨
Muchas gracias amiga 🤗, me alegra que te haya gustado, Saludos y bendiciones 💗
¡Saludos, cariño! Muy delicado y tierno tu porta lápices. Resultan muy útiles para los niños y también para los adultos, que como yo, dejamos por doquier cualquier cantidad de lápices y colores 😆💕 te mando un abrazo, súper tu trabajo.
Hola amiga, que bueno que te haya gustado, si! super útil, gracias por comentar, que tengas un excelente y bendecido día 🤗💓
Excelente idea amiga @dayanaromer, te quedo muy hermoso con ese diseño de lapices de colores, saludos.
Muchas gracias amiga, Saludos 😊
Los colores que usaste lo hacen ver delicado y super cute. Me ha encantado, hiciste que cada lápiz llegara a cada esquina sin que quedara corto. Además de la paciencia para cada pequeña piecita. Gracias por compartir con nosotros.
Saludos amiga, me alegra que te haya gustado, si fue un trabajo sencillo, pero de dedicación y un poco de paciencia precisamente por las piecitas que mencionas, pero se logró el objetivo, muchas gracias, que tengas un maravilloso día! 😊💓
de verdad esta muy hermoso y no se ve dificil de hacer, me estoy pensando hacer uno para mi escritorio, le cambiaria algunos colores, pero en escencia seria casi igual.
Gracias por compartirlo.
Saludos
Hola amigo, muchas gracias!! Me alegra que te hayas animado a realizar uno para ti, Bendiciones!! 🤗
Thank you for sharing this amazing post on HIVE!
Your content got selected by our fellow curator @rezoanulvibes & you just received a little thank you via an upvote from our non-profit curation initiative!
You will be featured in one of our recurring curation compilations and on our pinterest boards! Both are aiming to offer you a stage to widen your audience within and outside of the DIY scene of hive.
Join the official DIYHub community on HIVE and show us more of your amazing work and feel free to connect with us and other DIYers via our discord server: https://discord.gg/mY5uCfQ !
If you want to support our goal to motivate other DIY/art/music/homesteading/... creators just delegate to us and earn 100% of your curation rewards!
Stay creative & hive on!