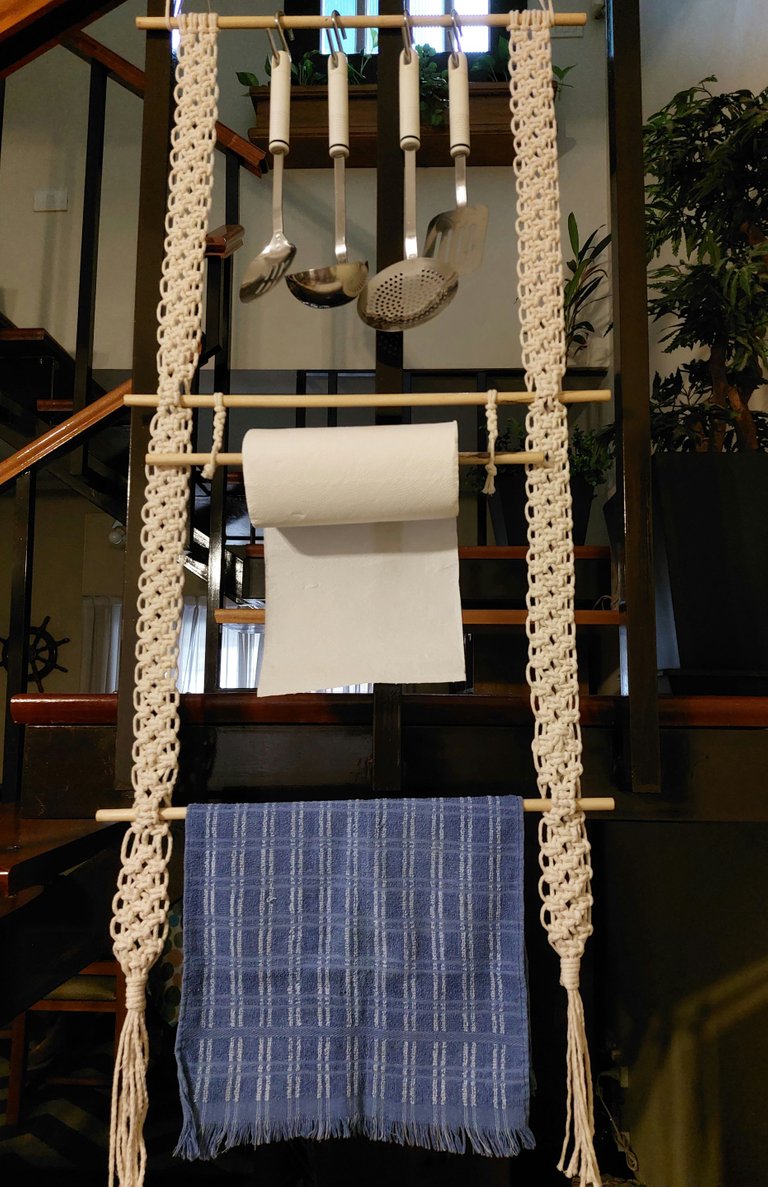
Very good day to the whole community, today I show you how to make this organizer for cooking with the technique of weaving in macramé, but it could be done with crochet fabric or with fabric strips.... To use the imagination!
Muy buen día a toda la comunidad, hoy les muestro como realizar este organizador para cocina con la técnica de tejido en macramé, pero podría hacerse con tejido al crochet o con tiras de tela…. A usar la imaginación!
Necessary materials:
3 wooden rods 50 cm long and 1 cm in diameter
1 wooden rod 40 cm long and 1 cm in diameter
8 strips of 4 mm thick cotton yarn 8 m long
Materiales necesarios:

3 varillas de madera de 50 cm de largo y 1 cm de diámetro
1 varilla de madera de 40 cm de largo y 1 cm de diámetro
8 tiras de hilo de algodón de 4 mm de espesor de 8 m de         largo
Procedure:
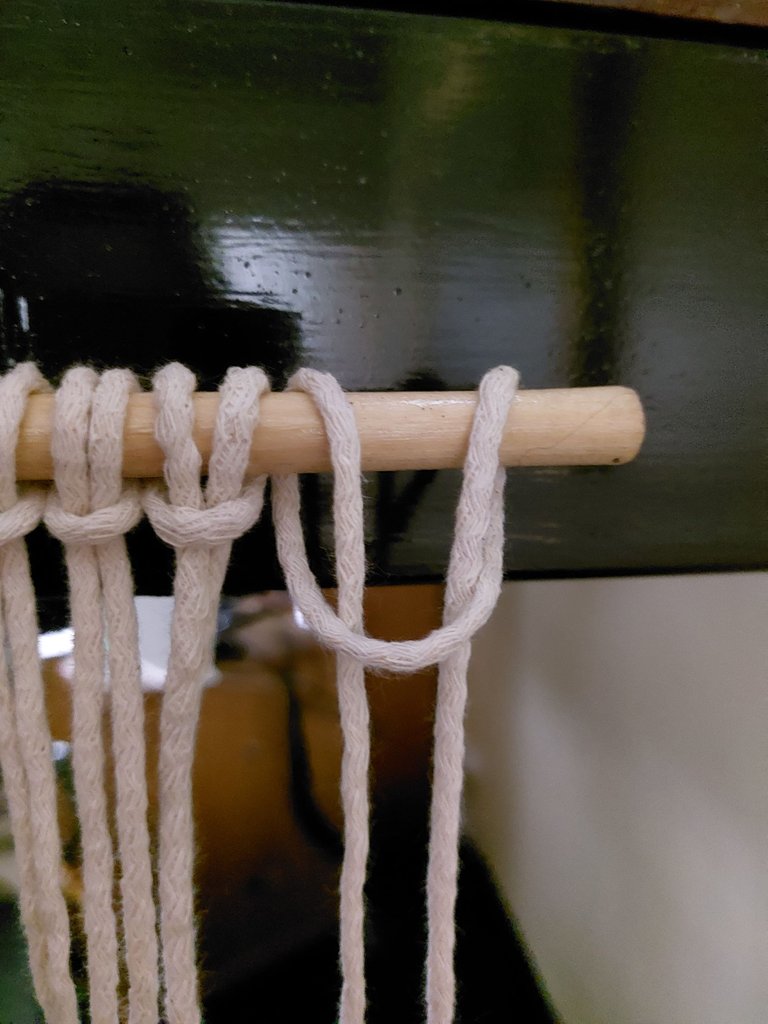
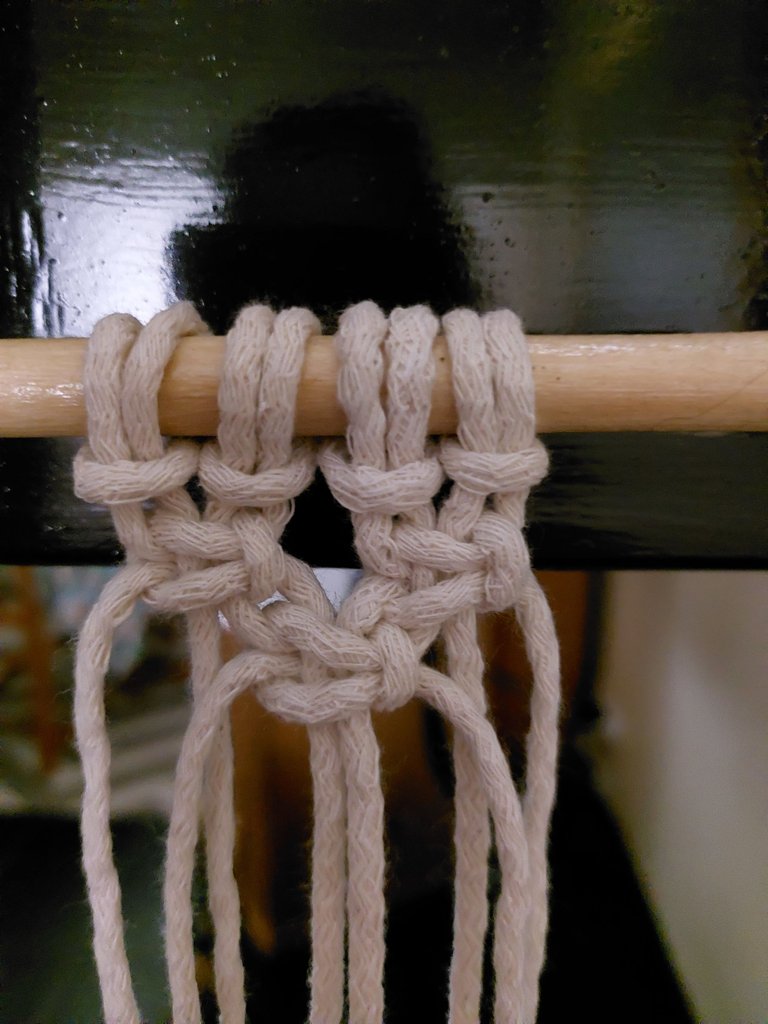
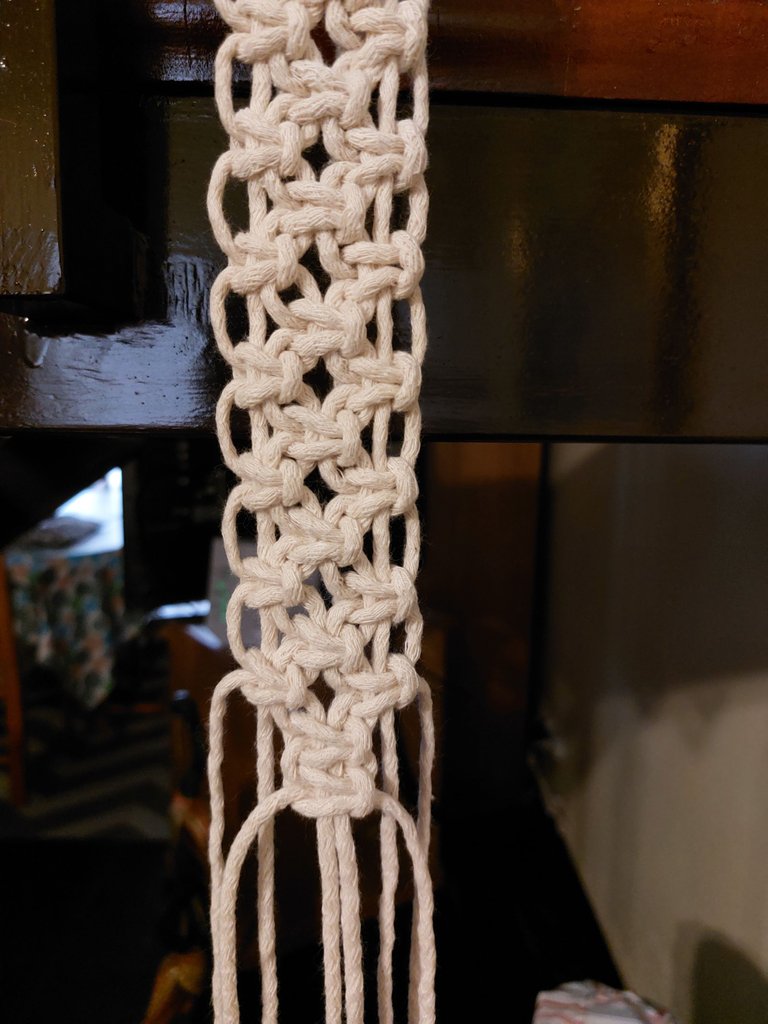
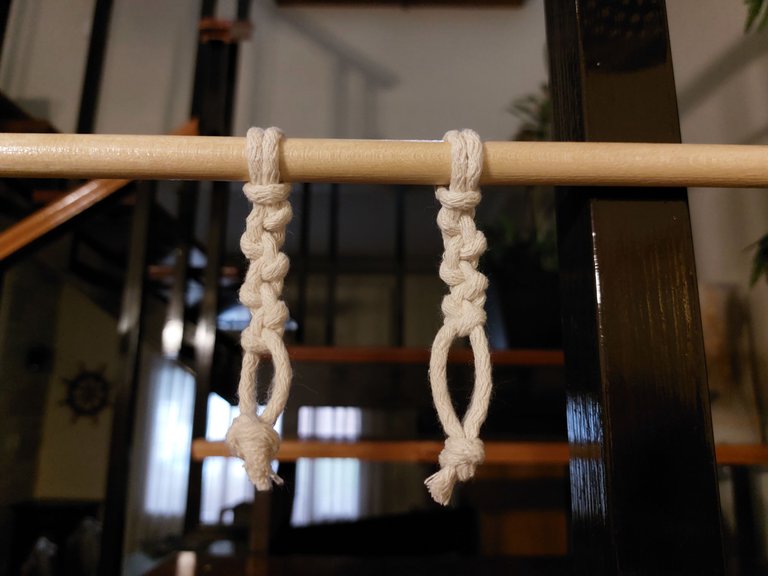
We hang the first rod with discard threads or hooks and on it we mount the 8 threads using ALONDRA KNOT (we fold each strip in half to make the knot). We have 4 knots at each end of the rod leaving 5 cm free on each side.
Procedimiento:

Colgamos la primera varilla con hilos de descarte o ganchos y sobre ella montamos los 8 hilos usando NUDO ALONDRA (doblamos cada tira por la mitad para hacer el nudo). Disponemos 4 nudos en cada extremo de la varilla dejando 5 cm libres de cada lado.

1st turn: we make 2 FLAT KNOTS using the 4 strips of thread at each end
1er vuelta: hacemos 2 NUDOS PLANOS usando las 4 tiras de hilo en cada extremo
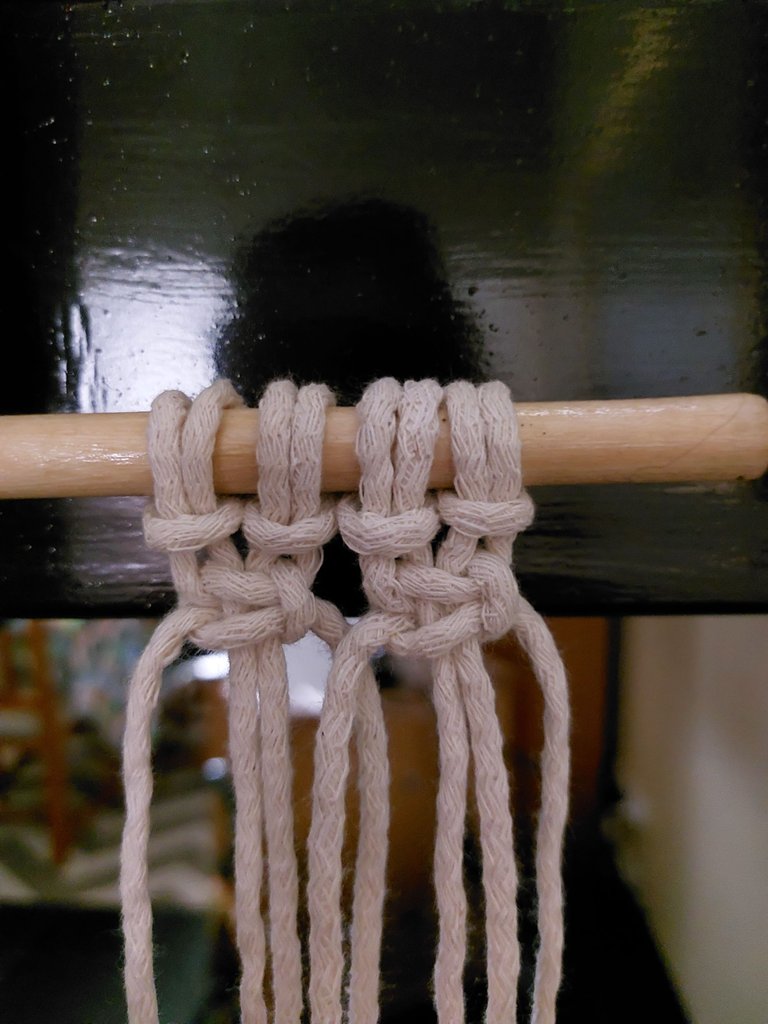
2nd turn: we leave 2 threads free and make a FLAT KNOT, it must be in the middle of the fabric.
2da vuelta: dejamos libres 2 hilos y hacemos un NUDO PLANO, debe quedar en el medio del tejido.
3rd lap: idem to the first.
4th lap: idem to the second
3er vuelta: idem a la primera.
4ta vuelta: idem a la segunda
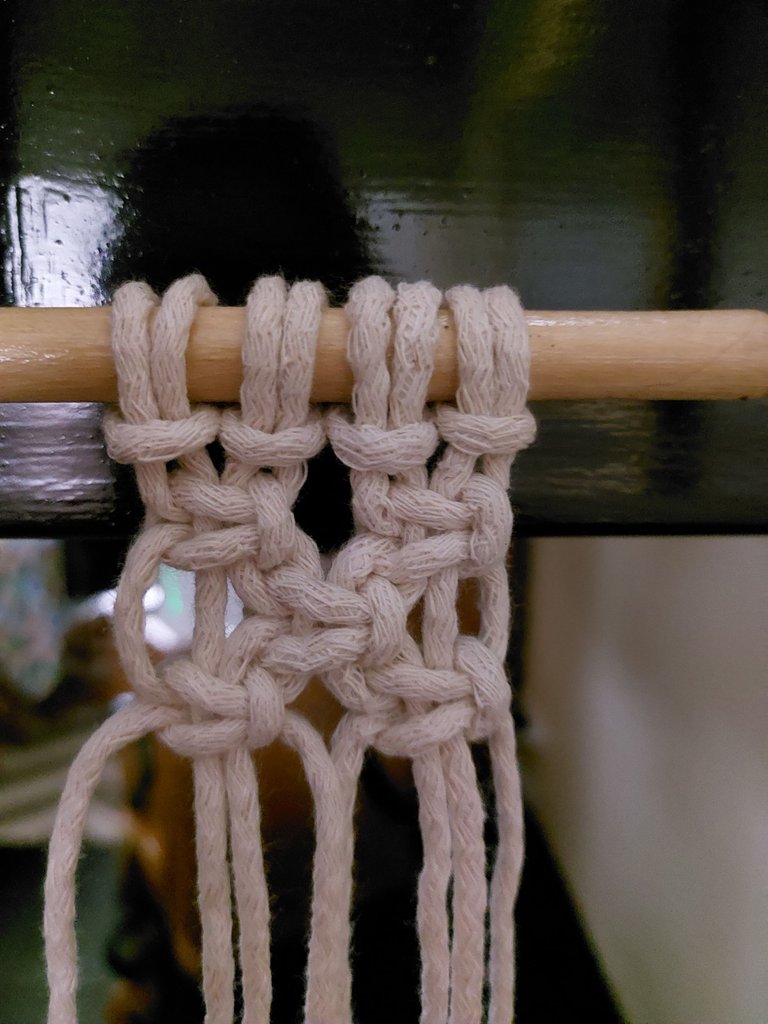
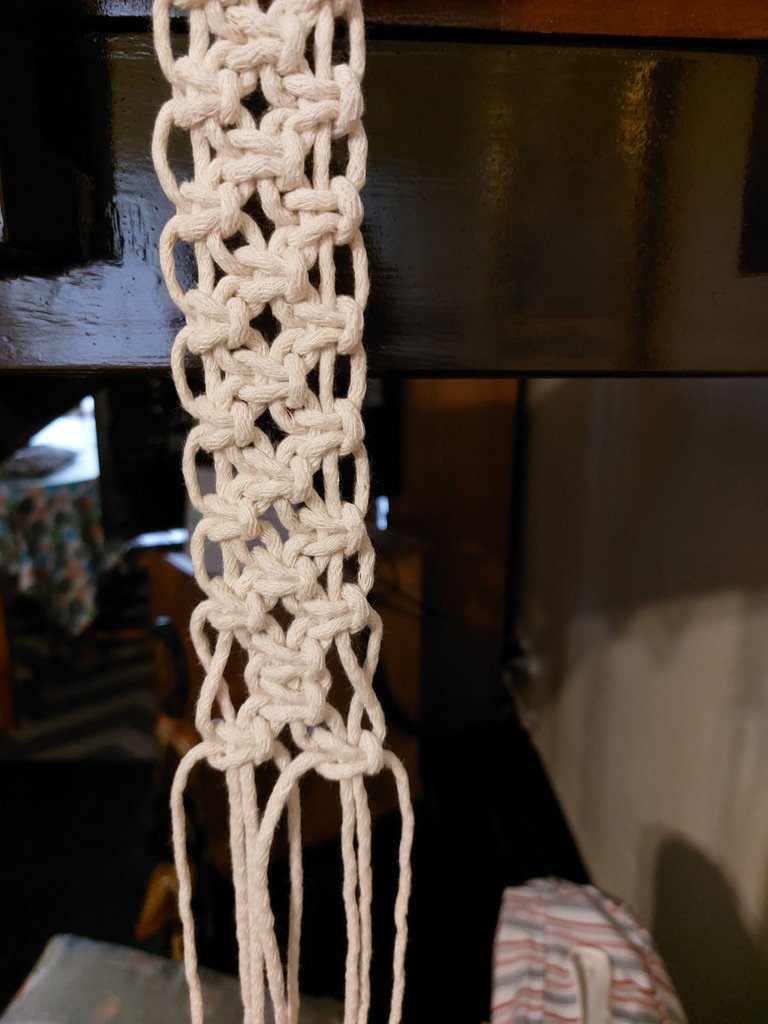
We continue making the same points until we weave strips of approximately 50 cm (it is convenient for them to measure what they are going to hang from that rod to see the height).
Continuamos haciendo los mismos puntos hasta llegar a tejer tiras de 50 cm aproximadamente (les conviene medir lo que van a colgar de esa varilla para ver el alto).
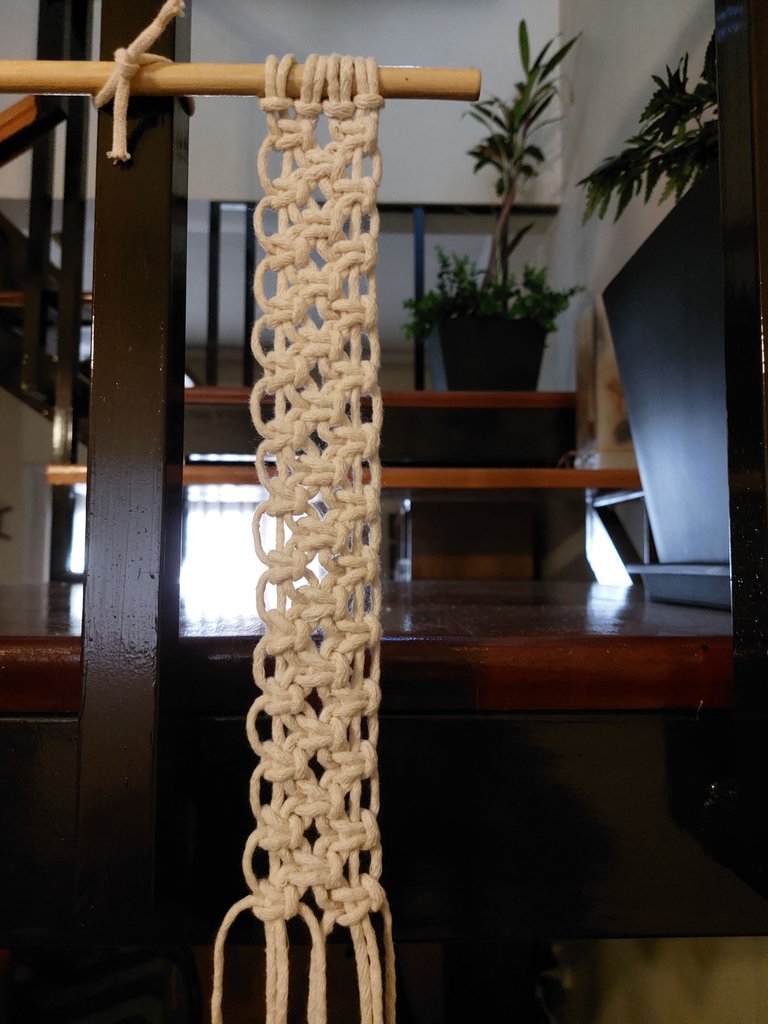
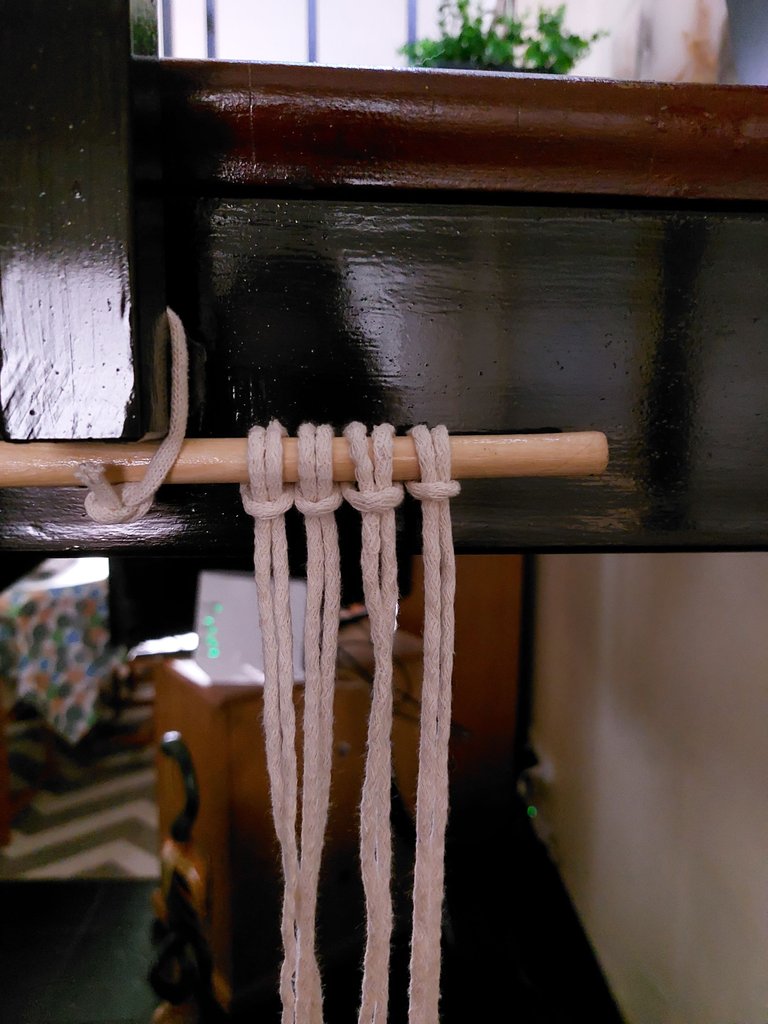
Leaving 2 free threads we make 1 FLAT KNOT that should be in the middle of the fabric, we repeat the same in the next turn. With this we managed to make the bra to put the second wooden rod.
The threads of the ends we cross and we return to make 2 FLAT KNOTS in each woven strip, like lap 1. We can already place the wooden rod.
Dejando 2 hilos libres hacemos 1 NUDO PLANO que debe quedar en el medio del tejido, repetimos lo mismo en la vuelta siguiente. Con esto logramos hacer el sujetador para poner la segunda varilla de madera.
Los hilos de los extremos los cruzamos y volvemos a hacer 2 NUDOS PLANOS en cada tira tejida, como la vuelta 1. Ya podemos colocar la varilla de madera.
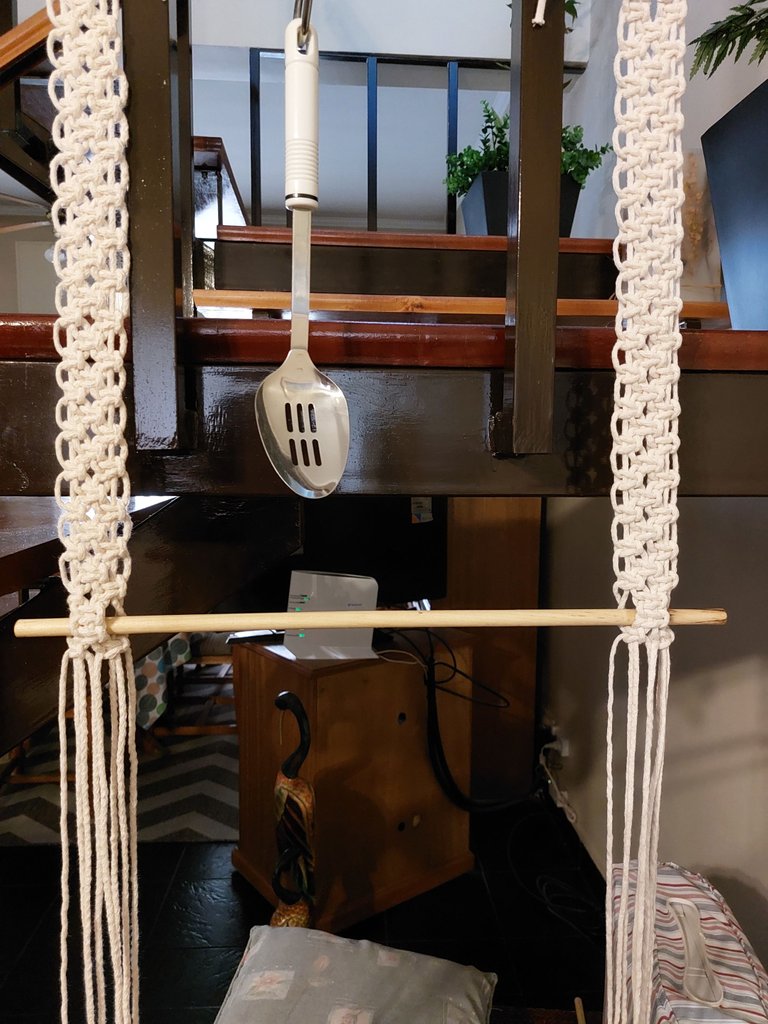
We continue weaving the strips with the same points, until we reach 45 cm (this is to taste, it will depend on those that hang on the second rod).
Continuamos tejiendo las tiras con los mismos puntos, hasta llegar a 45 cm (esto es a gusto, va a depender de los que cuelguen en la segunda varilla).
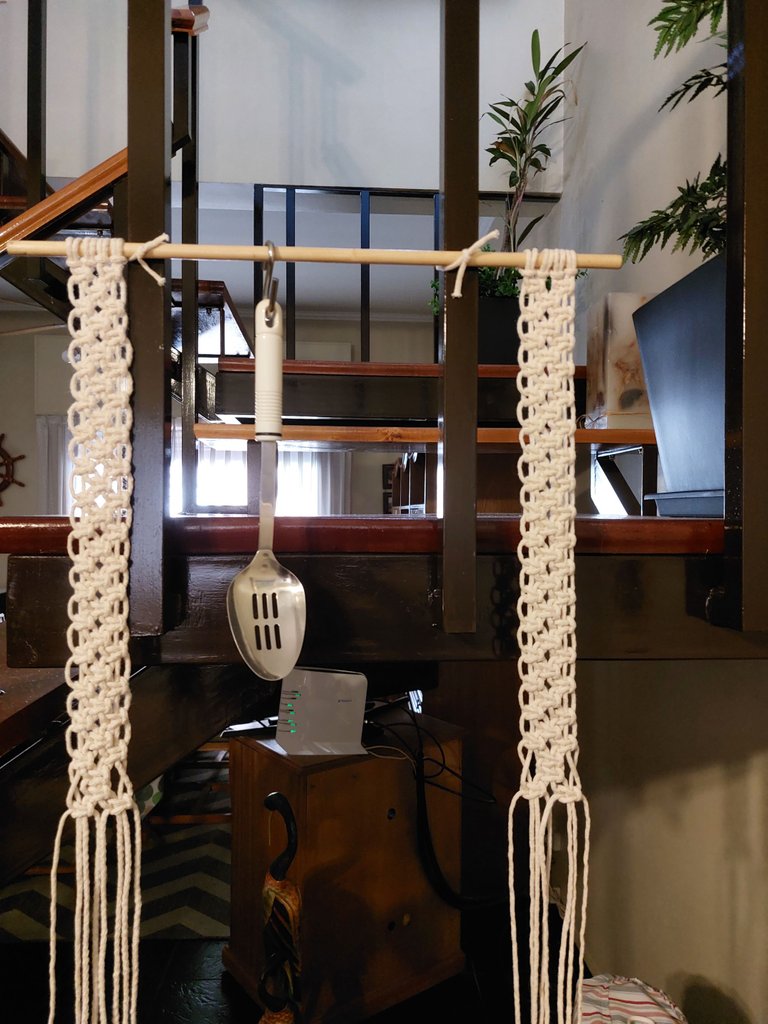
We redo the rod bra and pass the third wooden rod. I recommend leaving them in place to continue weaving so that the structure is already firm.
Volvemos a hacer el sujetador de la varilla y pasamos la tercera varilla de madera. Recomiendo dejarlas colocadas para seguir tejiendo así ya queda firme la estructura.
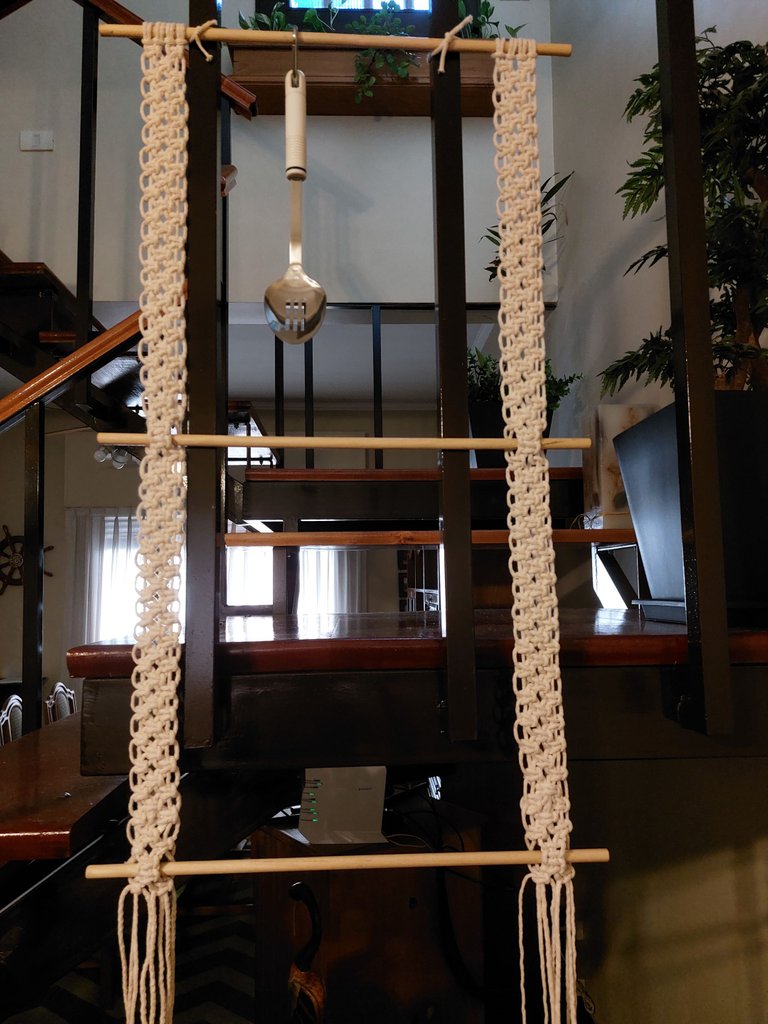
We continue weaving a little more (long to choose) and then we make MAGIC KNOT to close each strip and hang the fringes. We cut the surplus.
Continuamos tejiendo un poco más (largo a elección) y luego hacemos NUDO MAGICO para cerrar cada tira y que cuelguen los flecos. Cortamos el excedente.
To hold the shorter rod (paper roll holder) to the middle rod, we pass the small strips on the middle rod and make simple knots inverting the loop, in this way a reinforced strip remains. We make a knot on the tip so that the rod that will hold the paper roll passes.
Para sujetar la varilla mas corta (porta rollo de papel) a la varilla del medio, pasamos las tiras chiquitas sobre la varilla del medio y hacemos nudos simples invirtiendo el lazo, de esta forma queda una tira reforzada. Le hacemos un nudito en la punta para que pase la varilla que sujetará al rollo de papel.
I hope you can put it into practice and thank you for reading this post!
Espero que lo puedan poner en práctica y gracias por leer este post!
Thank you for sharing this amazing post on HIVE!
Your content got selected by our fellow curator @rezoanulvibes & you just received a little thank you via an upvote from our non-profit curation initiative!
You will be featured in one of our recurring curation compilations and on our pinterest boards! Both are aiming to offer you a stage to widen your audience within and outside of the DIY scene of hive.
Join the official DIYHub community on HIVE and show us more of your amazing work and feel free to connect with us and other DIYers via our discord server: https://discord.gg/mY5uCfQ !
If you want to support our goal to motivate other DIY/art/music/homesteading/... creators just delegate to us and earn 100% of your curation rewards!
Stay creative & hive on!
Hi, thanks a lot!
Wow this is really lovely and well detailed thanks for sharing
Hi, thanks for yours comments!
Hermoso trabajo! 🤗☺️😁😉👍🏼
🪡🧵🪡🧵🪡🧵🪡🧵🪡🧵🪡🧵🪡🧵🪡
Gracias por compartir
🌼🍂🍁🍄🌱🌻🏵️💮🌸🌷🌺🥀🌹💐☘️
Hola, gracias a vos por tu lindo comentario!