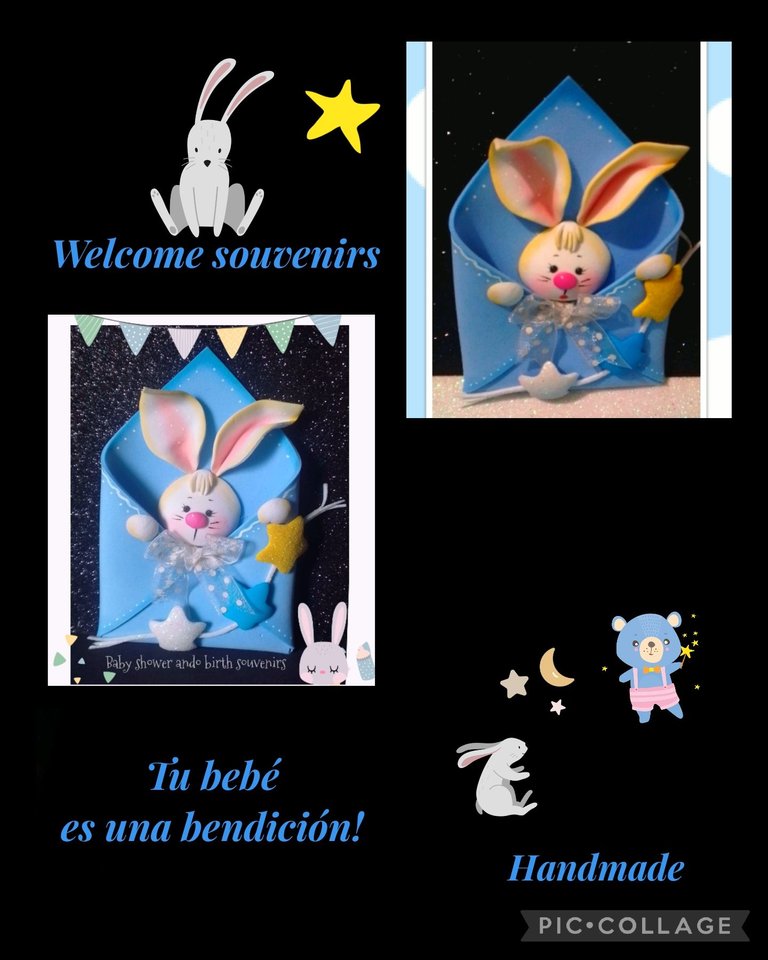
Hola, hola queridos amigos.
Por aquí vengo hoy a compartir con ustedes un tutorial que espero les guste.
Entonces para realizar este lindo recuerdo vas a necesitar:

| Foami mate y escarchados | Cinta de tela |
|---|---|
| Pinturas y pinceles | Palito de madera |
| Tijera | Silicón |
| Tizas, algodón | Plancha |
Comencemos:
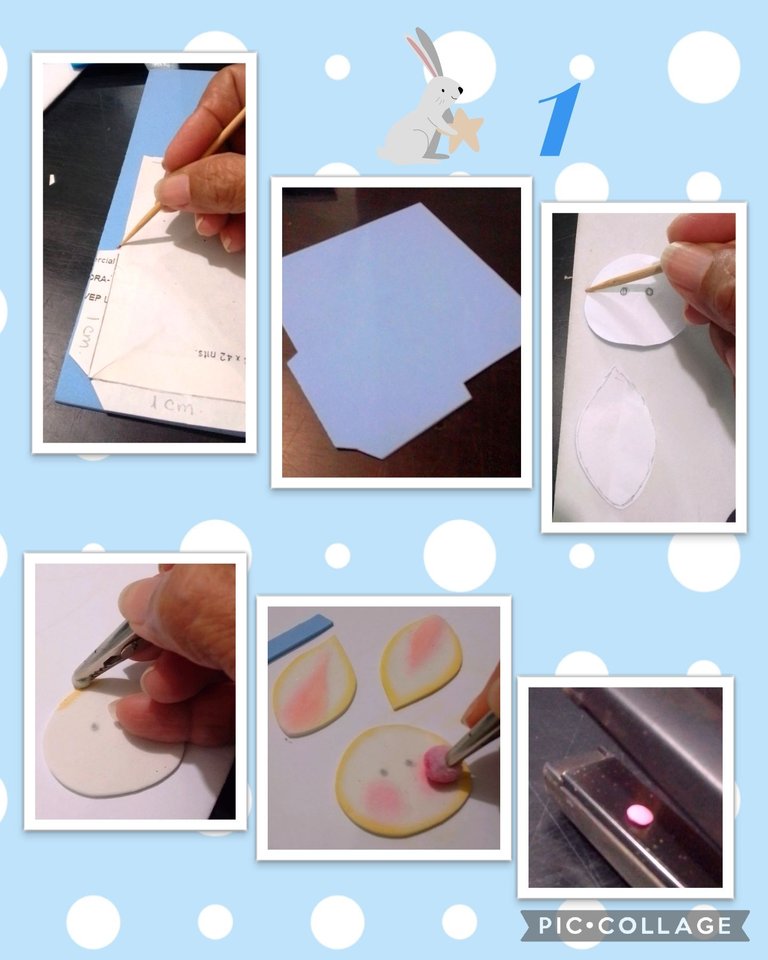
- Dibuja en un papel, un cuadrado con las medidas de tu preferencia, este lo hice de 10x10cms y en una esquina aumenta 1x5cm a cada lado, estas serán las petañas (ver foto).
- Marca con un palito de madera, todo el contorno del dibujo sobre el foami y recorta.
- Aparte dibuja la carita y orejas del conejito y marca de igual forma sobre el foami y recorta.
- Ahora con un algodón frota sobre tiza amarilla y pasa por todo el contorno de cara y orejas, luego con otro pedacito de algodón da color a las mejillas y orejas.
- Recorta un círculo para la nariz y calienta la plancha para darle forma.

- Después de pintar con la tiza coloca sobre la plancha y da forma.
- Ahora pinta todo el borde de cuadrado (Sobre), aplica silicón en las pestañas y pega uniendo tres lados como se ve en la foto.
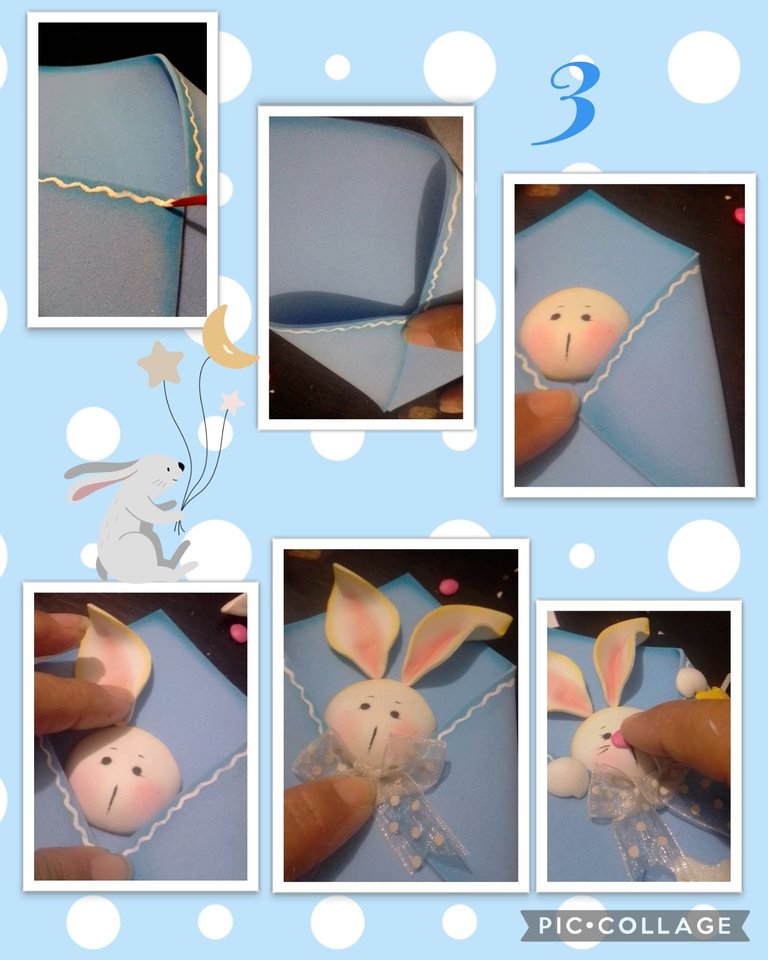
- Con un pincel liner (delgado) y haz una trencilla u onditas en el borde del sobre y deja secar, luego aplica un poco de silicón en el centro y presiona para que pegue.
- Pinta la carita (ojos con un palito de madera) y con pincel las cejas, bigote.
- Aplica luego silicón y pega al sobre, también las manitos, seguido las orejas, luego haz un lazo pega debajo de la cabeza y coloca la nariz

- Ahora aplica silicón en la nariz, pega presionando.
- Con un palito de madera pon puntos con pintura blanca en las orejas.
- Aparte dibuja una estrella, marca y recorta en foami escarchado y mate, en los colores de tu preferencia, calienta en la plancha hasta que tomen forma, luego corta una tira de foami y pega uniendo las 3 estrellitas y pega al sobre.
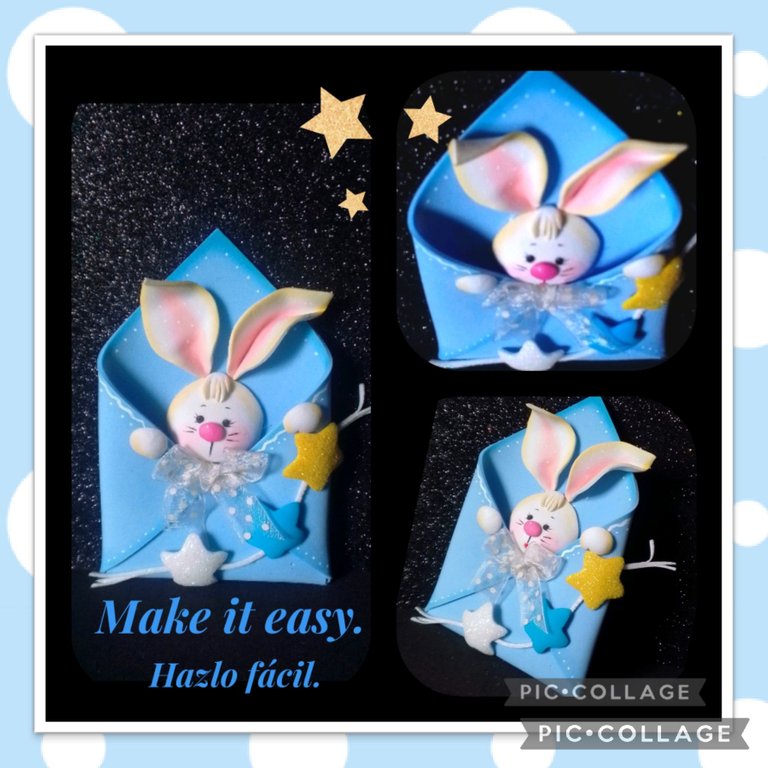
Y ya terminamos este hermoso recuerdo!
Fuente de imagen:
Cambiada a mi gusto!
Ahora te dejo unas fotos para que veas cómo luce este recuerdito.

Esta publicación está traducida con DeepL, editada con etiquetas HTLM y las fotos capturadas con mi Blu G5 y editadas con Pic Collage.
Ahora si me despido, deseando sea útil y de tu agrado mi publicación.
Muchas gracias por tu visita y apoyo.
Si deseas dejar un comentario, me agradará mucho y estaré feliz de responderte.
Saludos y bendiciones.
Recuerda hazlo con amor!!
English:
Hello, hello dear friends.
Here I come today to share with you a tutorial that I hope you like.
So to make this nice souvenir you will need:
| Foami matte and frosted | Fabric ribbon |
|---|---|
| Paints and brushes | Wooden stick |
| Scissors | Silicone |
| Chalk, cotton | Iron |
Let's get started:
- Draw on a piece of paper, a square with the measures of your preference, I made it 10x10cms and in one corner increase 1x5cm on each side, these will be the tabs (see photo).
- Mark with a wooden stick, all the outline of the drawing on the foami and cut it out.
- Draw the bunny's face and ears and mark the same way on the foami and cut out.
- Now with a cotton swab rub on yellow chalk and go all over the outline of the face and ears, then with another piece of cotton swab color the cheeks and ears.
- Cut out a circle for the nose and heat the iron to shape it.
- After painting with the chalk place on the iron and shape.
- Now paint the entire edge of square (Envelope), apply silicone on the tabs and glue joining three sides as seen in the photo.
- With a liner brush (thin) and make a braid or waves on the edge of the envelope and let dry, then apply a little silicone in the center and press to stick.
- Paint the face (eyes with a wooden stick) and with a brush the eyebrows and mustache.
- Then apply silicone and glue to the envelope, also the little hands, followed by the ears, then make a bow, glue it under the head and place the nose.
- Now apply silicone on the nose, glue by pressing.
- With a wooden stick put dots of white paint on the ears.
- Then draw a star, mark and cut in frosted and matte foami, in the colors of your choice, heat in the iron until they take shape, then cut a strip of foami and glue joining the 3 stars and glue to the envelope.
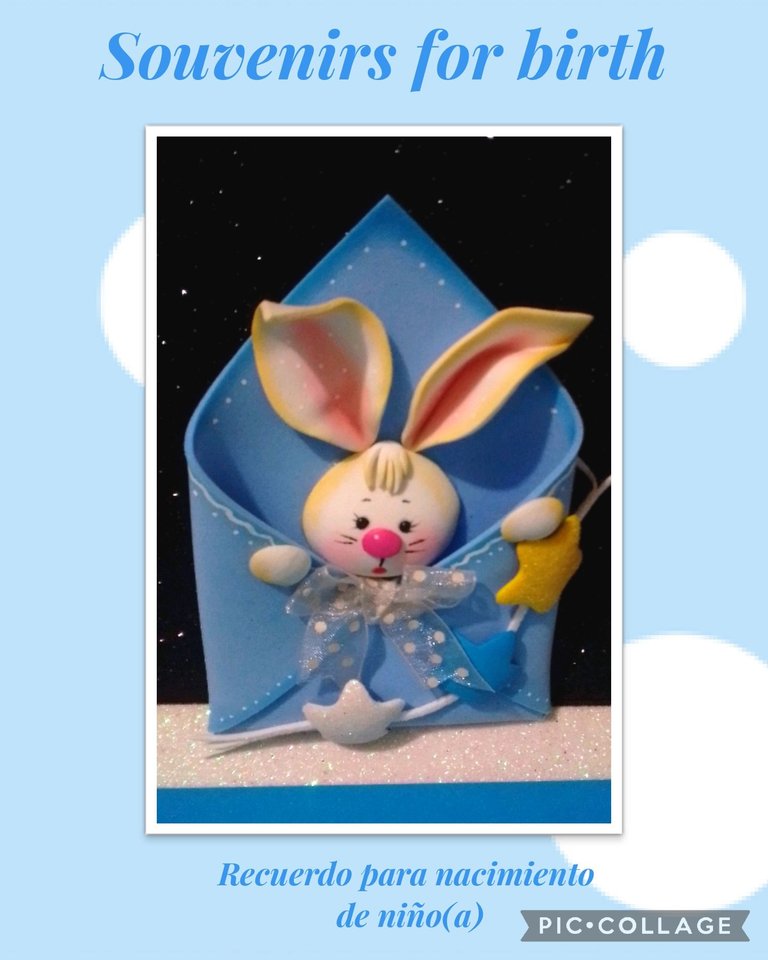
And now we have finished this beautiful souvenir!
Image source:
Changed to my liking!
Now I leave you some pictures so you can see how this souvenir looks like.
This post is translated with DeepL, edited with HTLM tags and the photos captured with my Blu G5 and edited with Pic Collage.
Now I say goodbye, hoping that my publication will be useful and to your liking.
Thank you very much for your visit and support.
If you want to leave a comment, I will be very pleased and I will be happy to answer you.
Greetings and blessings.
Remember to do it with love!
Gracias por el apoyo amiga @yennysferm71.
🌹
The rewards earned on this comment will go directly to the people sharing the post on Twitter as long as they are registered with @poshtoken. Sign up at https://hiveposh.com.
Admiro mucho este trabajo con foami. Es muy prolijo y tierno 😊 te felicito! 🌼🌼
Muchas gracias amiga, igualmente el tuyo, son muy hermosos tus tejidos.!
💐
Me encanta el diseño y la prolijidad hace que este trabajo se vea muy tierno y delicado. 💜
Hola amiga, que bueno que te ha gustado mi trabajo.
Gracias por tu apoyo!
Saludos🌼
Wow que talento Amiga, está súper prolijo, aprendiendo de tí, siempre he querido aprender esas técnicas de foami con plancha, con tiza y pincel. Me encantó! Muchas gracias por compartir amiga. ✨❤️
Gracias amiga, estoy a la orden si tienes alguna duda.
Me encantará ayudarte.
Saludos.