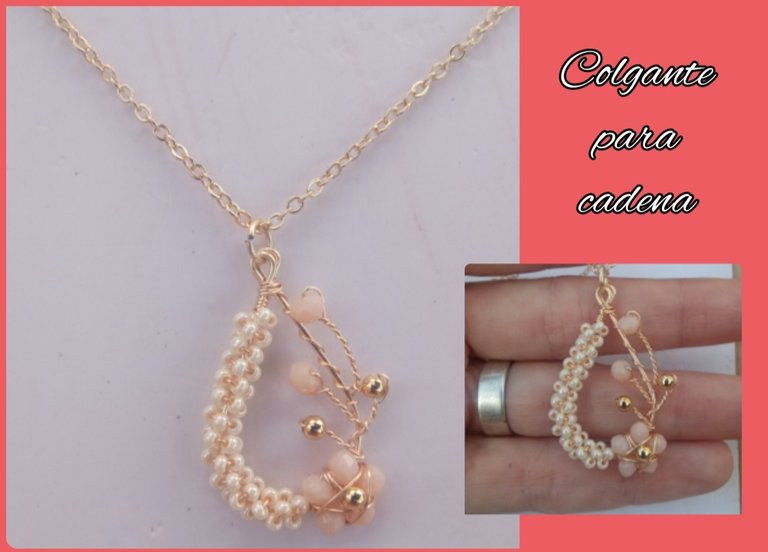
feliz y bendecido día tengan todos, feliz fin de semana para todos, el día de hoy tengo el gran placer de compartir con todos ustedes una vez más una de mis sencillas creaciones y en esta oportunidad les traigo un sencillo tutorial para la elaboración de un bello dije o colgante para embellecer nuestras cadenas. Este bello diseño debo confesarles que no ha sido de mi inspiración sino de la inspiración de mi esposo quien también es un gran creador de joyería y partiendo de un diseño que les compartí anteriormente de unas pequeñas argollas decoradas con mostacillas se le ocurrió esta brillante idea de la elaboración de un hermoso dije elaborado en alambrismo y decorado con piedras de mostacillas y cristales.
happy and blessed day everyone, happy weekend to all, today I have the great pleasure of sharing with all of you once again one of my simple creations and on this occasion I bring you a simple tutorial for making a Beautiful pendant or pendant to embellish our chains.
I must confess that this beautiful design was not my inspiration but rather the inspiration of my husband who is also a great jewelry creator and starting from a design that I previously shared with you of some small rings decorated with beads he came up with this brilliant idea of the creation of a beautiful pendant made of wire and decorated with beads and crystals.
I thought this idea was super beautiful, which is why I decided to make it step by step to share it with all of you today, so without further ado, I invite you to join me in this tutorial.
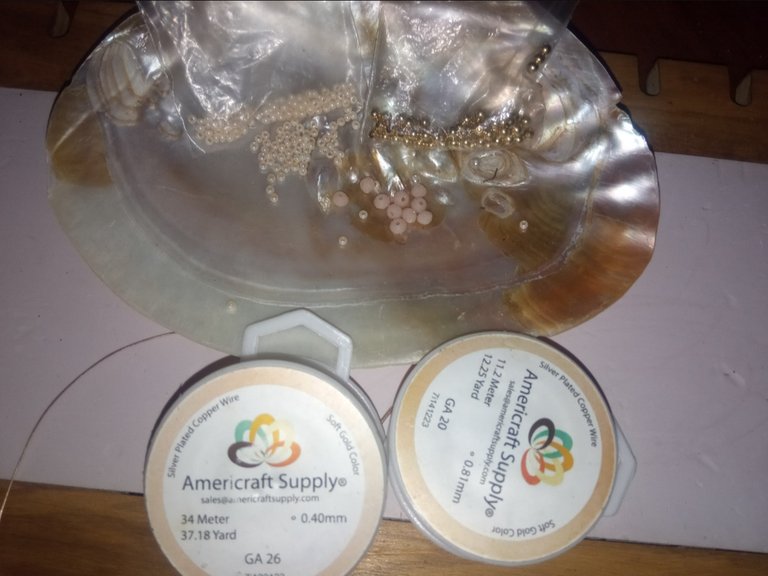
- alambre de bisutería calibre 20.
- alambre de bisutería calibre 26.
- piedras cristales color crema.
- Mostacillas pequeñas color crema.
- balines dorados.
- pinza de bisutería.
- cadena de bisutería o cuerina.
- 20 gauge jewelry wire.
- 26 gauge jewelry wire.
- cream colored crystal stones.
- Small cream colored beads.
- golden pellets.
- jewelry clamp.
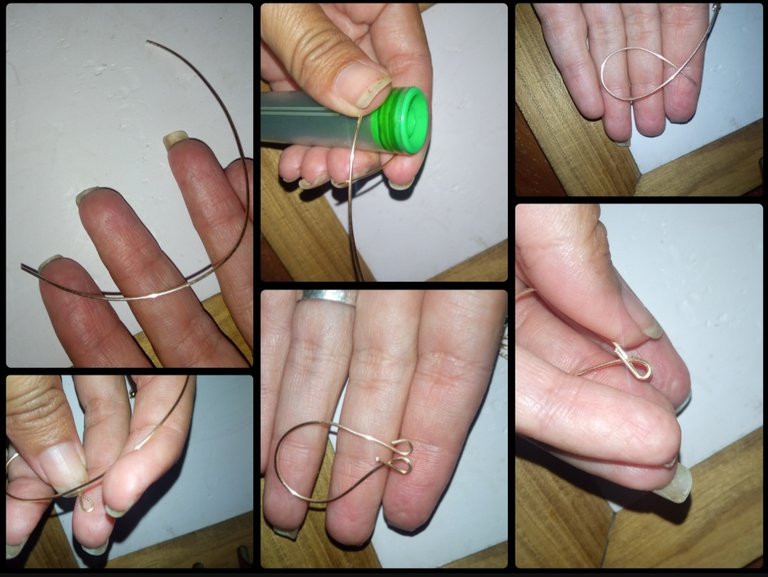
⭐ Paso 1: para iniciar la elaboración de este hermoso diseño lo primero que debemos hacer es tomar el alambre de bisutería calibre 20 y picaremos un pedazo de aproximadamente 10 cm dependiendo del tamaño en el que desee elaborar este hermoso colgante. Seguidamente con un objeto cilíndrico que en esta oportunidad pueden observar que utilicé como base un marcador moldearemos la forma dándole al alambre una forma ovalada o forma de gota y seguidamente en las puntas de cada lado elaboraremos un doblez con ayuda de la pinza de bisutería de manera que ambos dobles queden de la misma forma para cuándo lo vayamos a unir no se note diferencia entre ambos.
⭐ Step 1: to start making this beautiful design, the first thing we must do is take the 20 gauge jewelry wire and we will chop a piece of approximately 10 cm depending on the size in which you want to make this beautiful pendant.
Next, with a cylindrical object that on this occasion you can see that I used a marker as a base, we will mold the shape giving the wire an oval shape or drop shape and then at the tips of each side we will make a bend with the help of the jewelry tweezers in such a way.
Make sure that both doubles are the same so that when we are going to join them, there is no difference between them.
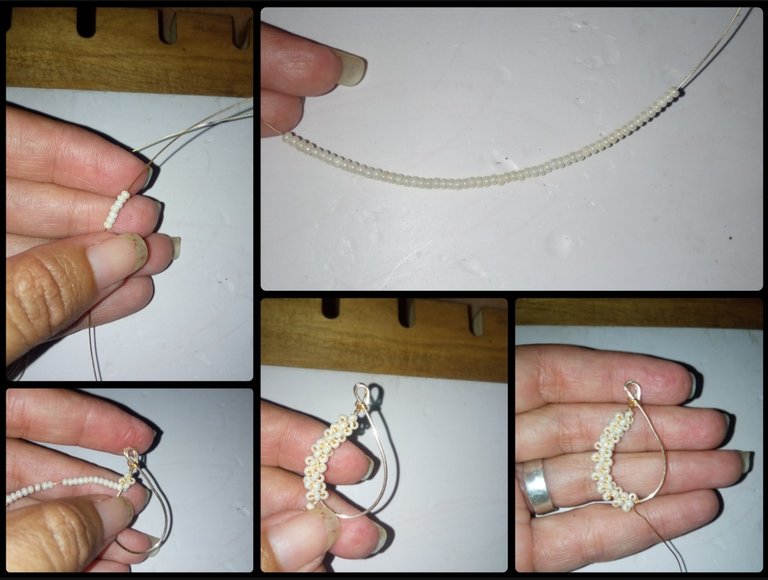
⭐ Paso 2: una vez elaborada la base principal de nuestro diseño procederemos a tomar el alambre de bisutería calibre 26 e introduciremos una gran cantidad de mostacillas color crema una vez tengamos suficientes mostacillas en el alambre procederemos a unir el alambre a la base enrollándolo en la parte posterior de ambos dobles poniendo los dos extremos para que así quede exacta la forma de gota. Seguidamente pasaremos el alambre hacia uno de los lados de la base y subiremos las mostacillas por el alambre para comenzar a decorar la base enrollando el alambre con las mostacillas en este lado de la base como pueden observar a continuación. Lo iremos enrollando poco a poco hasta cubrir un poco más de la mitad de nuestra base, una vez teniendo la mitad cubierta enrollaremos un poco de alambre para que las mostacillas no se muevan de su lugar.
⭐ Step 2: once the main base of our design has been made, we will proceed to take the 26 gauge jewelry wire and introduce a large amount of cream-colored beads. Once we have enough beads on the wire, we will proceed to attach the wire to the base. Rolling it on the back of both doubles, placing the two ends so that the drop shape is exact.
Next we will pass the wire towards one of the sides of the base and we will raise the beads up the wire to begin to decorate the base by rolling the wire with the beads on this side of the base as you can see below. We will roll it little by little until we cover a little more than half of our base. Once we have half covered, we will roll a little wire so that the beads do not move from their place.
⭐ Paso 3: ahora tomaremos el alambre calibre 26 que nos sobra e introduciremos cinco pequeños cristales color crema y los uniremos en pequeña forma de flor esta pequeña forma la llevaremos a encima de la base y en el alambre calibre 26 introduciremos un pequeño balín dorado el cual cruzaremos por encima de nuestra pequeña Flor y lo cruzaremos enrollando el alambre en la base luego daremos un par de vueltas con el alambre calibre 26 encima de la flor para sostenerla en la base principal.
⭐ Step 3: now we will take the 26 gauge wire that we have left over and we will insert five small cream-colored crystals and we will join them in a small flower shape. We will take this small shape to the top of the base and in the 26 gauge wire we will insert a small golden ball which we will cross over our small Flower and we will cross it by winding the wire at the base then we will make a couple of turns with the 26 gauge wire on top of the flower to hold it on the main base.
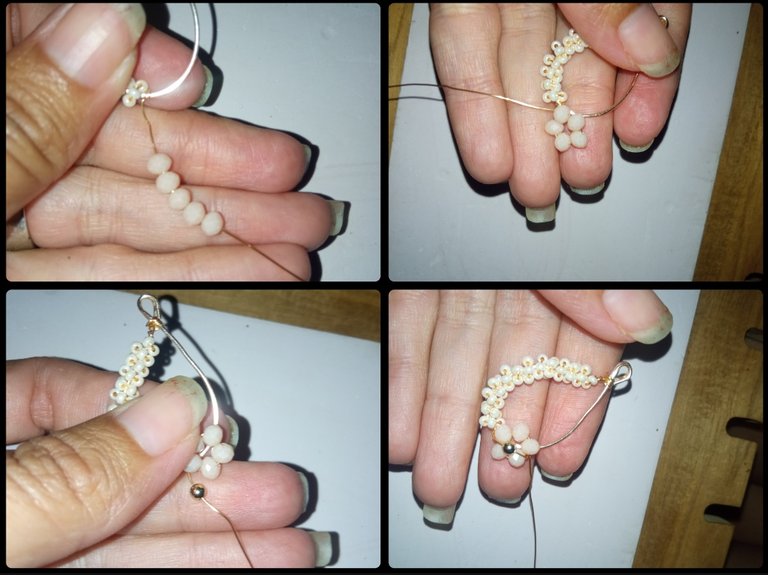
⭐ Paso 4: para continuar realizaremos unas pequeñas decoraciones, para ello introduciremos por el alambre calibre 26 un pequeño balín dorado dejaremos un pequeñito espacio libre en el alambre y doblaremos el alambre hacia la parte de abajo seguidamente entorcharemos el alambre dejando El balín dorado en la parte superior de doblez como pueden observar en las siguientes imágenes luego enrollamos un poco del alambre en la base y realizamos el mismo procedimiento con un segundo balín dorado que nos quedará un poco más arriba en la base. De igual manera introduciremos un cristal crema y realizamos el mismo procedimiento con un segundo cristal crema y el exceso del alambre lo pasamos por la base hasta llevarlo a la parte superior donde lo enrollaremos debajo de los dobles principales y cortamos el exceso de alambre para así culminar nuestro hermoso colgante.
⭐ Step 4: to continue we will make some small decorations, to do this we will insert a small golden ball through the 26 gauge wire, we will leave a small free space in the wire and we will bend the wire towards the bottom, then we will twist the wire leaving the ball golden in the upper part of the fold, as you can see in the following images, then we wind a little of the wire at the base and carry out the same procedure with a second golden ball that will be a little higher on the base.
In the same way we will introduce a cream crystal and carry out the same procedure with a second cream crystal and we pass the excess wire through the base until we take it to the top where we will roll it under the main doubles and cut the excess wire to finish. our beautiful pendant.
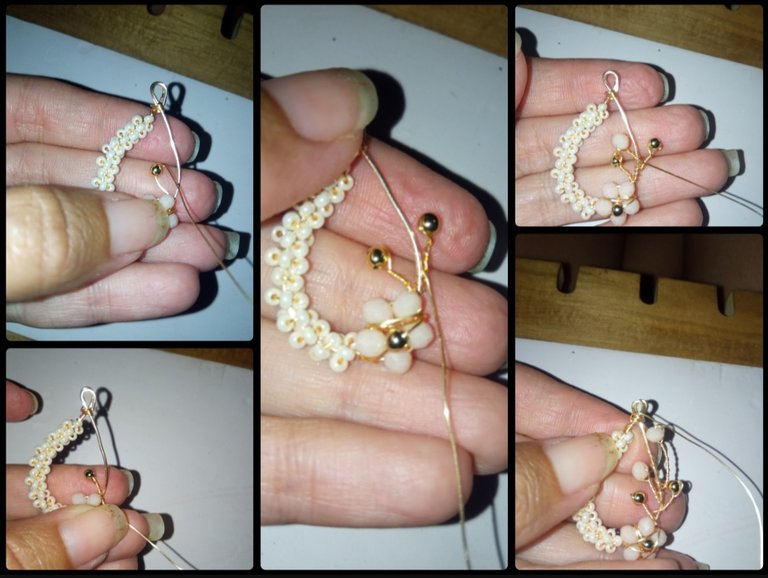
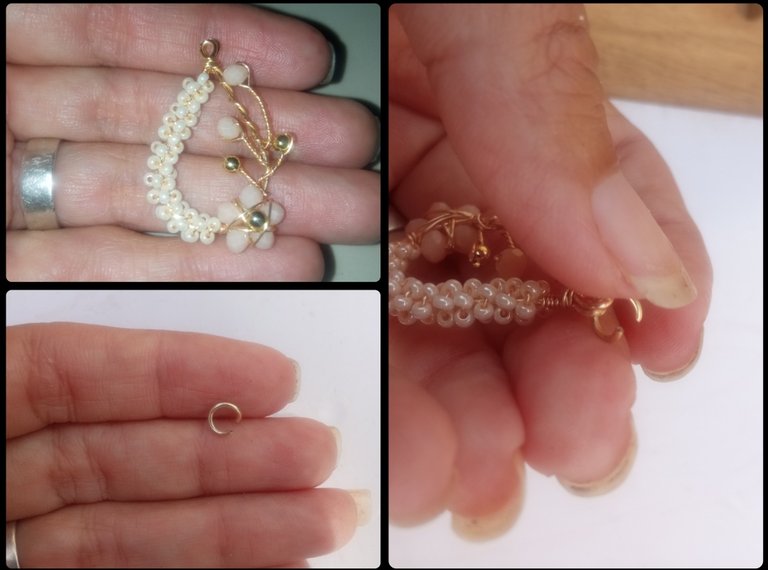
⭐ Paso 5: por último tomaremos un pedacito de alambre de bisutería calibre 20 y realizaremos una pequeña forma circular o argollita la cual la colocaremos introduciéndola por los dos dobles superiores de nuestro colgante y por esta pequeña argolla introduciremos la cadena o cuerina que hemos seleccionado para colgar este hermoso dije.
⭐ Step 5: finally we will take a small piece of 20 gauge jewelry wire and make a small circular shape or ring which we will place by inserting it through the two upper doubles of our pendant and through this small ring we will insert the chain or leatherette that We have selected to hang this beautiful pendant.
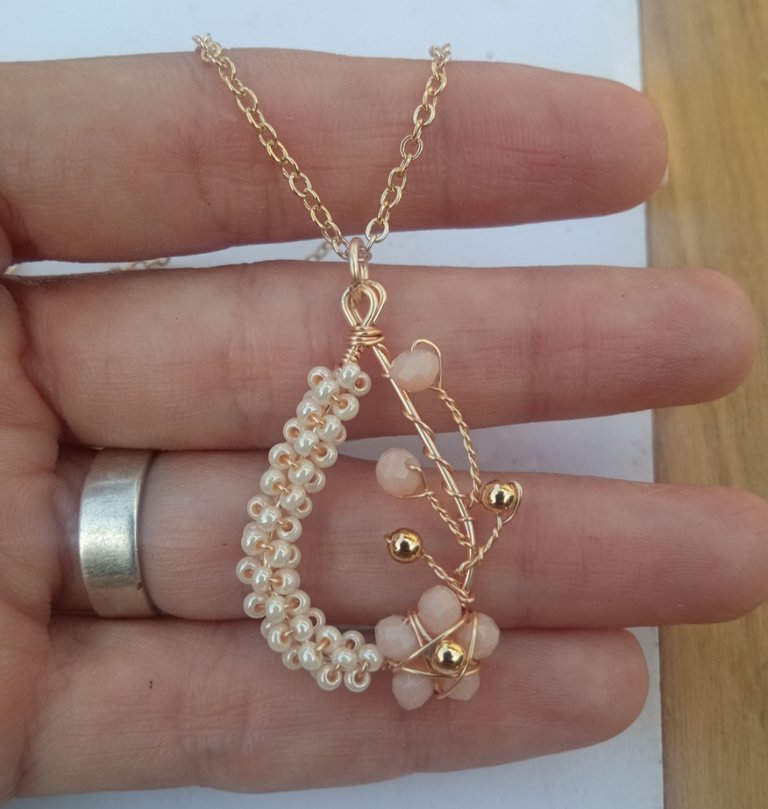
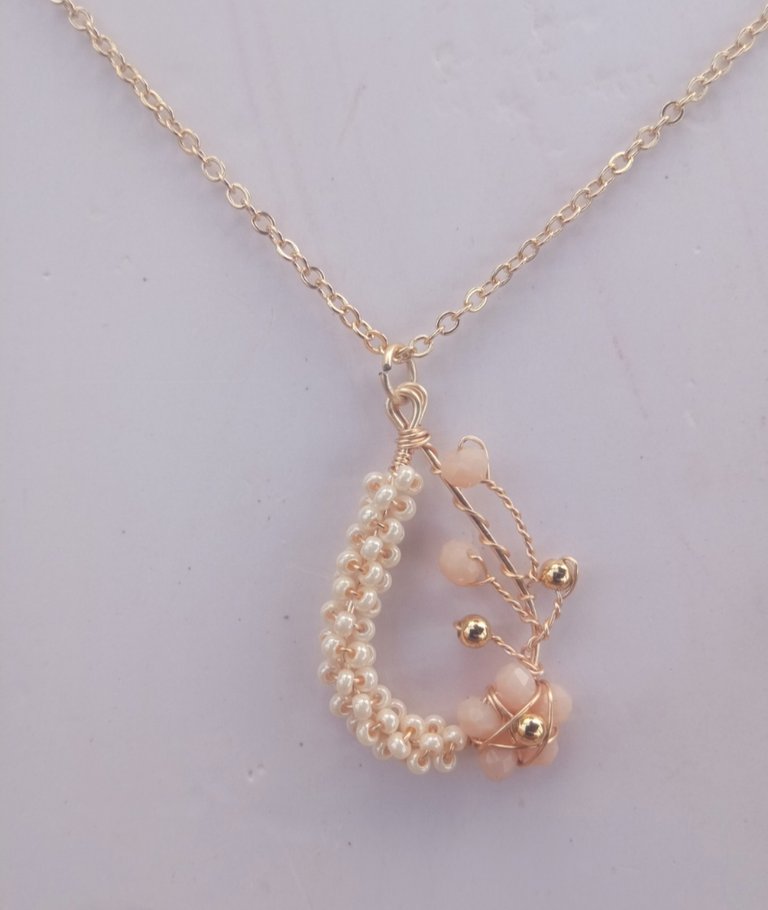
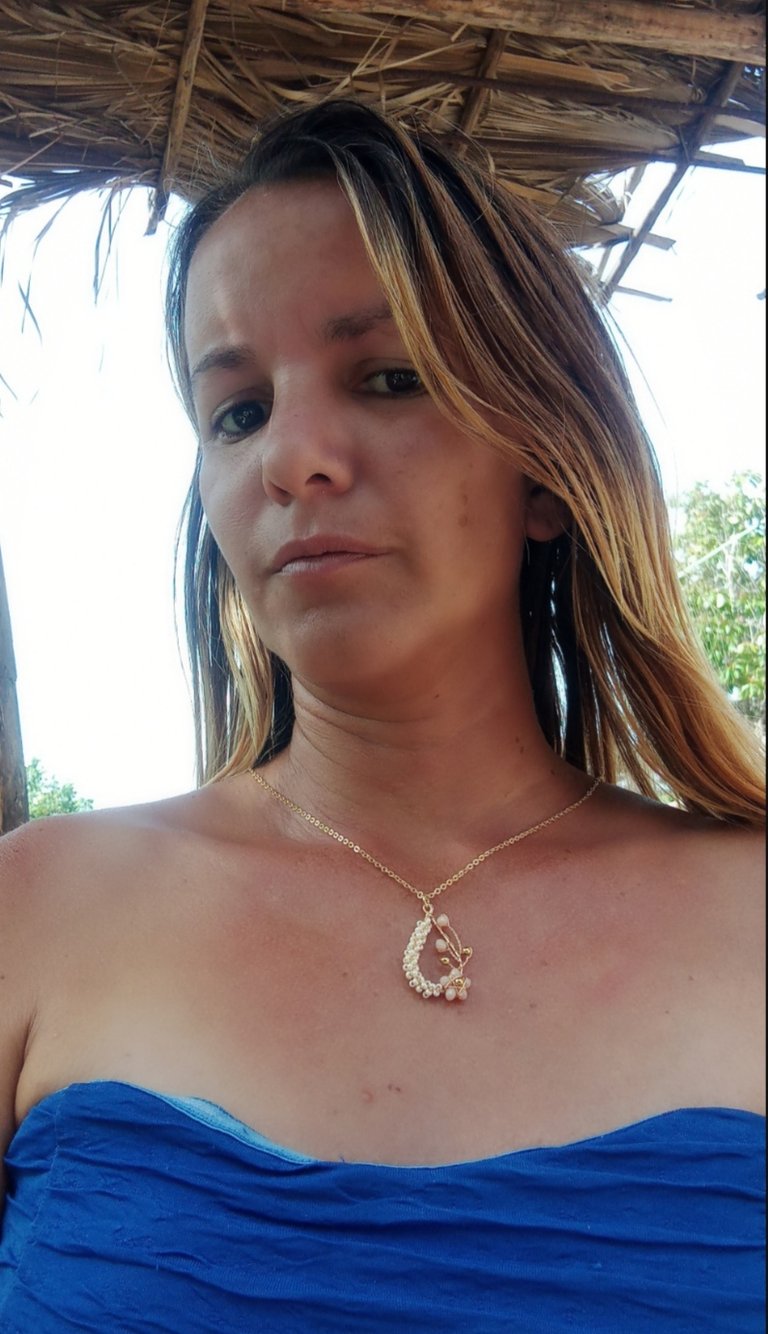
Todas las Fotos son de mi autoría y fueron tomadas con mi Celular Redmi 9.And so my dear and appreciated friends, in this super easy way we will be able to make a very beautiful pendant. To embellish our chains, a beautiful detail that we can add to our simple chains. And this has been my preparation today to share with all of you, which I hope has been to your complete liking. In the same way, I will be waiting for your comments and suggestions.
Greetings and blessings
All Photos are my authorship and were taken with my Redmi 9 Cellphone
Posted Using InLeo Alpha
Te quedó bien bonito Ema
Muchas gracias 😊
Que delicado y hermoso trabajo, uno de los lados, donde tiene la flor, me recuerda a las flores de cerezo y pareciera como una de sus ramificaciones.
What a delicate and beautiful work, one of the sides, where it has the flower, reminds me of cherry blossoms and looks like one of its branches.
Gracias amiga me alegra que te haya gustado.
Saludos.
A really nice pendant design you have there. Your husband must have a great mind for making pendant designs to have inspired you in making this. It is really beautiful.
Muchas gracias por su apoyo.
Muchas gracias ☺️
Very beautiful work with precision and skill can produce a very beautiful work. send regards for success
Thank you very much, I am very happy that you liked my work, thank you for your comment.
That's so lovely!! Thanks for the step by step guide :)
Thank you, I'm glad you liked it, I'm delighted to be able to share a little of what I do.
No problem. Pleasure all mine!
Amiga eso es un Avalon? Donde colocas tus materiales? Esta de ensueño! 😍 Y felicitaciones por un trabajo tan delicado y elegante 🤌 tienes muy buen ojo para el diseño 👑 ✨
Dónde están las piedritas? Es una concha marina natural pero embellecida ( de donde sacan las perlas) , es hermosa, acá en la isla de Margarita es muy buscada por los turistas, a esta no se le nota mucho pero tiene unas pequeñas perlitas pegadas de la concha lo que la hace mas llamativa y bella.
Y muchas gracias, me alegra mucho su comentario.
WAO que hermoso quedó ese colgante. Felicidades, realmente se ve el esfuerzo, la dedicación y la pasión en cada detalle
Excelente colgante amiga, una pregunta para que leo.voter te vote debes de cumplir algunas reglas o solo con publicar en inleo ya participas en que te vote osea al azar?
Me gusta mucho todo el proceso donde se involucra la mayor paciencia para lograr detalles tan impresionantes, especialmente cuando son tan pequeños. Felicidades por tan hermosa creación.
Muchas gracias amigo, me alegra mucho que te haya gustado.