
[Esp]
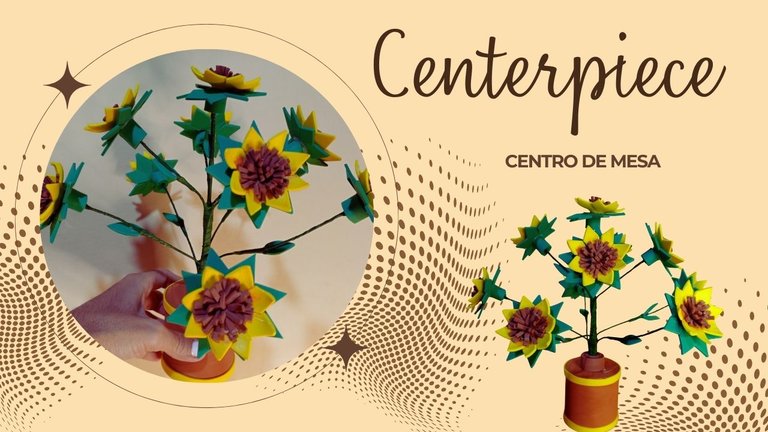
¡Saludos desde mi taller creativo!
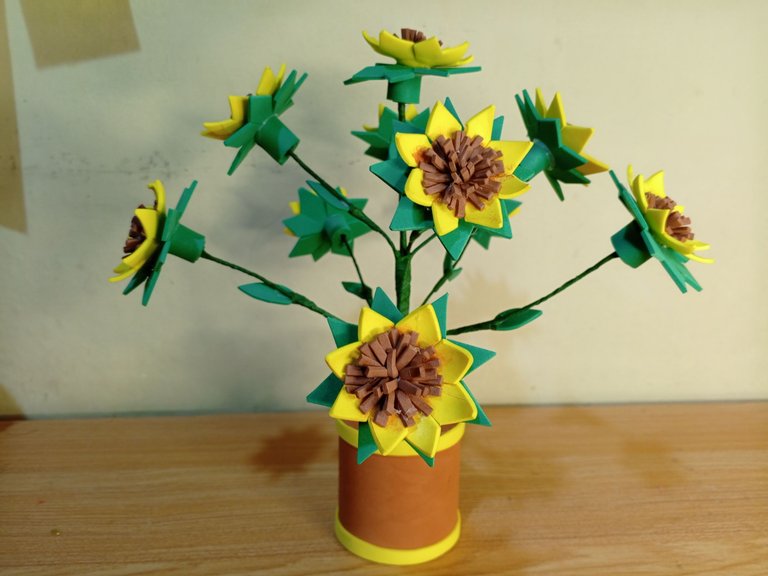
Es increíble lo que podemos hacer con pocos materiales, reciclando, con creatividad y teniendo la voluntad de hacerlo.
Estoy practicando para hacer mini arbolitos, en un pasado hice algunos bonsái, perdí la práctica, además no puedo manipular el alambre de cobre, soy alérgica, me causa inflamación en las manos y el dolor es tremendo, así que deberé usar otros materiales. Quiero intentar moldear el alambre tradicional. Sin embargo noté que no me proporciona mucha flexibilidad para hacerle curvas a las ramas.
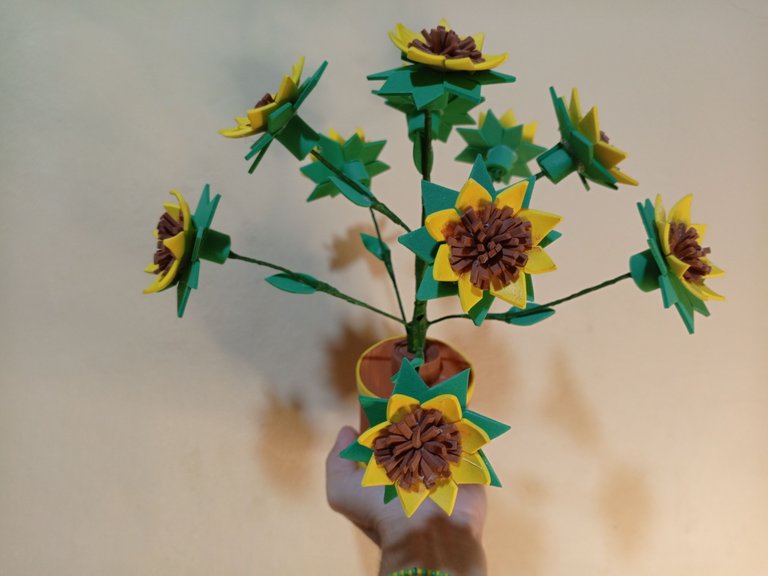
Me sirvió no solo de práctica sino también ahora decora mi mesita de la sala de estar y junto con otras plantitas en la mesa, luce muy bonita.
Espero les guste.
English version
Greetings from my creative workshop!
It's amazing what we can do with few materials, recycling, creativity and having the will to do it.
I am practicing to make mini trees, in the past I made some bonsai, I lost the practice, besides I cannot manipulate the copper wire, I am allergic, it causes inflammation in my hands and the pain is tremendous, so I will have to use other materials. I want to try to mold the traditional wire. However, I noticed that it does not give me much flexibility to make bends in the branches.
It served me not only for practice but also now decorates my living room table and together with other little plants on the table, it looks very pretty.
I hope you like it.
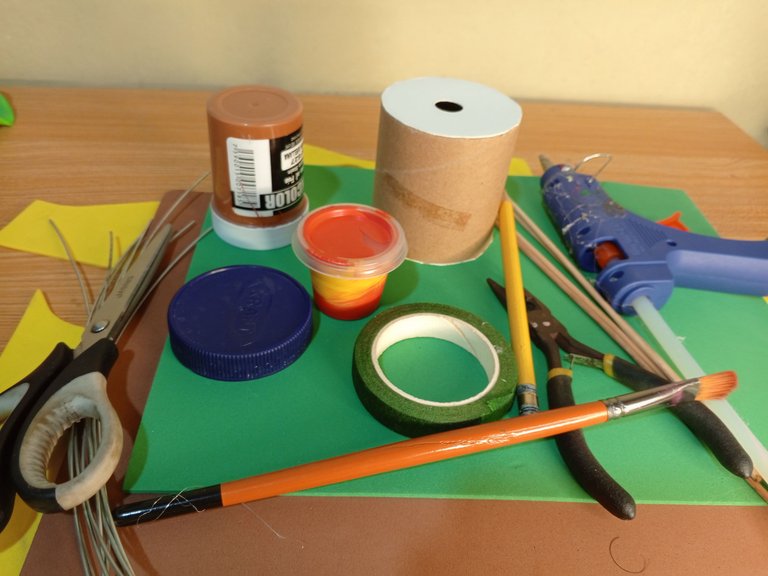
Materiales / Materials
| Spanish | English | |
| Foami verde, amarillo y color marrón | Green, yellow and brown foam | |
| Envase reciclado para hacer una maceta | Recycled container to make a flower pot | |
| Tijera, pinza | Scissors, clamp | |
| Pistola de silicón caliente | Silicone hot gun | |
| Alambre y palitos de altura | High wire and sticks | |
| Floratex, pintura acrílica color marrón, pincel | Floratex, brown acrylic paint, brush |
Paso a paso / Step by Step
Step 1️⃣/ Paso 1️⃣
 |  | |
 |  |

[Esp]
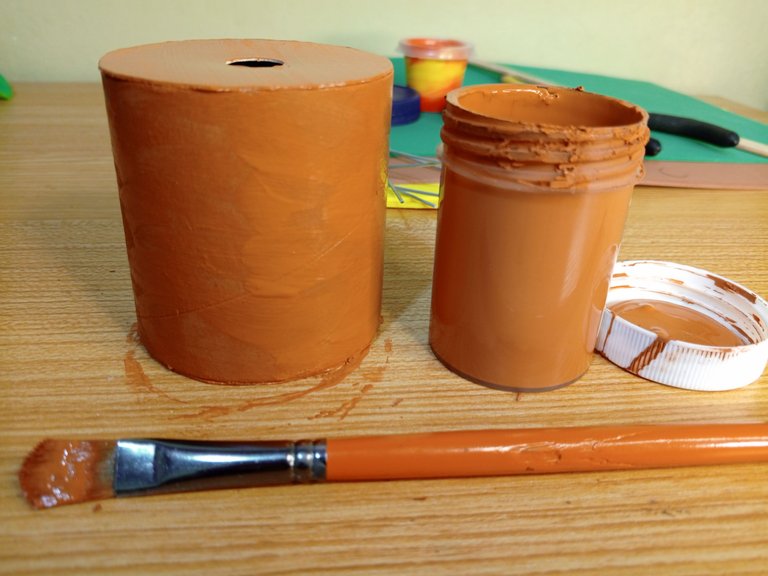
El envase que escogí como maceta es un rollo de cartón reciclado, el cual pinté de color marrón con la pintura acrílica.
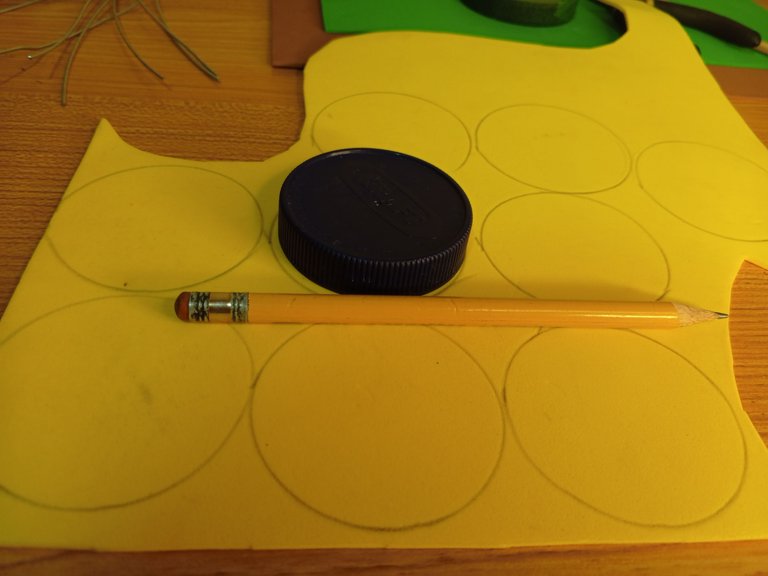
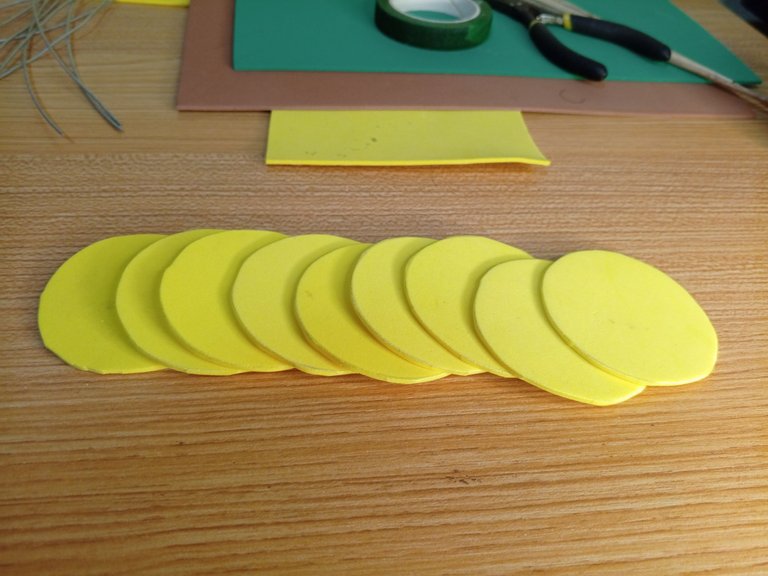
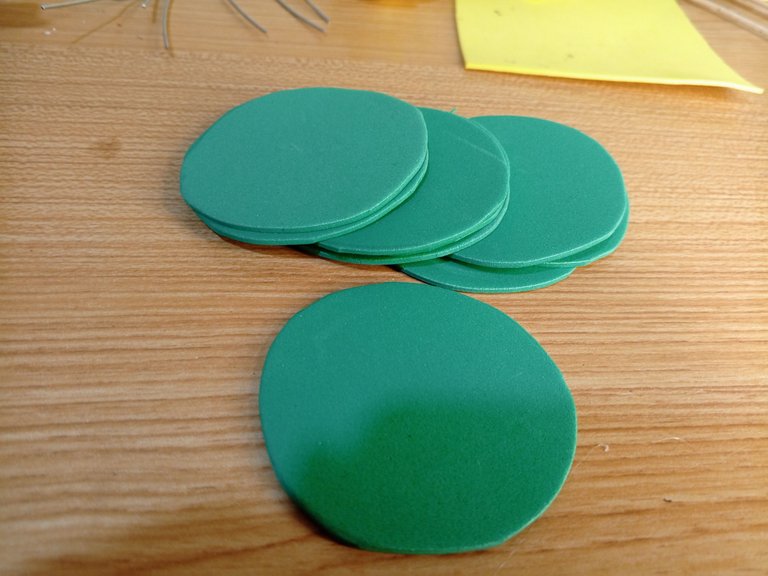
Con ayuda de un molde redondo marca el foami la cantidad de flores que necesites, yo hice 9, por lo cual marqué 9 piezas.
Recorta las piezas siguiendo la línea del molde.
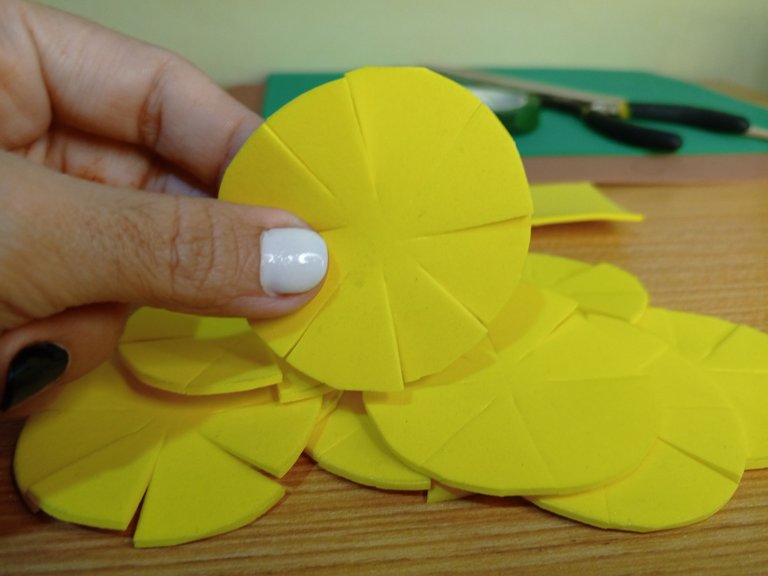
Ahora realiza un corte a la mitad de cada lado sin llegar al centro, y así sucesivamente cortarás cada centro.
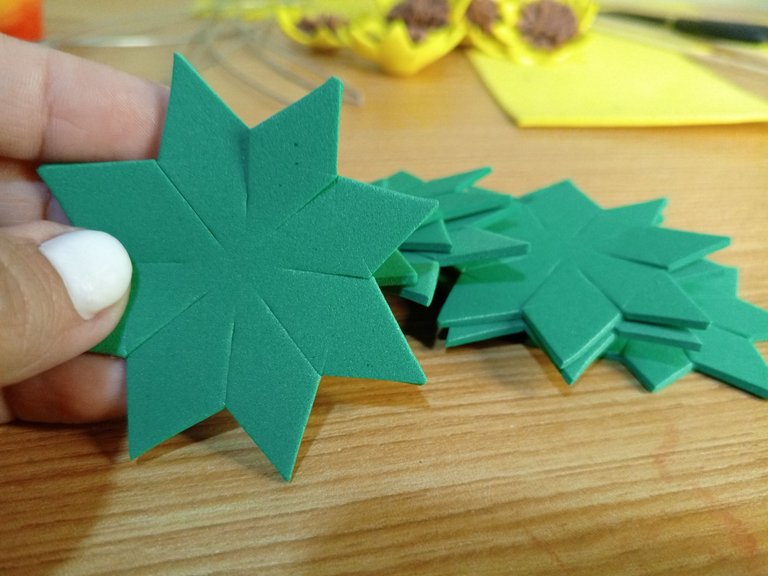
Recorta la forma estrella o flor de navidad, consiste en cortar diagonal cada punta. Estos pasos los repetirás en cada flor.
English version
The container I chose as a flower pot is a recycled cardboard roll, which I painted brown with acrylic paint.
With the help of a round mold mark on the foami the amount of flowers you need, I made 9, so I marked 9 pieces.
Cut out the pieces following the line of the mold.
Now make a cut in the middle of each side without reaching the center, and so on you will cut each center.
Cut out the star shape or Christmas flower, it consists of cutting diagonally each tip. Repeat these steps for each flower.
Step 2️⃣/ paso 2️⃣
 |  | |
 |  |
[Esp]
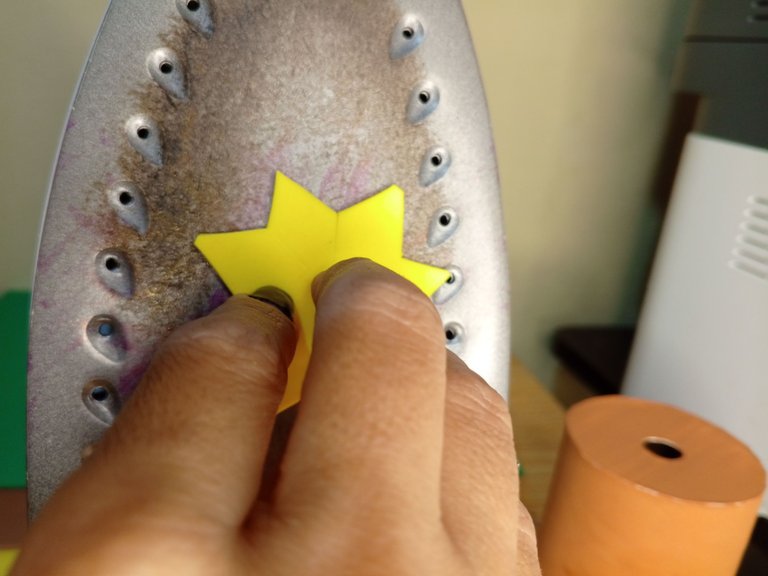
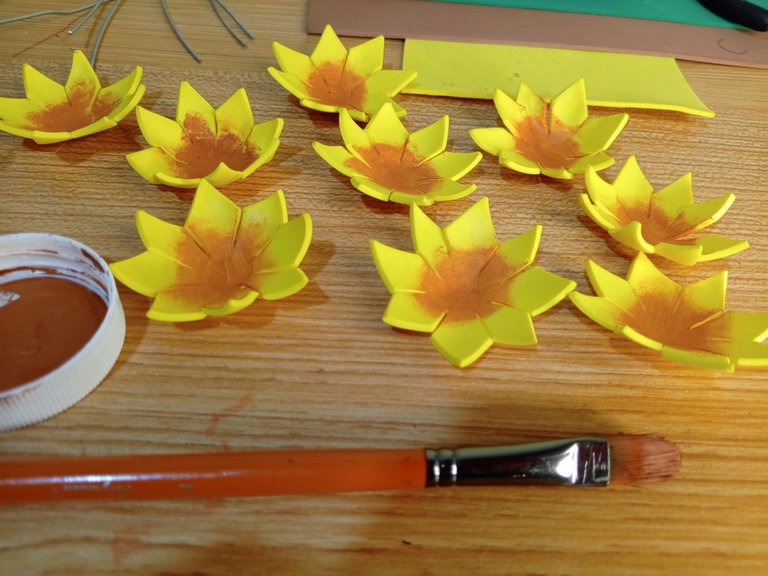
Usé la plancha para termoformar un poco cada flor.
Con ayuda del pincel y la pintura color marrón, pinté el centro de la flor.
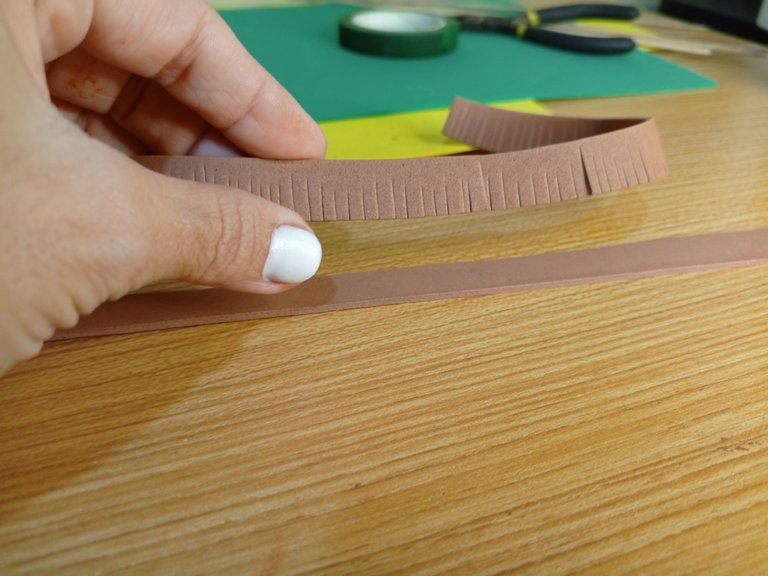
Corta uno ovarios listones de foami color marrón y realiza varios cortes en la parte delgada.
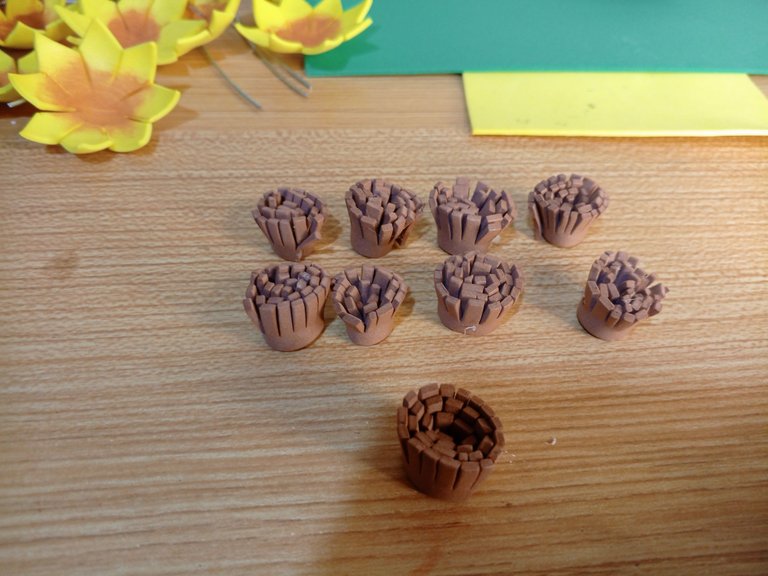
Coloca un poco de pegamento en la punta del foami con cortes y enrolla, estos serán los pistilos, como yo hice 9 flores, pues serán 9 pistilos.
English version
I used the iron to thermoform each flower a little.
With the help of the brush and brown paint, I painted the center of the flower.
Cut one of the brown foami strips and make several cuts in the thin part.
Put some glue on the tip of the foami with cuts and roll it up, these will be the pistils, as I made 9 flowers, they will be 9 pistils.
Step 3️⃣/ paso 3️⃣
 |  | |
 |  |
[Esp]
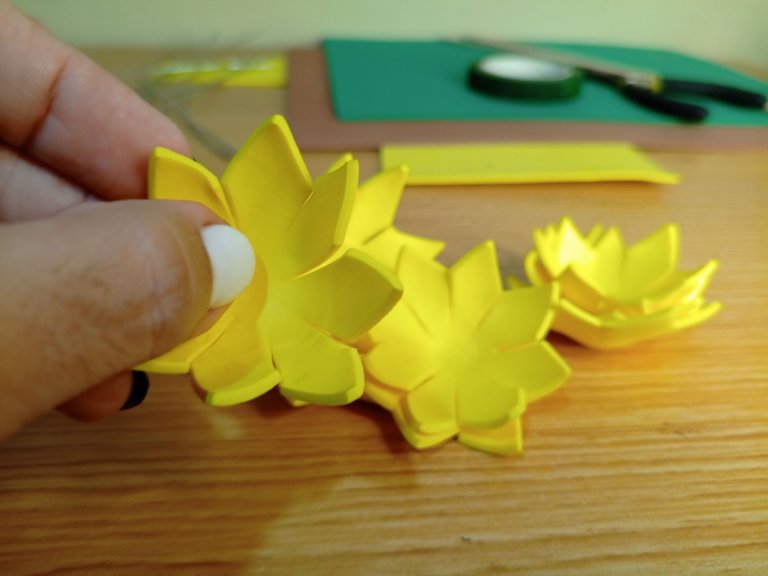
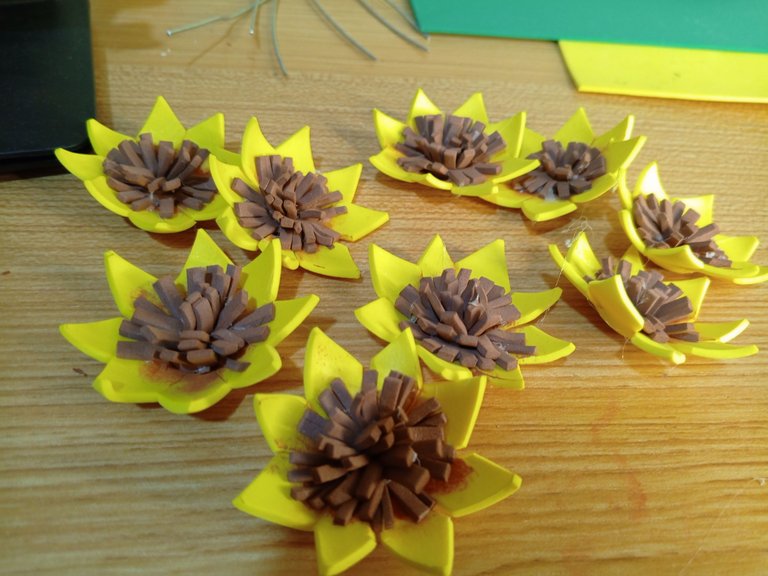
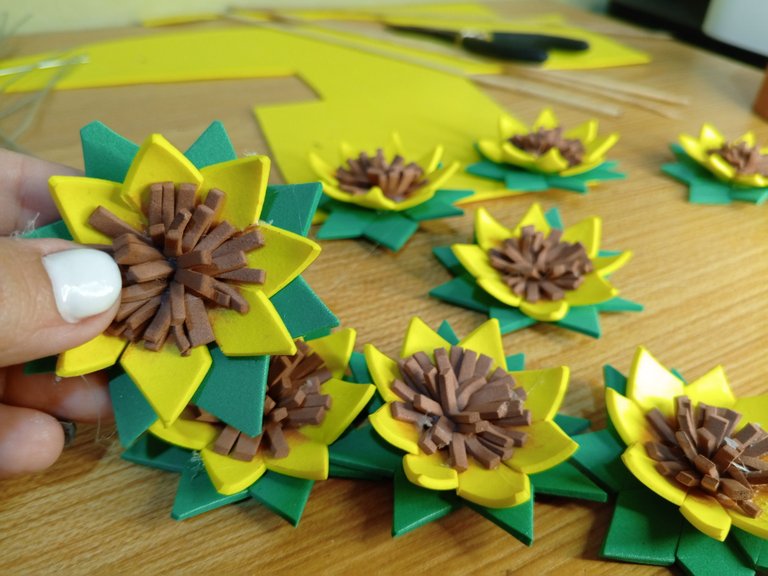
Pega los pistilos a la flor, procura que se abran un poco con ayuda del pegamento.
Repite los pasos del proceso de armado de la flor, marca 9 círculos en el foami color verde y recorta.
Luego realiza los cortes céntricos y los laterales para armar la estrella.
Pega la pieza color verde debajo de la flor, esto serán las hojitas.
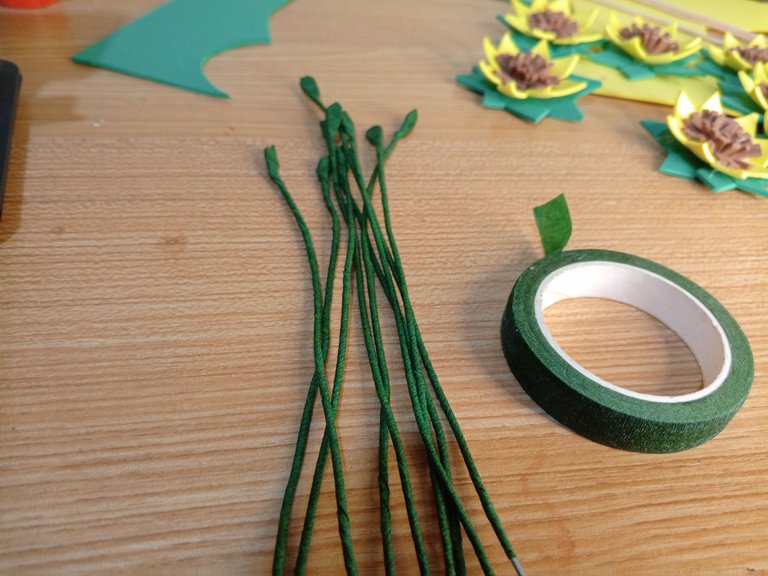
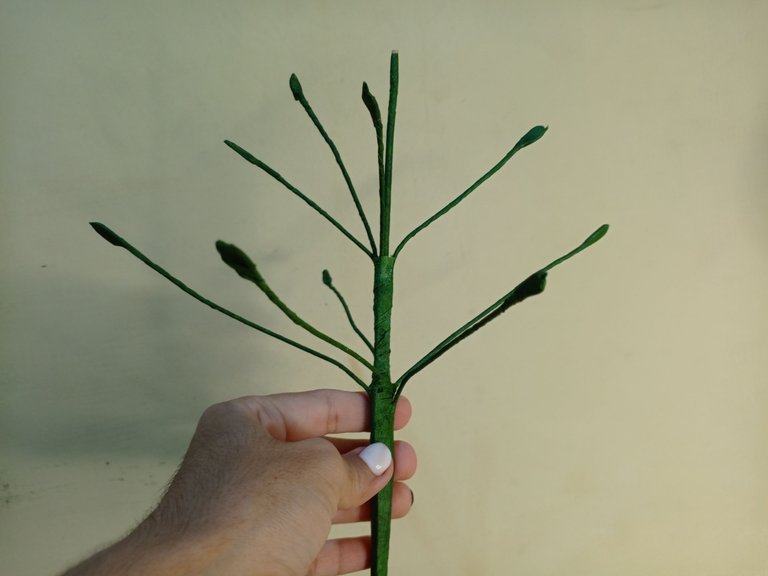
Forra el alambre y el palito de altura con floratex. Pienso que si usas alambre de floristería sería lo más ideal.
English version
Glue the pistils to the flower, making sure that they open a little with the help of the glue.
Repeat the steps of the flower assembly process, mark 9 circles on the green foami and cut them out.
Then make the central and lateral cuts to assemble the star.
Glue the green piece under the flower, this will be the leaves.
Line the wire and the height stick with floratex. I think that if you use florist's wire it would be the most ideal.
Step 4️⃣/ paso 4️⃣
 |  | |
 |  |
[Esp]
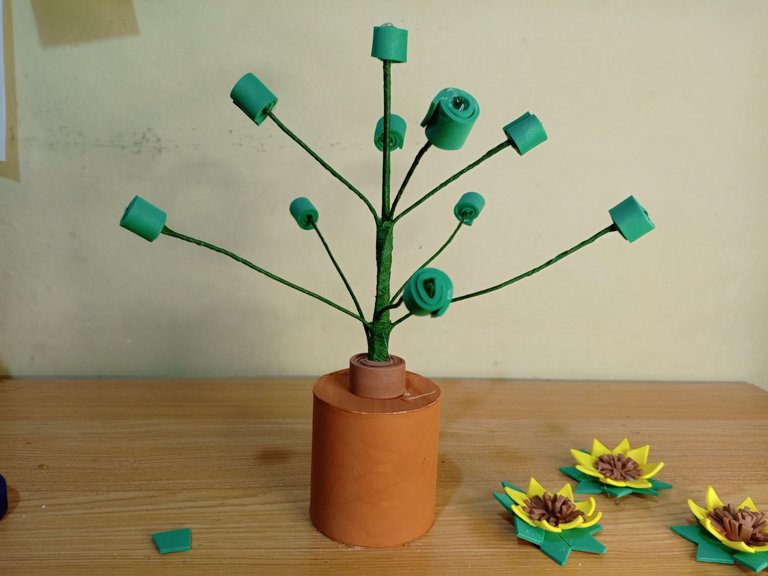
Une las piezas intercalando las flores. usa el floratex para fijar las piezas de alambre en el centro, en el palito de altura.
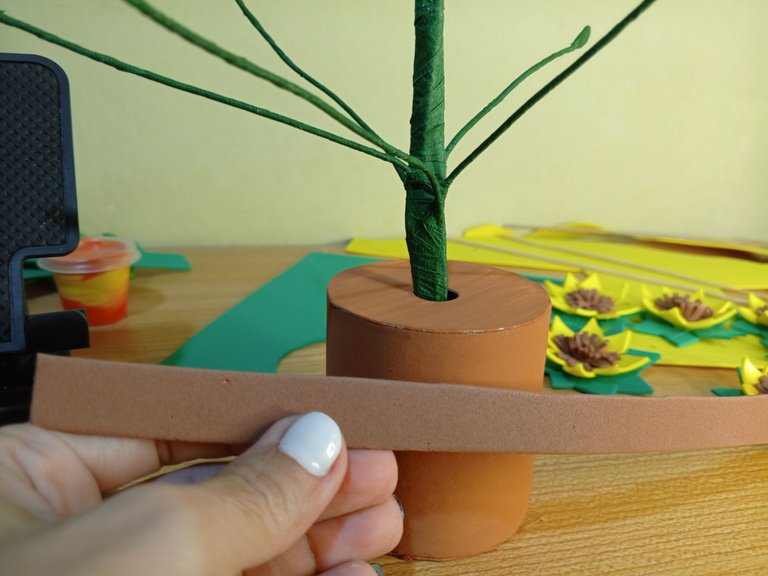
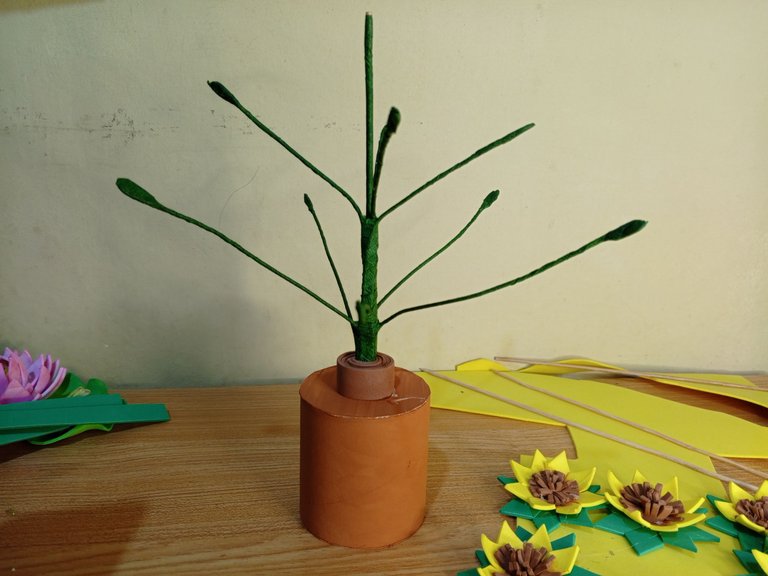
Usé un trozo de foami color marrón para soldar el tronco al rollo de papel y evitar que se mueva.
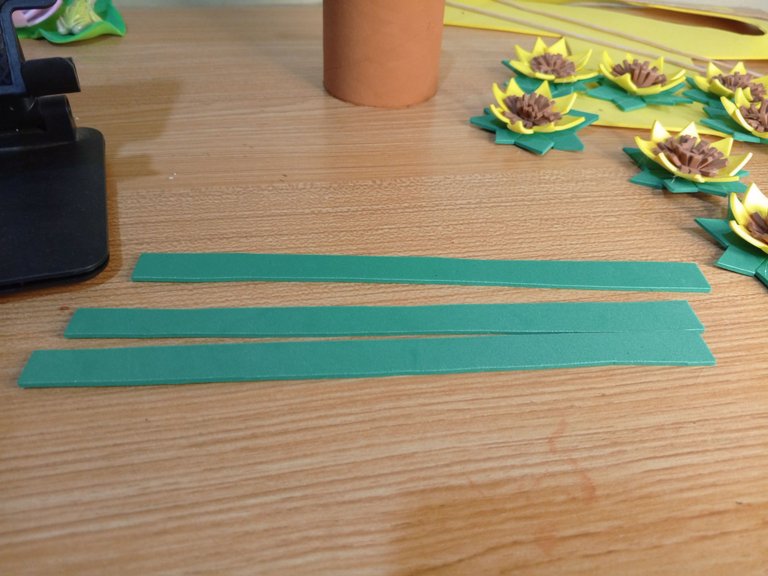
Recorta unas tiras de foami verde, enrolla y pega en cada una de las puntas, de las ramas.
English version
Use the floratex to attach the wire pieces in the center, on the height stick.
I used a piece of brown foami to weld the trunk to the paper roll to prevent it from moving.
Cut out some strips of green foami, roll them up and glue them to each end of the branches.
Step 5️⃣/ paso 5️⃣
 |  |  |
[Esp]
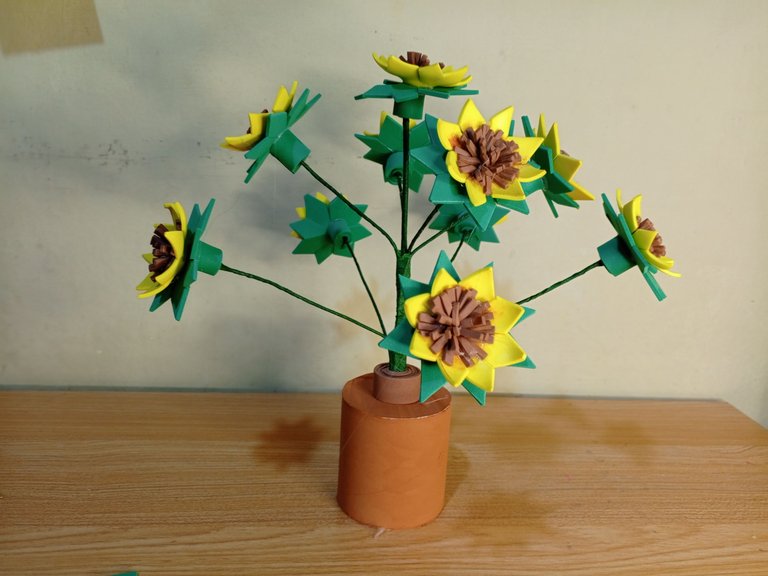
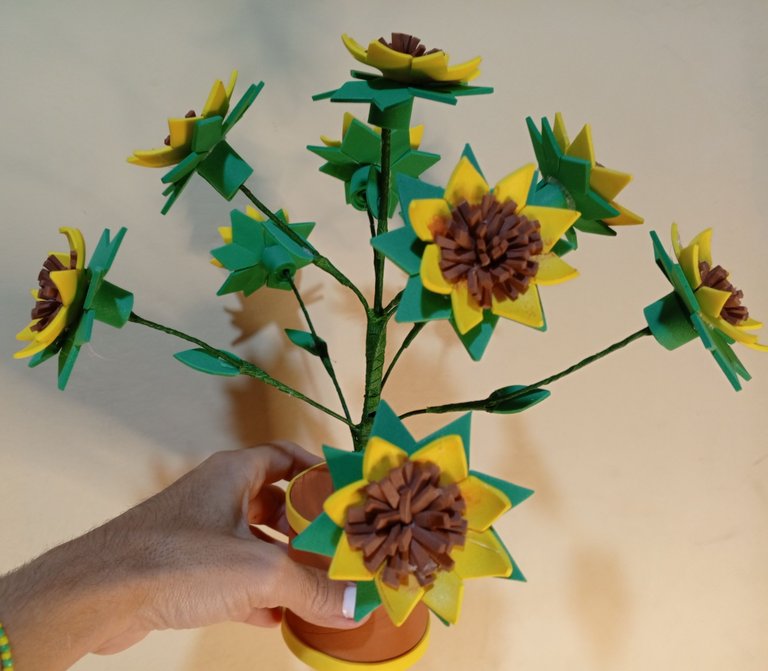
Ahora pega las flores a los tocones.
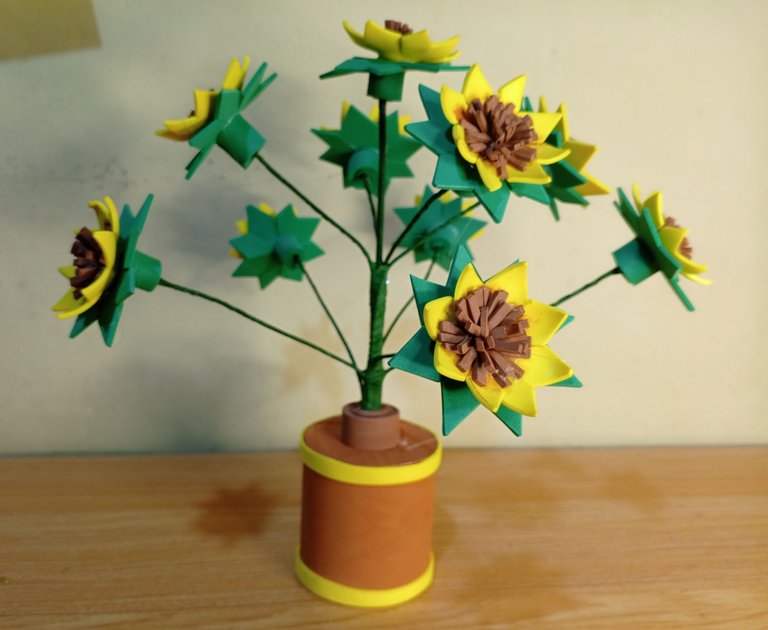
Recorta una tira delgada de foami amarillo y pégalo en los bordes de la maceta.
Disfruté mucho hacer mi proyecto, en un futuro buscaré alambre de floristería, es alfo difícil de conseguir, para hacer otro que sea más tupido de flores.
Nos vemos en mi siguiente publicación.
English version
Use the floratex to attach the wire pieces in the center, on the height stick.
I used a piece of brown foami to weld the trunk to the paper roll to prevent it from moving.
Cut out some strips of green foami, roll them up and glue them to each end of the branches.

Créditos / Credits

💜💜💜
![]() 👉
👉  👉
👉 ![]() 👉
👉 ![]() 👉
👉 
Here / Bríndame un café

You made some beautiful trees with beautiful flowers 😍😍
I'm glad you like it, I already want to buy florist wire to see if I can make one with lots of flowers.
That's nice
Hermosho 💗 Supieras lo que tengo en mente, cada día siento más que tenemos transmisión de pensamientos. Besos...
Tuve una recaída horrible, luego sabrás.
Bendiciones.
!discovery 45
Amiga espero te sientas mejor, Jah te envía sanación <3
This post was shared and voted inside the discord by the curators team of discovery-it
Join our Community and follow our Curation Trail
Discovery-it is also a Witness, vote for us here
Delegate to us for passive income. Check our 80% fee-back Program
Hello @equipodelta good day
I love everything you do, you always make great things
I'm sorry to read about the health problems you have when handling copper, perhaps you should try to use flexible gloves, other materials are harder to work with
That's a good idea about the gloves, I think I'll try it <3 Thanks you.
Amiga, Quedó muy lindo su arreglo!
Gracias por compartir su bello trabajo.
Saludos.
Gracias a ti por apreciar mis esfuerzos
Saludos y bendiciones.
Me encantan estos girasoles se ven sencillos y a la vez elegantes 🥰que hermoso trabajo 😊👍
Son fáciles de hacer, he hecho la base es la misma de cómo se elaboran las flores de navidad, aplica lo mismo, solo cambia el color.
Hola, te quedó bellísimo, con pocos materiales lograste un resultado final que quedó bello.
Hola querido Carlos, si sufrí un poquito jajajaja, es que ando como que inventando mucho, ni hablar de lo que hice después.
Congratulations, your post has been curated by @dsc-r2cornell. You can use the tag #R2cornell. Also, find us on Discord
Felicitaciones, su publicación ha sido votada por @ dsc-r2cornell. Puedes usar el tag #R2cornell. También, nos puedes encontrar en Discord
Wow,so nice😍😍😍
Thnaks you so much.
Te quedó muy hermoso amiga. Gracias por compartir. Felicidades 👏.
Gracias por visitarme, me alegra que te guste.
Estupendo trabajo querida, como siempre sorprendiéndonos con tus magníficas manualidades
Escrito por lionsaturbix / Written by lionsaturbix
¡¡¡Buen trabajo!!! Gracias por publicar tu excelente contenido en Hive Diy.
Gracias Lion, Gracias comunidad.
An amazing work of art. I am overwhelmed by such a beautiful craft idea. I will definitely follow your ideas for room decoration. The creation process and description written in so much detail is really amazing. Thank you so much for sharing such a beautiful tutorial with us.
I'm glad it's useful, I'm decorating my new house, I have almost no furniture, these little things give life to it.