💗💗💗💗💗💗💚🤍❤️🤍💚💗💗💗💗💗💗


Let's drain a little of our sorrows and worries by doing something beautiful, let's keep that mind busy.
Hello dear ones, many of us woke up today to the terrible news that is happening in the countries in conflict and of course it affects us all. Personally I thought of the lives of the innocent and am deeply saddened by the suffering children.
I tried to occupy myself by drawing while sharing conversations about these events with my family members and without realizing it I continued drawing, when I finished we were all amazed by the result and asked me:
How from such a toxic and horrible conversation, could I draw something so beautiful?
Well, I have no answer, I only know that I understand Walt Disney perfectly - In short - Since we all know that behind every story in his cartoons, a very cruel or sad reality was hidden and he transmuted all that into wonderful stories.
They (my relatives) said: The more stressed you are when you draw, the prettier they are.
But it doesn't feel pleasant the amount of bombardment of thoughts and emotions that invade me while I am drawing. Let's pray for an immediate end to the war.

Vamos a drenar un poco nuestra penas y preocupaciones haciendo algo bello, mantengamos esa mente ocupada.
Hola queridos, muchos nos despertamos hoy con las terribles noticias que está sucediendo en los países en conflicto y por supuesto que a todos nos afecta. En lo personal pensé en las vidas de los inocentes y me causa profunda tristeza los niños que sufren.
Traté de ocuparme dibujando mientras compartía conversaciones sobre estos hechos con mis familiares y sin darme cuenta continué dibujando, al terminar todos nos asombramos del resultado y me preguntaron:
¿Cómo de una conversación tan tóxica y horrible, podía dibujar algo tan bello?
Pues no tengo respuesta, solo sé que entiendo a Walt Disney perfectamente - En resumen - Ya que todos sabemos que detrás de cada historia en sus caricaturas, se escondía una realidad muy cruel o triste y el trasmutaba todo aquello en maravillosos cuentos.
Ellos (mis familiares) dijeron: Mientras más estresada estás cuando dibujas, te quedan más lindos.
Pero no se siente agradable la cantidad de bombardeo de pensamientos y emociones que me invaden mientras dibujo. Oremos porque se termine la guerra inmediatamente.
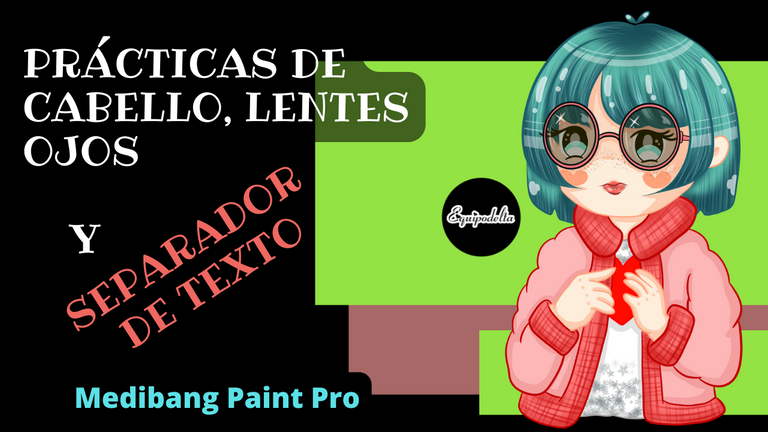
In my video, I not only show you in detail this practice today, but I also answer the concerns of my followers regarding my text separators, thinking about this, I think I should develop a whole tutorial dedicated to it.
I like to attend to the needs and concerns of my followers, because with them I learn and get new inspirations to publish.
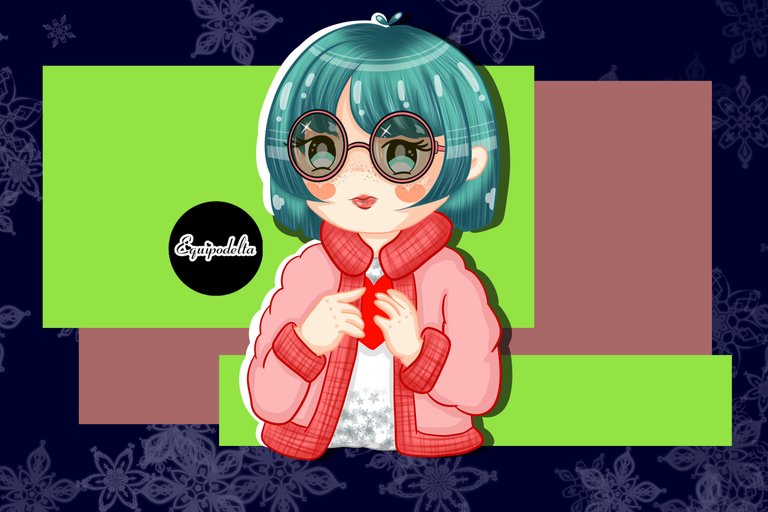
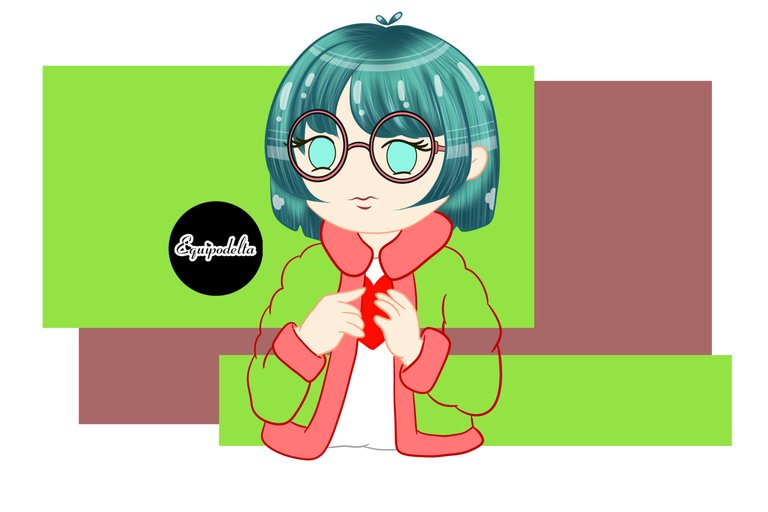
I really draw myself, short hair, I wear glasses and my constant coats because of the cold weather here, accompanied by my personalized palette in terms of color combinations so that my color blindness does not play one of its jokes on me again, I love that it has harmony and is pleasing to the eye. I remember I used to be told that I used a lot of loud colors (strong colors) but it was the way I could capture the color.
Let's start with the explanation of what I did.
En mi video, no solo te muestro con lujo de detalle está práctica de hoy, si no que respondo las inquietudes de mis seguidores con respecto a mis separadores de texto, pensando en esto, creo que debo elaborar un tutorial completo dedicado a ello.
Me gusta atender a las necesidades e inquietudes de mis seguidores, pues con ellas aprendo y obtengo nuevas inspiraciones para publicar.
Realmente me dibujo a mí misma, cabello corto, uso lentes y mis constantes abrigos por el frio que siempre hace aquí, acompañados de mi paleta personalizada en cuanto a combinación de colores para que mi daltonismo no me vuelva a jugar una de sus bromas, me encanta que tenga armonía y sea agradable a la vista. Recuerdo que antes me decían que usaba muchos colores chillones (colores fuertes) pero era la forma en la que podía captar el color.
Comencemos con la explicación de lo que hice
Paso a paso / Step by step.
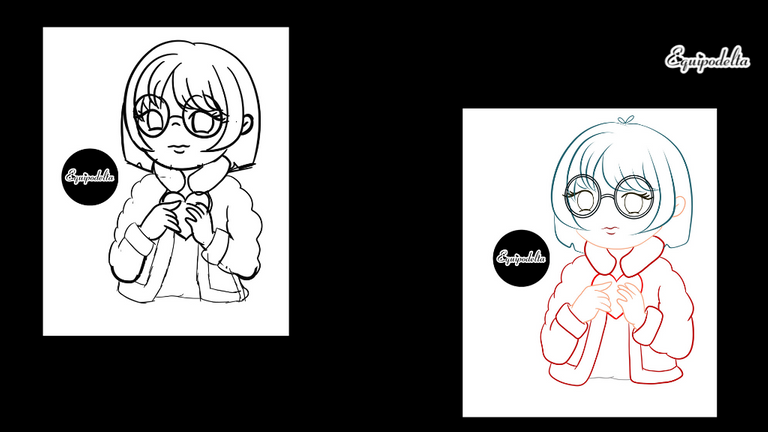
After scribbling for hours on the Medibang canvas and wearing several layers, once I finished sketching my idea of what will be the design, I remove all those lines or layers that make you lose sight and leave visible only the one that will guide me to the final line art.
Después de garabatear por horas en el lienzo de Medibang y llevar varias capas, una vez ya terminé de esbozar mi idea de lo que será el diseño, elimino todas esas líneas o capas que hacen perder la vista y dejo visible solo la que me guiará al line art final.
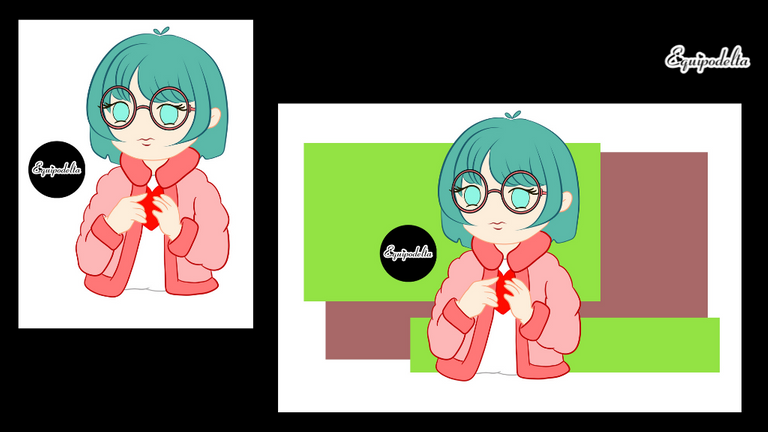
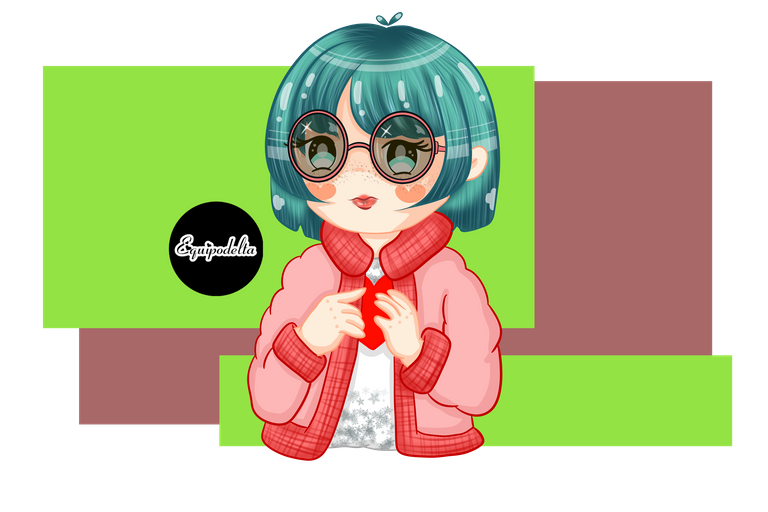
Once the previous step is finished, I open a folder and start emptying the base color.
As I was so distracted talking, I forgot to save several steps, so they will only be available in the video. In case you have any doubts.
Following the base color I work on the background, for this I used Medibang's fill tool, which creates those perfect rectangles.
Una vez terminado el paso anterior, abro una carpeta y comienzo a vaciar el color base.
Como estaba tan distraída hablando, he olvidado guardar varios pasos, así que solo estarán disponibles en el vídeo. Por si tienes algunas dudas.
Seguido del color base trabajo en el fondo, para ello usé la herramienta relleno de Medibang, que crea esos rectángulos perfectos.
I position myself on the base color layer of the hair, open a new layer, use the clipping tool to be able to draw on this layer without going out of the edges.
On the first layer I apply depth with the airbrush in a darker color tone.
I open a new layer and with the Feather brush (thick) I apply in a lighter tone the details of the reflections.
In a darker tone I make the same strands in a new layer.
Next, I open a new canvas (layer) and with the ellipse tool, I draw what are the anime style reflections.
To finish with this step, I make those little candy-like light reflections and manipulate the opacity of the folder, generating transparencies.
Me posiciono en la capa de color base del cabello, abro una capa nueva, uso la herramienta recorte para poder dibujar sobre esta capa sin que me salga de los bordes.
En la primera capa aplico profundidad con el pincel aerógrafo en un tono de color más oscuro.
Abro una capa nueva y con el pincel Pluma (gruesa) aplico en un tono más claro los detalles de los reflejos.
En un tono mas oscuro realizo las mismas hebras en una nueva capa.
Seguidamente, abro un nuevo lienzo (capa) y con la herramienta elipse, trazo lo que son los reflejos estilo anime.
Para finalizar con este paso, elaboro esos reflejitos de luz semejantes a dulces y manipulo la opacidad de la carpeta, generando transparencias.
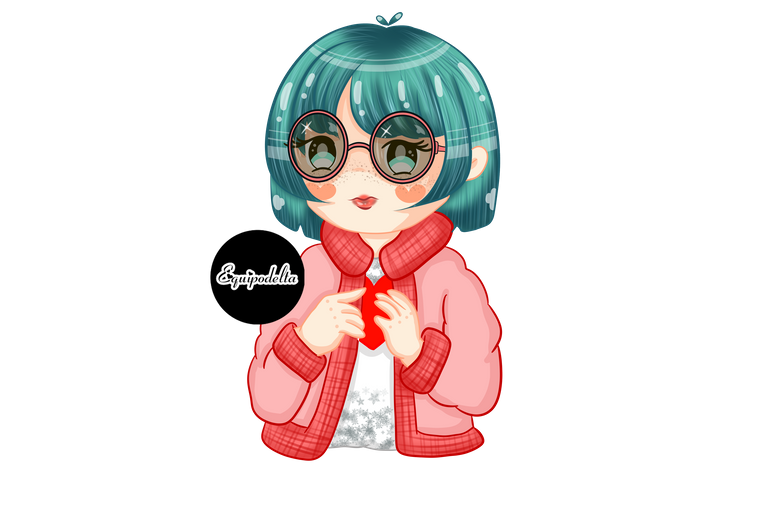
The next step corresponds to the chibi style eyes, these are very easy to do, I still practice it a lot trying to achieve perfection.
In particular these eyes consist of a base color (usually the lighter shade you used on the hair) then apply a white color on the lower part of the eye, then take the sample of the color you used on the eyelashes, in a new layer apply it on the upper part.
To finish with this step, add the light details in the center (pupils) and where the character is looking and manipulate the opacity of the layer to generate transparencies.
As for the lenses, it is necessary to be placed on a layer above all but prior to it, it consists of filling color and manipulating the opacity of the layer, this will create a transparency as you will see in the following images.
Don't forget to recreate the details of reflections, of course in separate layers.
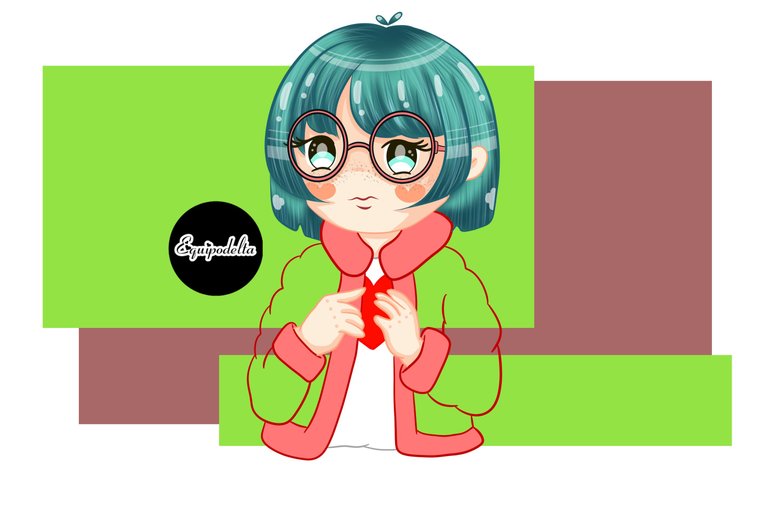
To finish just add the details in the shading and that's it, we are done.
El siguiente paso corresponde a los ojos estilo chibi, estos son muy sencillos de elaborar, aun lo practico mucho tratando de lograr la perfección.
En particular estos ojos constan de un color base (generalmente del tono mas claro que usaste en el cabello) luego aplica un color blanco en la parte inferior del ojo, luego toma la muestra del color que usaste en las pestañas, en una capa nueva aplica en la parte superior.
Para finalizar con este paso, agrega los detalles de luz en el centro (pupilas) y hacia donde mira el personaje y manipula la opacidad de la capa para que genere transparencias.
En cuanto a los lentes, es necesario colocarse en una capa superior a todas pero anterior al mismo, consta en rellenar de color y manipular la opacidad de la capa, esto creará una transparencia como verás en las siguientes imágenes.
No te olvides de recrear los detalles de reflejos, por supuesto en capas separadas.
Para finalizar solo agregué los detalles en el sombreado y listo, hemos terminado.
Creation of a text divider / Elaboración de un separador de texto
💗💗💗💗💗💗
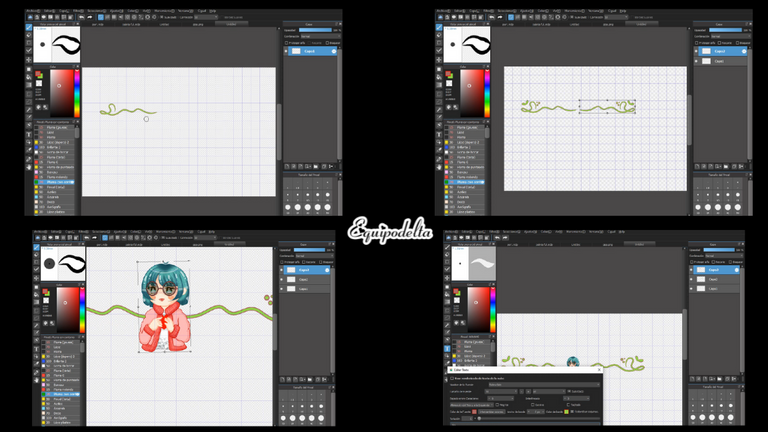
For the creation of my personalized and funny text separators, the procedure is simple, the most complicated thing would be the creation of the design that will be the central image, for this I take the same presentation image of the publication or part of it and save it in PNG format.
In a new workspace, I open a new canvas, generally I use a brush that has borders, the brush: feather with outline. With this brush using two different color tones but within the theme of my drawing, I draw lines and ornaments forming the first side of the separator.
Selecting (ctrl+T) I copy the image and invert it with the use of the tools and place it in the corresponding place.
To make them straight I use the grid tool, you can place or remove it by pressing the Ctrl+G command.
I look for the image that I saved in PNG format and I paste it in the place that I want of the separator, I adjust it selecting (ctrl+T).
To create my signature and prevent others from using my text separator, I use the Text tool and type my artist name. I can then move it around at will. This word processor within Medibang has the same features as the Word word processor so it will be easy for you.
Then I cut the canvas using the side select tool, dragging I select only the size of the separator.
Finally we use the tool in the top toolbar Edit / crop and save our project (File / Save as) in PNG format to generate transparencies.
Para la creación de mis separadores de texto personalizados y divertidos, el procedimiento es sencillo, lo más complicado sería la creación del diseño que será la imagen central, para ello tomo la misma imagen de presentación de la publicación o parte de ella y la guardo en formato PNG.
En un nuevo espacio de trabajo, abro un nuevo lienzo, generalmente uso un pincel que tiene bordes, el pincel: pluma con contorno. Con este pincel usando dos tonos de color distintos pero dentro de la temática de mi dibujo, trazo líneas y adornos formando el primer lado del separador.
Seleccionando (ctrl+T) Copio la imagen y la invierto con el uso de las herramientas y la coloco en el lugar correspondiente.
Para que me queden derechas uso la herramienta cuadrícula, esta la puedes colocar o quitar con solo presionar el comando Ctrl+G
busco la imagen que guardé en formato PNG y la pego en el lugar que deseo del separador, la ajusto seleccionando (ctrl+T).
Para elaborar mi firma y evitar que otros usen mi separador de texto, uso la herramienta Texto y escribo mi nombre de artista. Luego puedo moverlo a voluntad. Este procesador de texto dentro de Medibang tiene las mismas características del procesador de texto Word así que será sencillo para ti.
Luego corto el lienzo usando la herramienta lateral seleccionar, arrastrando selecciono solo el tamaño del separador.
Para finalizar usamos la herramienta en la barra superior Edición / recortar y guardamos nuestro proyecto (Archivo/ Guardar como) en formato PNG para generar transparencias.
Resources / Recursos
Time Lapse: 4 hours.
Program: MediBang Paint Pro.
Graphics tablet: Huion (Usb Pen Tablet). Model 420.
Pinceles personalizados: Pincel oro2.
Pinceles Medibang: Pluma tinta, Pluma, lápiz, aerógrafo, dedo, luz3, Pluma (gruesa), Snow Flake 5
Herramientas: Capas, recorte, Elipse, borrador.
Canva Gifs, covers, efects, editions
PNG Format
Video process
I'm a contributor of royalty-free images
Soy contribuyente de imágenes libres de derechos de autor

My youtube channel - game Play
My youtube channel - arts and crafts

Hacks, DIY, Crafts, handmade arts Community
Discord


![]() 👉
👉 ![]() 👉
👉 ![]() 👉
👉  👉
👉 ![]() 👉
👉 
Hola que hermoso dibujo, me gusta muscha como quedó el cabello, en el programa Inkscape me falta aprender un poco s màs cómo realizar ese efecto en el cabello
Saludos apreciada amiga me uno a ti, oremos porque termine la guerra y por todos los inocentes, deseamos vivir en un mundo lleno de paz y armonía 🙏
En cuanto a tu post excelente, cuánta creatividad y destreza para realizar esa belleza😍😍
Que Dios bendiga tu creatividad. Gracias por compartir con nosotros.❤️
The rewards earned on this comment will go directly to the person sharing the post on Twitter as long as they are registered with @poshtoken. Sign up at https://hiveposh.com.
Hola cariño espero que te encuentres bien. Gran aporte a la comunidad, está genial tu explicación y esto va a servir para que nosotros los usuarios podemos adornar mejor nuestras publicaciones. Besos y abrazos! Saludos 🤗
El cabello quedo genial, me recuerda a la famosa Candy Candy. gracias por compartir
Congratulations, your post has been upvoted by @dsc-r2cornell, which is the curating account for @R2cornell's Discord Community.
Me encanta,me encanta lentes y cabello fenomenal
Linda muñequita de gafas oscuras, te quedo muy linda y en una pose algo tímida, me encato!
Que lindo dibujo, y la combinación de colores lo hace muy llamativo, de verdad la felicito por tan lindo trabajo. Yo no sé dibujar nada en pc, pero me encantaría aprender por los menos lo básico. jajajaja.
Saludos y que siga con su buen trabajo.
Feliz y bendecido fin de semana.
Es muy hermoso, lo que más me gusto es el cabello y los lentes!
Qué animación tan cuchi! Me gusta, me encanta como le dedicaste tanto detalle al cabello, con todo ese brillo y lineas se ve re-hermoso. También me encuentro en las mismas, practicando y dibujando. Abrazos amiga! ♥