
A big hello to all the hiver's, hoping you are very healthy. I imagine more than one person, that every time you go out to do your errands, or any activity, many of us carry a bottle of water so we can be hydrated at all times. Since some of us do not have the economic availability to buy a bottle of water, it is better to be forewarned and always carry our bottle. And what better to carry it in a good liner where it keeps the water cold, and at the same time is a better presentation.
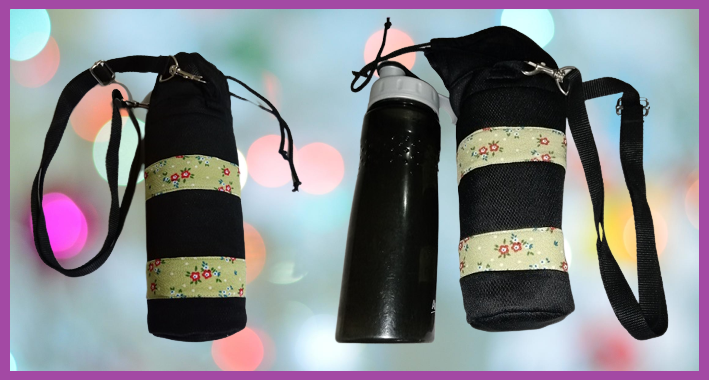
Today I want to share with you a liner I made for a plastic bottle, for my niece, who studies, and daily carries her water, because in high school sometimes there is no water in the filters, and most of the students carry their container for their water.
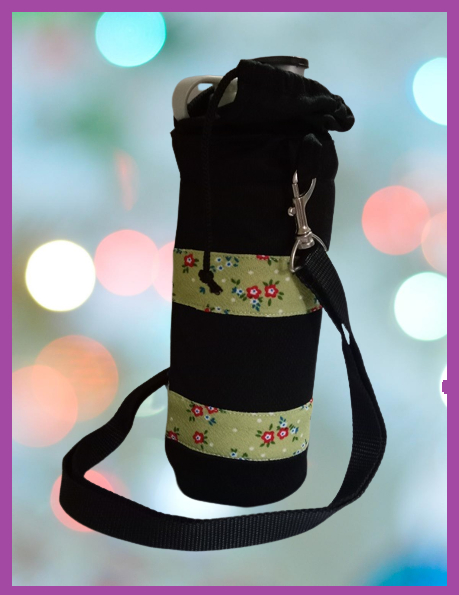
I made her this lining, with the material of a refractory or thermal bag, that had been damaged, but I had saved what I could continue using, and from this recycled material I made her lining, with its strap to be able to carry it on her shoulder.
And as well I made it to the standard size, in black and green printed fabric.
I show you the materials and steps made in this project.


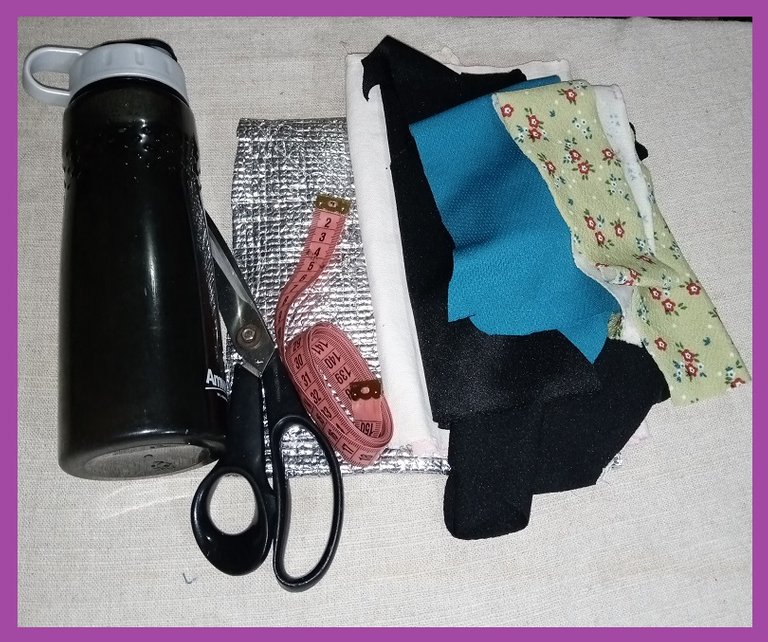
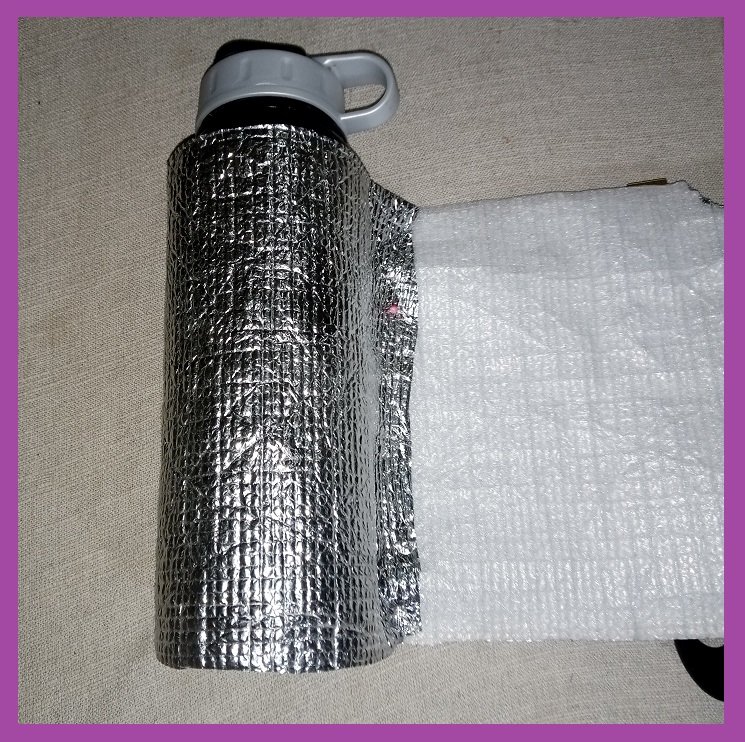
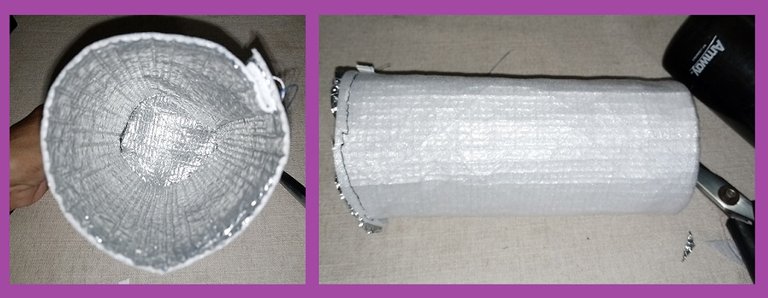
I place the bottle on the thermal fabric and cut to size, width and length, also the bottom in a circular shape.
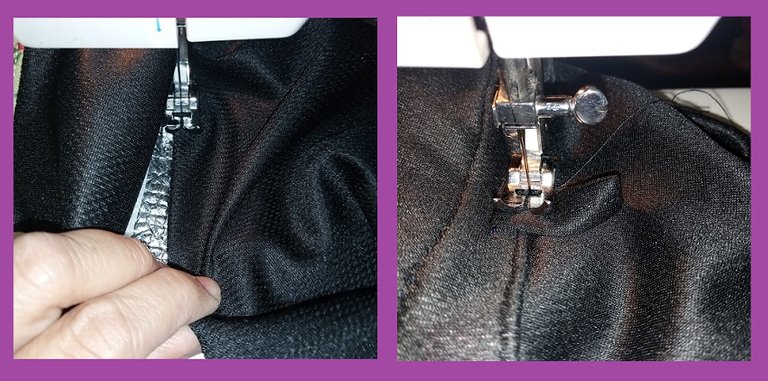
When I sewed it on the machine to be able to close it, I put a piece of paper underneath and over it, so that I could sew it, because without this it would stick and could not be sewn.

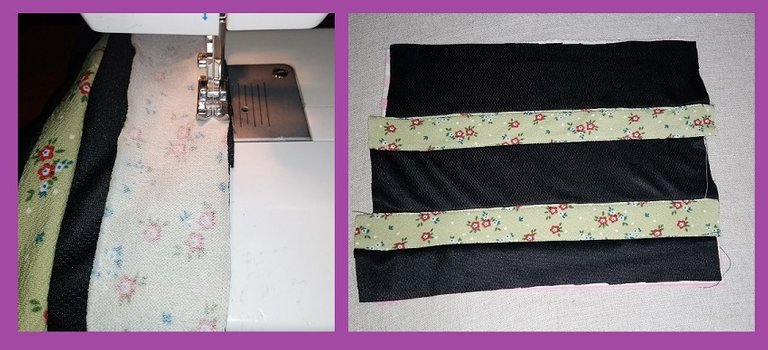
When making this part, I start with the fabric, where I put some green stripes, and at the same time I put another fabric underneath as a lining.
The high or length of the container I finish it with a roll, where then I pass a cord, which will tie, or close.
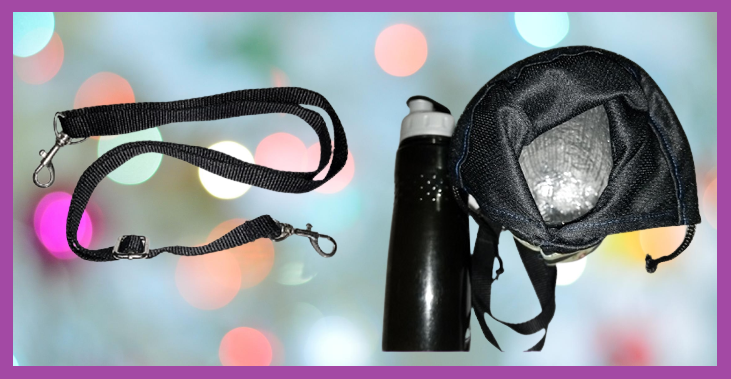
And with other short strips, I put them on each side, and then place the handle that comes with its hooks, which are easy to place.

The thermal part is 5cm less high, I made it this way so that it will not be damaged when it is closing and opening at every moment. Since it can break easily.
This handicraft is made for this occasion, and dedication, each step was made with a lot of patience and love.
Thanks for your visit and your time, remember to stay hydrated is important for our health!
Bye! see you next time, take care.


Un gran saludos a todos los hiver´s, esperando esten muy saludables. Me imagino a mas de una persona, que cada vez que sale a la calle hacer sus diligencias, o cualquier actividad, muchas llevamos una botella de agua para asi poder estar hidratados en todo momento. Ya que algunos no contamos con disponibilidad economica para estar comprando una botella de agua, es mejor estar prevenidos y llevar siempre nuestra botella. Y que mejor llevarla en un buen forro donde se conserve el agua fria, y al mismo tiempo es una mejor presentacion.
Hoy quiero compartir con ustedes un forro que hice para una botella de plastico, para mi sobrina, quien estudia, y diariamente lleva su agua, ya que en el liceo a veces no hay agua en los filtros, y la mayoria de los estudiantes llevan su envase para su agua.
Le hice este forro, con el material de un bolso refractario o termico, que se habia dañado, pero habia guardado lo que se podia seguir usando, y de este reciclado le realice su forro, con su correa para poder llevarlo colgado en el hombro.
Y como bien lo hice a la medida estandar, en color negro y tela verde estampada.
Te enseño los materiales y paso realizados en este proyecto.
Coloco la botella sobre la tela termica y corto a la medida, de ancho y largo, igualmente la parte de abajo en forma circular.
Cuando cosi en la maquina para poder cerrarlo, le puse por debajo y encima un trozo de papel, para que pudiera coserlo, ya que sin esto se quedaba pegado y no se podia coser.
Al hacer esta parte, empiezo con la tela, donde le coloque unas franjas en color verde, y al mismo tiempo le puse otra tela por debajo como forro.
El alto o largo del envase lo finalizo con un ruedo, donde luego le paso un cordon, que va amarrar, o cerrar.
y con otras tiras corta, se las coloque en cada lado, para luego colocar el asa que viene con sus ganchos, que son faciles de colocar.
La parte termica llega 5cm menos de alto, la hice asi para que no se dañe cuando este cerrando y abriendo en cada momento. Ya que se puede romper facilmente.
Esta manualidad es realizada para esta ocasion, y dedicacion, cada paso realizado, fue hecho con mucha paciencia y amor.
Gracias por tu visita y su tiempo, recuerda estar hidratados es importante para nuestra salud!
Chau! hasta la proxima, cuidense.
Quedó muy original y hermoso este forro para termo o envase de agua, lo mejor es que podemos hacerlos con la tela de nuestra preferencia. Muy útil y práctico.
Se nota a simple vista que es una creación de calidad, parece comprado honestamente me impresiona el proceso.
Congratulations @eylis! You have completed the following achievement on the Hive blockchain And have been rewarded with New badge(s)
Your next target is to reach 3000 upvotes.
You can view your badges on your board and compare yourself to others in the Ranking
If you no longer want to receive notifications, reply to this comment with the word
STOPCheck out our last posts:
Support the HiveBuzz project. Vote for our proposal!