
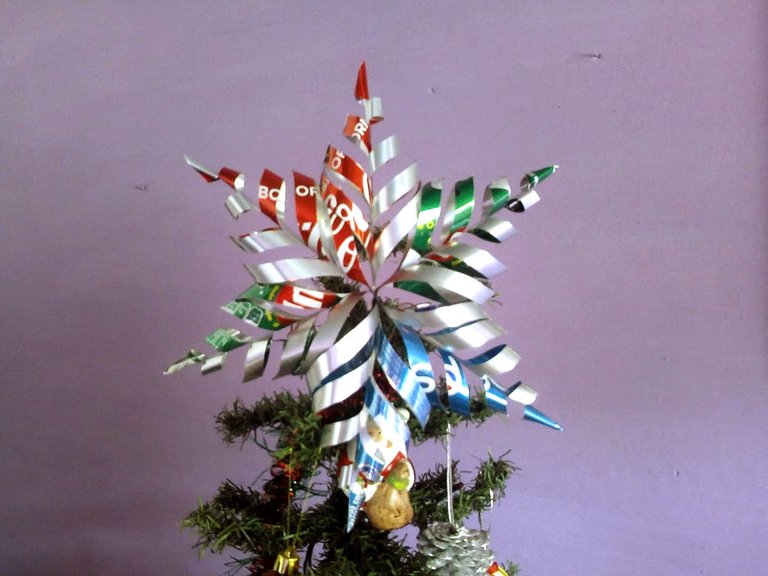
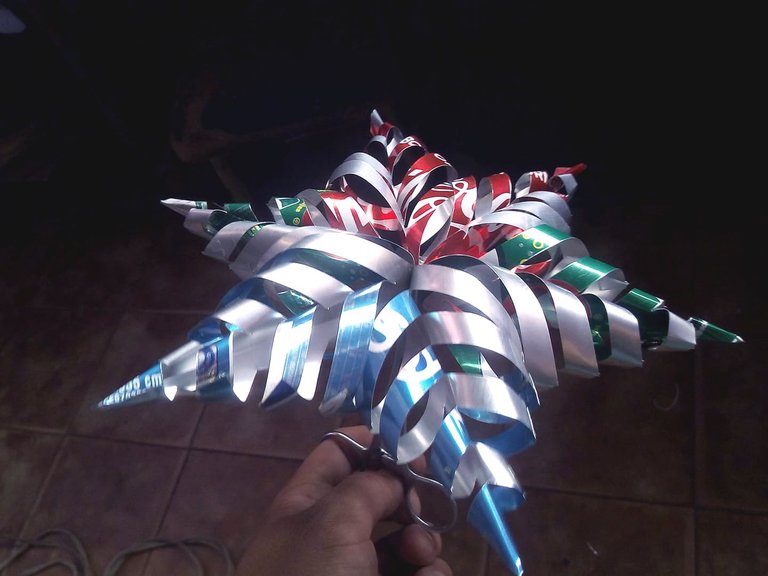
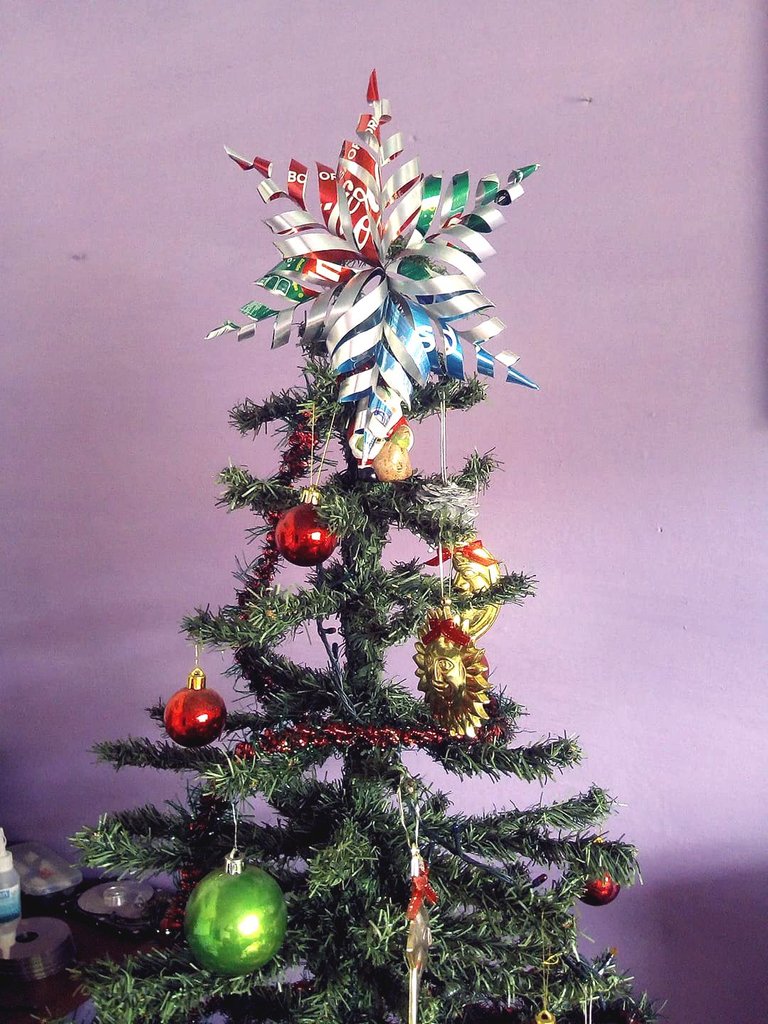
Hello friends, I hope you are very well. This time I want to join in the Christmas spirit that overflows in the community. I have been very impressed and happy to see so many beautiful creations from users, I congratulate you all for your great work. I join Christmas making a star for the Christmas tree or to decorate doors and windows, it is totally different from the model I made last week, I hope you like it. I made it using soda cans of different colors, in this case blue, red and green, which are the colors of Christmas. But they can make it on cardboard or paper following this model.
Hola amigos, espero que se encuentren muy bien. Esta vez quiero unirme al espíritu navideño que desborda en la comunidad. HE estado muy impresionado y contento por ver tantas creaciones hermosas de los usuarios, los felicito a todos por su gran trabajo. Yo me uno a la navidad haciendo una estrella para el arbol de navidad o para adornar puertas y ventanas, es diferente totalmente al modelo que hice la semana pasada, espero que les agrade. Yo la hice utilizando latas de soda de diferentes colores, en este caso color azul, rojo y verde que son los colores de la navidad. Pero pueden hacerla en cartulina o papel siguiendo este modelo.

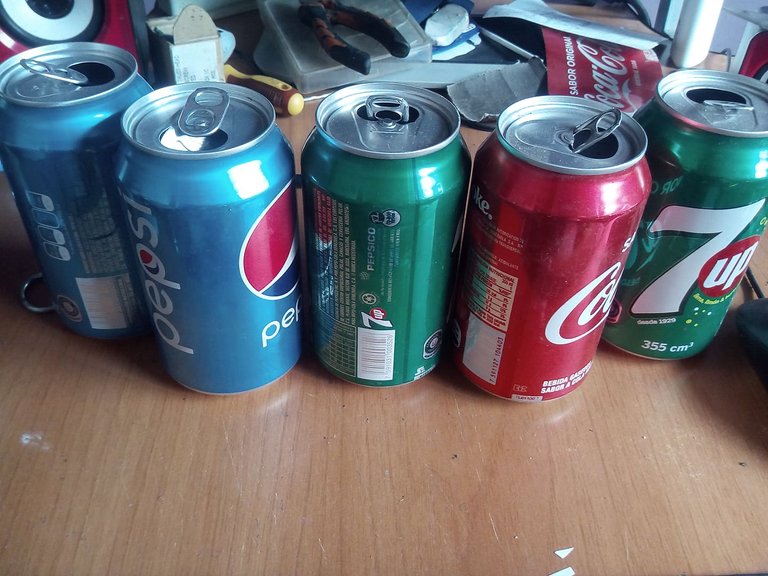
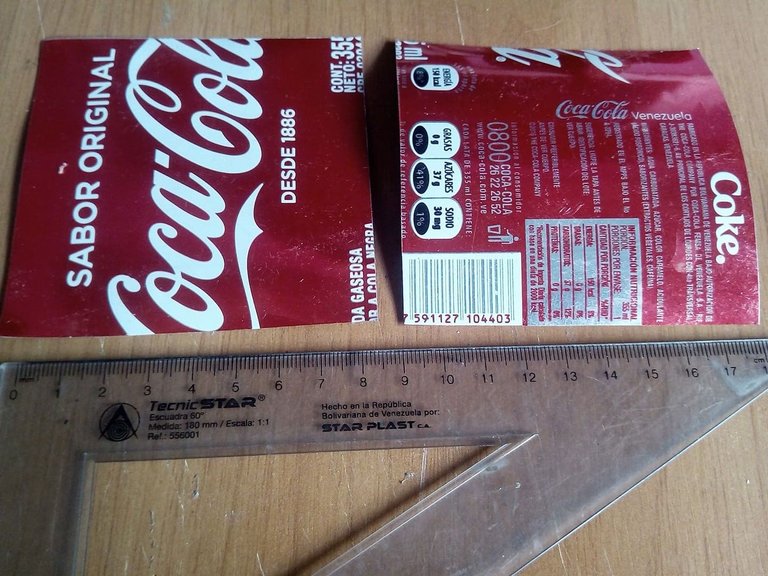
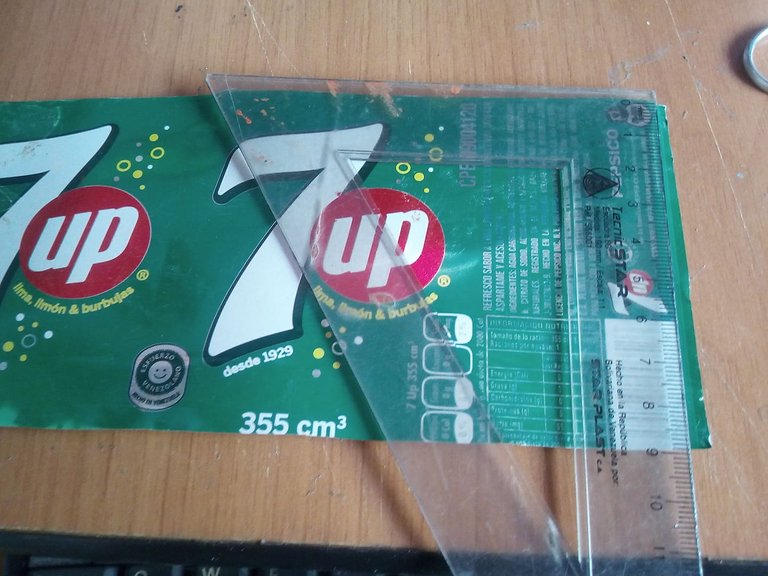
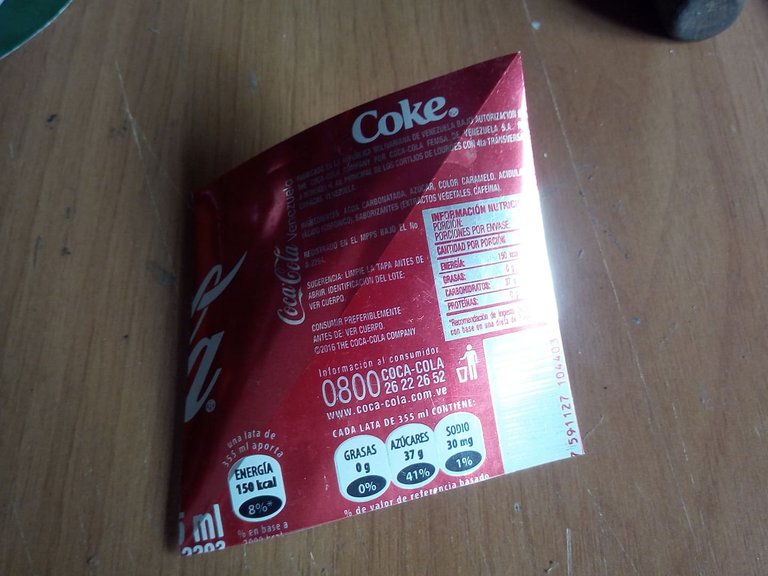
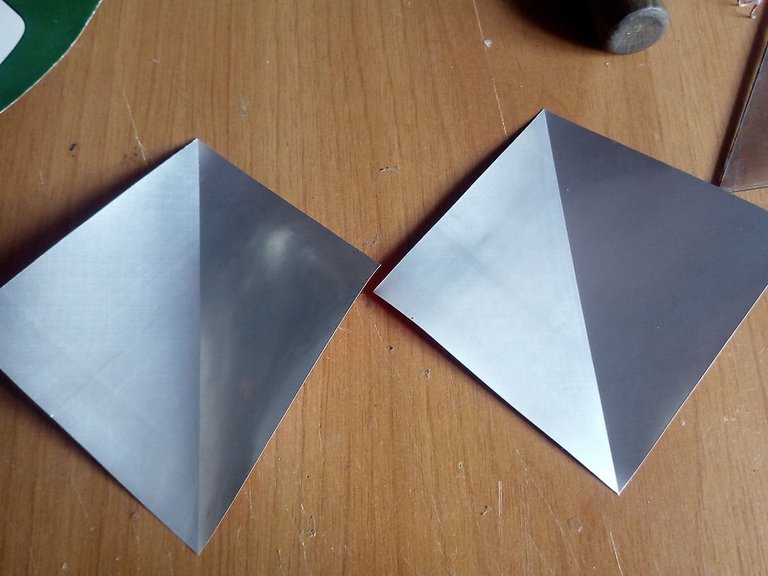
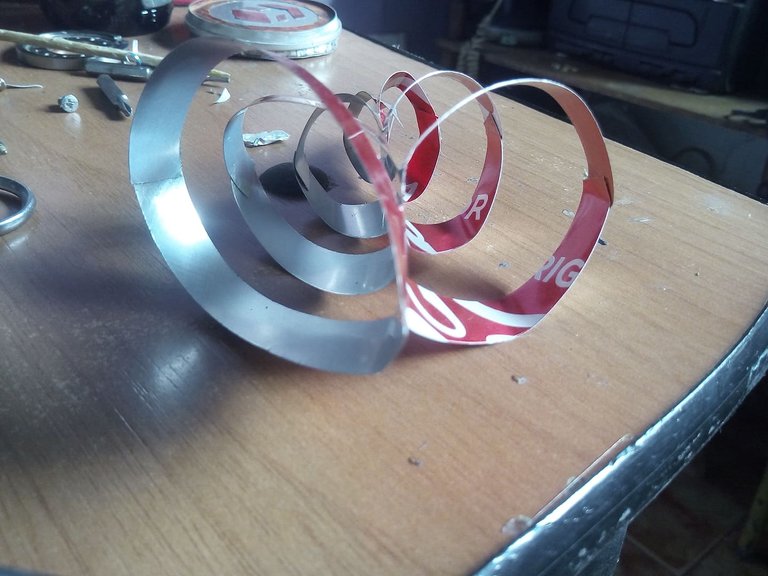
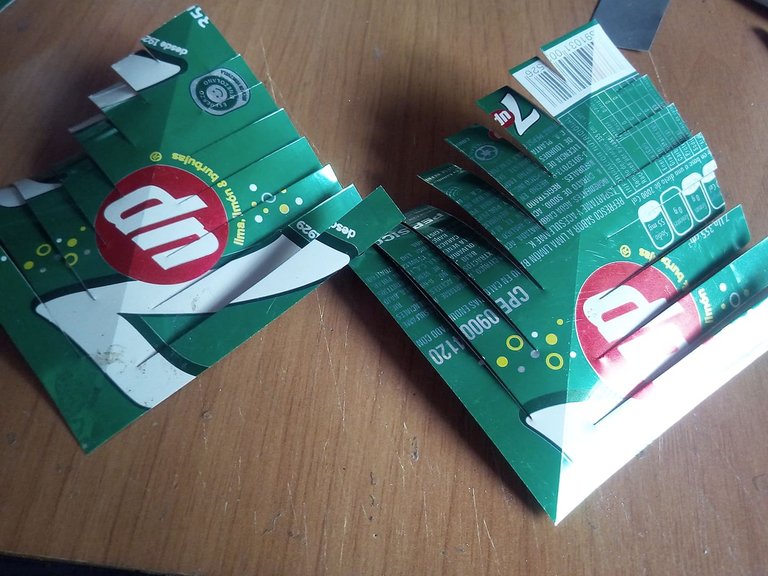
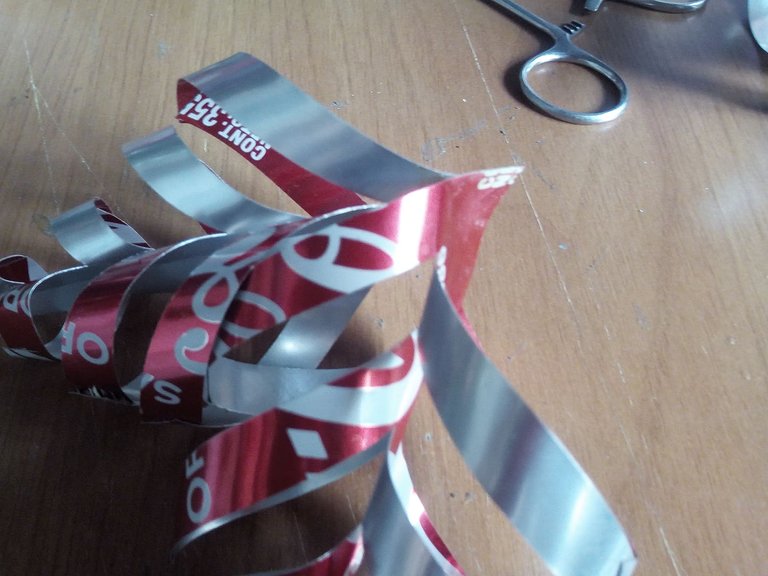
When we have chosen the cans that we will use, we must cut them and turn them into tin sheets, then we will cut two pieces of 9 centimeters each of each color. We take a pen and draw a line from one end to the other end.
Cuando tengamos escogidas las latas que usaremos debemos cortarla y convertilas en hojas de lata, luego cortaremos de cada color dos piezas de 9 centímetros cada una. Tomamos un boligrafo y trazamos una raya desde una punta a hasta el otro extremo.
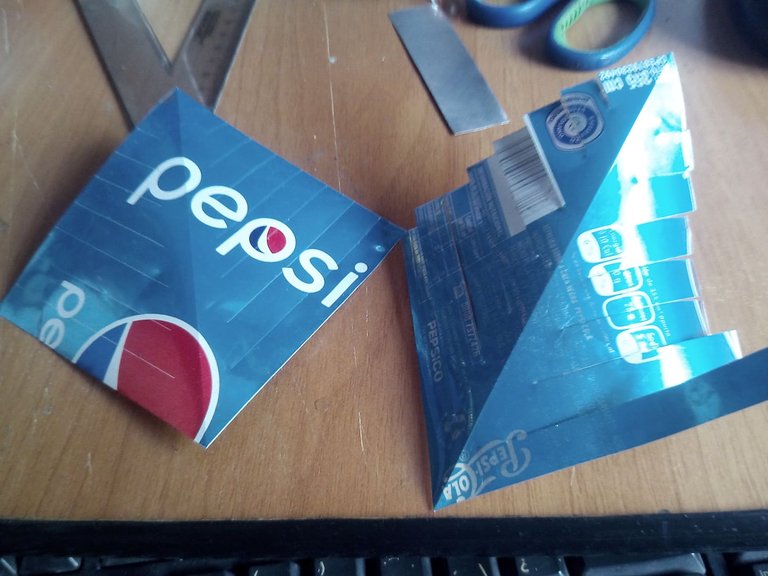
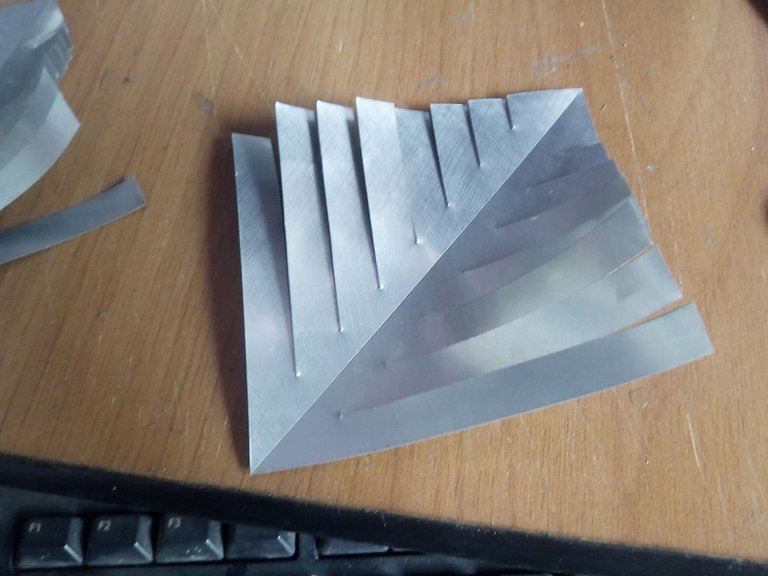
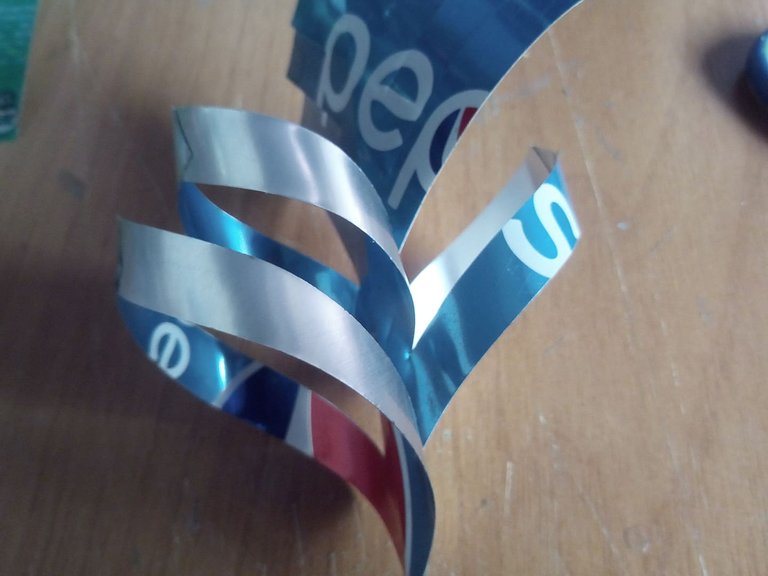
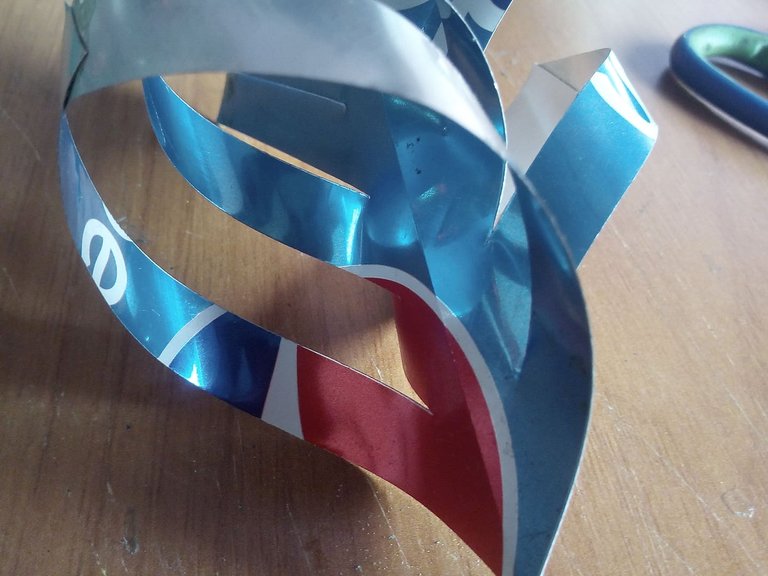

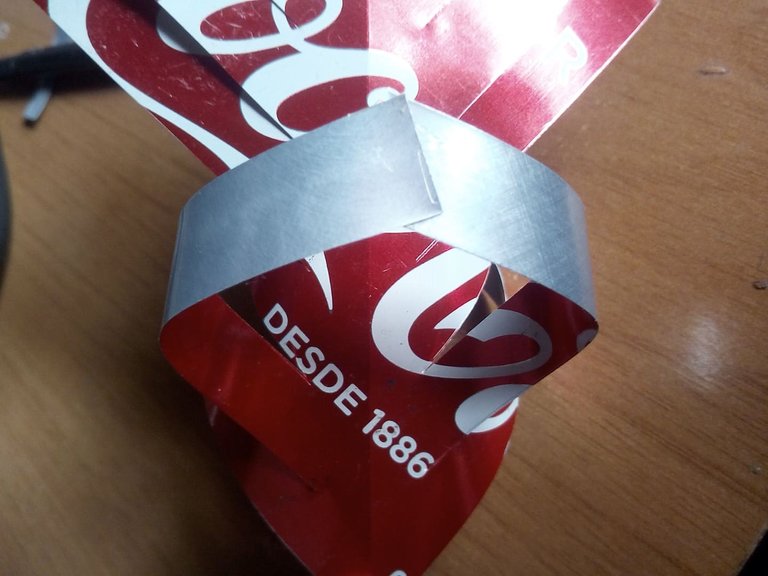
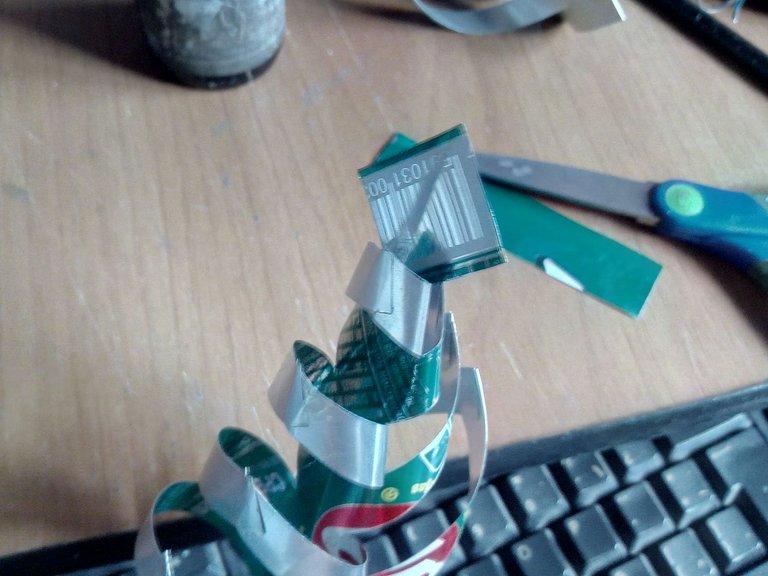
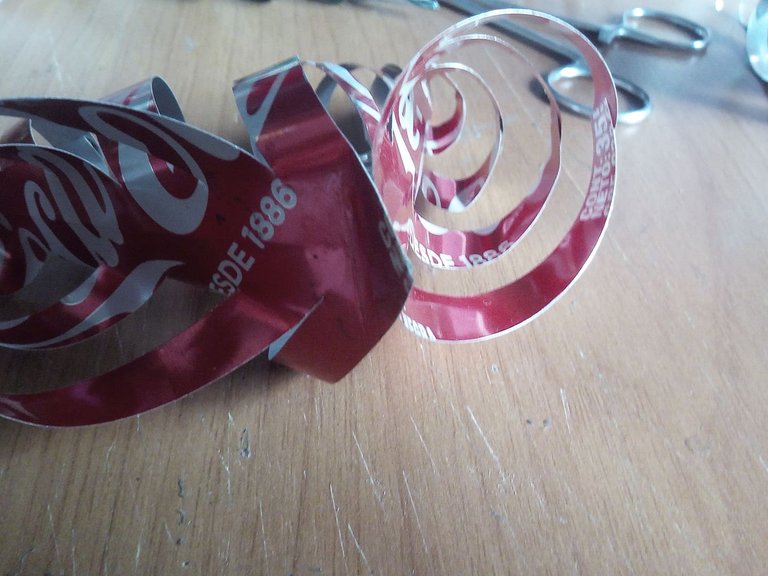
The process to create the tips is very easy. First we are going to measure 7 centimeters on two sides of the frame, we mark them very well. and then from the ends we are going to measure 7 centimeters in the first point and draw a line, in the second we are subtracting 1 centimeter, then it would be 6, and so on until we reach 2n centimeter. We do this for each side. Then we are going to take both ends and we will join them on both sides of the can as seen in the image, using a good glue we will place one by one in position, we will repeat this process with all the colors.
El proceso para crear las puntas es muy facil. Primero vamos a medir 7 centímetros por dos costados del cuadro, los marcamos muy bien. y luego desde los extremos vamos a ir midiendo en el primer punto 7 centímteros y trazamos una linea, en el segundo le vamos restando 1 centímtero entonces serían 6, y así hasta llegar a 2n centímtero. Esto lo hacemos por cada costado. Despues vamos a tomar ambas puntas y las uniremos por ambas caras de la lata así como se ve en la imagen, usando un buen pegamento vamos colocando una a una en posición, este proceso lo vamos a repetir con todos los colores.
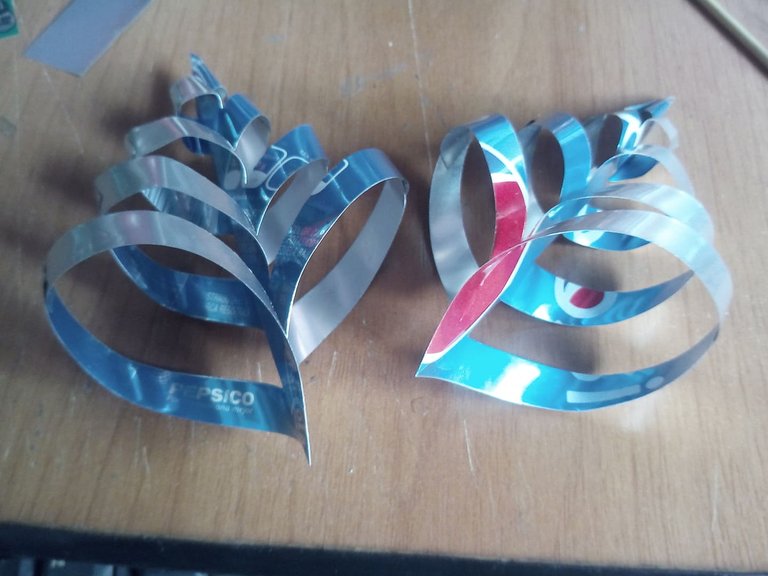
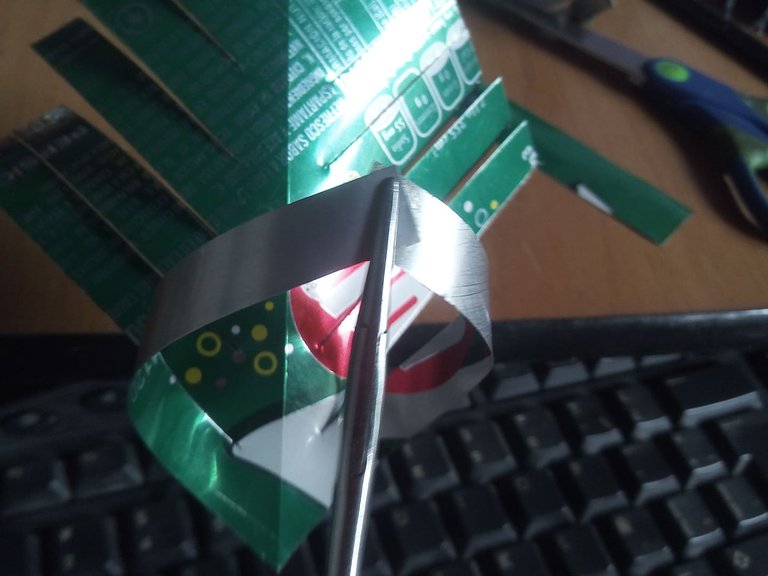
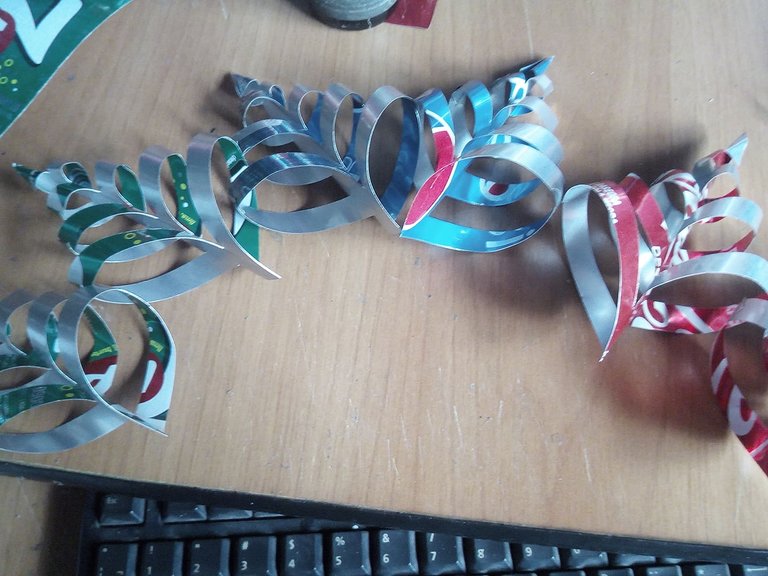
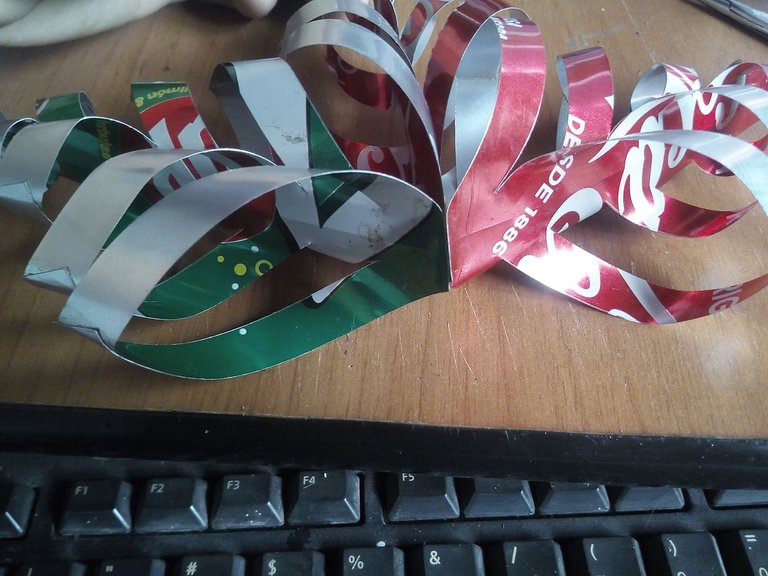
Then we continue the same process with the red color, two pieces for each color. The cans of coca cola were very bent so I had to buy two and take them to be able to make the tips of the star of that color so that it would not be missing lol.
Después continuamos el mismo proceso con el color rojo, dos piezas por cada color. Las latas de coca cola estaban muy dobladas así que tuve que comprarme dos y tomarmelas para poder hacer las puntas de la estrella de ese color y así no faltara jejej
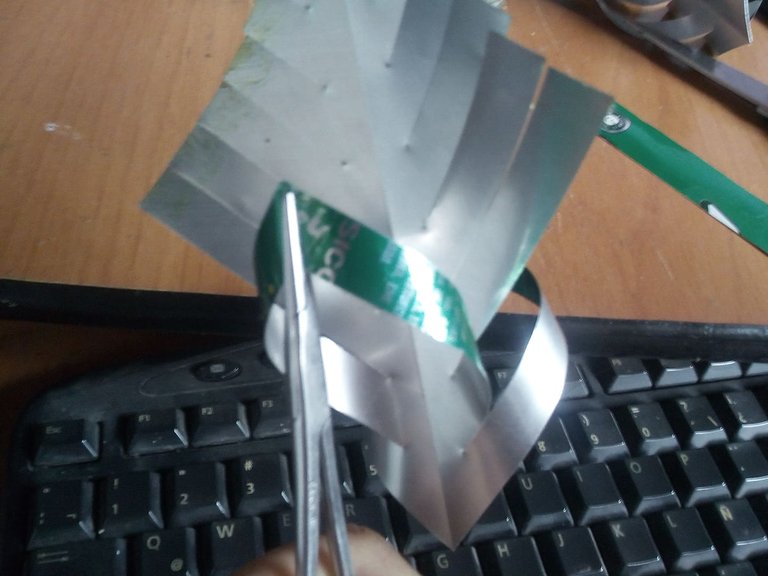
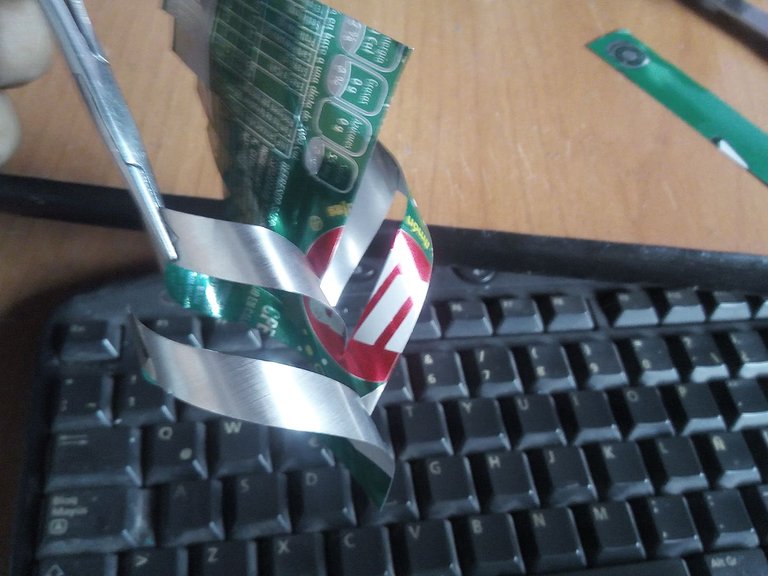

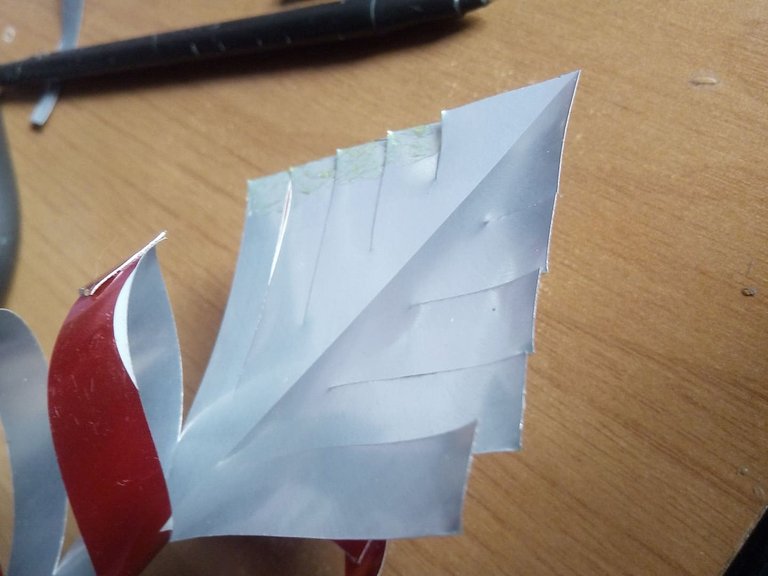
Finally we make the pieces green. Little by little we are joining the tips, we can use tweezers to hold it better and not run the risk of cutting our fingers or hands, and thus we help in the gluing process so that it looks very good.
Por último hacemos las piezas de color verde. Poco a poco vamos uniendo las puntas, podemos utilizar unas pinzas para sujetar mejor y no correr el riesgo de cortarnos los dedos o las manos, y así ayudamos en el proceso de pegado para que quede muy bien.
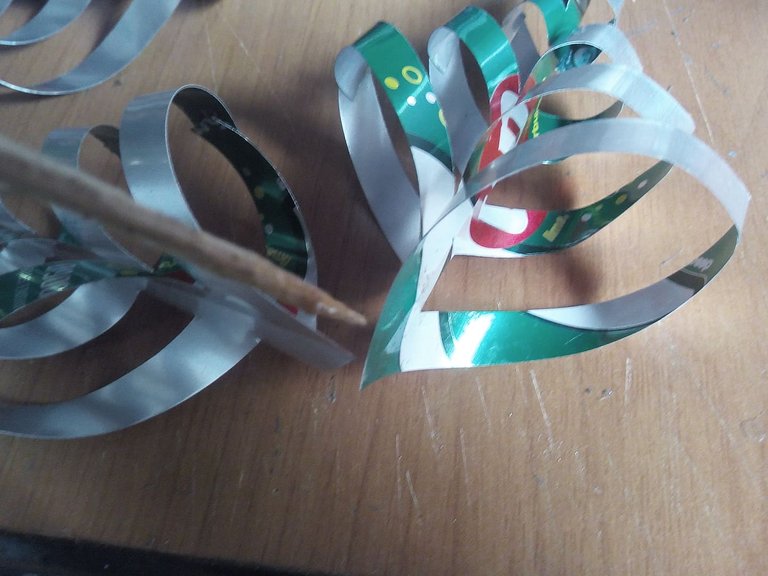
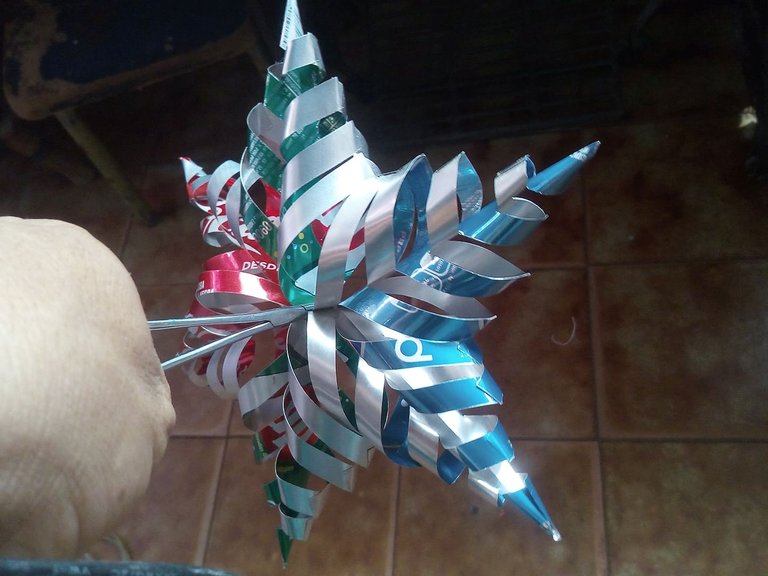
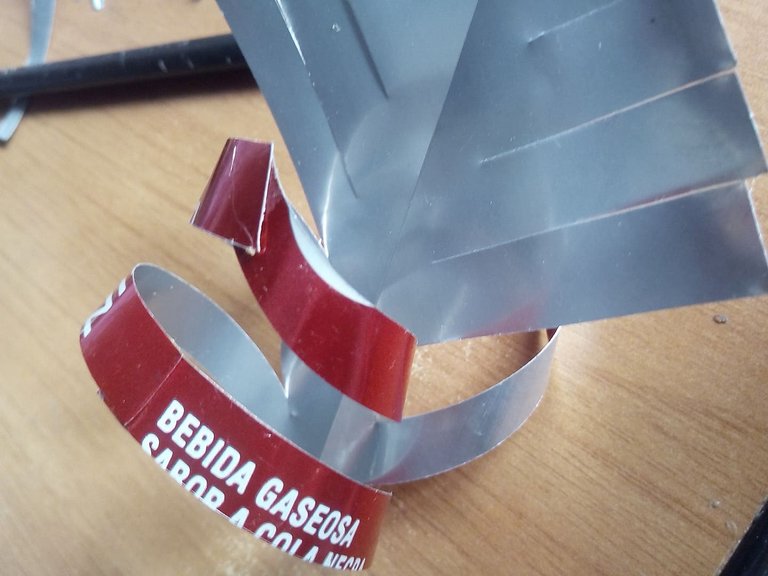
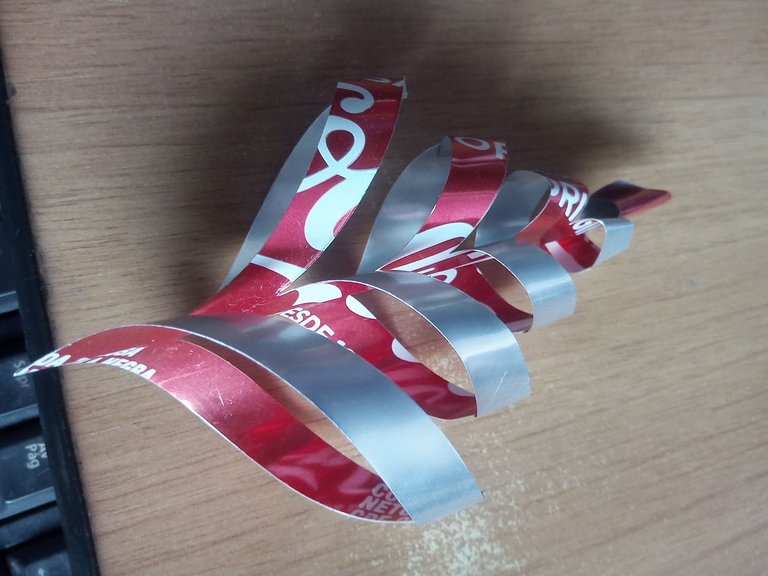
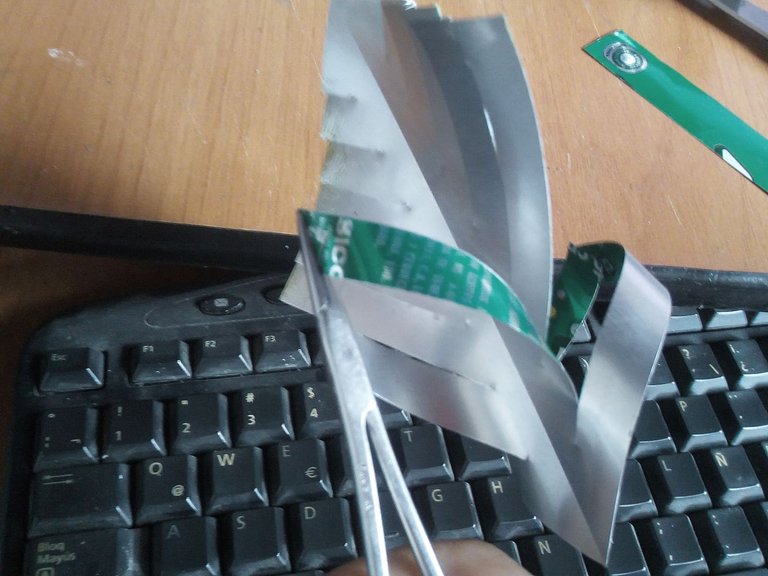
Now comes the process of assembling all the tips that we made. We will take each end and we will put glue on the thickest end, and we will join each pair with its color. We start with red, we hold it very well with a clamp so that the glue takes effect, then we add the other colors one by one. At the end we hold the entire star in the center for 1 hour so that the glue dries well and so we can put it on the tree.
Ahora viene el proceso de armar todas las puntas que hicimos. Tomaremos cada punta y le pondremos pegamento en el extremo mas grueso, y uniremos cada par con su color. Comenzamos por el rojo, lo sujetamos muy bien con una pinza para que el pegamento haga efecto, despues vamos añadiendo los demás colores uno por uno. Al final sujetamos toda la estrella en el centro por espacio de 1 hora para que el pegamento seque bien yasí podamos ponerla en el arbolito.
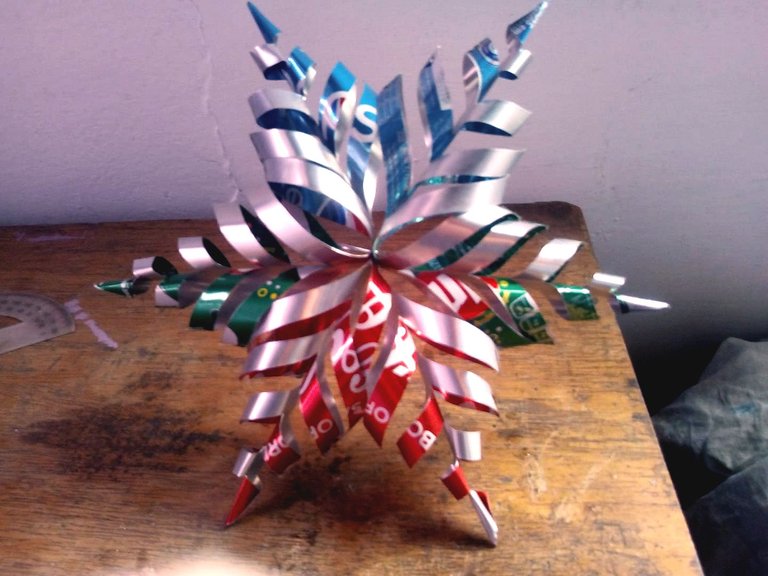
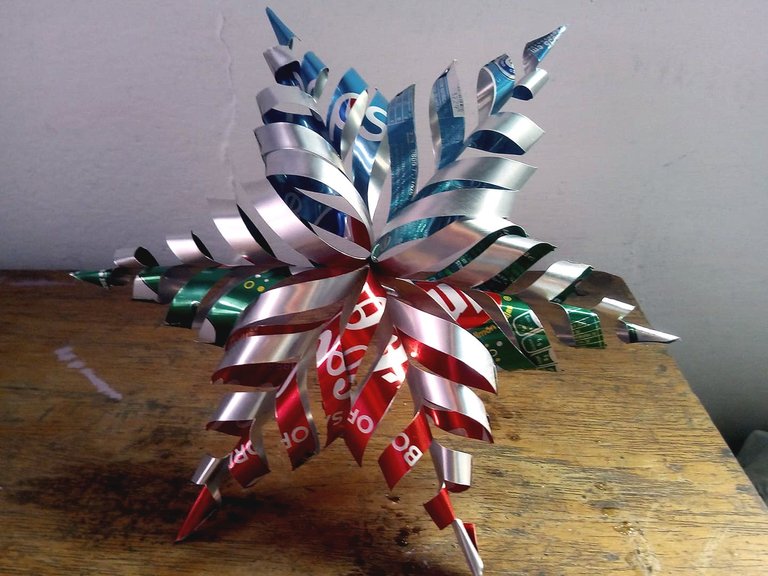
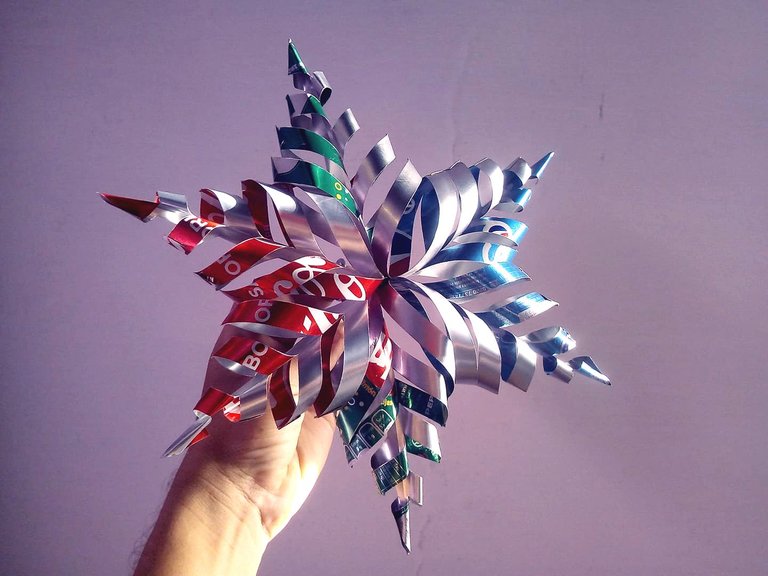
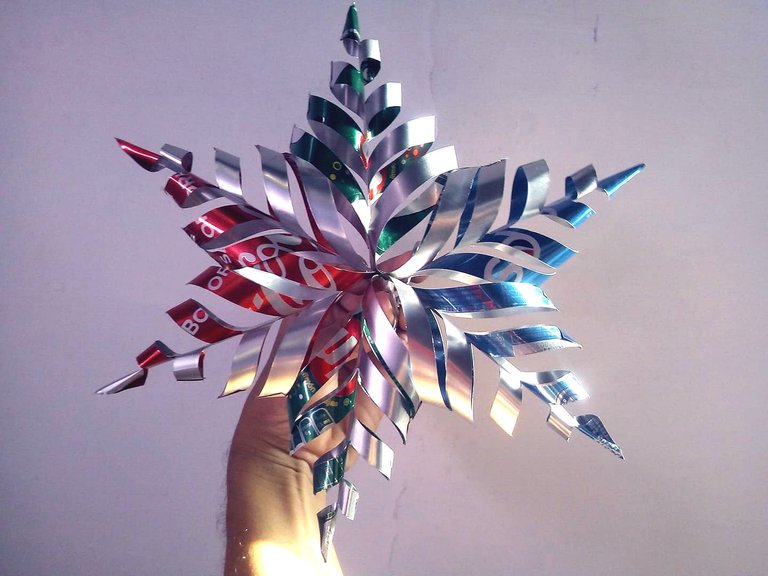
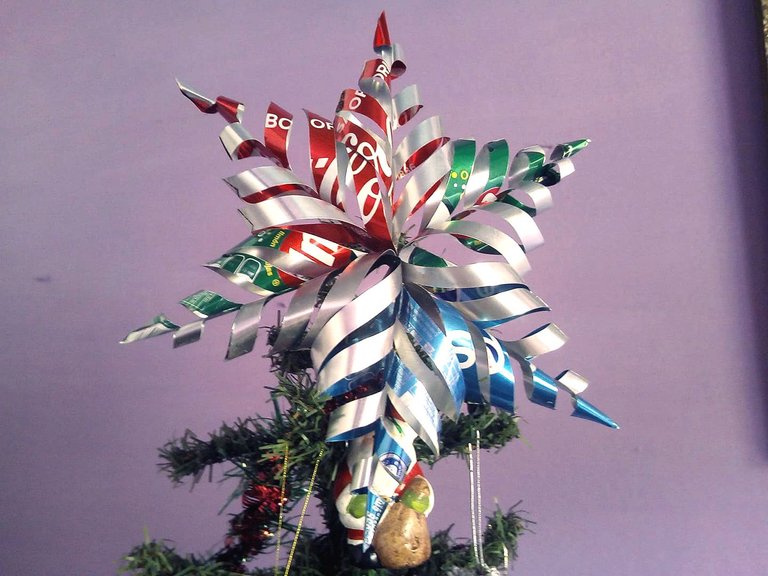
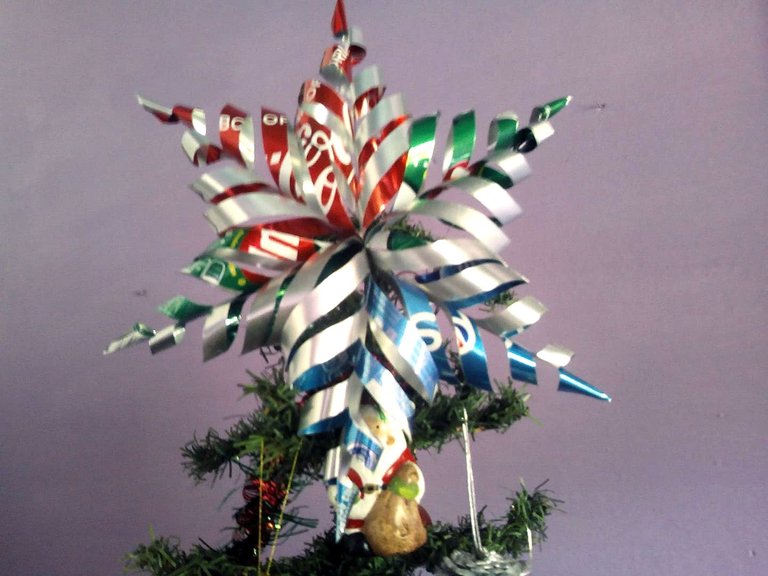
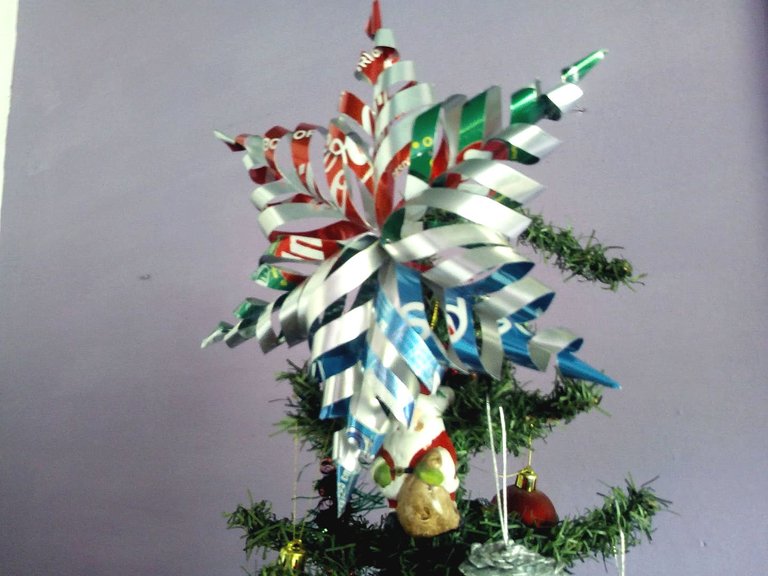
This is how the final result of this Christmas Star has been, as you can see the process is very easy and can be done with any material that is malleable. It can also be made with plastic bottles and it will surely be very beautiful. Being hollow inside, you can also add some light and music that come in Christmas cards and it would look great on our tree. I hope you liked it and that you are encouraged to do it for this Christmas and thus decorate at home, do not forget to comment if you liked it, I say goodbye to you soon.
Así ha quedado el resultado final de esta Estrella de Navidad, como pueden observar el proceso es muy facil y puede hacerse con cualquier material que sea maleable. Tambien puede hacerse con botellas de plástico y de seguro que quedará muy hermosa. Al ser hueca por dentro también se le puede agregar alguna luz y música de las que vienen en las tarjetas de navidad y quedaría genial en nuestro árbol. Espero que les haya gustado y que se animen a hacerla para esta navidad y asi decorar en sus casas, no olviden comentar si les ha gustado, me despido hasta pronto.
Muy buena entrada para empezar esta navidad, gran trabajo amigo, por cierto, feliz inicio de la navidad, feliz y bendecido día, saludos bro.!
Feliz inicio de navidad hermano.. Buenas vibras!
Demasiado espectaculaar esa estrellaaa, me encantó. Definitivamente la pondría en mi arbolito de navidad... Si tuviera uno, lastima que mi mamá lo vendió 😅 pero de tenerlo, sin duda me animaría a hacer esta estrella para decorar, sobre todo porque nunca sabía que ponerle encima jajaja. Muy bueno. Gracias por compartir!
suele pasar, aqui tampoco habia arbolito pero me regalaron uno jeje. y le he puesto de todo para que se vea bien. Incluyendo esta estrella, veremos que otra locura se me ocurre jejeje. Saludos!
Mis respetos, le ha quedado genial. Muy buen trabajo amigo.
Gracias amigo mío por su apoyo y sus comentarios. Saludos!
Me encanto como se ve
gracias, se ve muy bien. y así como está por dentro se le puede poner una luz y se verá mejor!
The rewards earned on this comment will go directly to the person sharing the post on Twitter as long as they are registered with @poshtoken. Sign up at https://hiveposh.com.
Muy creativo, no me imaginaba realizar una estrella con latas de refresco. Gracias por compartir.
queda muy bien, solo que hay que tener cuidado porque el aluminio es muy filoso. Saludos..
Congratulations @fixie! You have completed the following achievement on the Hive blockchain and have been rewarded with new badge(s):
Your next target is to reach 2000 replies.
You can view your badges on your board and compare yourself to others in the Ranking
If you no longer want to receive notifications, reply to this comment with the word
STOPCheck out the last post from @hivebuzz:
Bonita estrella @fixie
gracias amigo!
Excelente bro, bastante creativo la verdad, al menos con esta idea ya no hay que comprar la estrella para el arbol este año jejeje.
eso es un plus jajajaja. Saludos hermano!
Está hermoso, excelente idea. Un gusto saludarte.
Que bueno que te haya gustado como quedó el resultado.. Saludos!
Wow te quedó espectacular esa estrella!, que buen uso de la creatividad se nota que tienes talento para las manualidades ✨
Hola muchas gracias por pasar y apoyar mi trabajo, me alegra que te haya gustado como quedó!