Editado en Canva || Edited in canva

Hola, hola mis queridos amigos de Hive feliz domingo para todos.
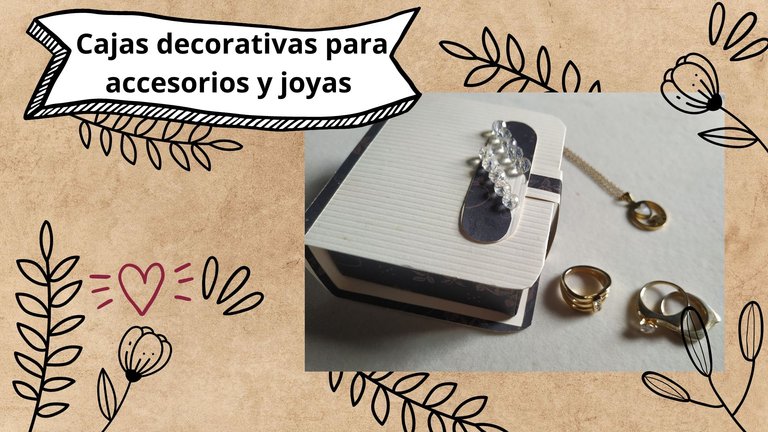
El día de hoy quiero compartirles una manualidad muy bonita y fácil de hacer. Se trata de una caja para accesorios en forma de cofre que elaboraremos a partir de cartulina y hojas estampadas.
Este proyecto lo hice para poder colocar de forma ordenada todos los accesorios que tengo en mi mesita de noche, es decir, diferentes zarcillos, brazaletes y anillos.
El procedimiento es bastante sencillo y además queda con un resultado muy bonito, aquí les dejo los materiales a utilizar.
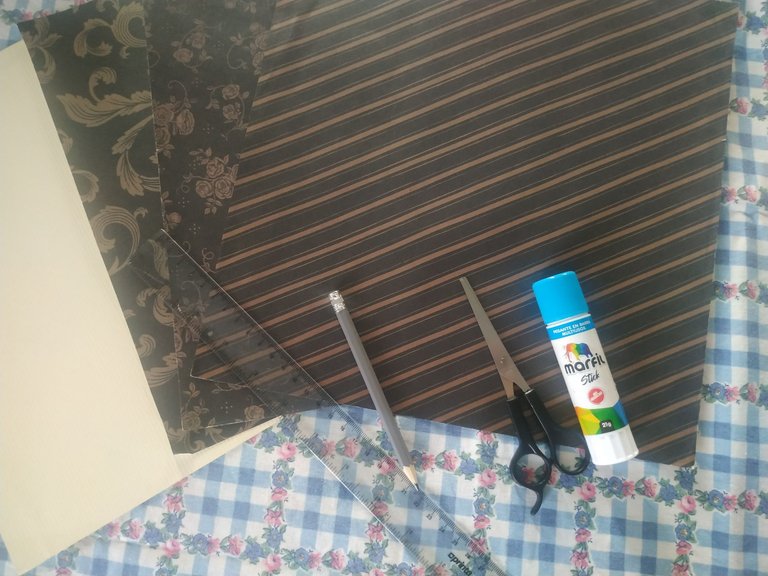
MATERIALES
- Hojas con diferentes estampados.
- Cartulinas.
- Pega en barra.
- Tijeras.
- Lápiz y regla.
- Decoraciones varias.
PROCEDIMIENTO
Escogemos la hoja de papel de nuestra preferencia y la recortamos haciendo un cuadrado de 20 cm por cada lado.
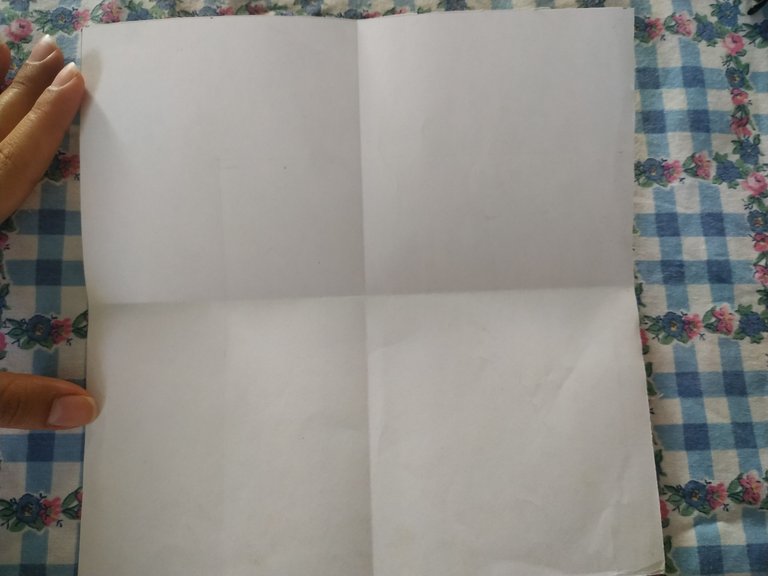
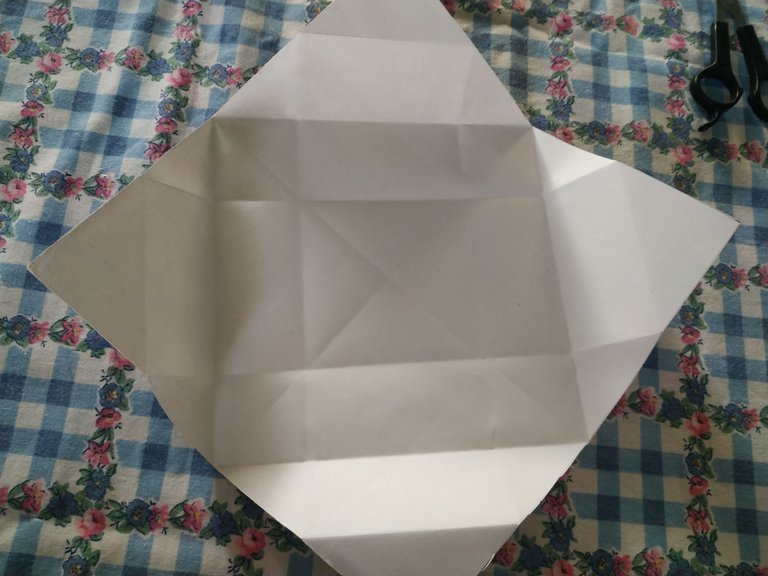
Vamos a doblarlo a la mitad dos veces para que se haga una cruz y poder saber cuál es el centro del cuadrado.

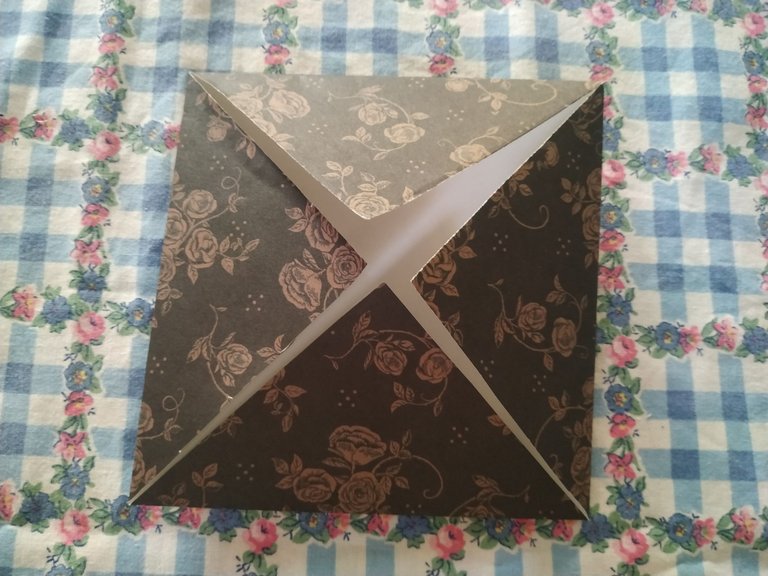
Continuamos doblando las esquinas de la hoja hacia el centro de la figura.
Ahora vamos a doblar los laterales hacia el centro, desdoblamos damos media vuelta y doblamos los otros dos laterales.
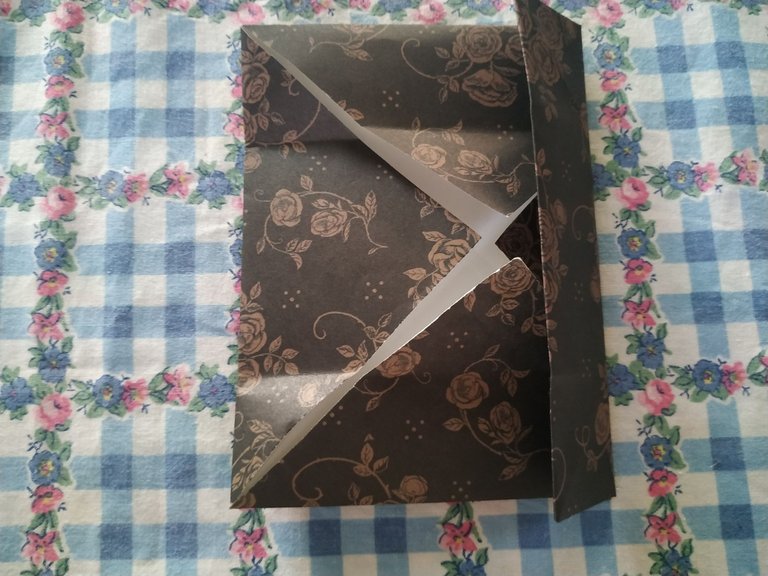
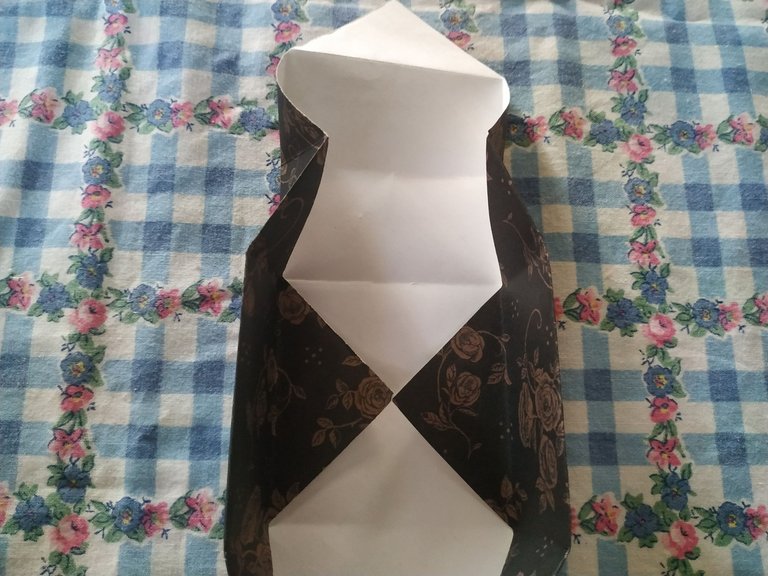
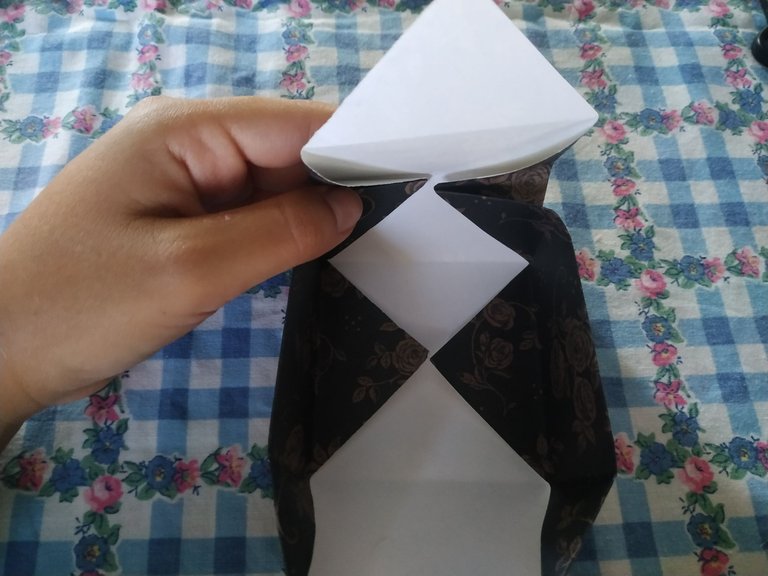
Se desdobla por completo la hoja y vamos a colocarla con las puntas señalando hacia arriba, abajo y los lados (en forma de diamante).
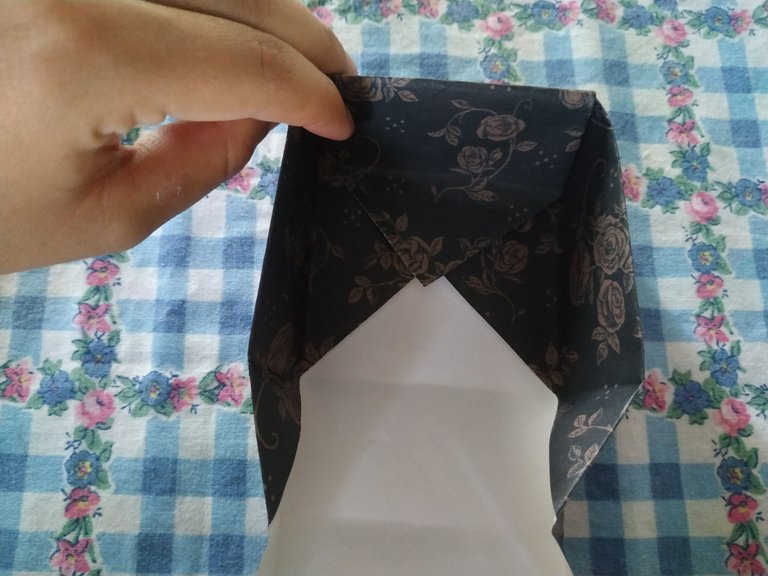
Doblamos los laterales como se muestra en la primera foto y doblamos dos veces la solapa que sobresale en la parte superior hacia el centro.
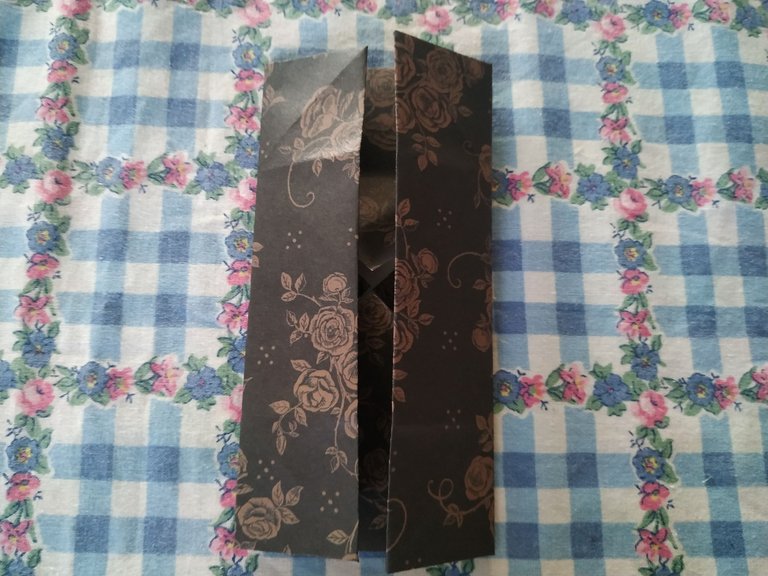
Damos media vuelta y repetimos el proceso.
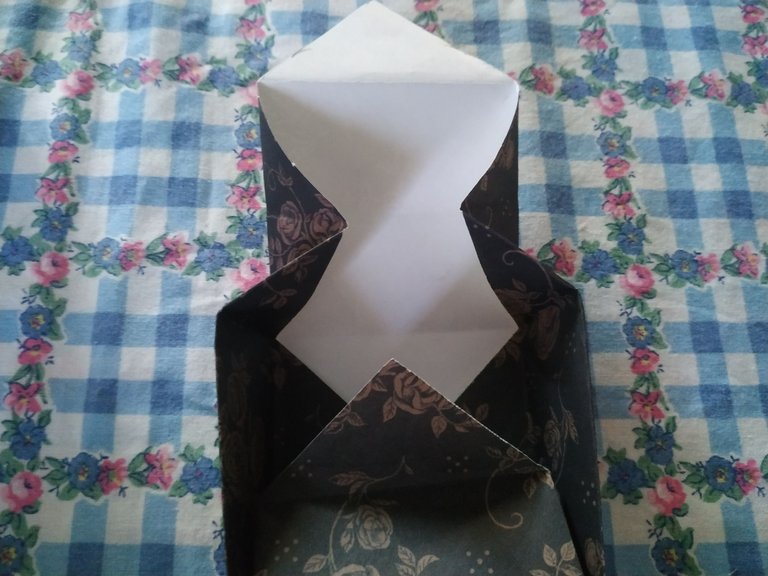
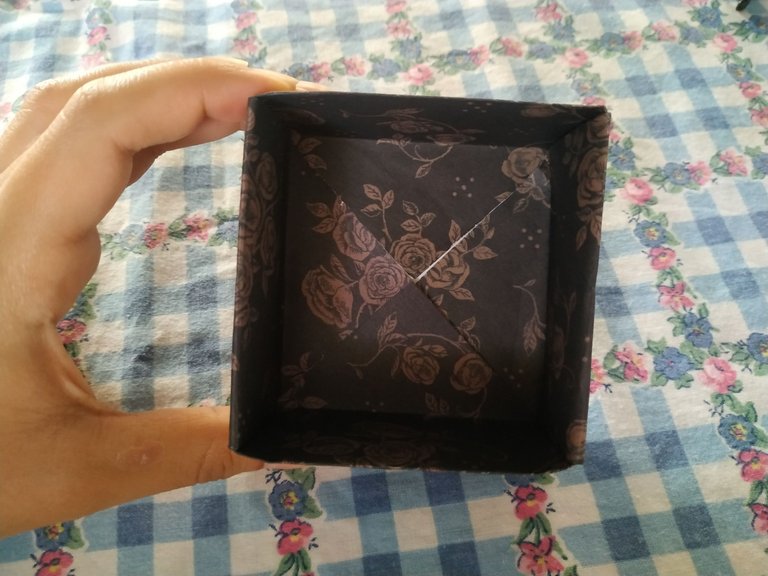
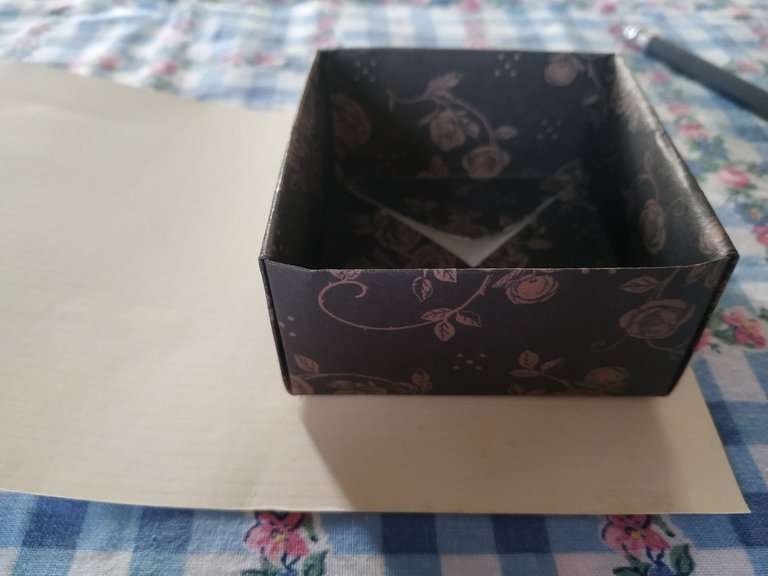
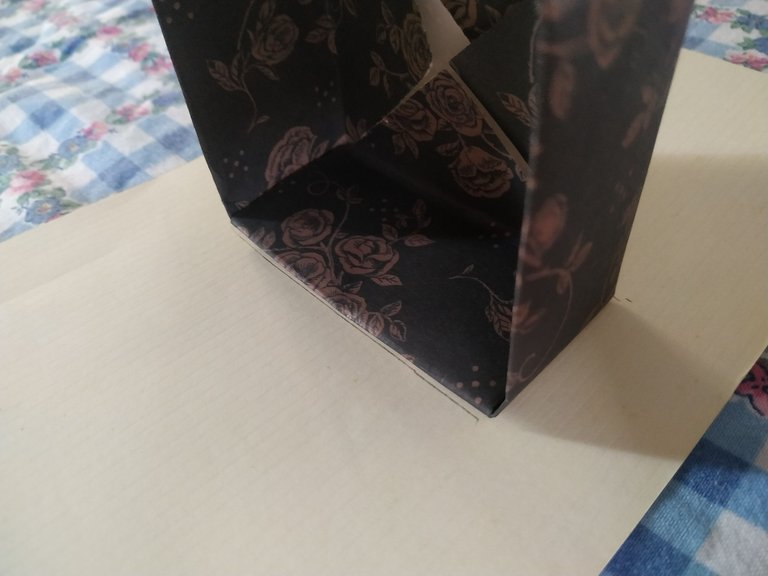
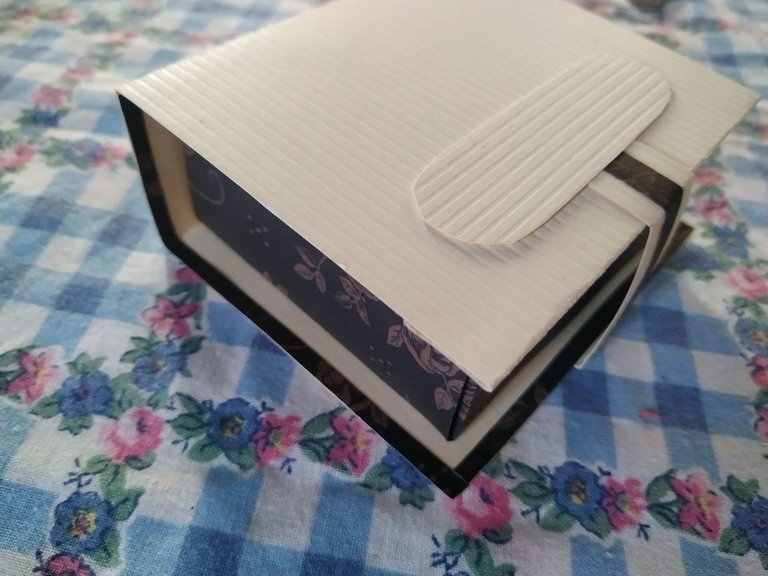
Nos debe de quedar armada una pequeña caja
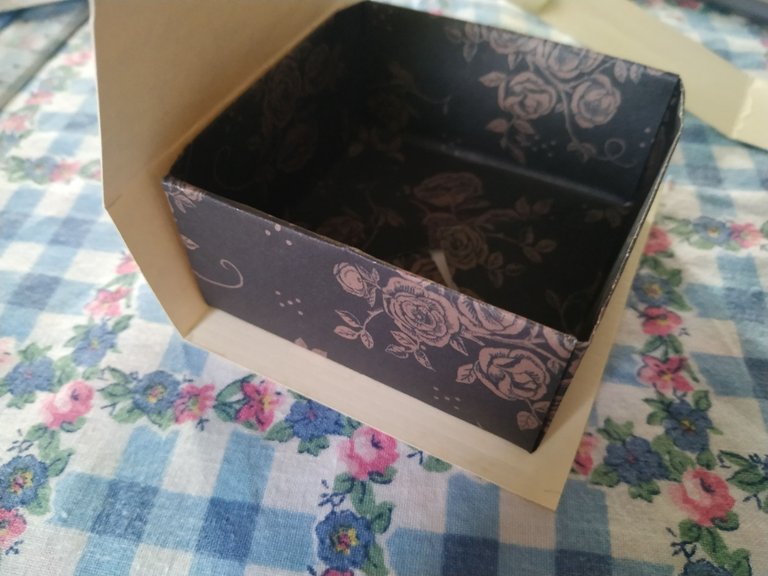
Continuamos recortando un rectángulo con cartulina de nuestra preferencia, vamos a usar la pequeña caja que acabamos de hacer como referencia para tomar las medidas en la cartulina.
Vamos a medir donde termina la base de la caja y damos una vuelta de 90° para medir el lateral. Nos van a quedar dos marcas que nos servirán como referencia para doblar la cartulina.
Recortamos los excedentes y pegamos en la base y el lateral de la caja.

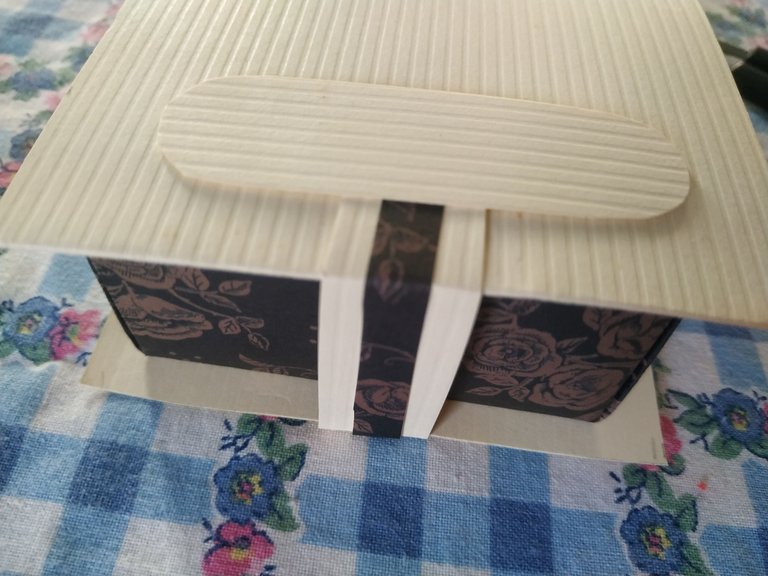
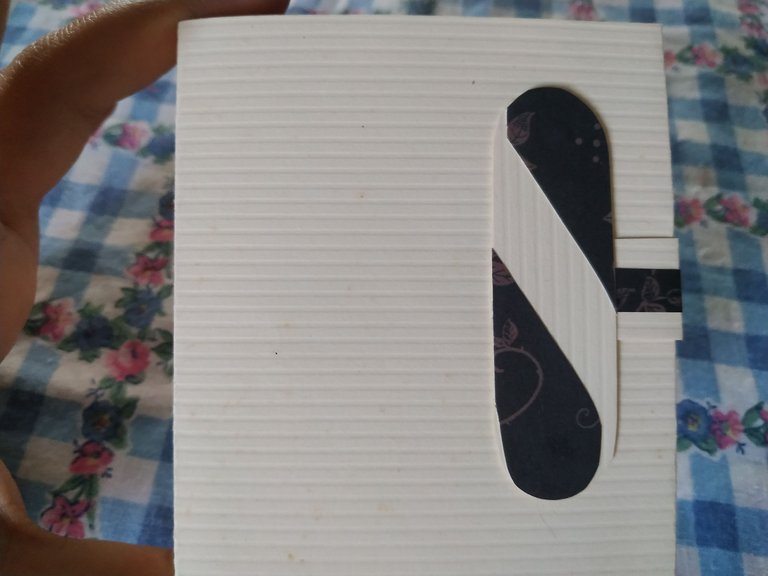
Continuamos haciendo un óvalo y una tira con la cartulina que hicimos la carátula de nuestra caja, los pegamos con nuestra pega en barra y dejamos secar
Vamos a hacer diferentes decoraciones que van a hacer la diferencia, recortamos tiras delgadas con la hoja color negro y pegamos en el contorno de la caja, también hacemos decoraciones en la tapa.
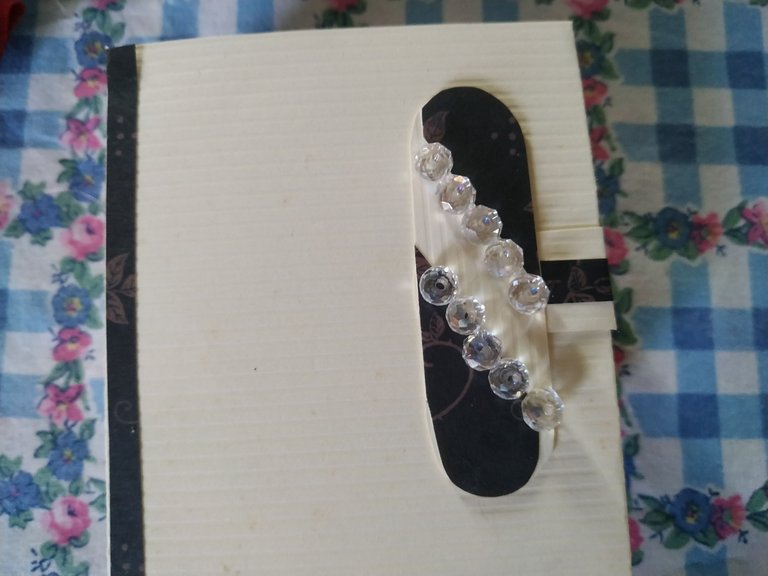
Cómo decoración final encontré unas pequeñas piedras de Swarovski que pegue en la solapa de la tapa de nuestra caja.
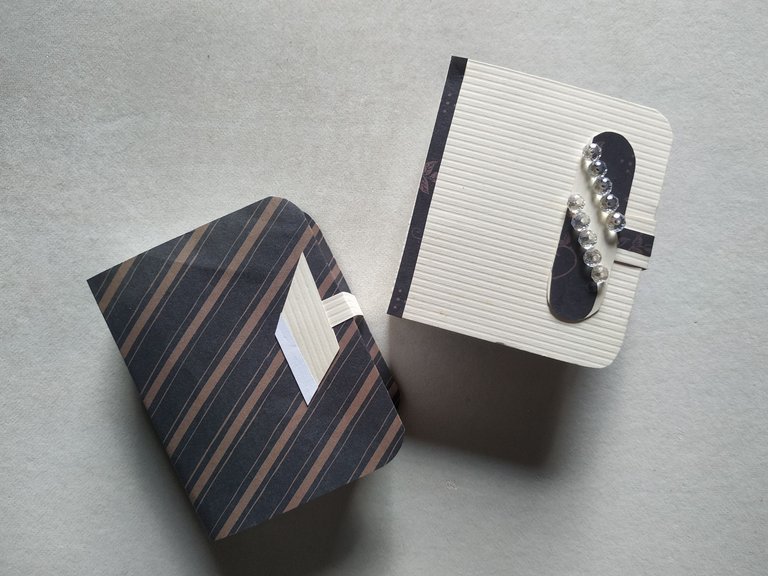
Ya con esto tendremos lista está adorable caja hecha a mano.
Como les dije, es una caja que lleva pocos materiales, es fácil de hacer y además queda muy bonita. Puedes hacerla de los colores que más te gusten y ajustarla a la decoración que tengas en tu cuarto para que quede muy bonita en tu mesa de noche o estante.
Espero les haya gustado mi publicación del día de hoy, gracias por visitar mi blog, les deseo que tengan un feliz día y noche.

Hello, hello my dear friends of Hive happy Sunday to all.
Today I want to share with you a very nice and easy to make craft. It is a box for accessories in the shape of a chest that we will make from cardboard and stamped leaves.
I made this project to be able to place in an orderly way all the accessories I have in my nightstand, that is, different earrings, bracelets and rings.
The procedure is quite simple and the result is very nice, here are the materials to use.
MATERIALS
- Sheets with different patterns.
- Cardboard.
- Glue stick.
- Scissors.
- Pencil and ruler.
- Various decorations.
PROCEDURE
Choose the sheet of paper of your choice and cut it into a square of 20 cm on each side.
We are going to fold it in half twice to make a cross and to be able to know which is the center of the square.
We continue folding the corners of the sheet towards the center of the figure.
Now we are going to fold the sides towards the center, unfold, turn around and fold the other two sides.
The sheet is completely unfolded and we are going to place it with the tips pointing up, down and sideways (diamond shape).
Fold the sides as shown in the first photo and fold twice the flap that protrudes at the top towards the center.
Turn halfway around and repeat the process.
We should be able to assemble a small box
We continue by cutting out a rectangle with cardboard of our choice, we are going to use the small box we just made as a reference to take the measurements on the cardboard.
We are going to measure where the base of the box ends and make a 90° turn to measure the side. We will be left with two marks that will serve as a reference to fold the cardboard.
Cut off the excess and glue on the base and the side of the box.
We continue making an oval and a strip with the cardboard that we made the cover of our box, we glue them with our glue stick and let them dry.
We are going to make different decorations that will make the difference, we cut thin strips with the black sheet and glue them on the contour of the box, we also make decorations on the lid.
As a final decoration I found some small Swarovski stones that I glued on the flap of the lid of our box.
With this we will have ready this lovely handmade box.
As I said, it is a box that takes few materials, it is easy to make and it looks very pretty. You can make it in the colors you like and adjust it to the decor you have in your room to make it look very nice on your nightstand or shelf.
I hope you liked my post today, thank you for visiting my blog, I wish you a happy day and night.

Editado en Canva || Edited in canva
Fotos tomadas de mi teléfono Xiaomi Redmi Note 6 Pro || Photos taken from my Xiaomi Redmi Note 6 Pro phone.
Fuente del editor de imágenes y separadores || Image editor source and separators
Congratulations @gabimramirez! You have completed the following achievement on the Hive blockchain And have been rewarded with New badge(s)
Your next target is to reach 300 posts.
You can view your badges on your board and compare yourself to others in the Ranking
If you no longer want to receive notifications, reply to this comment with the word
STOPTo support your work, I also upvoted your post!
Check out our last posts:
Guao Gabi! Es muy lindo, se ve muy pero muy elegante!
Hola 👋 muchas gracias, trate de combinar lo colores para que el resultado quedará así de elegante.
Saludos y de nuevo gracias por pasarte por mi blog 🙏
Hola, Gaby!! 🌷 Esta cajita está muy linda, tanto en el diseños como en los materiales que elegiste. Esa técnica que muestras para armar la cajita doblando la cartulina es muy práctica!!🌸 Gracias por compartir!!
Hola 👋 si, e una forma práctica de hacer la cajita. Muchas gracias, saludos ☺️
I like the outcome, it looks great. Well done!
Muchas gracias ☺️ que tengas un buen día.
Hola, Gabriela ✨ que practico el diseño de la cajita, me encantó como la elaboraste. Gracias por compartir.