English
Greetings to all, fellow creatives. This time I will show you how to mix the use of plasticine with other materials. In a very simple way I will show you how to make a couple of penguin figurines.
Español
Saludos a todos, compañeros creativos. En esta ocasión los mostraré cómo mezclar el uso de la plastilina con otros materiales. De manera muy sencilla les enseñaré a hacer un par de figuritas de pingüinos.
Step by step
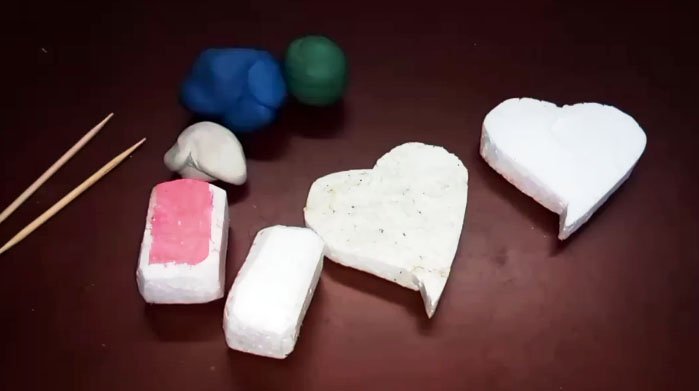
To make these penguins I used several materials besides plasticine. I used polystyrene, wooden sticks, paints and glue.
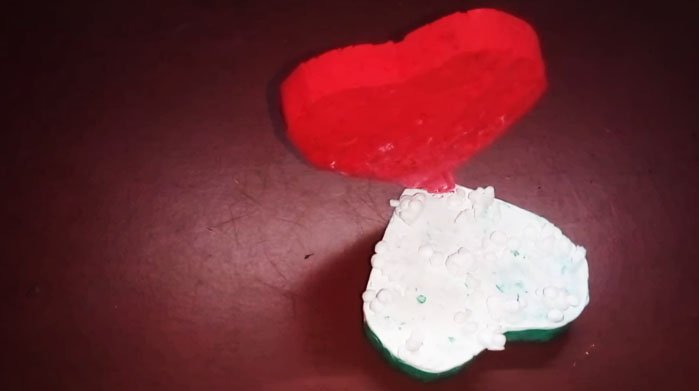
With the polystyrene I made several shapes, a couple of hearts and two rectangles that would serve as stuffing for the two penguins.
Paso a paso
Para hacer estos pingüinos usé varios materiales además de la plastilina. Usé poliestireno, palillos de madera, pinturas y pegamento.
Con el poliestireno hice varias formas, un par de corazones y dos rectángulos que servirían como relleno para los dos pingüinos.
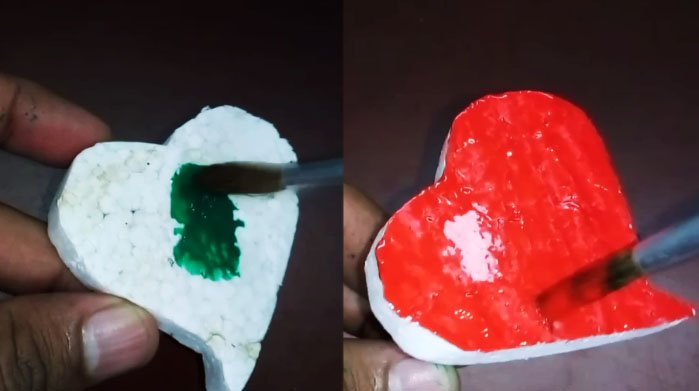
The first thing I did, as shown in the video, was to prepare the base for the figure. First I painted the two hearts in green and red; the green would be the floor and the red on the back.
Lo primero que hice, tal como lo muestro en el video, fue preparar la base para la figura. Primero pinté los dos corazones de colores verde y rojo; el verde sería el piso y el rojo en la parte trasera.
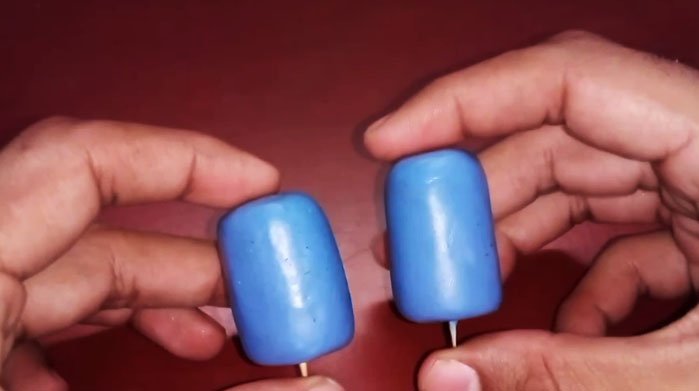
While the paint on these pieces dried, I started working on the penguins, so I lined the polystyrene rectangles with the blue plasticine. I used a blue similar to king blue, but a little darker.
Mientras la pintura de estas piezas se seca, comencé a trabajar en los pingüinos, para ello comencé a forrar los rectángulos de poliestireno con la plastilina azul. Usé un azul similar al azul rey, pero un poco más oscuro.

Once I had completely covered the polystyrene rectangle, I began to mold the surface of the plasticine to make it completely uniform. I used the surface of the table to give it a smooth surface, similar to a flat cylinder at the top and bottom.
Una vez cubrí por completo el rectángulo de poliestireno, empecé a moldear la superficie de la plastilina para dejarla completamente uniforme. Me ayudé de la superficie de la mesa para darle una superficie lisa, similar a un cilindro plano en la parte superior e inferior.
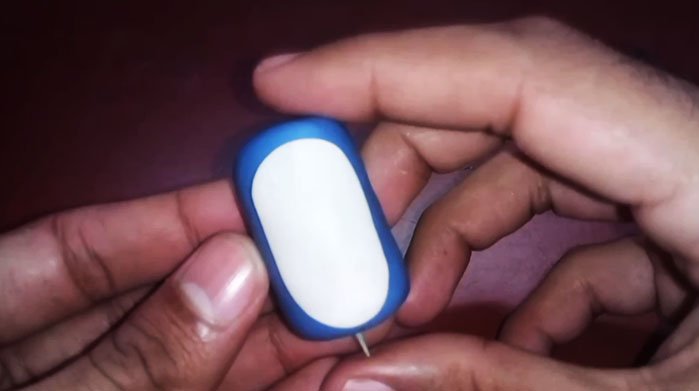
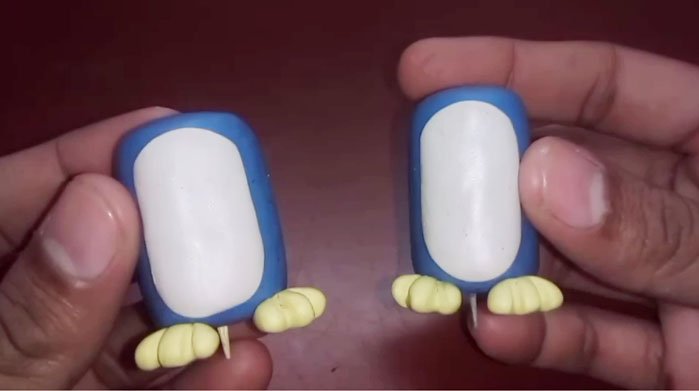
The penguins have a white part in front, so to make it I used plasticine of that color and flattened it to make an elongated tortilla, as shown in the image below. It should be noted that in the video you can see the molding process.
Los pingüinos tienen una parte blanca al frente, así que para hacerla usé plastilina de ese color y la aplasté hasta hacer una tortilla alargada, tal como se muestra en la imagen de abajo. Cabe destacar que en el video se aprecia el proceso de moldeado.
Once I made that white area of the chest, I proceeded with the penguin legs. To make them, I molded a triangle and then made three small lines with the help of a toothpick.
Once I made the four legs, I placed them on the bottom of each penguin, keeping enough separation between each leg.
Una vez que hice esa área blanca del pecho, procedí con las patas de los pingüinos. Para hacerlas, moldeé un triángulo y luego hice tres pequeñas líneas con ayuda de un palillo.
Una vez que hice las cuatro patas, las coloqué en la parte inferior de cada pinguino, guardando suficiente separación entre cada pata.
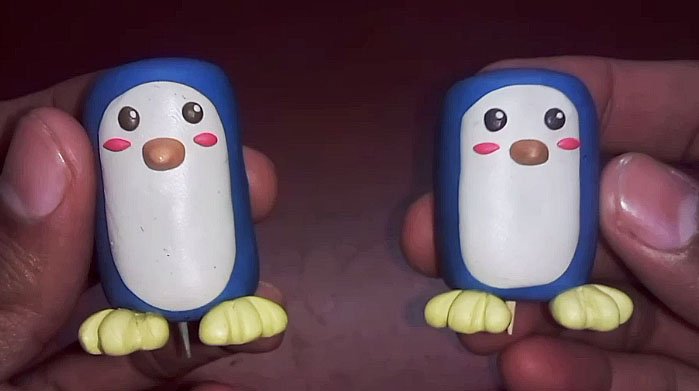
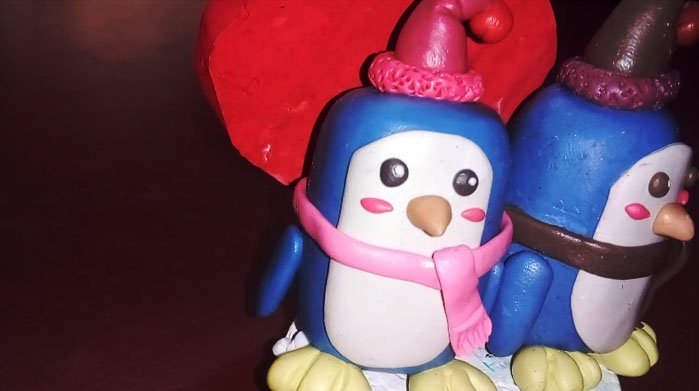
Finally, I made their faces. I made them with quite simple but adorable faces. Little black eyes, an orange beak and a couple of pink lines to simulate blushing. Again, the process can be seen in better detail in the video.
Para finalizar les hice el rostro. Los hice con rostros bastante sencillos pero adorables. Pequeños ojos negros, un pico naranja y un par de líneas rosadas para simular rubor. Nuevamente, el proceso se aprecia con mejor detalle en el video.
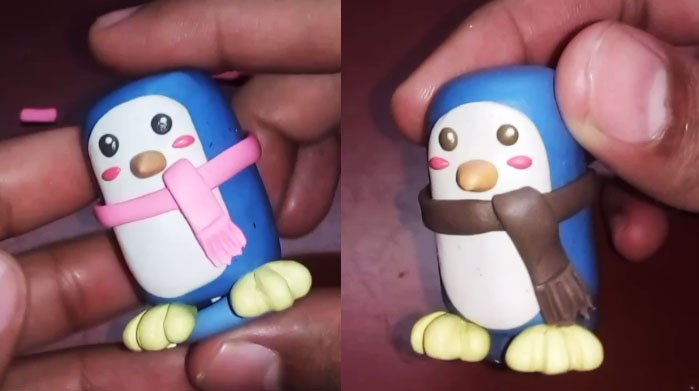
As accessories, these penguins wear a scarf and a beanie. I made the scarves in different colors for each penguin, a pink scarf for the female penguin and a brown scarf for the male penguin.
I also placed the flippers, which I made with two strips of plasticine that I flattened, then I gave them a triangular shape at one end and a rounded shape at the other.
Below you can see how each one looked with their scarves:
Como accesorios, estos pingüinos llevan una bufanda y un gorrito. Las bufandas las hice de distintos colores para cada pinguino, una bufanda rosa para la pingüino hembra y una marrón para el pingüinos macho.
También les coloqué las aletas, las cuales hice con dos tiras de plastilina que aplasté, luego les di forma triangular en uno de los extremos y redondeada en el otro.
A continuación pueden ver cómo quedó cada uno con sus bufandas:
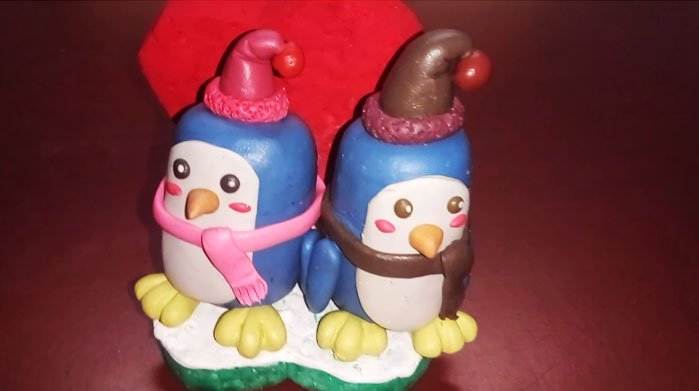
And with their beanies:
Y con sus gorritos:
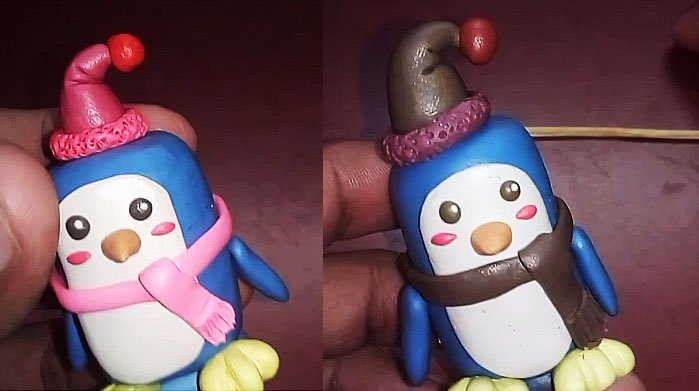
I should mention that it is not necessary to place the caps in the exact center of the penguins' heads, they can be placed on their sides or wherever they like. It is not necessary to be exact in this work.
On the other hand, I placed the base in the shape of a chair. However, I covered the white part with white paint to simulate snow, since the penguins are in snow, so that's why I painted it.
It should be noted that I joined them together with wooden sticks and glue.
Debo mencionar que no es necesario colocar los gorritos en el centro exacto de la cabeza de los pingüinos, pueden colocarse ladeados o donde mejor les parezca. No hay que ser exactos en este trabajo.
Por otra parte, la base las coloqué con forma de silla. Sin embargo, la parte blanca la cubrí con pintura blanca para simular nieve, ya que los pingüinos estan en nieve así que por eso la pinté.
Cabe destacar que las uni con palillos de madera y pegamento.
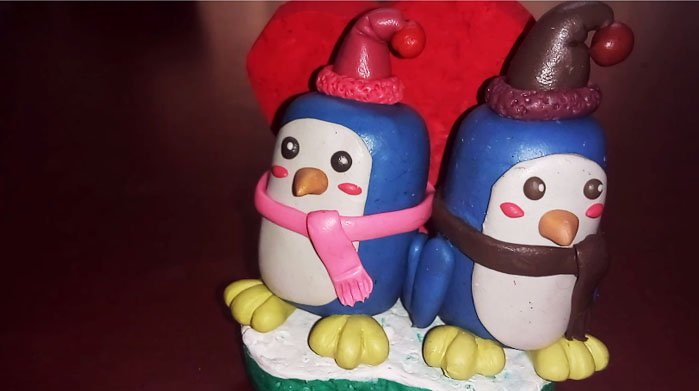
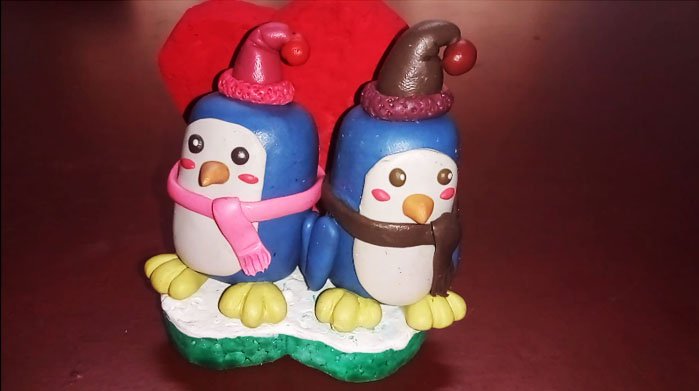
Once this base was ready, I placed each penguin in its place. One next to the other, with their hands together, as if they were holding hands.
Below you can see a series of pictures of the final result:
Una vez lista esta base, coloqué cada pingüino en su lugar. Uno al lado del otro, con las manos juntas, como si estuviesen tomándose de la mano.
A continuación pueden ver una serie de fotografías del resultado final:
Traducido con DeepL
Maintenance and New Mouse
Express Lunch
WE 85 - Photography
La verdad es que eres muy talentoso y creativo @gaboamc2393.
@discovery 25
Hola! Me alegra que te haya gustado el tutorial, muchas gracias por ver el video y comentar!
Que adorables, querido! ains me encantaría aprender hacer estas cositas <3 un día me pongo con paciencia viendo tus tutoriales hermosos.
Siii eso sería genial. Si llegas a hacer algo me etiquetas. Me encantaría verlo! Saluditos, muchas gracias por pasar por mi post <3
Hola @gaboamc2393 soy fan de los pinguinos je je je te quedaron hermosos....
Ah que bueno entonces este tutorial seguro te gustó mucho jeje quise hacerlos con un toque sencillo pero tierno. Gracias por comentar.
The rewards earned on this comment will go directly to the person sharing the post on Twitter as long as they are registered with @poshtoken. Sign up at https://hiveposh.com.
Grande Gabo, todo un artista Bro.
Saludos hermano muchas gracias por tu comentario y el apoyo, lo aprecio.
Siempre tan impecable tu trabajo 👏👏👏👏.
Pero deberías venderlos je,je,je... Seguro te encargarán muchos 🤭.
Hola estimada que bueno verla por acá, que gusto que te hayan gustado los pinguinos jejeje cuando te animes a hacer algo así, ya sabes qué etiqueta buscar jejeje saluditos.
Que cositas mas tiernas y hermosas esos pingüinos @gaboamc2393, espero no sean cono los tremendos de Madagascar, jajaja, me encanta saber que continuas con esta labor tuya de dar clases virtuales, eso dice mucho de ti y creo que estos si me atrevería a hacerlos, por otro lado si mas no recuerdo me dijiste que habías representado a tus michis, si subiste es publicación me la perdí.
Me encanta ver que has tenido el éxito que mereces dentro de la plataforma sabia que llegaras lejos y cada vez lo haras mejor un abrazo.
Hola cristina un gusto leer este comentario tan bonito.
En respuesta a lo que comentas de mis michis, una vez hice una de ellas, aquí está el post para que me des un vistazo jejeje
https://peakd.com/hive-130560/@gaboamc2393/learn-with-gabo-5
wau @gaboamc2393 me enamoro esa publicación, me encanto, quedo bellísima, ¡quiero de mis bebes!
Eres bienvenida a hacerme un reto en Challenge to Gabo, busca el último post y deja el reto, mira aquí estan todos los post de ese tópico:
https://peakd.com/created/challengetogabo
Excelente trabajo hermano, cuanta creatividad.
Hola gracias por pasarte a ver el video y comentar.
Demasiado genial tu arte, me encantó el paso a paso, muy chévere ya me imagino haciendo las pestañas a la pinguinita 😄 super ideal para hacer con los chamos.
Hola amiga muchas gracias por su valoración. Si, ciertamente es genial para poner a los niños a trabajar su creatividad. Estos trabajos son relativamente sencillos pero para los niños estimulan mucho su cerebro y sus habilidades motrices con las manos.
That's really really very wonderful man. You are so creative and talented
Hey thanks man, i really appreciated you comment!
hola amigo, te quedaron genial estos muñecos, felicitaciones y excelente amigo, saludos
Saludos david, muchas gracias por pasar a leer y comentar.
esta demás decir lo fabuloso que le quedo todo.
haces que se vea tan fácil,pero se necesita habilidad y practica.
un abrazo.
Saludos estimada. Ciertamente se requiere cierta técnica pero si se sigue el paso a paso se pueden lograr las cosas jeje muchas gracias por pasarte por mi post