Hola, creativos de Hive! El día de hoy les traigo un tutorial después de mucho tiempo, en el cual les mostraré cómo logré hacer un lindo pozo usando principalmente palitos de madera o baja lenguas, como ustedes le digan. Aquí abajo les dejaré como siempre el paso a paso detallado de como se hace y por supuesto todo lo que van a necesitar para ello.
Hello, Hive creatives! Today I bring you a tutorial after a long time, in which I will show you how I managed to make a nice well using mainly wooden sticks or tongue depressors, as you call it. Here below I will leave you as always the detailed step by step of how it is done and of course everything you will need for it.

Primero les diré los materiales que necesitaremos:
- Papel craft
- palitos de madera
- palillos de madera grandes (los que se utilizar para las brochetas)
- palillos de madera pequeños
- silicona líquida o en barra
- un tubo de cartón
- una tapa de salsa
- un trozo de lana
First I will tell you the materials we will need:
- Craft paper
- Wooden sticks
- large wooden sticks (the ones used for the skewers)
- small wooden sticks
- liquid or stick silicone
- a cardboard tube
- a sauce lid
- a piece of wool
Lo primero que haremos será la base. Esta la haremos con palitos de madera y los pegaremos uno después de otro con silicona de esta forma:
The first thing we will do is the base. We will make it with wooden sticks and glue them one after the other with silicone in this way:

Para mayor soporte, yo recomendaría que las pegaran encima de papel craft, ya que así no se separaran.
For added support, I would recommend gluing them on top of craft paper so that they do not separate.
Luego de eso, le pegamos otros palitos a cada lado de esta manera:
After that, we glue other sticks on each side like this:

Como ya tenemos una base, el siguiente paso consiste en hacer el pozo en si. Para esto necesitaremos un tubo de cartón o también si tienen un objeto cilíndrico a la mano, lo pueden usar.
Since we already have a base, the next step is to make the well itself. For this we will need a cardboard tube or if you have a cylindrical object at hand, you can use it.

Vamos a pegar palitos al rededor del cilindro el cual nos servirá como un soporte.
We are going to glue sticks around the cylinder which will serve as a support.

Y listo, así quedaría el pozo en sí.
And that's it, that's how the well itself would look like.
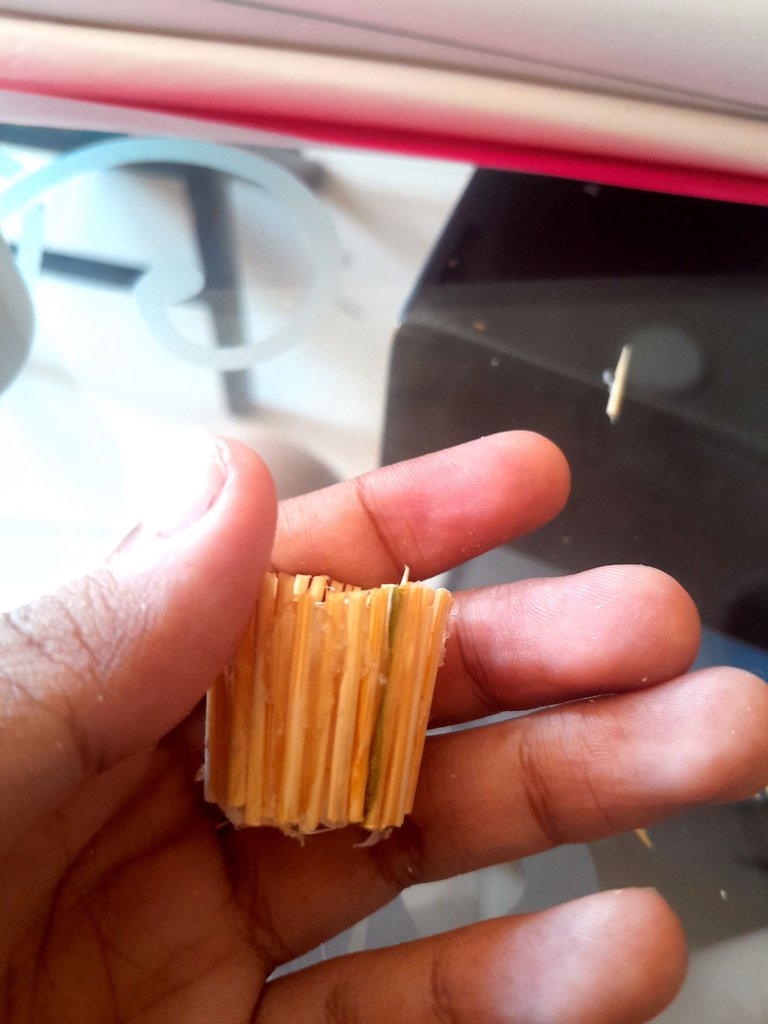
Ahora, haremos el balde o recogedor de agua. Para este, necesitaremos una tapa de salsas (ya que se debe usar algo pequeño) y los palillos
Now, we will make the bucket or water catcher. For this one, we will need a sauce lid (since it must be small) and the skewer sticks.

Pegaremos los palillos uno al lado de otro de esta manera:
We will glue the toothpicks side by side in this way:

Ahora viene el techo, la cual seria la parte más demorada de todo. Para ello necesitamos las tiras de cartón, los palillos grandes y más palitos de madera.
Now comes the roof, which would be the most time-consuming part of all. For this we need the cardboard strips, the big sticks and more wooden sticks.
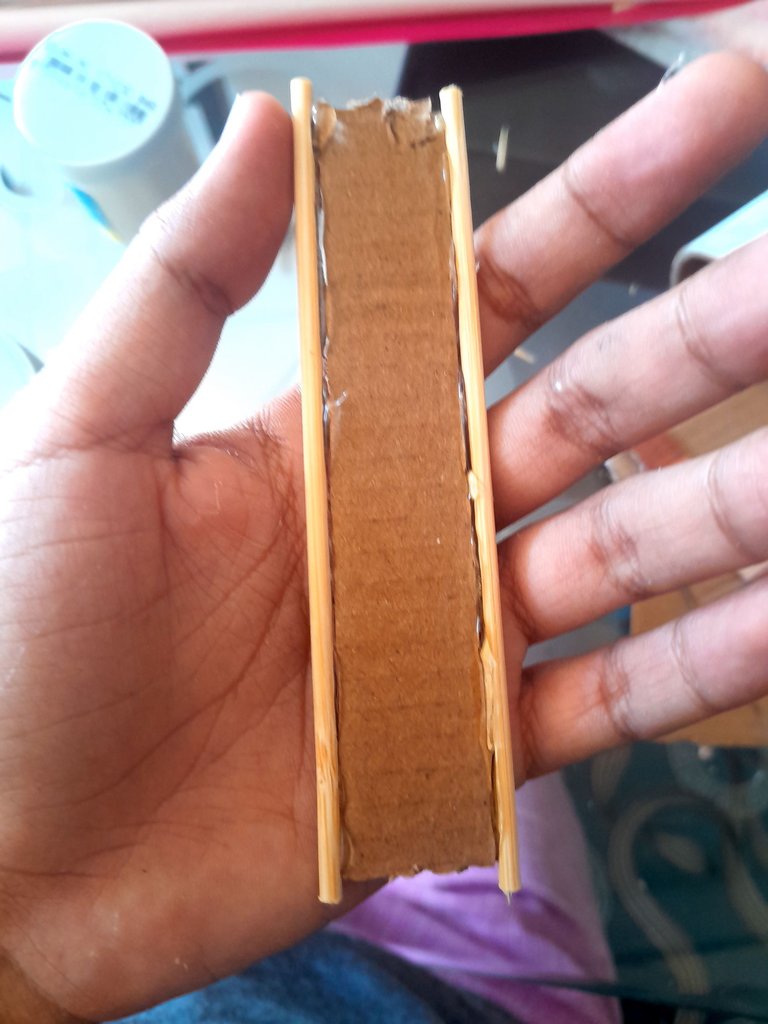
Lo primero que haremos será recortar una tira delgada de cartón y a cada lado pegar los palillos de brochetas, asi:
The first thing we will do is cut a thin strip of cardboard and glue the skewer sticks on each side, like this:

Luego pegaremos una tira de cartón más gruesas a cada lado, justo así:
Then we will glue a thicker strip of cardboard on each side, just like this:

Pegaremos palitos de madera por encima del cartón y en la superficie del techo pegaremos varios palillos de brochetas hasta cubrir toda esa zona.
We will glue wooden sticks on top of the cardboard and on the surface of the ceiling we will glue several skewers until the whole area is covered.

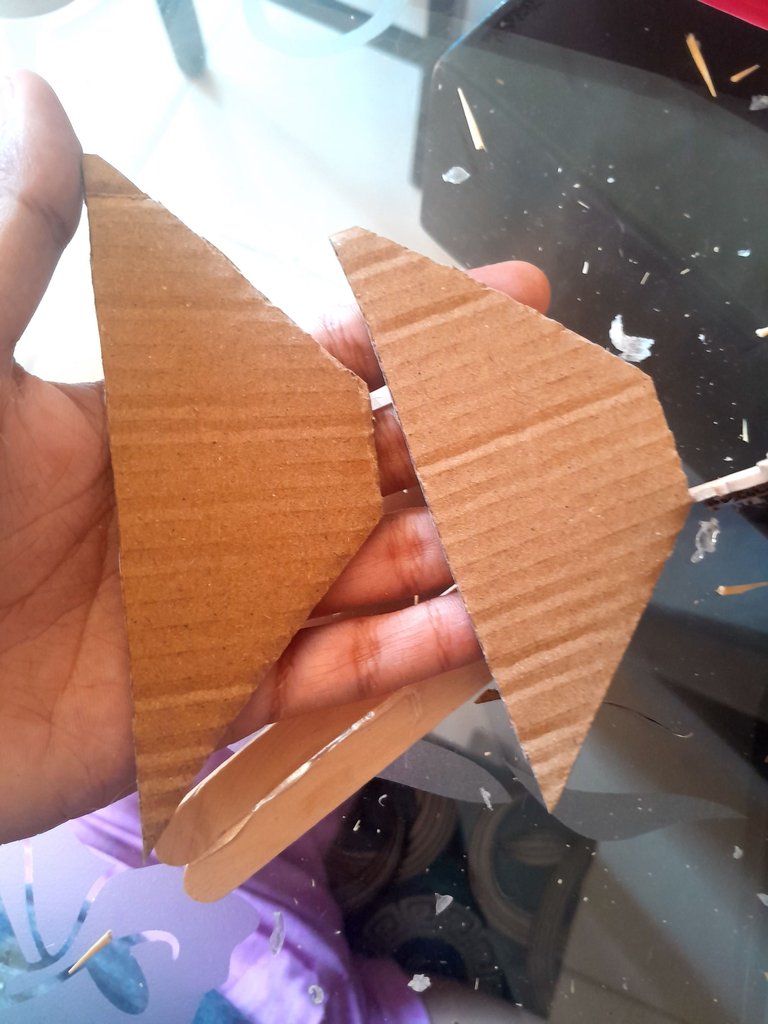
Por último, recortaremos unos triángulos con el cartón sobrante
Finally, we will cut out some triangles with the leftover cardboard.

Los pegamos a cada lado y listo! Ya tenemos nuestro techo terminado.
We glue them on each side and that's it! Now we have our roof finished.

Llegó la hora de unir el techo con el pozo y para eso usaremos más palillos grandes de brochetas. La idea es pegarlos a cada lado del pozo y posteriormente en la parte de abajo del techo.
No se nos puede olvidar el recogedor que hicimos y para ello, recortaremos un pedazo de palillo el cual pegaremos horizontalmente unos centímetros por encima del pozo.
Now it's time to join the roof to the well and for that we will use more large skewers. The idea is to glue them on each side of the well and then on the underside of the roof.
We cannot forget the dustpan we made and for this, we will cut out a piece of toothpick which we will glue horizontally a few centimeters above the well.

Por último, pero no menos importante, con el trozo de lana o pita qué tengamos lo atamos al palito como se vio en la imagen y listo, así nos quedaría el pozo completo.
A mi en lo personal me gustó mucho el resultado, no es un proceso fácil, pero vale mucho la pena. Yo lo hice para el pesebre de mi madre, pero serviría perfectamente para decorar cualquier espacio.
Last but not least, with the piece of wool or pita that we have we tie it to the stick as shown in the picture and ready, so we would have the complete well.
Personally I really liked the result, it is not an easy process, but it is worth it. I did it for my mother's nativity scene, but it would be perfect to decorate any space.
Thanks for reading and watching.
Es muy creativo, se ve bien 😉
Graciass
Esta realmente muy bonito y adorable, me encanto el resultado final 😍
Muchas gracias ❤️
Te quedó muy bonito, parece de historia de fantasía.
Siii... Gracias ✨️❤️
Me encanta el resultado. Es tan hermoso.
Graciassss ✨️✨️
de nada 🥰