

Hello, beautiful and creative people of #HiveDIY, I hope you are having a beautiful Thursday. Today I bring you a super simple tutorial, that doesn't require a lot of materials and can be given as a gift to whoever you want, be it a girl, a teenager or an adult. I wanted to publish this tutorial yesterday, but I had several inconveniences, I was sick to my stomach and every now and then they took away the light. I came up with this project for you enterprising people to learn and make these hair clips and sell them, it is very easy to do, so take your needles and read the step by step.
Holaaaa gente preciosa y creativa de #HiveDIY, espero estén teniendo un hermoso día jueves. Hoy les traigo un tutorial supersencillo, que no se lleva muchos materiales y sirve para que lo regales a quien más quieras, sea niña, adolescente o adulta. Este tutorial quise publicarlo ayer, pero tuve varios inconvenientes, estuve enferma del estómago y a cada rato me quitaban la luz. Se me ocurrió este proyecto para que ustedes personas emprendedoras aprendan y hagan estos clips para el cabello y los vendan, es muy fácil de hacer, así que toma tus agujas y sigue leyendo el paso a paso.

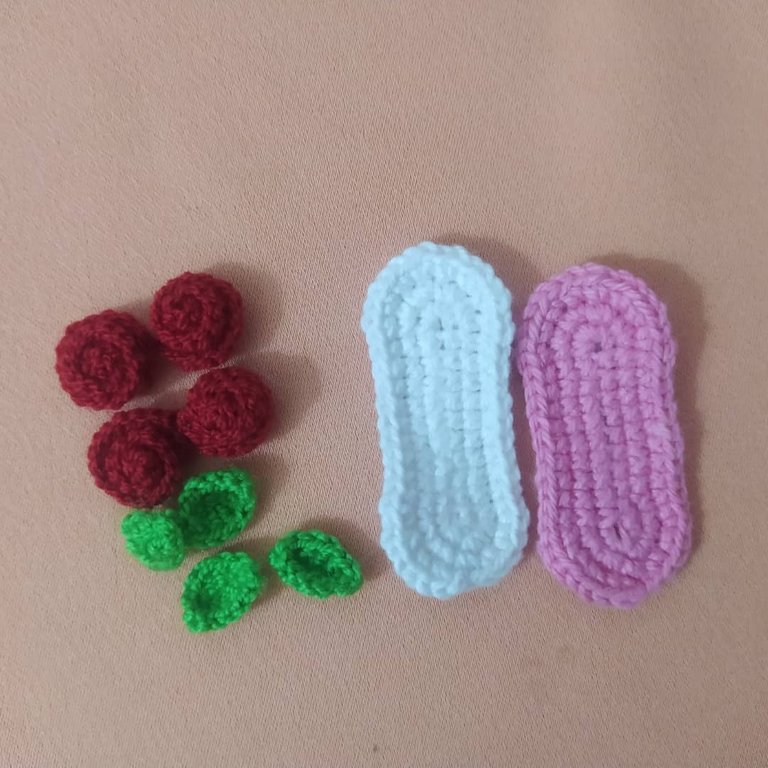
- Pabilo yarn: white, pink.
- Crochet thread: green and red.
- Crochet needle #1 and #2.
- A small piece of white felt.
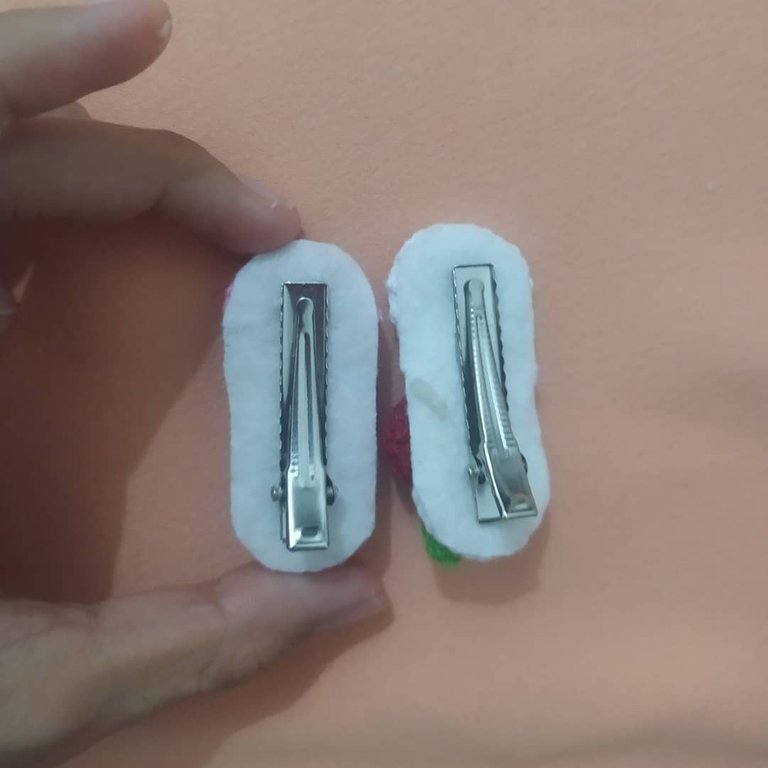
- 2 hair clips.
- Liquid silicone.
- Hilo pábilo: blanco, rosa.
- Hilo crochet: verde y rojo.
- Aguja de crochet #1 y #2.
- Un pequeño trozo de fieltro blanco.
- 2 pinzas para el cabello.
- Silicón líquido.


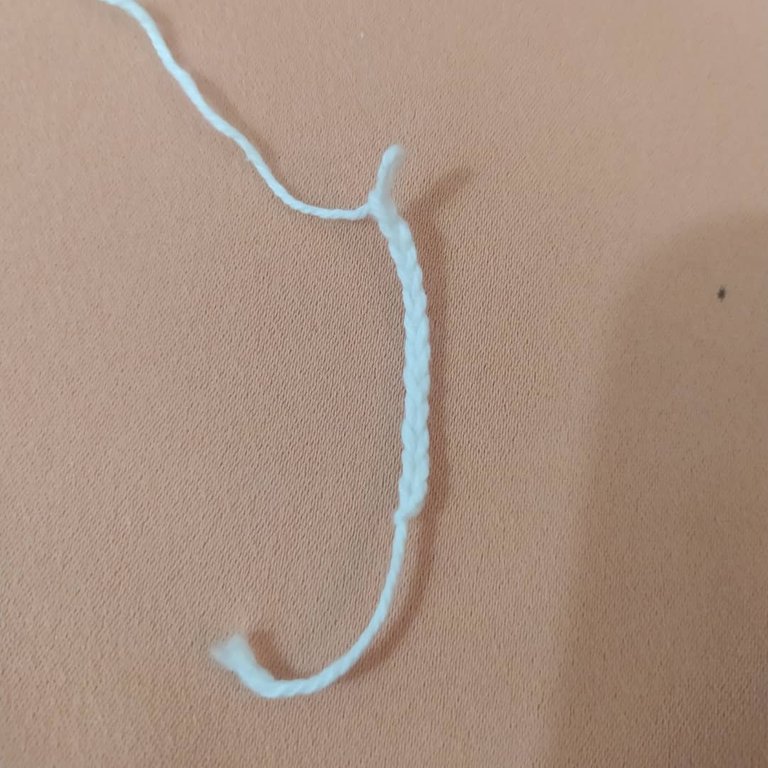
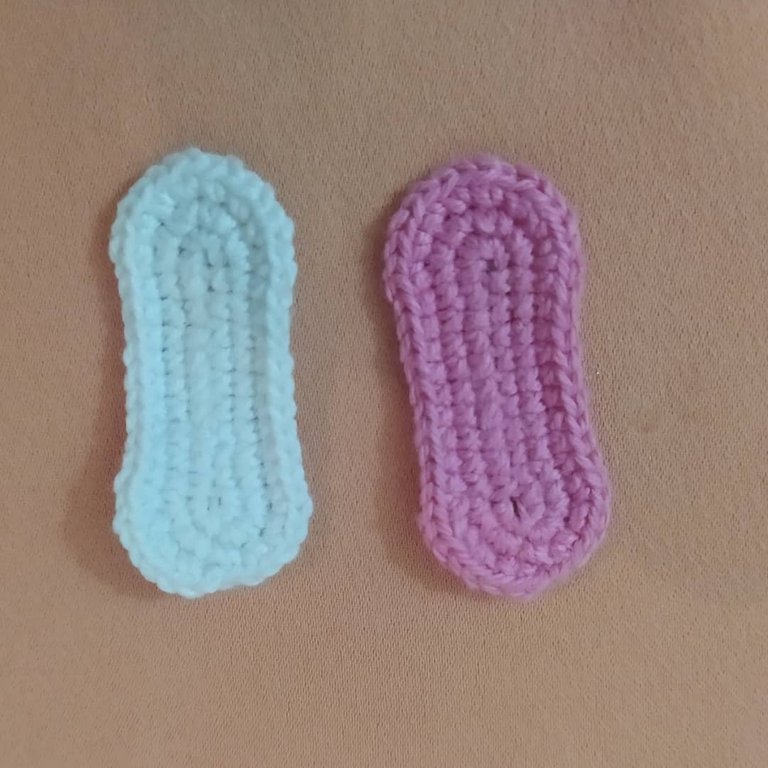
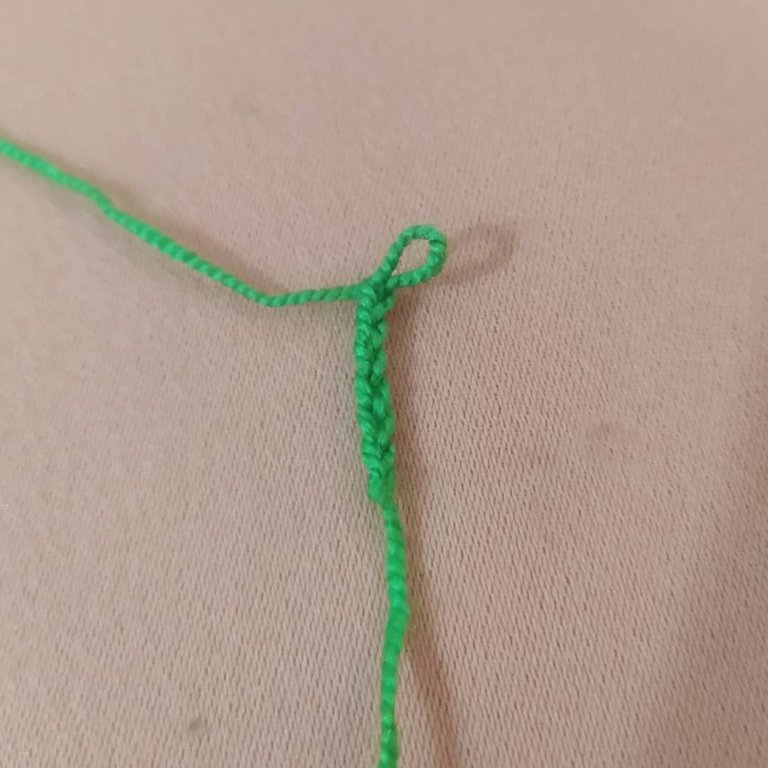
- We take the white pablum yarn and needle #1.
- Round 1: We start by making 12 chains, in the second stitch we make a single crochet increase, 9 single crochets, 2 increases, 9 single crochets and 1 increase.
- Tomamos el hilo pábilo blanco y la aguja #1.
- Ronda 1: Comenzamos haciendo 12 cadenas, en el segundo punto hacemos un aumento de punto bajo, 9 puntos bajos, 2 aumentos, 9 puntos bajos y un aumento.
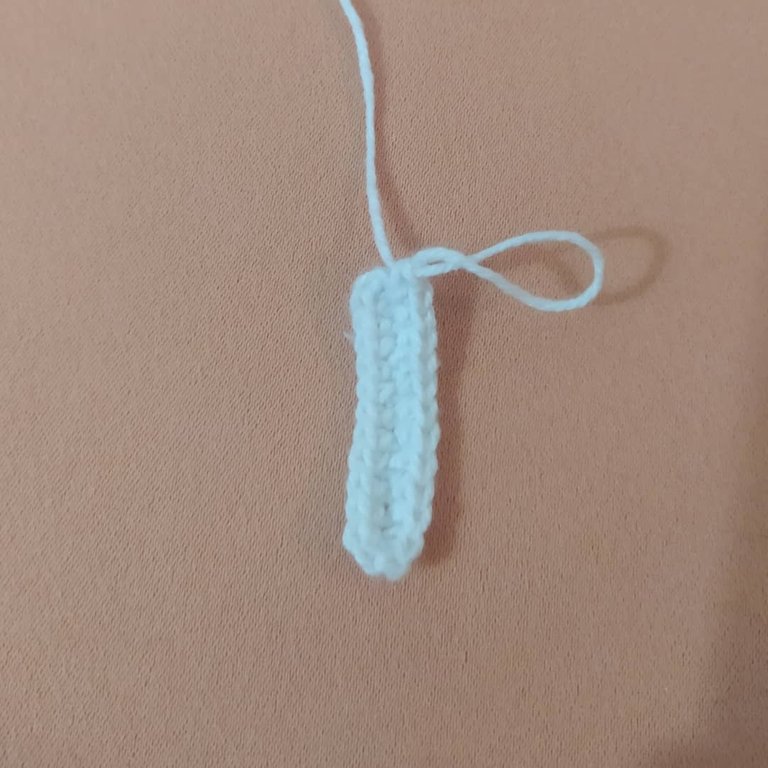
- Round 2: 2 increases, 9 single crochets, 4 increases, 9 single crochets, 2 increases.
- Round 3: 4 increases, 9 single crochets, 8 increases, 9 single crochets, 4 increases, close with a single crochet, cut yarn and stash.
- Ronda 2: 2 aumentos, 9 puntos bajos, 4 aumentos, 9 puntos bajos, 2 aumentos.
- Ronda 3: 4 aumentos, 9 puntos bajos, 8 aumentos, 9 puntos bajos, 4 aumentos, cerramos con un punto raso, cortamos hebra y escondemos.
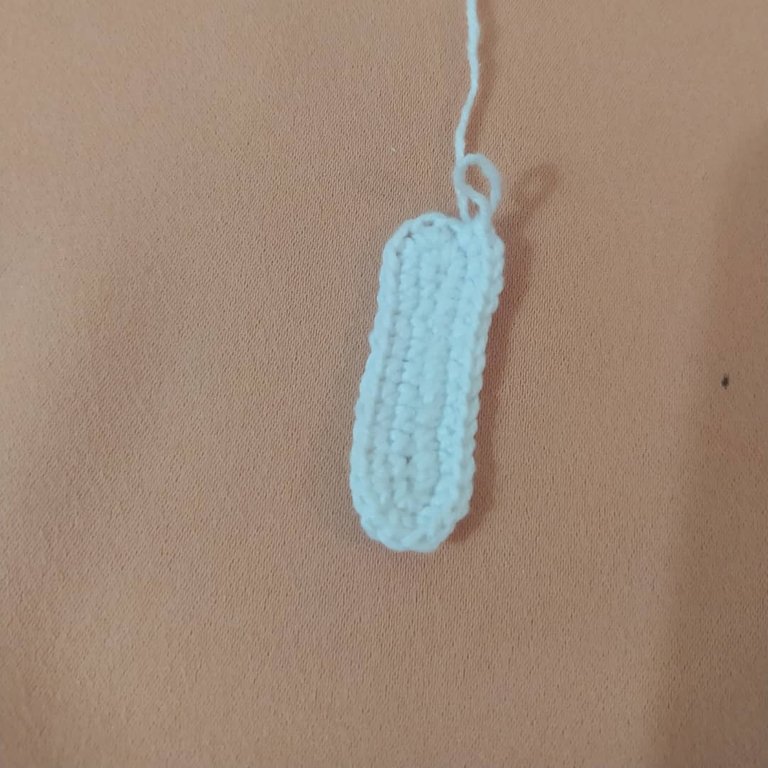
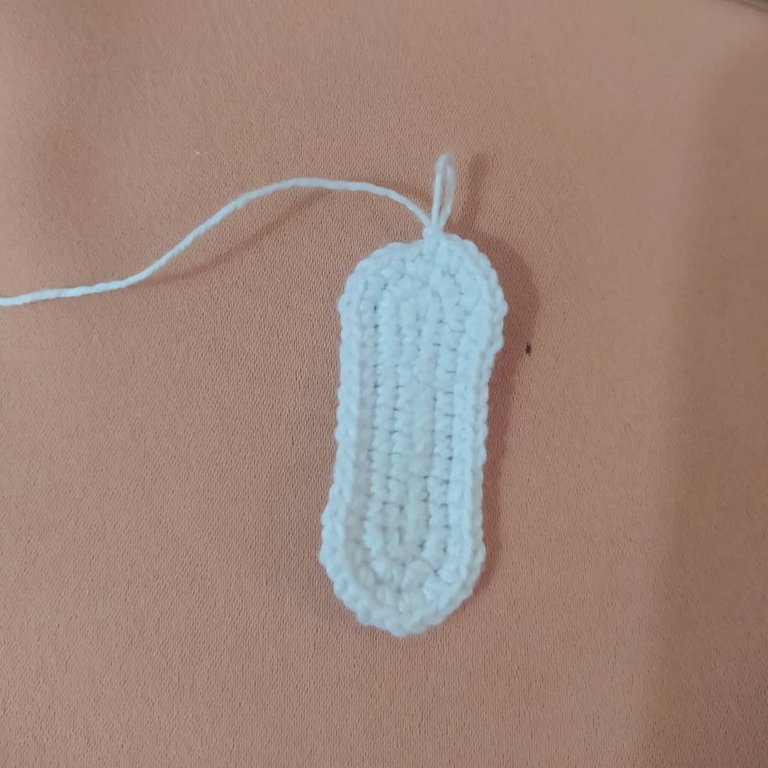
- Repeat the same process with the pink pábilo thread.
- Repetimos el mismo proceso con el hilo pábilo color rosa.
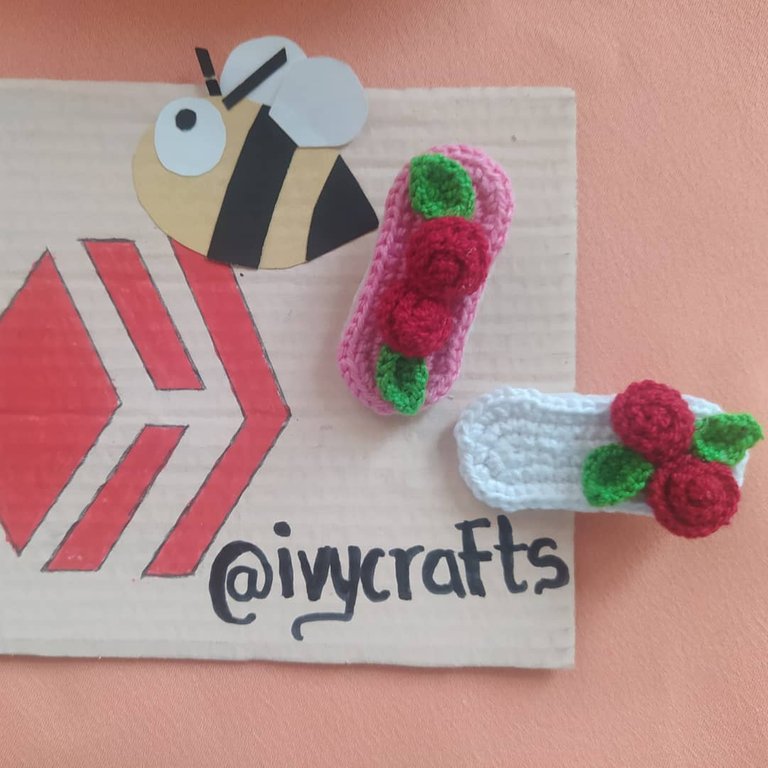
Rose/Rosa:
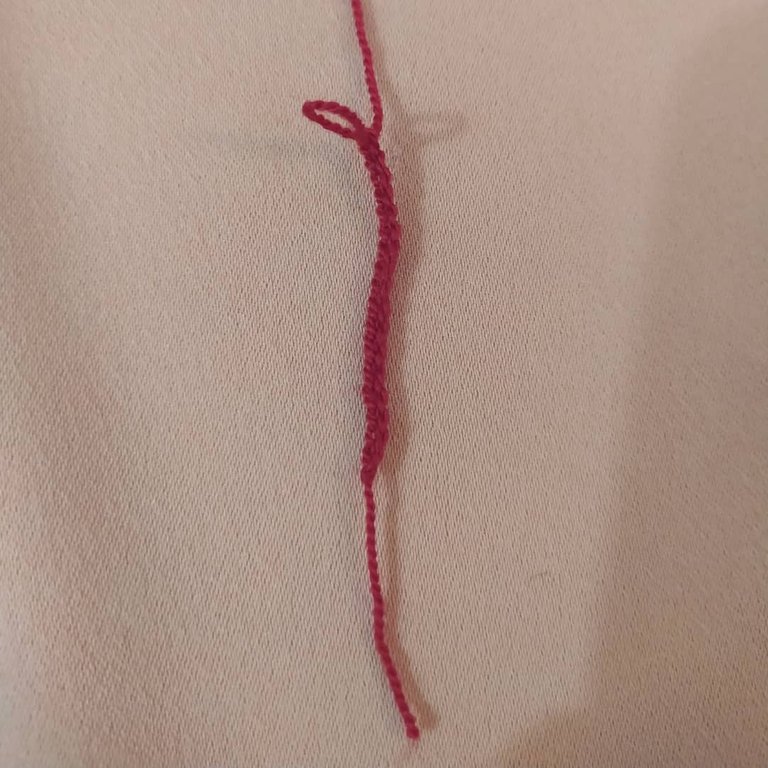
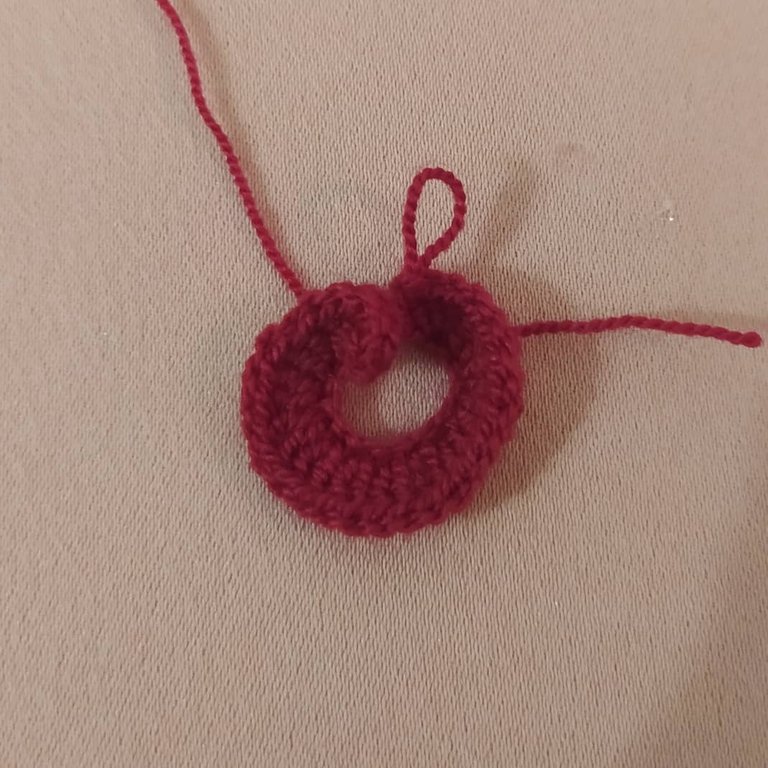
Red crochet thread needle #2.
- We start by making 17 chains, in the third chain we make a single crochet, in the next chain we make a half double crochet and a single crochet, (2 double crochets in each stitch)x12 times, and in the last chain we make 4 double crochet stitches.
- We leave the yarn long, and with the wool needle we roll up and sew.
Hilo crochet color rojo aguja #2.
- Iniciamos haciendo 17 cadenas, en la tercera cadena hacemos un punto bajo, en la siguiente cadena hacemos un medio punto alto y un punto alto, (2 puntos altos en cada punto)x12 veces, y en el último punto haremos 4 puntos altos.
- Dejamos hebra larga, y con la aguja lanera vamos enrollando y cosiendo.
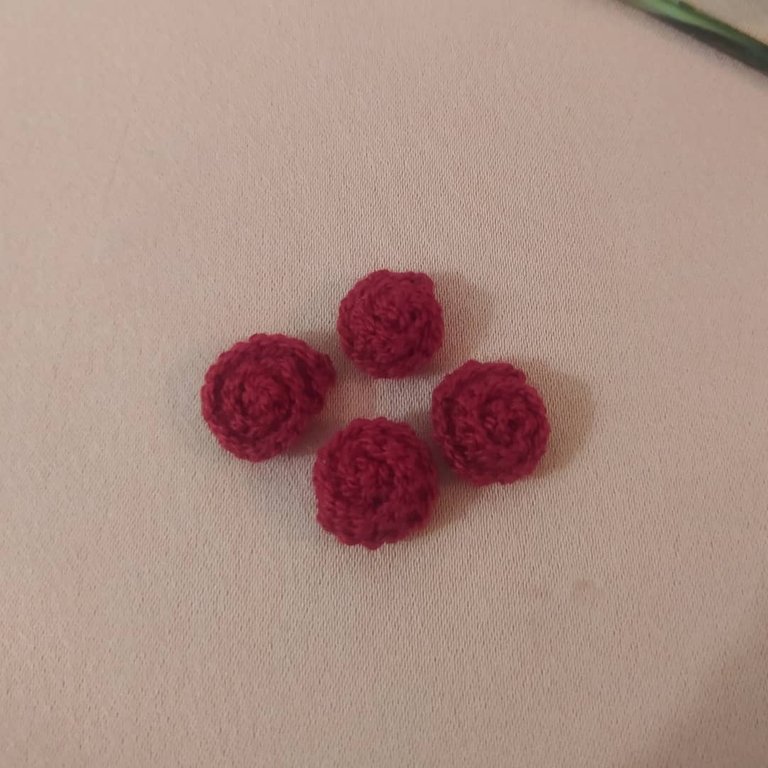
- Repeat the above process until 4 flowers are obtained.
- Repetimos el proceso anterior hasta obtener 4 flores.
Leaves/Hojas:
Green crochet thread needle #2.
- We make 6 chains.
- In the second chain make 1 single crochet, in the next chain 1 medium high stitch, in the next 1 high stitch, in the next 1 half high stitch, in the last chain make 3 low stitches, then make 1 medium high stitch, 1 high stitch, 1 medium high stitch, 1 low stitch, close with single crochet, cut and hide yarn.
- Repeat until we have 4 leaves.
Hilo crochet de color verde aguja #2.
- Hacemos 6 cadenas.
- En la segunda cadena hacemos 1 punto bajo, en la siguiente cadena 1 punto medio alto, en la siguiente 1 punto alto, en la siguiente 1 medio punto alto, en la última cadena hacemos 3 puntos bajos, luego hacemos 1 punto medio alto, 1 punto alto, 1 punto medio alto, 1 punto bajo, cerramos con punto raso, cortamos y escondemos hebra.
- Repetimos hasta que tengamos 4 hojas.

- Here we have each part. We cut 2 pieces of felt as follows.
- Acá tenemos cada parte. Cortamos 2 trozos de fieltro de la siguiente manera.
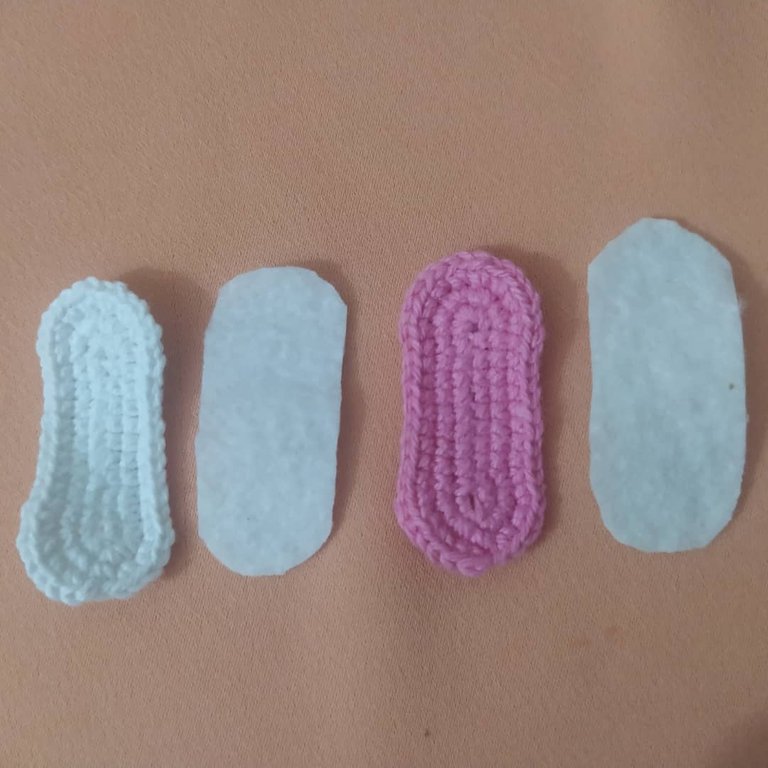
- We glue with liquid silicone each flower and leaves in the shapes we want, we glue the felt to the back and the clip.
- Pegamos con silicón líquido cada flor y hojas de las formas que queramos, le pegamos el fieltro a la parte de atrás y el clip.
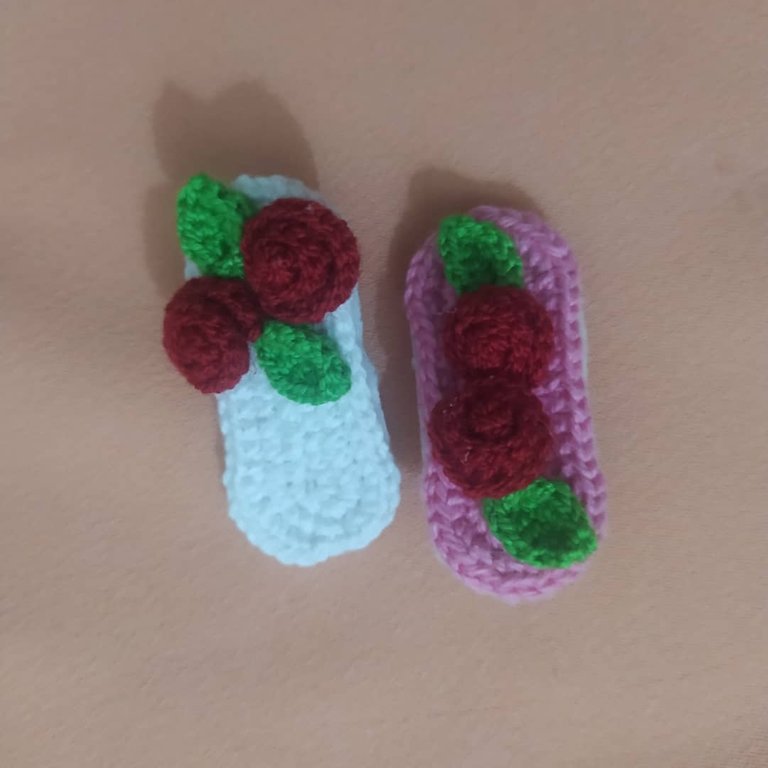
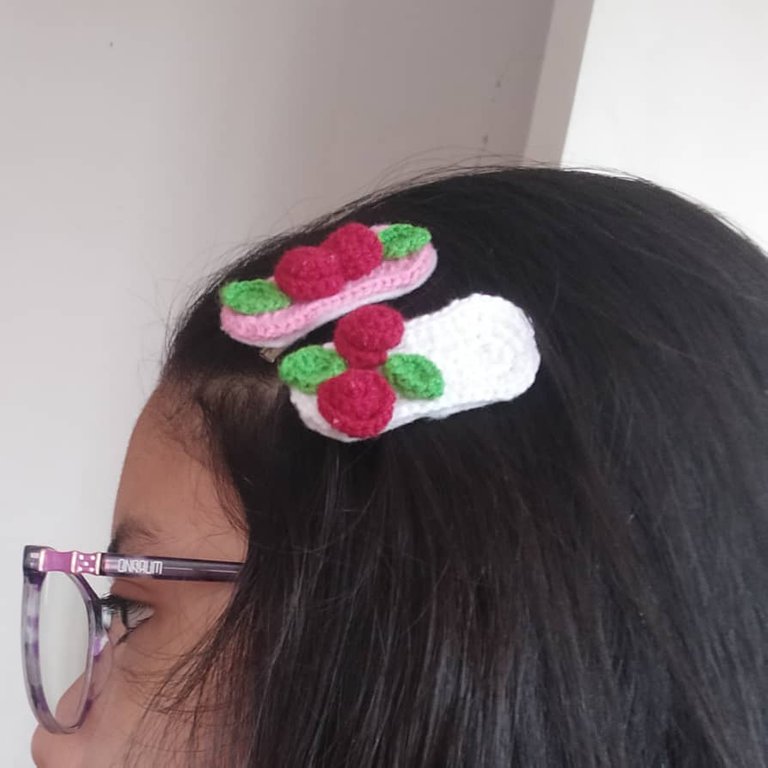
- And that's it, this is how our hair clips turned out, so that even the princesses of the house can use them. I hope you liked my tutorial and I encourage you to do it. Good luck in your sales entrepreneur friends ✨ Have a nice day ✨.
- Y listo, así quedaron nuestros clips para el cabello, para que los usen hasta las princesas de las casas. Espero les haya gustado mi tutorial y se animen a hacerlo. Suerte en sus ventas amigos emprendedores ✨ Tengan un hermoso día.✨
You have reached the end of my post. Thanks for reading me❤️ Have a nice day 😊❤️ If you need help do not hesitate to write me on my Discord Ivycrafts#0396.❤️
Has llegado al final de mi publicación. Gracias por leerme❤️ Ten un lindo día 😊❤️ Si necesitas ayuda no dudes en escribirme a mi Discord Ivycrafts#0396.❤️
Text and photos are my authorship. Text translated with DeepL. Photos taken with my Xiaomi Redmi 8. Text separator with Canva Pro.
Texto y fotos son de mi autoría. Texto traducido con DeepL. Fotos sacadas con mi Xiaomi Redmi 8. Separador de texto creado con Canva Pro.


Quedo muy lindo amiga , se me hace muy difícil hacer eso mi mamá hace de todo le encanta las manualidades pero yo no tanto jeje espero aprender,saludos y éxitos .
The rewards earned on this comment will go directly to the person sharing the post on Twitter as long as they are registered with @poshtoken. Sign up at https://hiveposh.com.
Te quedó hermoso... gracias por compartir.
🎇🎆💐❤️🌹🥀🌺🌷💛🌸💮🏵️🌻🌼🍂🍁🍄🌾🌱🌿🌿🍃💙☘️🍀💜🪴🌵🌵🤍🌴🌳🌲☀️⭐🌟💫✨🌙🌠🌌🌍🐞🦋🎇🎆
Thank you for sharing this amazing post on HIVE!
Your content got selected by our fellow curator @stevenson7 & you just received a little thank you via an upvote from our non-profit curation initiative!
You will be featured in one of our recurring curation compilations and on our pinterest boards! Both are aiming to offer you a stage to widen your audience within and outside of the DIY scene of hive.
Join the official DIYHub community on HIVE and show us more of your amazing work and feel free to connect with us and other DIYers via our discord server: https://discord.gg/mY5uCfQ !
If you want to support our goal to motivate other DIY/art/music/homesteading/... creators just delegate to us and earn 100% of your curation rewards!
Stay creative & hive on!