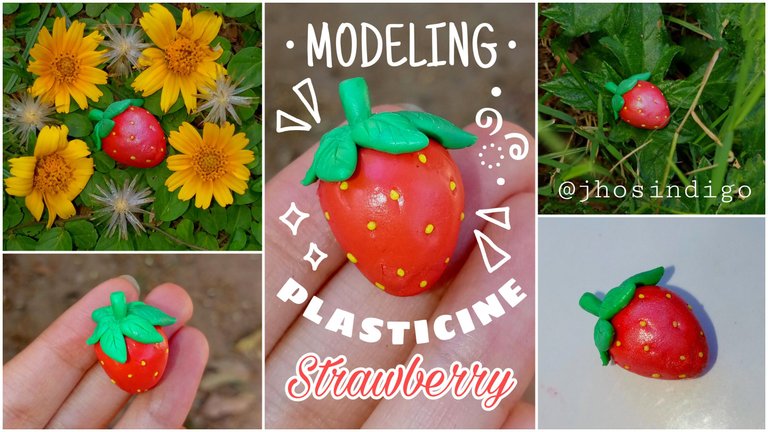
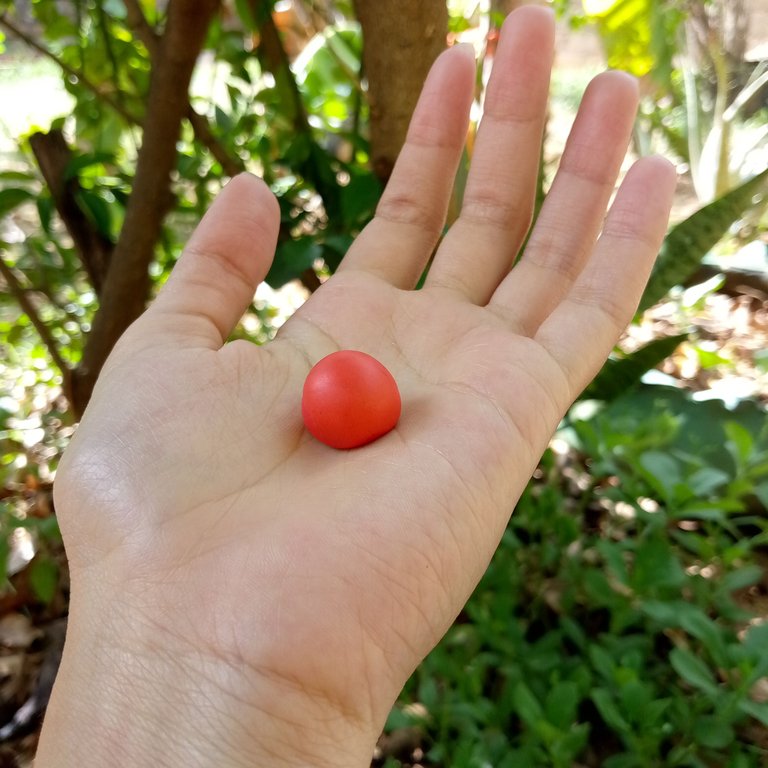
Hola chicosss 💙✨🍁, ¿qué tal están? Hoy volví con más fresas. Ustedes a lo mejor se preguntarán porqué tantas fresas últimamente? La verdad no hay un motivo, sólo digamos que últimamente tengo una fijación con su estética y eso me ha llevado a recrearlas de múltiples maneras.
Hey everyone, how are you doing? Today I’m back with more strawberries! You might be wondering, why so many strawberries lately? Honestly, there isn’t a real reason—I’ve just been fixated on their aesthetic lately, and that has led me to recreate them in multiple ways.
🍓✨ En realidad ya yo había hecho fresitas con masa moldeable hace al rededor de dos años, pero nunca hice un paso a paso de cómo las hice por lo que sentí que había perdido mí oportunidad de compartirlas con ustedes... En su momento la hice para una persona a la que amo mucho, y creo que estaba tan ilusionada que no quise matar mí pasión y mi concentración tomando fotos (se me hace muy incómodo).
I actually made clay strawberries about two years ago, but I never created a step-by-step guide on how I did it, so I felt like I had lost my chance to share them with you. At the time, I made them for someone I love very much, and I think I was so excited that I didn’t want to break my passion and concentration by taking pictures (I find it uncomfortable).
En fin. Siempre me ha gustado hacer cosas en plasticina y hoy por fin lo puedo compartir con ustedes, así que estoy muy feliz por eso (人 •͈ᴗ•͈)
Anyway, I’ve always loved making things out of modeling clay, and today I can finally share that with you, so I’m very happy about it! (人 •ᴗ•)
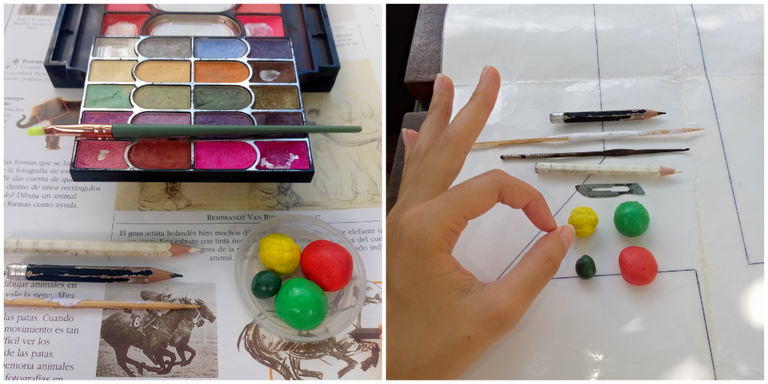
Para esta fresita necesitaremos los siguientes ingredientes, digo, materiales:
For this little strawberry, we will need the following ingredients—or rather, materials:
🍃 ❀ 𝙼𝙰𝚃𝙴𝚁𝙸𝙰𝙻𝙴𝚂 ❀ 🍓 ❀ 𝙼𝙰𝚃𝙴𝚁𝙸𝙰𝙻𝚂 ❀ 🍃
- Plasticina: Roja, Verde y Amarilla ❤️💚💛
- Objetos con punta: opciones: Lápiz/bolígrafo/color/aguja de tejer/mondadientes. ✏️🖊️🖍️🥢
- Pincel suave. 🖌️
- Sombra de ojos satinada: Blanca/beige/rosa y verde. 🤍💗💚
- Bisturí/cuchillo/cutter 🔪
- Superficie impermeable. ☂️
- Modeling clay: Red, Green, and Yellow ❤️💚💛
- Pointed objects: Pencil/pen/crayon/knitting needle/toothpick ✏️🖊️🖍️🥢
- Soft brush 🖌️
- Satin eyeshadow: White/beige/pink and green 🤍💗💚
- Scalpel/knife/cutter 🔪
- Waterproof surface ☂️
᯽𝑷𝑹𝑶𝑪𝑬𝑫𝑰𝑴𝑰𝑬𝑵𝑻𝑶᯽ 🤲 ᯽ 𝑷𝑹𝑶𝑪𝑬𝑫𝑼𝑹𝑬 ᯽
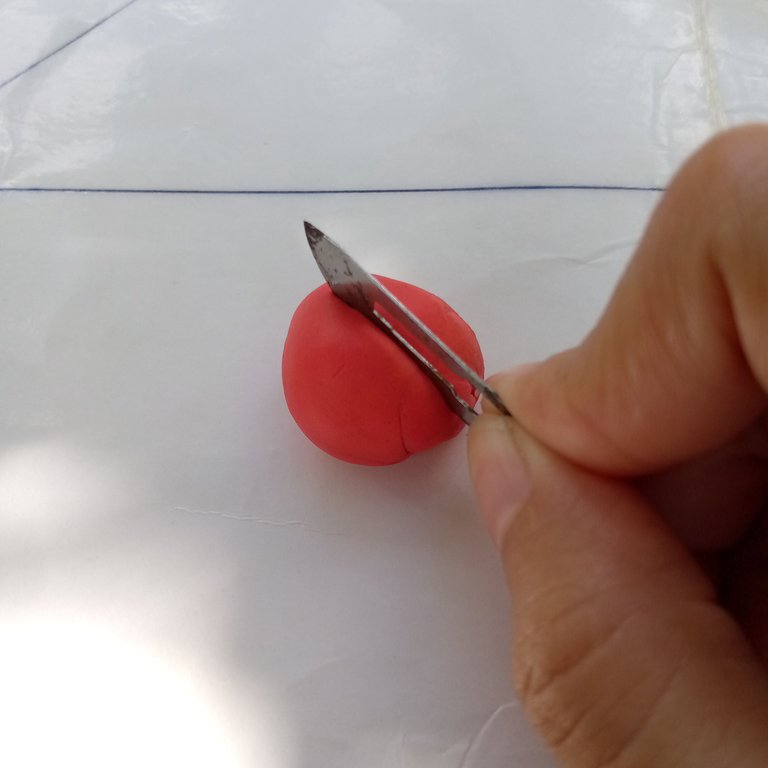
• Fruta • ✨🍓✨ • Fruit •
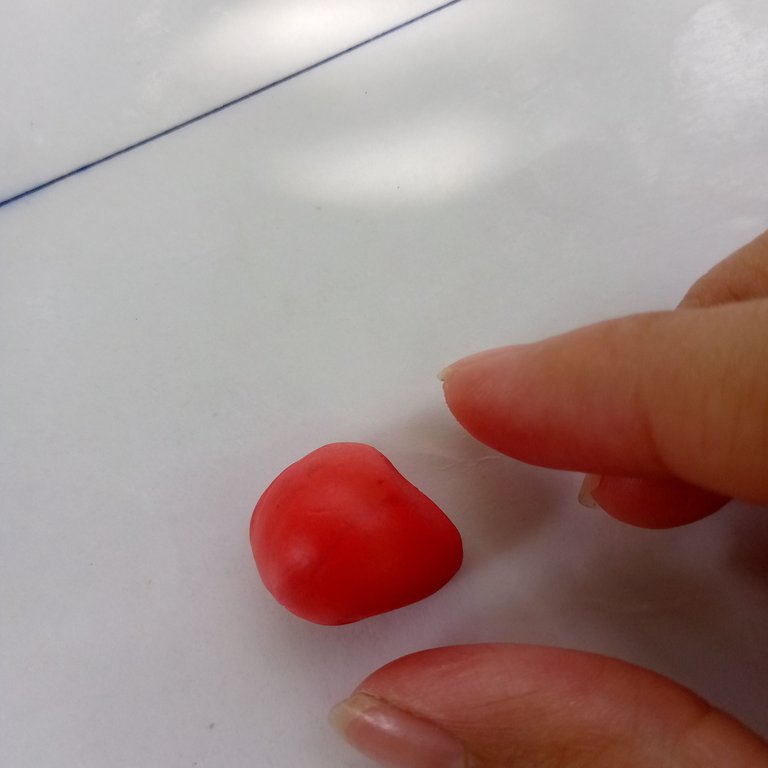
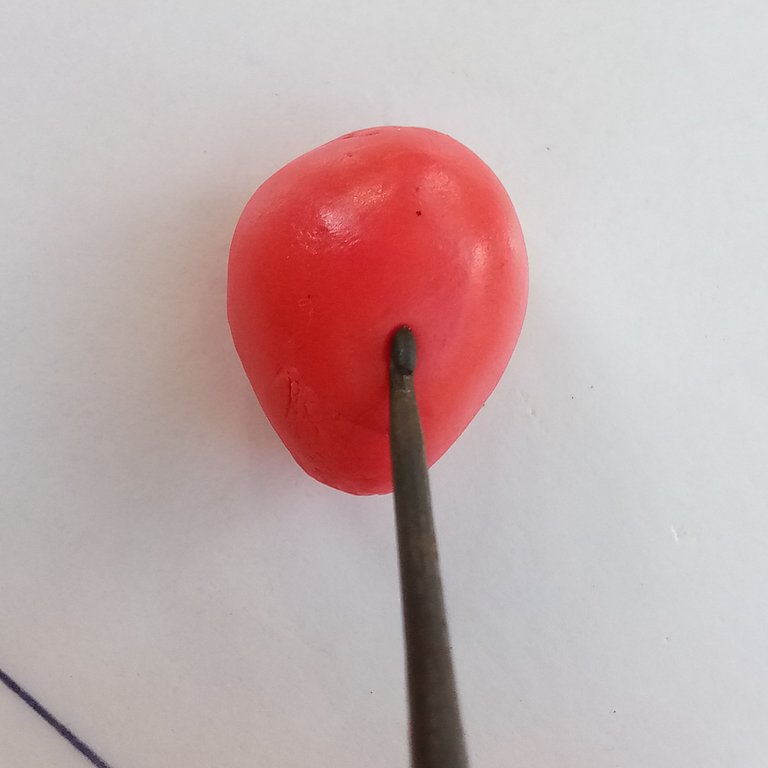
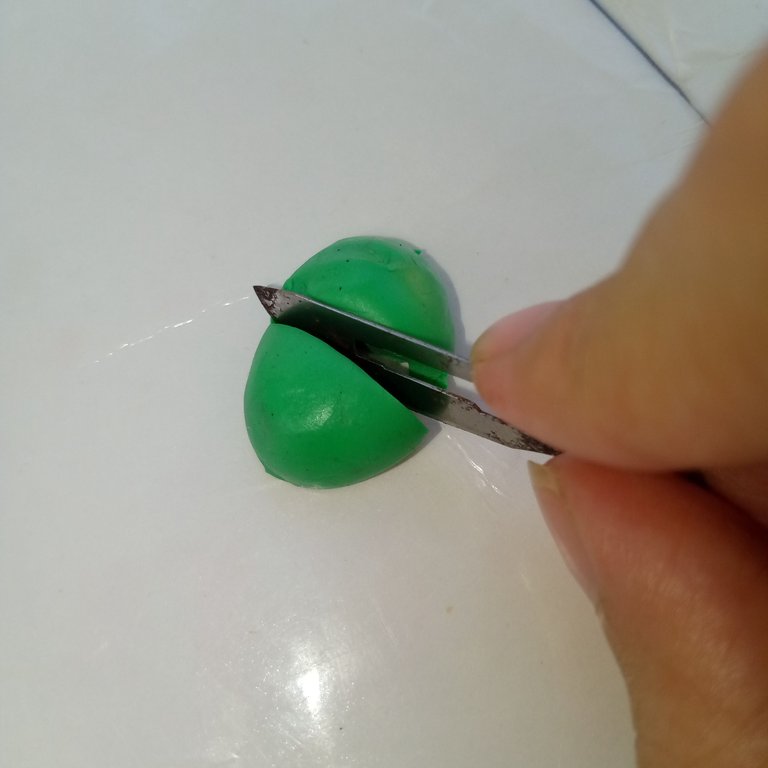
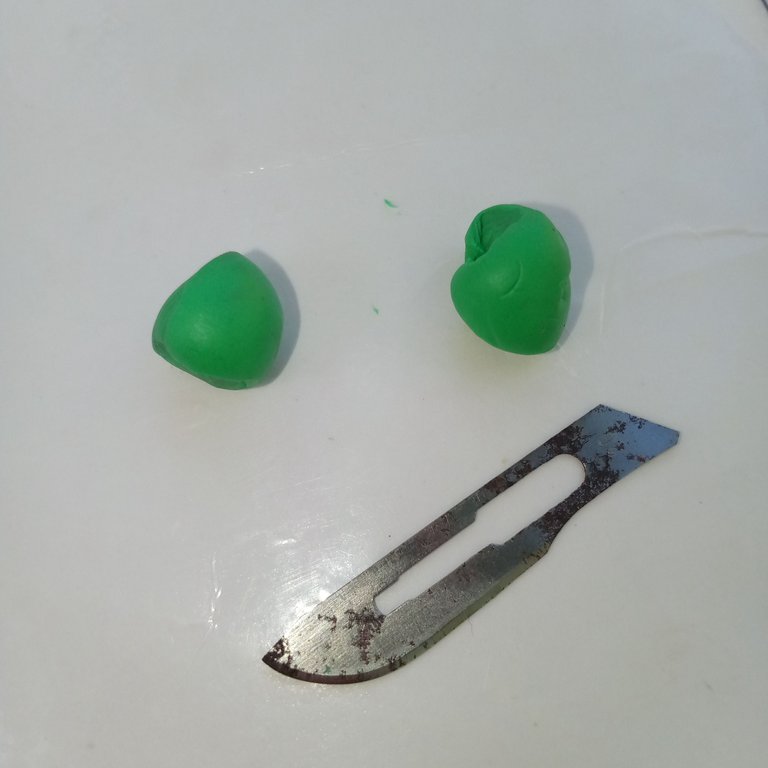
Dividí la masa a la mitad con la ayuda del bisturí para no hacer la fresa tan grande, seguidamente hice una bolita con la masa.
I divided the clay in half using a scalpel so the strawberry wouldn’t be too big, then I shaped it into a small ball.
 |  |
|---|---|
 |  |
| - | - |
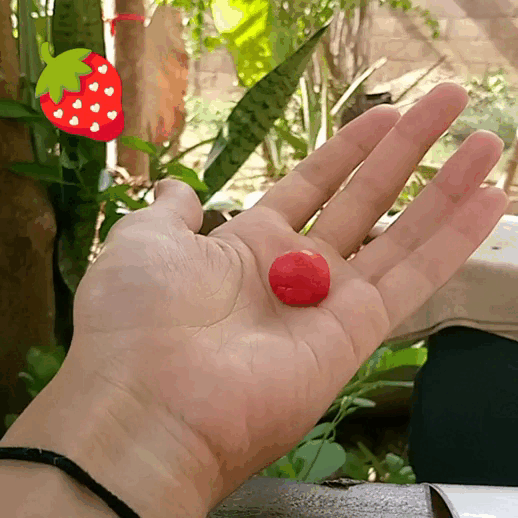
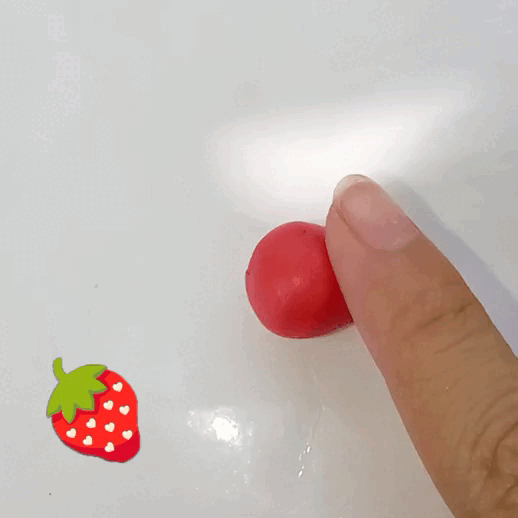
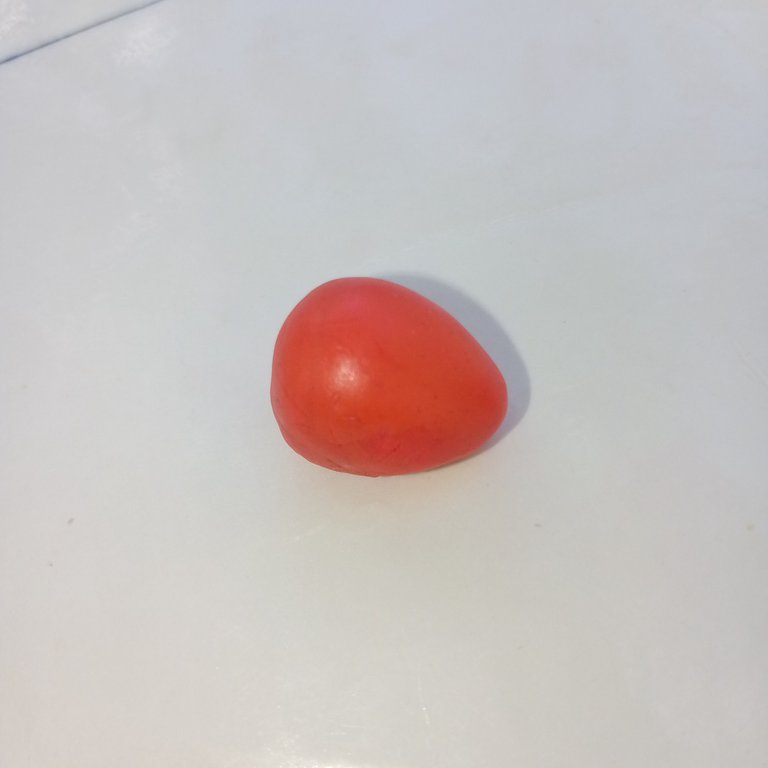
Tomaremos la bolita que hicimos y pellizacaremos levemente uno de sus lados, rodaremos un poco la masa controladamente en este lado que pellizcamos para redondearlo y darle forma de gota a la fresa. Ahora sólo podemos corregir, suavizar y perfeccionar su forma con la ayuda de nuestros dedos.
Next, take the ball and lightly pinch one of its sides. Roll the clay a bit on the pinched side to smooth it out and give the strawberry a teardrop shape. Now, just refine, soften, and perfect its shape using your fingers.
 |  |
|---|---|
 |  |
| - | - |
• Semillas • ✨💛✨ • Seeds •
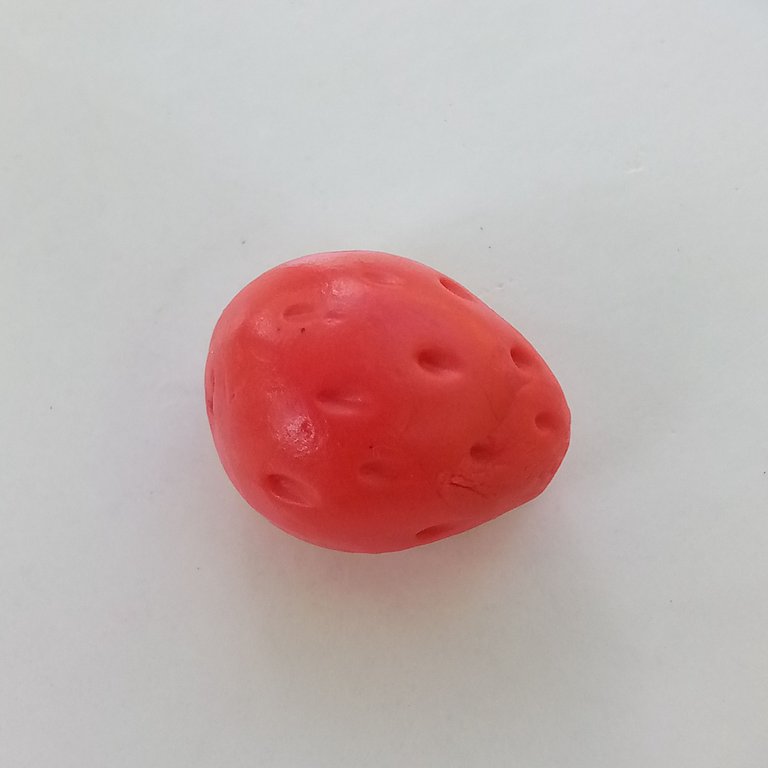
Haremos orificios en la superficie de la fresa en forma de patrón, con ayuda del objeto puntiagudo, yo elegí la aguja de tejer.
Using a pointed object (I chose a knitting needle), make small indentations in the strawberry’s surface, following a pattern.
 |  |  |
|---|
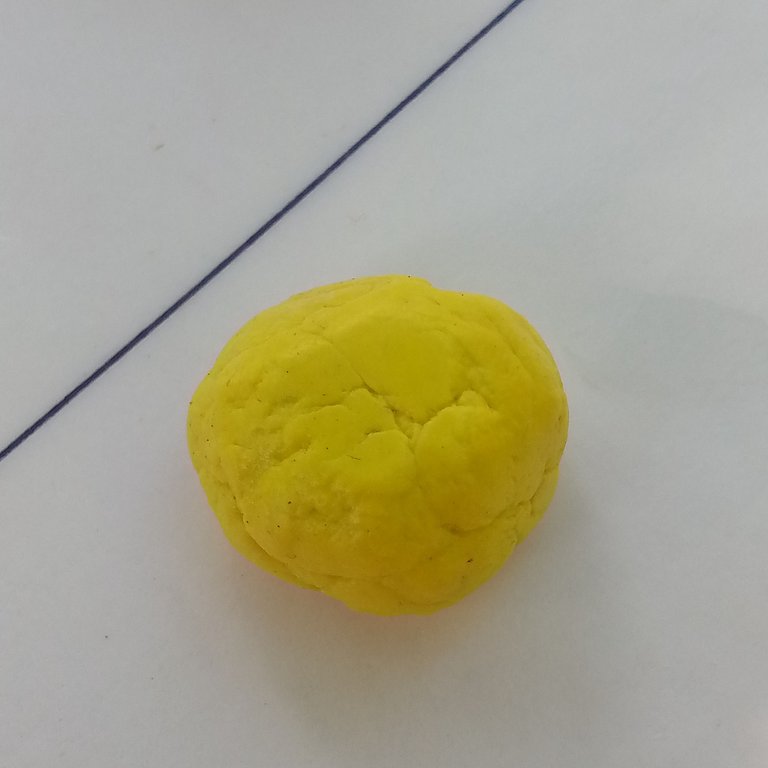
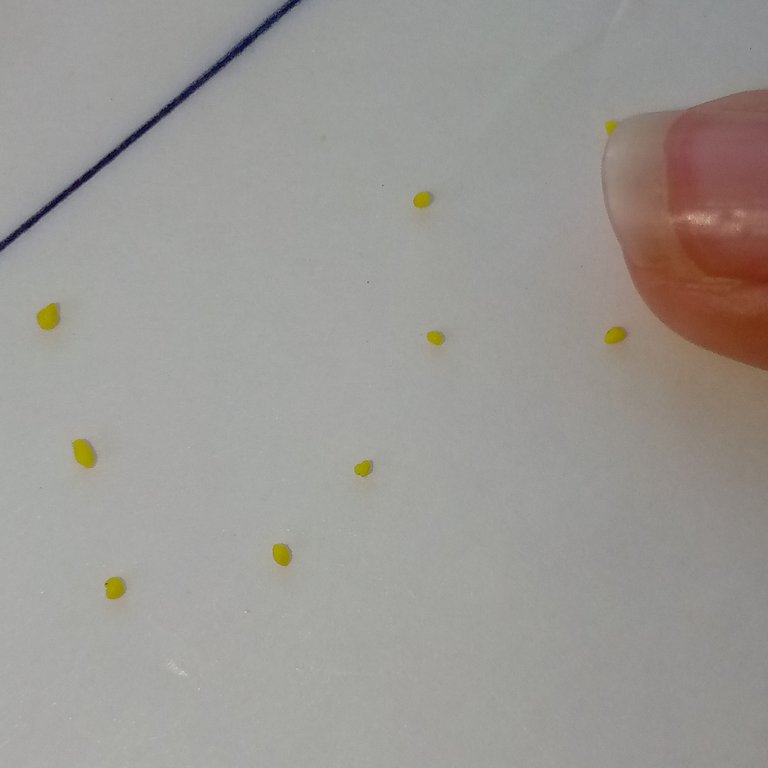
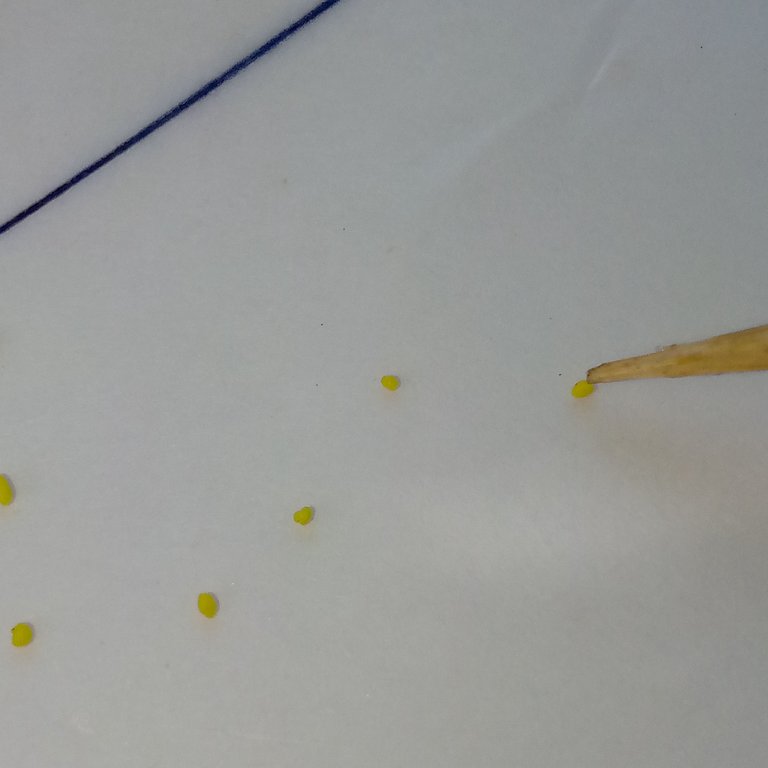
Tomaremos masa amarilla, haremos unas pelotitas minúsculas.
Take a tiny piece of yellow clay and roll it into minuscule balls.
 |  |
|---|
Colocaremos las semillas en su lugar sosteniéndolas (para mayor precisión) con la punta del palillo de madera.
Place the seeds into the indentations, carefully holding them with the tip of a wooden stick for precision.
 |  |  |
|---|
• Cáliz-Sepalos • ✨🌿✨ • Calyx-Sepals •
En este caso, yo dividí en dos la masa verde pues mostraré dos formas de hacer las hojitas de la fresa.
For this part, I divided the green clay into two since I’ll show two different methods for making the strawberry’s leaves.
 |  |
|---|
• Opción 1 • 🍃 • Option 1 •
Hacemos una bolita con la masa, la aplastamos con el dedo y seguidamente la estiramos con ayuda del mango del pincel.
Make a small ball with the clay, press it flat with your finger, and then stretch it out using the handle of a brush.
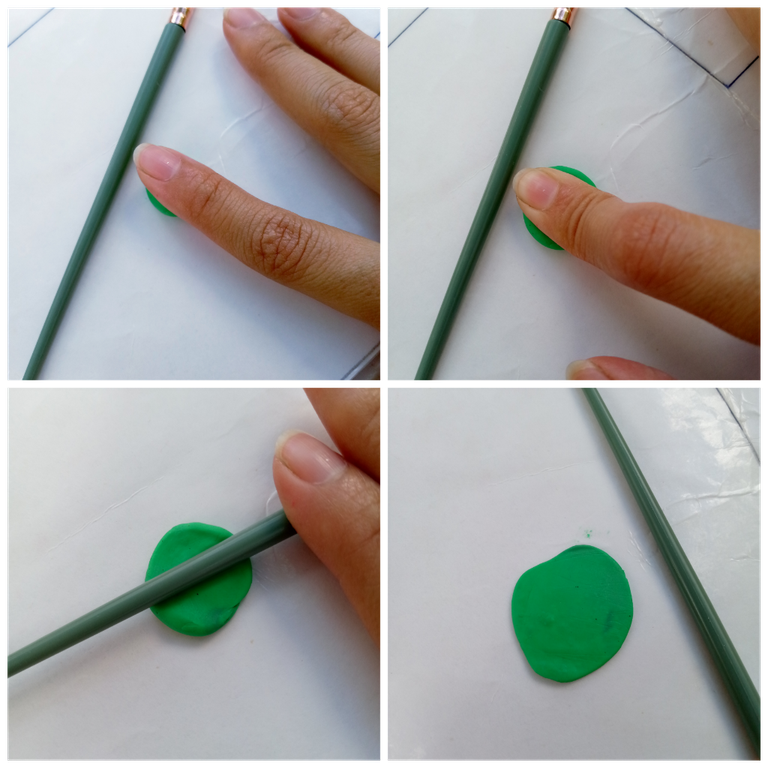
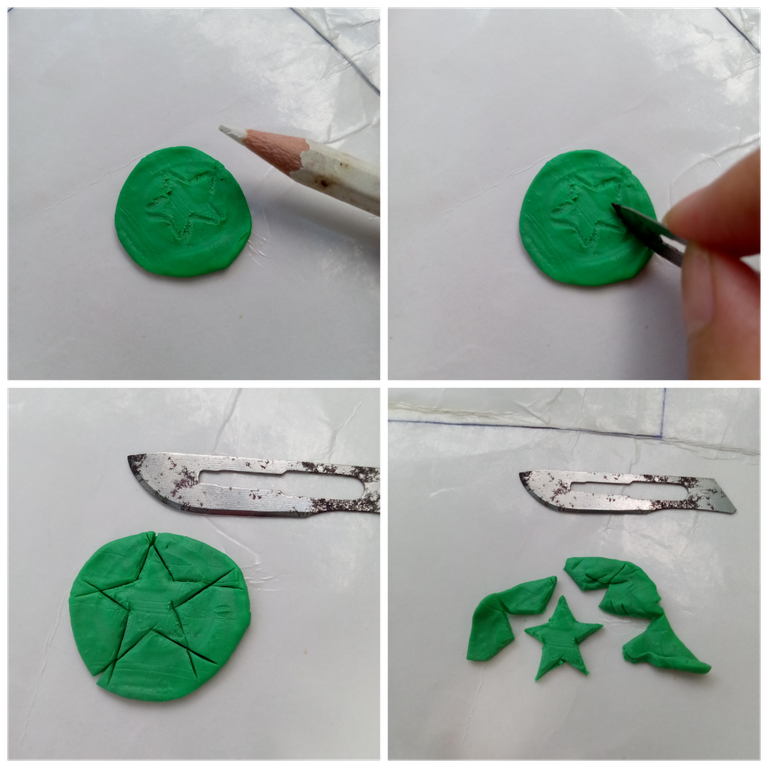
Con la ayuda de un objeto con punta haremos la silueta de una estrella de cinco puntas y la cortaremos con el bisturí.
Using a pointed object, trace the outline of a five-pointed star and cut it out using a scalpel.
Colocaremos la coronita encima del fruto y con ayuda del mango del pincel presionaremos las hojitas para que se adhieran a la fresa, además, también con el el mango orientaremos hacia arriba las hojitas.
Place the leafy crown on top of the fruit and gently press the leaves onto the strawberry using the brush handle. Then, use the handle to slightly lift the tips of the leaves upward.
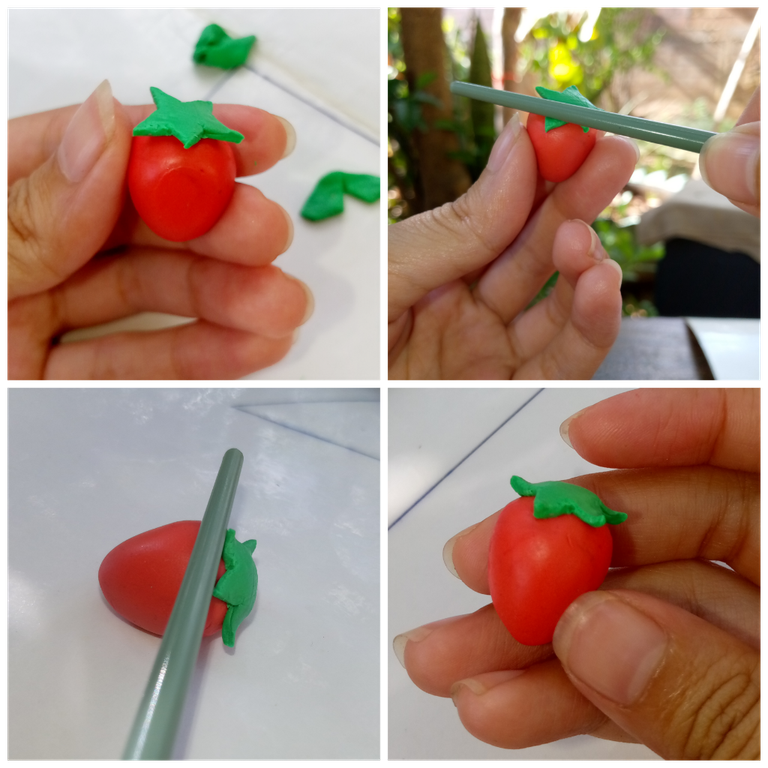
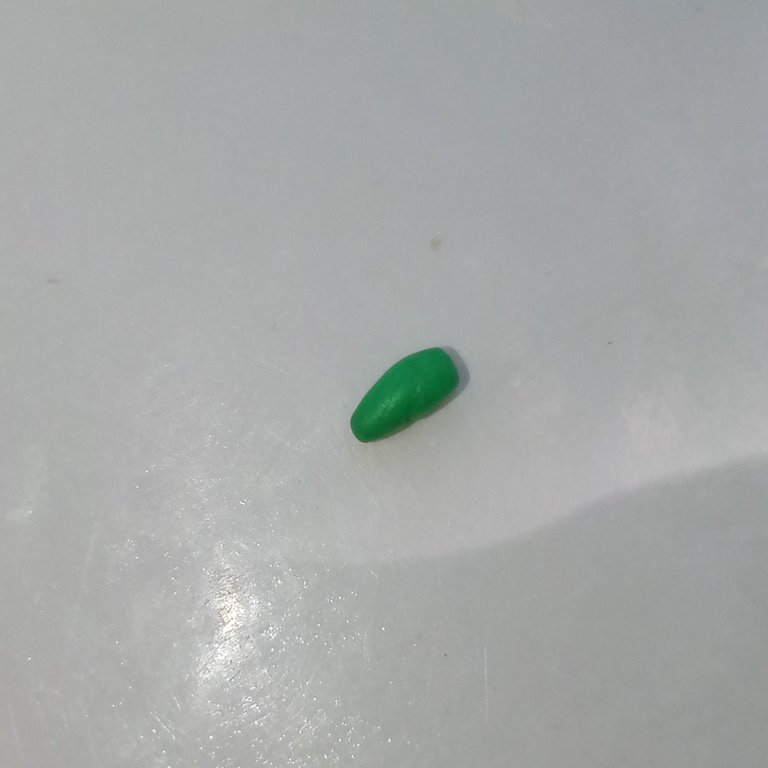
Haremos una piecita en forma de un granito de arroz para el tallito.
Create a small piece in the shape of a rice grain for the stem.
 |  |
|---|
• Opción 2 • 🍃 • Option 2 •
Esta es mi favorita, puedo hacer las hojitas de forma individual y siento que eso le da un toque más lindo.
This is my favorite method—I can make the leaves individually, and I feel it gives a more charming touch.
Hacemos bolitas pequeñas y haremos con ellas lo que hicimos con la fresa: rodaremos sobre la superficie sólo un extremo de ellas hasta dejar la forma de gotitas, luego las aplastamos con los dedos y seguidamente presionaremos sus "colitas" para que se adapten a la forma de la fresa y poder colocarlas encima sin exagerar con el volumen.
Roll small balls of green clay and repeat the same steps as with the strawberry—roll them on the surface, shaping only one end into tiny teardrops. Then, flatten them with your fingers and gently press their bases so they fit the shape of the strawberry without making them too bulky.
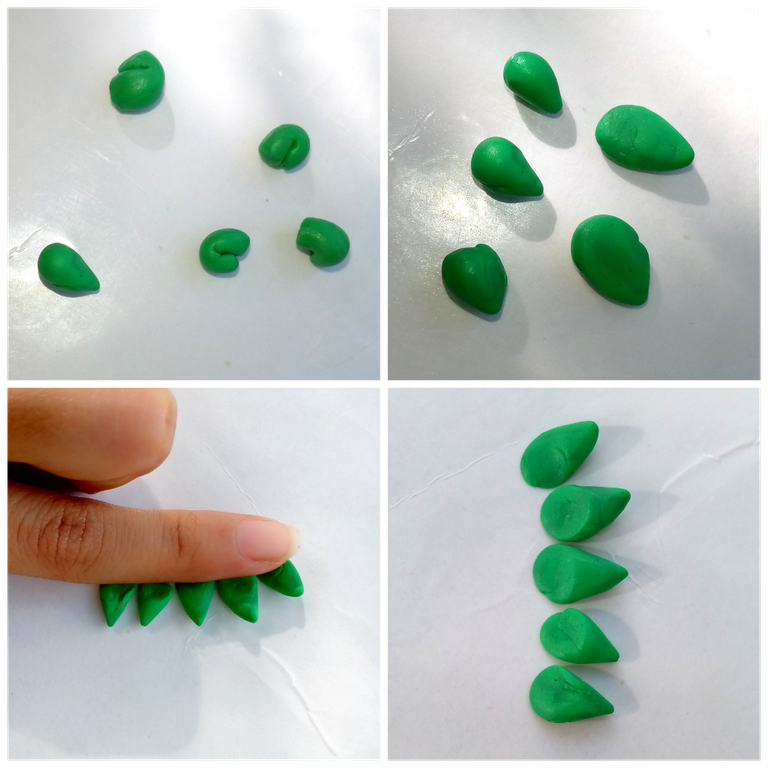
Se las colocaremos al fruto arriba uno al lado de otro como si fueran los pétalos de una flor y orientaremos las puntas hacia arriba.
Place the leaves on top of the fruit one by one, arranging them like flower petals and pointing their tips upward.
 |  |  |
|---|
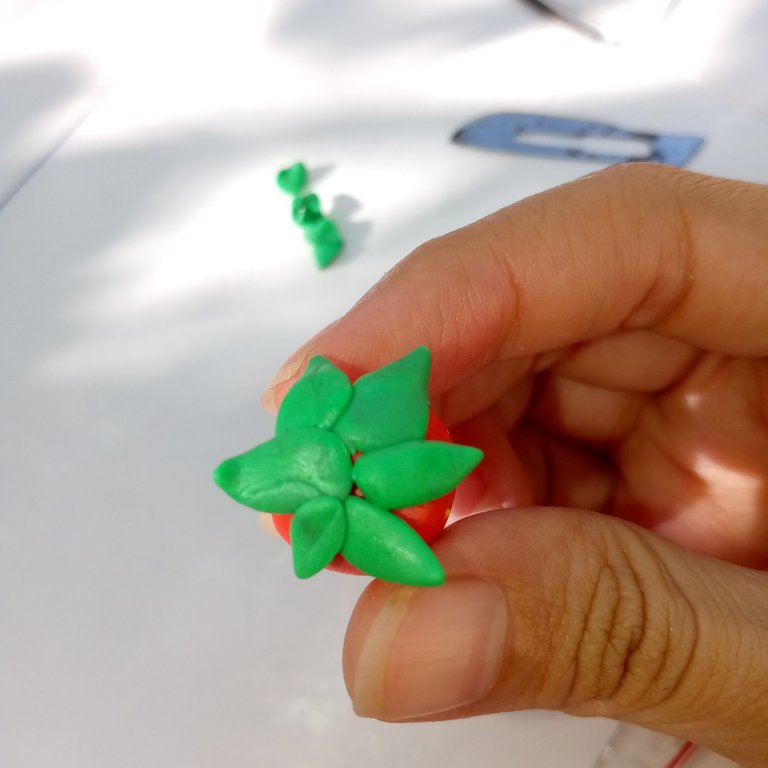
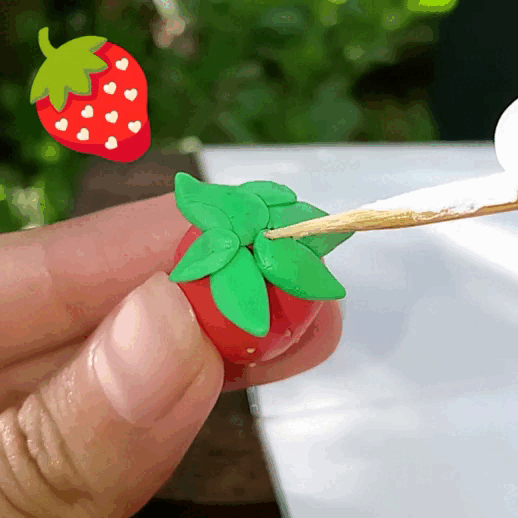
Con la ayuda de un palillo, uniremos sellando así el cáliz.
Use a toothpick to connect and seal the calyx.
 |  |
|---|
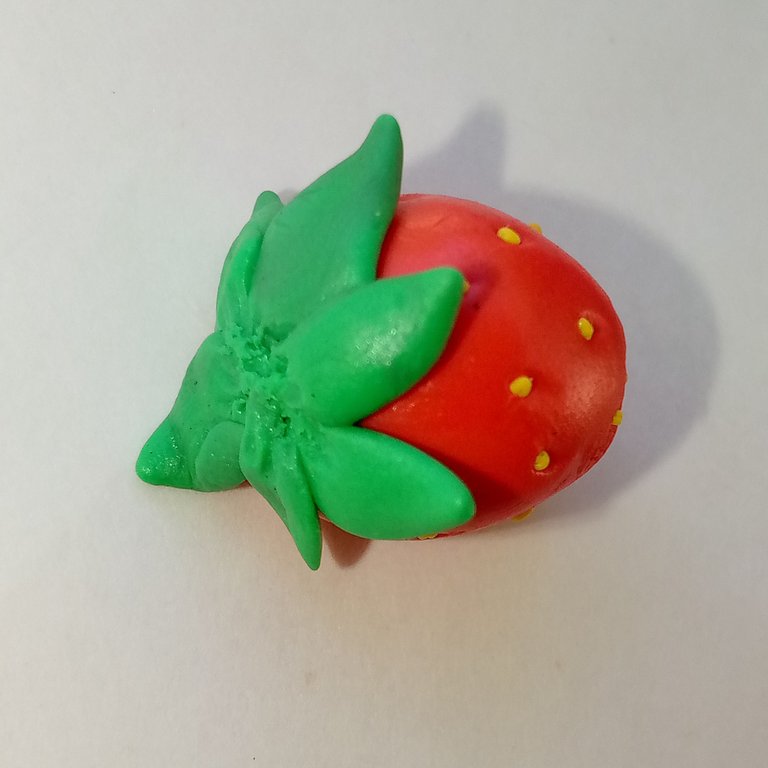
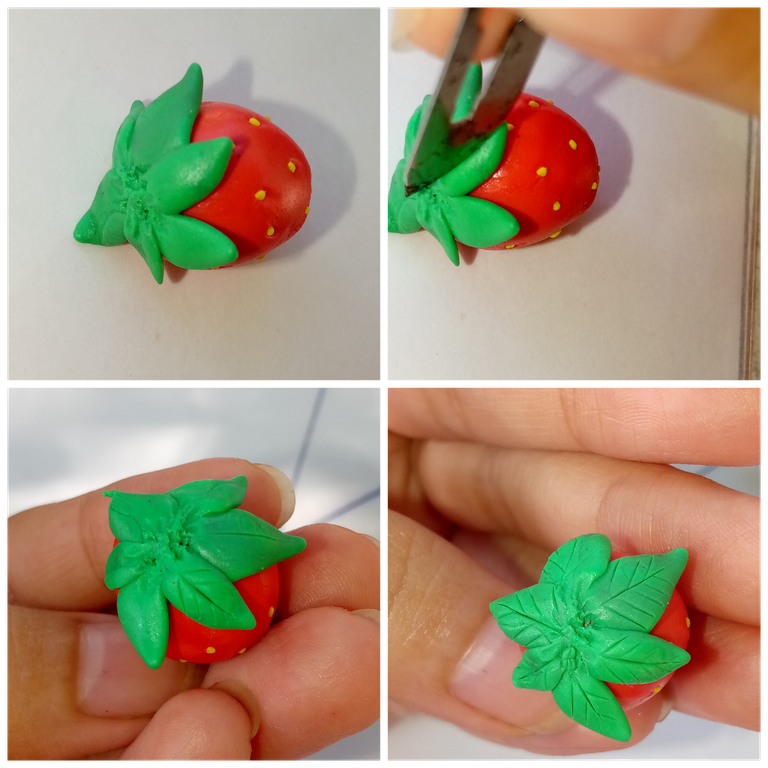
Ahora usando el bisturí haremos las marcas de los sépalos (las hojitas de la fresa). Primero haremos una línea en el centro de cada una y luego líneas perpendiculares en una misma dirección que nacen de la línea inicial.
Now, using the scalpel, create marks on the sepals (the strawberry’s leaves). First, draw a line down the center of each leaf, then add perpendicular lines in the same direction branching from the initial mark.
Repetimos el proceso anterior para hacer el tallito, y haremos este.
Repeat the same steps to shape the stem.
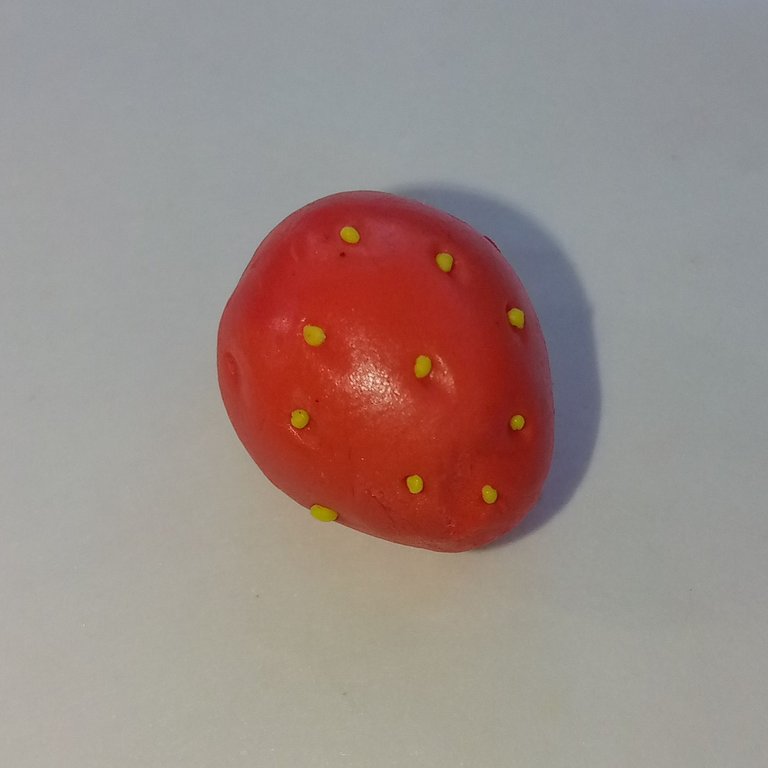
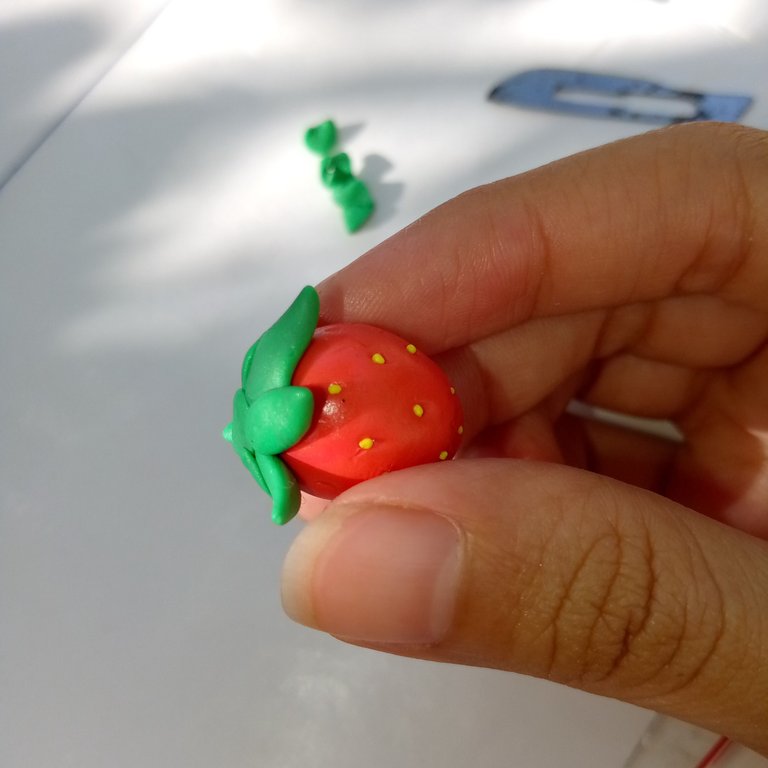
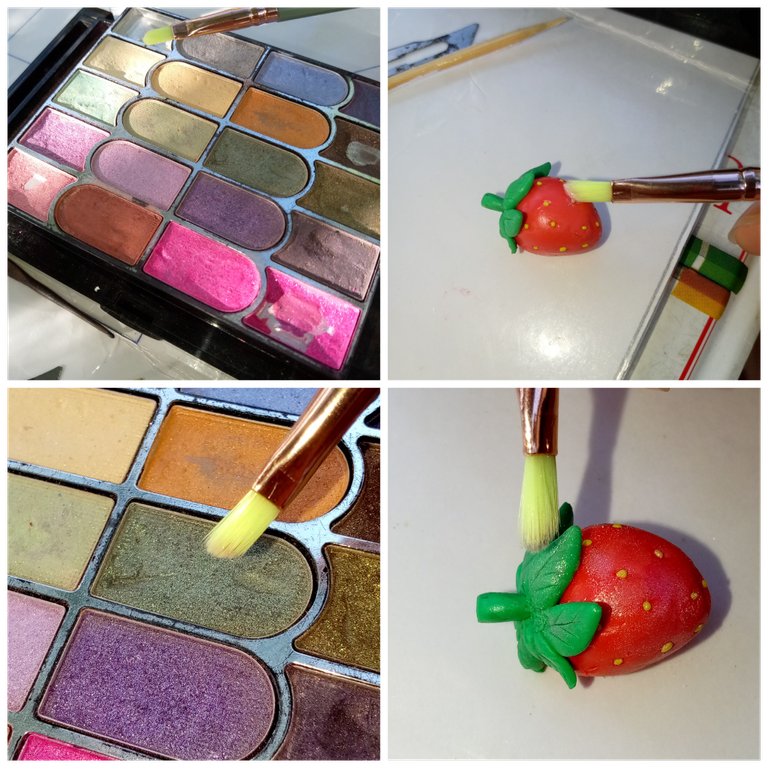
• Hora del maquillaje • ✨💄✨ • Makeup time •
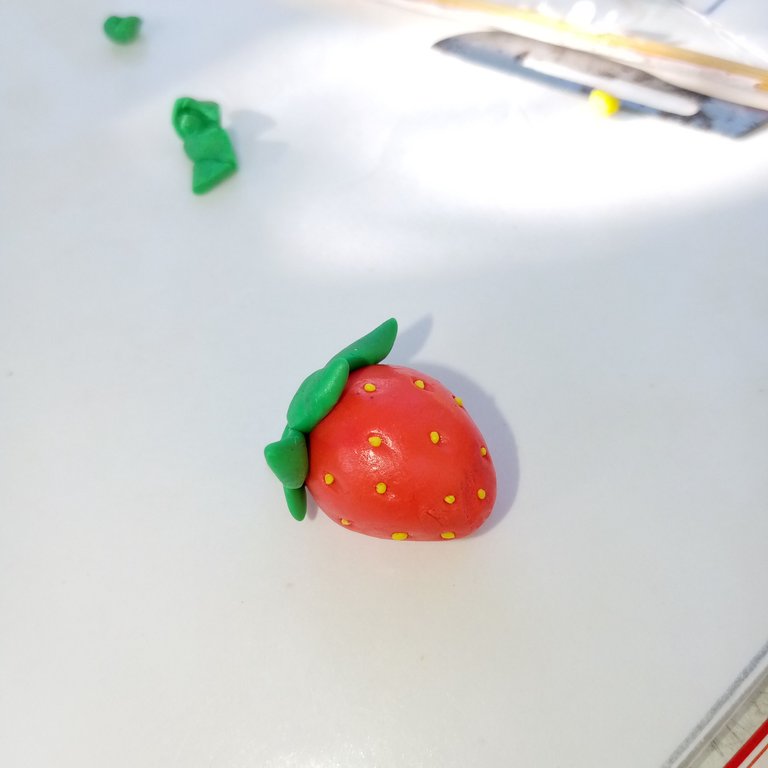
Ahora vamos a maquillar a nuestra fresa, fingamos que le estamos colocando iluminador. Primero con el blanco/beige/rosa a la fruta, y luego con verde a la hojita.
Now, let's give our strawberry a little makeover—imagine we're applying a highlighter! First, use white/beige/pink on the fruit, and then green on the leaves.
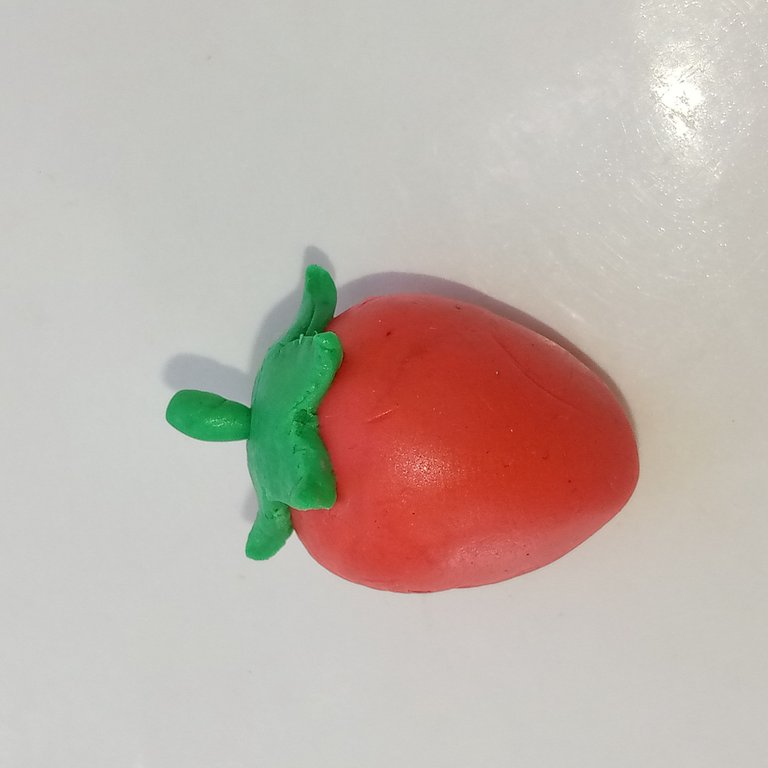
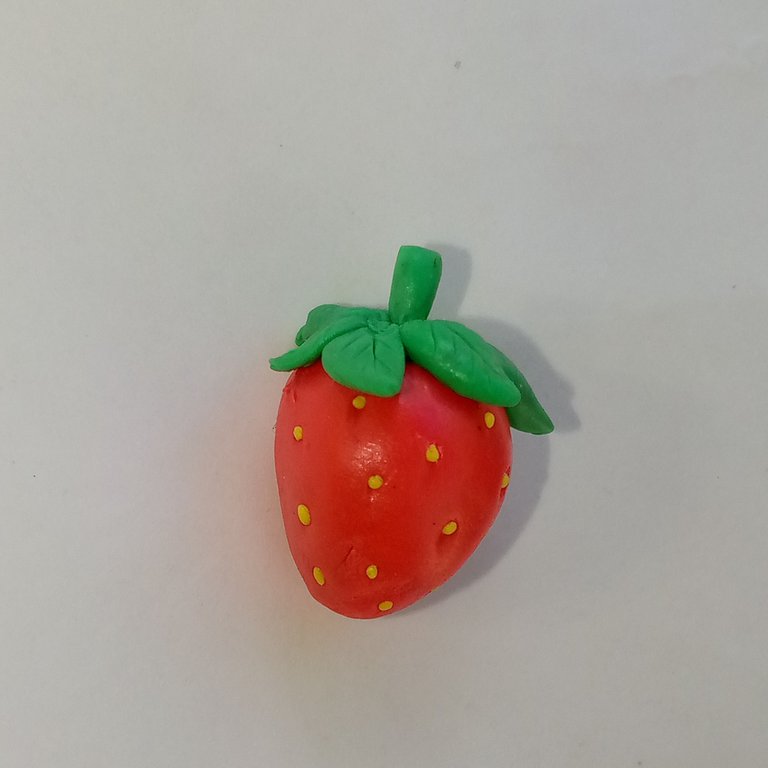
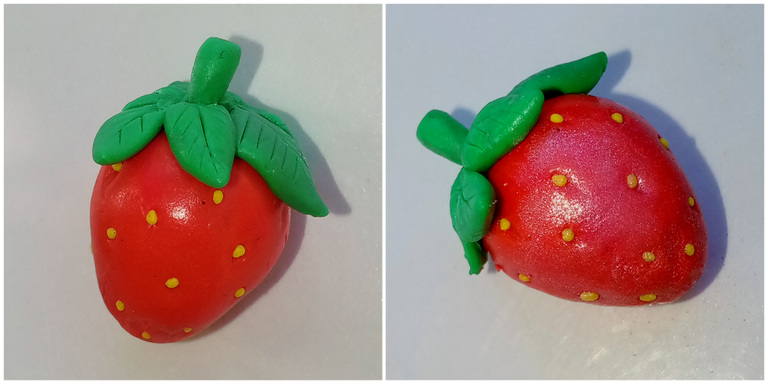
Y esto fue todo. La verdad siento que no es nada súper complicado de hacer, después de todo cuando eramos niños una de las actividades del kinder era jugar con plasticina. Además, amasar y modelar es una actividad muy desestresante, estimulante y un buen ejercicio para la creatividad.
And that’s it! Honestly, I feel like it’s not super complicated to do. After all, when we were kids, playing with plasticine was a common kindergarten activity. Plus, kneading and sculpting is a great way to relieve stress, stimulate creativity, and have fun.
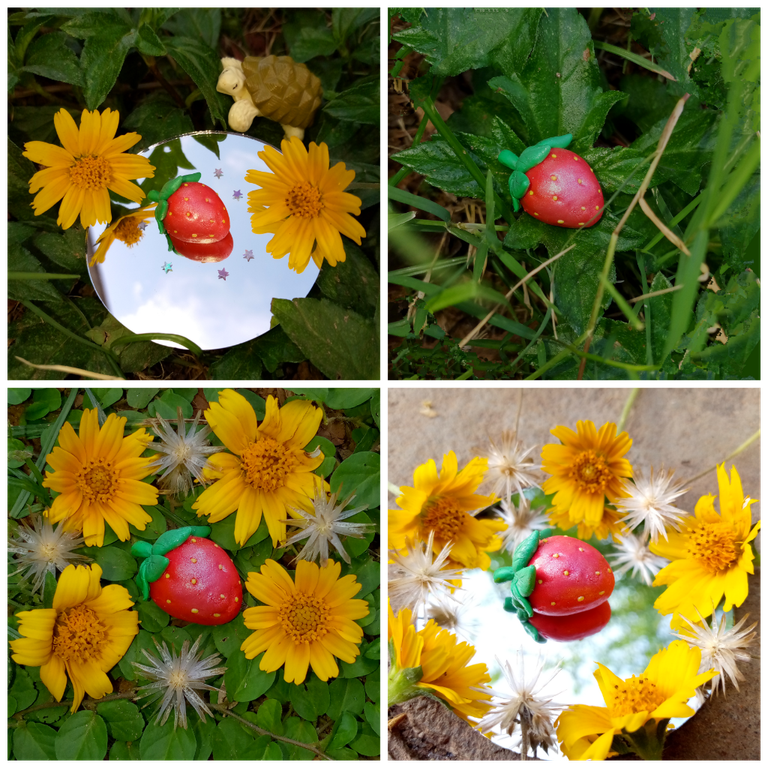
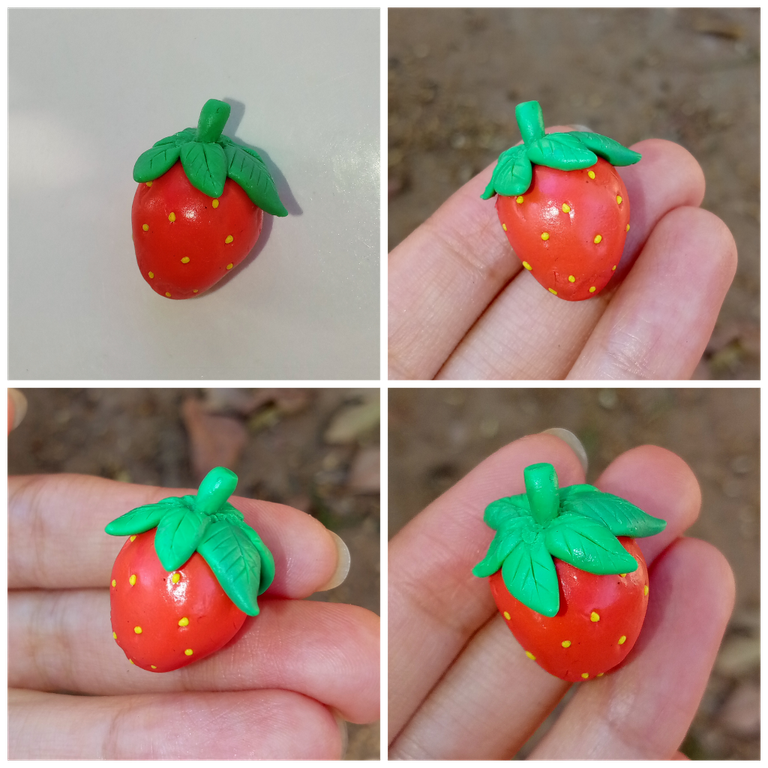
¿Qué les pareció esta manualidad? 👀 Les pareció sencilla o complicada? A mí me encantó el resultado honestamente, espero que el sentimiento no sea sólo mío y que a ustedes como mínimo les haya agradado.
What did you think of this craft? 👀 Did you find it easy or tricky? Personally, I loved the result, and I hope I’m not the only one—I hope at the very least, you found it enjoyable.
Un millón de gracias por leer mi post 💙🍁✨ o al menos haberle dado la oportunidad de echarle un ojo.
A million thanks for reading my post 💙🍁✨ or at least for giving it a glance!
💙 See you next time!! 🤗
Bellísima! Y la forma en la tomas las fotos es muy artística. La verdad es que tienes mucho talento para esto también, eres una multiartista mi niña. 🥰👏🏻👏🏻👏🏻👏🏻👏🏻👏🏻👏🏻👏🏻👏🏻👏🏻😊😊😊😊
Graaaciassss, las fotos también me encantaron :') tenía muchas ideas en mente para presentarlas jsjsjsj me picaron las hormigas por poner las cosas en el monte, pero valió la pena. Aynss, no me considero, pero es mí sueño ser una multiartista 💙🫂✨
Que bonita, se ve perfecta 🥹
Gracias! No tanto como usted ✨( ◜‿◝ )♡
Que bonita fresita😍 te quedó bellísima y además está muy bien explicado el paso a paso☺️ gracias por compartirlo, me encantaron tus fotos💖
Aynsss, mil gracias! Tengo entendido que usted también es una gran creadora de cosas muy muy lindas, así que es para mí un gran honor que usted halague mi fresita ✨
Siiiiii en realidad captar el paso a paso fue más complicado que la creación de la fresita en sí. Me alegra que se hayan entendido mis indicaciones, hice lo mejor que pude por explicarme biennnn. Muchas gracias por su lindo comentario, las fotos del resultado final sin dudas fueron de mis favoritas entre todas las publicaciones que he hecho. Un abrazoteee 🫂
Awww muchas gracias por tus palabras tan bonitas🥹 un abrazo para ti también🤗✨
Que linda, me encanta 😍 es una de mis frutas favoritas jeje y te quedo super cuchis esta fresita 😍
Jijiji, muchas gracias 🫂 no es precisamente mi fruta favorita, sí es una de las favoritas de mi pareja y a la persona a la que se la regalé también era fan de esta fruta. Siii, quedó muy cute, lo admito 🍓✨ gracias por apreciar mi post Buhito, soy tu fan (人 •͈ᴗ•͈)
This plasticine strawberry is nice. bright, fun, and so neatly modeled. Great little piece.
selected by @stevenson7
Thank you so much for appreciating my work! I'm so glad you liked the result as much as I did 💙✨
Qué buen proyecto, excelentemente mostrado. Es maravilloso cuando podemos modelar y esculpir la belleza. Te quedó hermosa y con un buenísima factura
Mil gracias por tomarse el tiempo de apreciar mi post y mi resultado... Es increíble lo que podemos hacer moldeando con nuestras manos. También gracias por su lindo comentario. Saludos 💙✨
Asi es, nuestras manos pueden lograr magia. El comentario es merecido, has logrado un trabajo de excelencia y belleza.
¿ᴺᵉᶜᵉˢᶦᵗᵃˢ ᴴᴮᴰ? ᵀᵉ ˡᵒ ᵖʳᵉˢᵗᵃᵐᵒˢ ᶜᵒⁿ @ruta.loans
Congratulations @jhos.indigo! You have completed the following achievement on the Hive blockchain And have been rewarded with New badge(s)
Your next target is to reach 6000 upvotes.
You can view your badges on your board and compare yourself to others in the Ranking
If you no longer want to receive notifications, reply to this comment with the word
STOPMuy lindo tu trabajo. Saludos!
Grazie mille por valorar mi trabajo 💙✨ saludos para usted también.
Qué belleza me gustan mucho las fresitas, son decorativas y su color es vibrante, nunca están de sobra en nuestra cocina, porque son ricas y decorativas. Gracias por el paso a paso quedo excelente.
Siii, tienen un color muy apetitoso y una estética muy agradable, así que para decorar siempre generan un efecto muy agradable en nuestros espacios. Jsjsjs, me alegra muchísimo saber que mi paso a paso le haya resultado útil. 🍓✨
your strawberries are so beautiful, they look like real ones. cool👍 good job.
Ooo, thank you so much for your lovely comment! It makes me so excited to hear that! I really loved the result 💙✨
Yes, you're welcome, happy weekend.
We always appreciate it when you share such a creative and outstanding project like this. I really enjoyed reading through the whole process and it turned out really great, well done
Aww, thank you so much for appreciating my post and content. I'm so glad you liked the step-by-step guide.
I enjoy putting in the effort to make the things I love interesting for everyone 🍓✨ Truly, thank you again for your kind words and support. 💙