¡Sin más a trabajar!
Good afternoon, #hive friends, God bless you, I hope you are resting in your homes.
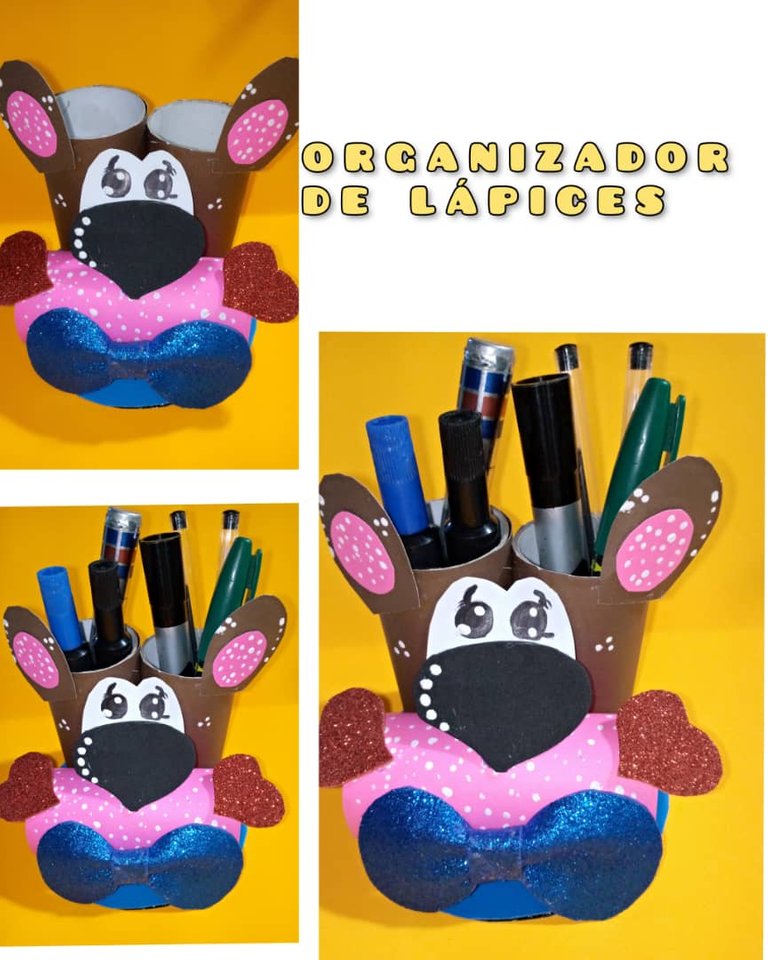
Today I want to share a tutorial: How to make a pencil organizer, with useful material.
Let's not throw away toilet paper rolls, or pieces of cardboard, that is very useful in a home, because with all these materials, you can build very nice things, such as this organizer, you can do it in the color of your choice and with the decorations you want, use your creativity.
Let's get to work!
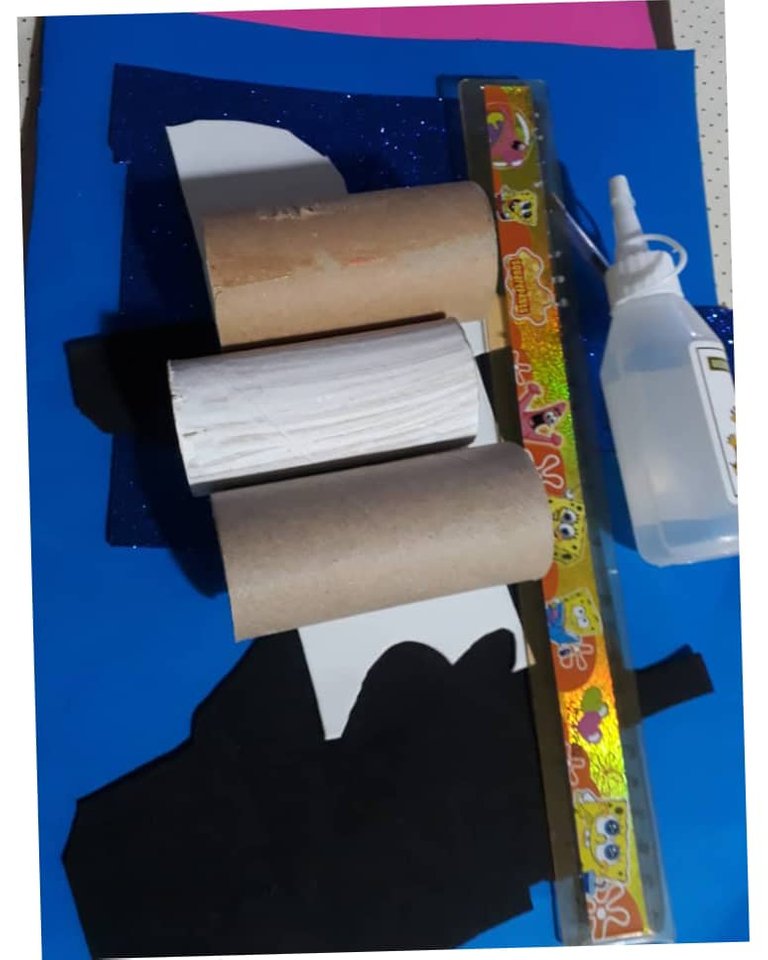
MATERIALES:
3 Rollos de papel higiénico.
Cartulina de colores: marrón,azul,blanco y rosado.
Silicona líquida.
Regla.
Lápiz.
Pedazo de cartón.
Foami negro.
Tempera blanca.
Foami escarchado: rojo y azul.
Marcador.
MATERIALS:
3 rolls of toilet paper.
Colored cardboard: brown, blue, white and pink.
Liquid silicone.
Ruler.
Pencil.
Piece of cardboard.
Black Foami.
White tempera.
Frosted foami: red and blue.
Marker pen.
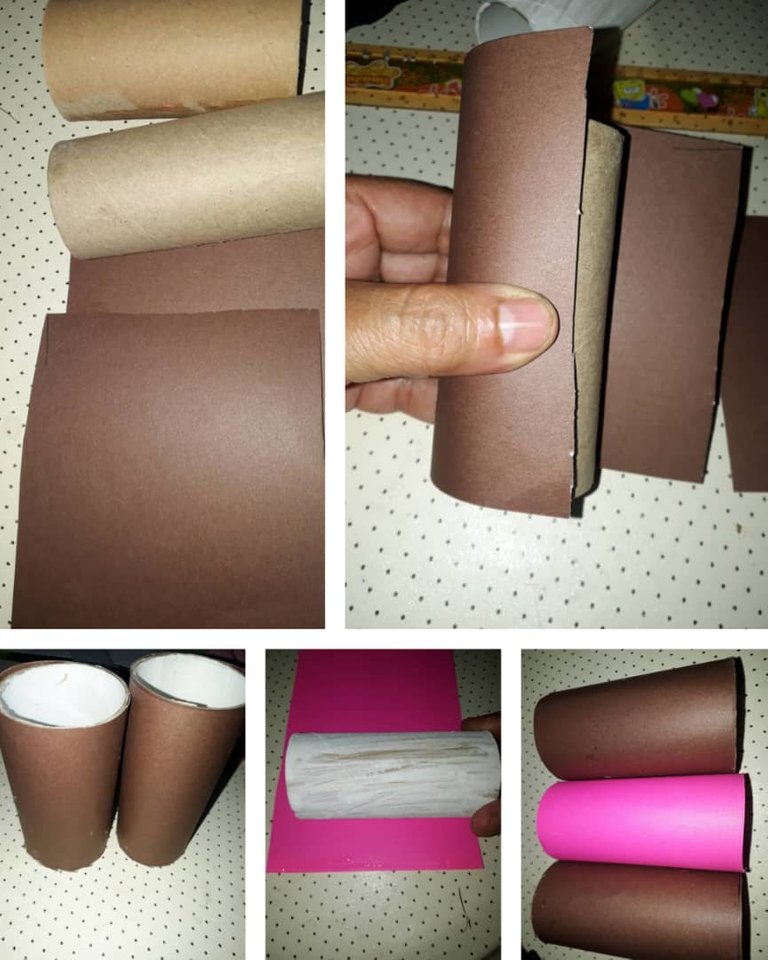
PASO A PASO:
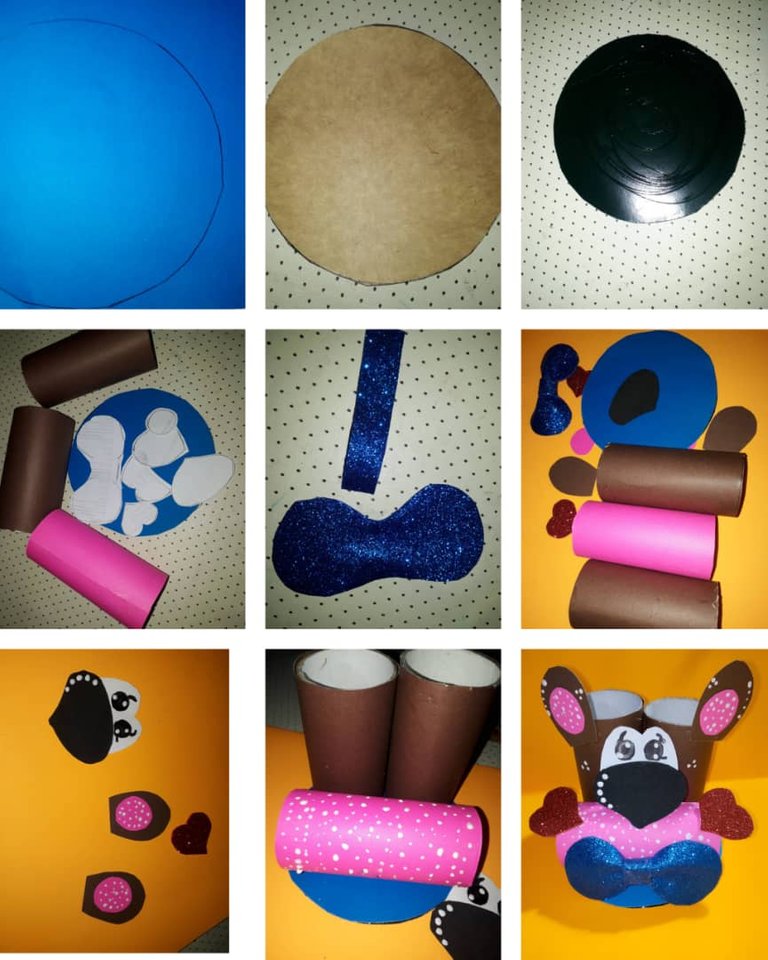
- Lo primero que se hace es forrar los rollos de papel con cartulina marrón y de rosado.
- Después el pedazo de cartón , se recorta en forma redonda, que es lo que va a hacer la base del organizador.
- The first thing to do is to line the paper rolls with brown and pink cardboard.
- Then the piece of cardboard is cut into a round shape, which is what will make the base of the organizer.
Ahora marca y recorta con unas tijeras, las partes del oso: los ojos, orejas,nariz, corazón y lazo.
Para hacer el lazo, recorta con una tijera el patrón de forma de lazo y una cinta, luego con silicona vas pegando.
Así va a hacer con todas las partes van recortando y pegando con silicona.
Con témpera blanca se le hace los puntitos , en la nariz, ojos , orejas y cuerpo del oso.
Con marcador negro se pintan los ojos.
Ahora se pegan , cada una de las partes, pueden guiarse por las fotos.
- Now mark and cut out with scissors the parts of the bear: the eyes, ears, nose, heart and bow.
- To make the bow, cut with scissors the pattern of the bow and a ribbon, then glue with silicone.
- This is how it will be done with all the parts, cut them out and glue them with silicone.
- With white tempera you make the dots on the nose, eyes, ears and body of the bear.
- With black marker the eyes are painted.
- Now glue each of the parts, you can be guided by the photos.
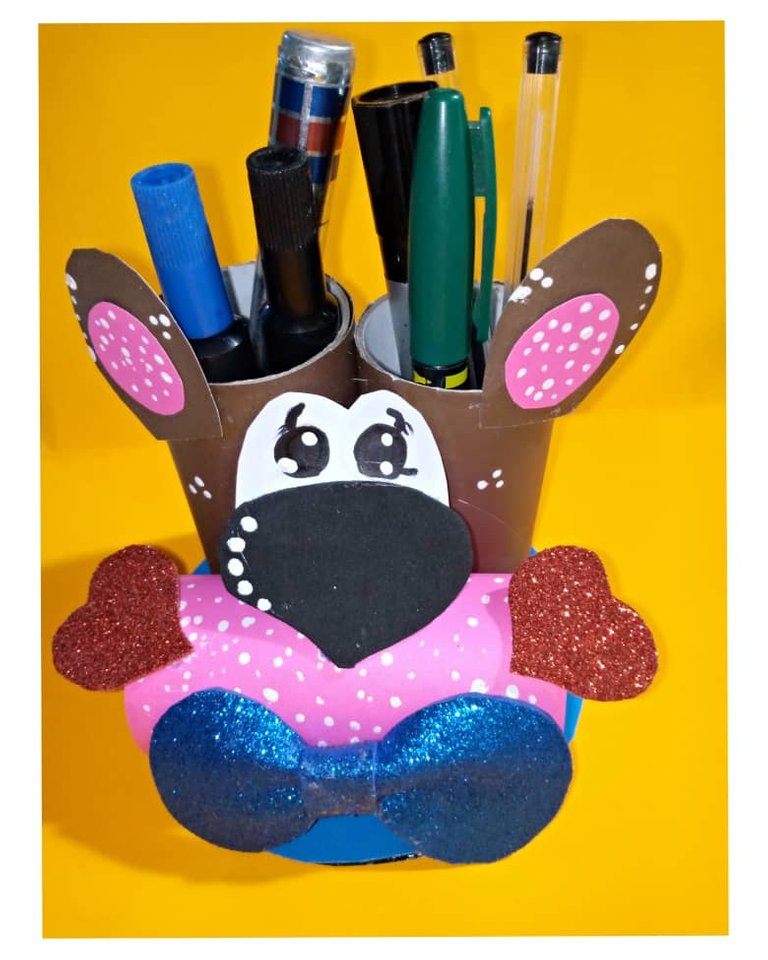
Aquí podemos ver un hermoso organizador.
Here we can see a beautiful organizer.
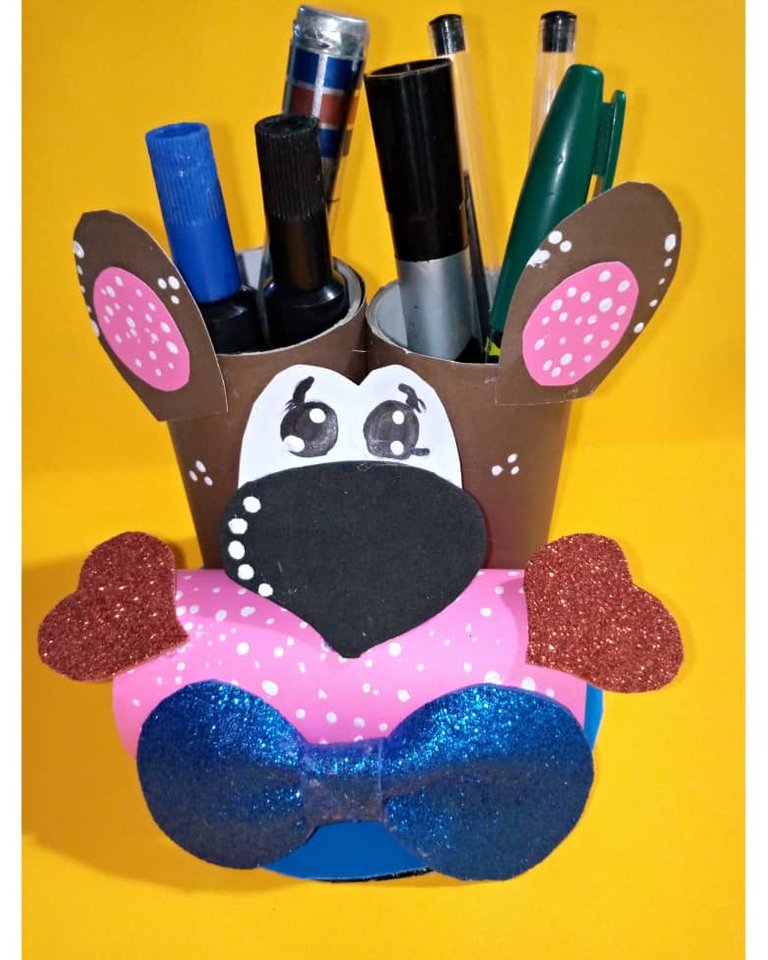
Espero que les guste.
I hope you like it.
Las fotos son de mi propiedad, capturado con teléfono Samsung y editadas con incollage.
Traducido con DEEPL.
Photos are my own, captured with Samsung phone and edited with incollage.
Translated with DEEPL.
Gracias @equipodelta . Bendiciones
A very cute project! It looks fun to make, too!
Thanks for sharing your craft with us. Your tutorial was very clear and easy to understand. Great job!
Cheers!
Gracias a usted @braveboat, me alegra que le haya gustado, gracias muchas gracias, bendiciones.