 ⚜️⚜️⚜️⚜️⚜️⚜️⚜️⚜️⚜️⚜️⚜️⚜️⚜️
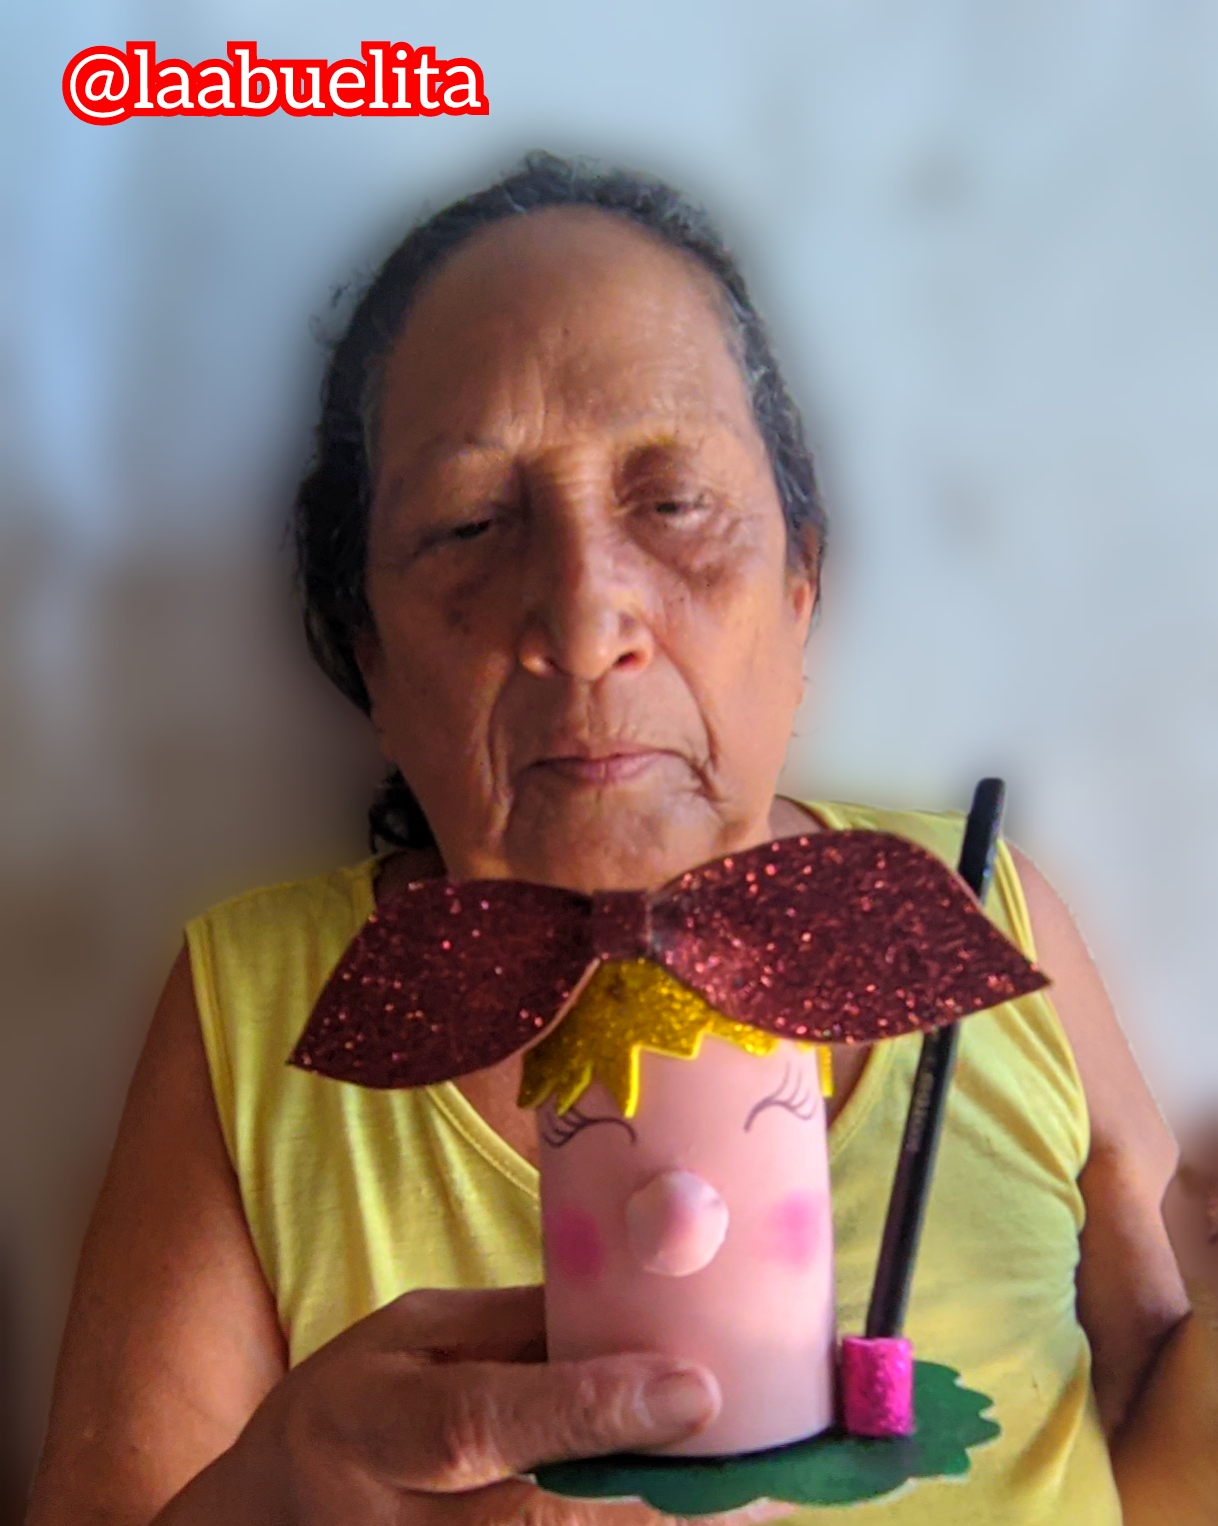
Hola mis queridos nietecitos de hive,feliz inicio de semana para todos, espero que hayan pasado un fin de semana maravilloso, y sobretodo el en unión de su familia, yo la pasé muy bien ya les contaré en otro post, pero por ahora les traigo una linda idea para una lapicera muy diferente.
Me inspire en una típica ama de casa con su pañoleta en la cabeza, claro lo hice a modo de caricatura y espero que les guste, fue un trabajo que realice como siempre en compañía de mi bella flor Lupita, que es la que me ayuda a tomar las fotos, como siempre aquí les dejo los materiales, el paso a paso y por supuesto el resultado final.
⚜️Materiales⚜️
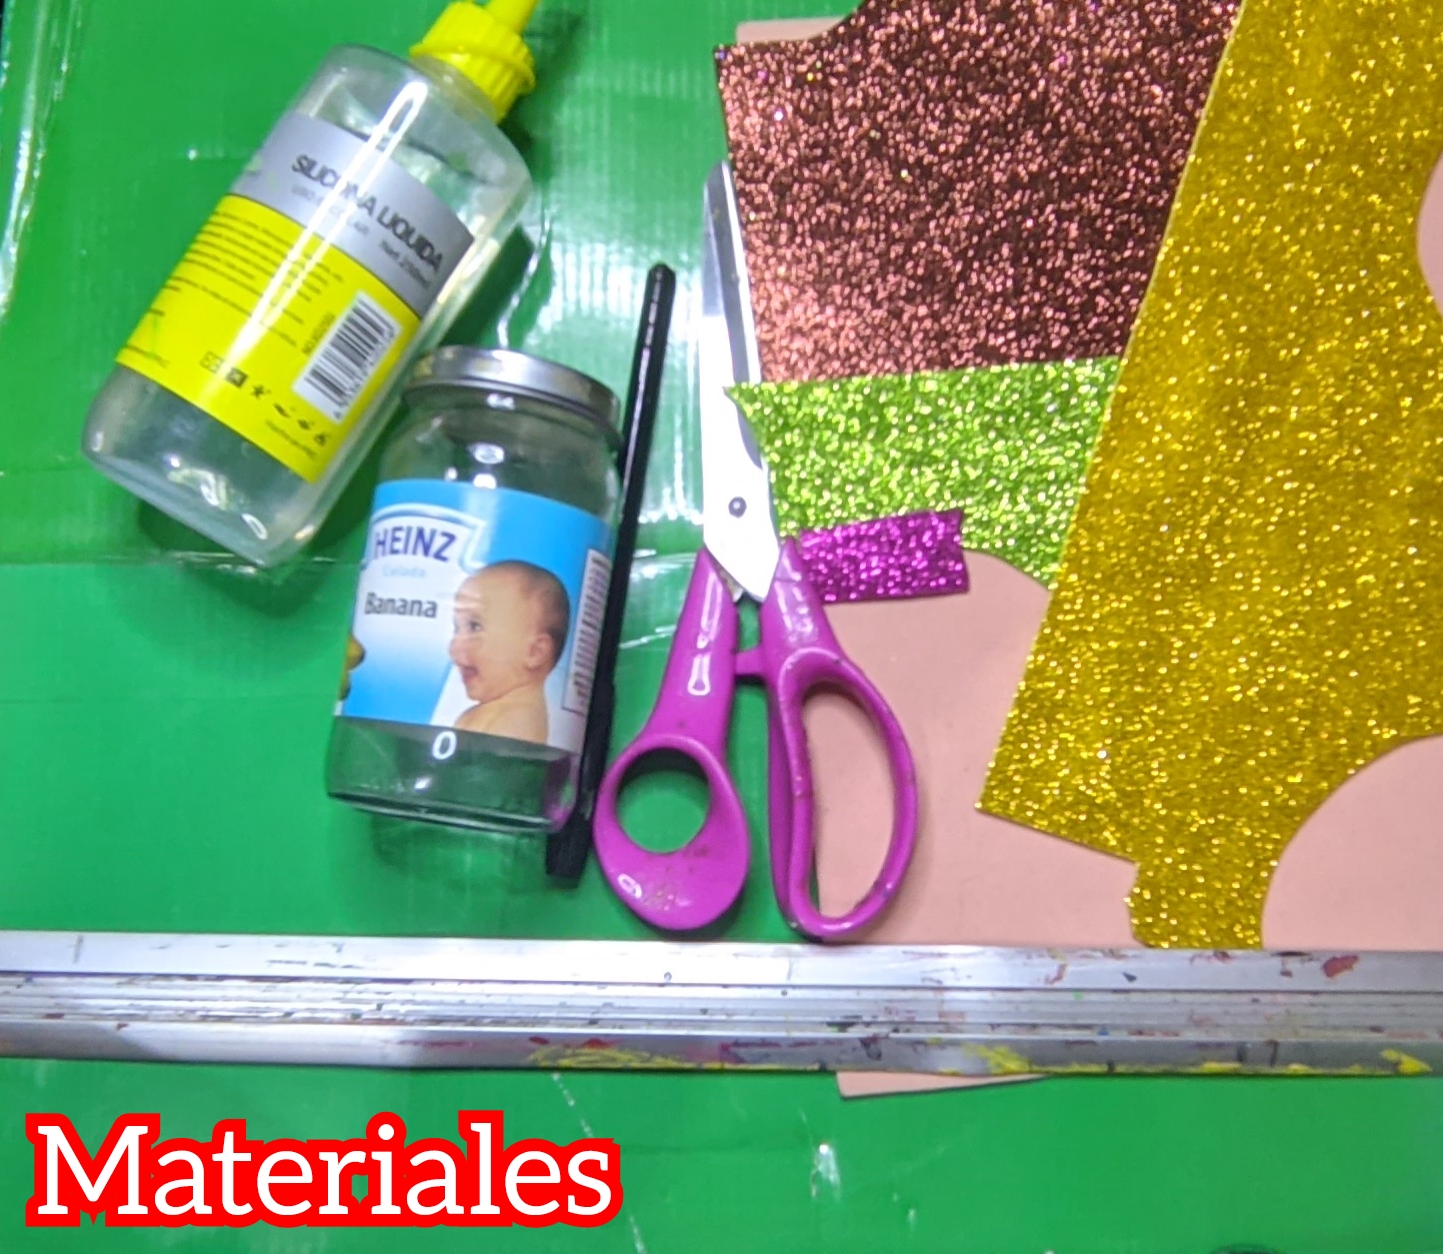
⚜️ Foami color piel.
⚜️ Foami escarchado marrón.
⚜️ Foami escarchado amarillo.
⚜️ Foami escarchado verde.
⚜️ Foami escarchado fucsia.
⚜️ Silicón líquido.
⚜️ Frasco.
⚜️ Tijera.
⚜️ Regla.
⚜️ Lapicero.
⚜️Paso a paso ⚜️
⚜️Paso 1:
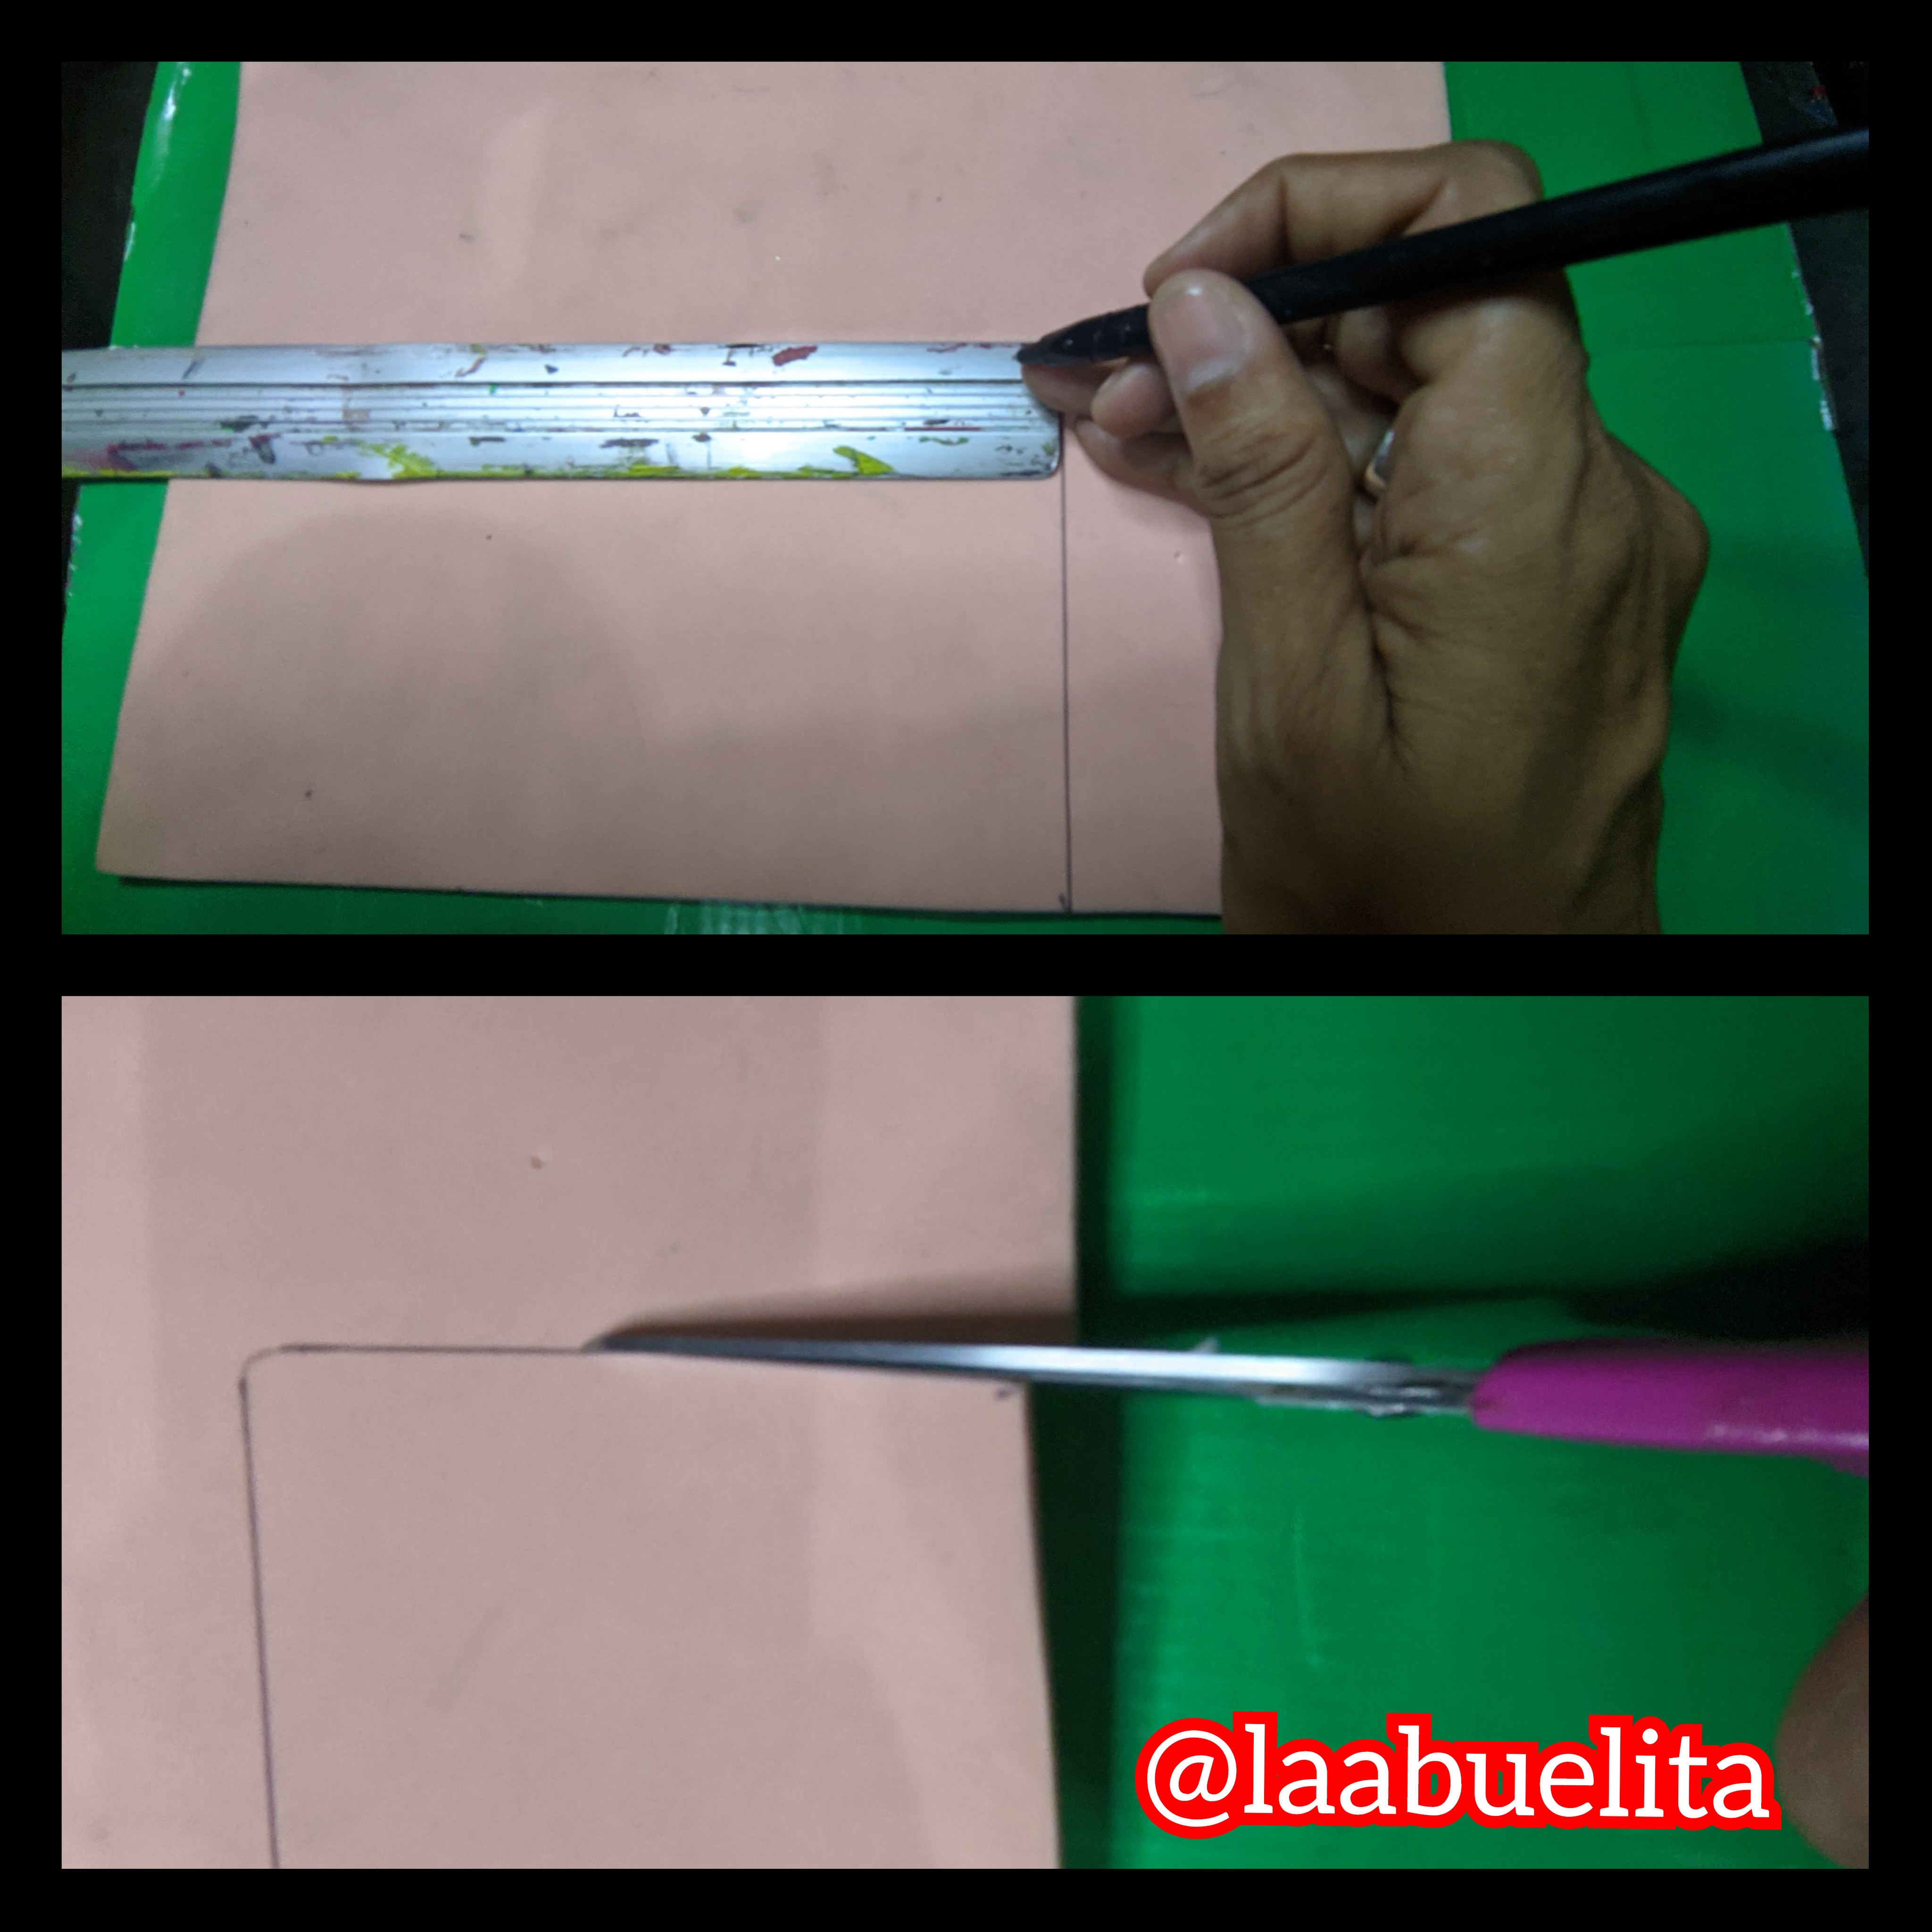
Agarre el foami de color piel y con la ayuda de la regla y el lapicero marque un rectángulo, el tamaño sera de acuerdo al tamaño del frasco que ustedes tengan a la mano para trabajar, solo es cuestión de medirlo y marcarlo, luego lo recorté.
⚜️Paso 2:

Ahora lo que hice fue forrar el frasco, así que aplique silicón líquido en el frasco y pegue el rectángulo de foami de color piel, le presionamos un poco y dejamos secar bien.
⚜️Paso 3:
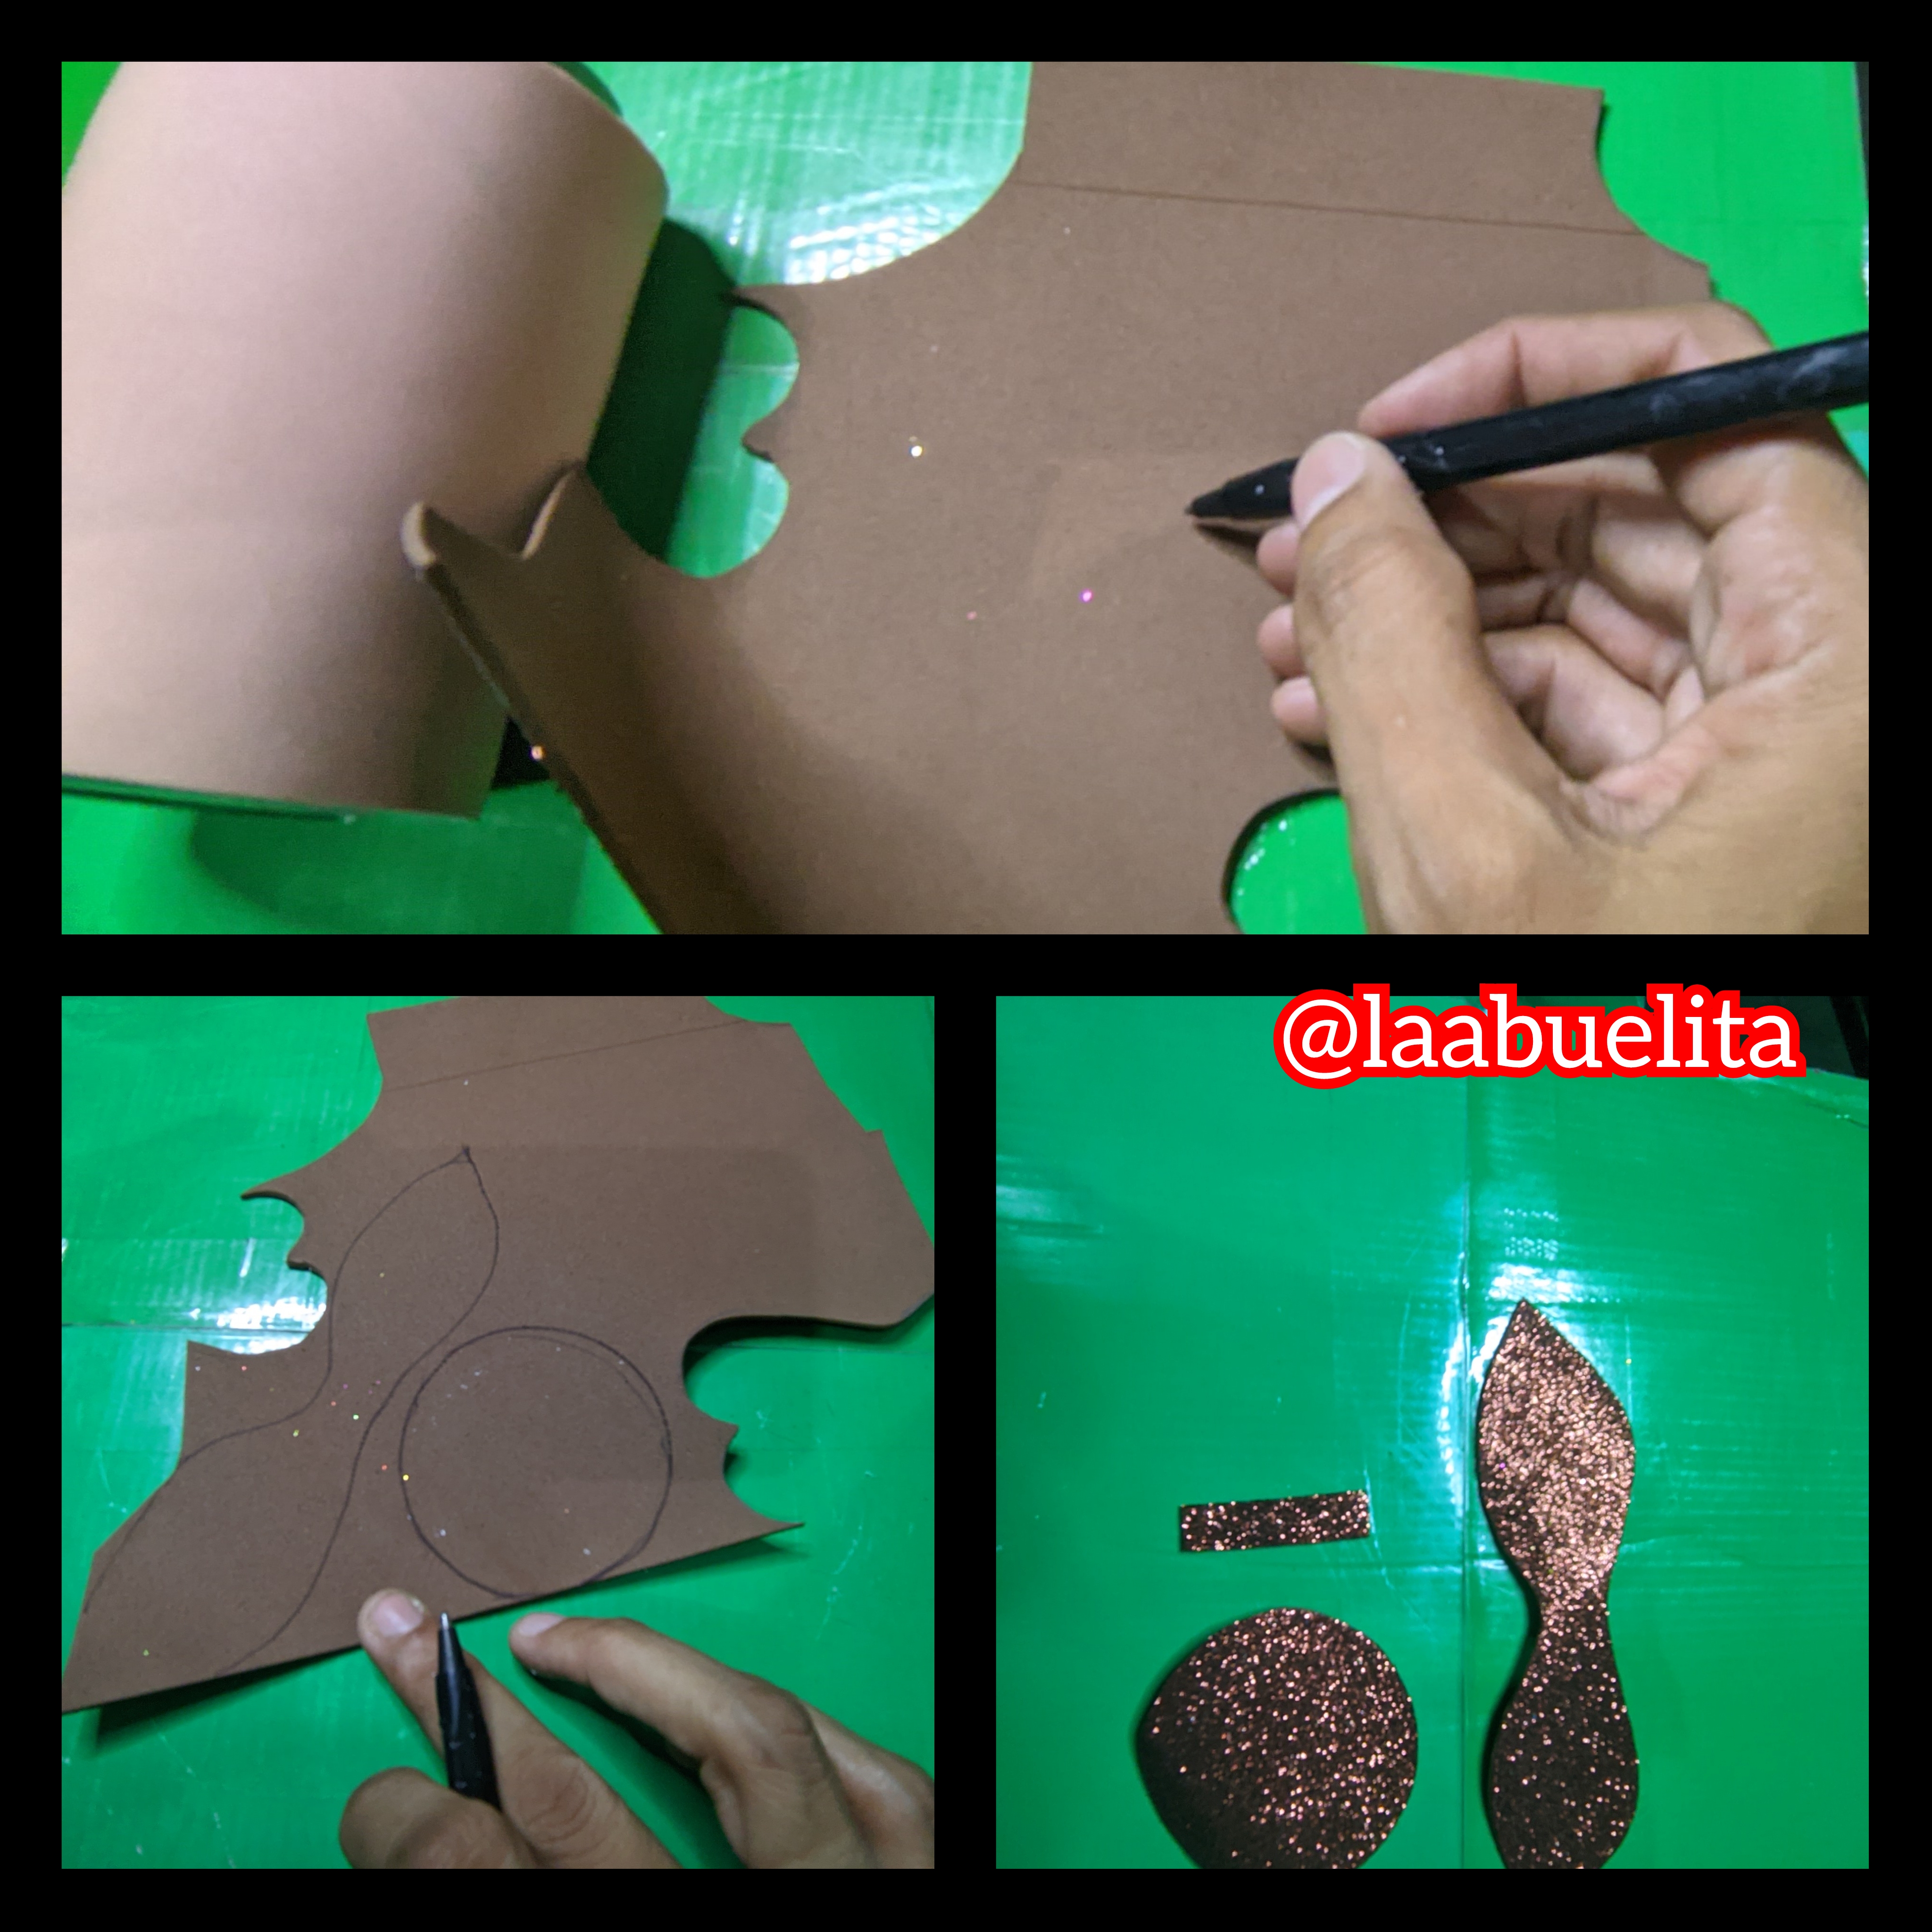
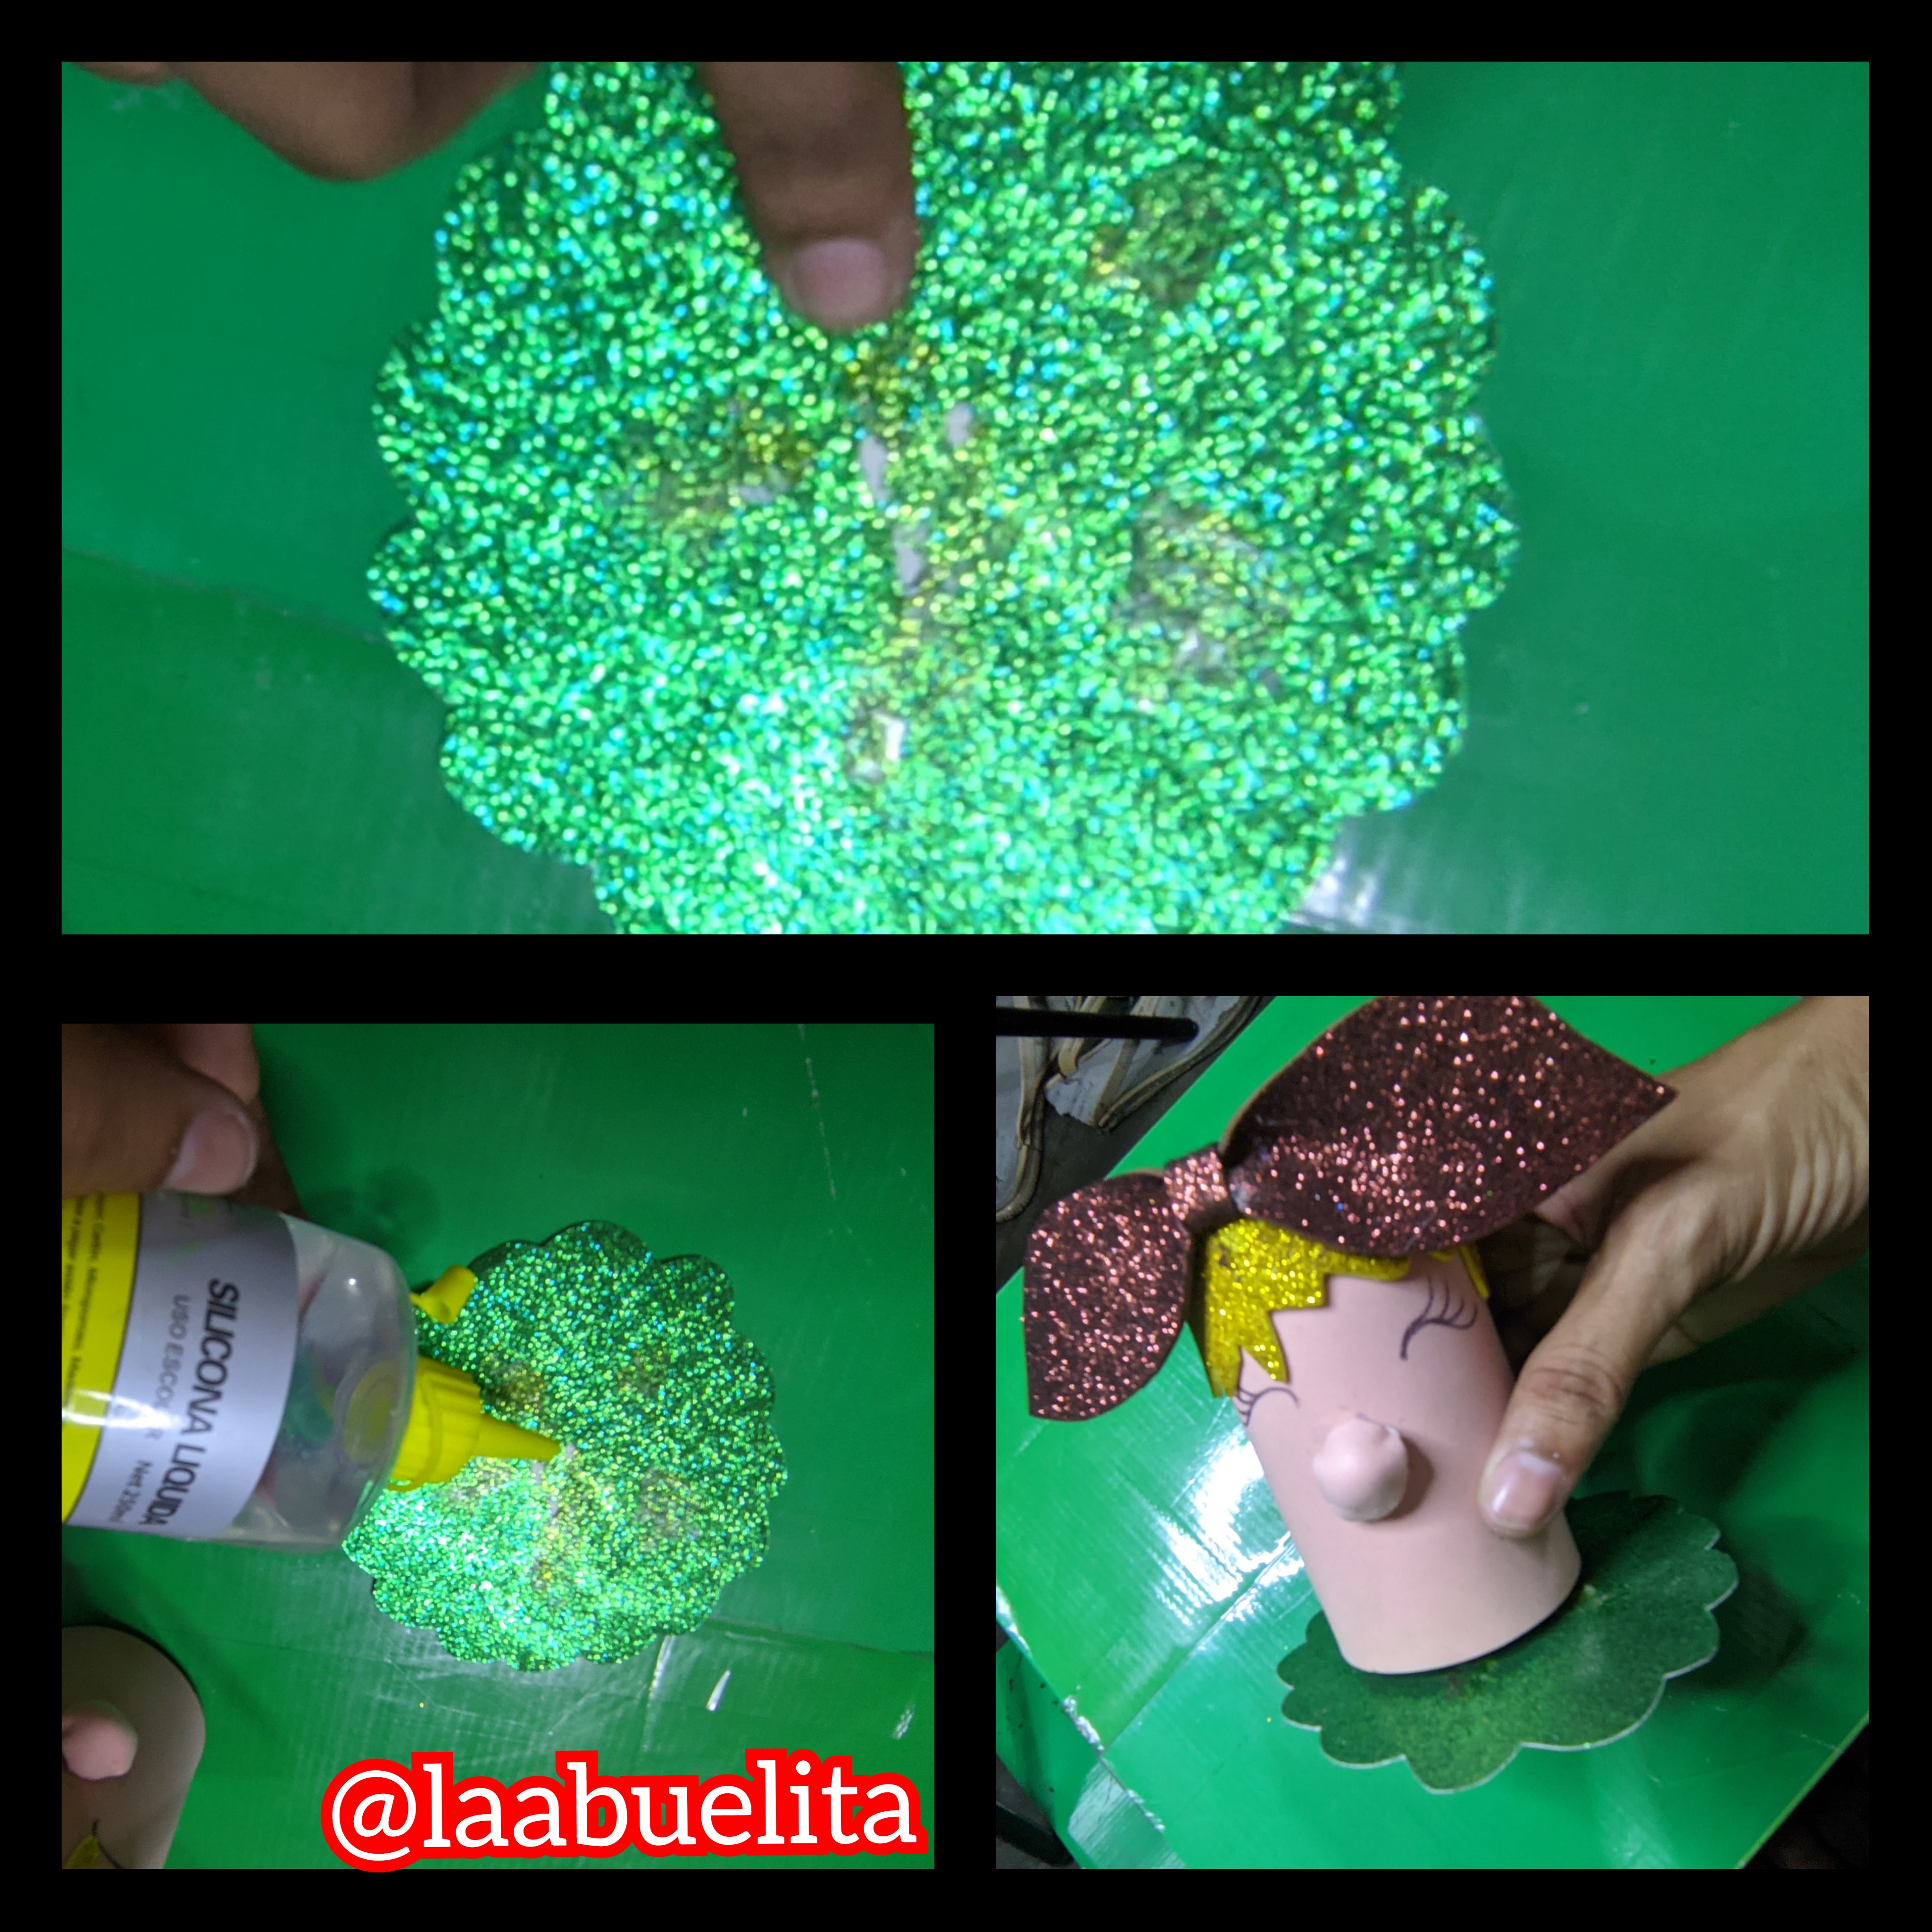
En el foami de color marrón marque las piezas con las que voy a trabajar de ese color, marque el lazo que lleva mi muñeca, también un pequeñito rectángulo que será el centro del lazo y también la base redonda que será la que utilizaré para cubrir la tapa de arriba, una vez dibujados los recortamos.
⚜️Paso 4:
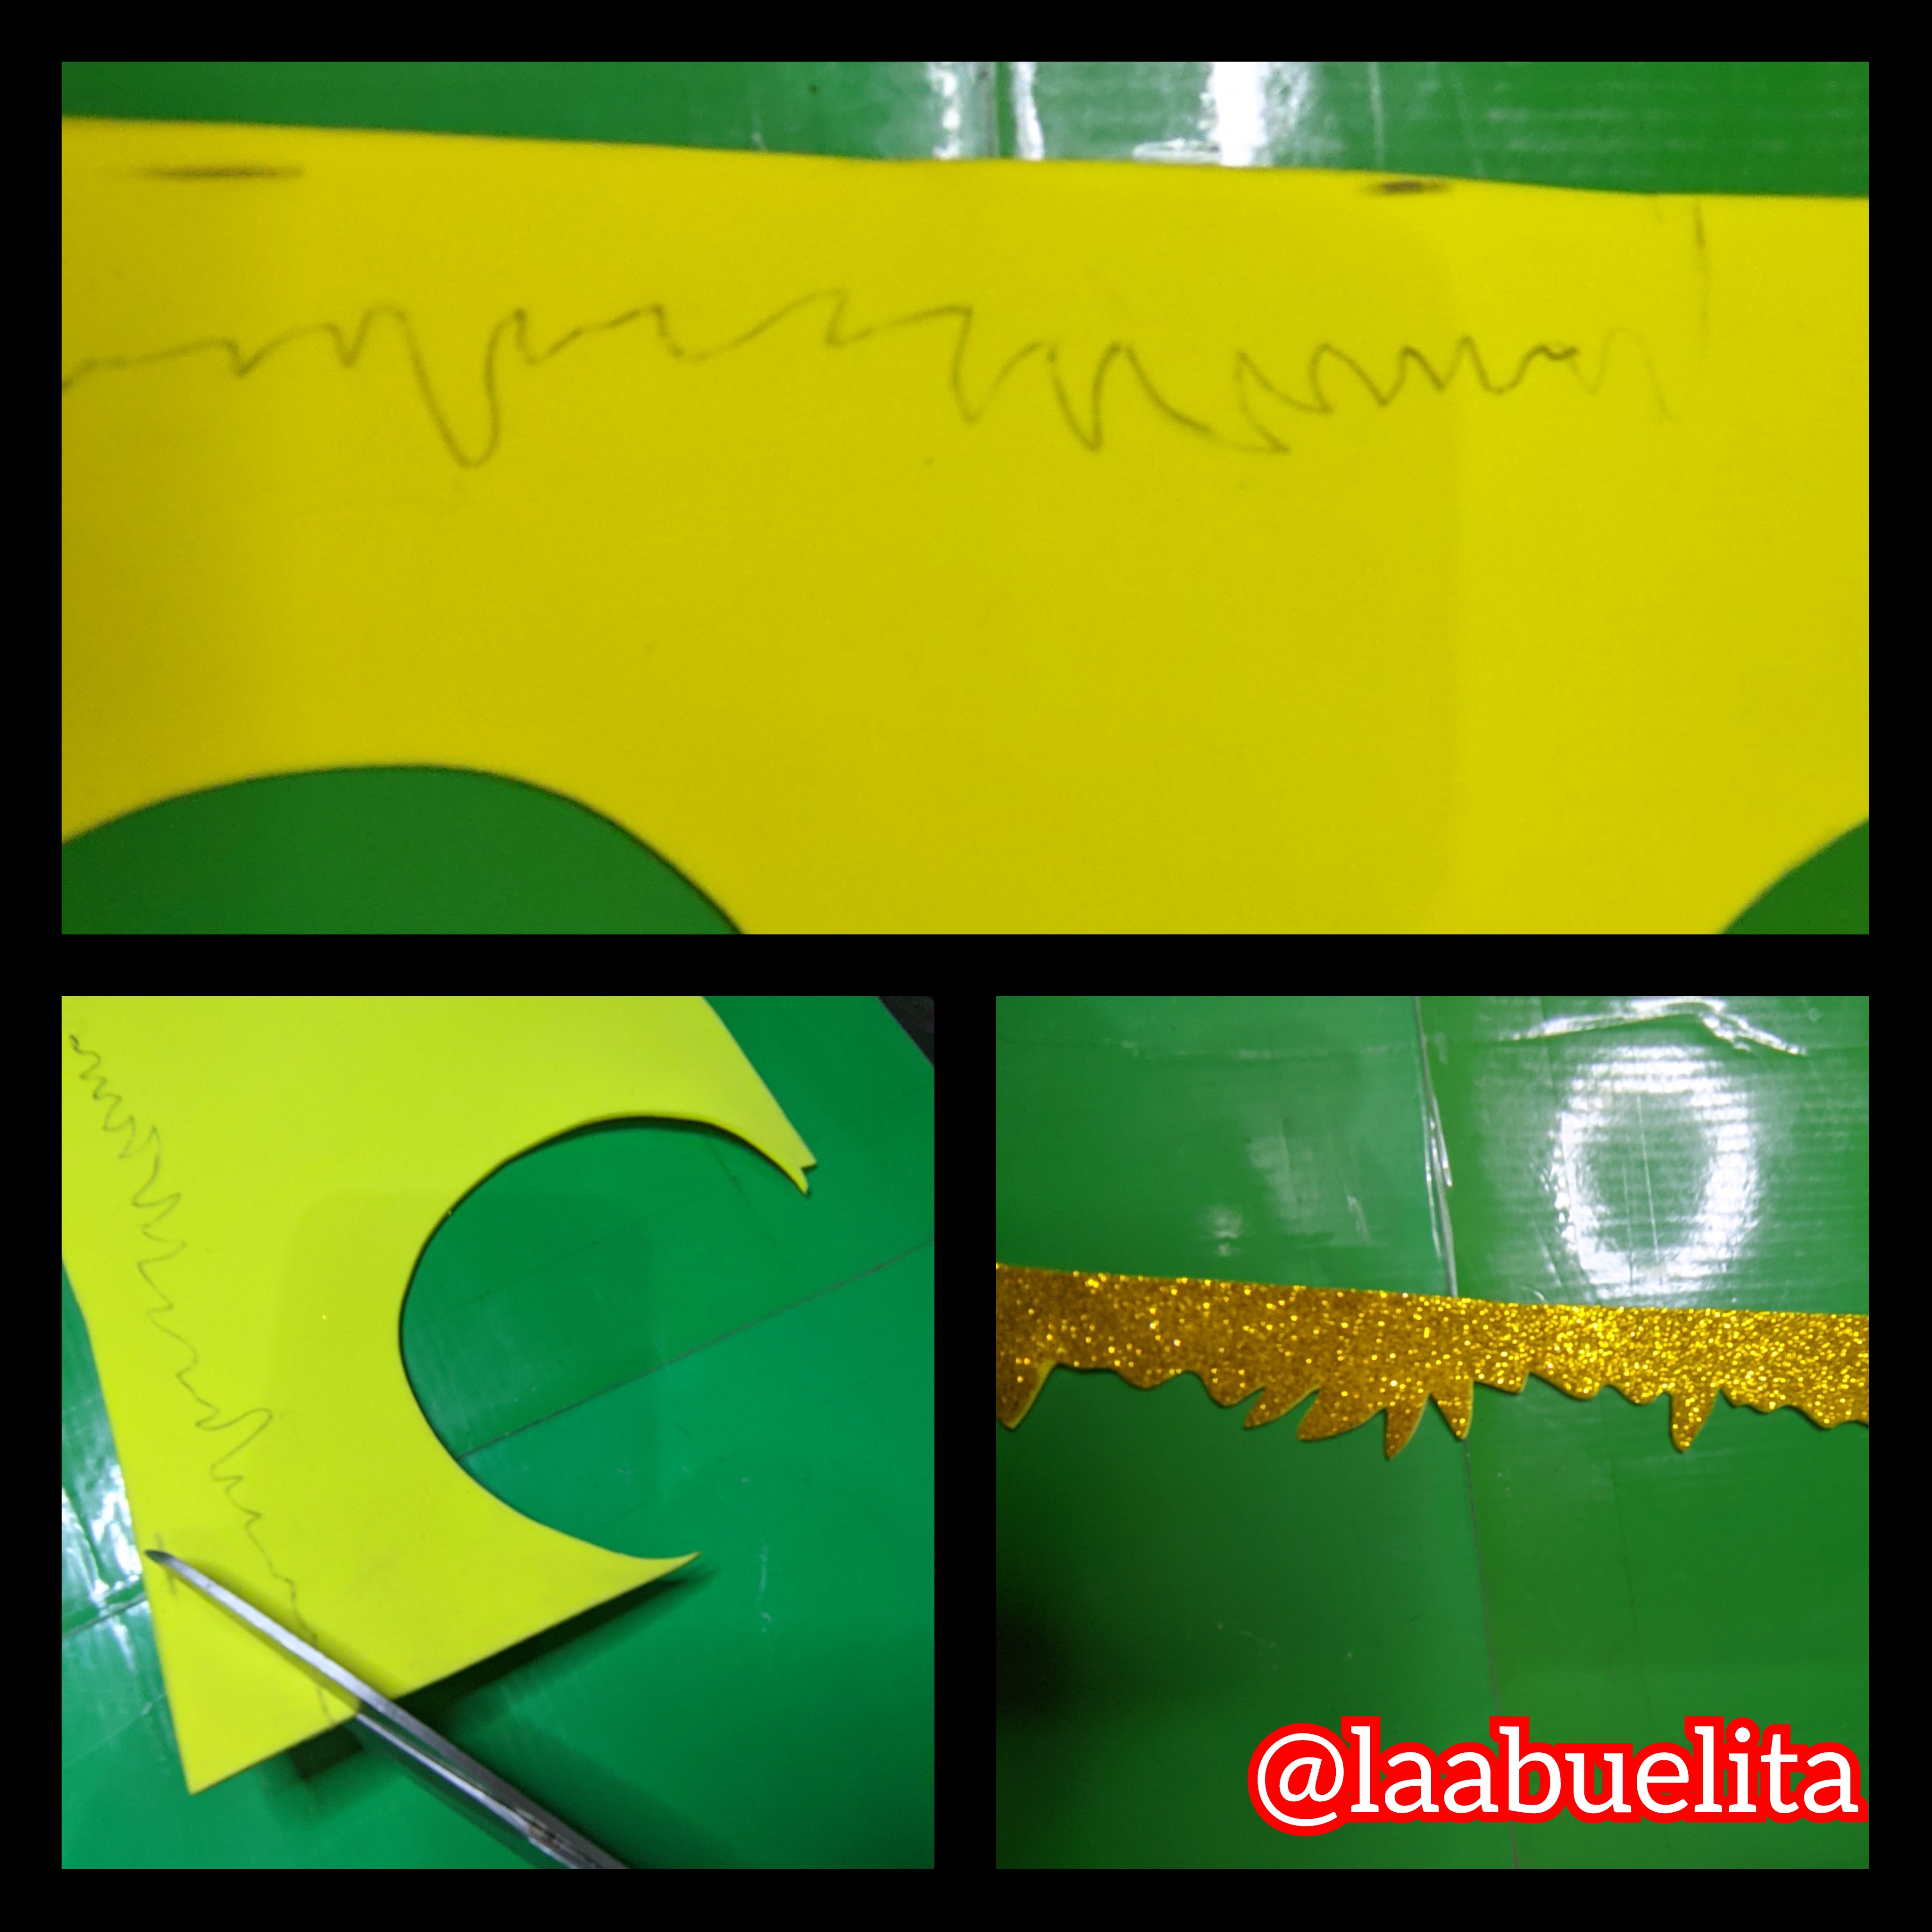
Ahora agarre el Foami escarchado amarillo y con el lapicero marcamos el cabello, esto también es a gusto de cada quien, luego lo recortamos.
⚜️Paso 5:
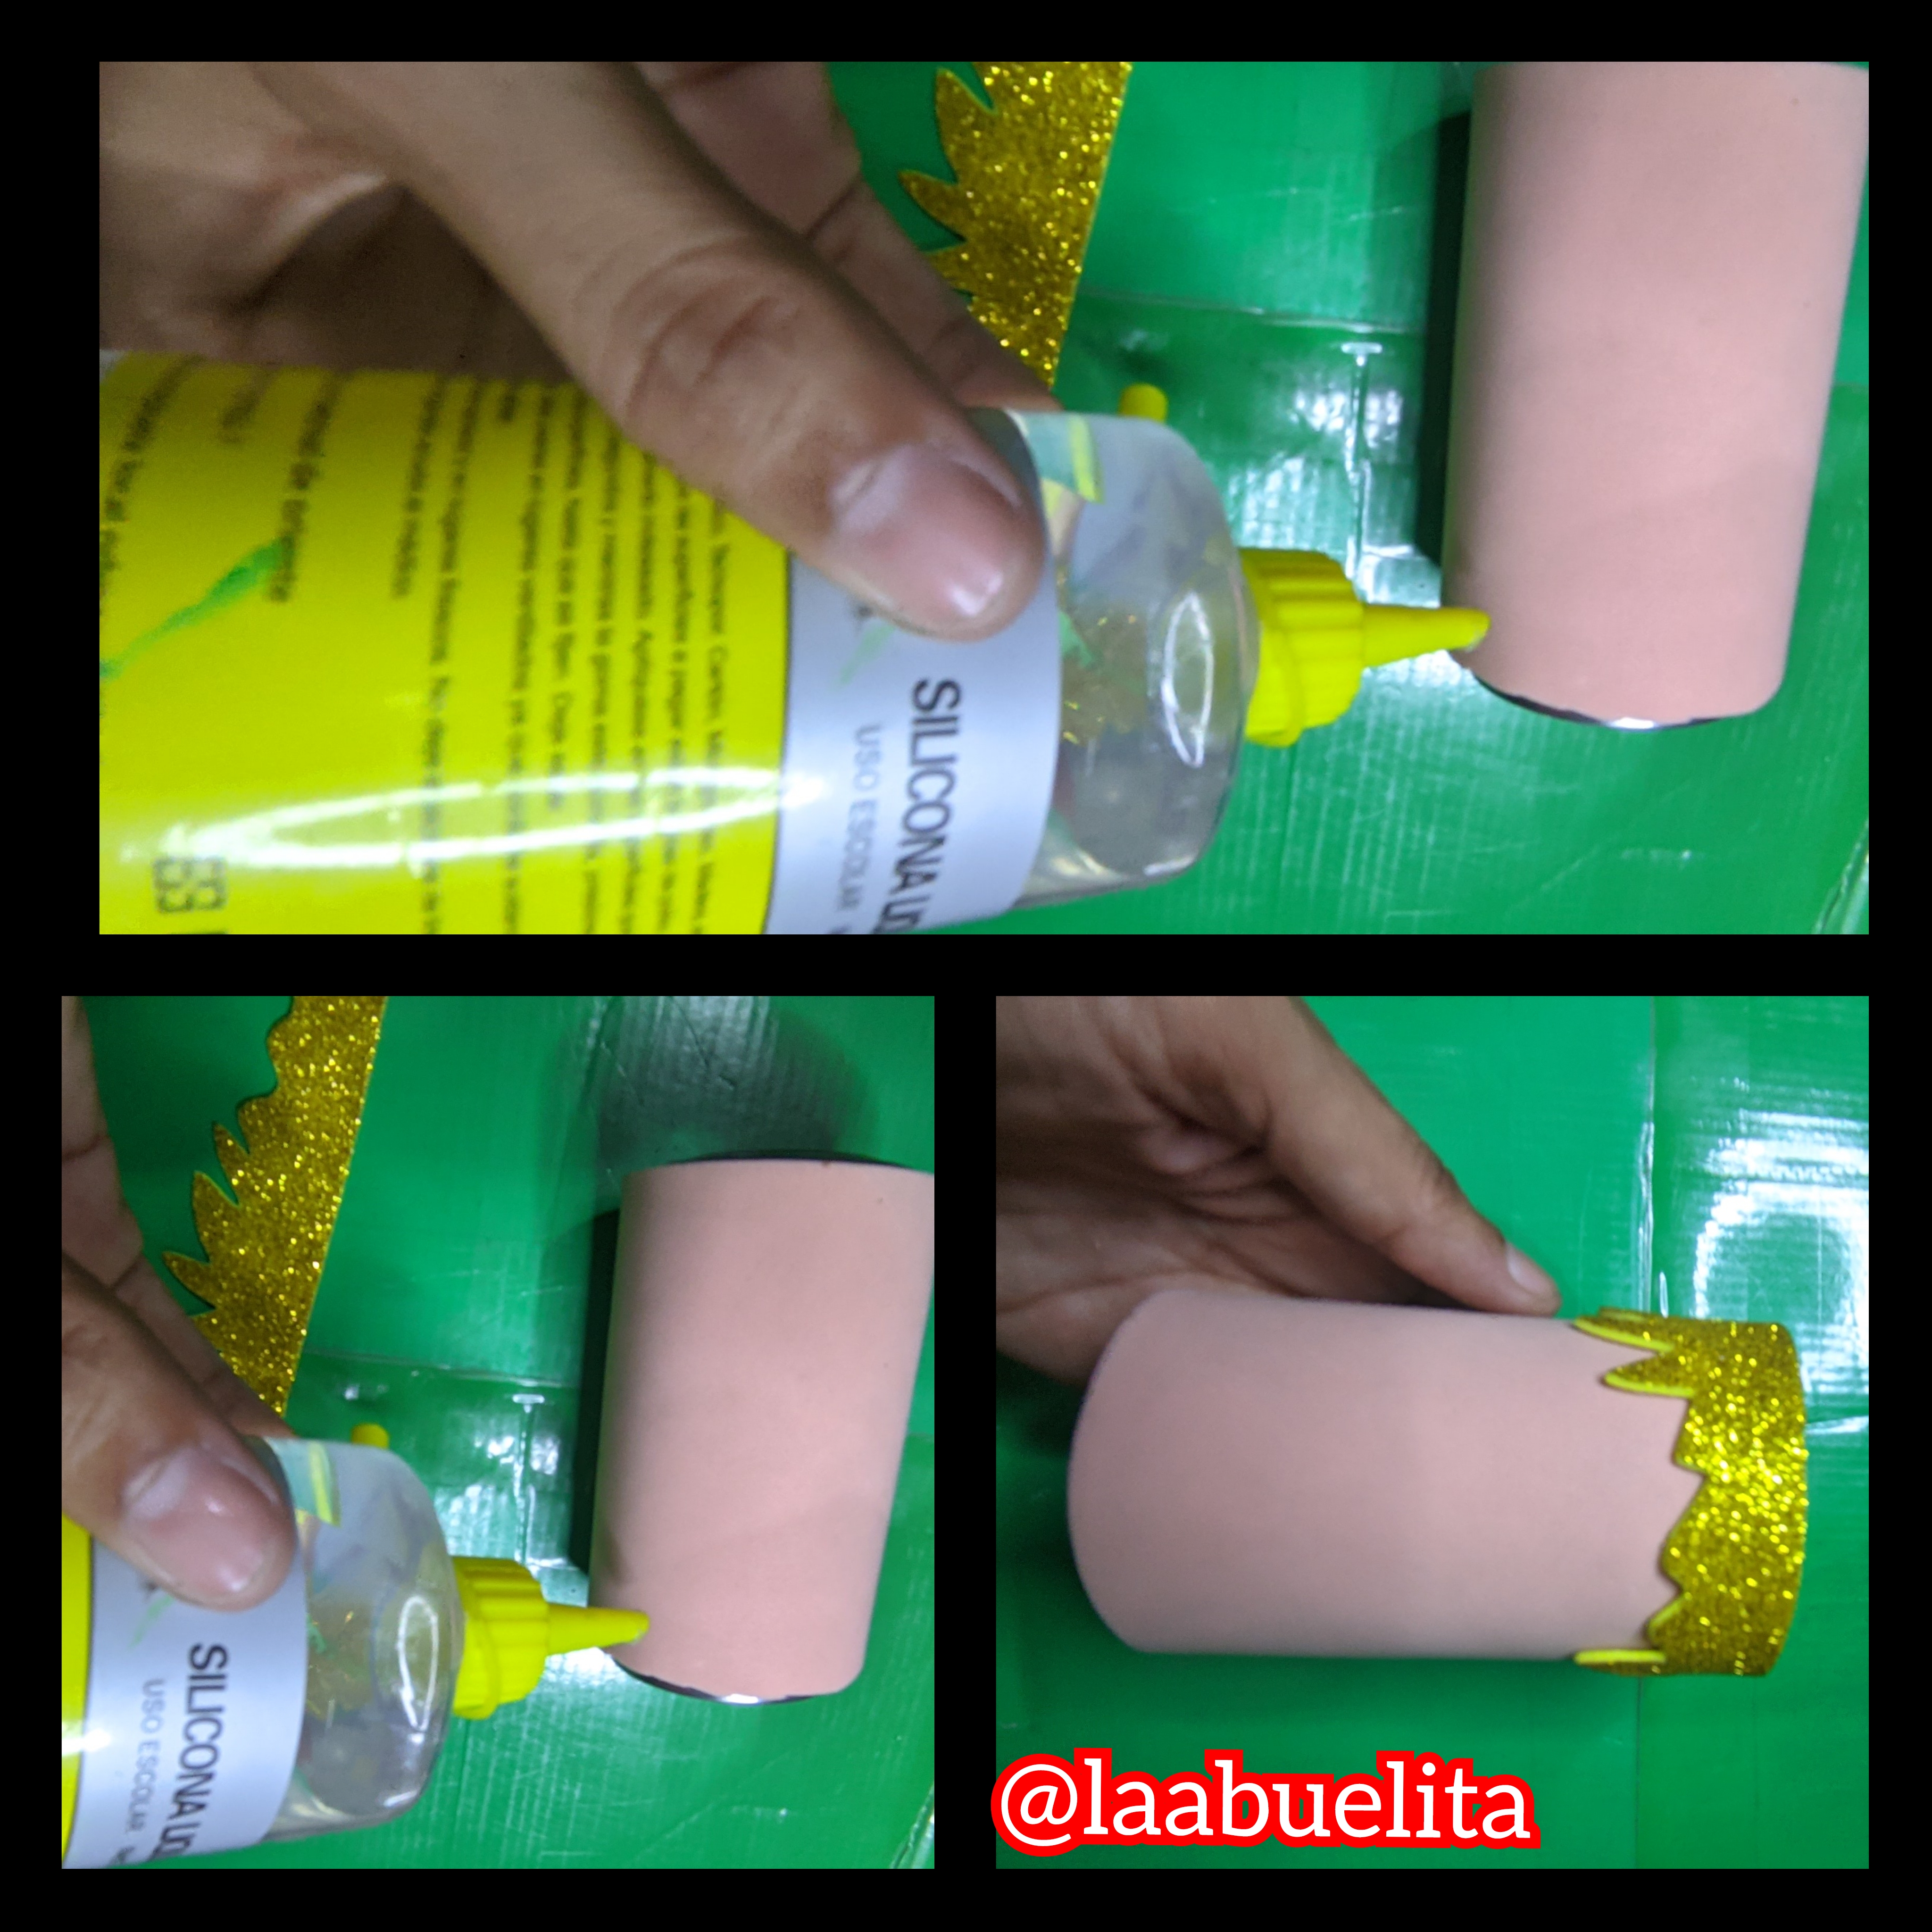
En el borde de el envase ya forrado aplicó un poco de silicón líquido y pegué el cabello que recorté en el foami amarillo.
⚜️Paso 6:
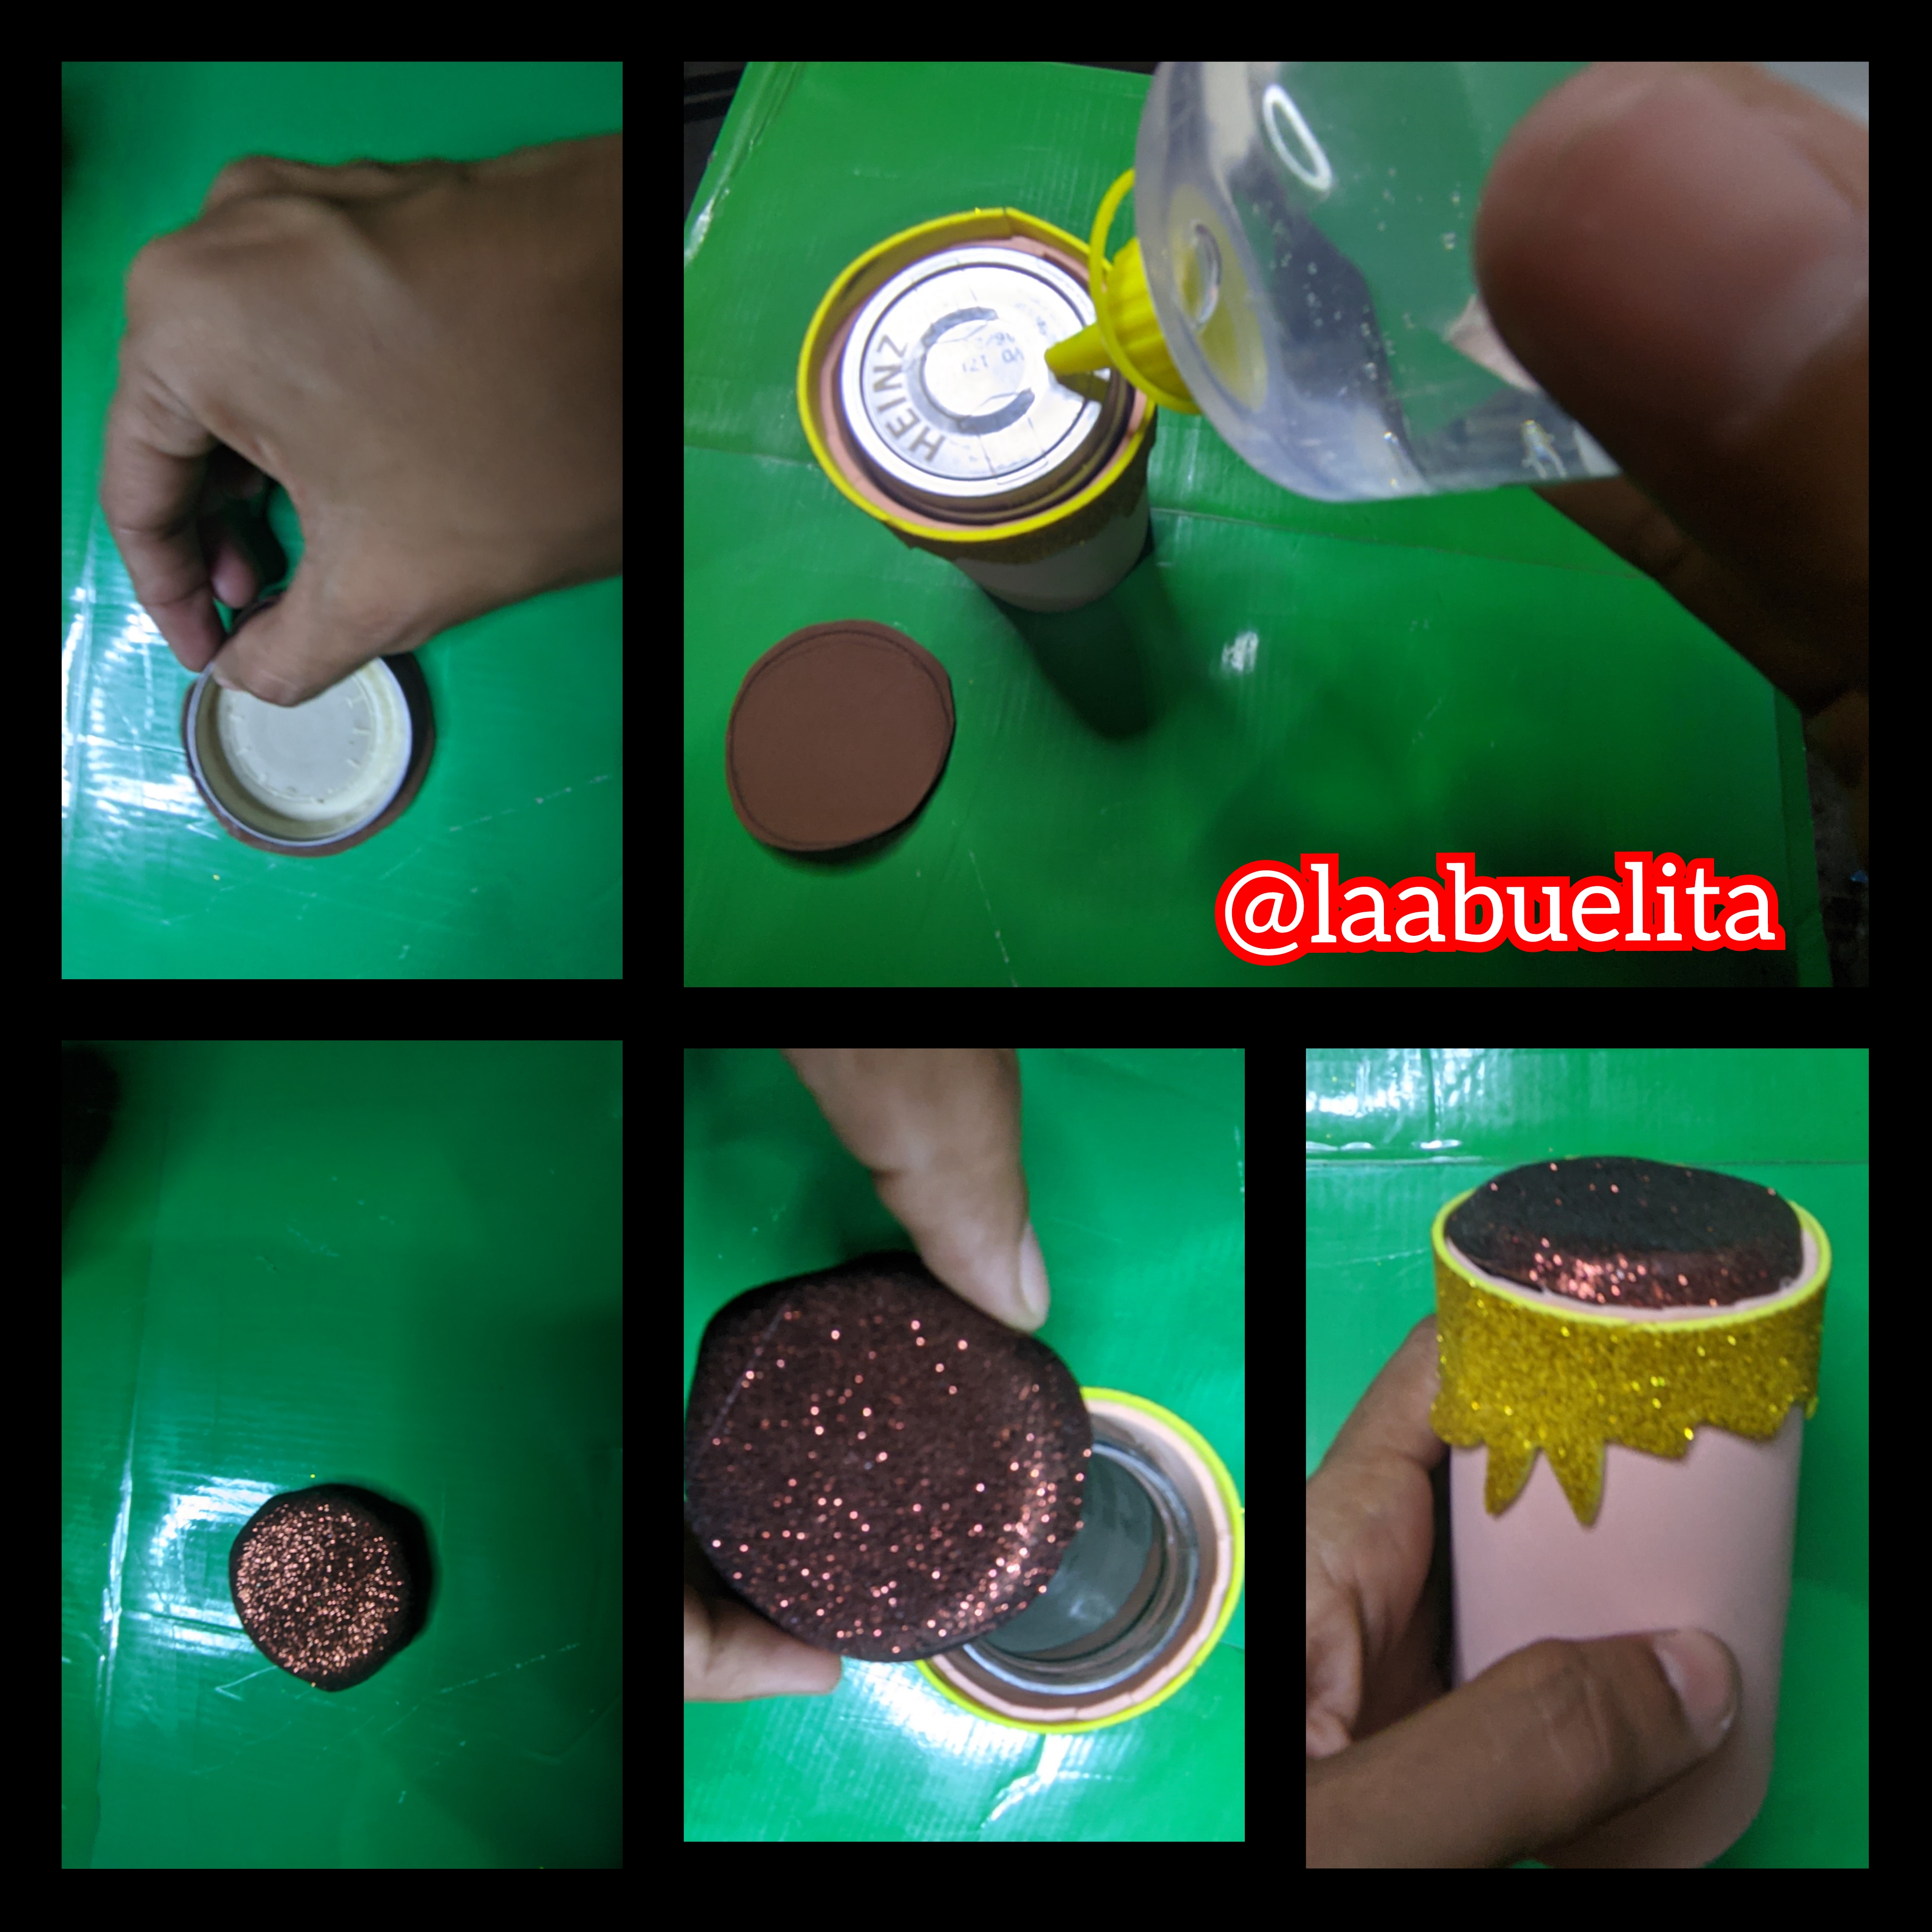
Cuando ya seco el cabello agarre el círculo de foami escarchado marrón y le aplicó silicón líquido para pegarlo de la tapa, asegurándonos de que se cubra los lados.
⚜️Paso 7:
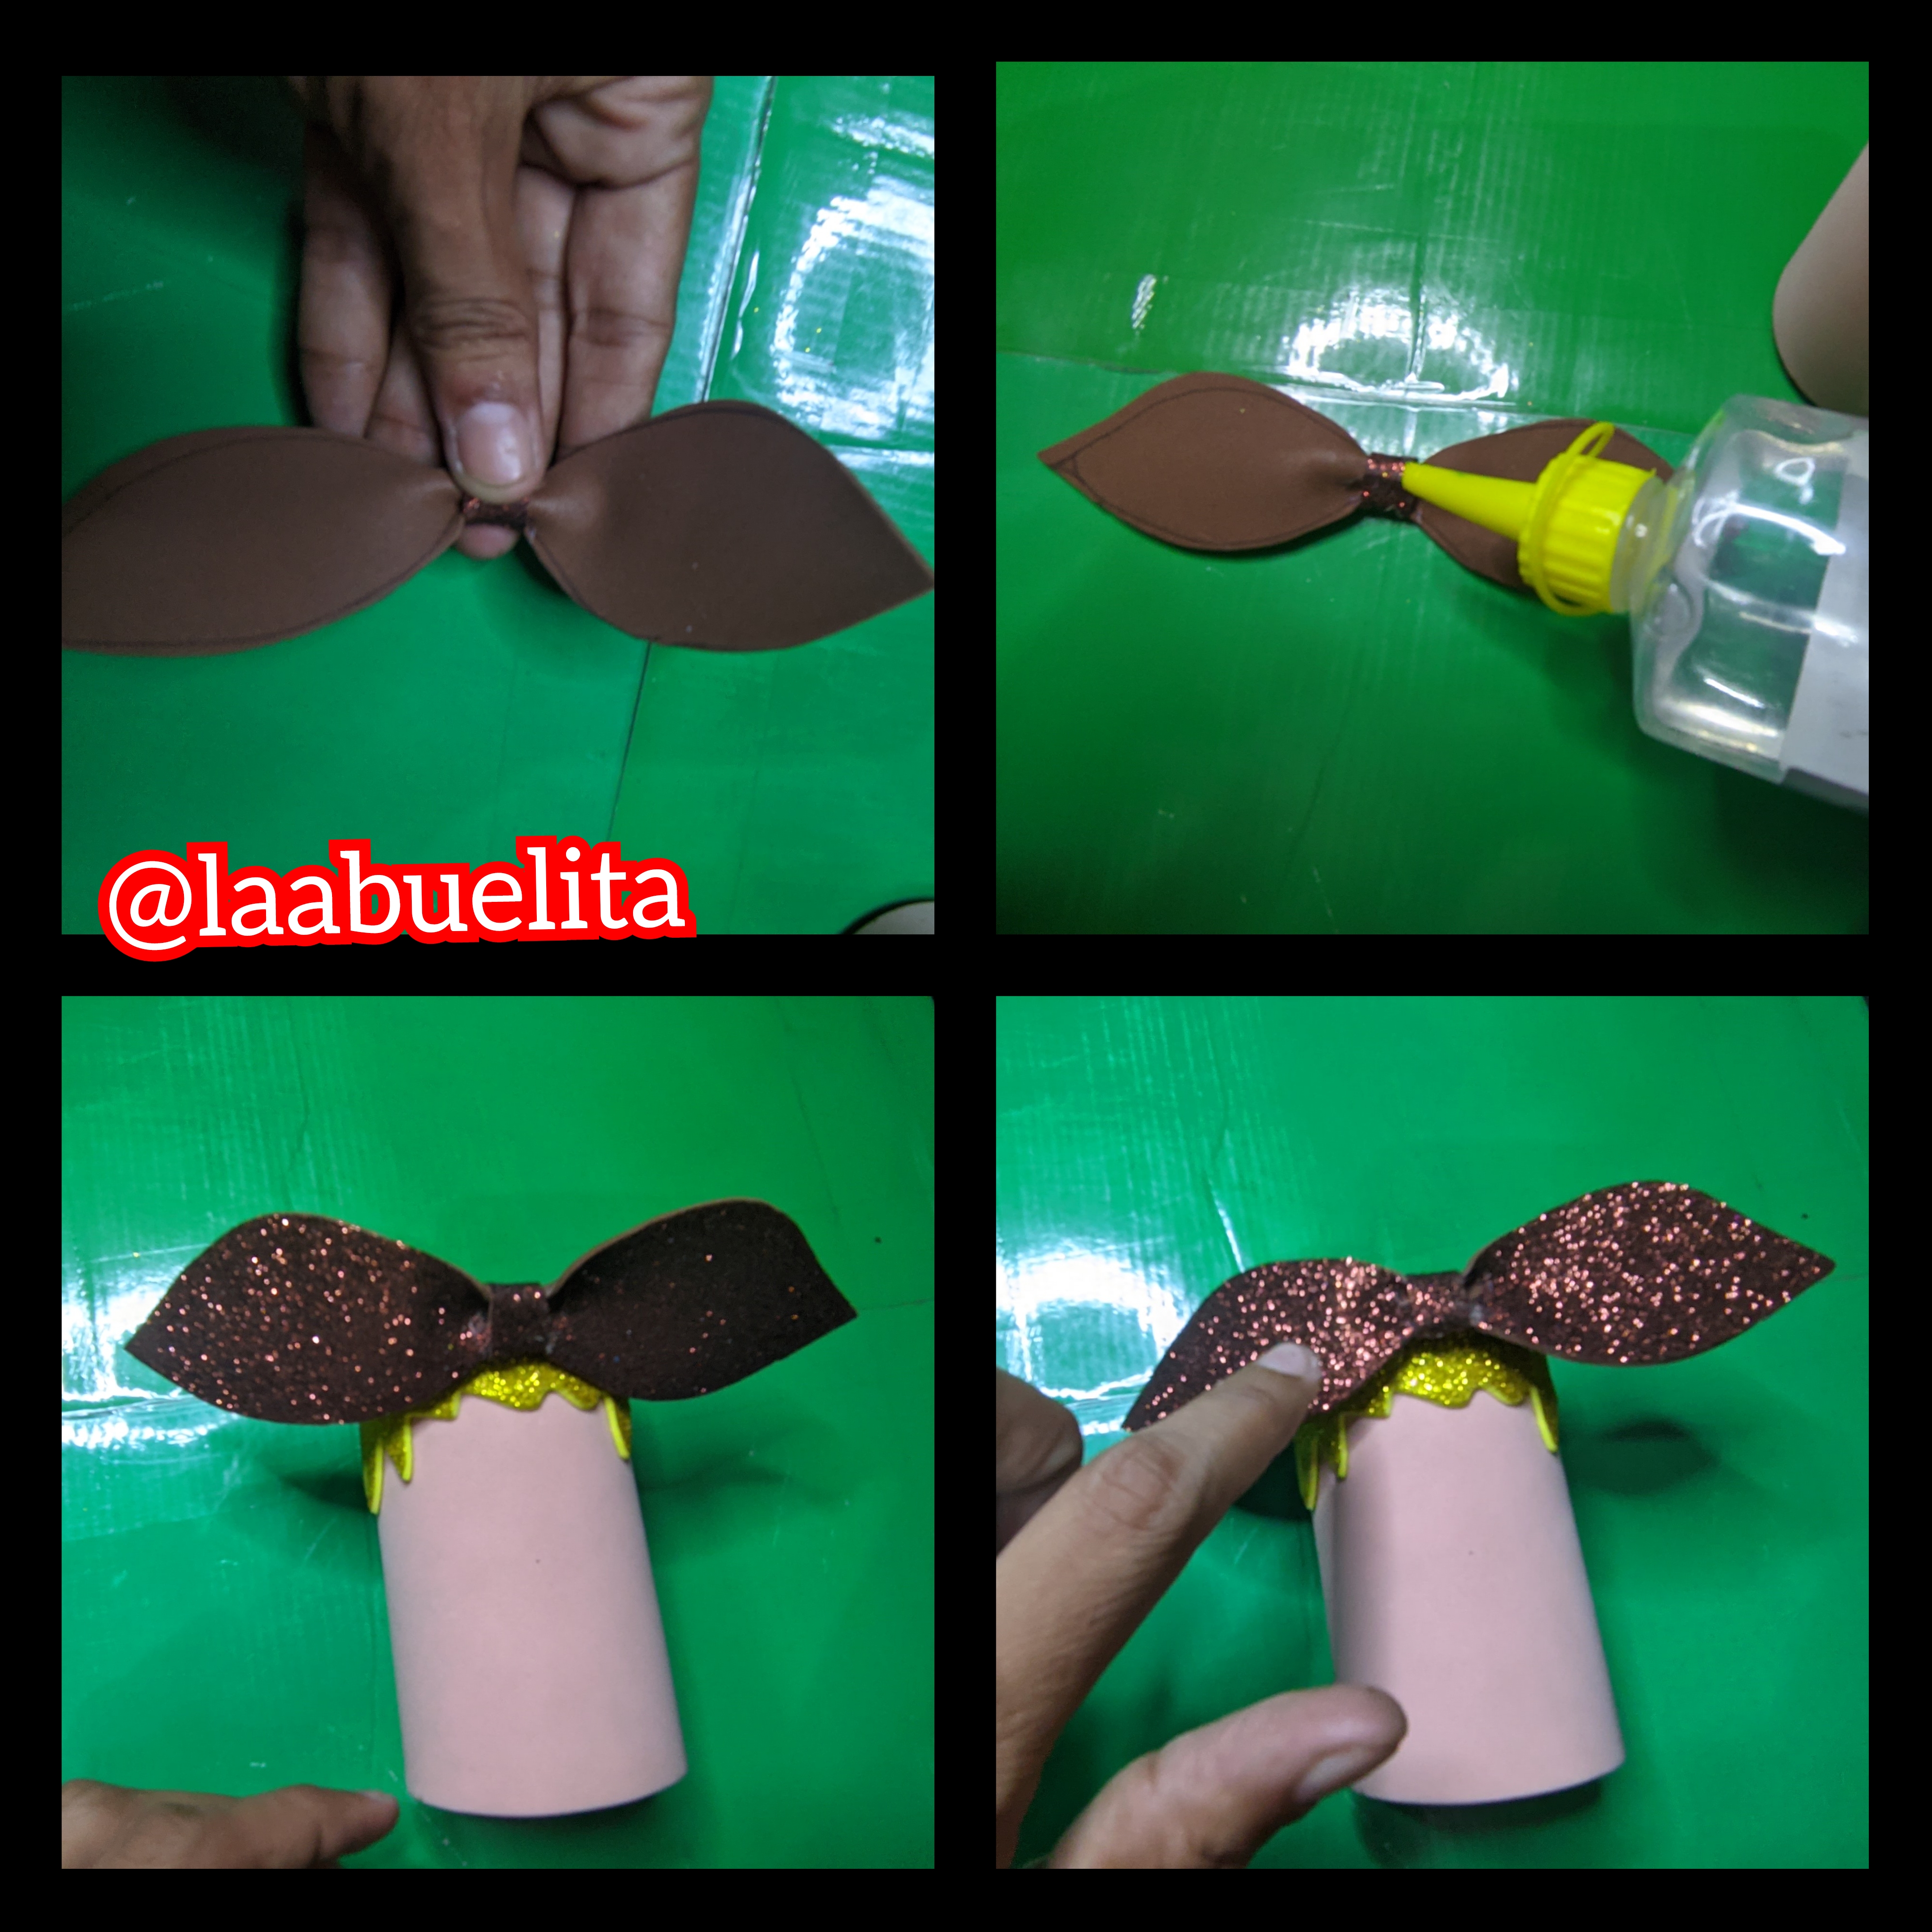
Ahora tome el lazo y le pegué el rectángulo del centro y dejo secar un ratito, cuando ya está seco, le aplicó silicón líquido y lo pegamos del envase y dejamos secar.
⚜️Paso 8:

Luego recorté un pequeño cuadrado de foami color piel, la cual luego pase por la plancha para hacerlo más manejable y luego rellene con los sobrantes del foami y formamos la nariz, a la que le aplicamos silicón líquido y pegamos en el rostro.
⚜️Paso 9:
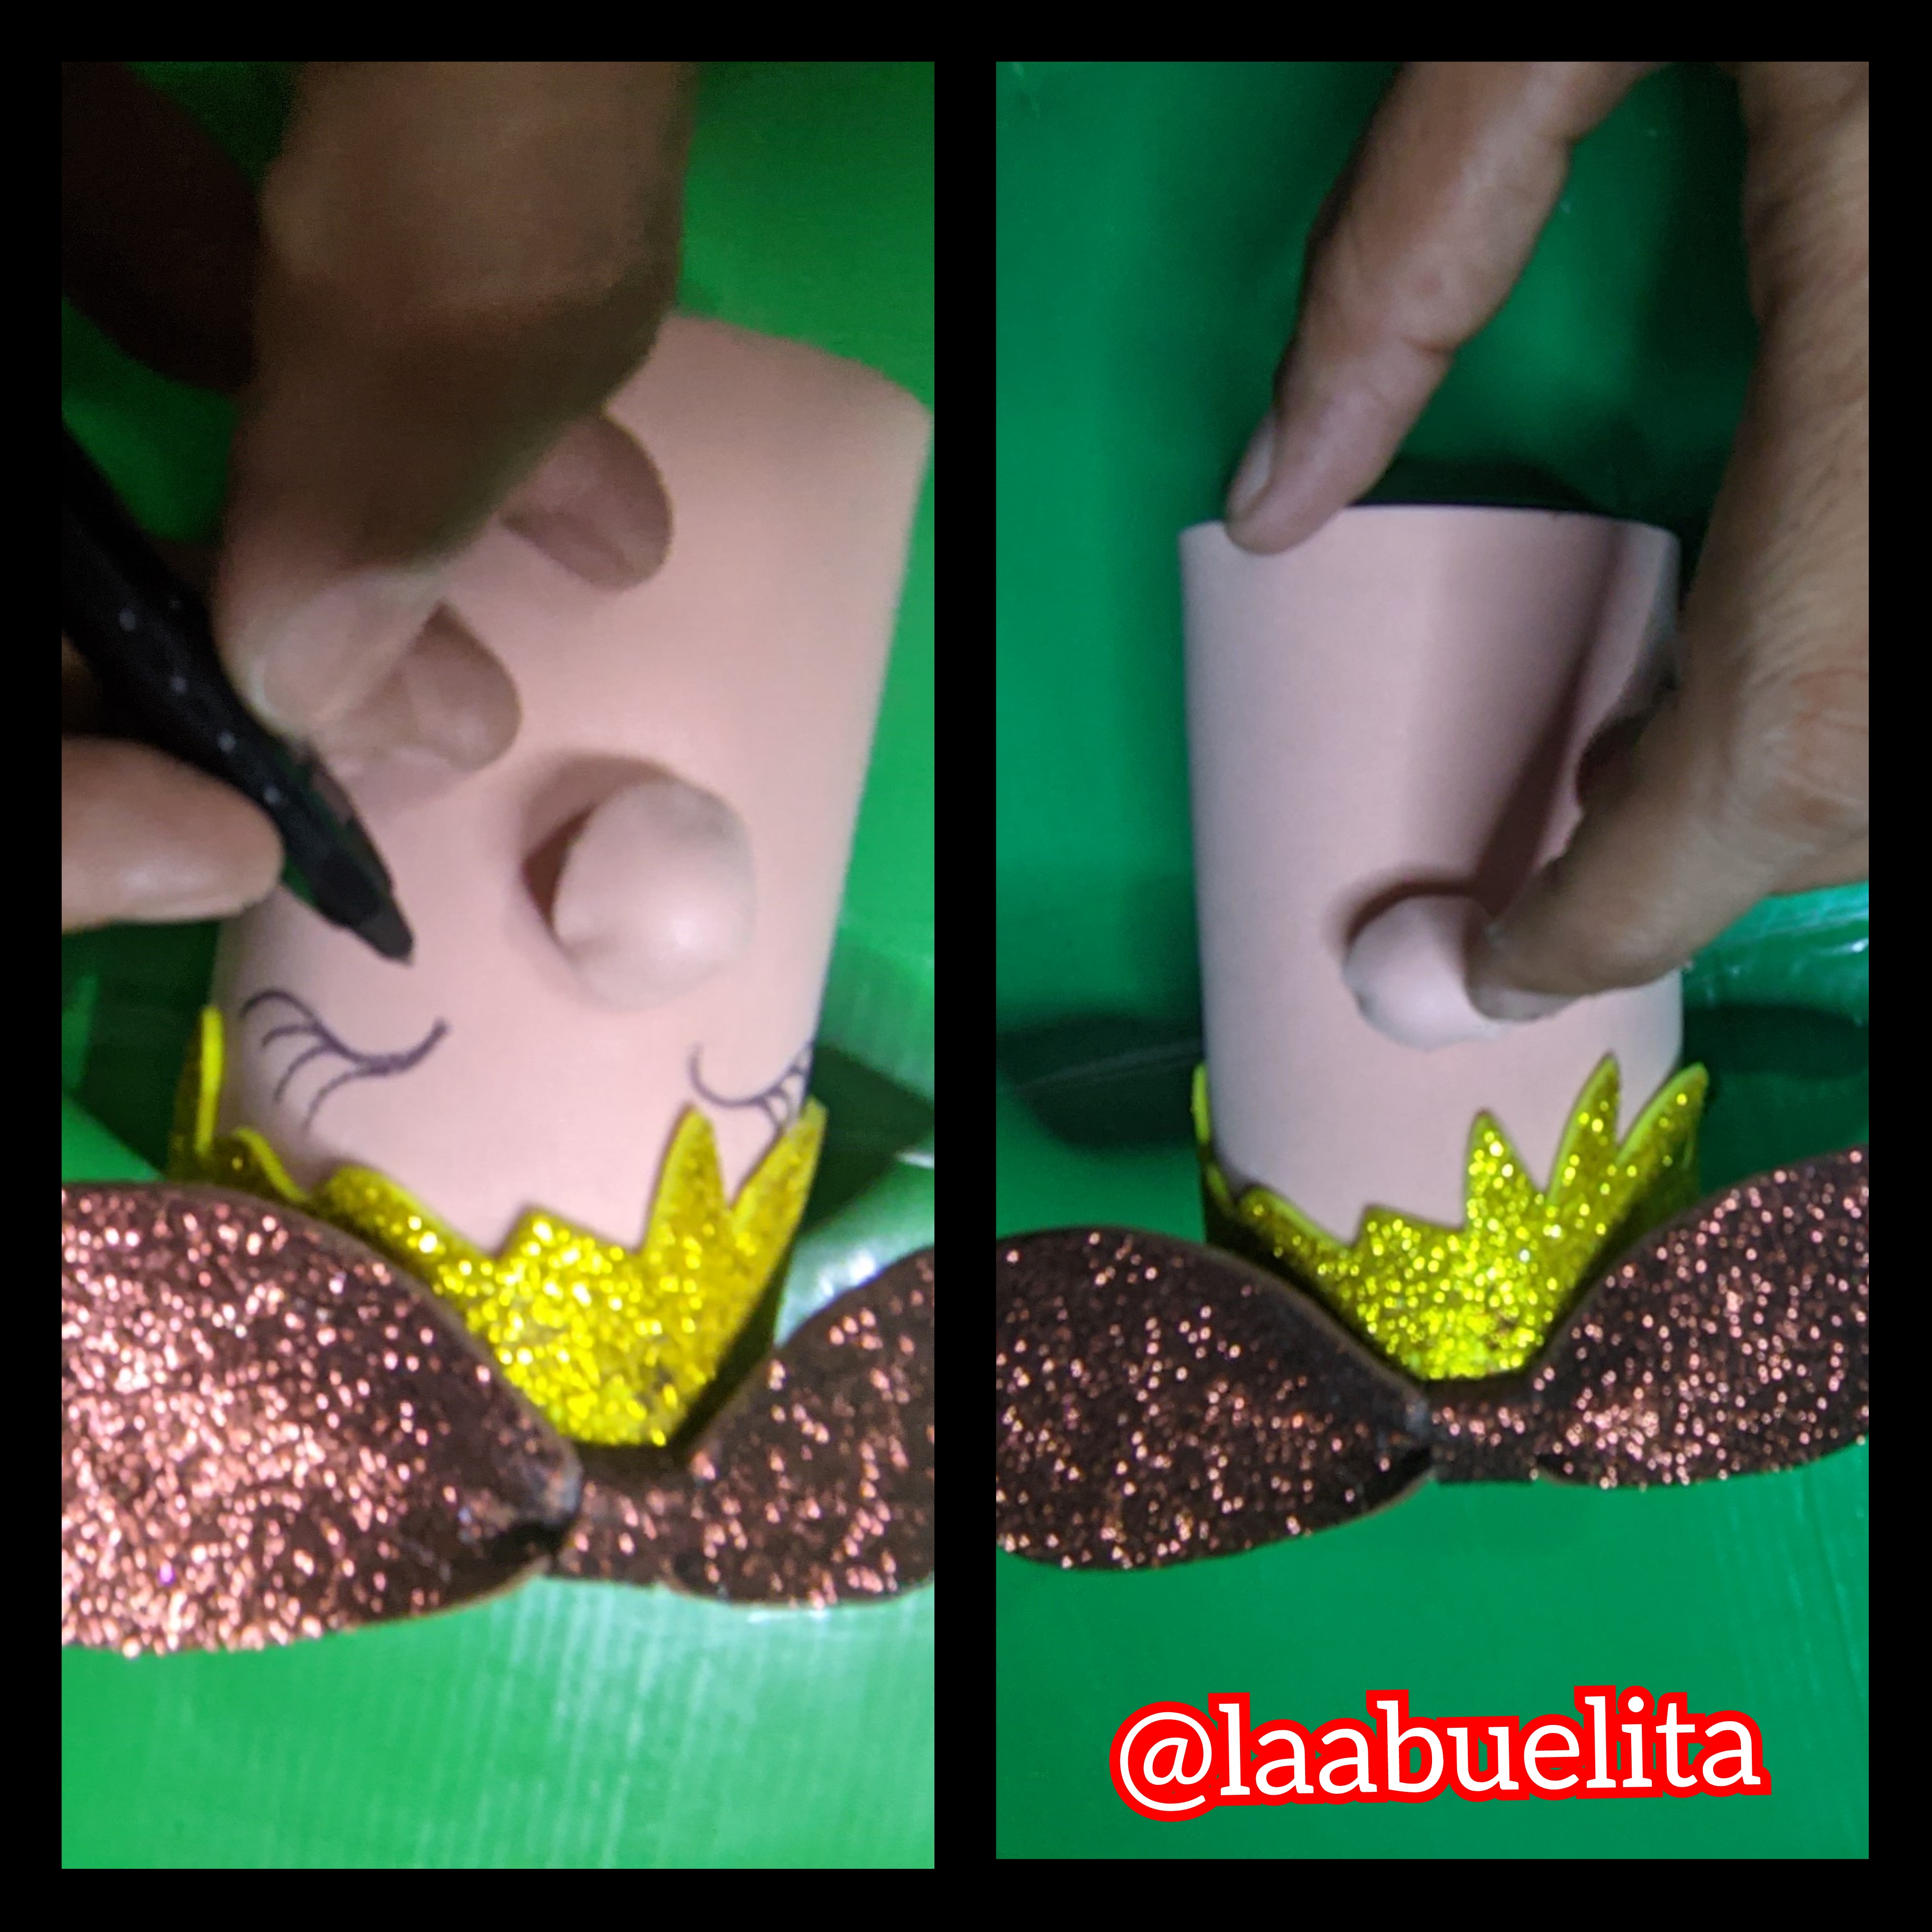
Ahora con el lapicero de color negro dibuje sus ojos y unas pestañas bastante pronunciadas.
⚜️Paso 10:
Recorte una base de foami verde y le apliqué silicón líquido y pegamos el envase.
⚜️Paso 11:
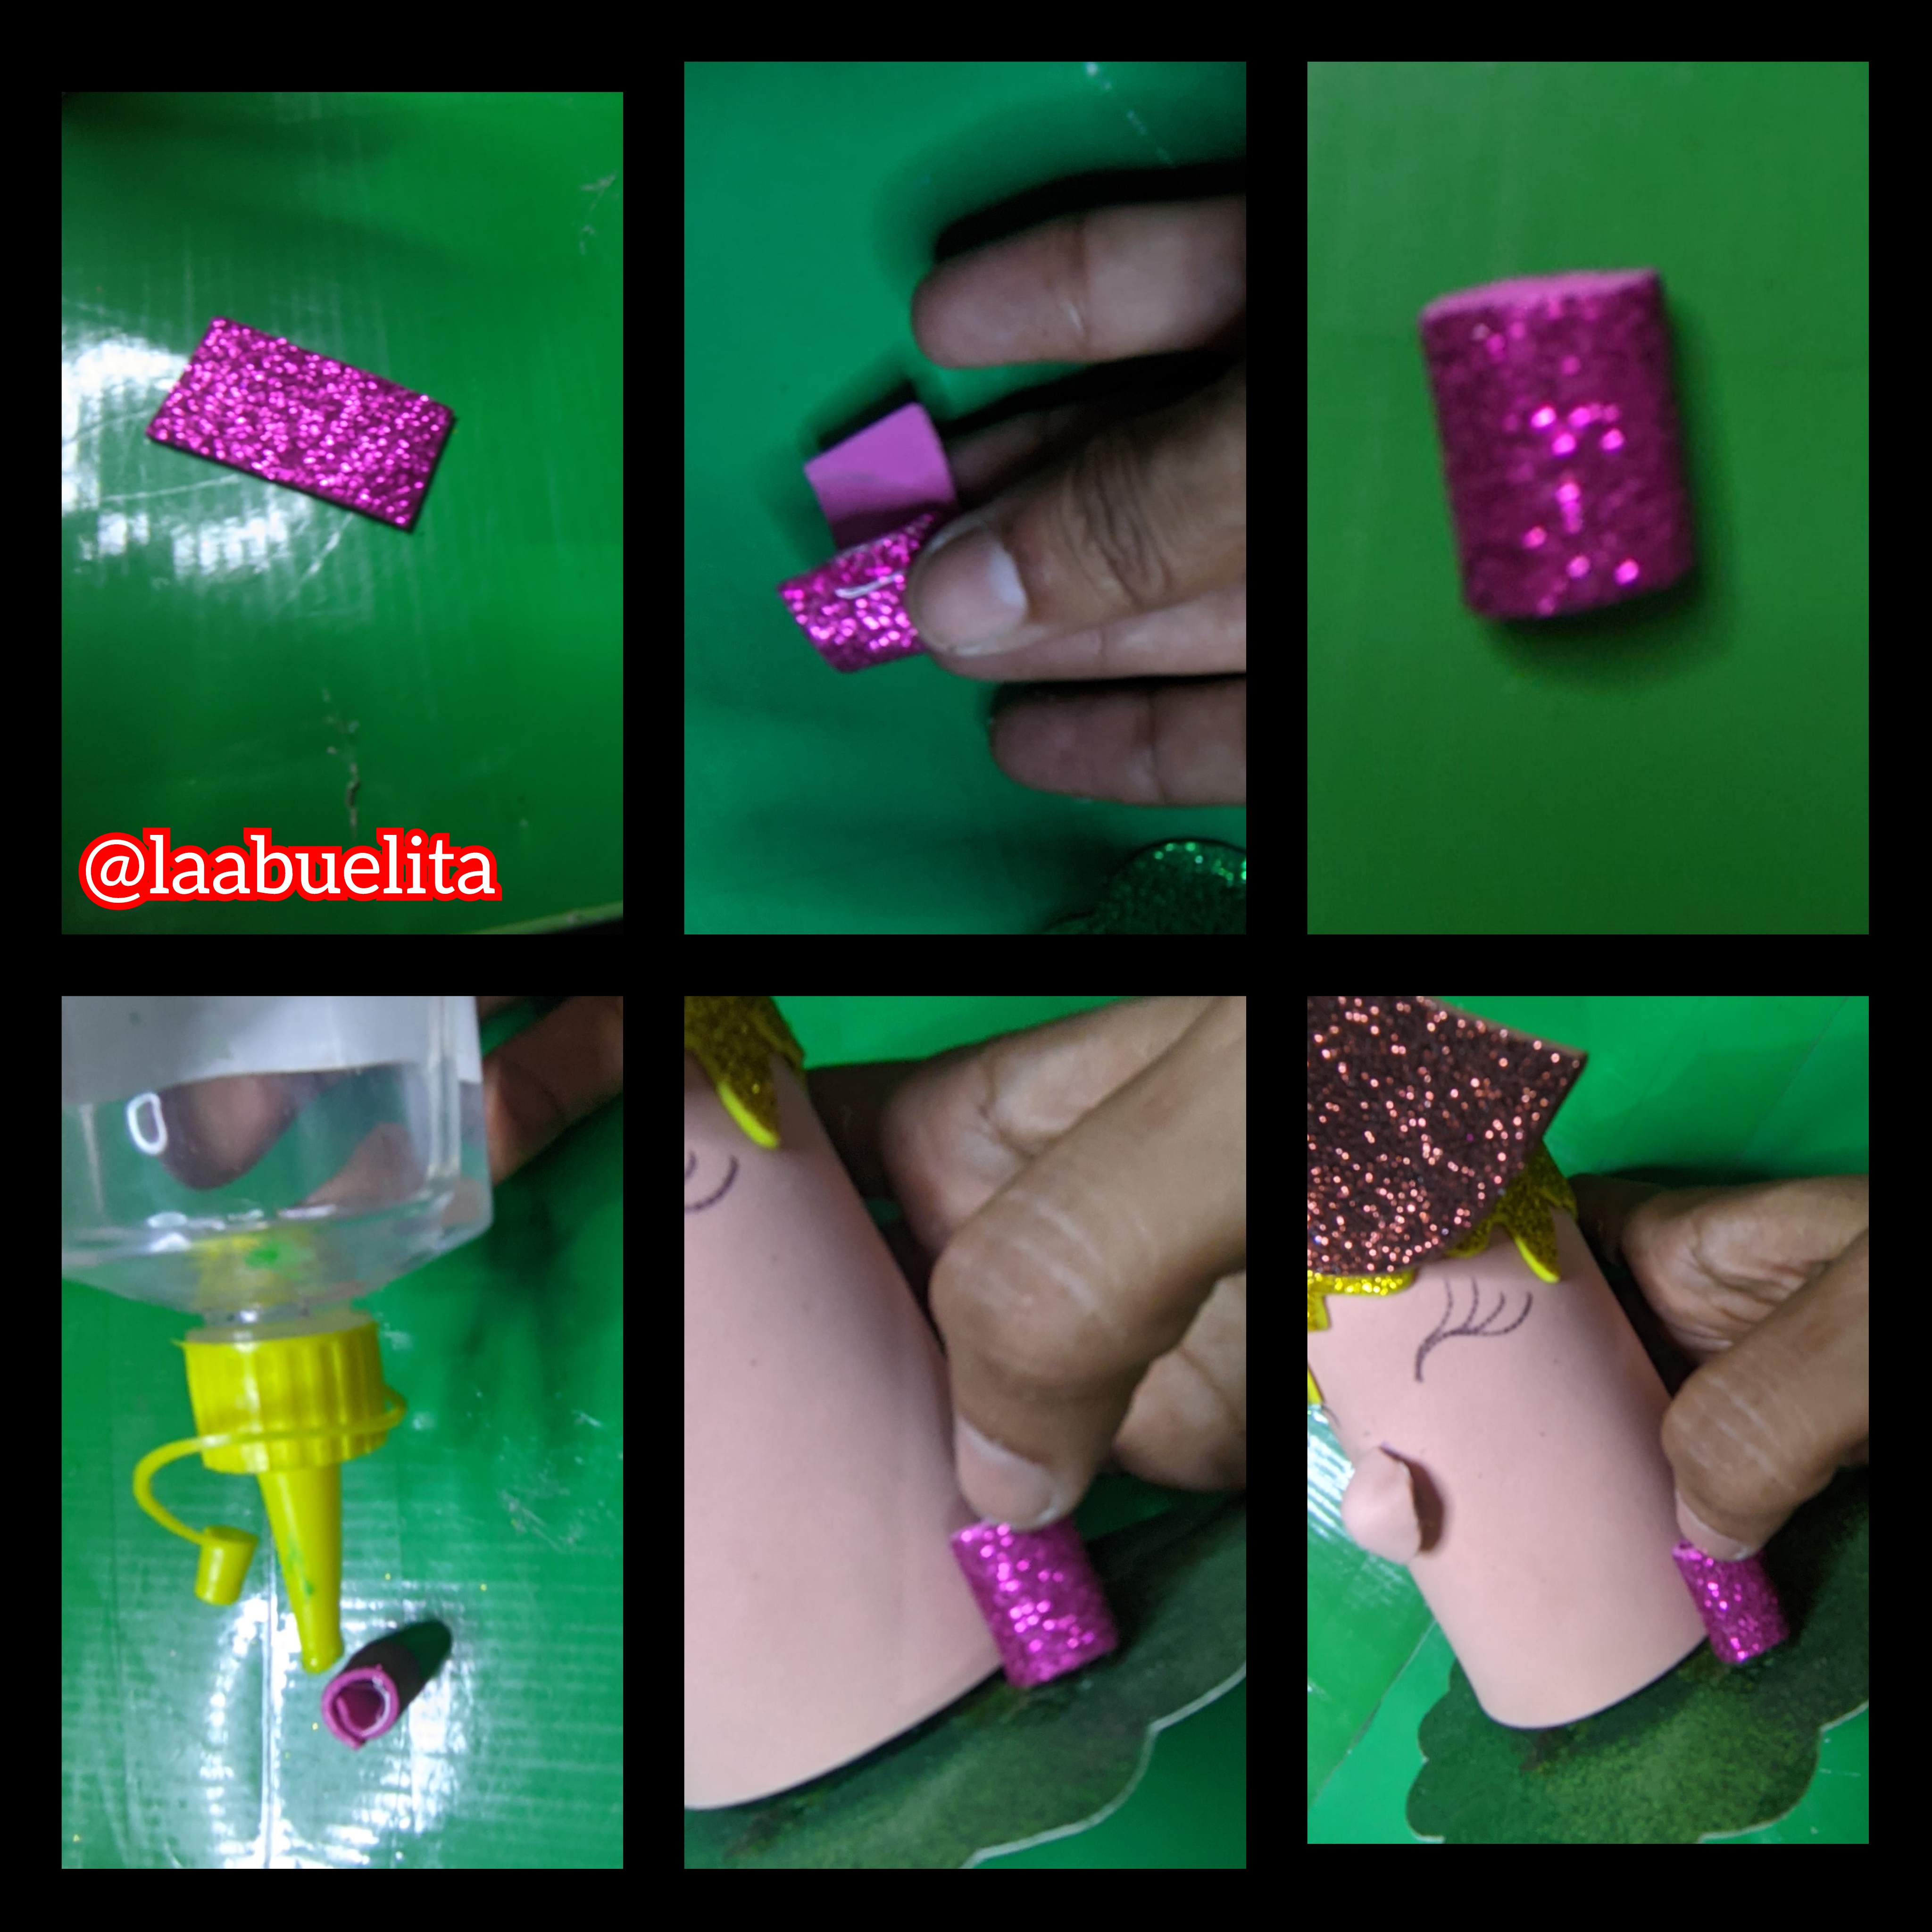
Agarre el pequeño rectangulo de foami de color fucsia y unimos los extremos, luego lo pegamos entre la base y el envase y dejamos que seque, este debe ser estrecho para que se aguante el lapicero.
⚜️Paso 12:
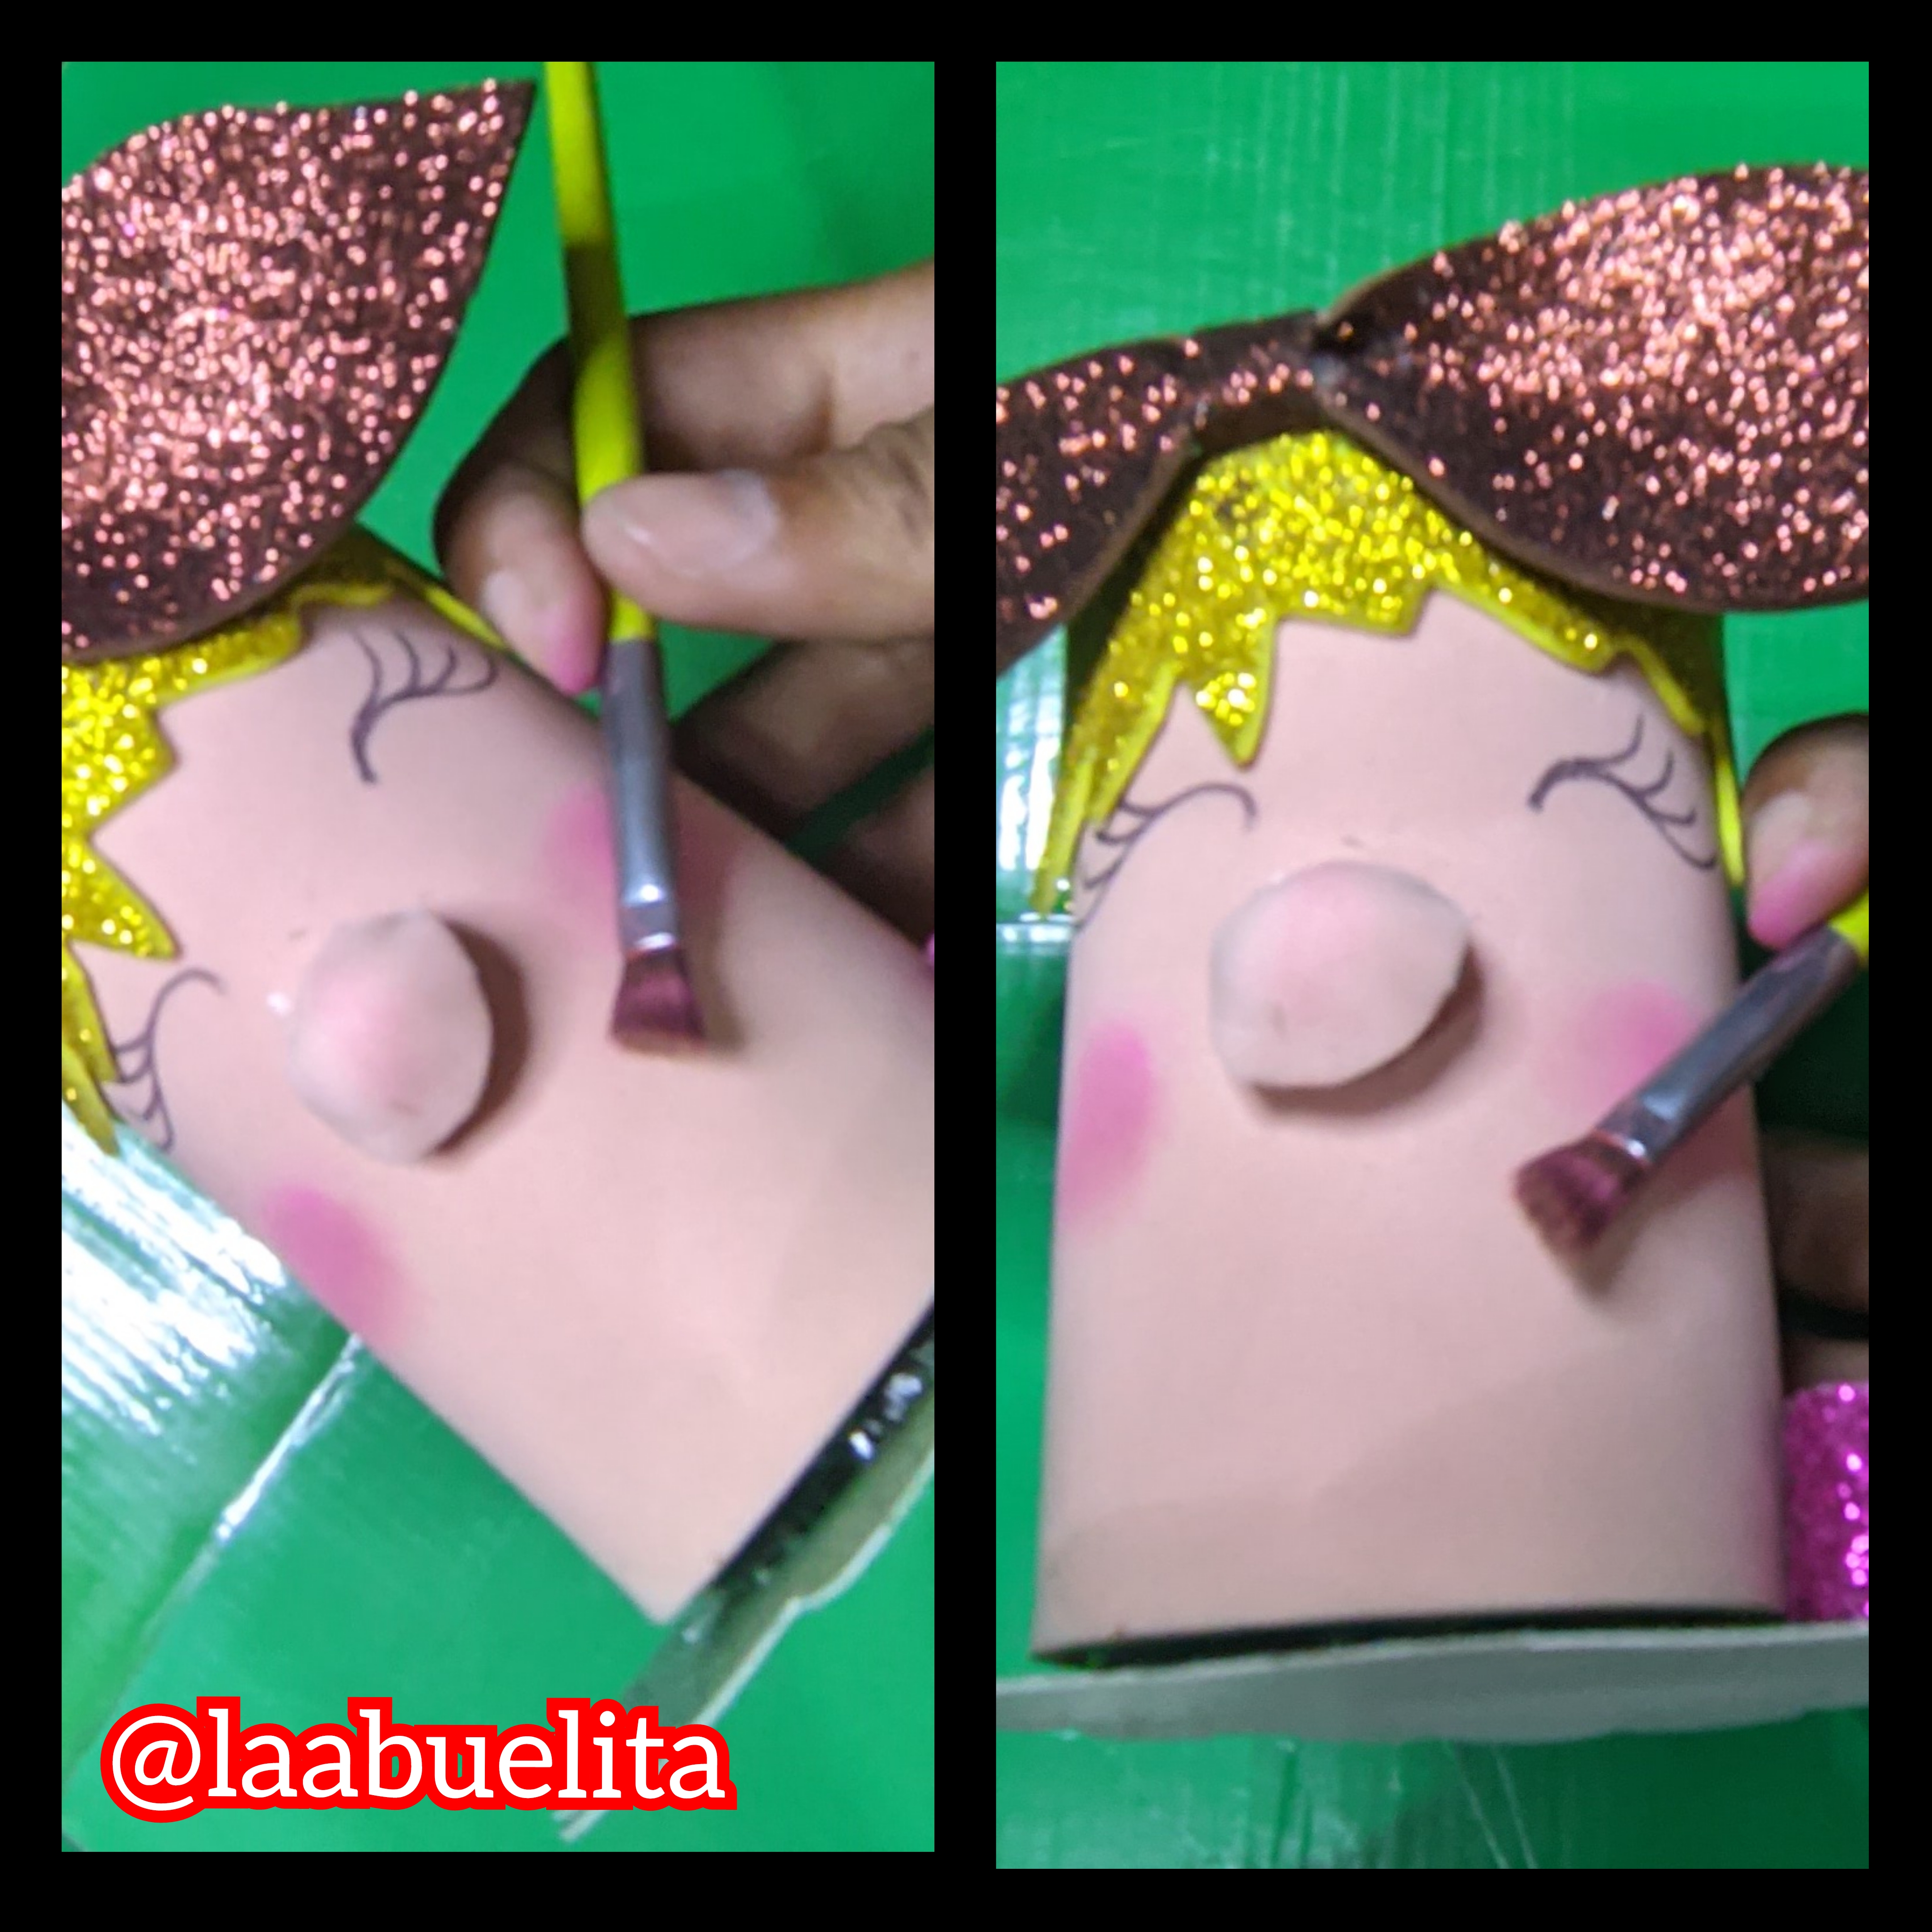
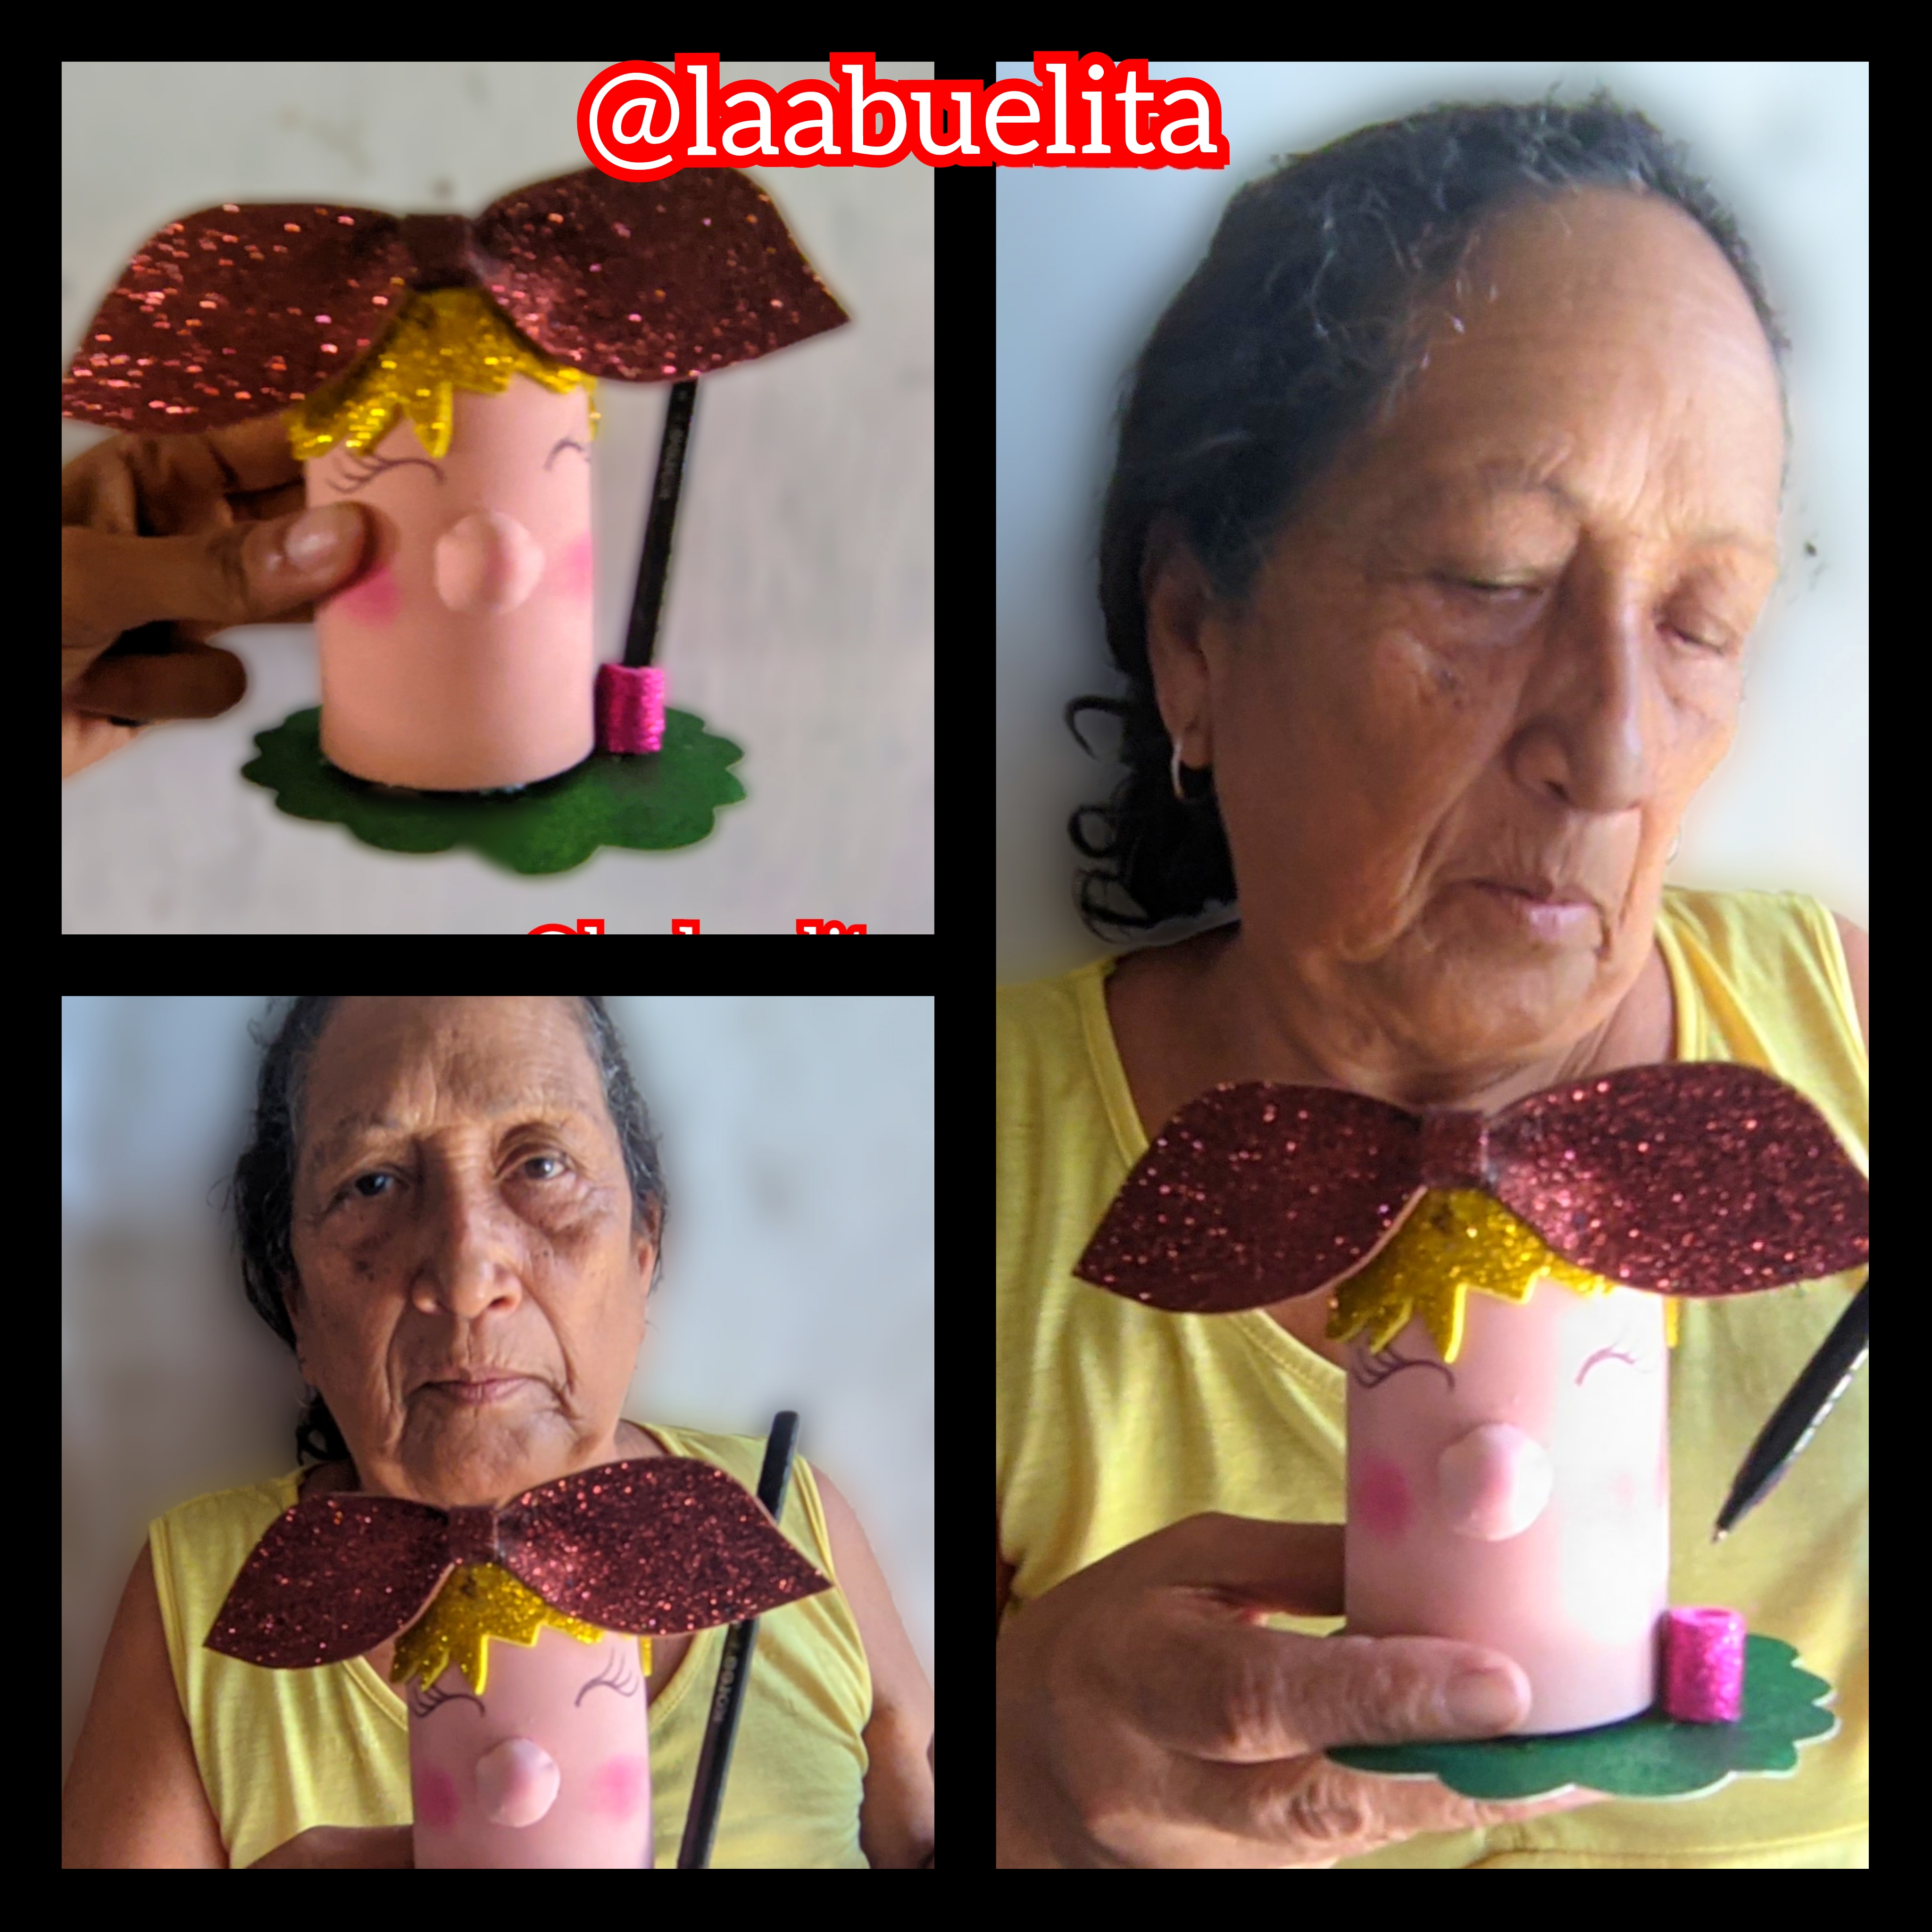
Finalmente le echamos un poco de rubor en las mejillas y listo hemos terminado.
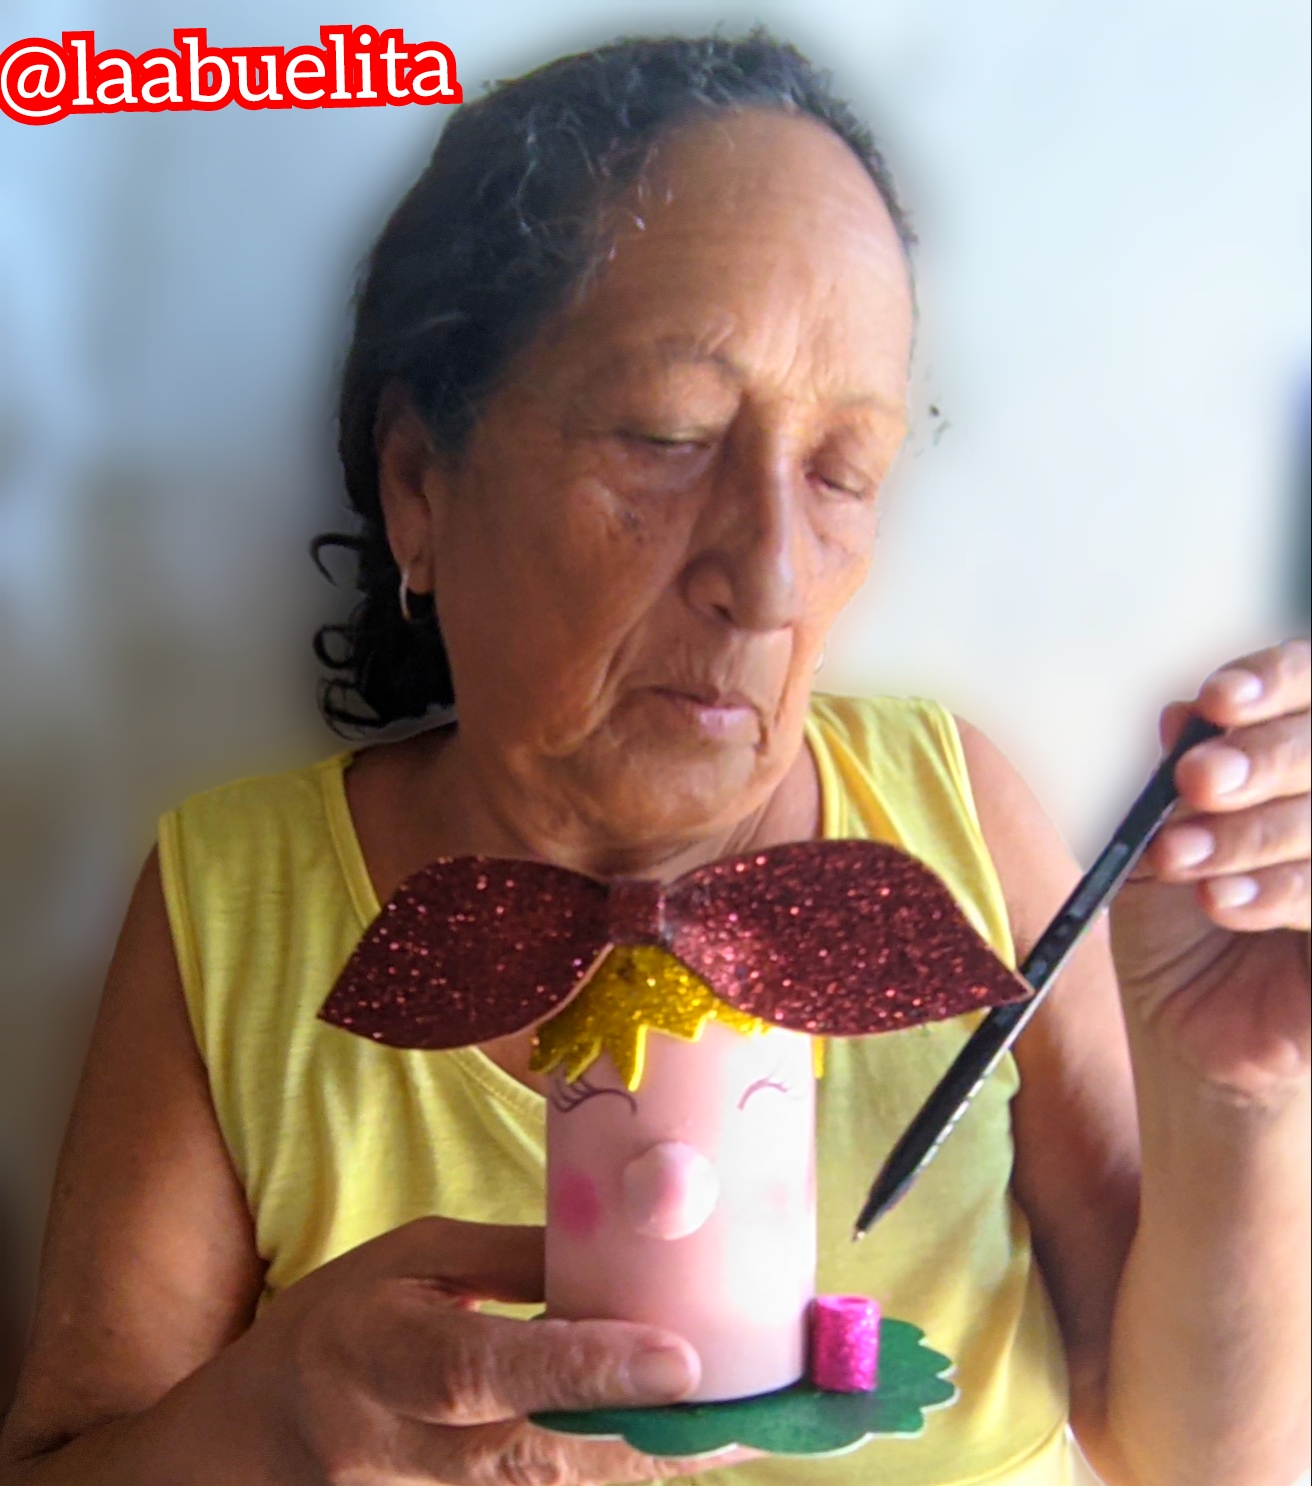
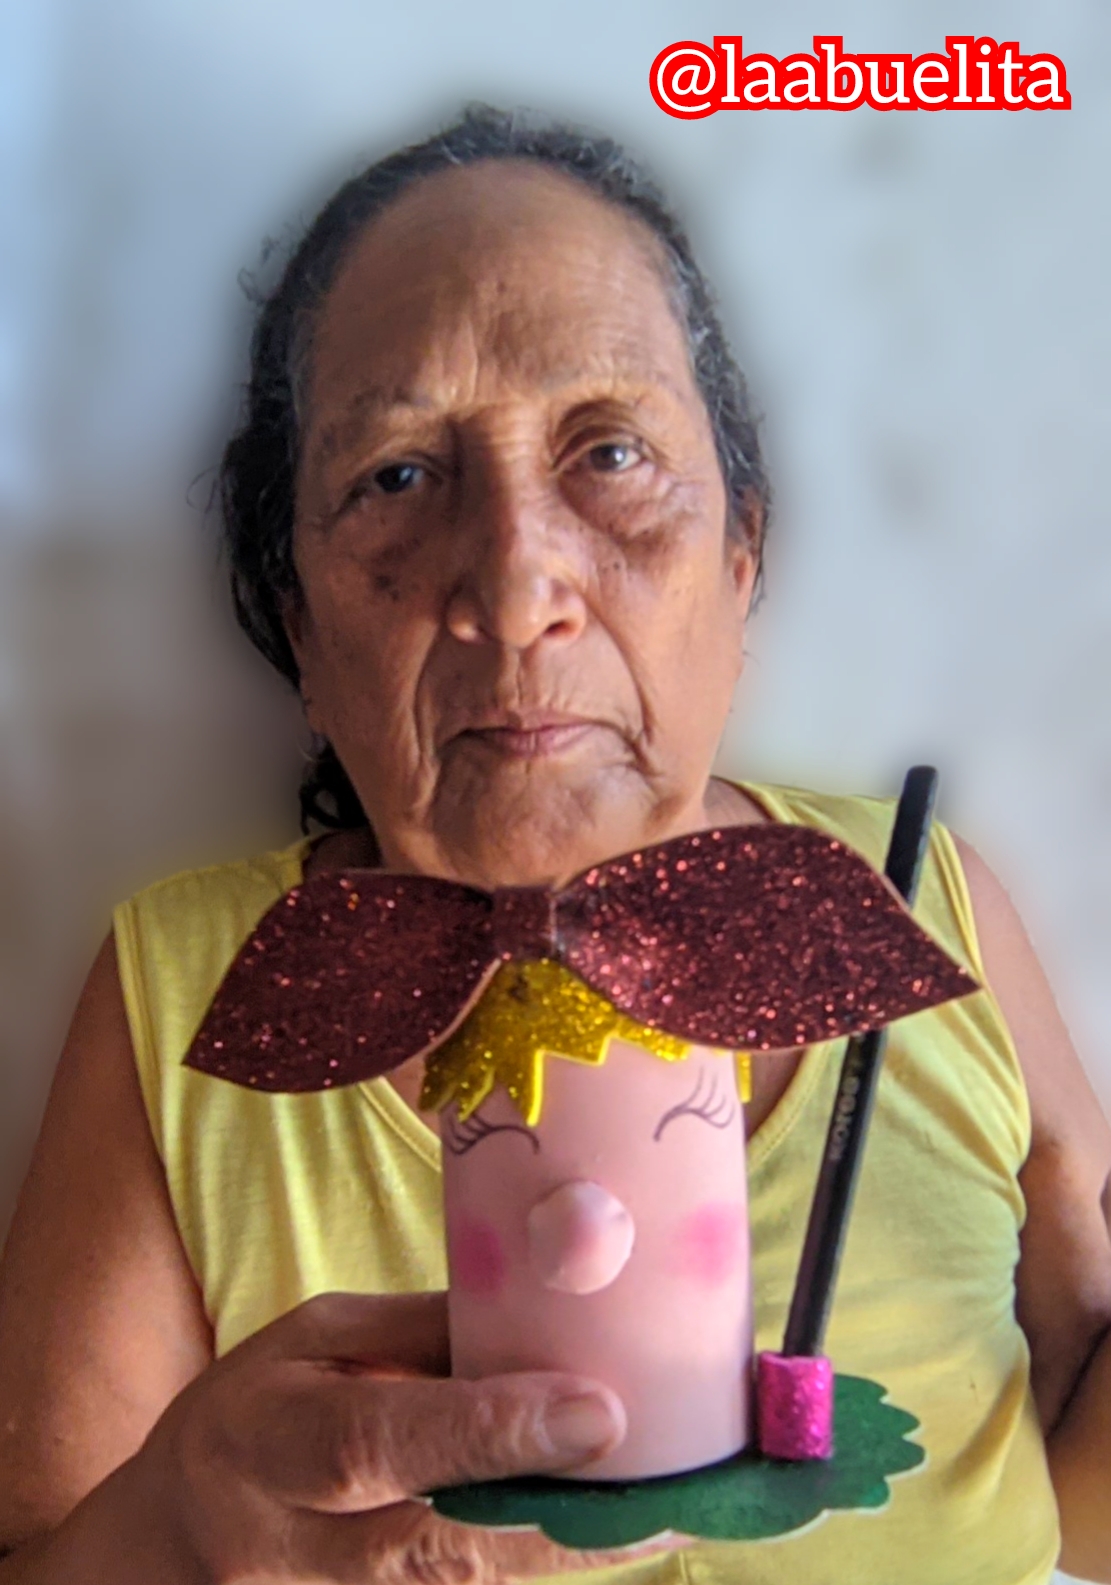
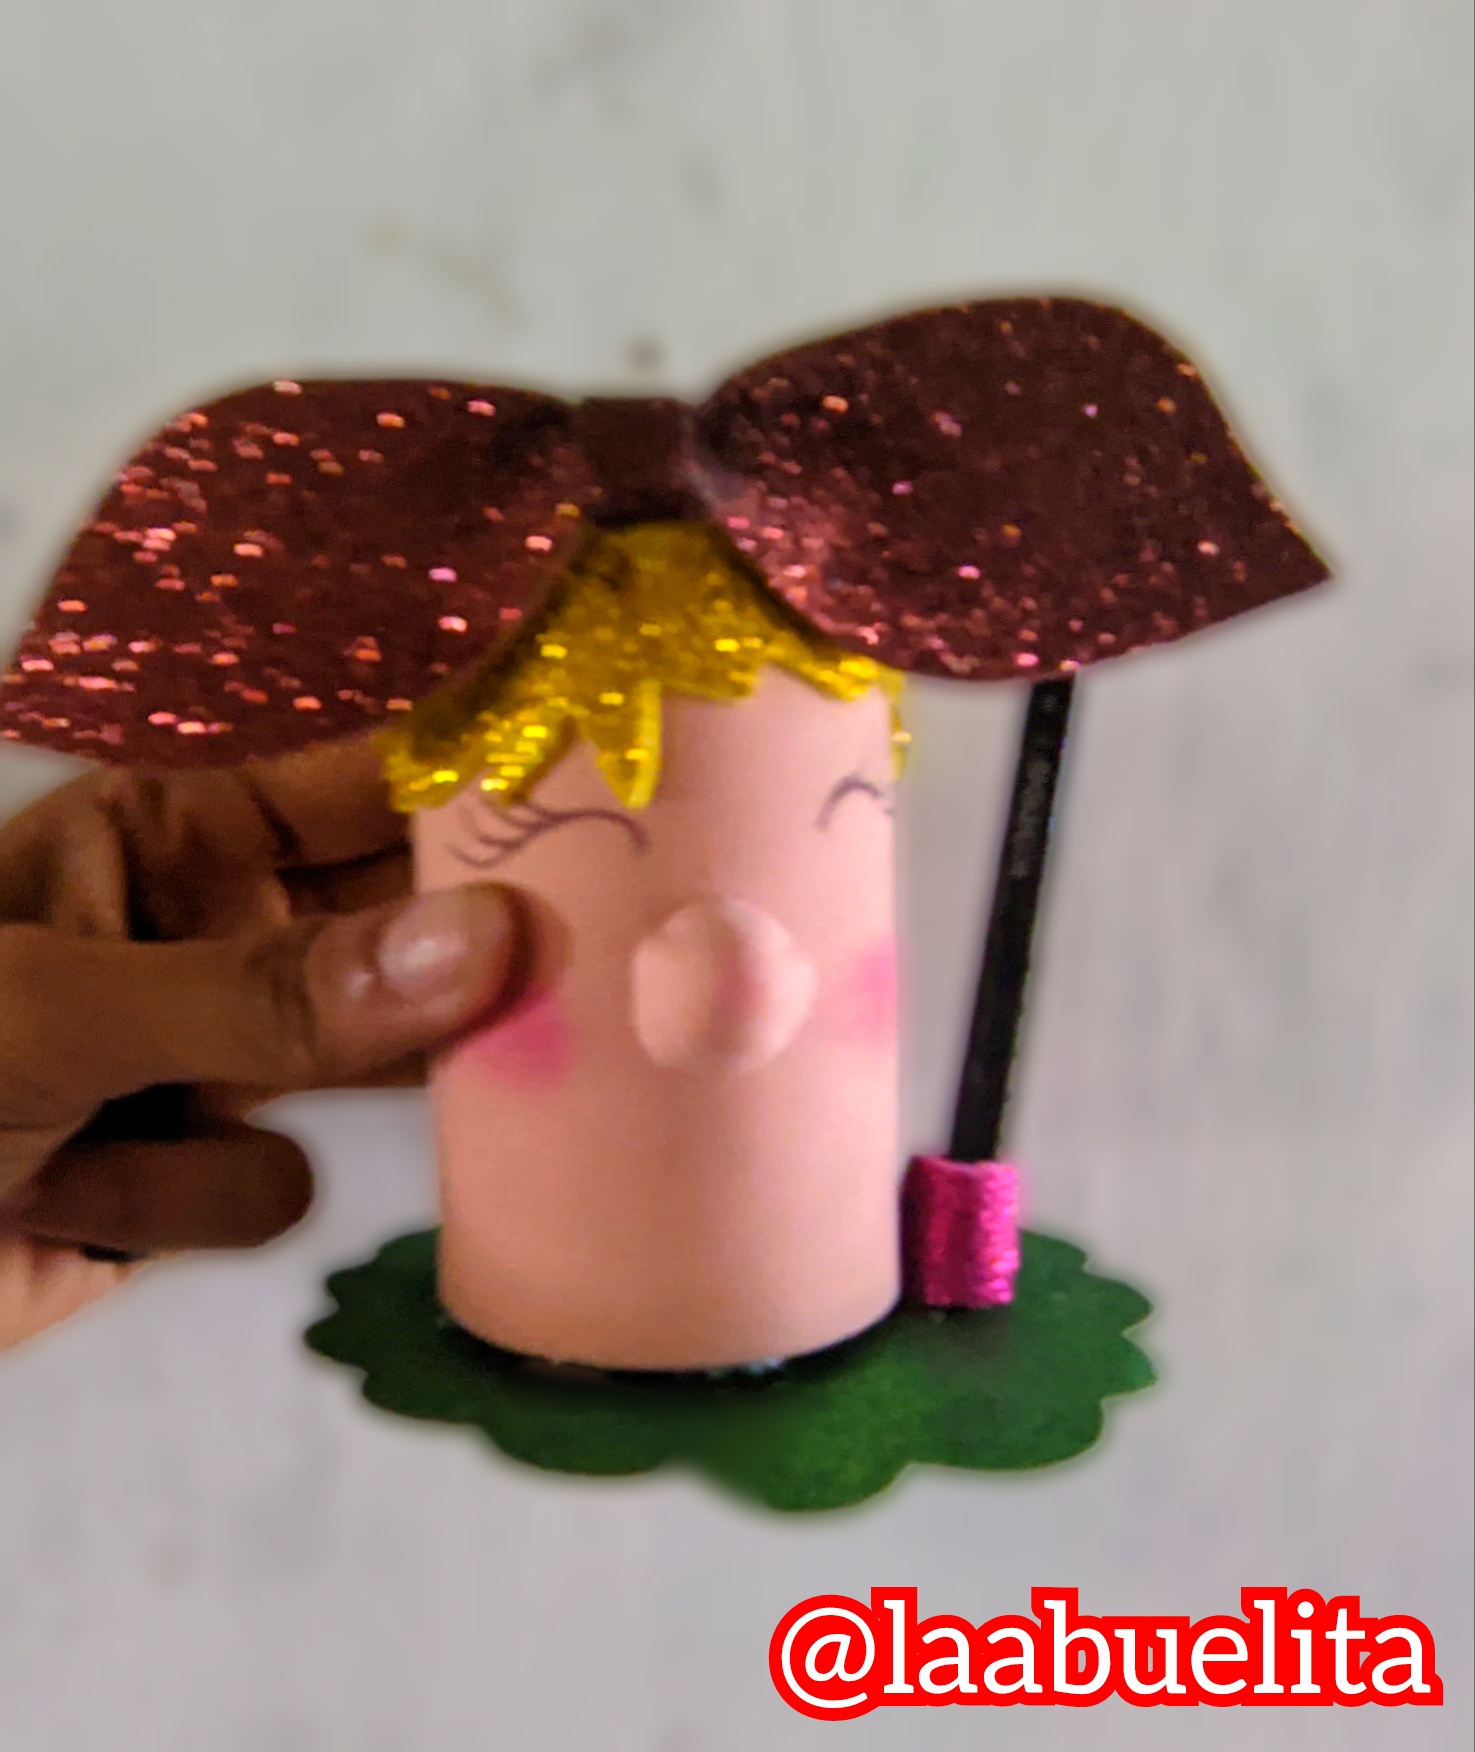
⚜️Fotos resultado final ⚜️
 ⚜️⚜️⚜️⚜️⚜️⚜️⚜️⚜️⚜️⚜️⚜️⚜️⚜️
 ⚜️⚜️⚜️⚜️⚜️⚜️⚜️⚜️⚜️⚜️⚜️⚜️⚜️
 ⚜️⚜️⚜️⚜️⚜️⚜️⚜️⚜️⚜️⚜️⚜️⚜️⚜️
 ⚜️⚜️⚜️⚜️⚜️⚜️⚜️⚜️⚜️⚜️⚜️⚜️⚜️
 ⚜️⚜️⚜️⚜️⚜️⚜️⚜️⚜️⚜️⚜️⚜️⚜️⚜️
Díganme ¿qué les pareció este trabajo?, ¿verdad que fue fácil y rápido de elaborar?Espero que les haya gustado a todos, para realizar este post use el programa polish y el traductor deepl versión gratis y las fotos todos son mías tomadas con mi teléfono Xiaomi redmi.

⚜️ ENGLISH ⚜️
⚜️⚜️⚜️⚜️⚜️⚜️⚜️⚜️⚜️⚜️⚜️⚜️⚜️
⚜️⚜️⚜️⚜️⚜️⚜️⚜️⚜️⚜️⚜️⚜️⚜️⚜️
Hello my dear hive grandchildren, happy start of the week to all of you, I hope you had a wonderful weekend, and above all with your family, I had a great time and I will tell you about it in another post, but for now I bring you a nice idea for a very different pen.
I was inspired by a typical housewife with her scarf on her head, of course I did it as a caricature and I hope you like it, it was a work that I did as always in the company of my beautiful flower Lupita, who is the one who helps me to take the pictures, as always here I leave the materials, the step by step and of course the final result.
⚜️Materiales⚜️
⚜️ Skin coloured Foami.
⚜️ Brown frosted foami.
⚜️ Yellow frosted foami.
⚜️ Green frosted foami.
⚜️ Fuchsia frosted foami.
⚜️ Liquid silicone.
⚜️ Flask.
⚜️ Scissors.
⚜️ Ruler.
⚜️ Pencil.
⚜️Paso a paso ⚜️
⚜️Paso 1:
Carry the skin coloured foami and with the help of the ruler and the pen mark a rectangle, the size will be according to the size of the jar you have on hand to work with, it is just a matter of measuring it and marking it, then I cut it out.
⚜️Paso 2:
Now what I did was to line the jar, so I applied liquid silicone on the jar and stuck the rectangle of skin-coloured foami on it, pressed it a bit and let it dry well.
⚜️Paso 3:
On the brown foami mark the pieces that I am going to work with in that colour, mark the bow that my doll is wearing, also a small rectangle that will be the centre of the bow and also the round base that I will use to cover the top cover, once they are drawn we cut them out.
⚜️Paso 4:
Now enlarge the yellow frosted Foami and mark the hair with the pencil, this is also up to each person's taste, then cut it out.
⚜️Paso 5:
At the edge of the already lined container I applied some liquid silicone and glued the hair I cut out on the yellow foami.
⚜️Paso 6:
When the hair was dry I grabbed the brown frosted foami circle and applied liquid silicone to stick it to the top, making sure to cover the sides.
⚜️Paso 7:
Now take the ribbon and glue the rectangle in the middle and let it dry for a while, when it is dry, apply liquid silicone and glue it to the container and let it dry.
⚜️Paso 8:
Then I cut out a small square of skin-coloured foami, which I then put through the iron to make it more manageable, and then I filled it with the leftover foami and formed the nose, which I applied liquid silicone to and stuck to the face.
⚜️Paso 9:
Now, with the black pen, draw her eyes and some very pronounced eyelashes.
⚜️Paso 10:
I cut out a green foami base and applied some liquid silicone and glued the container to it.
⚜️Paso 11:
Carry the small rectangle of fuchsia coloured foami and join the ends, then glue it between the base and the container and let it dry, this must be narrow so that the pencil can hold.
⚜️Paso 12:
Finally we put a little blush on the cheeks and we're done.
⚜️Fotos final result ⚜️
Tell me what you thought about this work, wasn't it easy and quick to elaborate? I hope you all liked it, to make this post I used the polish program and the free version of deepl translator and the photos are all mine taken with my Xiaomi redmi phone.
Este tipo de portalápices siempre son muy útiles. Debo decir que te quedó muy bonito.
Saludos.
Muchas gracias hijita Dios te bendiga
Muy lindo.
También se puede utilizar los tubos de cartón del papel toilette, así como los de papel de cocina...en caso de no tener envases de vidrio u otro envase.
Saludos
Por supuesto que sí amiga, todo es cuestión de tener creatividad, gracias por visitar mi post y apoyarlo
Buen trabajo para organizar los lápices y no perderlos de vista @laabuelita . Linda muñequita! feliz noche!
Muchas gracias hijito y que Dios me lo bendiga
Amén cariño 🙏
Me encanto su presentación estimada. Se nota el cariño, dedicación, amor en sus escritos y también en la forma de como presenta sus trabajos.
Felicitaciones por eso.
Saludos.
Muchas gracias por sus palabras que me motivan a seguir trabajando por hacer un mejor trabajo y a seguir aprendiendo, Dios lo bendiga