Hello dear friends, crafters of magical ideas, I hope you are well.
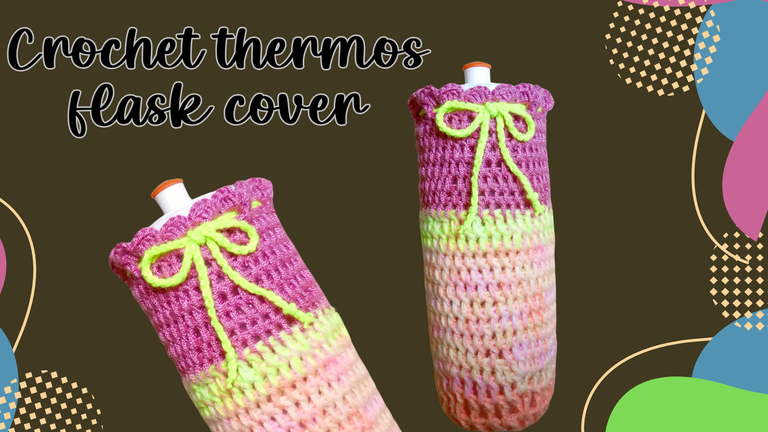
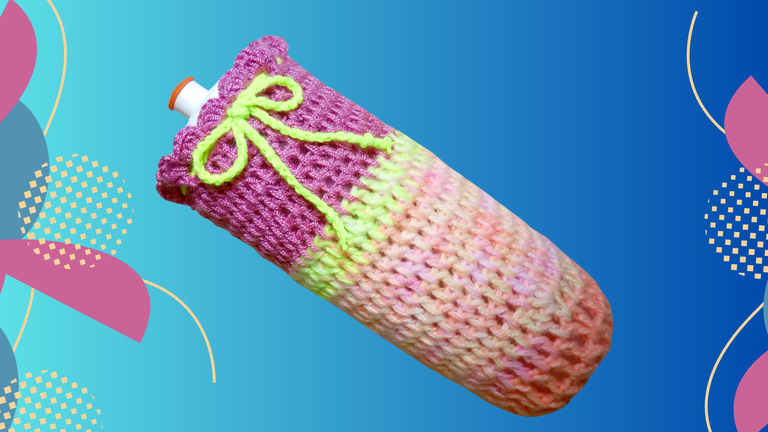
I am pleased to invite you to join me in another of my publications, today I share with you a woven cover or lining for thermoses and simple recycled plastic bottles, where we usually carry water.
One of the things that we like is to be always presentable, in every occasion, and if we are using a simple bottle for water, it gives us some pain to take it out in public, since there are so many beautiful thermoses in the market, but often the budget does not give us, to acquire them, especially with the high costs of commodities, we almost do not have, to make such purchases, and especially in times of trouble, as when we suddenly travel.
This option is very nice to carry in the bag anywhere, especially in this hot season, it is essential to carry thermoses with cool water, it is a cover, which can keep our water cool, for longer to have a pleasant hydration.
If we can make a woven cover, with beautiful colors, we can be sure that we will feel better and more cheerful.
In particular it has happened to me that I have had to travel, and in a hurry, many times to prevent, I used to carry water from home, in a plastic bottle, lined with a cloth or flannel hahahaha, but not anymore, it is already a fixed matter hahahaha.
I hope you like the way I made it, and I also encourage you to make it with your own innovative ideas of colors and designs.
The pictures you will see below, were taken with my phone model TECNO SPARK GO 2024.
Hola queridos amigos, artesanos de mágicas ideas, espero que se encuentren bien.
Me complace invitarlos a acompañarme a otra de mis publicaciones, hoy les comparto una funda o forro tejido, para termos y botellas sencillas, de plástico recicladas, donde solemos llevar el agua.
Una de las cosas que nos gusta es estar siempre presentables, en toda ocasión, y si estamos usando una botella sencilla para el agua, nos da como cierta pena sacarla en público, ya que hay tantos termos preciosos en el mercado, pero que muchas veces el presupuesto no nos da para adquirirlos, sobre todo con los altos costos de los productos básicos, casi no nos queda, para hacer este tipo de compras, y sobre todo en momentos de apuros, como cuando repentinamente viajamos.
Esta opción es muy bonita para llevar en el bolso a cualquier lugar, sobre todo en esta temporada de calor, que es imprescindible llevar los termos con agua fresca, es una funda, que puede mantener nuestra agua fresca, por más tiempo, para tener una hidratación placentera.
Si podemos hacer una funda tejida, con bellos colores, podemos estar seguros que vamos a sentirnos mejor y más animados.
En particular me ha pasado que he tenido que viajar, y por apuros, muchas veces para prevenir, acostumbro llevar agua de casa, en una botella plástica, forrada con un paño o franela jajajaja, pero ya no, ya es asunto arreglado jajajaja.
Espero les guste como fue que la hice, y también se animen hacerla con sus propias ideas innovadoras de colores y diseños.
Las fotografías que verán a continuación, fueron tomadas con mi teléfono modelo TECNO SPARK GO 2024.

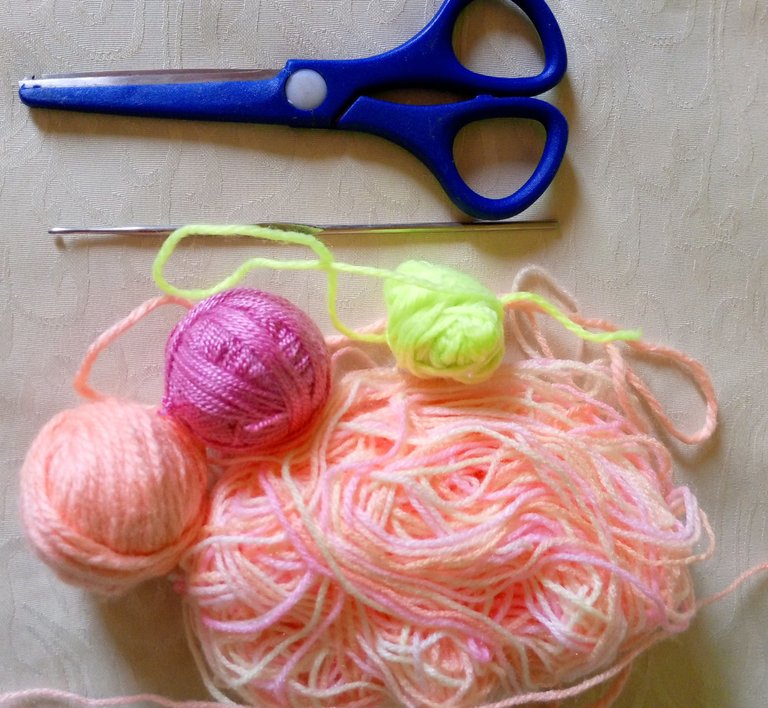
Materials used.
- Crochet thread and wool
- 1.6 mm crochet hook needle
- Scissors
Materiales que utilice.
- Hilo de crochet, y lana
- Aguja de ganchillo de 1,6 mm
- Tijera
 |  |
|---|---|
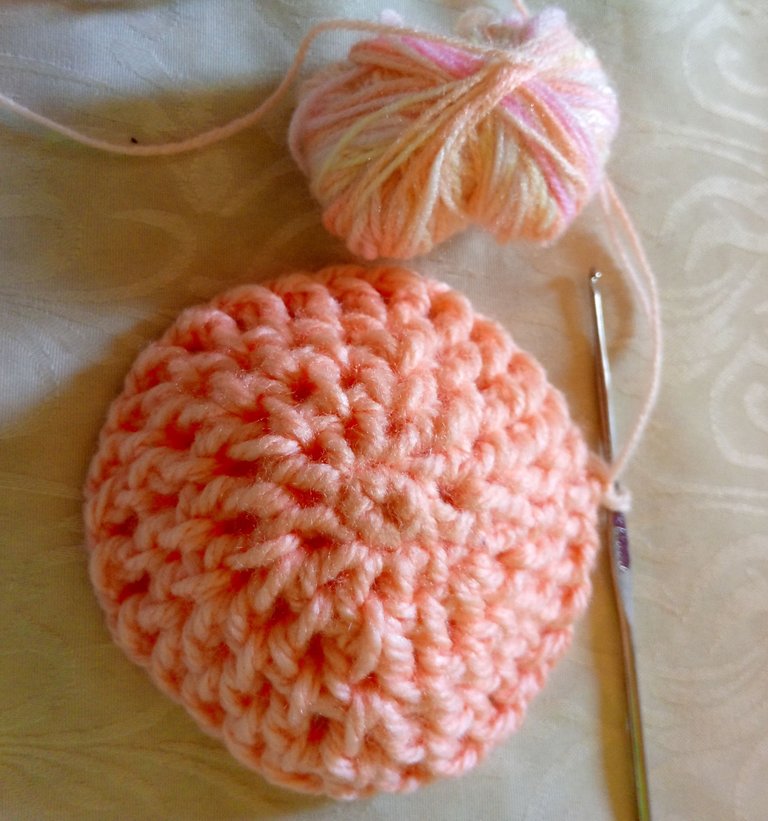 |  |
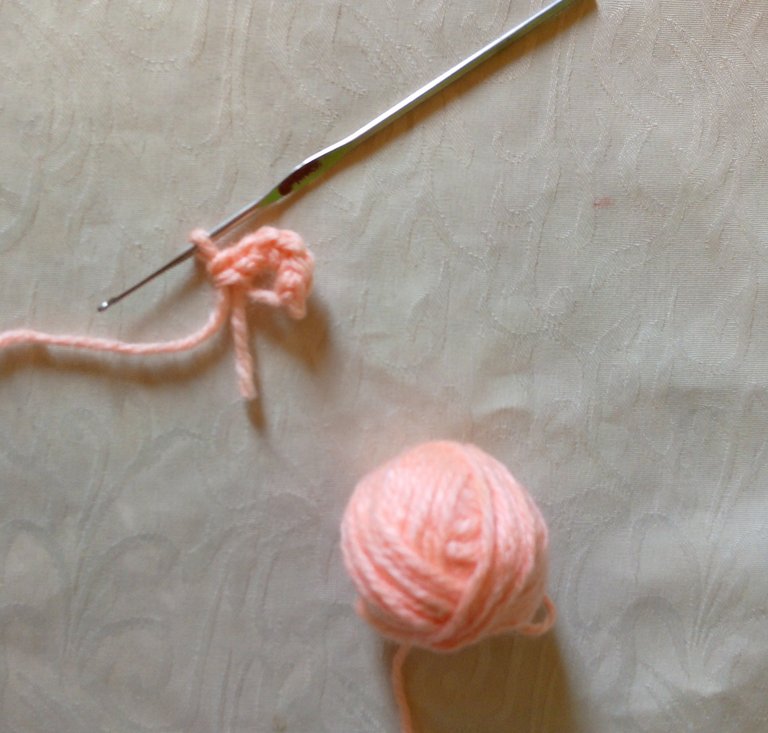
I started with a magic ring of 7 medium low stitches, closed with a dwarf stitch.
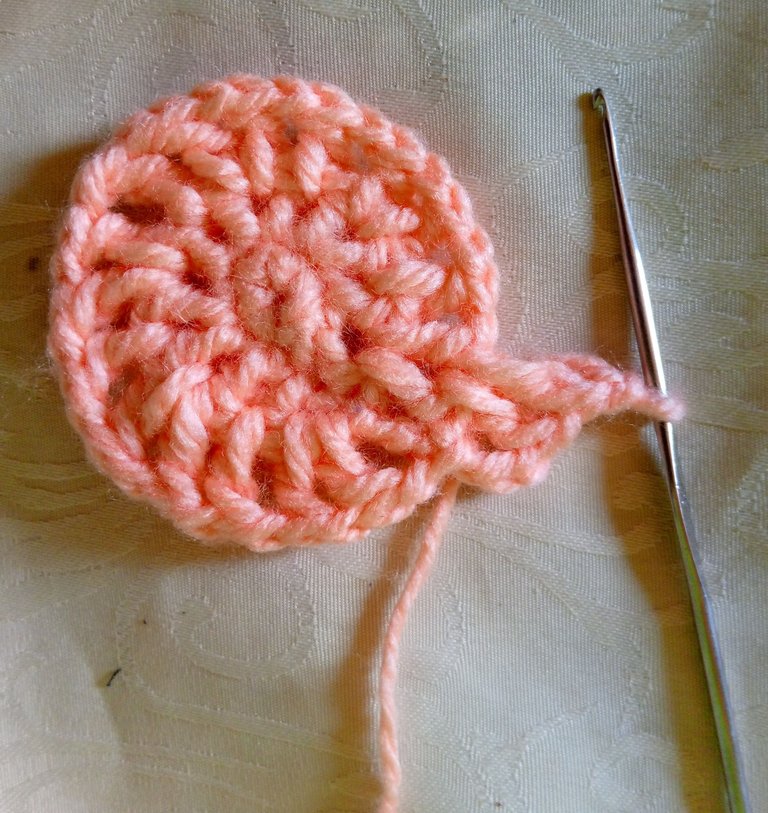
Then I knit the first round, raising 2 chain stitches, then I knit 1 medium high stitch, followed by 1 chain stitch to separate the stitches from each other, until I completed 12 stitches.
2nd row, repeat the steps of the previous row, but increase the stitches to 6 medium-high stitches, total 18 stitches.
3-th row, repeat the previous row.
4-th st, increases of 7 sts, total 25 sts, 5-th st, increase of 8 sts, total sts, 33
From row 6 onwards I started to increase the stitches and make yarn changes.
In row 6 I knit a total of 35 stitches.
Comencé con un anillo mágico de 7 puntos medios bajos, cerre con un punto enano.
Luego tejí la primera vuelta, levantando 2 puntos de cadena, seguido tejí 1 punto medio alto, seguido de 1 punto cadena para separar los puntos entre sí, hasta completar 12 puntos.
2-da vuelta, se repiten los pasos de la anterior, pero se hacen aumentos de puntos a 6 puntos medios altos, total 18 puntos
3-era vuelta repito la vuelta anterior.
4-vta aumentos de 7 ptos, total 25 ptos, 5-vta, aumento de 8 puntos, total de puntos, 33
A partir de la vuelta 6 comencé a subir los puntos y a hacer cambios de hilos.
En la vuelta 6 tejí un total de 35 puntos.
 |  |  |
|---|
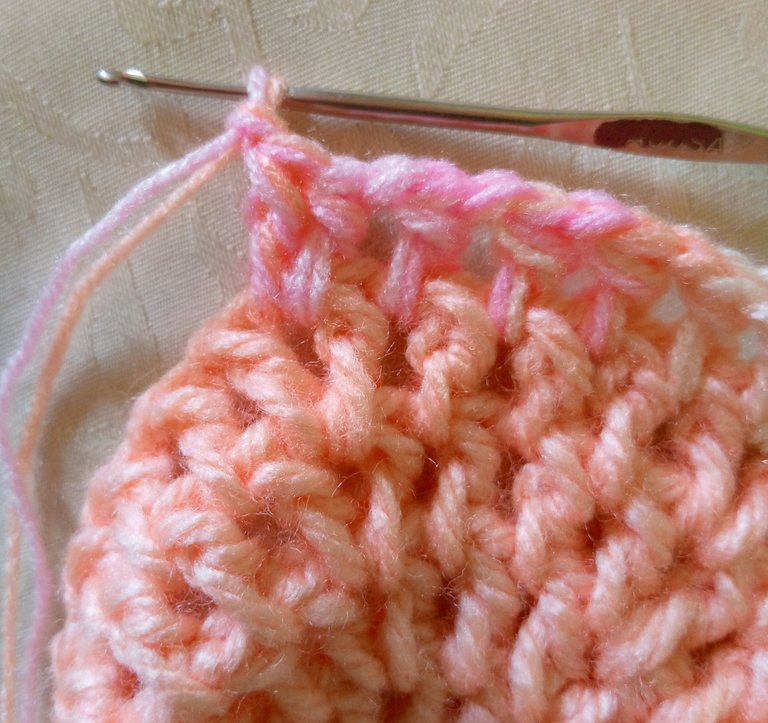
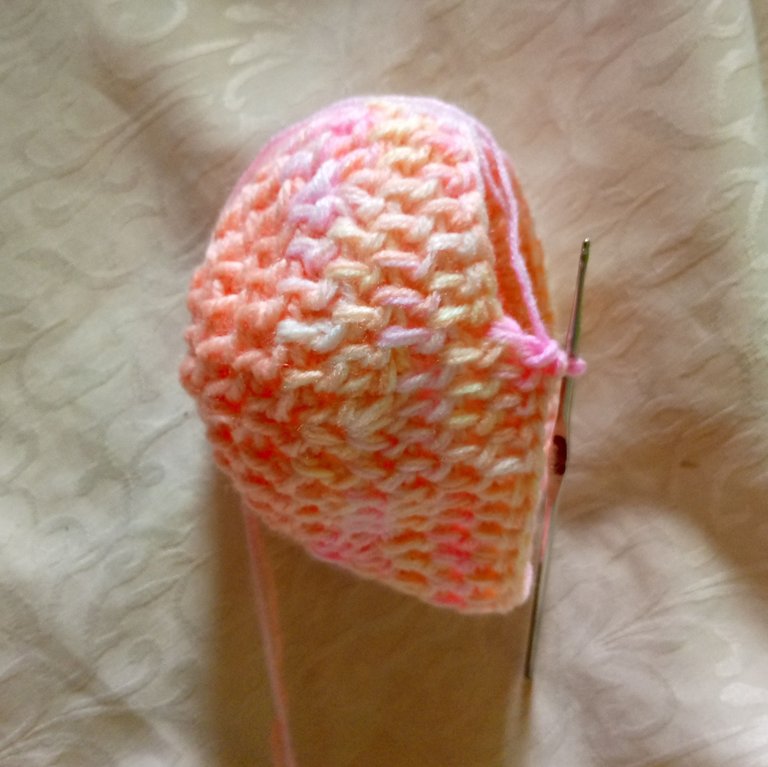
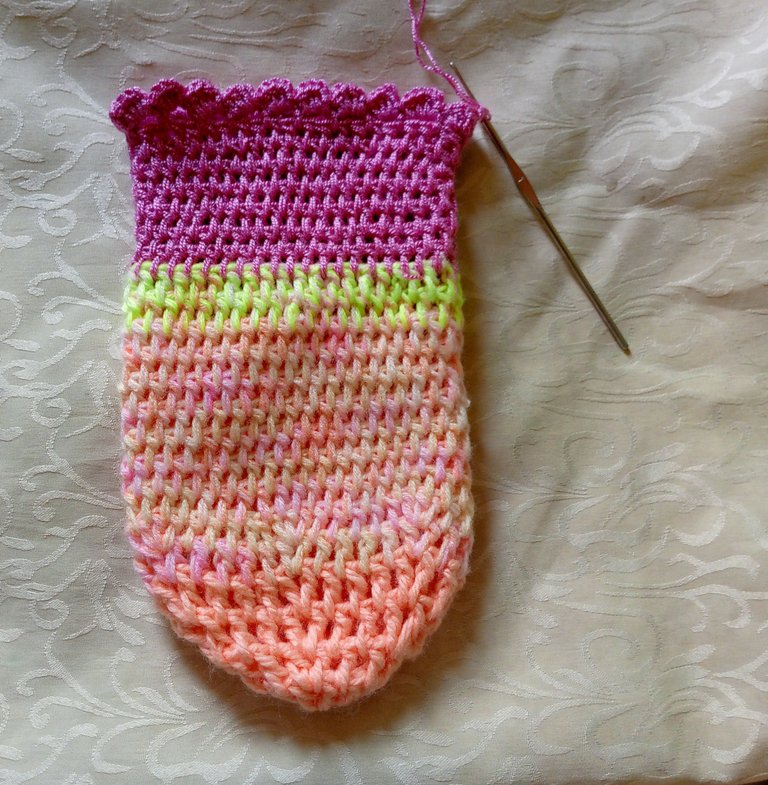
From row 8 to row 16 I knitted 35 running single crochet stitches, closing each row with a dwarf stitch, and at the beginning of each row I picked up 2 chain stitches to start the new single crochet stitches.
In this process I changed the yarn colors.
Desde la vuelta 8 hasta la 16 tejí 35 puntos varetas corridos, cerrando cada vuelta con punto enano, y por cada inicio de vuelta levante 2 puntos de cadena para comenzar los nuevos puntos varetas.
En este proceso fui haciendo los cambios de colores de los hilos.
 |  |  |
|---|
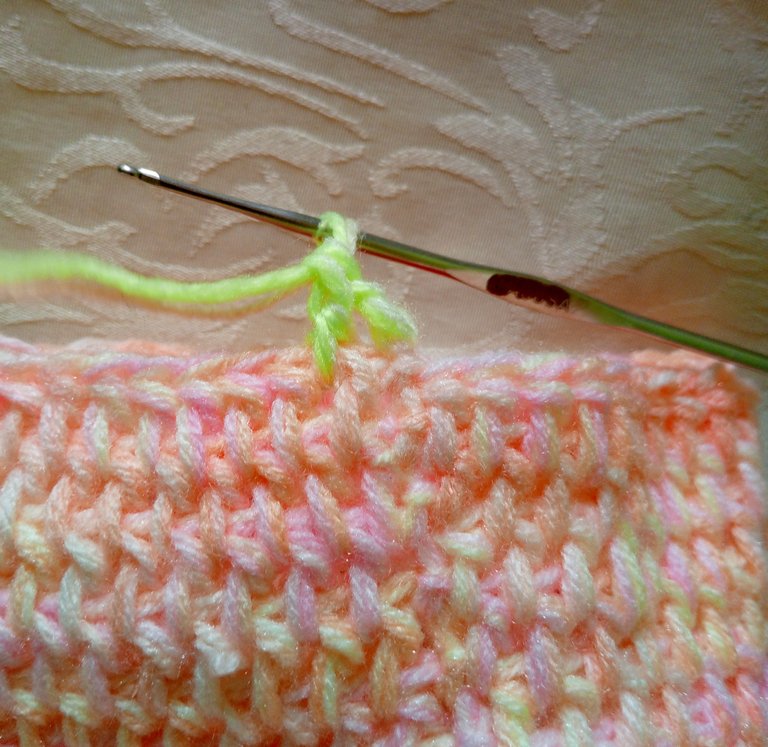
At the end of row 16 I knit 5 chain stitches, to make a fringe on the top of the cover, intercalating 5 stitches for every 2 stitches of separation, for a total of 20 spaces for the fringe. I filled in the spaces with 3 chain stitches, followed by a medium high stitch, closing each fringe with 1 dwarf stitch.
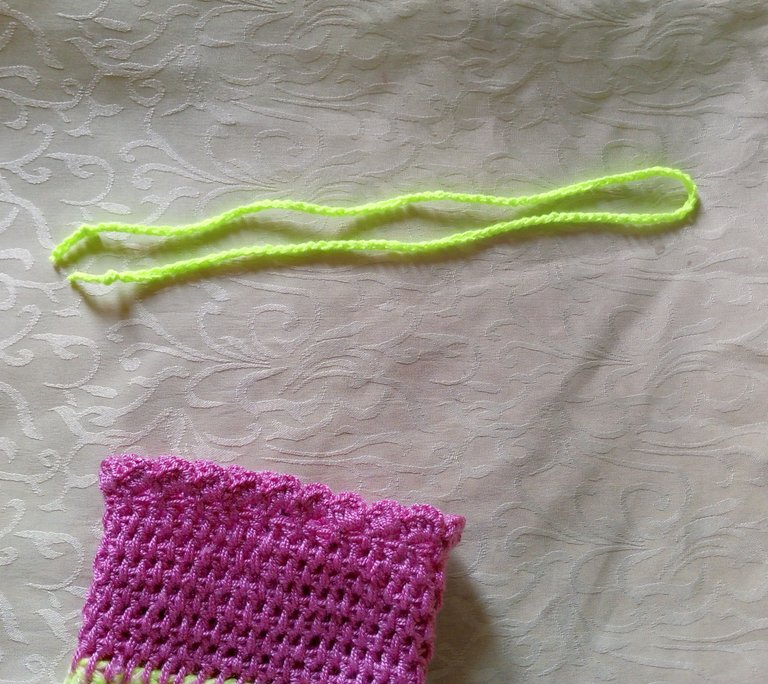
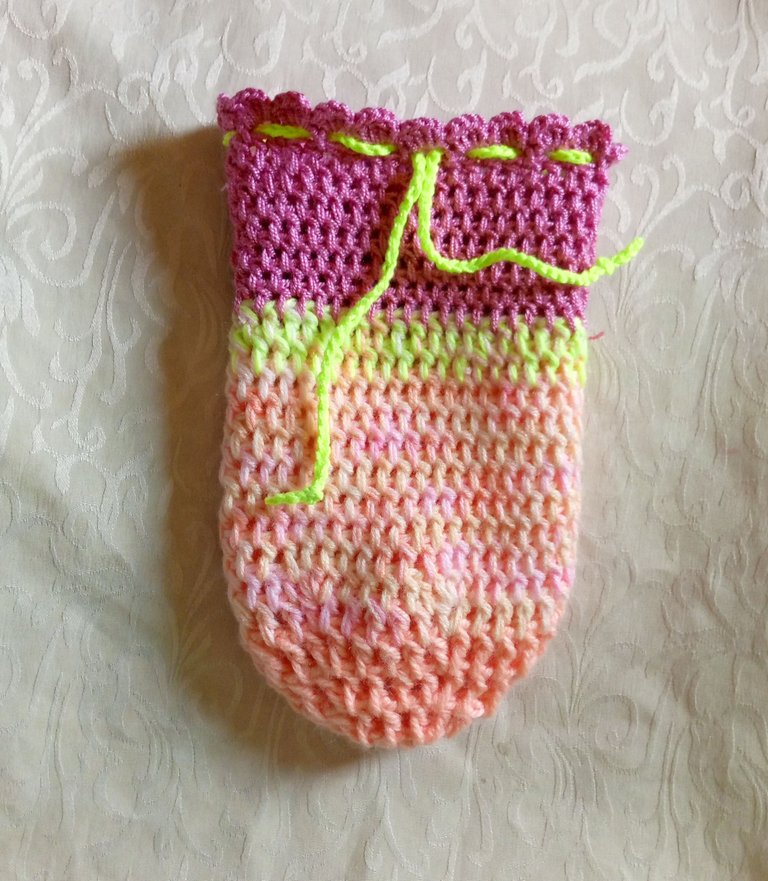
Finally I knitted a 57 cm long cord of chains to adjust the cover to the thermos, I finished closing it with a bow, and that's it, I can now show off an aesthetically beautiful and presentable cover in any terrain.
Terminando la vuelta 16 tejí 5 puntos de cadena, para hacer un flequillo en la parte superior de la funda, intercalando 5 puntos por cada 2 puntos de separación, para un total de espacios para el flequillo de, 20 espacios. Que fui rellenando con 3 puntos cadenas, seguidas de puntos varetas, o punto medio altos, cerrando cada flequillo con 1 punto enano.
Por último tejí un cordón de cadenas, de 57 cm de largo, para ajustar la funda al termo, finalice cerrando con un lazo, y listo, ya puedo lucir una funda estéticamente hermosa y presentable en todo terreno.
I hope you have understood a little bit of the process to elaborate the cover, and you are encouraged to try it.
Thank you for being part of my projects, and with all my love I wish you all the best.
Espero que hayan entendido un poco el proceso para elaborar la funda, y se animen a intentarlo.
Gracias por ser parte de mis proyectos, y con todo el cariño les deseo todo lo mejor.
social networks / redes sociales

Traductor Deepl
Translated Deepl
Ediciones Canva
Editions Canva


Posted Using INLEO
Muy bonita idea, necesitaré hacer uno para mí... gracias por compartir su idea amiga
Gracias corazón, me alegra que te haya gustado, espero te animes hacer el tuyo.😊🤗
Está muy lindo el bolsito, y de verdad tienes toda la razón del mundo es algo que hace que se vea presentable todos esos envases que usamos reciclables. Mi mamá tanto que teje y nunca se me ocurrió pedirle un bolsito para eso, y yo andaba con esos potes de refresco metidos en la cartera con agua 🤭😅🤣 Mala artesana jajajaja. Lo que hice fue que compré un envase bonito.
!discovery 35
😂😂😂😂 hay amiga que cosas, en realidad yo tenía tiempo pensando hacer uno, pero no me había enfocado en ello, me alegra que hayas comprado uno, realmente, yo tenía pena de sacar mis potes de refresco, con agua en público😊🤣tu mamá, te lo está debiendo todavía jajajaj.
Feliz fin de semana querida amiga @dayadam🤗😘
This post was shared and voted inside the discord by the curators team of discovery-it
Join our Community and follow our Curation Trail
Discovery-it is also a Witness, vote for us here
Delegate to us for passive income. Check our 80% fee-back Program
Thank you for your support team @discovery-it 🙂
you are welcome, if you can vote our witness it would help us a lot!!
Thank you for your support team @innerblocks 👌
Buena idea, y quedó genial el patrón de crochet.
Gracias querida, hice todo lo posible por ser más ordenada con el crochet y darle una bonita forma.
Quedó hermoso como todo lo tejido con amor a crochet 🤗 y es muy útil 😊.
Gracias amiga, siempre quise aprender a tejer, y ya puedo decir que voy muy bien.
Amiga me encantan los colores que elegiste para este porta termos, seguro le encanta a mi hija.