WELCOME TO MY BLOG
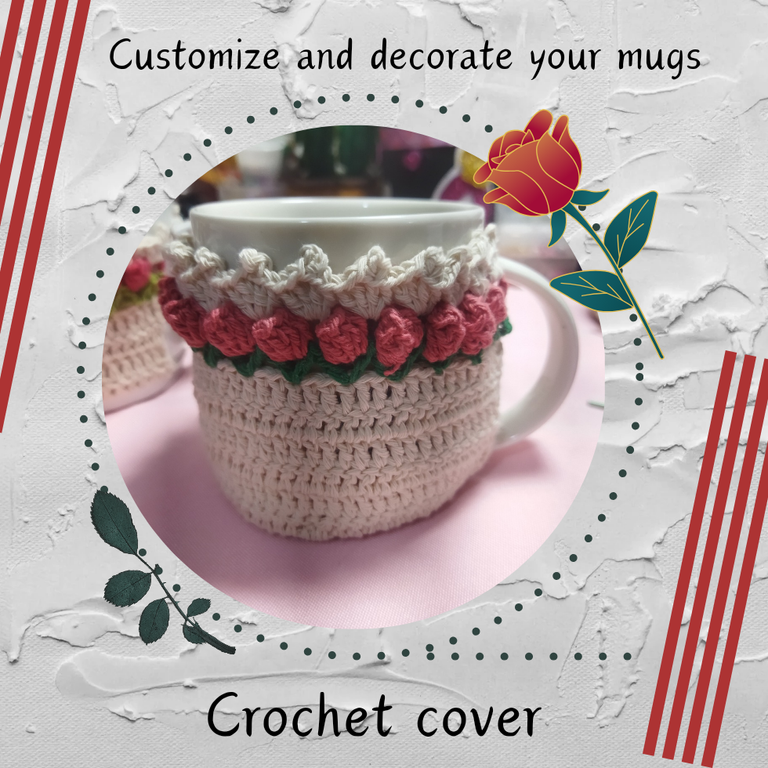
Hellooooo, hellooooooo! Greetings my dear #HiveDiy creatives. For me, crocheting has become one of the activities that I enjoy the most because, in addition to serving as a relaxation therapy, it has helped me make noticeable changes in my home.
In December of last year I bought a Christmas mug that I used throughout the festivities and that became my favorite mug because I can add just the right amount of drink that I like to consume.
Well, it turns out that the people who visit me and see me drinking from this cup tell me very jokingly that Christmas is over, that I should put it away again and I simply answer that it is my favorite cup. So with the materials at home and the desire to keep making changes, I made this beautiful woven cover with a beautiful tulip detail made with the pop stitch, which enhances the embroidery because the flowers stand out from the fabric. I hope you like it. Without further ado let's begin.
BIENVENIDOS A MI BLOG
¡Holaaaa, holaaaaa! Saludos mis estimados creativos de #HiveDiy. El tejido a crochet se ha convertido para mi en una de las actividades que más disfruto porque además de servirme como terapia de relajación me ha ayudado a realizar cambios bien notorios en mi hogar.
En el mes de diciembre del año pasado compré una taza navideño que utilicé durante todas las festividades y que se convirtió en mi taza favorita porque puedo agregar la cantidad de bebida justa que me gusta consumir.
Pues, resulta que las personas que me visitan y me ven tomando en esta taza me comentan muy chistosamente que ya la navidad pasó, que la guarde nuevamente y yo simplemente contesto que es mi taza favorita. Así que con los materiales en casa y las ganas de segur realizando cambios, realicé esta linda funda tejida con un bello detalle de tulipanes realizado con el punto pop, que realza el bordado debido a que las flores sobresalen del tejido. Espero les guste. Sin más comencemos.
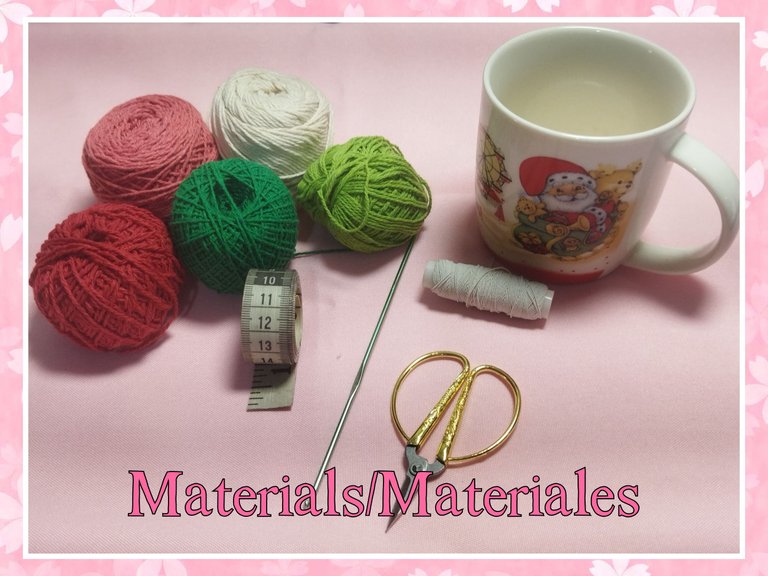
MATERIALS
- Off-white, forest green and old pink cotton threads)
- 2.5 mm crochet hook
- Elastic thread
- Wool needle
- Scissors
- Measuring tape
MATERIALES
- Hilos de algodón blanco hueso, verde bosque y rosa vieja)
- Aguja de crochet de 2,5 mm
- Hilo elástico
- Aguja lanera
- Tijera
- Cinta métrica
STEP BY STEP // PASO A PASO
LAP 1
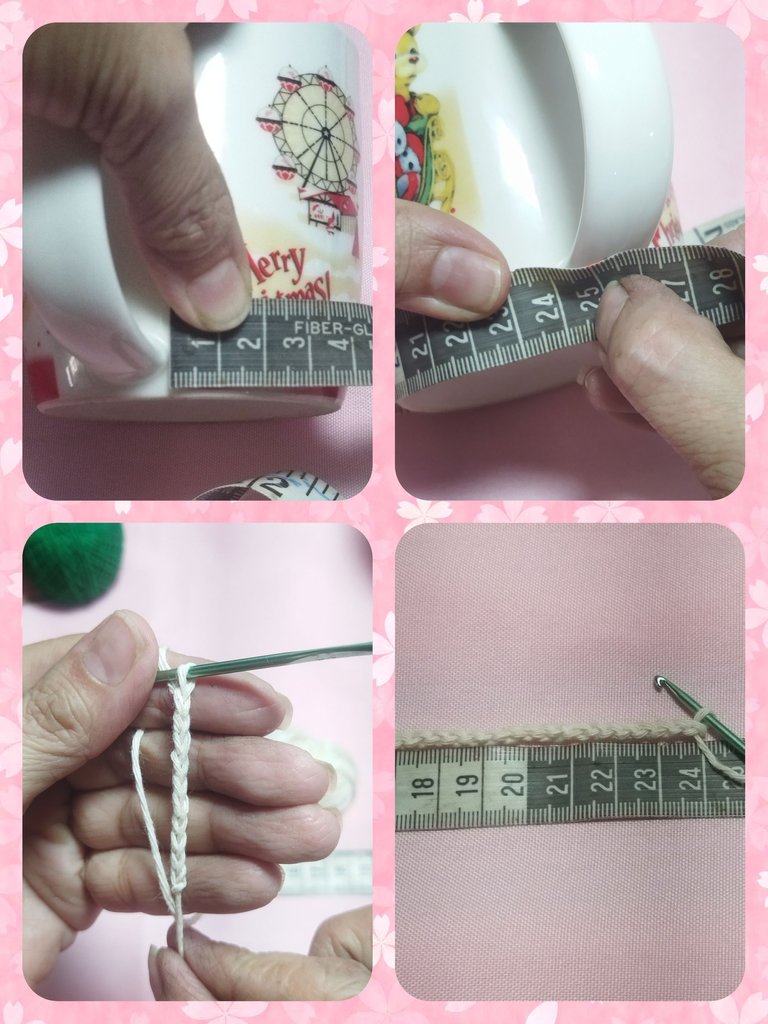
Before starting the weaving, we must measure the width of the cup, using a measuring tape, from the beginning of the handle to the next edge, that is, the centimeters of the handle are not included.
We will begin the weaving with the off-white thread, making a 24 cm chain, which is the measurement of my cup. This chain is 64 links.
VUELTA 1
Antes de comenzar el tejido, debemos tomar la medida del ancho de la taza, utilizando una cinta métrica, a partir del inicio del asa hasta el siguiente borde, es decir, no se incluye los centímetros del asa.
Comenzaremos el tejido con el hilo blanco hueso, realizando una cadena de 24 cm que es la medida de mi taza. Esta cadena es de 64 eslabones.
LAP 2
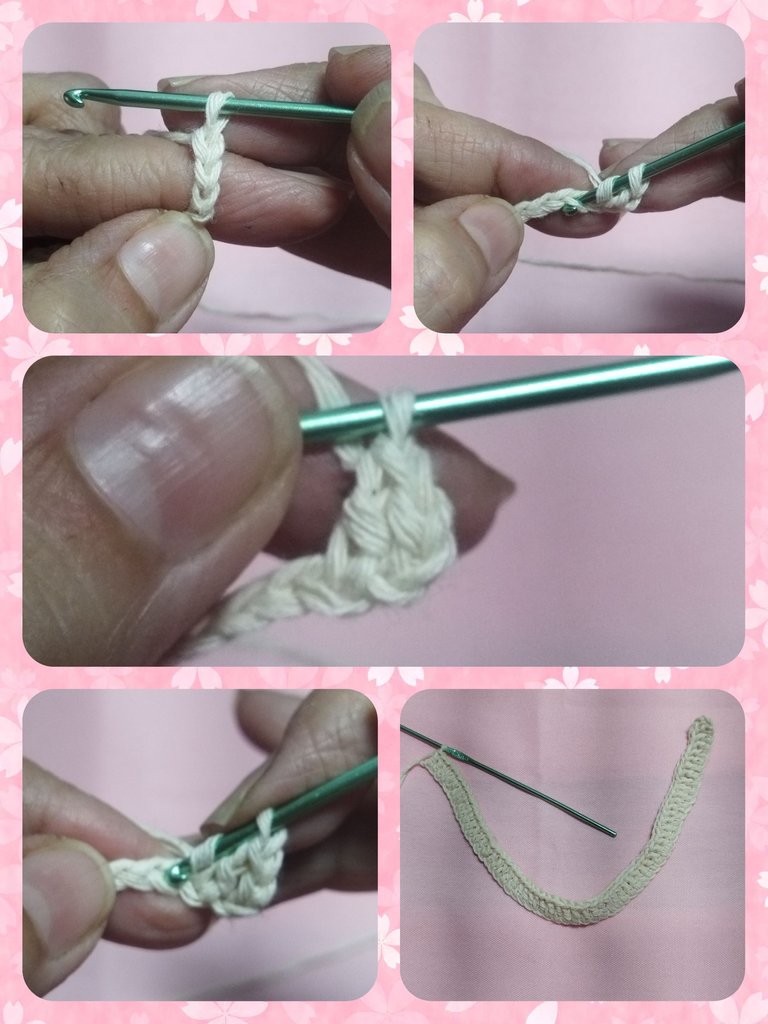
- We raise 3 additional chains that will replace the first double crochet, and then insert the needle into point 4 of the chain, counting from the first link and we will make 1 double crochet in each of the links of the chain for a total of 65 high points.
VUELTA 2
- Levantamos 3 cadenas adicionales que sustituirá al primer punto alto, para luego inserta la aguja en el punto 4 de la cadena, contando a partir del primer eslabón y realizaremos 1 punto alto en cada uno de los eslabones de la cadena para un total de 65 puntos altos.
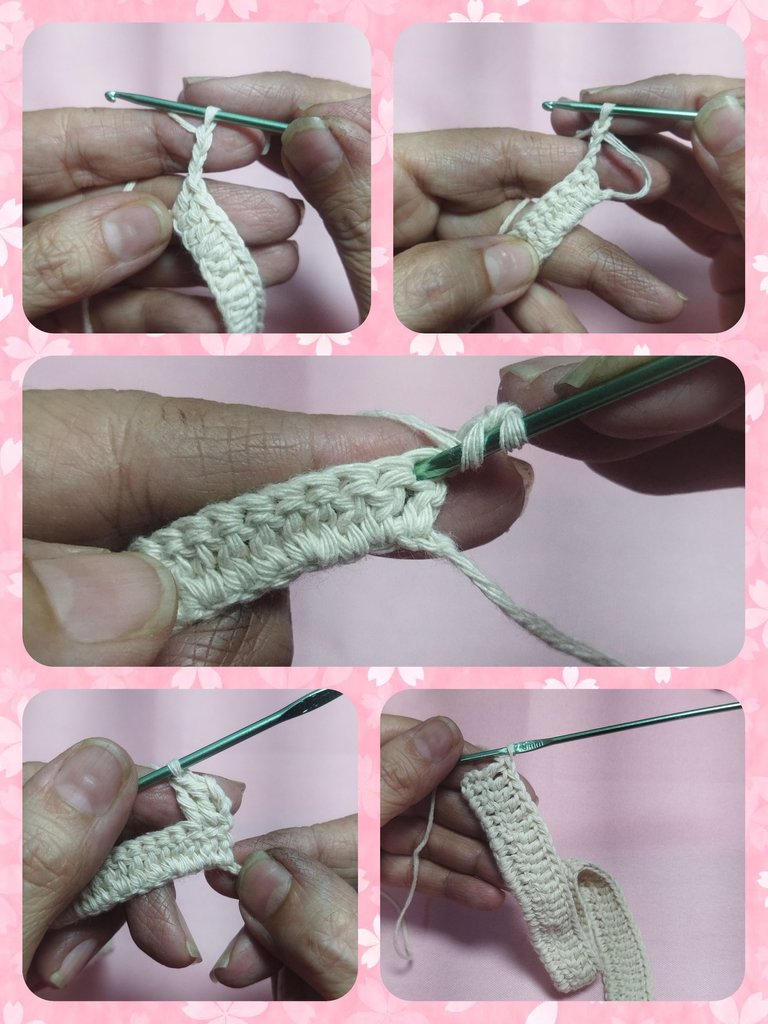
ROUNDS 2, 3, 4, 5 AND 6
- On the third round we are going to pick up 3 chain stitches and we are going to turn the fabric and begin to knit 1 double crochet in each of the stitches of the previous chain, for a total of 65 stitches.
- We repeat the process until round No. 6.
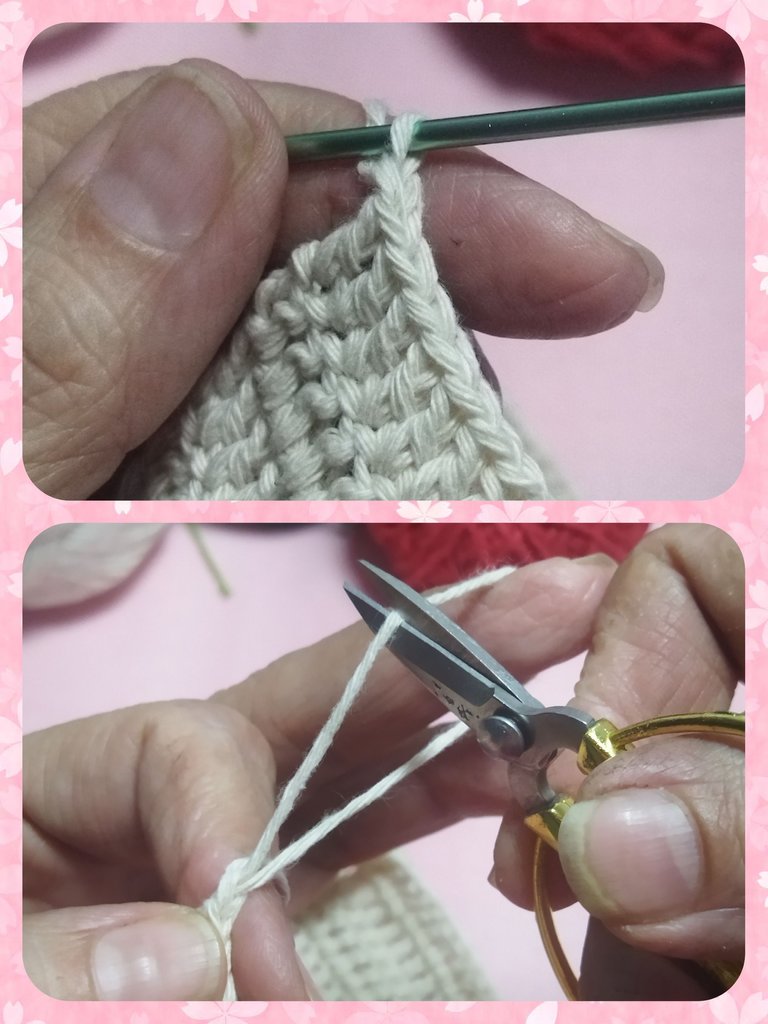
- We make a chain stitch at the end of round 6, extract thread, cut and adjust.
VUELTAS 2, 3, 4, 5 Y 6
- En la segunda vuelta vamos a levantar 3 puntos cadena y vamos a girar el tejido y comenzaremos a tejer 1 punto alto en cada uno de los puntos de la cadena anterior, para un total de 65 puntos.
- Repetimos el proceso hasta la vuelta Nº 6.
- Realizamos un punto cadena al final de la vuelta 6, extraemos hilo, cortamos y ajustamos.

LAP 7
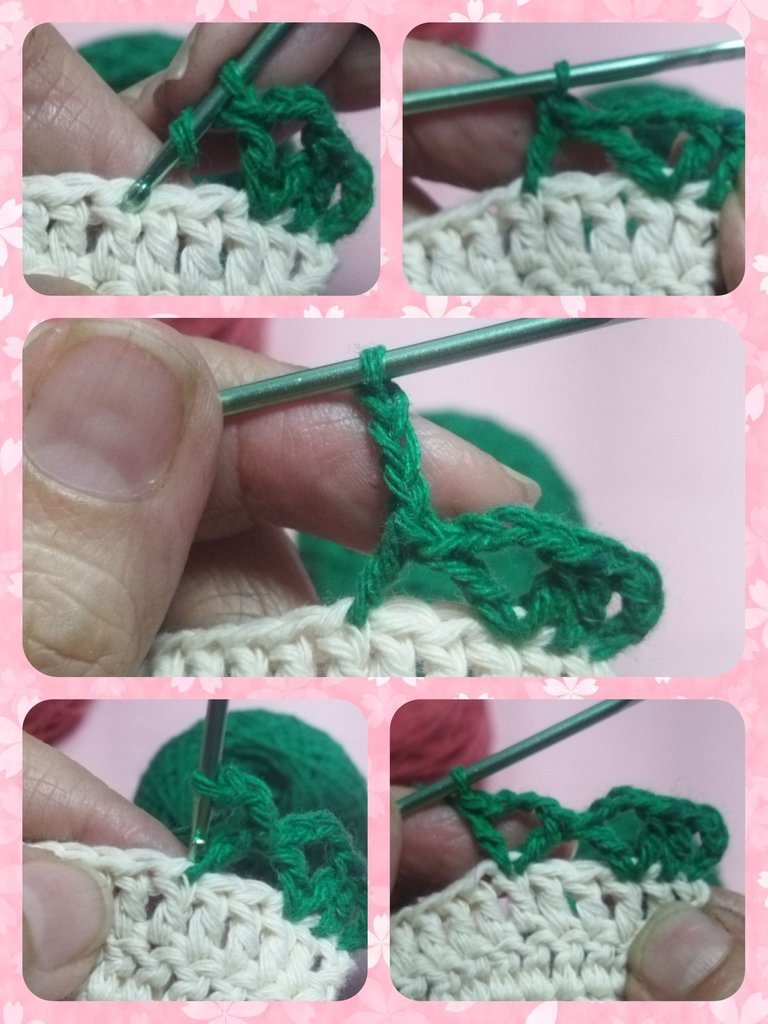
We will do this round with the green thread. We are going to introduce the needle through the first point where we started round No. 6 (where we started, not where we finished).
We make a slip knot, adjust and lift 3 chain stitches to replace the first double crochet, then we make two double crochets, one in each point of the previous round.
We lift 3 chain stitches and make another double crochet in the same point, forming a "V".
VUELTA 7
Esta vuelta la haremos con el hilo verde. Vamos a introducir la aguja por el primer punto donde iniciamos la vuelta Nº 6 (donde iniciamos, no donde terminamos).
Realizamos un nudo corredizo, ajustamos y levantamos 3 puntos cadena para sustituir el primer punto alto, seguidamente realizamos dos puntos altos, uno en cada punto de la vuelta anterior.
Levantamos 3 puntos cadena y realizamos otro punto alto en e mismo punto, formando una "V".
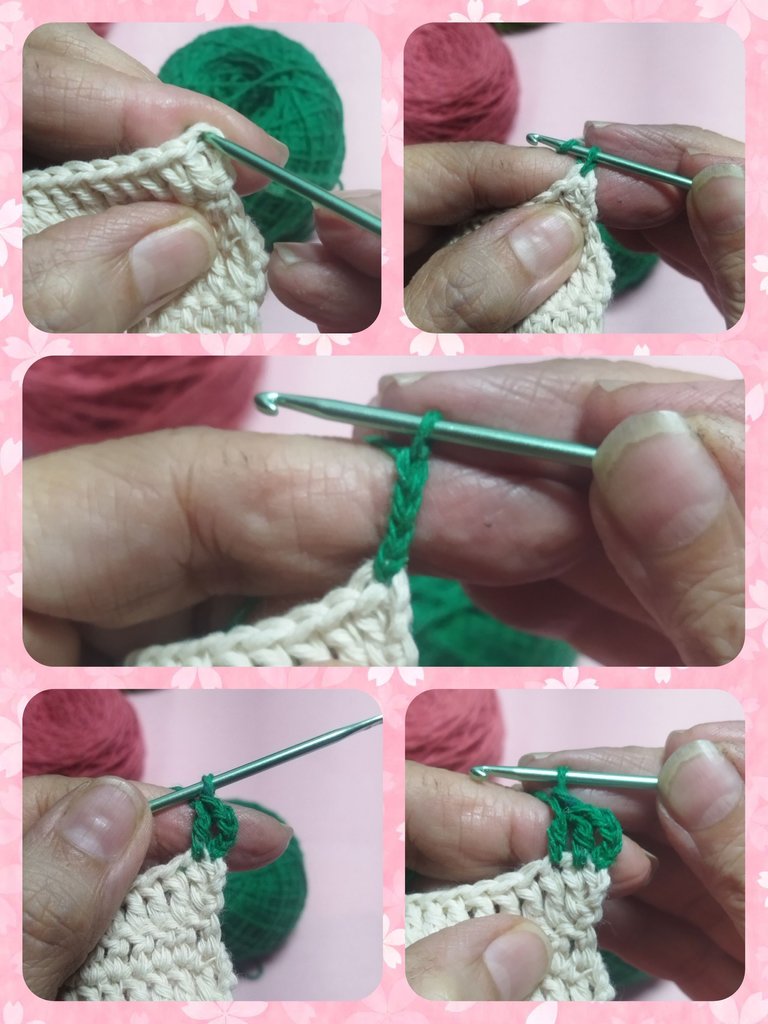
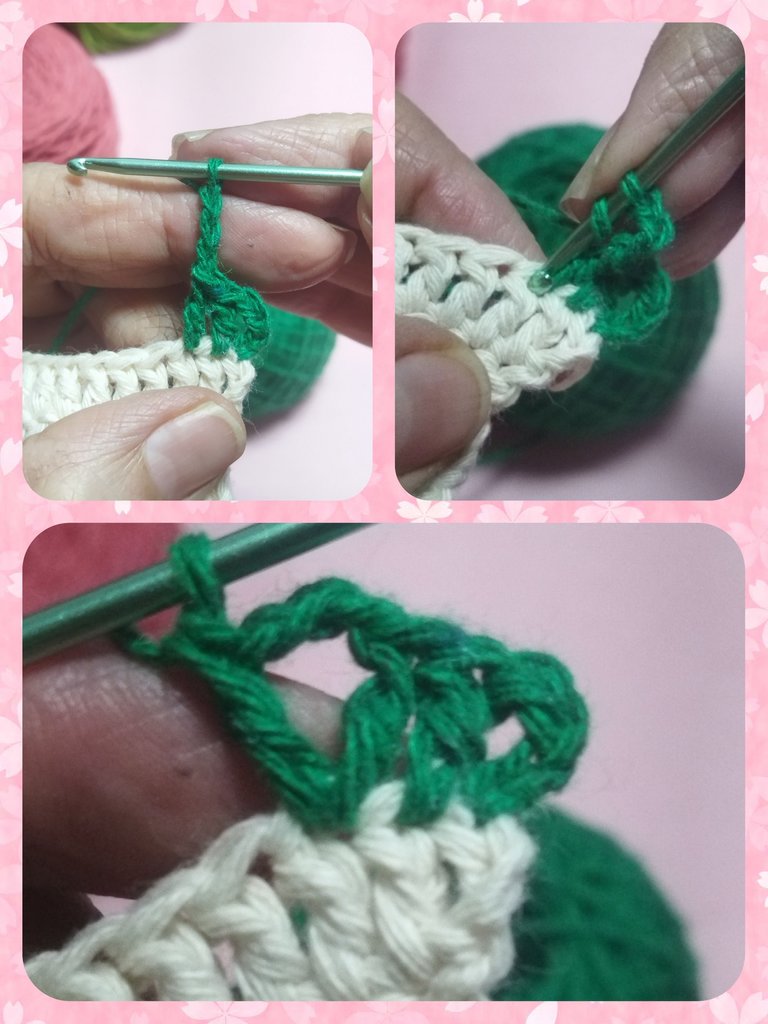
- We take yarn over and count 3 stitches in the previous round, in the third stitch we will make a double crochet.
- We make 3 chain stitches and we will make another double crochet in that same point, and we repeat until we finish the round.
- We close with a chain stitch, remove thread, cut the thread and adjust.
- Tomamos lazada y contamos 3 puntos en la vuelta anterior, en el tercer punto haremos un punto alto.
- Realizamos 3 puntos cadena y haremos otro punto alto en ese mismo punto, y repetimos hasta finalizar la vuelta.
- Cerramos con un punto cadena, sacamos hebra, cortamos el hilo y ajustamos.
LAP 8
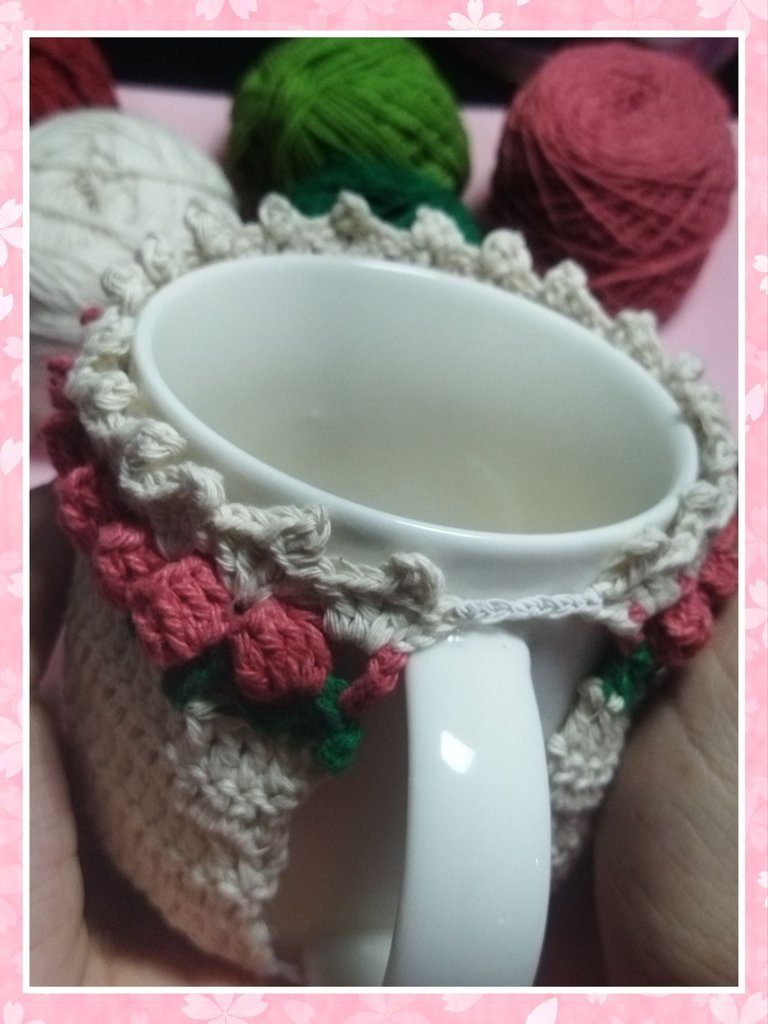
For this round we are going to use the old pink thread, with which we are going to make the tulips with the pop stitch.
We start at the beginning of lap No. 7 with a slip knot. We make 5 chain stitches and in the "V" that we formed in the previous round we are going to knit 6 double crochets.
VUELTA 8
Para esta vuelta vamos a utilizar el hilo rosa vieja, con el que vamos a realizar los tulipanes con el punto pop.
Iniciamos en el inicio de la vuelta Nº 7 con un nudo corredizo. Realizamos 5 puntos cadenas y en la "V" que formamos en la vuelta anterior vamos a tejer 6 puntos altos.
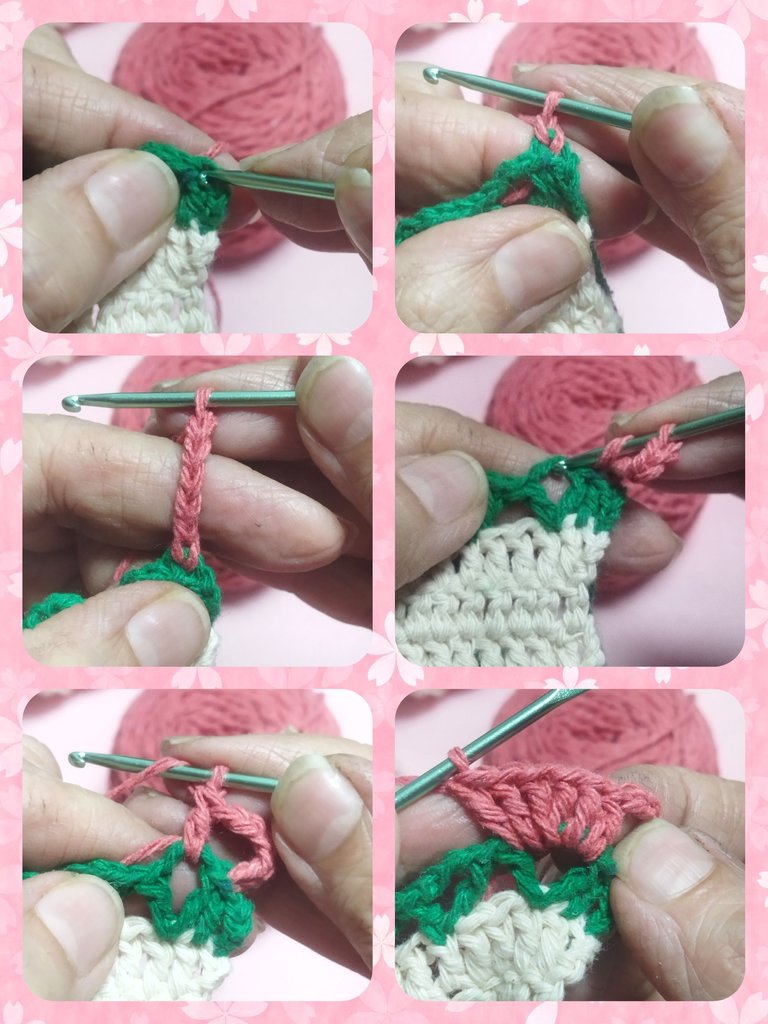
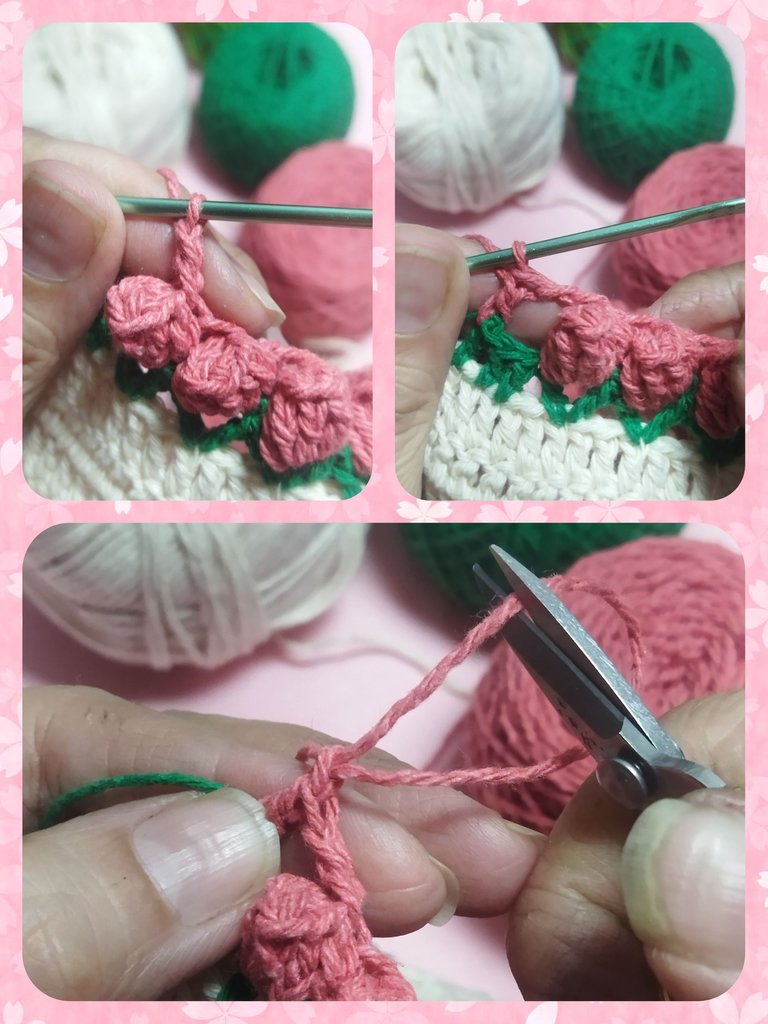
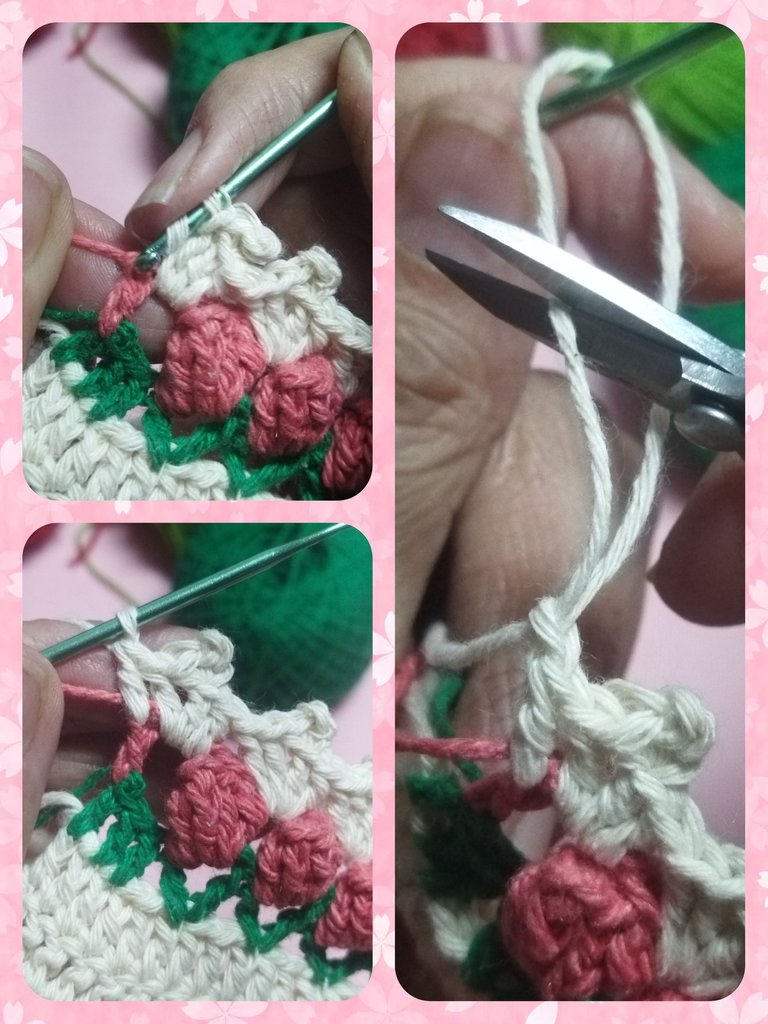
We take the needle out of the stitch and insert it through the first half-double stitch, we bring the needle to the loop of the last stitch and pull the thread to close and form the tulip. Next we lift two chain stitches.
Sacamos la aguja del punto y la introduciremos por el primer punto medio alto, llevamos la aguja al lazo del último punto y halamos el hilo para cerrar y formar el tulipán. Seguidamente alzamos dos puntos cadenas.
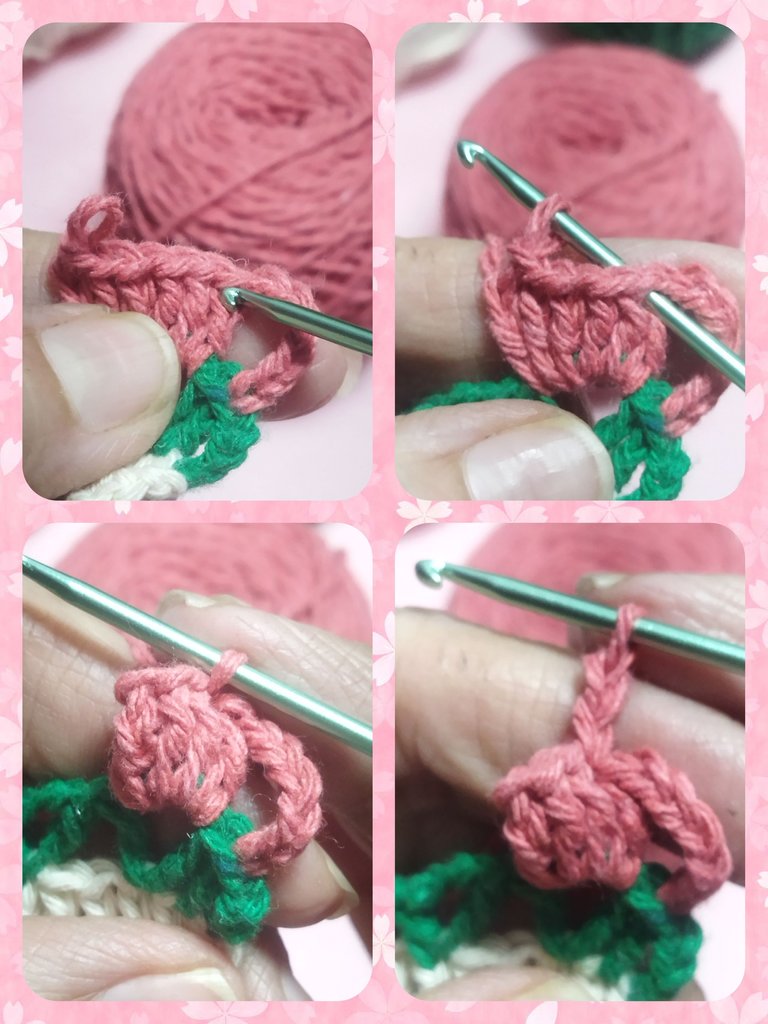
Again we knit 6 double crochets in the next "V" and form another tulip and repeat the process until completing the round.
Nuevamente tejemos 6 puntos altos en la siguiente "V" y formamos otro tulipán y repetimos el proceso hasta culminar la vuelta.
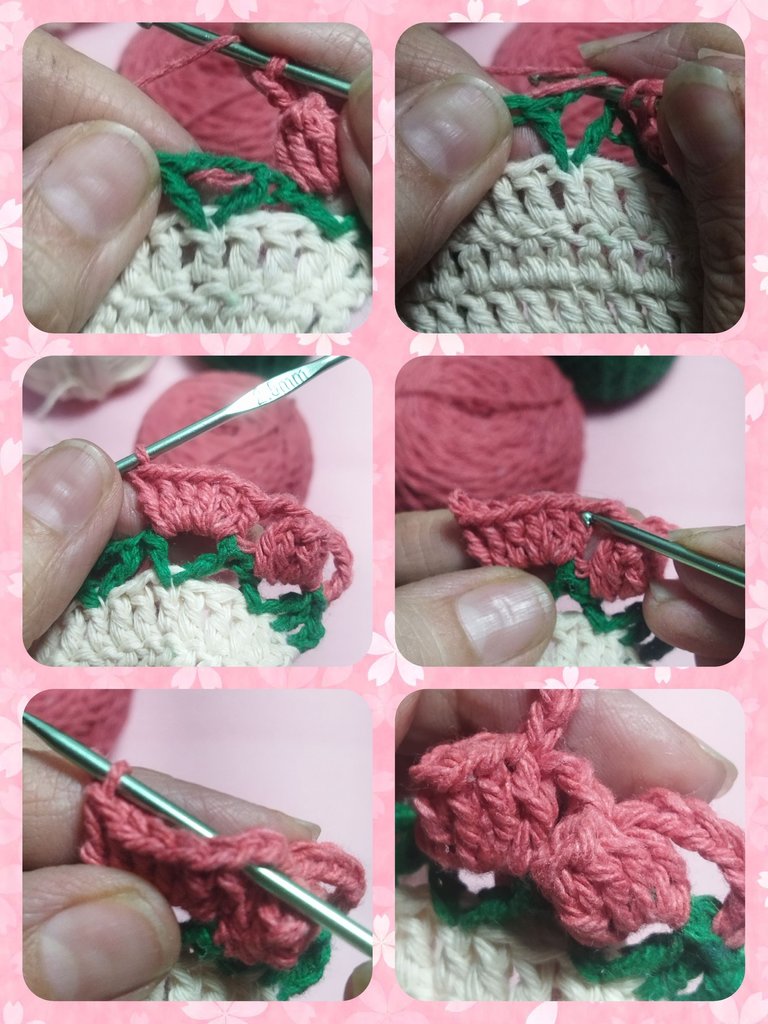
At the end of the last tulip of the round we make two chain stitches and in the last stitch of the previous round we make a double crochet, make a chain, extract thread, cut and adjust.
Al finalizar el último tulipán de la vuelta realizamos dos puntos cadena y en el ultimo punto de la vuelta anterior realizamos un punto alto, hacemos una cadena, extraemos hilo, cortamos y ajustamos.
LAP 9
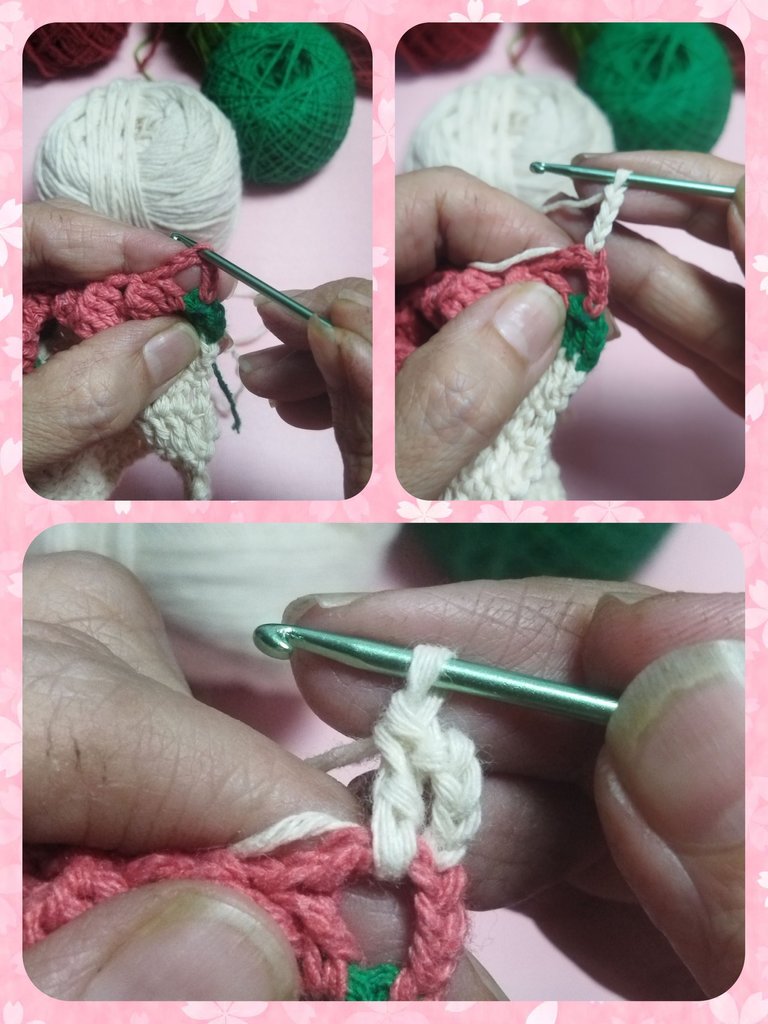
Round No. 9 is the last of the design and we will do it with the thread we started with, that is, the off-white.
We start in the third chain of the 5 that we made in the previous round. Then in the next two points we are going to knit and double crochet, we make 3 chain stitches that we will close in the same double crochet to form a peak and we continue with two double crochets.
VUELTA 9
La vuelta Nº 9 es la última del diseño y a realizaremos con el hilo con que iniciamos, es decir, el blanco hueso.
Iniciamos en la tercera cadena de las 5 que realizamos en la vuelta anterior. Luego en los dos puntos siguientes vamos a tejer y punto alto, realizamos 3 puntos cadenas que cerraremos en el mismo punto alto para formar un pico y seguimos con dos puntos altos.
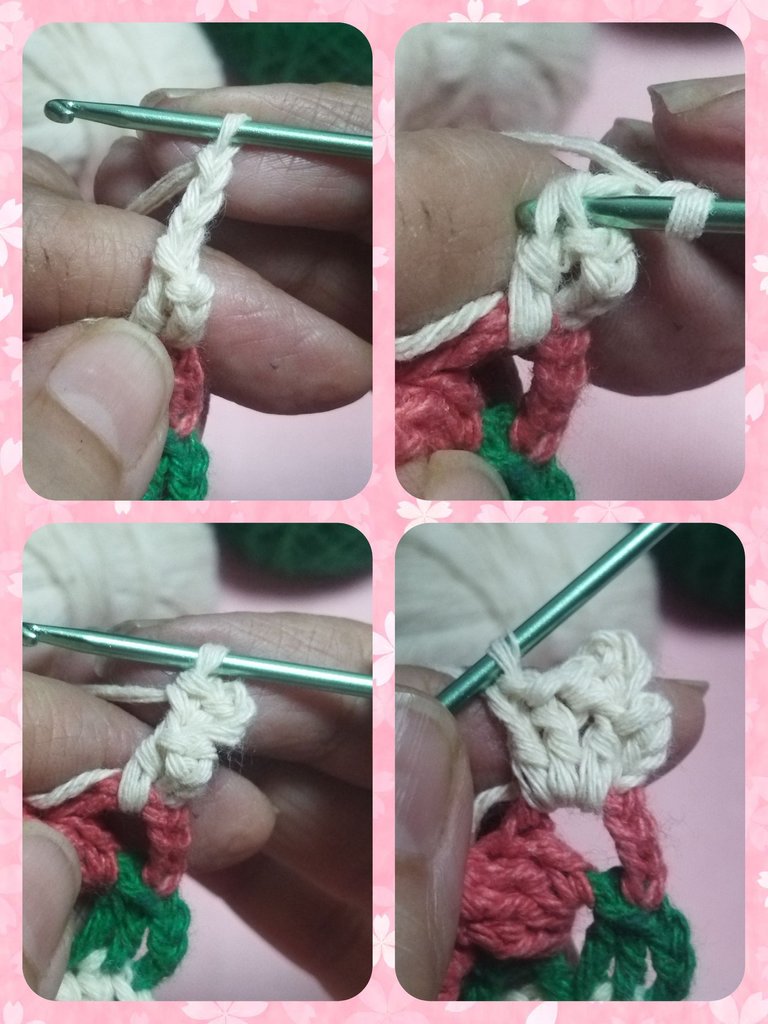
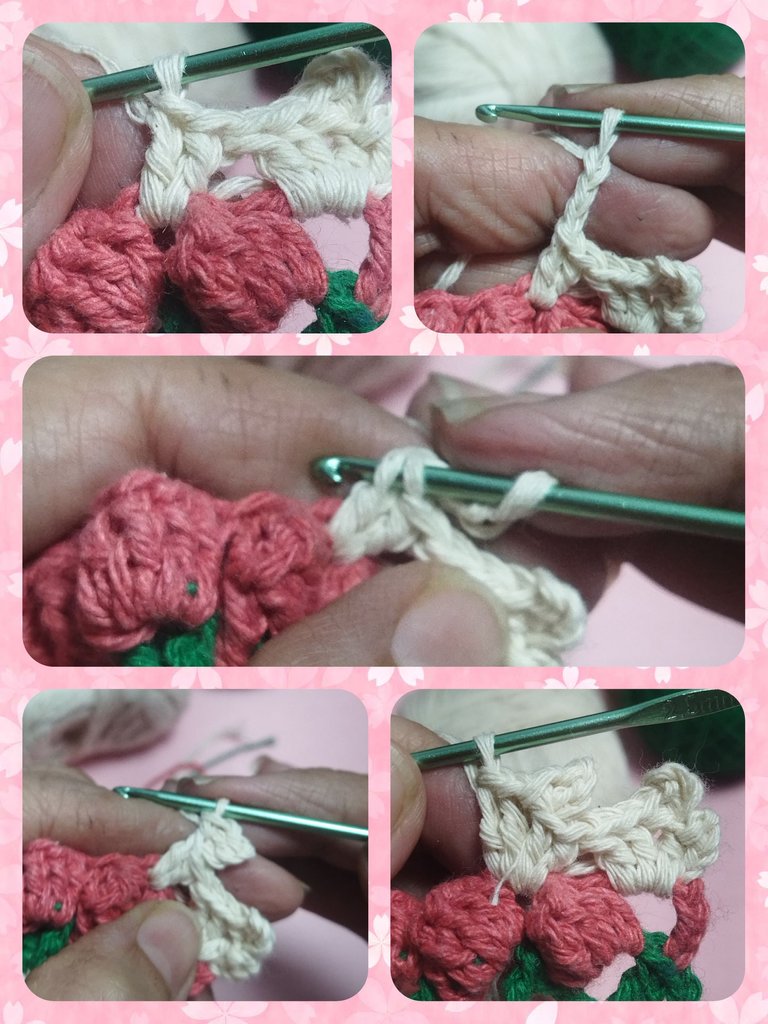
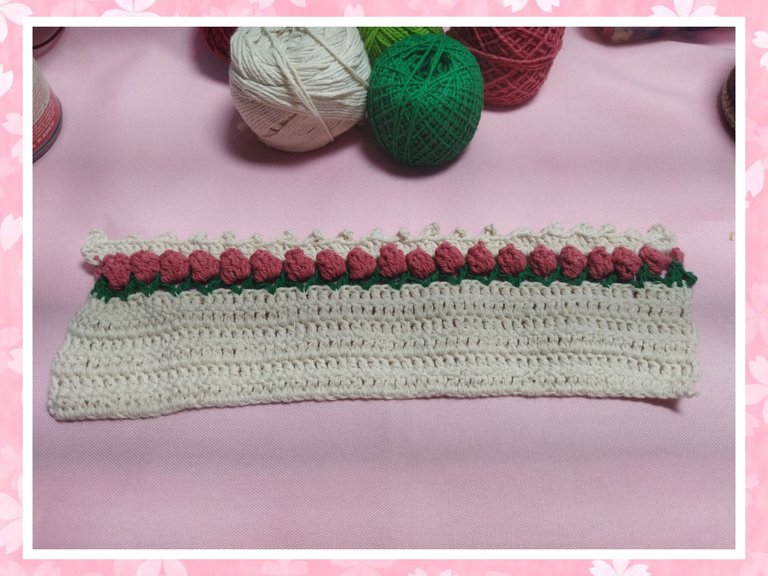
We will repeat the same points in each of the spaces between each tulip. 2 double crochets, 3 chains that we will close in a peak over the last stitch and again 2 double crochets, until finished.
We close with a chain stitch, extract thread, adjust and cut.
Repetiremos los mismos puntos en cada uno de los espacios que hay entre cada tulipán. 2 puntos altos, 3 cadenas que cerraremos en un pico sobre el último punto y nuevamente 2 puntos altos, hasta finalizar.
Cerramos con un punto cadena, extraemos hilo, ajustamos y cortamos.
Once the fabric is finished, with the wool needle we are going to hide all the excess threads on the back of the fabric.
Terminado el tejido, con la aguja lanera vamos a esconder por el reverso del tejido todos los hilos sobrantes.
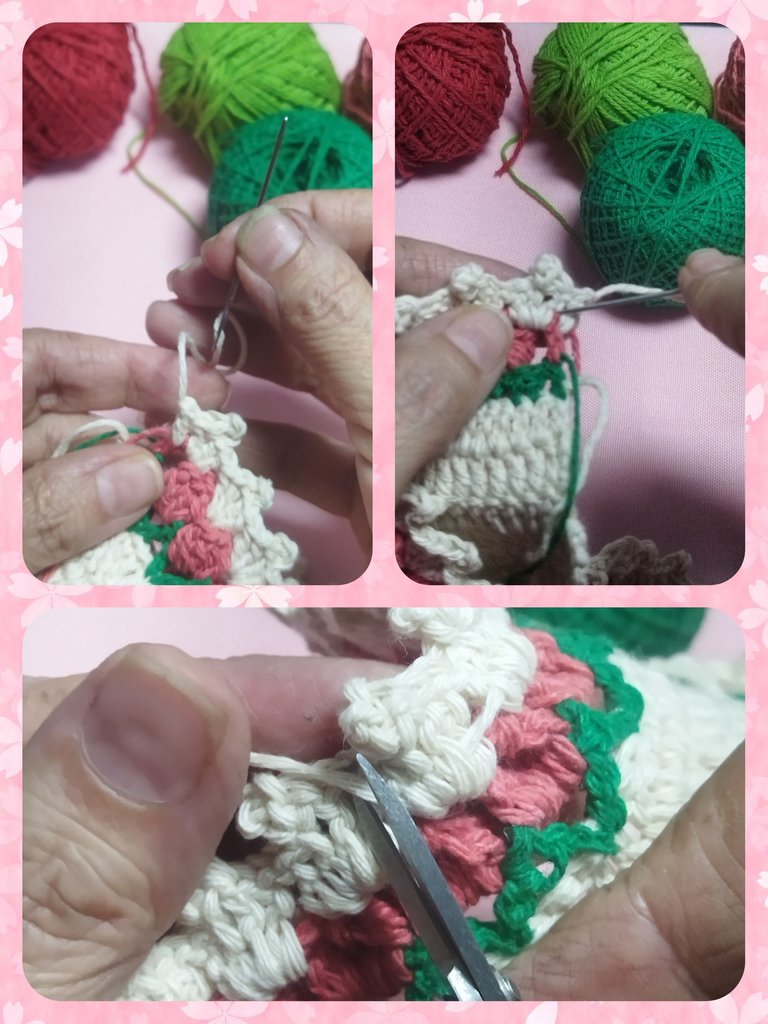
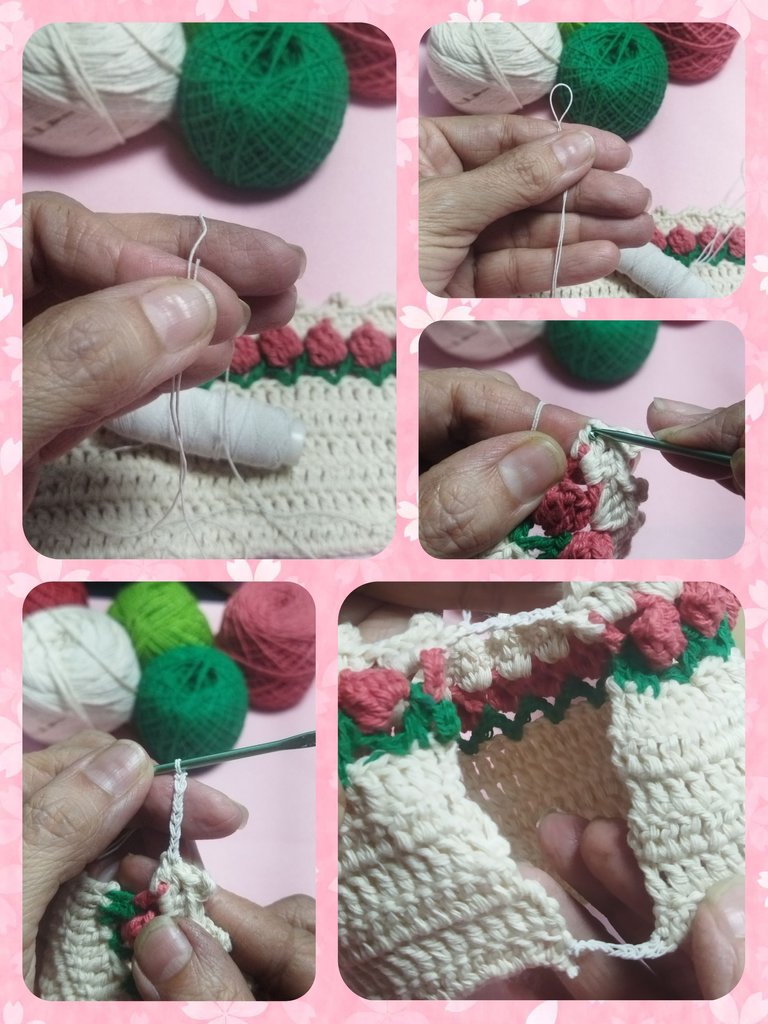
ELASTIC CLOSURE
To close the cover and make it fit the cup, we are going to make a chain in each of the corners on one side and join it to the corresponding corner on the other side.
We begin by taking a strand of approximately 60 cm and folding it, we make a sliding knot in the last point of the fabric, we make 6 to 8 links, depending on the distance between each end, and we join with the first point at the other end, we make a chain, we extract the thread, adjust and cut. We repeat at the bottom ends.
CIERRE ELÁSTICO
Para cerrar la funda y que se ajuste a la taza vamos a realizar una cadena en cada una de la esquinas de un lado y la unimos a la esquina correspondiente del otro lado.
Comenzamos tomando una hebra de 60 cm aproximadamente y la doblamos, realizamos una nudo corredizo en el último punto del tejido, realizamos de 6 a 8 eslabones, según la distancia que haya entre cada extremo, y unimos con el primer punto del otro extremo, realizamos un cadena, extraemos el hilo, ajustamos y cortamos. Repetimos en los extremos de abajo.
PROJECT COMPLETED
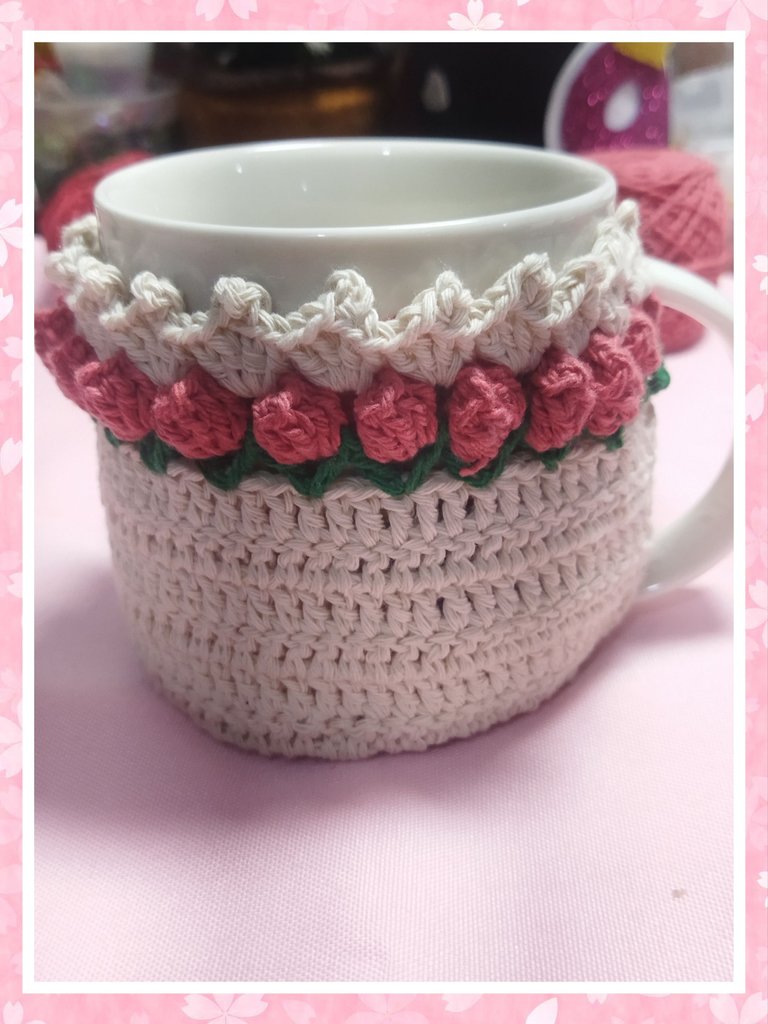
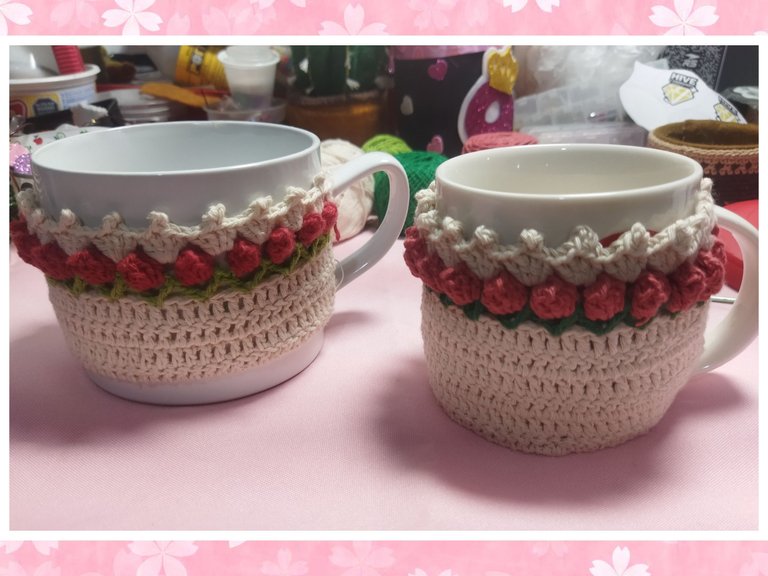
Once the cover is finished, we place it in the cup, inserting it through the elastic part until it covers the cup. A very subtle and beautiful way to cover our favorite cups, whether because they are stained, peeled or, as in my case, out of season. So if you want to change the image of your favorite mug, this is a great idea. I hope you like it.
PROYECTO FINALIZADO
Una vez culminada la funda, colocamos en la taza introduciéndola por la parte elástica hasta cubrir la taza. Una forma muy sutil y bonita de cubrir nuestras tazas favoritas, bien sea por que están manchadas, peladas o como en mi caso, fuera de temporada. Así que si quieres cambiar la imagen de tu taza favorita, esta es un idea genial. Espero te guste.
Que linda ha quedado, que envidia saber tejer, me gustaría aprender algún día, de esta forma ya los curiosos no te dirán nada por seguir usando la taza de la temporada de navidad 😁, no ven que es la misma 🥰
Jejejejeje, siempre hay quien comente. Y pensar que aún tengo un adorno navideño puesto en una puerta, jajajajaja. Tejer es muy fácil, no requiere gran habilidad, con la práctica mejoras rápido.
Que belleza me encanta este tejido, los colores, los tulipanes, te quedo tan linda esta funda, el aspecto y la utilidad porque sí es una bebida caliente con esta funda protege tus manos, creo que es una buena idea para las tazas de los niños para que soporten el frío o calor y disfruten sus bebidas más cómodas. Recuerdo que mi mamá nos colocaba un pañito porque no tenía esta brillante idea para el momento. Gracias por compartir la consideraré para hacer una me encanto.
Crochet cup can be useful to reduce heat as well when we bring hot drink.
Thank you for sharing and well done for great results 😍
Está hermoso!!
Looking at your crocheting makes me have the urge to try it out. If you enjoy it and find that it relaxes your mind, it can be therapeutic for your overall well-being.
¡¡¡Buen trabajo!!! Gracias por publicar tu excelente contenido en Hive Diy, nos encantó mucho tu trabajo, las tazas nunca antes habían quedado tan hermosas con este forro para tazas
Tu comunidad artesana ahora es testigo
