WELCOME TO MY BLOG
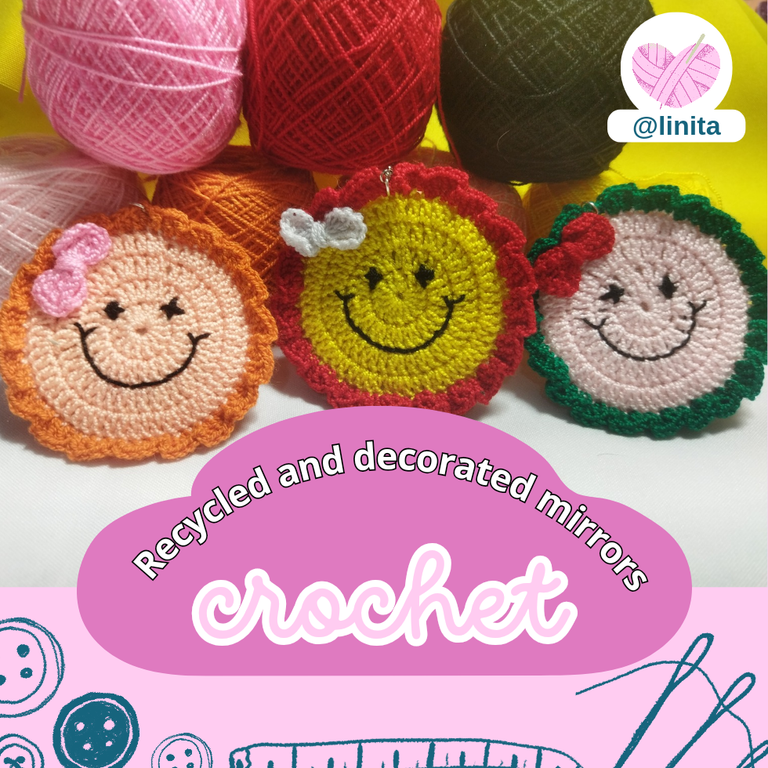
Hellooooo, hellooooooo! Greetings my dear #HiveDiy creatives. I returned with energy recharged after a few good days of rest and relaxation. Sometimes we have to free our minds and fill them with new memories to inject our lives with optimism and strength. This project that I present to you today was stagnated, my table was ready to start it but for reasons of force majeure I was not able to continue it. They are some mirrors that I have been saving from the powders and blushes that my daughters have finished and that went straight to the trash can and to give them a new use with great care and dedication I removed them from the case and knitted them a nice cover in the shape of a happy face so that each of us can carry in our bags, wallets, shoulder bags, etc. etc and see each other every time we have the need to check our makeup or just look at our face. It is a great and very useful idea, easy to carry since it is designed in the shape of keychains. I hope you like it.
BIENVENIDOS A MI BLOG
¡Holaaaa, holaaaaa! Saludos mis estimados creativos de #HiveDiy. Regresé con energía recargadas después de unos buenos días de descanso y relajación. A veces tenemos que liberar nuestras mentes y llenarlas con nuevos recuerdos para inyectar nuestra vida de optimismo y fuerza. Este proyecto que les presento hoy, quedó en stanb by, mi mesa preparada para iniciarlo pero por motivos de fuerza mayor no pude continuarlos. Son unos espejos que he venido guardando de los polvos y rubores que mis hijas han acabado y que iban directo a la papelera y para darle un nuevo uso con mucho cuidado y esmero los retiré del estuche y les tejí una linda cubierta con forma de carita feliz para que cada una de nosotras podamos llevar en nuestros bolsos, carteras, bandoleras, etc. etc. y vernos cada vez que tengamos la necesidad de comprobar nuestro maquillaje o simplemente mirar nuestro rostro. Es una idea genial y muy util, fácil de llevar ya que está diseñado en forma de llaveros. Espero les guste.
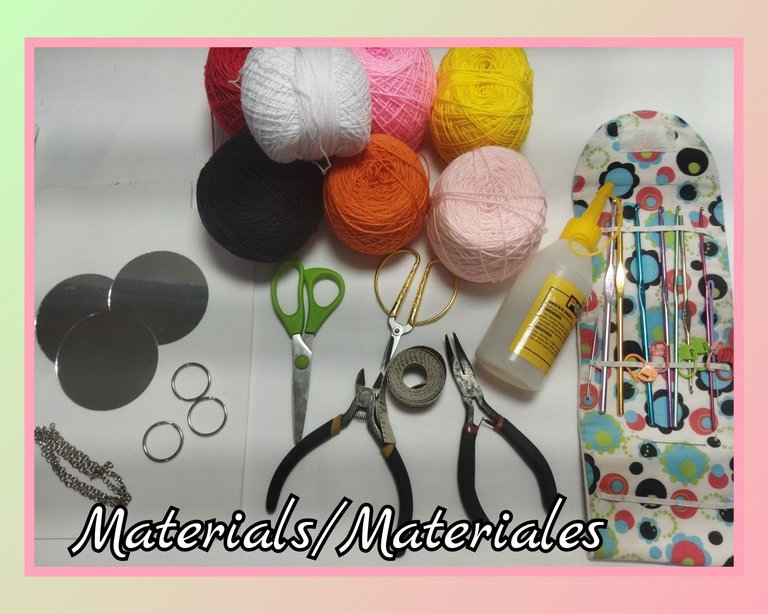
MATERIALS
- Acrylic crochet threads of various colors
- Knitting needle 2.6 mm
- Wool needle
- Fabric marker
- Chain
- Key rings
- 4 mm hoops
- Cutting pliers
- Scissors
- Liquid silicone
MATERIALES
- Hilos de crochet acrílico de colores variados
- Aguja de tejer 2,6 mm
- Aguja lanera
- Marcador de tejido
- Cadena
- Aros para llaveros
- Aros de 4 mm
- Pinzas de corte
- Tijera
- Silicón líquido
STEP BY STEP // PASO A PASO
LAP 1
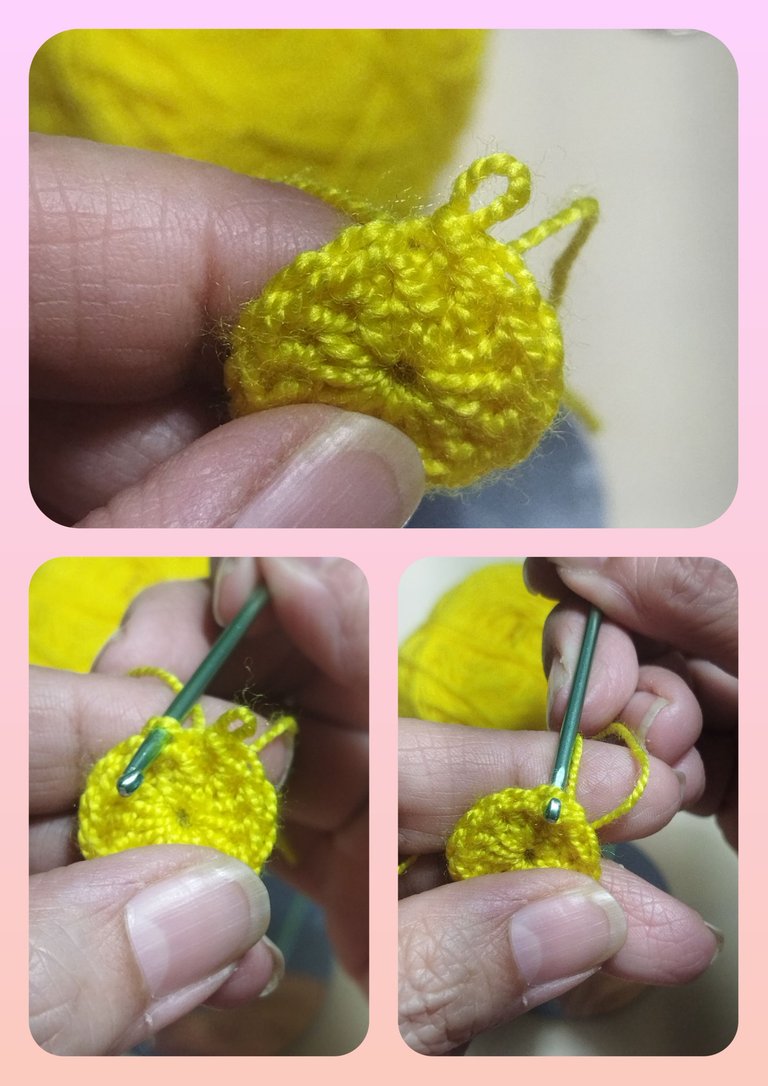
- We start with a magic ring. In it we are going to knit 1 first false double crochet as follows. We make 1 single crochet followed by a chain. This false stitch will replace the first double crochet and will allow us to obtain a better finish at the end of the round. Then we continue with 13 double crochets for a total of 14 double crochets.
VUELTA 1
- Iniciamos con un anillo mágico. En él vamos a tejer un 1 primer falso punto alto de la siguiente manera. Realizamos 1 punto bajo seguido de una cadena. Este punto falso sustituirá el primer punto alto y nos permitirá obtener un mejor acabado al cierre de la vuelta. Luego continuamos con 13 puntos alto para un total de 14 puntos altos.
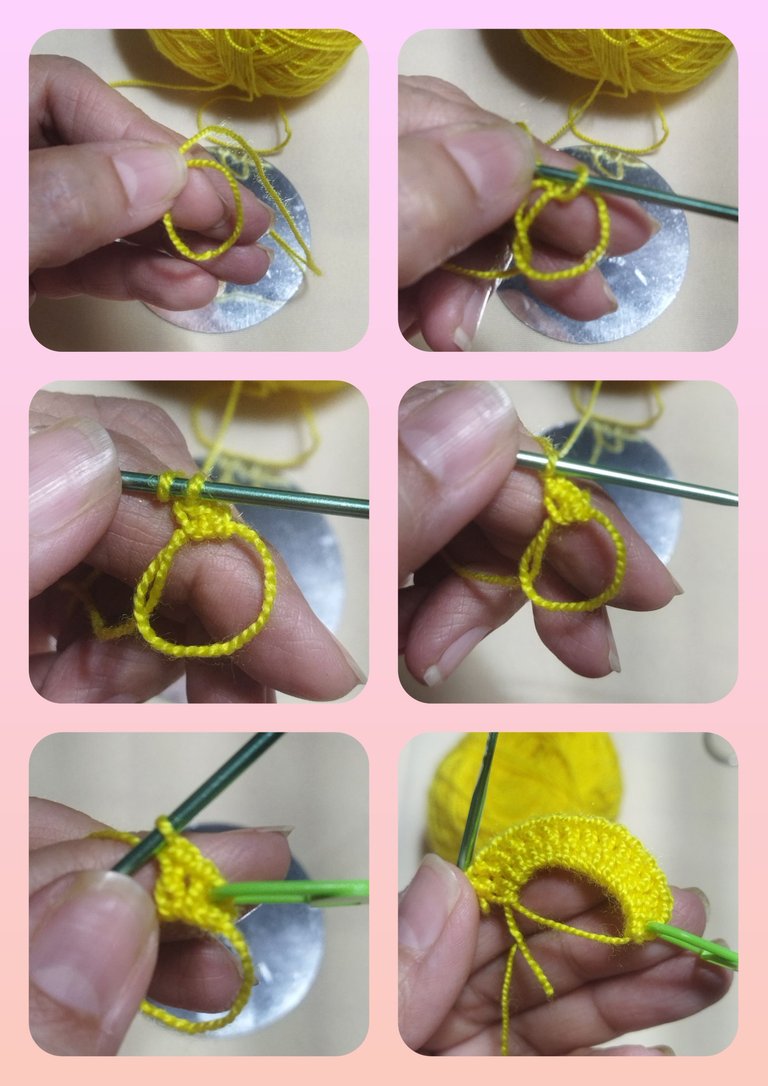
- We close the magic ring and finish the round with 1 slipped stitch in the chain stitch at the beginning, taking a single strand of the stitch.
- Cerramos el anillo mágico y culminamos la vuelta con 1 punto deslizado en el punto cadena del inicio, tomando una sola hebra del punto.
LAP 2
- On this round we are going to pass the needle through the next stitch where we closed, only the back thread of the stitch, and pull the thread to begin knitting.
VUELTA 2
- En esta vuelta vamos a pasar la aguja por el punto siguiente donde cerramos, sólo la hebra posterior del punto, y halamos el hilo para comenzar el tejido.
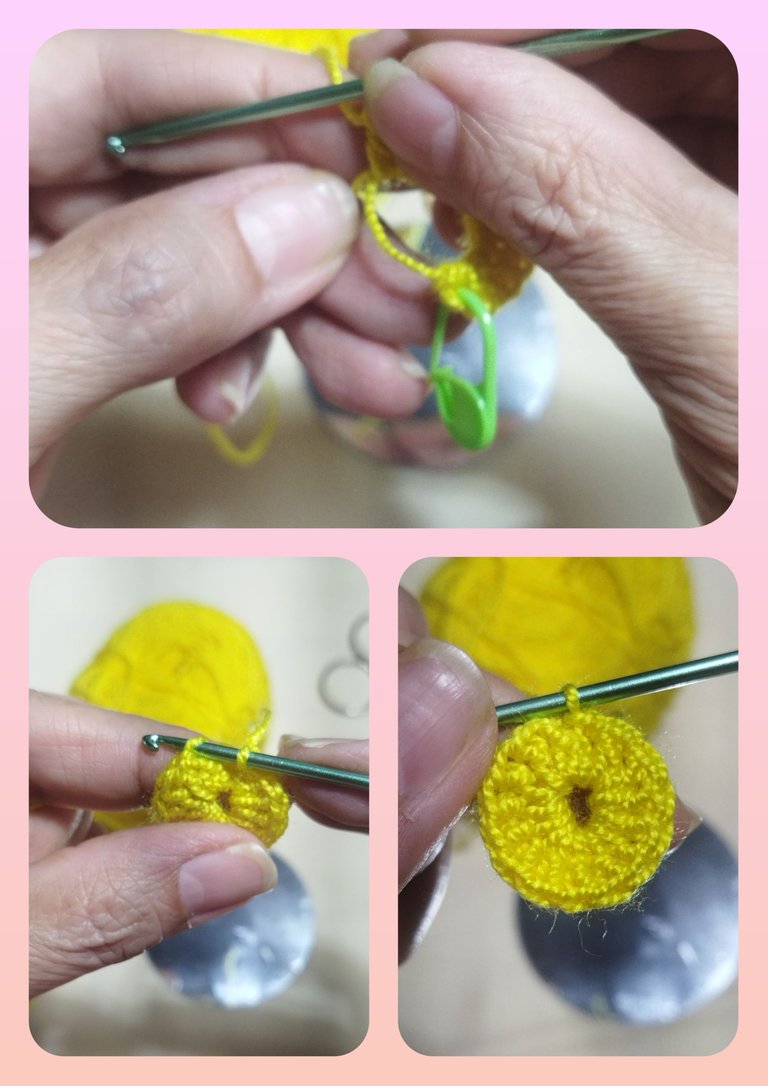
In that same point, we are going to make 1 false stitch, 1 single crochet followed by a chain, then we make 1 double crochet in the same point to make increases in each stitch of the previous round. That is, we will make 2 double crochets in each point.
We finish with 1 slipped stitch in the starting chain.
En ese mismo punto, vamos a realizar 1punto falso, 1 punto bajo seguido de una cadena, luego realizamos 1 punto alto en el mismo punto para realizar aumentos en cada punto de la vuelta anterior. Es decir, realizaremos 2 puntos altos en cada punto hasta finalizar para un total de 28 puntos.
Finalizamos con 1 punto deslizado en la cadena de inicio.
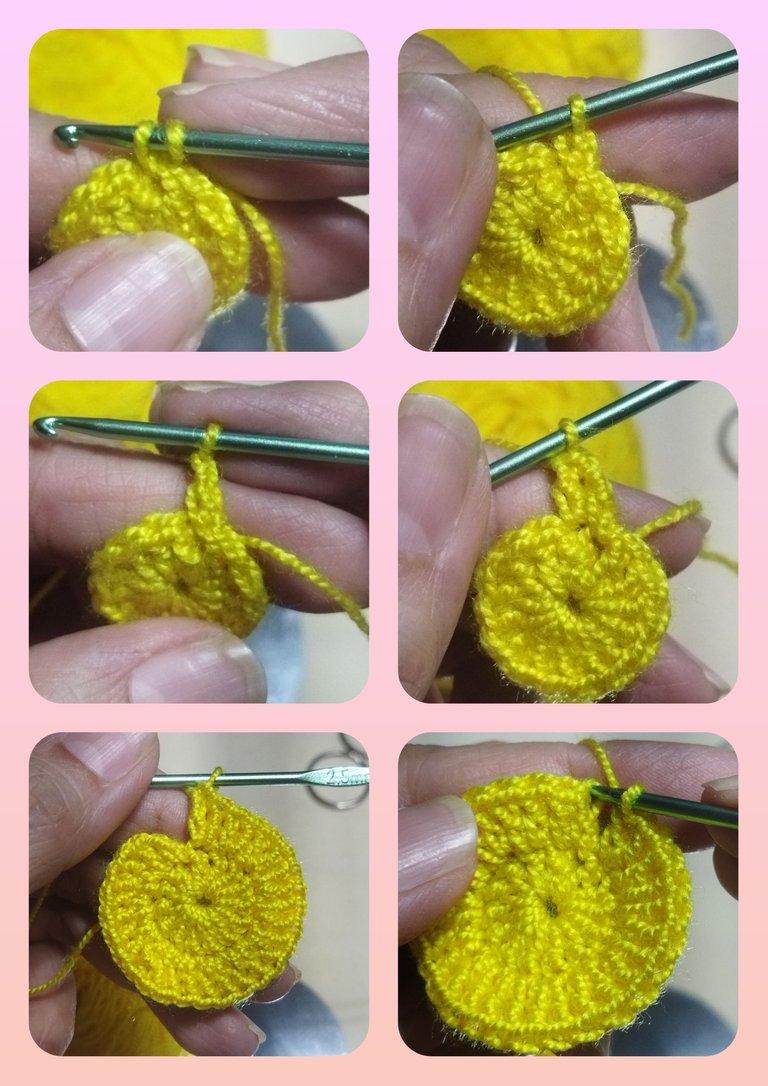
LAP 3
- In the same way as the previous round, we begin knitting in the next stitch of the previous round. We make 1 false stitch and in the same stitch 1 double crochet. In the next stitch 1 double crochet and in the next one an increase. We repeat this series until the end of the round for a total of 42 points.
VUELTA 3
- De la misma forma de la vuelta anterior, comenzamos el tejido en el siguiente punto de la vuelta anterior. Realizamos 1 punto falso y en el mismo punto 1 punto alto. En el siguiente punto 1 punto alto y en el siguiente un aumento. Repetimos esta serie hasta finalizar la vuelta para un total de 42 puntos.
LAP 4
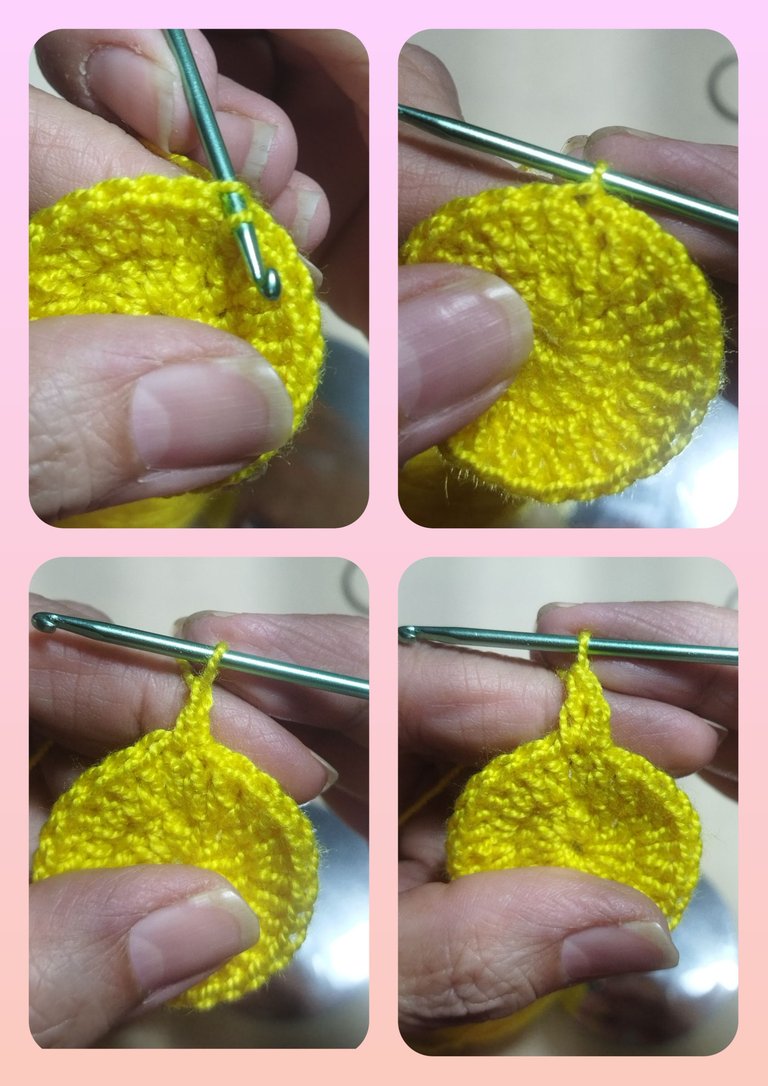
On this round we start with 1 false stitch in the stitch following the end of the previous round and make an increase, then we knit 1 double crochet in the next two stitches. And we repeat 1 increase and 2 double crochets for a total of 52 stitches.
VUELTA 4
En esta vuelta inciamos con 1 punto falso en el punto siguiente al cierre de la vuelta anterior y realizamos un aumento, luego tejemos 1 punto alto en los dos puntos siguientes. Y hacemos repeticiones de 1 aumento y 2 puntos altos para un total de 52 puntos.
As we make the fabric, we have to try it with the mirror until it covers it.
A medida que vayamos realizando el tejido, tenemos que ir probando con el espejo hasta que lo cubra.

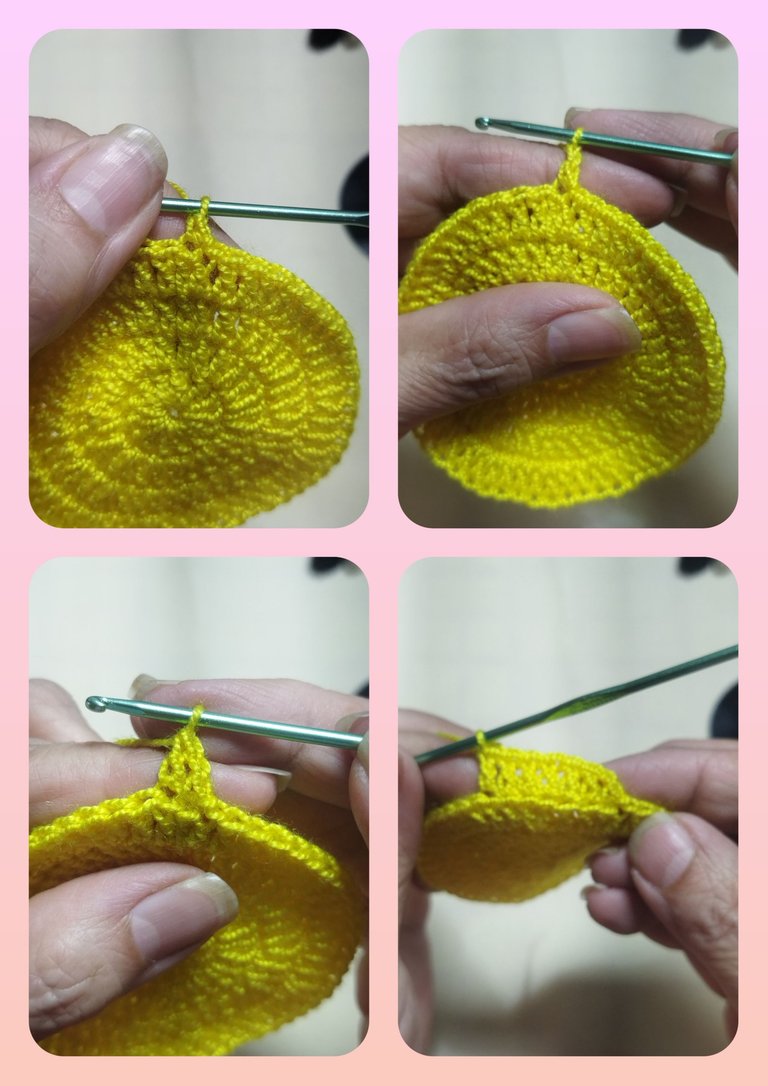
LAP 5
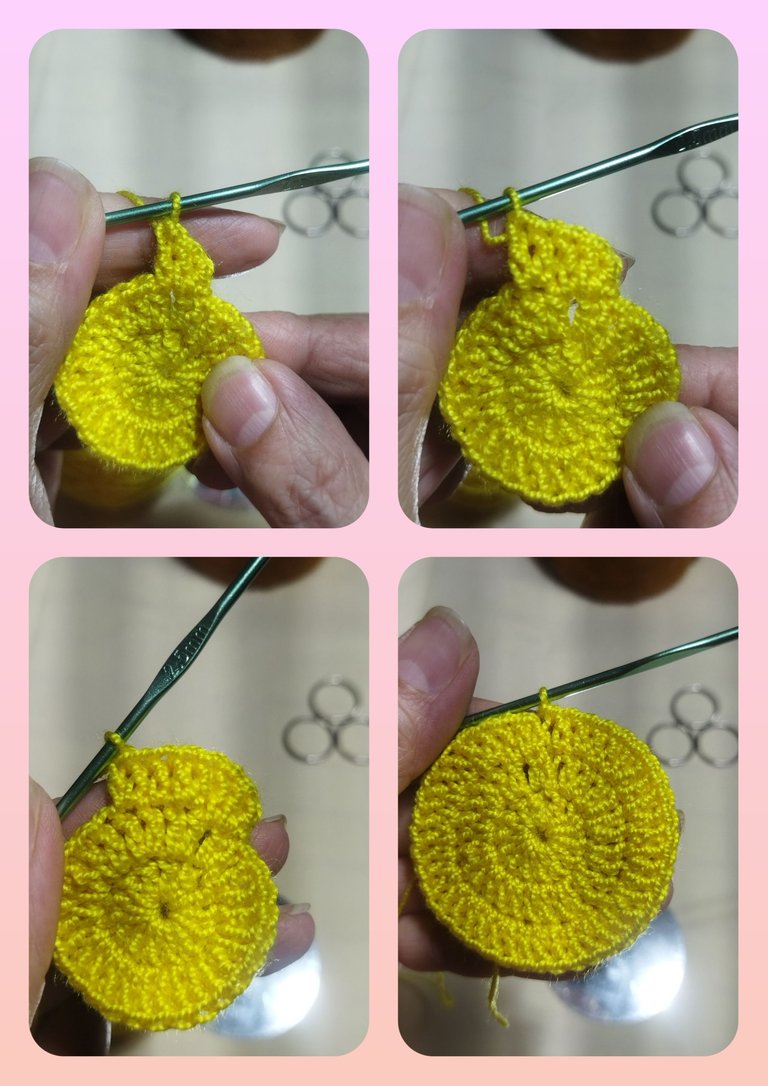
With the previous round, we reached the exact measurement of our mirror. Now we will make a folding turn to make the mirror cover. We will do this in the following way:
- We make the false stitch only in the back thread of the previous stitch. We are going to work only on these strands this round. And we will make 1 double crochet in each stitch for a total of 52 stitches.
VUELTA 5
Con la vuelta anterior, alcazamos la medida exacta de nuestro espejo. Ahora realizaremos una vuelta de doblez para realizar la funda del espejo. Esto lo realizaremos de la siguiente forma:
- Realizamos el punto falso sólo en la hebra posterior delpunto anterior. Vamos a trabajar únicamente en estas hebras esta vuelta. Y realizaremos 1 punto alto en cada punto para un total de 52 puntos.
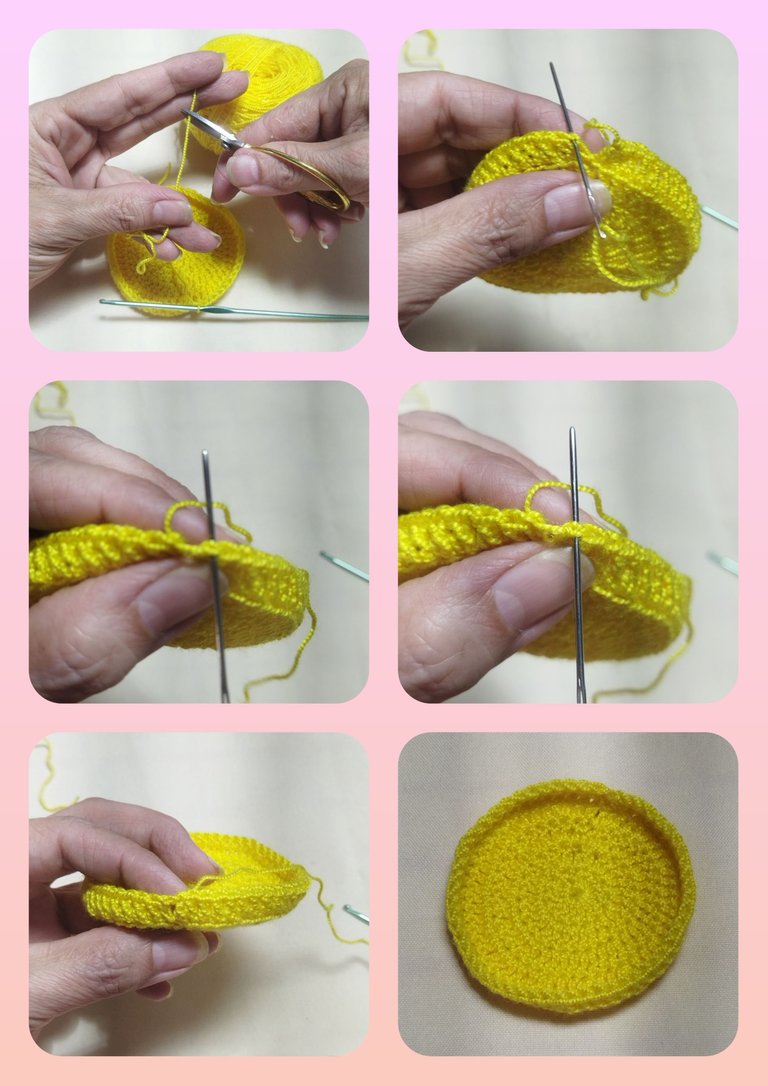
We close the round with the magic closure that we will make with the wool needle. We cut the thread and pass it to the wool needle, then we introduce it through the chain stitch and then through the last stitch. We hide the rest of the thread.
Cerramos la vuelta con el cierre mágico que realizaremos con la aguja lanera. Cortamos el hilo y lo pasamos a la aguja lanera, luego la introducimos por el punto cadena y después por el último punto. Escondemos el resto del hilo.
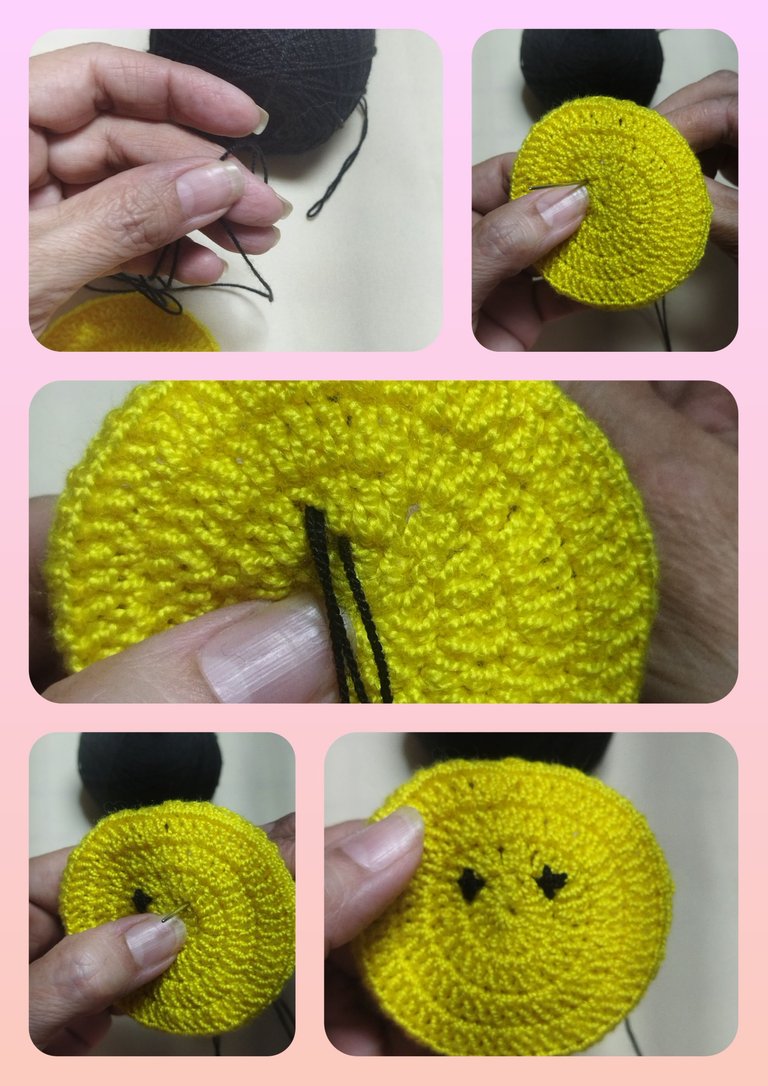
Eye and Mouth embroidery
It is time to embroider the face of our face. For this we will use black thread and the wool needle.
- To make the eyes we will use the cross stitch repeated three times in each eye so that it remains bulky.
Bordado de Ojos y Boca
Es momento de realizar el bordado del rostro de nuestra carita. Para ello utilizaremos hilo negro y la aguja lanera.
- Para realizar los ojos utilizaremos el punto de cruz repetido tres veces en cada ojo para que nos quede abultado.
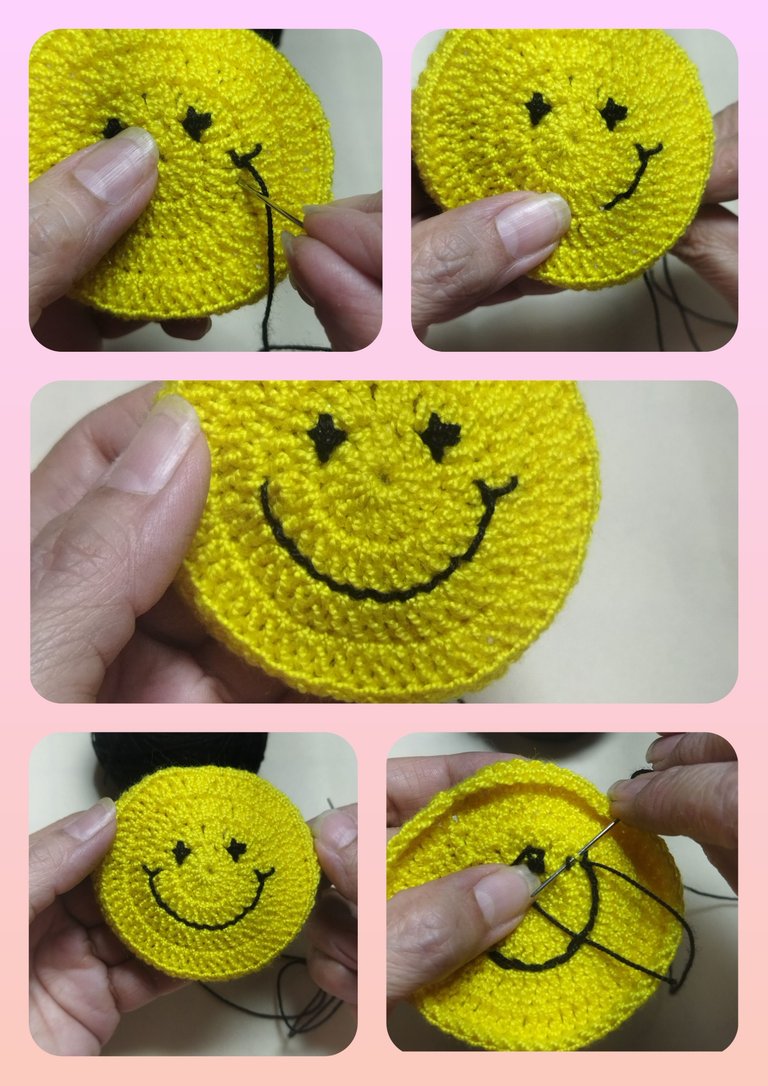
- Without cutting the thread, we make the mouth guided by the separation between rows 2 and 3, and we form the mouth by doing a back stitch.
- Sin cortar el hilo, realizamos la boca guiándonos por el separación entre la vuelta 2 y 3, y formamos la boca realizando punto atrás.
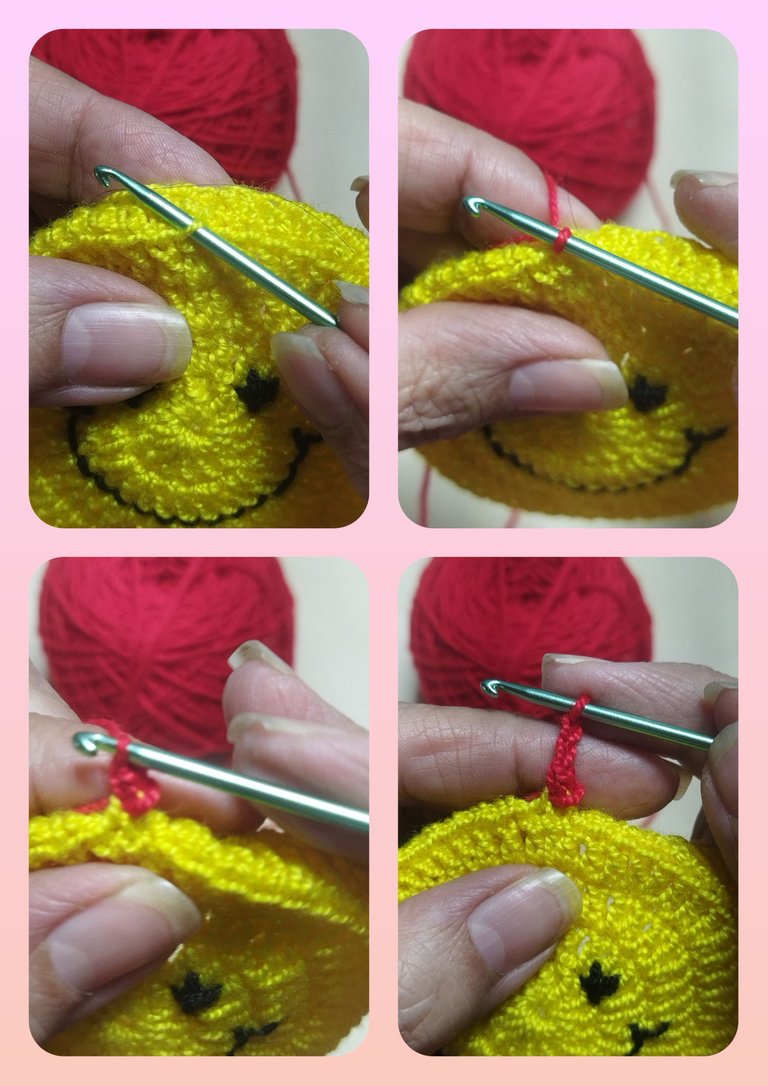
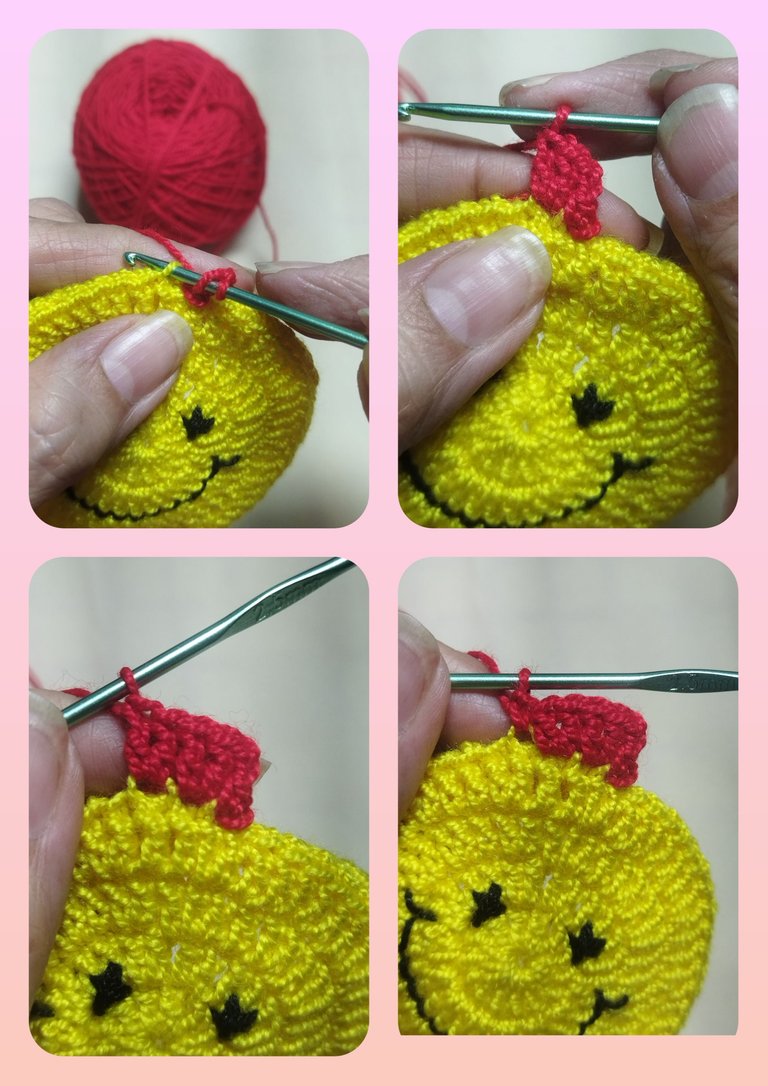
LAP 6
And we finish the knitting by forming petals in the strands that we did not knit in round 5. This round allows us to give a better closure to the cover and at the same time we decorate the face.
- We introduce the needle with the red thread into the first strand where we started round 5. We make a single crochet and lift 2 chains. We make 2 double crochets in the next stitch and 2 double crochets in the next one. We make 2 chains and then 1 single crochet in the next stitch. We repeat until we finish the round.
VUELTA 6
Y finalizamos el tejido formando pétalos en las hebras que no tejimos en el vuelta 5. Esta vuelta nos permite darle un mejor cierre a la funda y a la vez decoramos la carita.
- Introducimos la aguja con el hilo rojo en la primera hebra donde iniciamos la vuelta 5. Realizamos un punto bajo y levantamos 2 cadenas. Realizamos 2 punto altos en el punto siguiente y 2 puntos altos en el que continua. Realizamos 2 cadenas y luego 1 punto bajo en el punto siguiente. Repetimos hasta culminar la vuelta.
- We make the magical closure, using our wool needle. We introduce the needle through the starting low point then through the last stitch of the chain at the end of the round. We adjust and hide the excess thread and cut the excess.
- Realizamos el cierre mágico, utilizando nuestra aguja lanera. Introducimos la aguja por el punto bajo de inicio luego por el último punto de la cadena del final de la vuelta. Ajustamos y escondemos el hilo sobrante y cortamos el exceso.
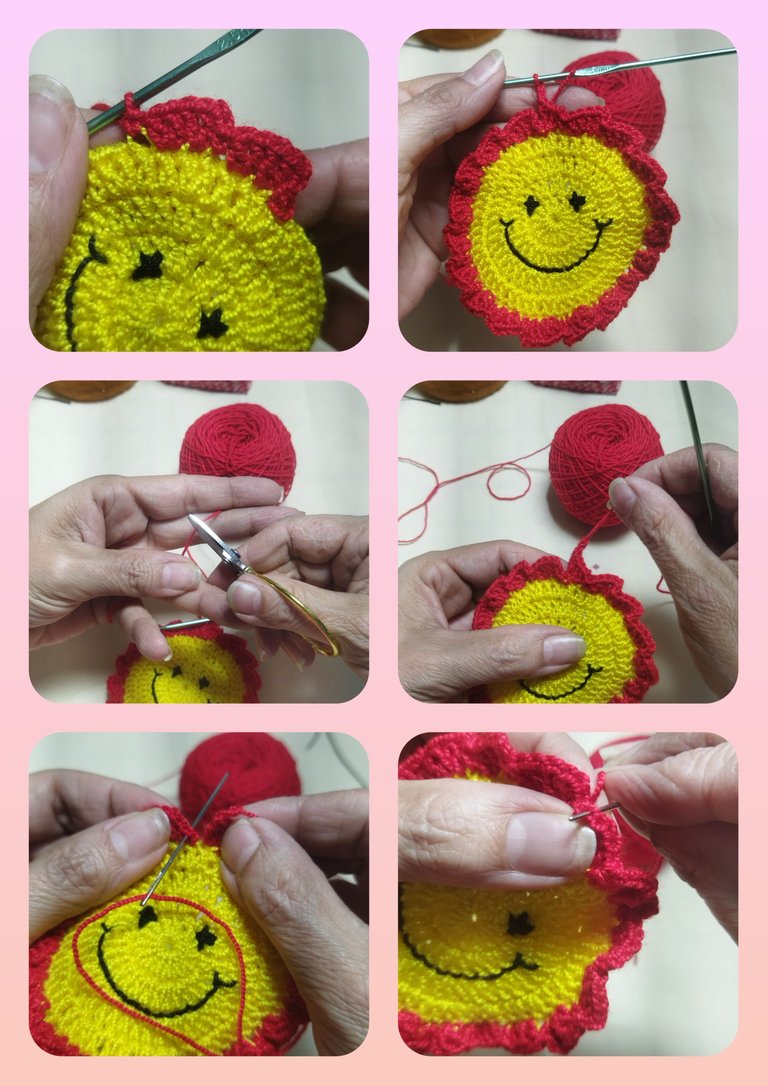
Ready. We already have our cover to reuse our mirrors.
Listo. Ya tenemos nuestra funda para reutilizar nuestros espejos.
Woven bow
To make the loop, in a magic ring we make 4 chains followed by 4 elongated double treble crochets, we make 4 chain stitches and close with 1 single crochet.
Lazo tejido
Para realizar el lazo, en un anillo mágico realizamos 4 cadenas seguidas de 4 puntos altos dobles alargados, realizamos 4 puntos cadenas y cerramos con 1 punto bajo.
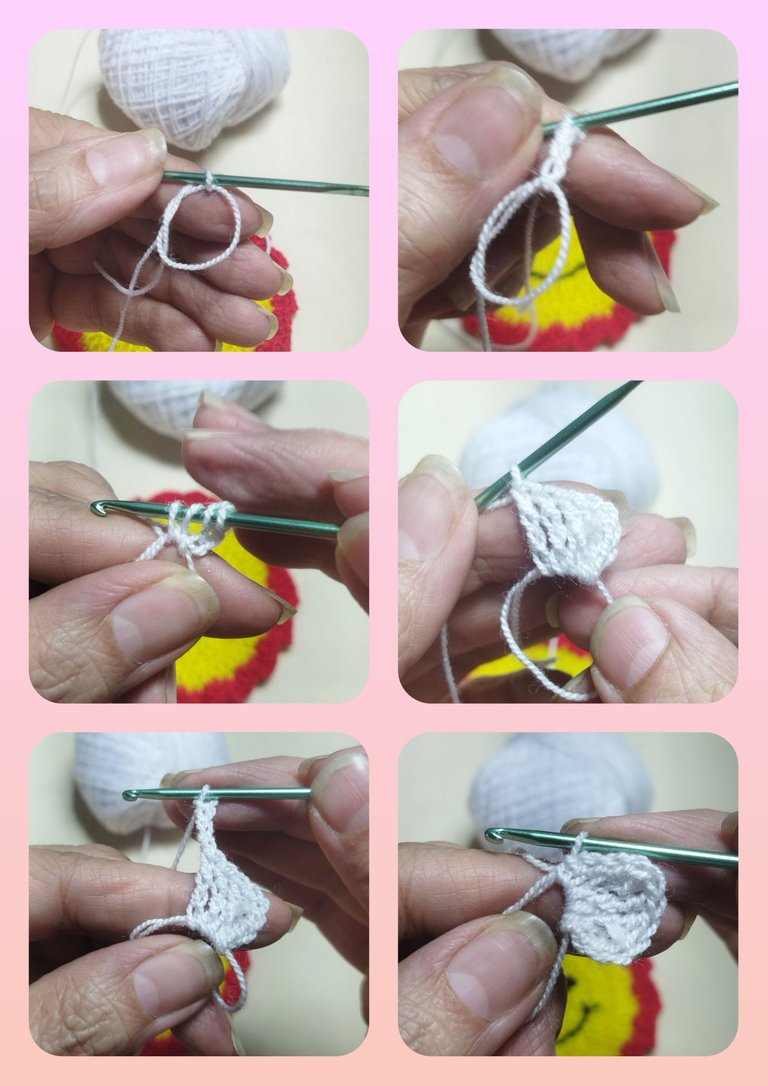
We repeat the series to do the other side. We close the magic ring, cut the thread and with the leftovers we make 4 turns through the center of the loop and knot.
Repetimos la serie para realizar el otro lado. Cerramos el anillo mágico, cortamos el hilo y con los sobrantes realizamos 4 giros por el centro del lazo y anudamos.
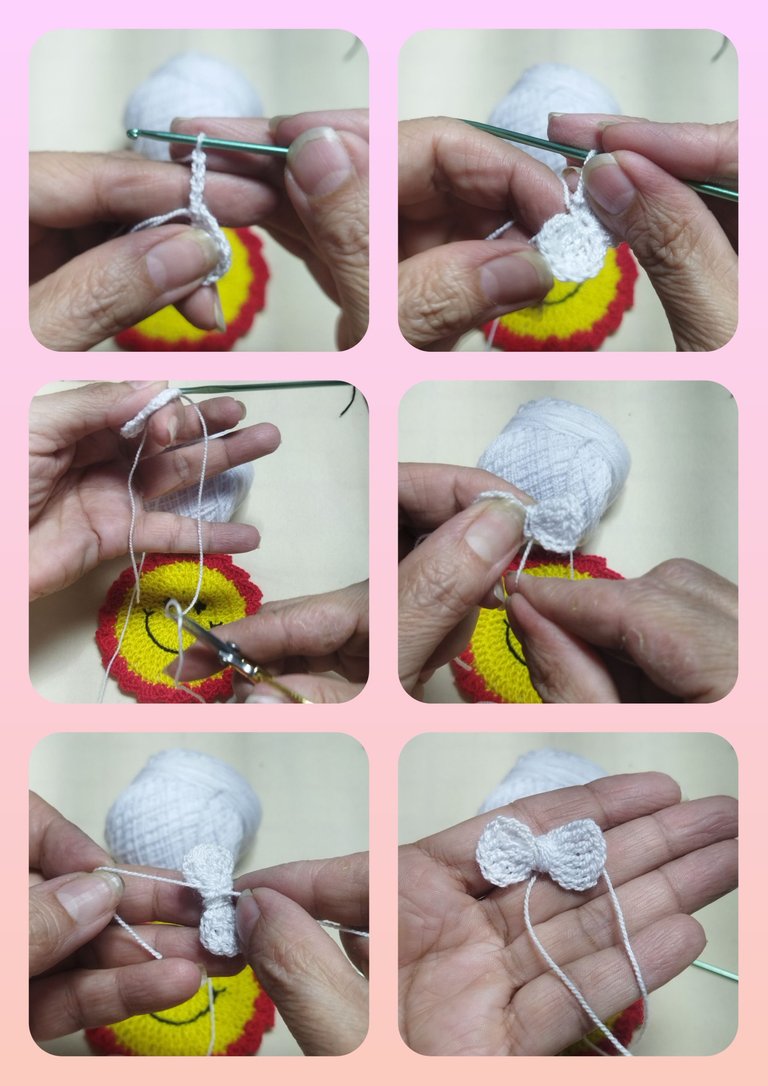
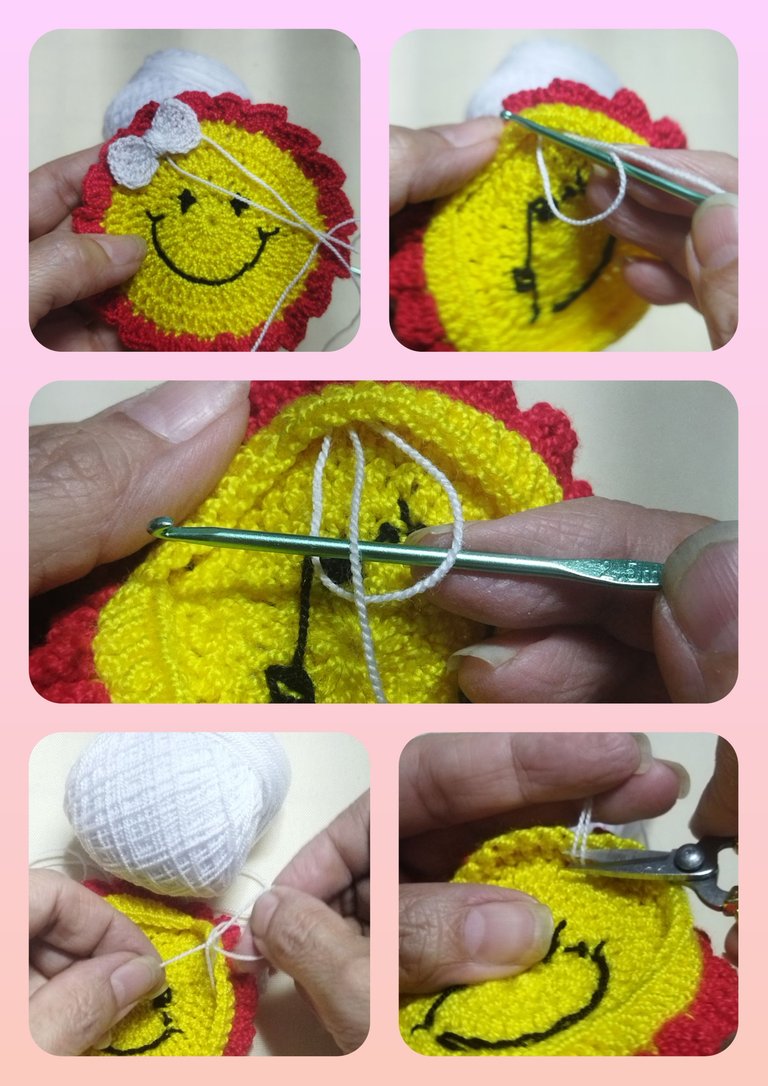
We place the bow in the case and pass the threads through the back and knot. We cut the excess thread.
Ubicamos el lazo en la funda y pasamos los hilos por la parte trasera y anudamos. Cortamos el hilo sobrante.
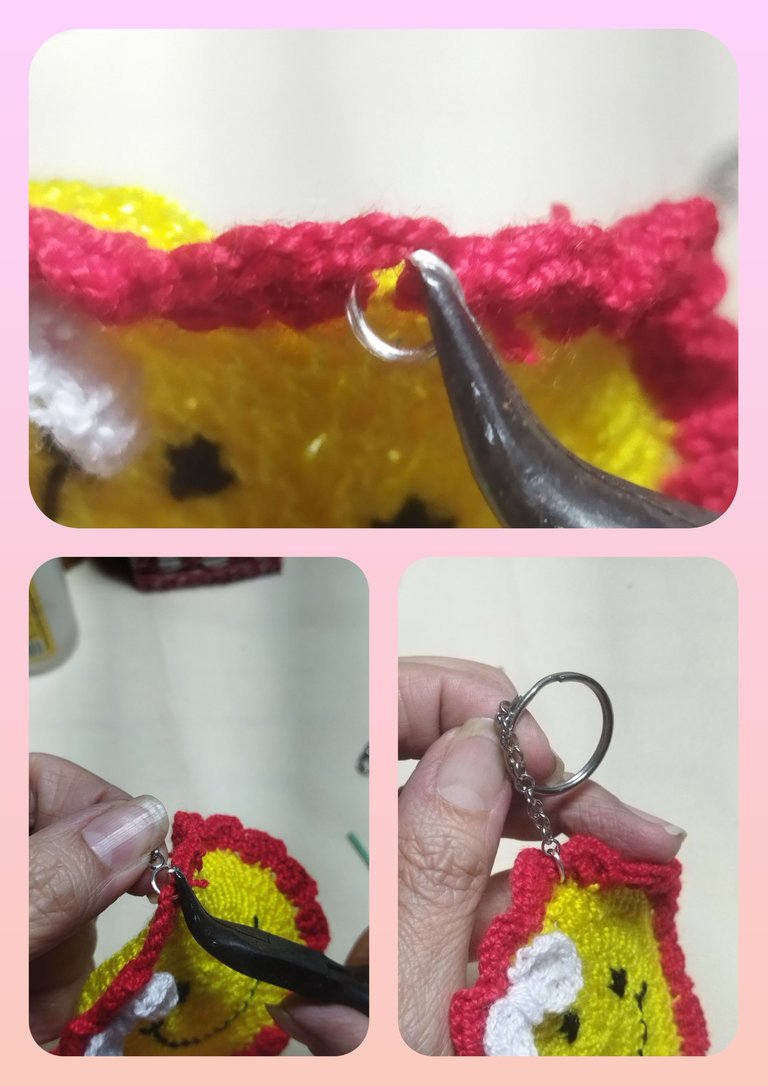
We place a 4 mm ring at the closure of the last loop, a 3 cm piece of chain and the ring for key rings.
Colocamos un aro de 4 mm en el cierre del la última vuelta, un trozo de cadena de 3 cm y el aro para llaveros.
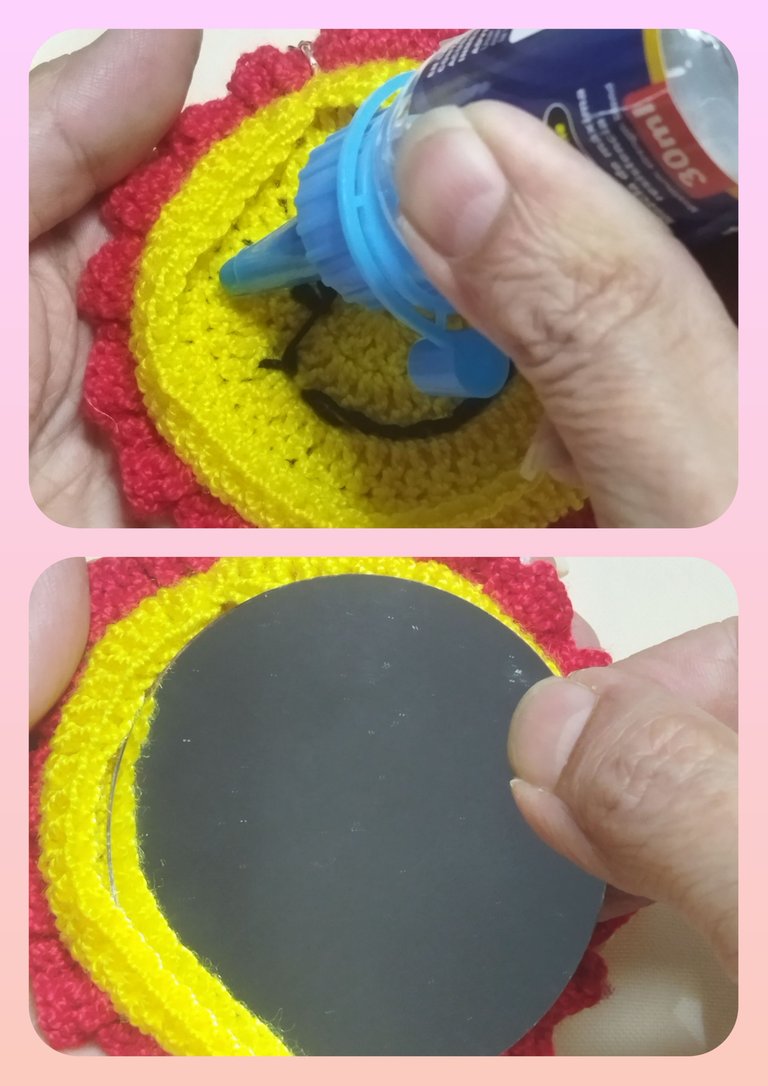
We place the mirror in the case, but first we place a little silicone in the cold to secure it.
Colocamos el espejo en la funda, pero antes colocamos un poco de silicón al frío para asegurarlo.
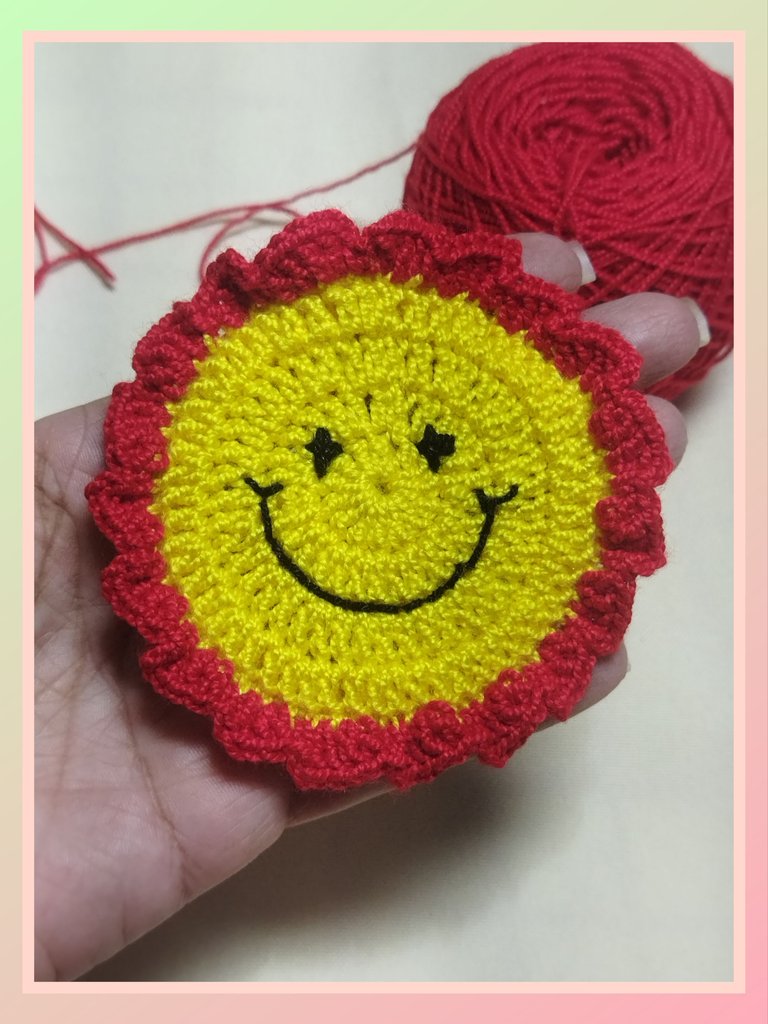
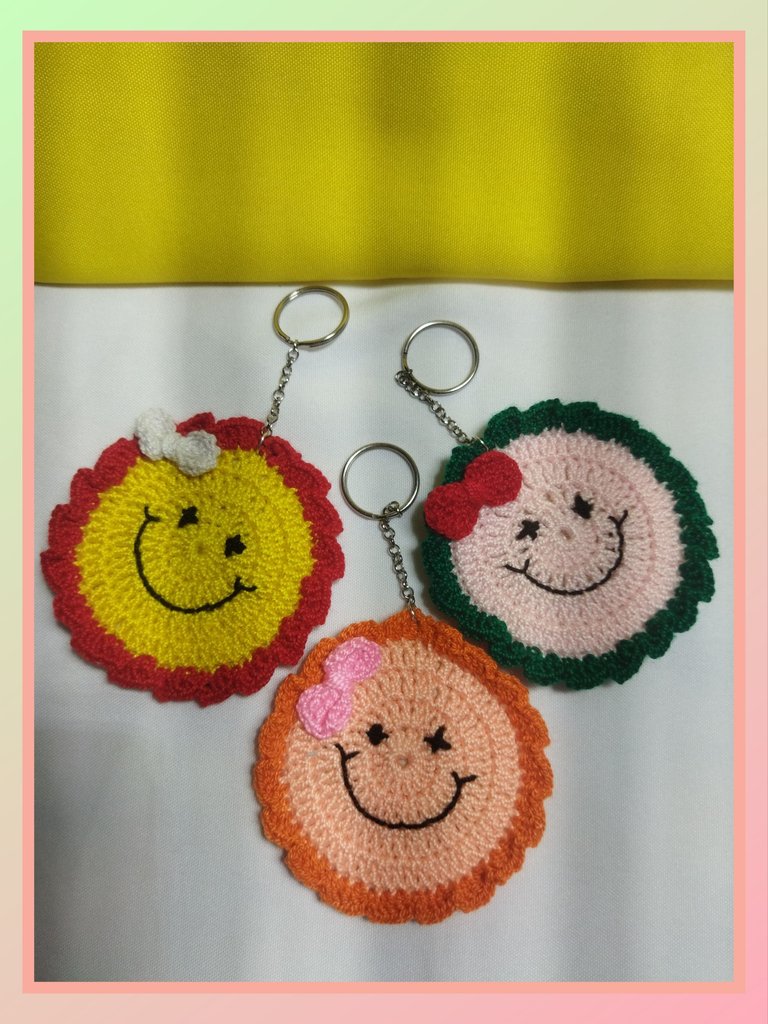
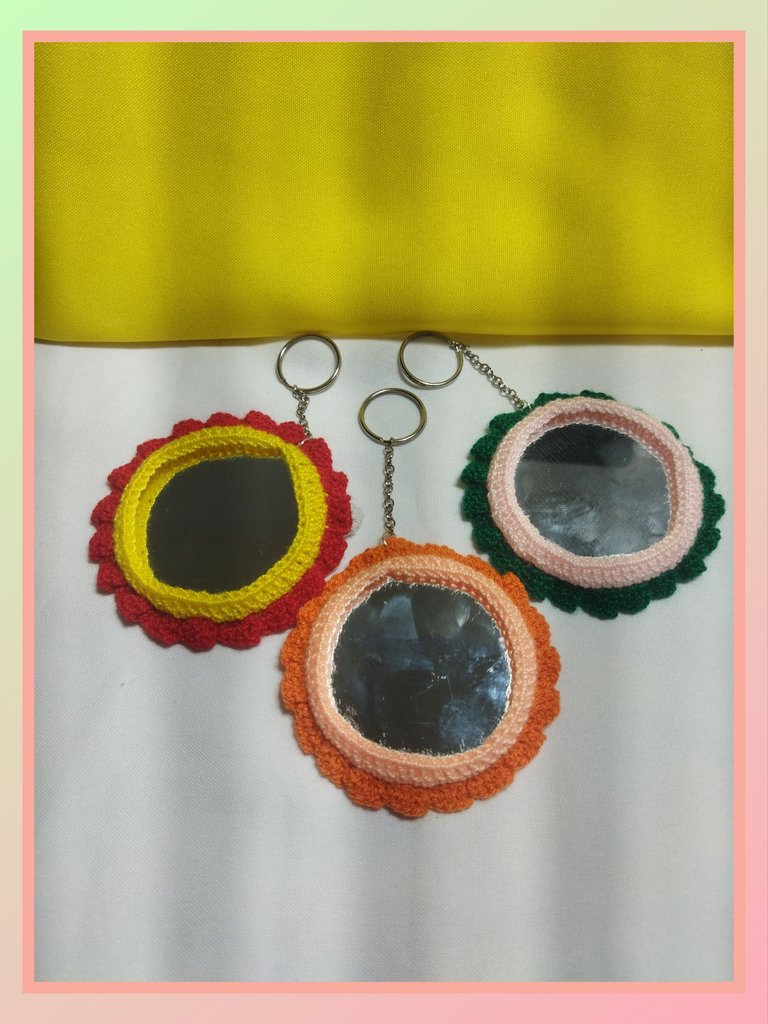
PROJECT COMPLETED
And so were the mirrors that I had saved in order to give them new uses and what better way than to do this cute and tender crochet fabric. I hope this idea is very useful to you. See you next time.
PROYECTO FINALIZADO
Y así quedaron los espejos que tenía guardados con el fin de darle nuevos usos y qué mejor manera que hacerlo este lindo y tierno tejido a crochet. espeor que esta idea te sea de gran utilidad. Nos vemos en la próxima.

Hermosura creación. Felicidades, gracias por compartir @linita
Gracias. Me alegro que te haya gustado.
Qué hermosos quedaron, ver tanta gente tejiendo en Hive me hace querer desempolvar mi revista de tejido comprarme un hilo y ponerme a terminar de aprender. Qué maravilla de trabajo hiciste de verdad quedé encantada. 🥰🥰🥰🥰🥰
Me alegro que te haya gustado. Empieza a desenpolvar tus revistas y aprende, verás que no te arrepentirás. Saludos.
I really like what people do with crochets. I have seen someone redesign a slippers with crochet and it looks so beautiful and here you are using your superpower on a mirror. Great work here.
Quedaron hermosos! Y me encanta que esta muy bien explicado :)
Muchas gracias ☺️
Quedaron hermosos y cuchis me encantan, los colores están geniales 😉
Gracias 😁, si están muy lindos y son muy prácticos para llevar en la cartera. Saludos.
Hola, @linita !! Te quedaron súper tiernas estás flores 😊 te felicito!!!
Que bellos amiga, excelente 🤗 saludos!
You've done a great job with this project.
This is really beautiful ❤️
Excelente trabajo te felicito, me encantó para recuperar esos espejos que tenemos olvidados en casa.
Hermoso diseño para lucir, me encanta como quedaron, feliz día.
WOW! It is so beautiful and useful. It looks amazing. Good to see how you reused mirrors. Great job! Keep it up!
Congratulations, your post has been curated by @dsc-r2cornell. You can use the tag #R2cornell. Also, find us on Discord
Felicitaciones, su publicación ha sido votada por @ dsc-r2cornell. Puedes usar el tag #R2cornell. También, nos puedes encontrar en Discord
Excelente idea, me encantó 👍🏽