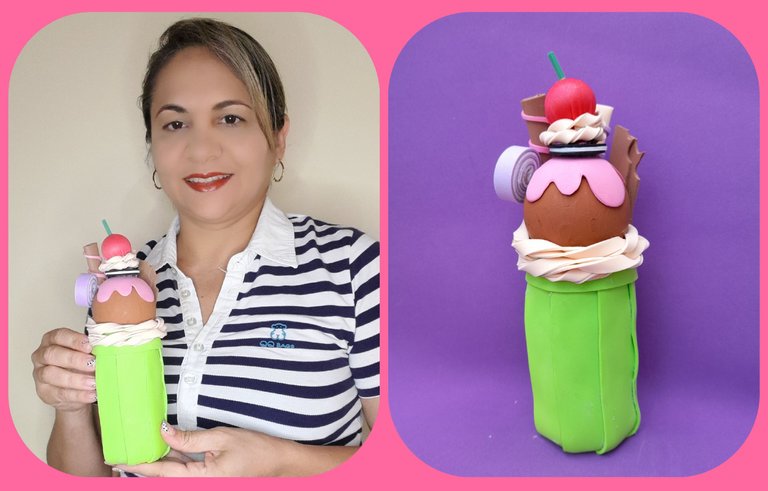
Saludos amigos de hivediy, espero que todos hayan tenido un excelente y maravilloso día. Mi proyecto de hoy esta inspirado en un helado con muchos dulces, y esta elaborado con material de provecho específicamente con un frasco, un bombillo y decorado en foami de varios colores, esta ideal para decorar fiestas infantiles o algún espacio de nuestro hogar.Te invito a seguir este paso a paso para que veas los fácil, rápido y sencillo que es de elaborar este hermoso adorno.
Greetings hivediy friends, I hope you all had a great and wonderful day. My project today is inspired by an ice cream with many sweets, and it is made with useful material specifically with a jar, a light bulb and decorated in foami of various colors, it is ideal for decorating children's parties or any space in our home. I invite you to follow this step by step so you can see how easy, fast and simple it is to make this beautiful ornament.
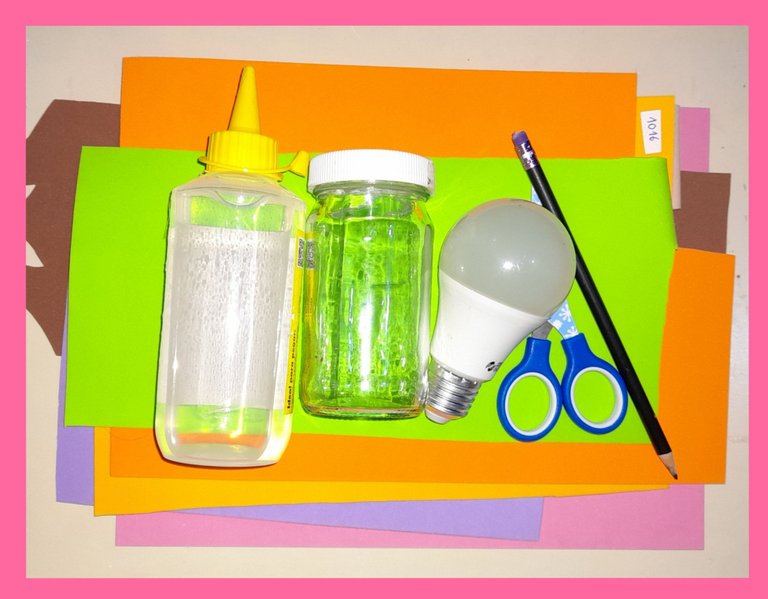
Materiales:
- Foami de los colores: verde, piel, marrón, morado, rosado, rosado, morado, azul y blanco.
- Pintura al frío marrón.
- Frasco de vidrio.
- Bombillo.
- Esfera de plástico pequeña.
- Pincel.
- Silicón.
- Tijeras.
- Lápiz.
- Regla.
Materials:
- Foami of the colors: green, leather, brown, purple, pink, purple, blue and white.
- Brown cold paint.
- Glass jar.
- Bulb.
- Small plastic sphere.
- Brush.
- Silicon.
- Pair of scissors.
- Pencil.
- Ruler.
Paso a paso:
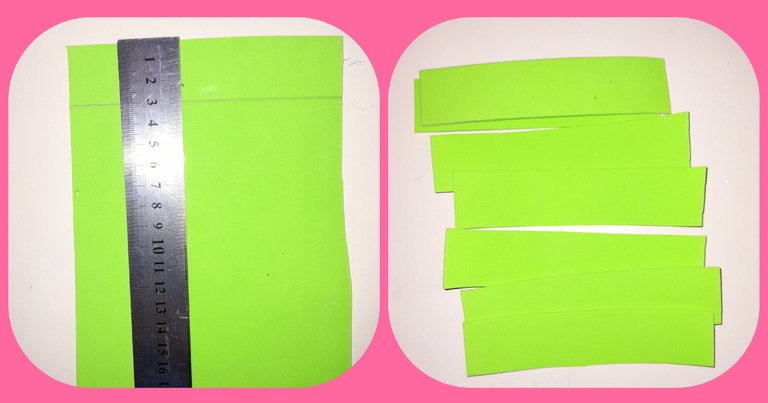
Para forrar el frasco de vidrio cortamos siete tiras del foami verde de 3cm de ancho por 8cm de largo.
Step by Step:
To line the glass jar, we cut seven strips of green foami 3cm wide by 8cm long.
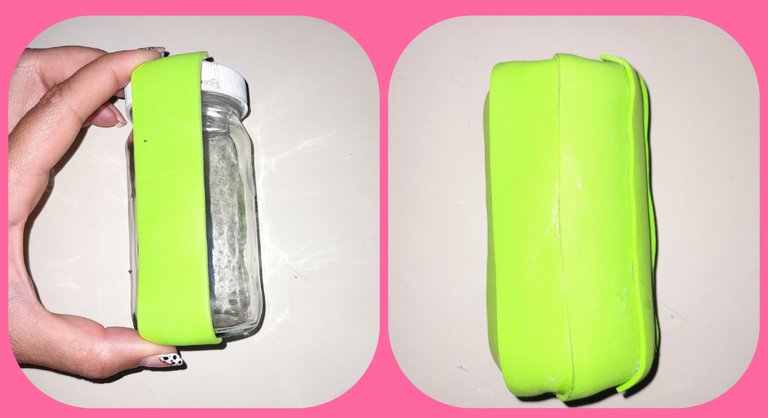
Luego con el silicón vamos pegando cada una de las tiras alrededor del frasco de vidrio superponiendolas por la orilla.
Then with the silicone we stick each of the strips around the glass jar overlapping them by the edge.
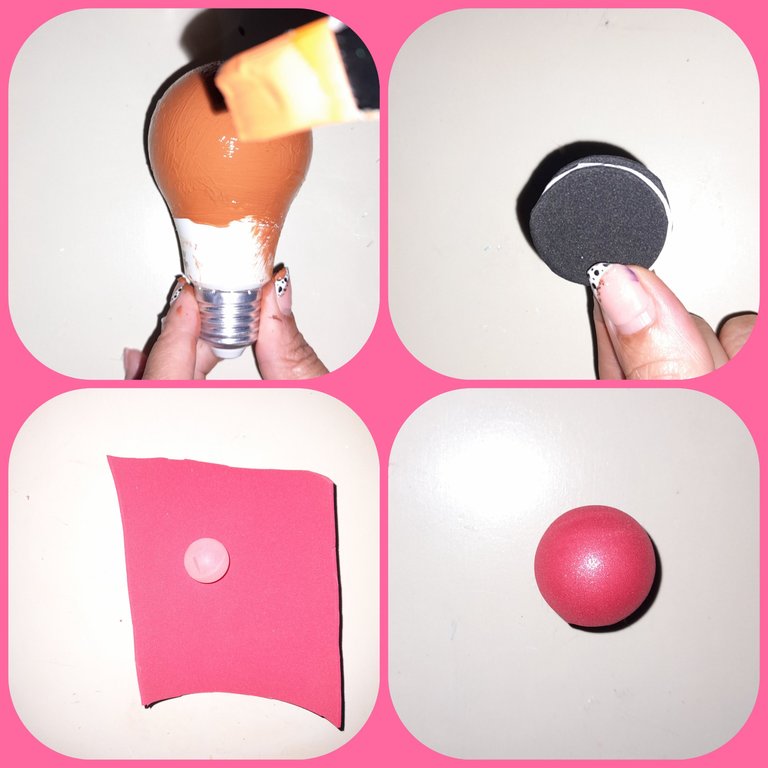
Con la pintura al frío marrón pintamos el bombillo, mientras la pintura se seca elaboramos la galleta, para esto cortamos tres círculos pequeños dos negros y uno blanco luego con el silicón pegamos uno sobre de otro dejando el círculo de foami blanco en el centro. Para elaborar la cereza calentamos el foami rojo en la plancha y luego lo pegamos en la Esfera de plástico estiramos bien el foami de manera que no le queden arrugas.
With the brown cold paint we paint the bulb, while the paint dries we make the cookie, for this we cut three small circles, two black and one white, then with the silicone we glue one on top of the other leaving the white foami circle in the center. To make the cherry we heat the red foami on the iron and then we stick it on the plastic sphere, we stretch the foami well so that there are no wrinkles left.
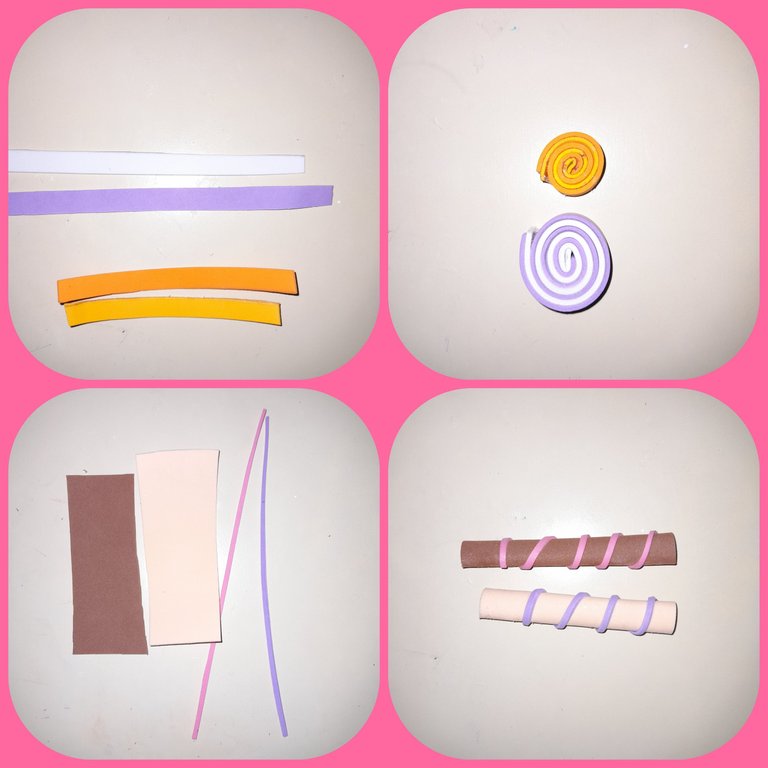
En este paso vamos a elaborar los dulce y pirulin que van en la copa del helado. Para los dulce cortamos una tira de color blanco y una azul, pegamos uno sobre de otra y luego la enrollamos. Para los pirulin cortamos dos rectángulos uno marrón y otro de color piel y dos tiras muy delgadas una morada y una rosada, luego enrollamos los rectángulos y pegamos con el silicón por toda la orilla y pasamos las tiras delgadas alrededor del pirulin.
In this step we are going to make the sweets and lollipops that go in the ice cream cup. For the sweets, we cut a white and a blue strip, glue one on top of the other and then roll it up. For the lollipops, we cut two rectangles, one brown and one skin-colored, and two very thin strips, one purple and one pink, then we rolled the rectangles and glued the entire edge with silicone and passed the thin strips around the lollipop.
Luego pegamos con el silicón por toda la orilla el bombillo al frasco de vidrio.
Then we stick the bulb to the glass jar with the silicone all around the edge.
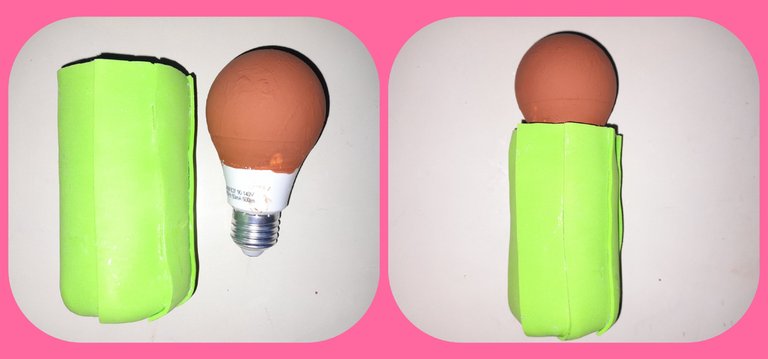
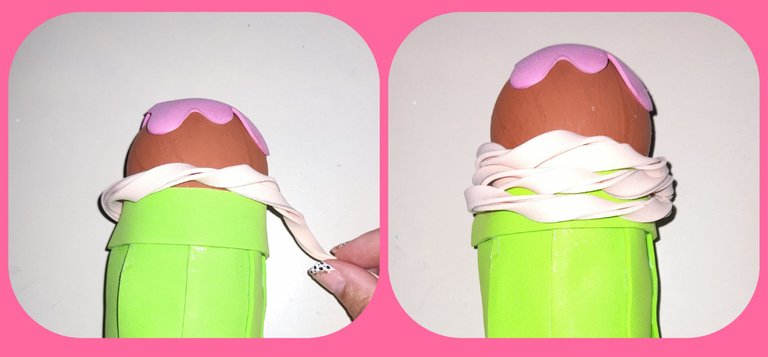
Recortamos en rosado la parte superior del helado, luego calentamos el foami en la plancha y le damos la forma de la bola del bombillo y pegamos una tira de foami verde alrededor del frasco y el bombillo tal como lo indica la figura.
We cut the upper part of the ice cream in pink, then we heat the foami on the iron and shape it into the ball of the light bulb and stick a strip of green foami around the jar and the light bulb as indicated in the figure.
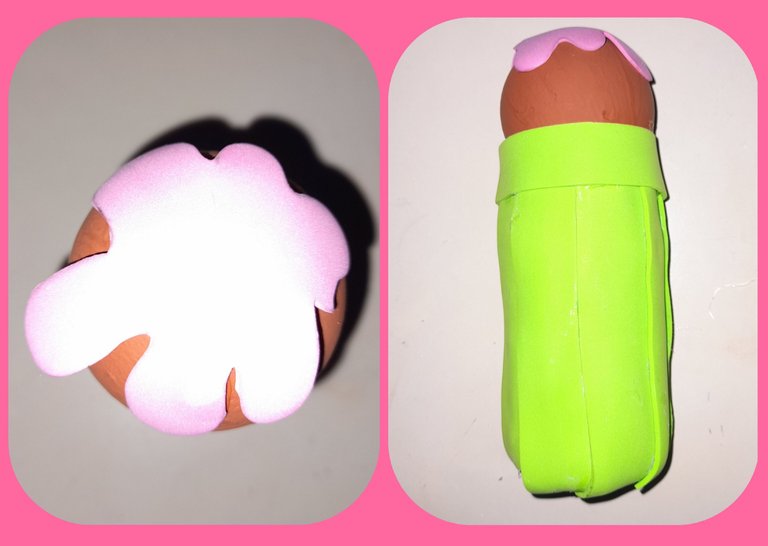
Para simular la crema del helado cortamos tres tiras larga del foami color piel y la doblamos a la mitad, luego la enrollamos y la pegamos alrededor del frasco, le damos tres vuelta para que se vea bien esponjoso.
To simulate the cream of the ice cream, we cut three long strips of skin-colored foami and fold it in half, then we roll it up and glue it around the jar, we turn it three times so that it looks very fluffy.
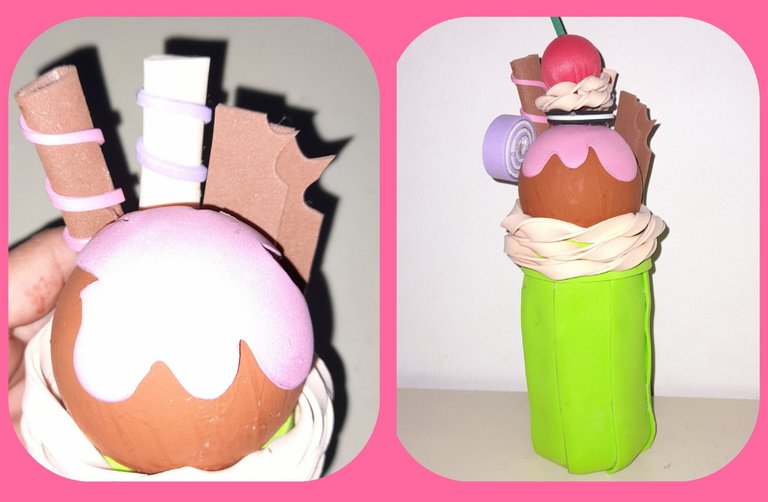
Por últimos para decorar el helado pegamos con el silicón los pirulin,uno a cada lado, la chupeta de colores, los chocolates, la galleta y sobre la galleta colocamos la cereza.
De esta manera tenemos listo este adorno elaborado con material de provecho, espero les haya gustado este paso a paso.
Finally, to decorate the ice cream, we glue the lollipops with the silicone, one on each side, the colored lollipop, the chocolates, the cookie and on the cookie we place the cherry.
In this way we have ready this ornament made with useful material, I hope you liked this step by step.
-Las fotos son de mi propiedad, tomadas un Samsung A21S,cámara de 48MP.
-Para la traduccion Google Traductor.
-The photos are my property, taken with a Samsung A21S, 48MP camera.
-For Google Translate translation.

Congratulations @marciabon! You have completed the following achievement on the Hive blockchain and have been rewarded with new badge(s):
Your next target is to reach 25000 upvotes.
You can view your badges on your board and compare yourself to others in the Ranking
If you no longer want to receive notifications, reply to this comment with the word
STOPCheck out the last post from @hivebuzz:
Support the HiveBuzz project. Vote for our proposal!
Que bonito e interesante tu trabajo amiga. Felicidades y bendiciones