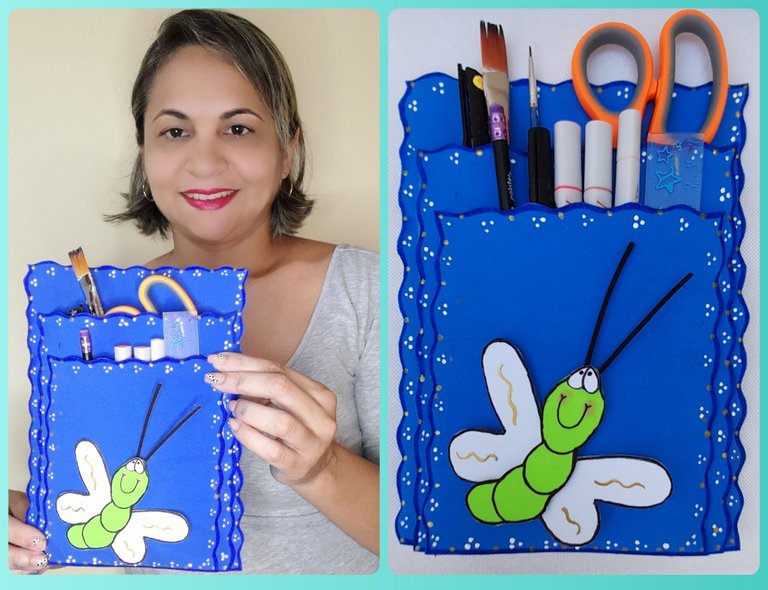
Saludos amigos de #hivediy, ya culminando estos días de descanso, para empezar una semana con nuevos proyectos y espectativas esperando que cada una de nuestras metas se vayan cumpliendo. El proyecto que hoy lo elaboré especialmente para mi, ya que muchas veces tengo que trasladarme de un sitio a otro para elaborar los proyectos de mis publicaciones diarias, así que elaboré un organizador donde pueda meter mis instrumentos de trabajo y se me haga fácil trasladarlos. Esta elaborado totalmente en foami y decorado con una libélula, en lo particular me encantan estos insectos y quise recrearla en una muy colorida .Te invito a seguir este paso a paso para que veas los fácil, rápido y sencillo que es de elaborar este organizador.
Greetings friends from #hivediy, now culminating these days of rest, to start a week with new projects and expectations hoping that each of our goals will be fulfilled. The project that I created today was especially for me, since many times I have to move from one place to another to prepare the projects for my daily publications, so I created an organizer where I can put my work tools and it is easy for me to move them. It is made entirely of foami and decorated with a dragonfly, in particular I love these insects and I wanted to recreate it in a very colorful one. I invite you to follow this step by step so you can see how easy, fast and simple it is to make this organizer.
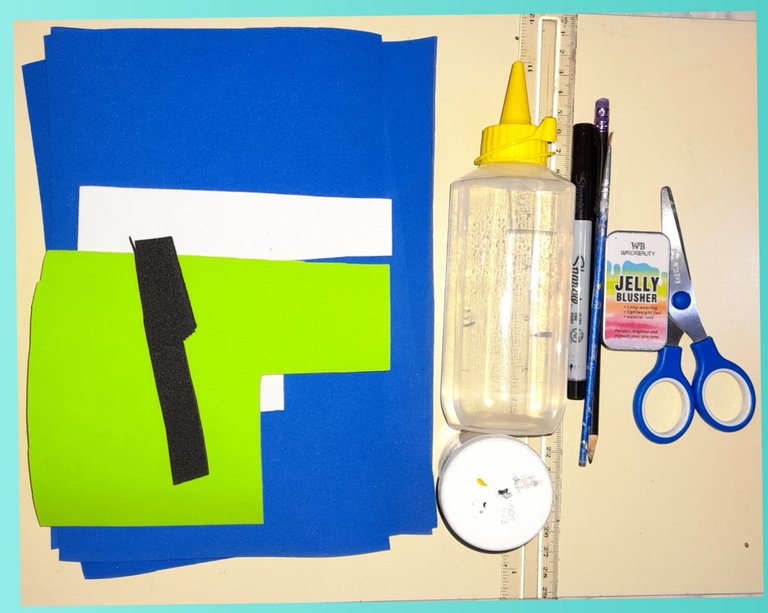
Materiales:
- Foami de los colores: azul, blanco, verde y negro.
- Pintura al frío blanca y dorada.
- Pincel.
- Lápiz.
- Tijeras.
- Regla.
- Marcador puntafina negro y azul.
- Silicón frío.
- Rubor rosado.
Materials:
- Foami of the colors: blue, white, green and black.
- White and gold cold paint.
- Brush.
- Pencil.
- Pair of scissors.
- Ruler.
- Black and blue fine point marker.
- Cold sylicon.
- Pink blush.
Paso a paso:
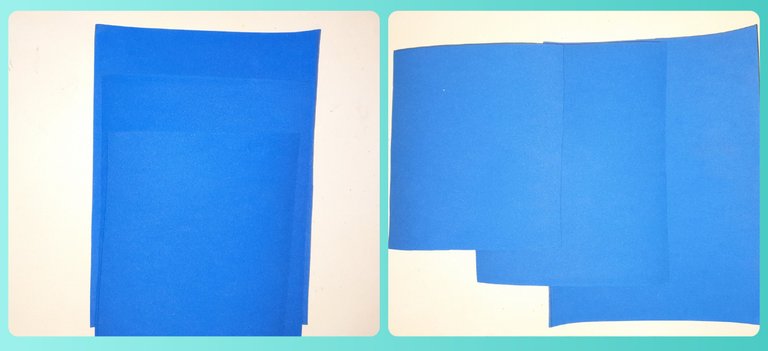
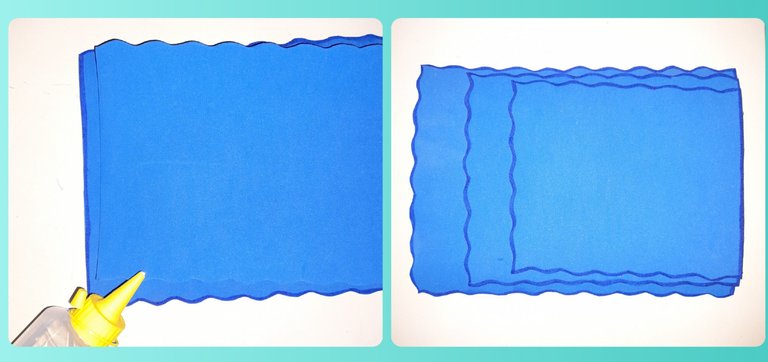
Para empezar a elaborar el organizador recortamos tres cuadrados de foami azul con diferente medidas, uno de 24cm de alto x 19cm de ancho, otro de 20cm de alto por 17cm de ancho y el último de 17cm de alto x 15 de ancho.
Step by Step:
To start making the organizer we cut three squares of blue foami with different measurements, one 24cm high x 19cm wide, another 20cm high x 17cm wide and the last one 17cm high x 15 wide.
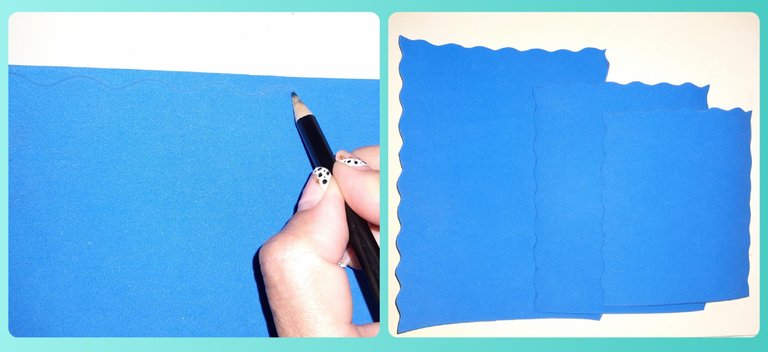
Luego con el lápiz por toda la orilla marcamos unas formas de ondas y las recortamos con las tijeras.
Then with the pencil along the edge we mark some wave shapes and cut them out with scissors.
Para darle más realce al organizador con el marcador puntafina azul delineamos las orillas de los foami.
To give more prominence to the organizer with the blue fine point marker we outline the edges of the foami.

En este paso vamos a pegar con el silicón las láminas de foami, superponiendo una sobre otra de manera descendente, es decir, desde la más grande a la más pequeña.
In this step we are going to paste the foam sheets with the silicone, superimposing one on top of the other in a descending manner, that is, from the largest to the smallest.
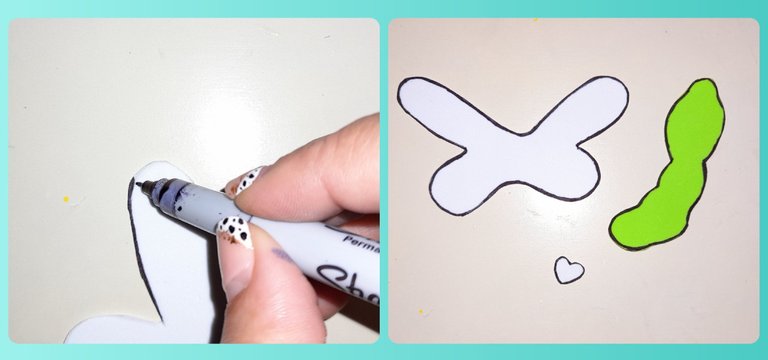
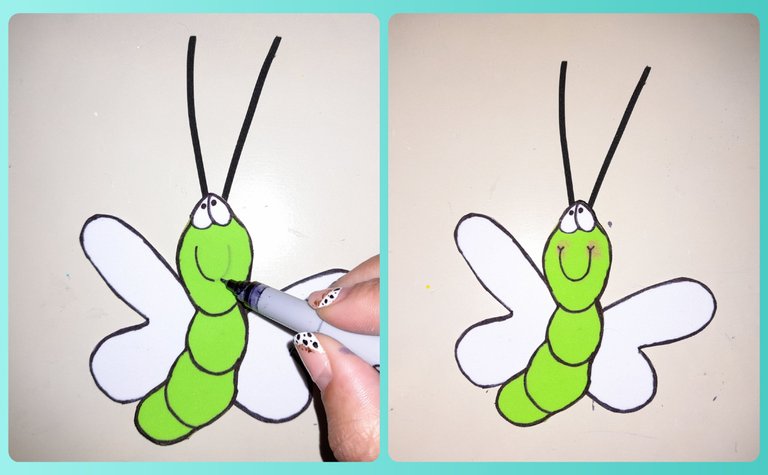
Para elaborar la libélula recortamos los patrones y los ubicamos en el color que les corresponde, luego con el marcador puntafina negro delineamos las orillas.
To make the dragonfly we cut out the patterns and place them in the color that corresponds to them, then with the black fine point marker we outline the edges.
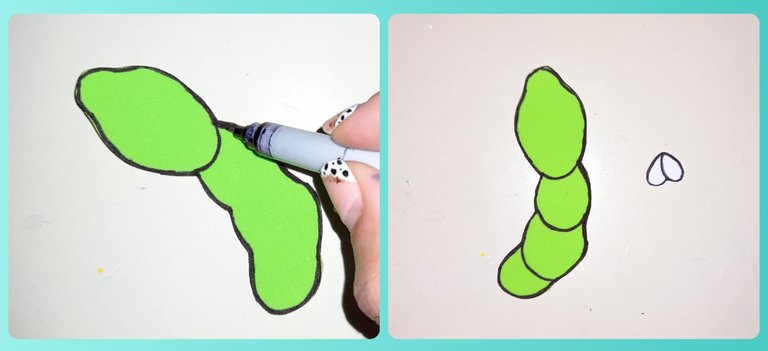
Luego definimos las líneas internas del gusano de la libélula y los ojos dándole forma ovalada.
Then we define the internal lines of the dragonfly worm and the eyes giving it an oval shape.
Recortamos dos tiras delgadas de foami negro para hacer las antenas, luego las pegamos con el silicón en la cabeza de la libélula y con el marcador puntafina negro dibujamos dos puntos en cada ojo.
We cut two thin strips of black foami to make the antennas, then we glue them with the silicone on the head of the dragonfly and with the black fine tip marker we draw two dots on each eye.
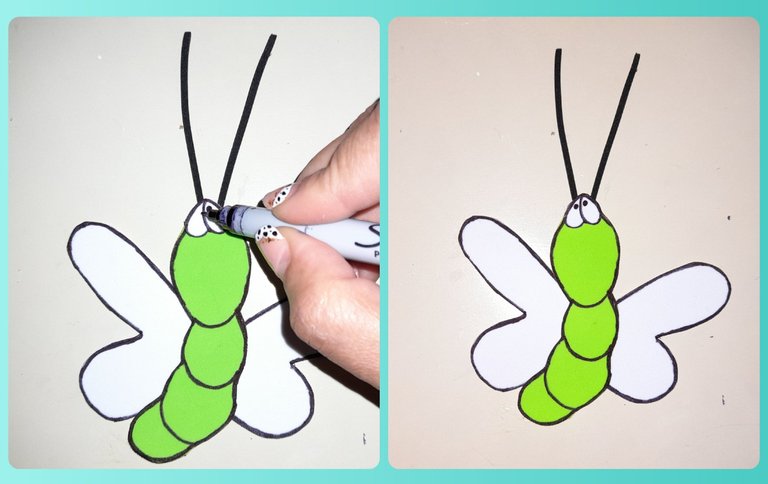
Para hacer la boca de la libélula con el marcador puntafina negro dibujamos un medio ovalo, luego con el rubor rosado le damos color a las mejillas.
To make the mouth of the dragonfly with the black fine tip marker we draw a half oval, then with the pink blush we color the cheeks.
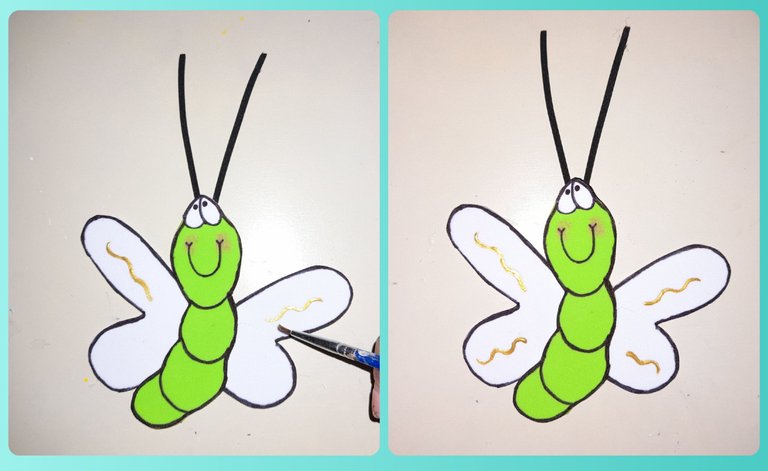
Luego para darle la sensación de movimiento a las alas con la pintura dorada y el pincel delgado dibujamos pequeñas ondas.
Then to give the sensation of movement to the wings with the gold paint and the thin brush we draw small waves.
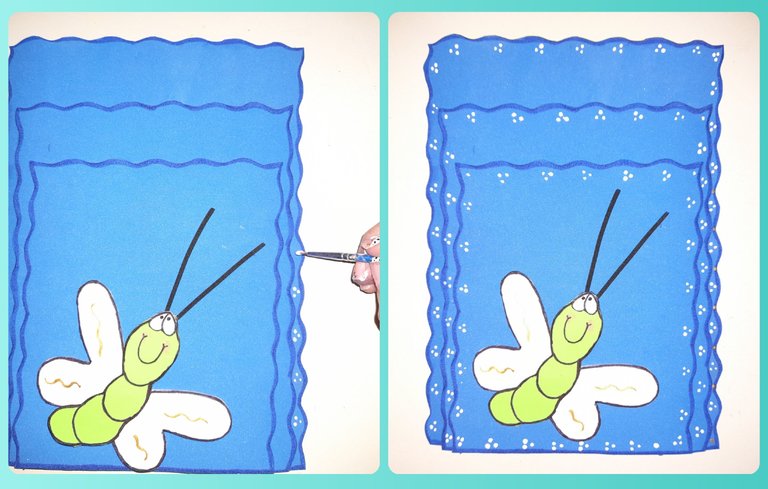
Luego pegamos la libélula en una esquina del organizador, y con el pincel y la pintura blanca pintamos puntos blancos de tres en tres por toda las orillas del organizador.
Then we stick the dragonfly in one corner of the organizer, and with the brush and white paint we paint white dots three by three all over the edges of the organizer.
Por último con la pintura dorada pintamos puntos dorados entre cada uno de los blancos y de esta manera culminamos con esta lindo y práctico organizador.
Finally with the golden paint we paint golden dots between each of the white ones and in this way we culminate with this beautiful and practical organizer.
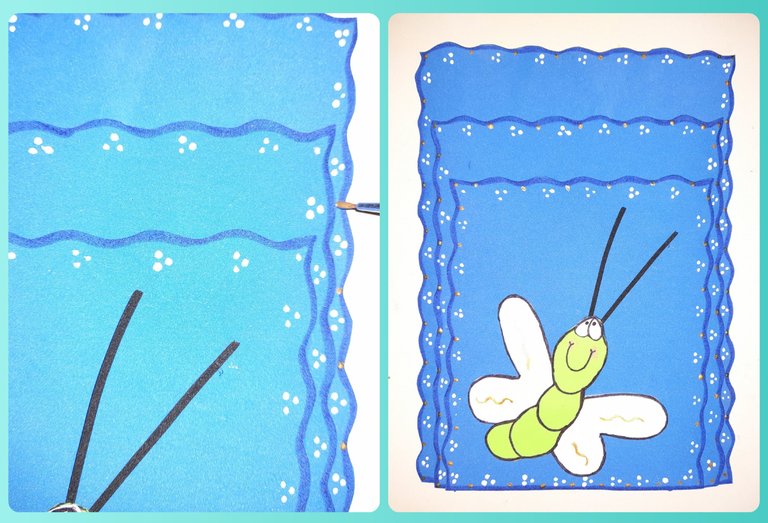
En este organizar puedes colocar, tijeras, lapiceros, marcadores, pinceles y otros instrumentos, es muy útil y fácil al momento de usarlo.
In this organizer you can place scissors, pens, markers, brushes and other instruments, it is very useful and easy to use.
-Las fotos son de mi propiedad, tomadas un Samsung A21S,cámara de 48MP.
-Para la traduccion Google Traductor.
-The photos are my property, taken with a Samsung A21S, 48MP camera.
-For Google Translate translation.
Te quedo muy linda. Feliz noche
Hola muchas gracias 🤗
Muy lindo amiga me gusto 😍
Muchas gracias @mayifiestas me contenta que te haya gustado.
Congratulations @marciabon! You have completed the following achievement on the Hive blockchain and have been rewarded with new badge(s):
You can view your badges on your board and compare yourself to others in the Ranking
If you no longer want to receive notifications, reply to this comment with the word
STOPCheck out the last post from @hivebuzz:
Support the HiveBuzz project. Vote for our proposal!
Muy bonito y práctico organizador. Bendiciones amiga y éxitos🤩👏👏
Hola amiga, que bonita y práctica me gustó así tienes las cosas organizadas y listas para ser usadas, la libélula le dió un toque especial.
Me encanta...🥰