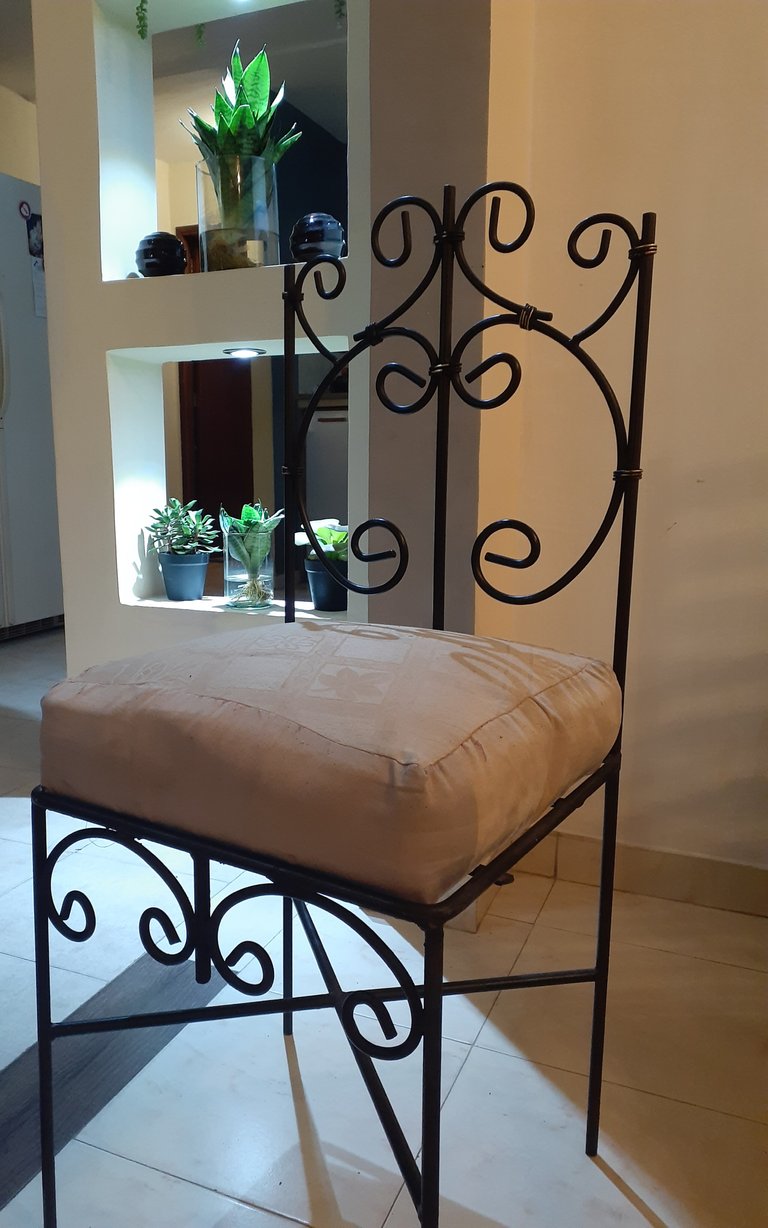
Hola amigos de Hive Diy, hoy les voy a contar un poco sobre como aprovechamos y modificamos unas sillas de comedor, la verdad es que ya estaban bastante deterioradas y no combinaban con la decoración que teníamos en casa. Así que, luego de decidir qué modelo podíamos hacer con la base de la silla, ver que materiales teníamos en casa y cuales teníamos que comprar decidí poner manos a la obra con mi mamá.
Entre los materiales que no teníamos se gastaron unos 100 dólares, que la verdad no nos pareció tan costoso en comparación a comprar un juego de sillas nuevo, ya en el monto se incluyeron algunas cosas como la pintura, los materiales para soldar, cortar la madera como tenemos amigos carpinteros y soldadores ellos sólo nos pidieron los materiales.
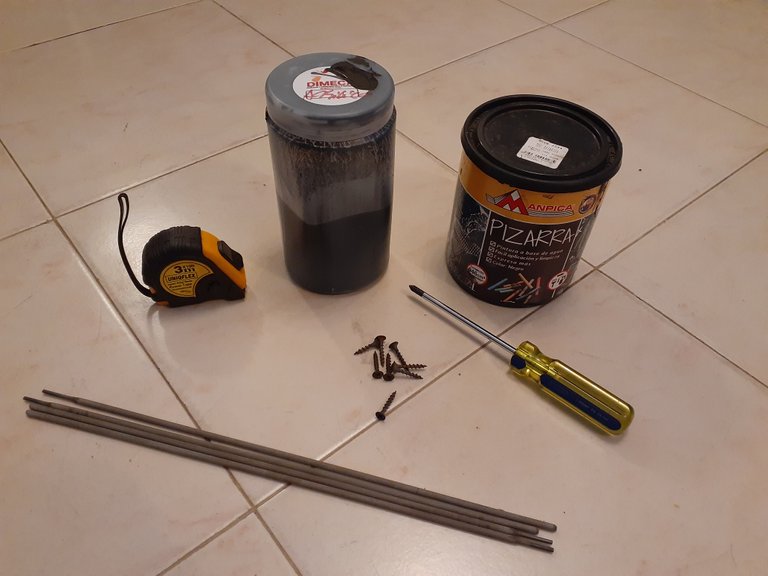
Para esta remodelación utilizamos
10 Varillas de soldar
Platina de 3/8 x 3.16
Listones de Madera de pino o cualquier madera que tengan en casa; esta madera nos sobro de un proyecto que hicimos en casa.
Tornillos auto roscante para madera
Pintura acrílica negra, también puede ser pintura en aerosol, pintura a la tiza
Destornillador de estrías
Grapadora de tapicería
Cinta métrica
Primero con un cuadro de madera que teníamos medimos la parte interna de la silla, para tener la forma y medida luego cortar los listones. (Ver imágenes)
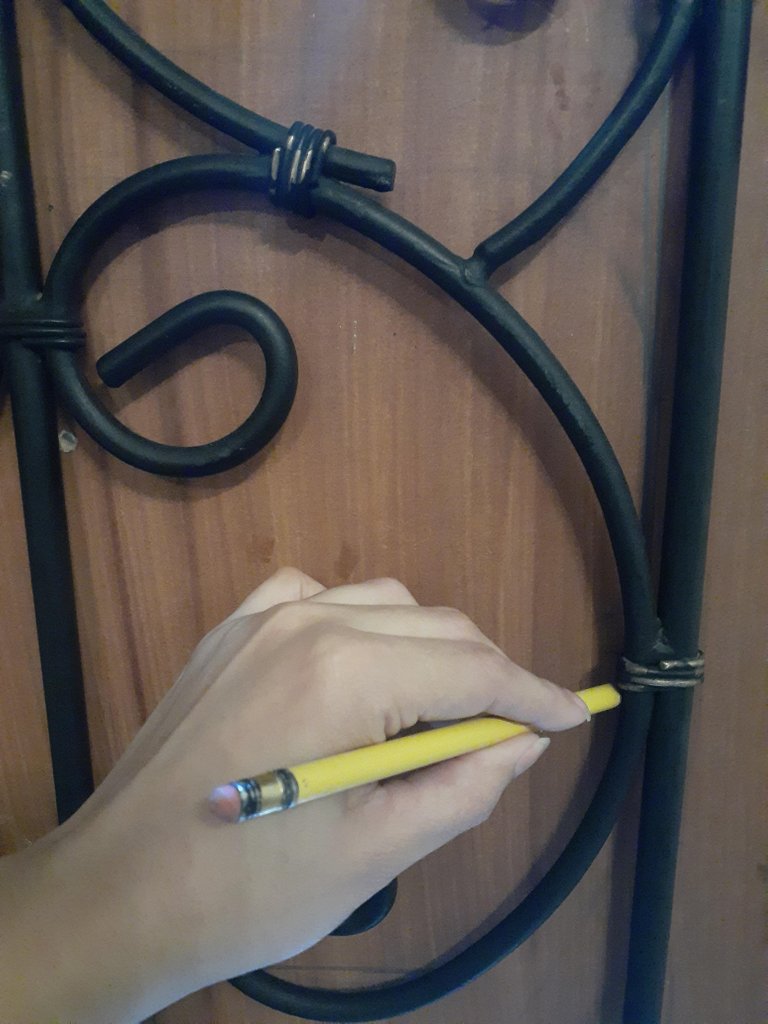

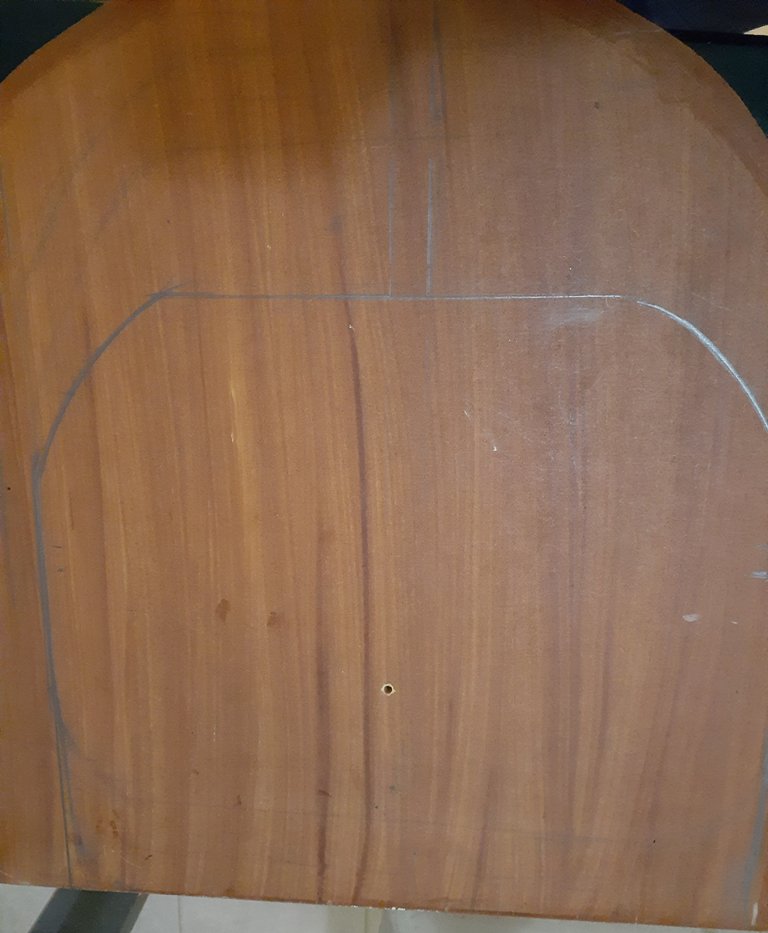
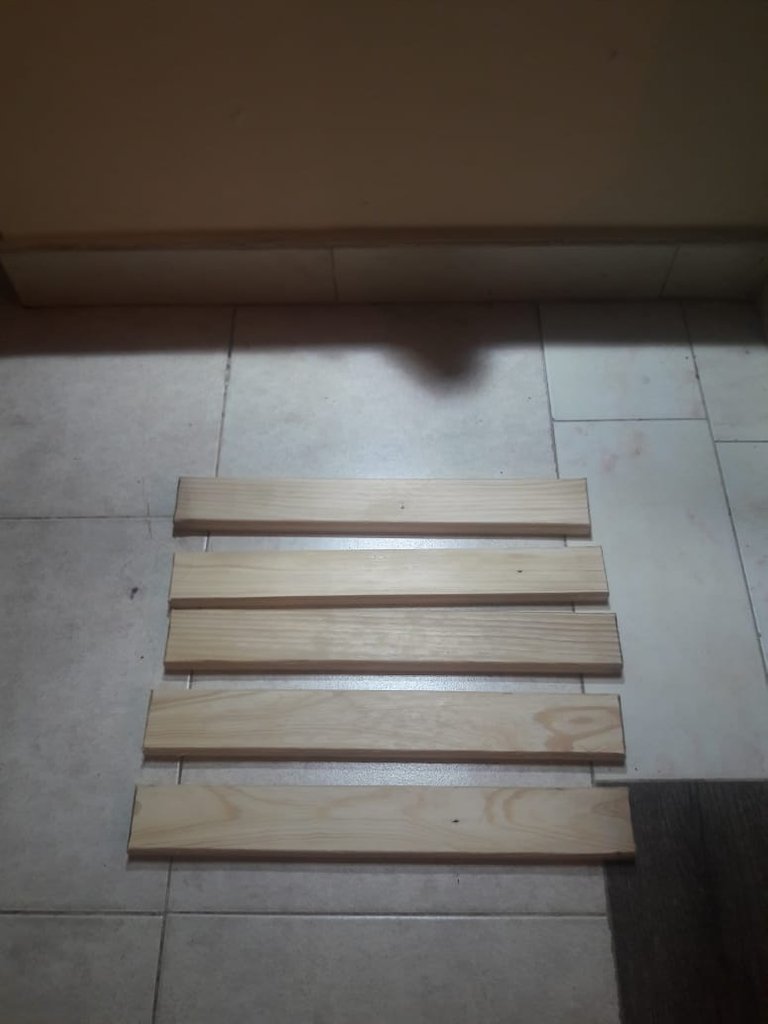
Una vez tengamos la medida que en este caso fue de 37 centímetros, marcamos cada listón para cortarlos del mismo tamaño, aquí vino la ayuda de nuestro amigo el carpintero que nos cortó cada listón de madera y quedaron así. (Ver imagen)


Como los listones ya estaban lijados, ya que nos quedaron de otro proyecto que hicimos en casa. Los pintamos con pintura acrílica negra, en caso de que no tengas compresor para pintar puedes usar , pintura en spray o pintura a la tiza, se aplicaron dos capas de pintura y se dejaron secar secar 5 horas entre una capa y otra. (ver imagen)


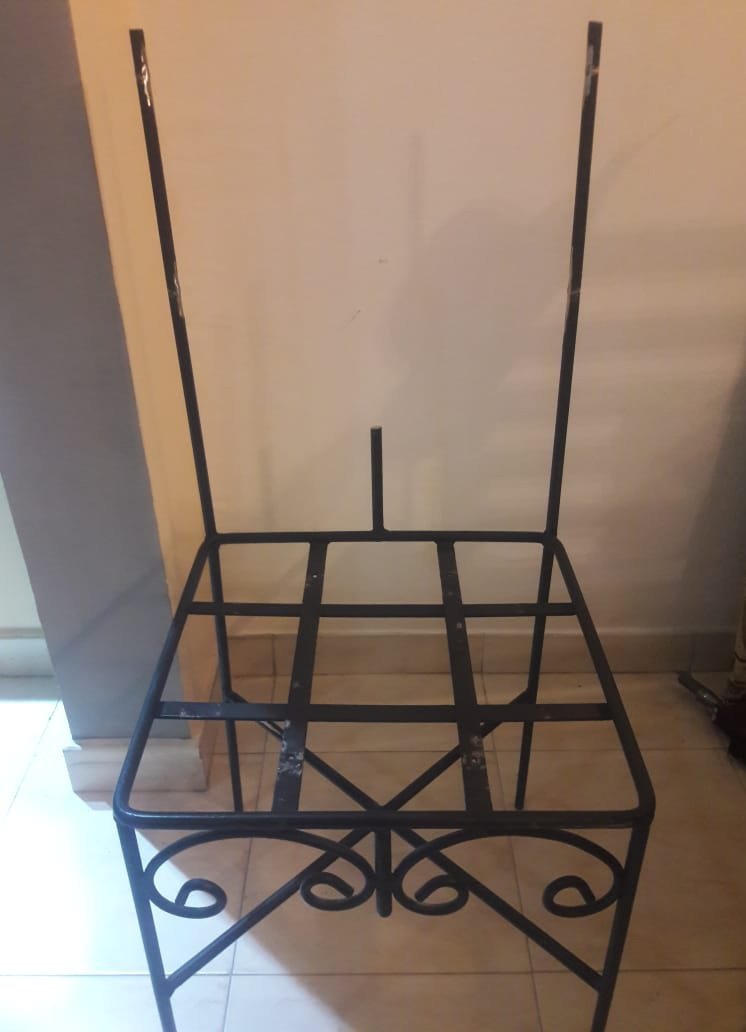
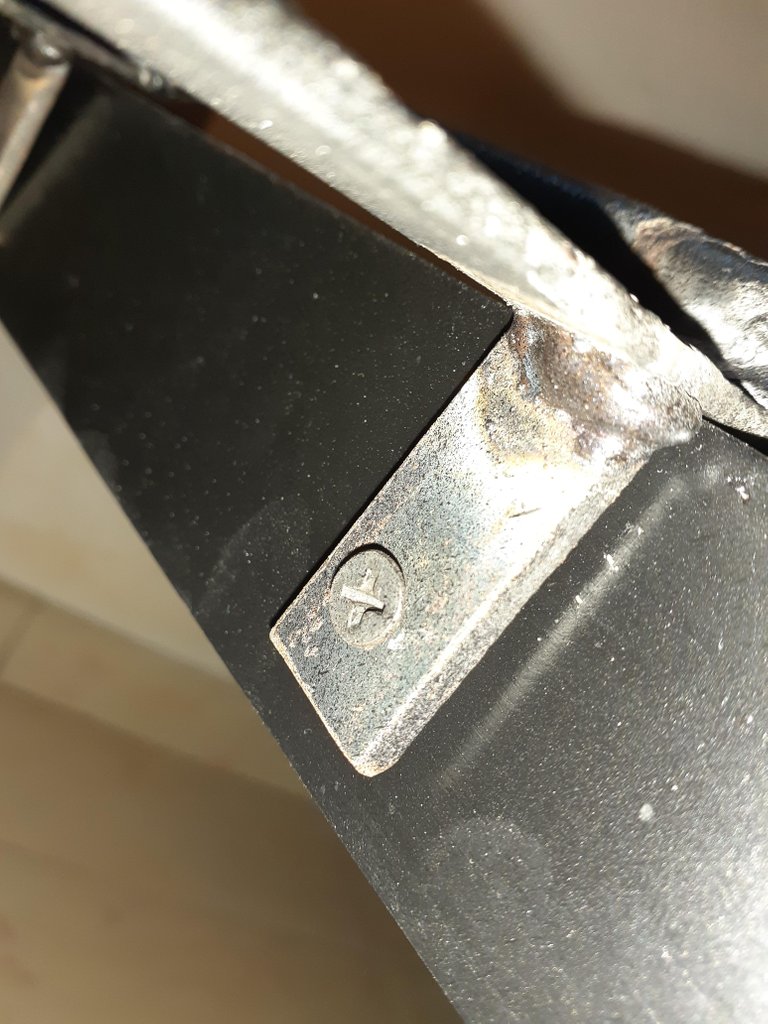
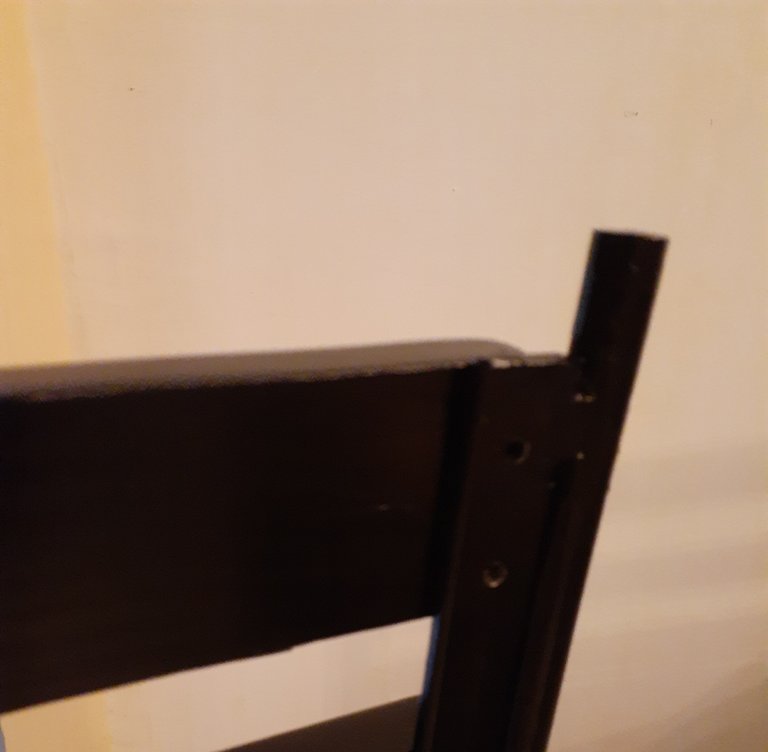
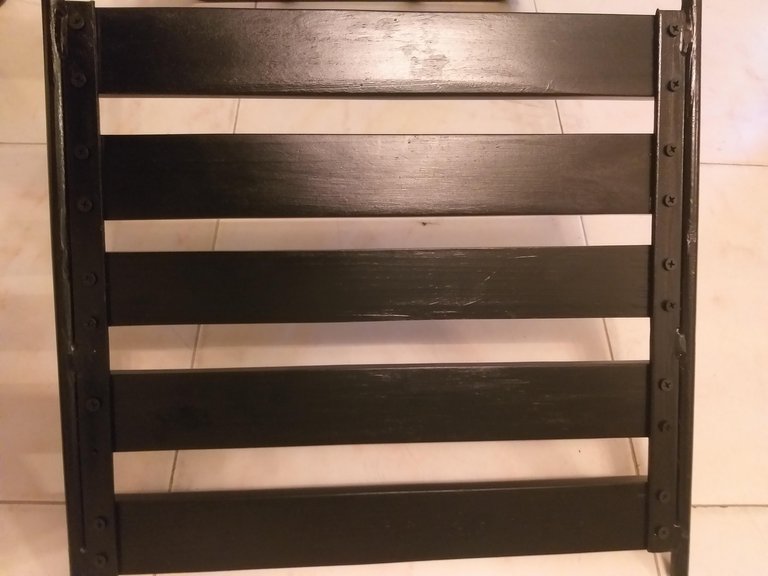
Mandamos a retirar toda el área del espaldar de nuestra silla y dejamos solo las varillas laterales del espaldar de la silla.( Ver imagen) Además, se le colocaron dos láminas de hierro de 35 centímetros que servirán de soporte para nuestros listones en el área del espaldar.
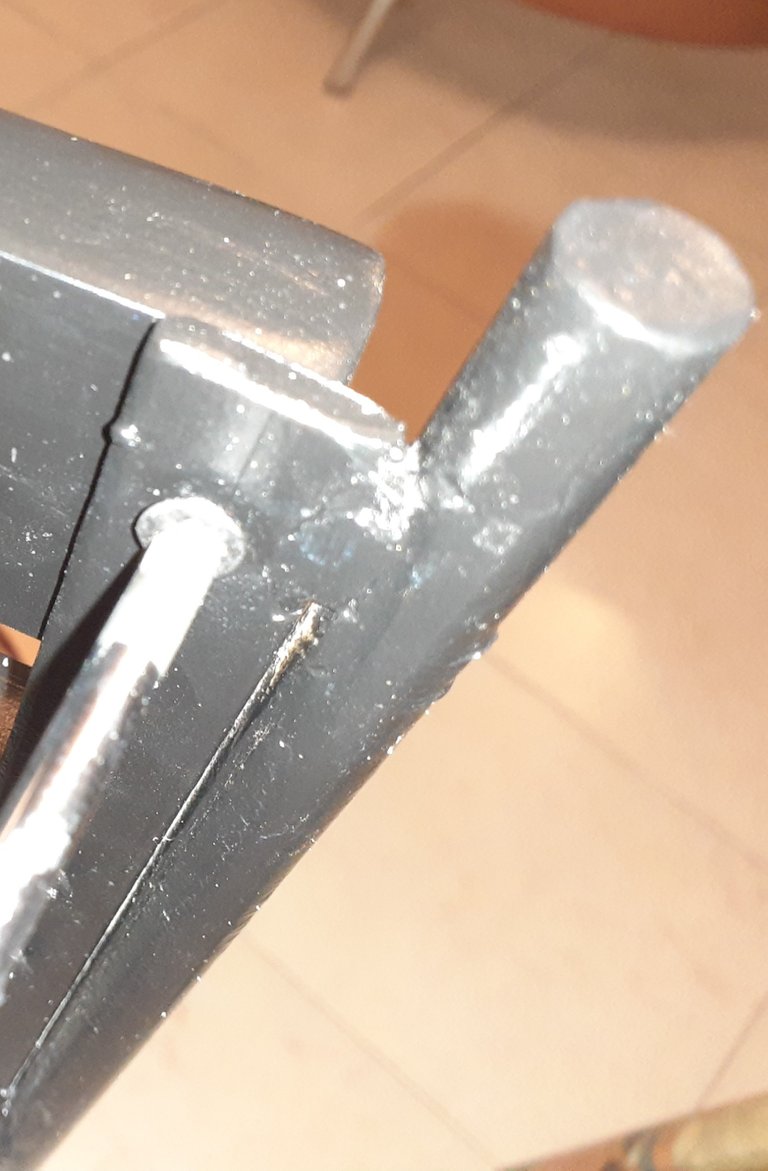
En la parte inferior, a los costados se le soldaron dos soportes para colocarle dos listones de madera ya pintados, de 37 centímetros cada uno. (ver imágenes)


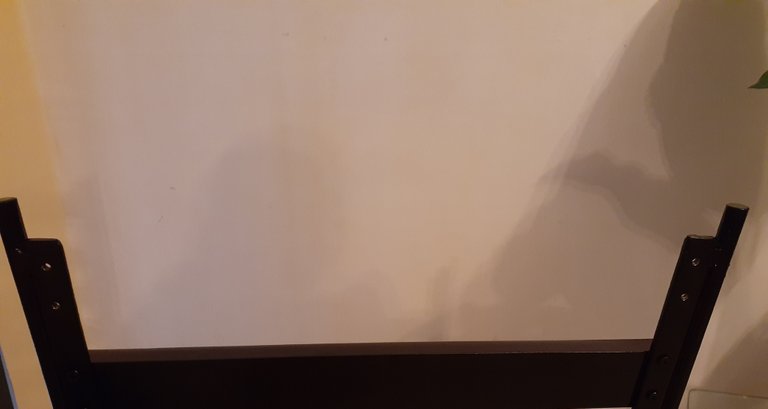
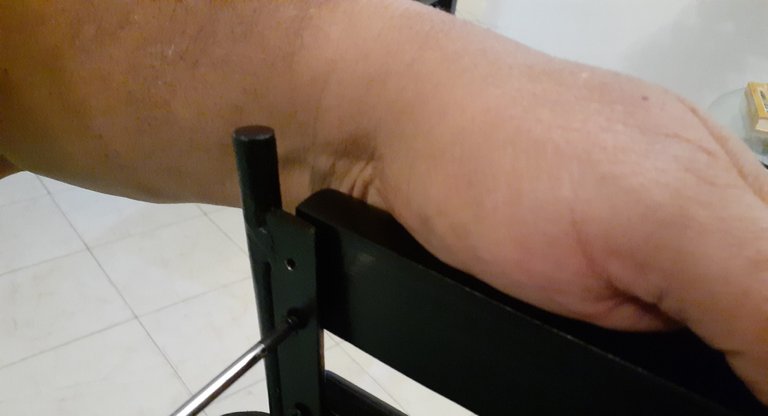
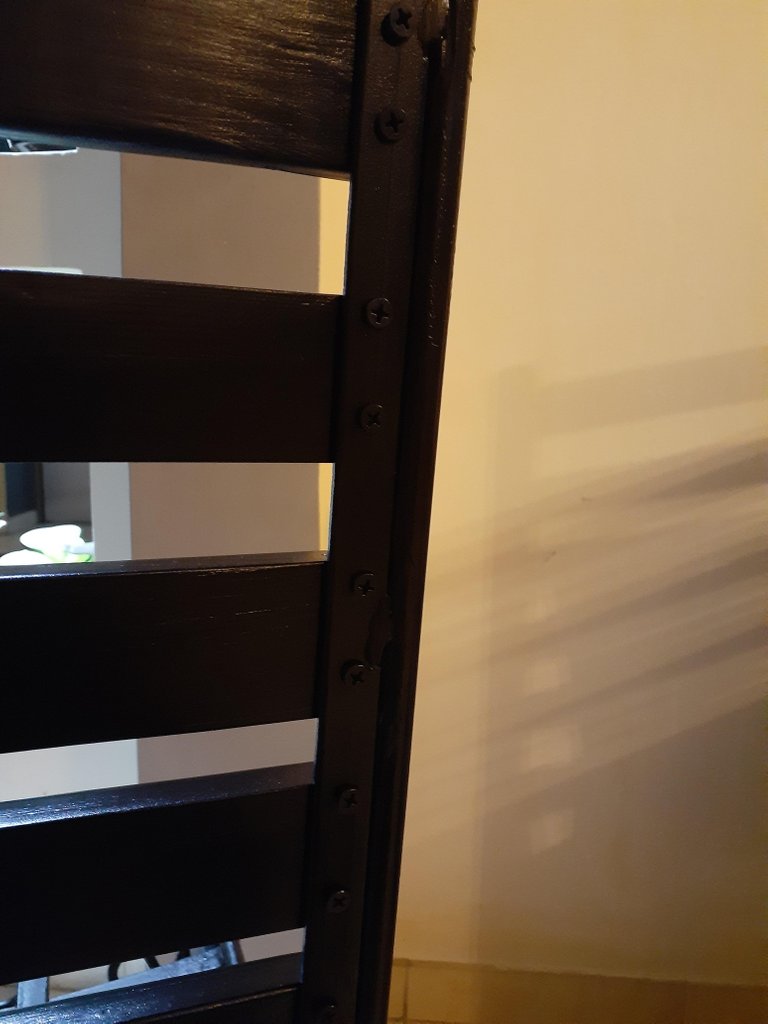
Una vez tengamos nuestros listones de madera pintados y secos, se procedió a instalar cada listón en el espaldar de cada silla, atornillando dos tornillos a cada lado de cada listón. Se utilizaron 5 listones de madera para cada silla y cada listón tenía 4 tornillos. (ver imágenes)
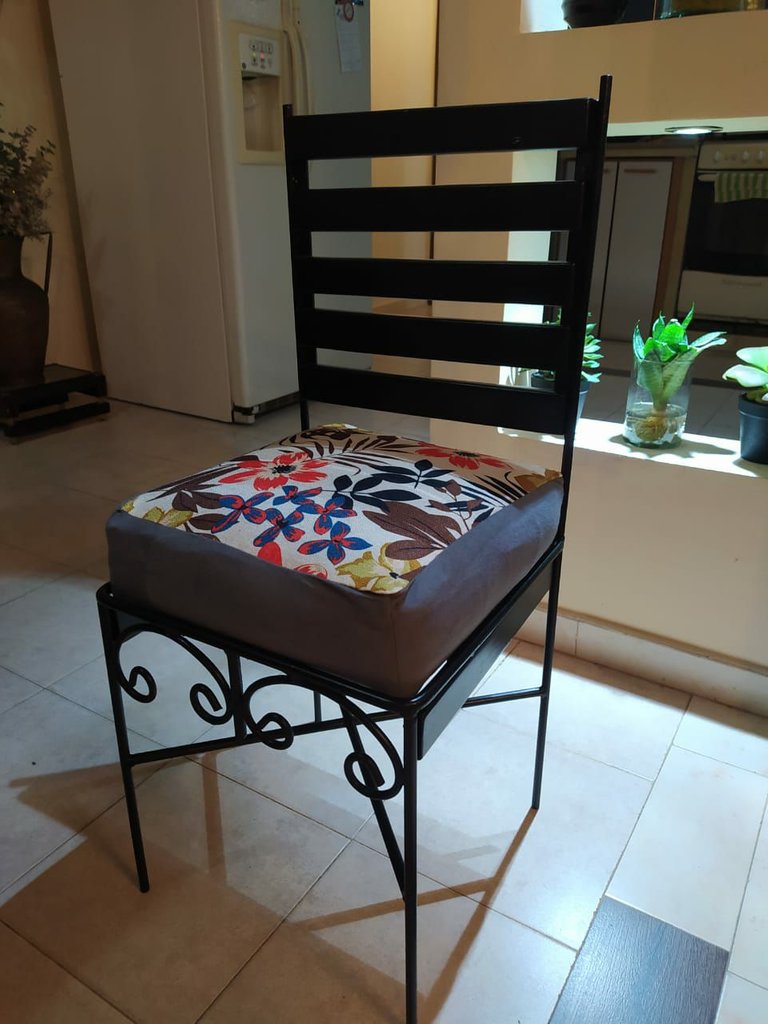
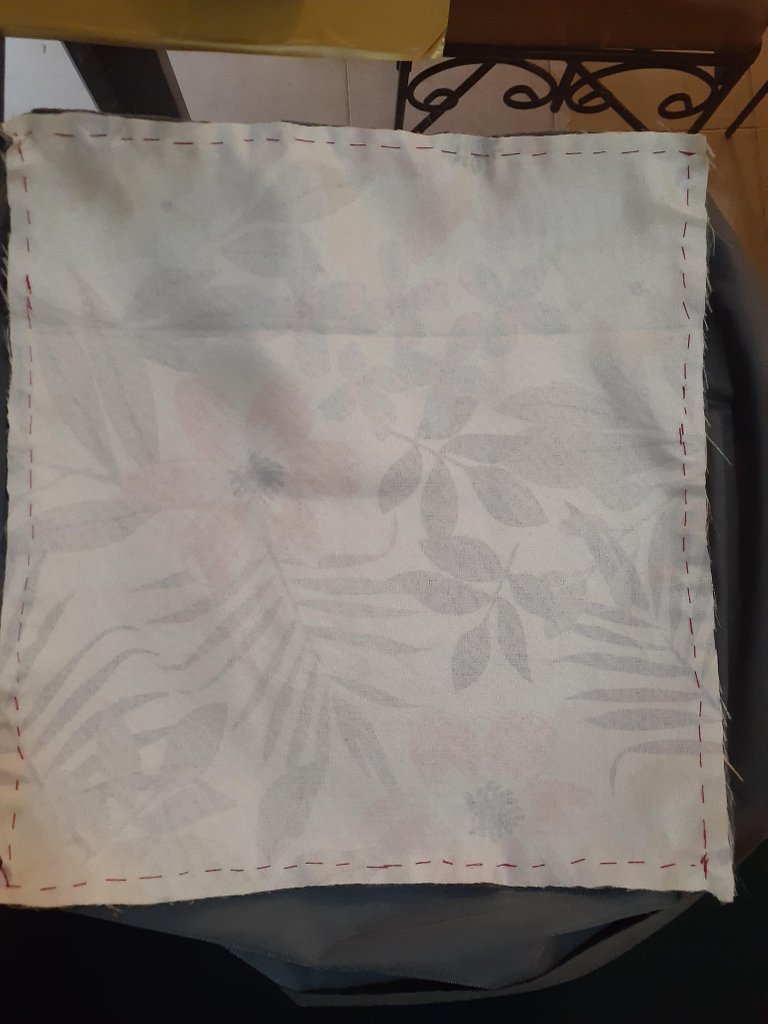
A este punto ya se veía el cambio, en las sillas. Sin embargo, como teníamos una tela que nos sobró de unos cojines que hicimos, decidimos también forrar los cojines de las sillas para que el cambio fuese total.

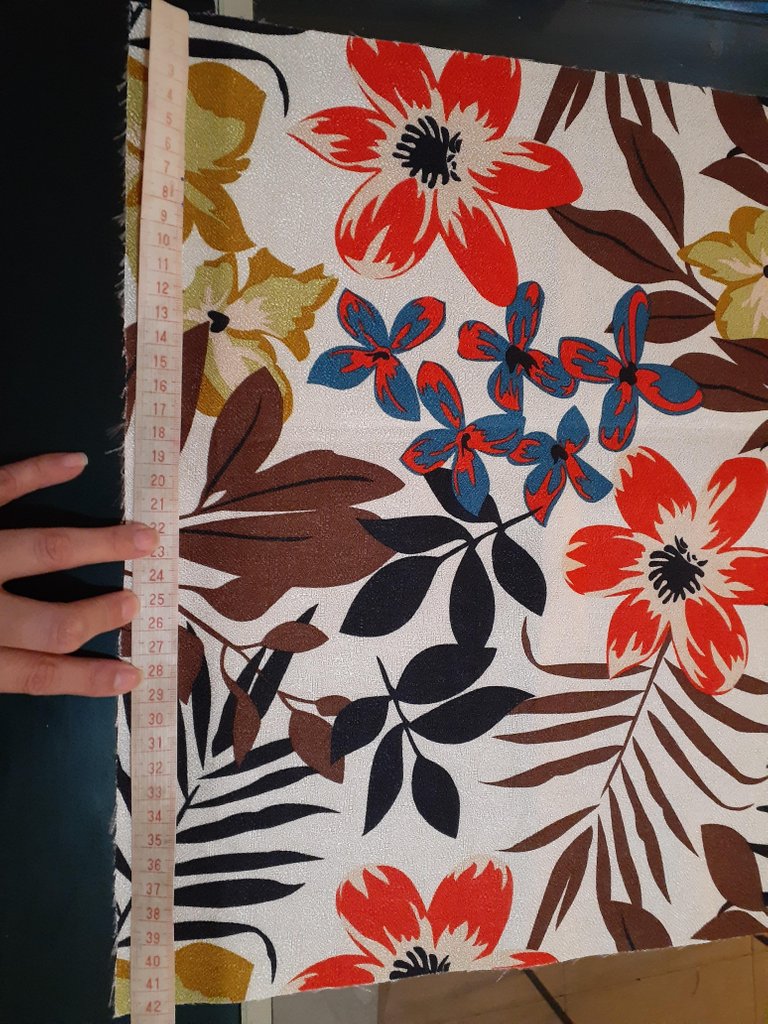
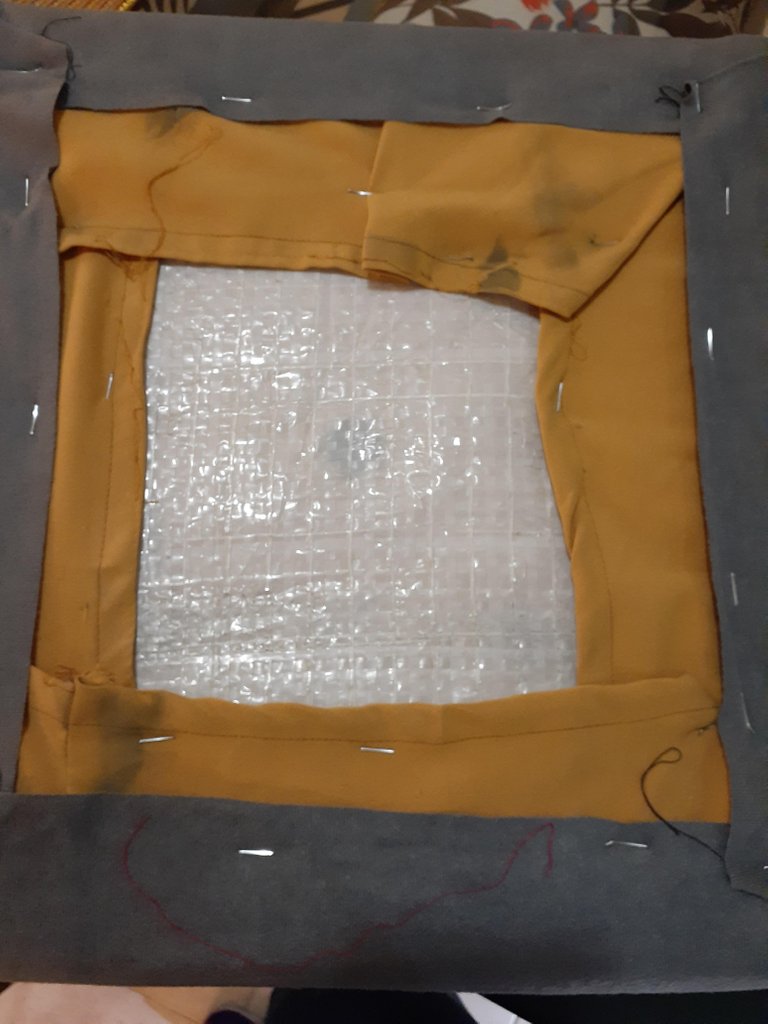
Para los cojines cortamos cinco cuadrados cuyas medidas fueron 42 cm de ancho x 39 cm de alto (ver imágenes).
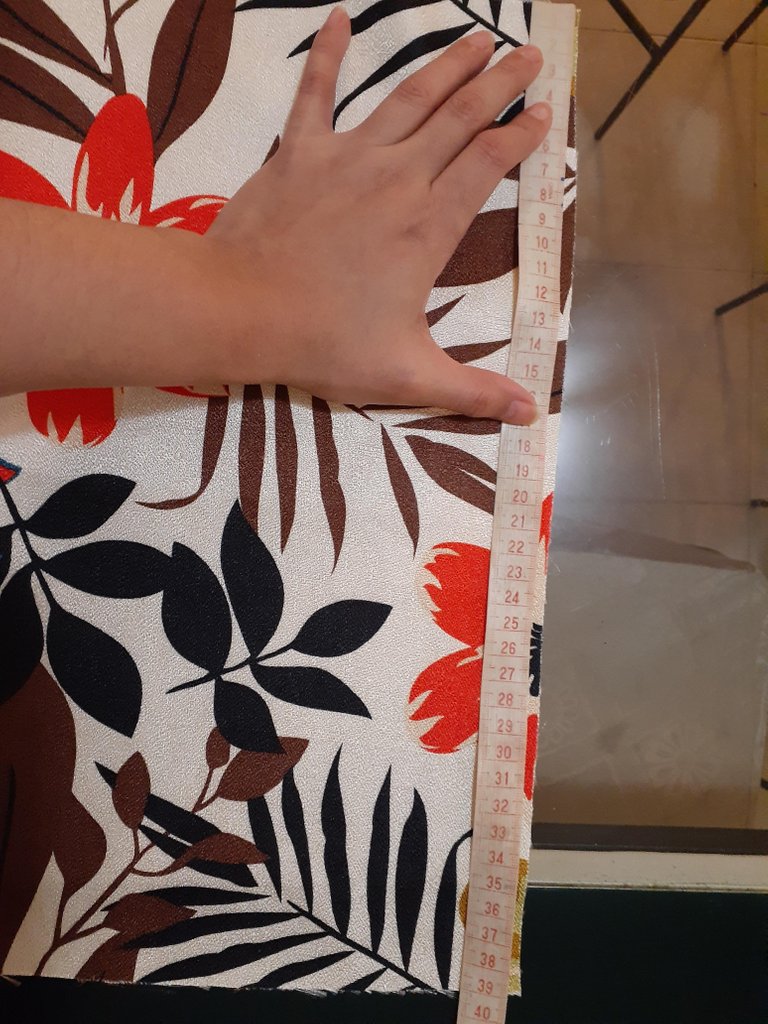
Y 5 tiras de 18 cm de ancho por un metro de largo de tela gris (ver imagen).

En su caso, pueden medir las sillas que van a remodelar y a esa medida le agregan 1 cm más por la costura.
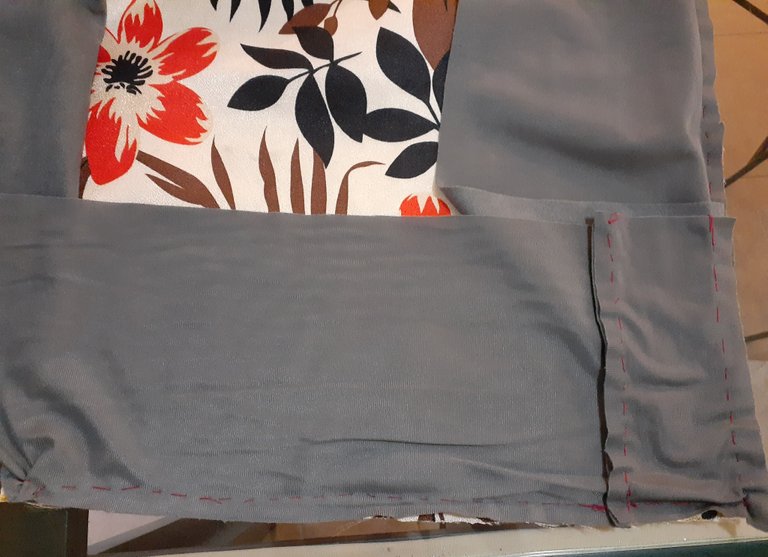
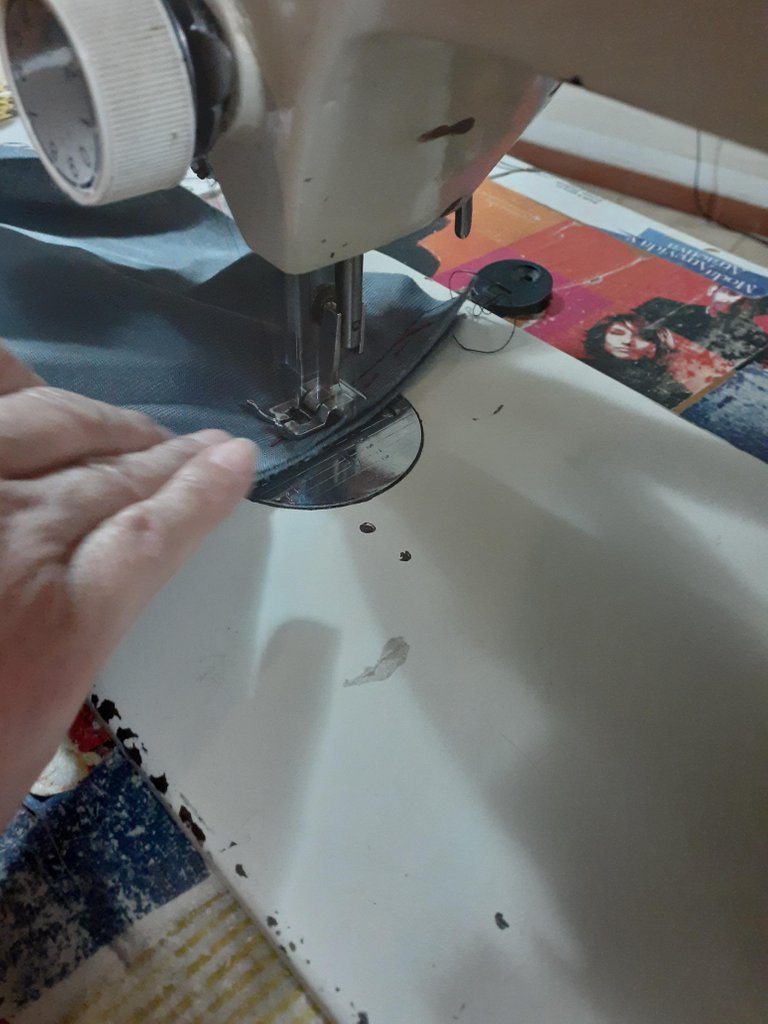
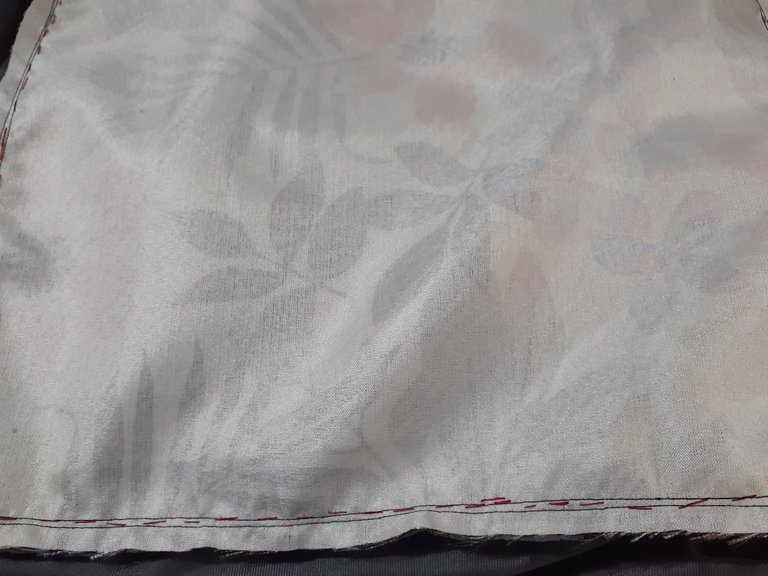
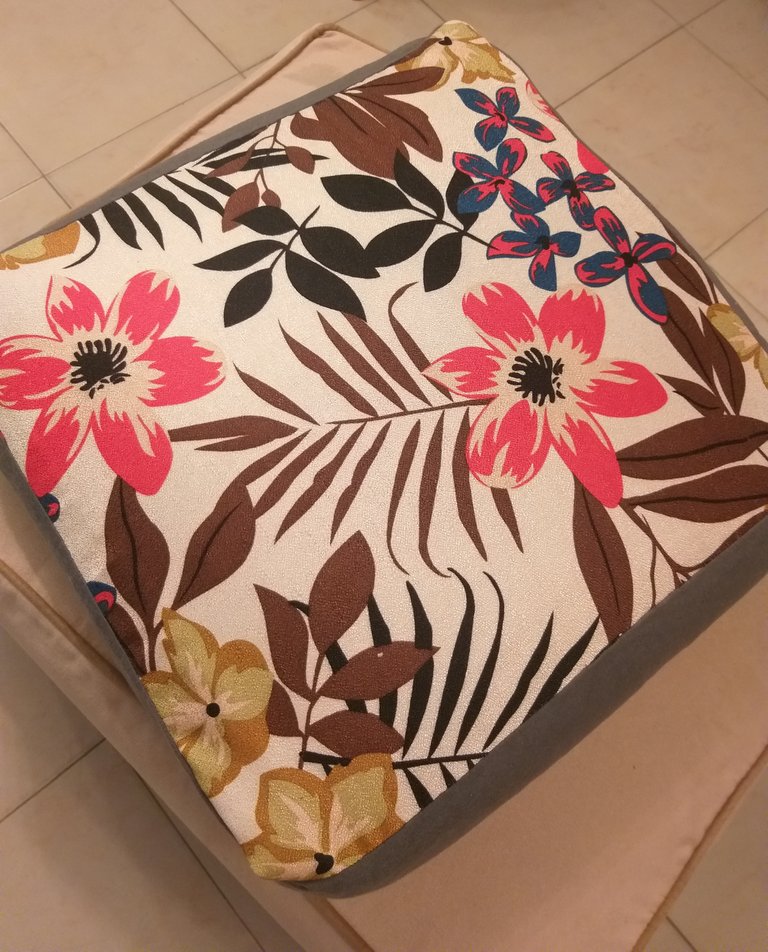
Comenzamos a pasar una costura a mano con la tela gris y la de flores para formar cada forro, tal como se ve en las imágenes y luego con la máquina de coser, cosimos cada forro y quedan así. (Ver imágenes).


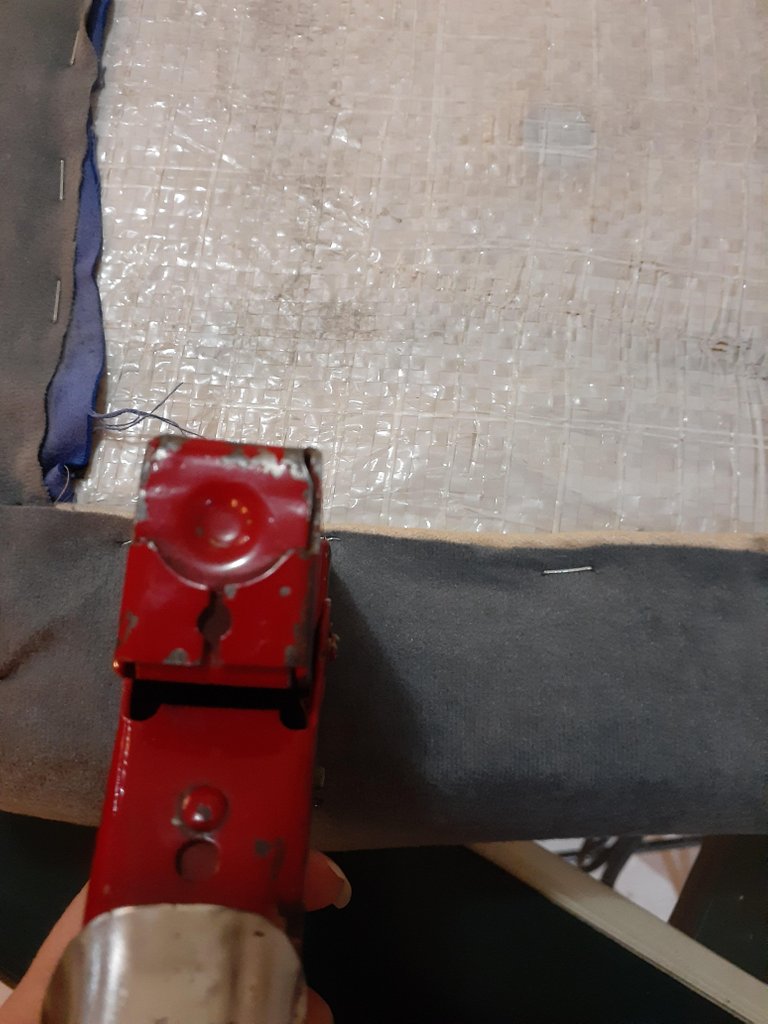
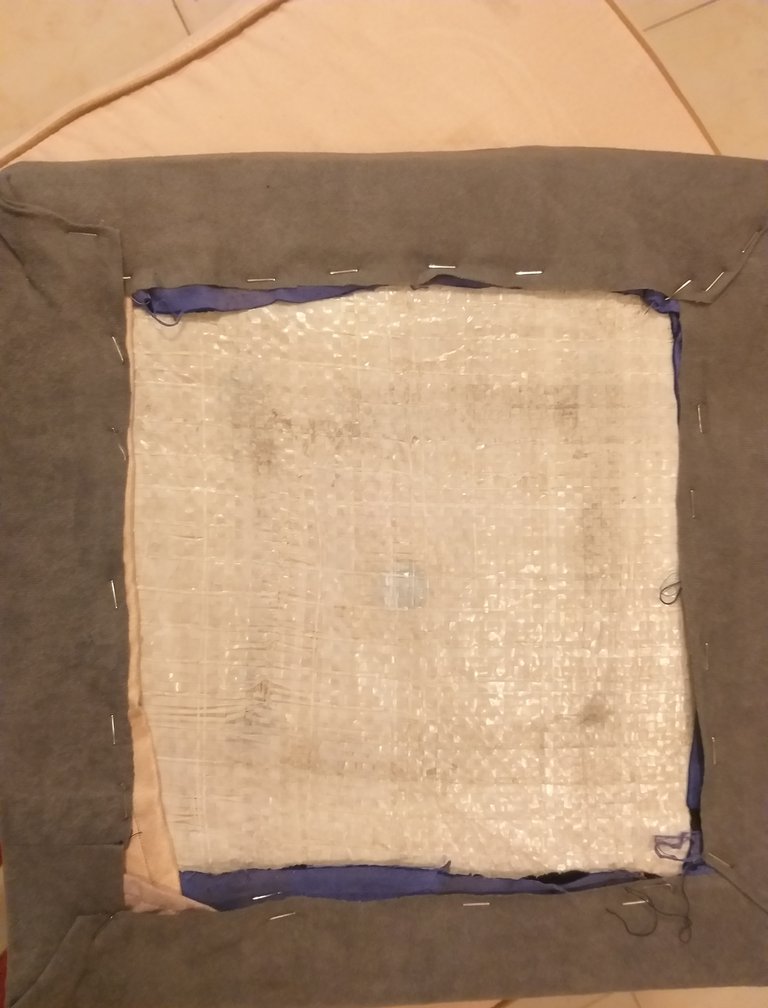
Luego, tomamos cada cojín, colocamos los forros y con una grapadora de tapicería van a ir grapando como se ve en la imagen, no tiene mucha ciencia, es como si envolvieran un regalo. En caso de que les sobre algo de tela pueden cortarla para que la grapa tenga buen agarre.
Una vez tengamos todos los cojines forrados procedemos a fijarlos en las sillas y ya tenemos nuestras sillas completamente renovadas.
Les dejo una foto del antes y después

Si no se atreven con las sillas del comedor, inténtenlo primero con un banco o alguna silla, en todas las casas siempre tenemos alguna silla en un rincón a la que, con un poco de lija, pintura, tela y nuestra creatividad podemos dar una segunda oportunidad.
Espero les haya gustado en el resultado y si realizan alguna transformación me lo dejan en los comentarios me encantaría verlos.
Las fotografías fueron tomadas por mí
Hi Hive Diy friends, today I'm going to tell you a little about how we took advantage and modified some dining chairs, the truth is that they were already quite deteriorated and did not match the decor we had at home. So, after deciding what model we could do with the base of the chair, see what materials we had at home and which ones we had to buy, I decided to get down to work with my mom.
Among the materials we didn't have we spent about 100 dollars, which really didn't seem so expensive compared to buying a new set of chairs, and the amount included some things like paint, materials for welding, cutting wood as we have friends who are carpenters and welders, they only asked us for the materials.
For this remodeling we used
10 welding rods
3/8 x 3.16" x 3.16" plate
Strips of pine wood or any wood you have at home; this wood was left over from a project we did at home.
Self tapping wood screws
Black acrylic paint, can also be spray paint, chalk paint, etc.
Phillips screwdriver
Upholstery stapler
Tape measure
First we measured the inside of the chair with a wooden square we had, to have the shape and measure then cut the strips (see pictures).
Once we have the measure that in this case was 37 centimeters, we marked each strip to cut them of the same size, here came the help of our friend the carpenter who cut each wood strip and they were like this. (See image)
As the strips were already sanded, since they were left over from another project we did at home. We painted them with black acrylic paint, in case you don't have a compressor to paint you can use spray paint or chalk paint, we applied two coats of paint and let them dry for 5 hours between one coat and the other (see image).
We had to remove the entire backrest area of our chair and left only the side rods of the backrest of the chair (see image). In addition, we placed two 35 centimeters iron sheets that will serve as support for our slats in the backrest area.
In the lower part, on the sides, two supports were welded to place two wooden slats of 37 centimeters each, already painted (see pictures).
Once we had our wooden slats painted and dry, we proceeded to install each slat on the back of each chair, screwing two screws on each side of each slat. We used 5 wooden slats for each chair and each slat had 4 screws (see images).
At this point we could already see the change in the chairs. However, since we had some fabric left over from some cushions we made, we decided to also cover the cushions of the chairs so that the change would be total.
For the cushions we cut five squares measuring 42 cm wide x 39 cm high (see images).
And 5 strips of 18 cm wide by one meter long of gray fabric (see image).
In your case, you can measure the chairs to be remodeled and add 1 cm more for the seam.
We start sewing by hand with the gray fabric and the flower fabric to form each lining, as shown in the pictures and then with the sewing machine, we sew each lining and they look like this (See pictures).
Then, we take each cushion, we place the linings and with an upholstery stapler they will staple as shown in the image, it is not very scientific, it is as if they were wrapping a gift. In case you have some fabric left over, you can cut it so that the staple has a good grip.
Once we have all the cushions covered we proceed to fix them on the chairs and we have our chairs completely renovated.
Here is a before and after picture
If you do not dare with the dining room chairs, try it first with a bench or a chair, in every house we always have a chair in a corner to which, with a little sandpaper, paint, fabric and our creativity we can give a second chance.
I hope you liked the result and if you make any transformation leave it in the comments I would love to see them.
The photos were taken by me
https://leofinance.io/threads/josephdon211/re-josephdon211-2ms6rhddh
The rewards earned on this comment will go directly to the people ( josephdon211 ) sharing the post on LeoThreads,LikeTu,dBuzz.
Parece bastante trabajo, pero el resultado vale la pena. Lo que se hace con cariño se nota, así que ya tienes muebles nuevos, eso le da otro ambiente a la casa. Fue un gusto visitar tu blog. Saludos.
Si nos dio algo de trabajo, pero super valió la pena y lo importante es que aprovechamos algunas cosas que ya teníamos. Gracias por comentar!🌼😉
Están bellísimas, quedaron como nuevas 👍
Gracias por comentar!! 😉🌼
You just taught me a very valuable life lesson.
Everyone deserves a second chance 😅
Wow.
The chair looks completely different now.
Bravo 👏🏾
!discovery 40
!diy
thanks for commenting! I'm sure you have something at home that you can renovate and give it a second chance! 😉🌼
Excelente trabajo, están para ser usadas por mucho tiempo más.
Contáctenos para saber más del proyecto a nuestro servidor de Discord.
Si deseas delegar HP al proyecto: Delegue 5 HP - Delegue 10 HP - Delegue 20 HP - Delegue 30 HP - Delegue 50 HP - Delegue 100 HP.
gracias por el apoyo😊
Congratulations @maru2007! You have completed the following achievement on the Hive blockchain And have been rewarded with New badge(s)
Your next target is to reach 1000 upvotes.
You can view your badges on your board and compare yourself to others in the Ranking
If you no longer want to receive notifications, reply to this comment with the word
STOPTo support your work, I also upvoted your post!
This post was shared and voted inside the discord by the curators team of discovery-it
Join our Community and follow our Curation Trail
Discovery-it is also a Witness, vote for us here
Delegate to us for passive income. Check our 80% fee-back Program
you've completely created something new and beautiful from the old piece. That is a very good job well done.
Bravo 👏🏿
Yay! 🤗
Your content has been boosted with Ecency Points, by @hive-130560.
Use Ecency daily to boost your growth on platform!
Support Ecency
Vote for new Proposal
Delegate HP and earn more