Feliz Noche amigos de “Hive DIY” como bien sabemos este domingo celebramos el día de las madres, por lo menos en mi país es muy emotivo ese día, todos nos esmeramos por hacer sentir muy especial a nuestras madres. Personalmente soy muy apegada a mi mamá, quizás por ser la hija menor siento que me consintió bastante. Eso no quiere decir que mi papá no tenga también un lugar muy especial en mi corazón.
Happy Evening friends of "Hive DIY" as we all know this Sunday we celebrate Mother's Day, at least in my country it is very emotional that day, we all strive to make our mothers feel very special. Personally I am very attached to my mom, maybe because I am the youngest daughter I feel that she spoiled me a lot. That doesn't mean that my dad doesn't also have a very special place in my heart.
Hoy en día tengo a mi hija de 2 años, y le quiero inculcar ese mismo valor hacia sus padres, a respetar y sobre todo no tener miedo ni vergüenza de demostrar su amor hacia su mamá y su papá. El Domingo en la iglesia tenemos preparado un evento donde los hijos le llevarán un obsequio especial a sus madres, lo particular es que no se trata de llevar objetos de lujo ni mucho costosos. Se trata de algo lleno de cariño que es lo que lo vuelve algo especial.
Today I have my 2 year old daughter, and I want to instill in her the same value towards her parents, to respect and above all not to be afraid or ashamed to show her love towards her mom and dad. On Sunday at church we have prepared an event where the children will bring a special gift to their mothers, the particular thing is that it is not about bringing luxury or expensive objects. It is something full of love that makes it something special.
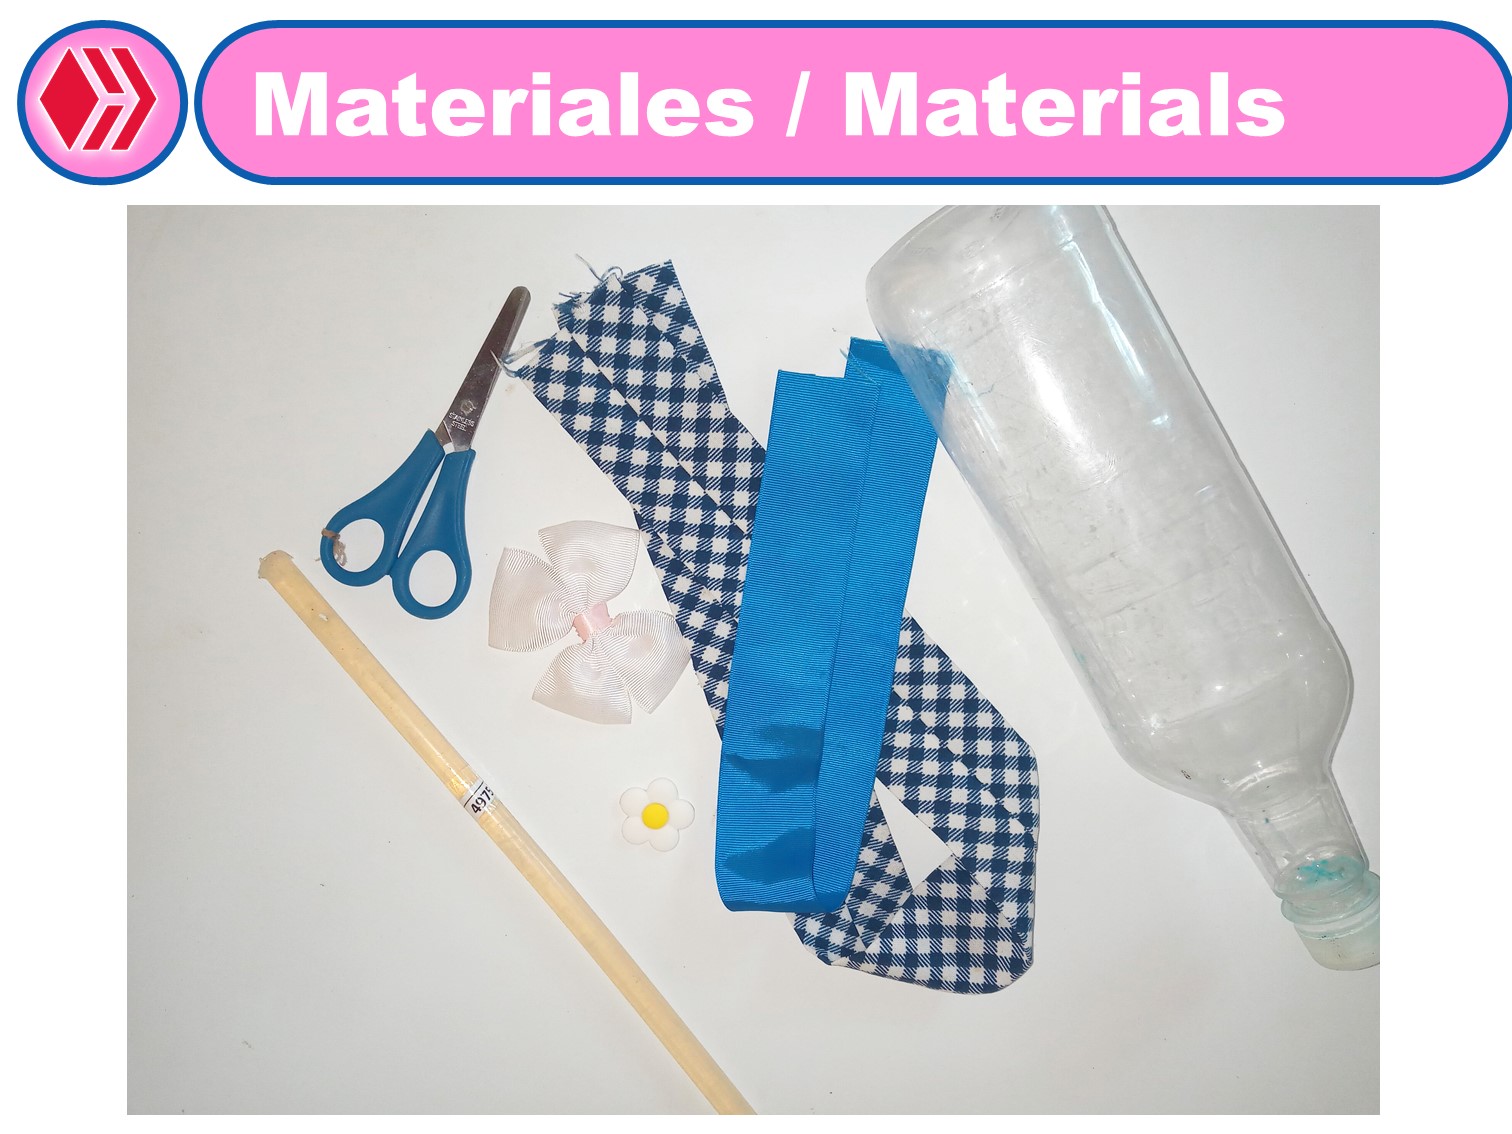
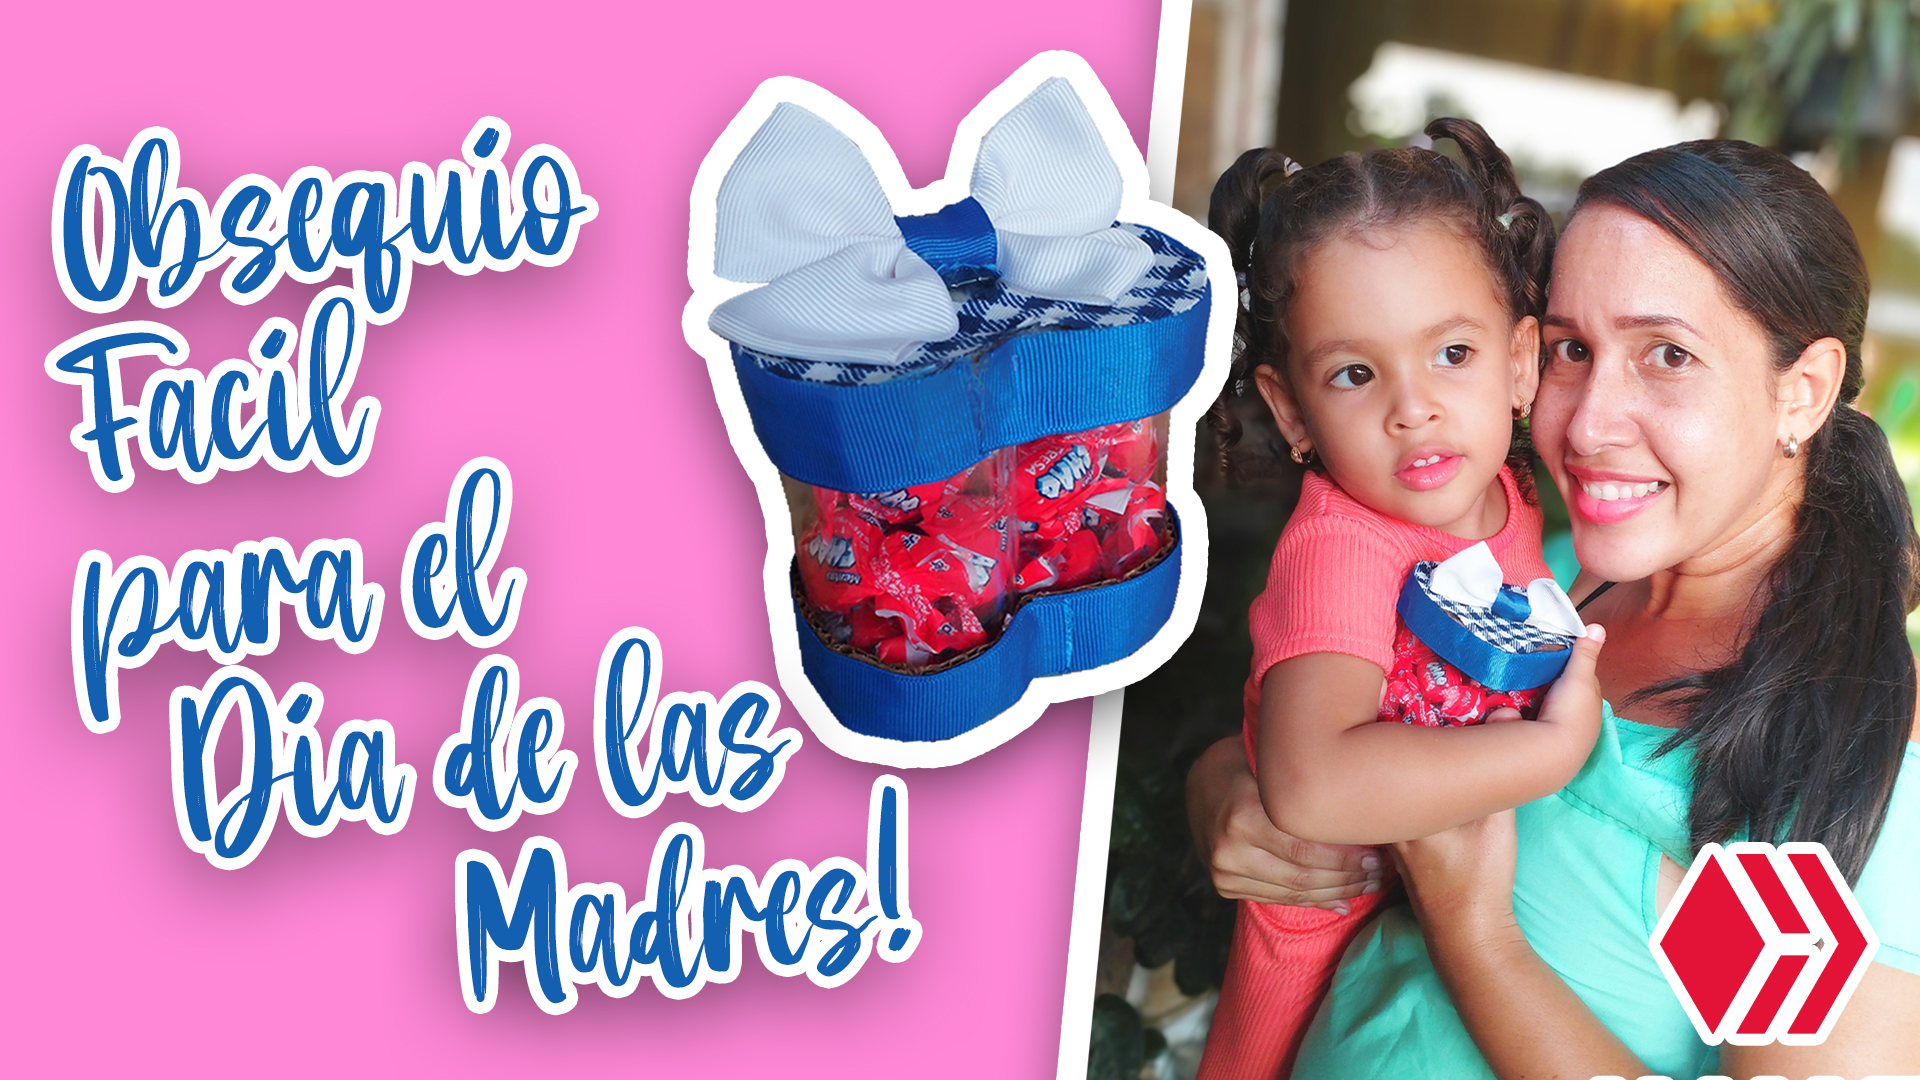
Preparé este detalle con materiales reciclables, que además de ser muy económico, es muy sencillo de realizar. Los materiales que utilicé son: una botella plástica, una tela estampada de cuadros, una cinta azul, cartón, tijeras y barra de silicón.
I prepared this detail with recyclable materials, which besides being very economical, is very easy to make. The materials I used are: a plastic bottle, a checkered fabric, a blue ribbon, cardboard, scissors and a silicone stick.

Podemos empezar primeramente recortando la botella plástica, le quité la parte de arriba y la de abajo. La doblé para darle la forma de corazón. Es muy importante hacer esto de primero porque la forma de corazón resultante es que usaremos como patrón para marcarla en el cartón y hacer también dos corazones del mismo tamaño.
Asimismo, recorté del cartón dos cintas de 22 cm x 2 cm para que sean el borde. Luego pegué con el silicón en barra las cintas en cada uno de los corazones de cartón. Esto servirá para que sirvan de tapa.
We can start by first cutting out the plastic bottle, I removed the top and the bottom. I folded it to give it a heart shape. It is very important to do this first because the resulting heart shape is what we will use as a pattern to mark it on the cardboard and also make two hearts of the same size.
Also, I cut two 22 cm x 2 cm ribbons from the cardboard to be the border. Then I glued the ribbons to each of the cardboard hearts with the silicone stick. This will serve as a lid.
A continuación, seguiremos usando los corazones ahora de cartón par que sean el patrón sobre la tela, y así recortarlos y forrar los corazones (los de cartón). También usaremos la cinta para forrar los corazones de cartón, pero en los laterales. Ya va tomando forma, las dos tapas de cartón en forma de corazón irán una a cada lado del corazón que hicimos al principio con la botella plástica. Para culminar usé un lazo de cinta que le coloqué en la parte de arriba, y rellené con caramelos.
Next, we will continue using the cardboard hearts to be the pattern on the fabric, so we can cut them out and line the hearts (the cardboard ones). We will also use the ribbon to line the cardboard hearts, but on the sides. The two heart-shaped cardboard lids will go one on each side of the heart we made at the beginning with the plastic bottle. To finish, I used a ribbon bow that I placed on the top, and filled with candies.
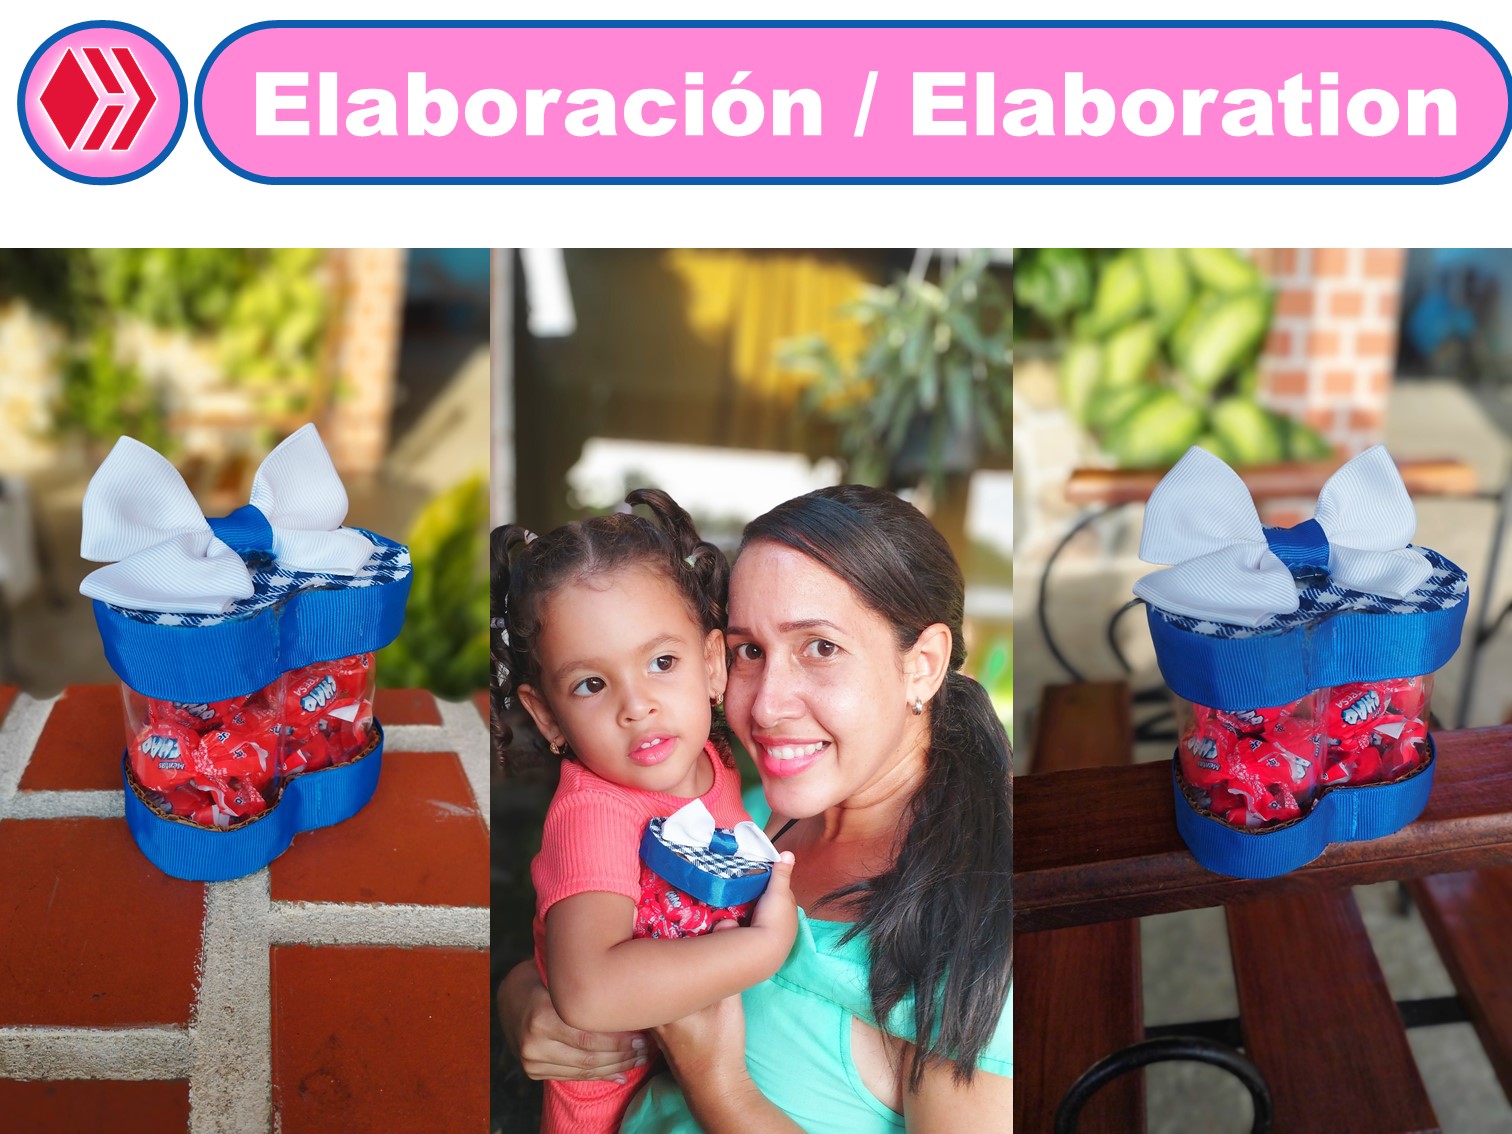
Luego, la parte más dulce fue compartir con mi beba unas fotografías que nos tomó mi esposo. Como puedes ver es sumamente sencillo de hacer, y súper económico. Pero sobre todo es un lindo detalle, no sólo para el día de las madres sino también para fiestas de cumpleaños, aniversarios, baby shower, y hasta bodas. Lo pueden rellenar con chocolates, galletas, alguna flor, o una tarjeta con palabras bonitas.
“Celebrar el día de las madres es un gesto lindo, pero más lindo es que las valoremos cada día del año, que las honremos y amamos siempre, recordemos que como parte de la ley de la vida un día no van a estar y nos podemos lamentar”
Then, the sweetest part was to share with my baby some pictures my husband took of us. As you can see it is very easy to make, and very inexpensive. But above all it is a nice detail, not only for Mother's Day but also for birthday parties, anniversaries, baby showers, and even weddings. You can fill it with chocolates, cookies, flowers, or a card with beautiful words.
"Celebrating Mother's Day is a nice gesture, but even nicer is that we value them every day of the year, that we honor them and love them always, remembering that as part of the law of life one day they will not be around and we may regret it".
Bueno, como siempre agradezco por leer este post, yo edité mis fotografías con una aplicación Móvil llamada “Lumii” y con “Power Point”, además usé como traductor la página: https://www.deepl.com/translator
Well, as always I thank you for reading this post, I edited my pictures with a mobile application called "Lumii" and with "Power Point", I also used as translator the page: https://www.deepl.com/translator
Hermoso, me encantó muchísimo 🥰😻
Muy bonito, gracias por compartir
Muy hermoso querida amiga, gracias por compartir tu trabajo.