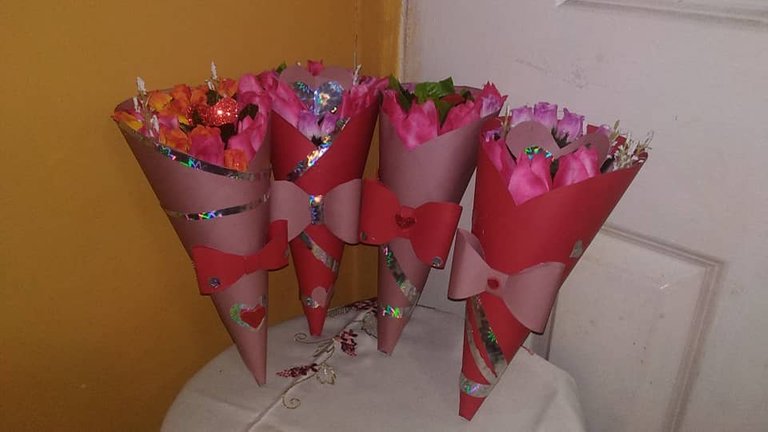
Hello, dear friends, I hope you are well, having a great weekend, today I would like to share with you a beautiful craft, for Mother's Day or to give as a gift on a special date, being a: Beautiful Bouquet, Of Flowers Artificial, what better way to create something special, for that important person for us, giving them a gift that they can keep for a long time.
This type of details make the difference, because it comes out of the everyday, being something original, being perfect, for that special person and elaborated by ourselves.
Next, he presented the materials and steps for its preparation:
.
Hola, queridos amigos, espero se encuentren bien, pasando un excelente fin de semana, hoy quisiera compartir con ustedes, una hermosa manualidad, para el Día de las Madres o para regalar en alguna fecha en especial, siendo un: Hermoso Ramo, De Flores Artificiales, que mejor forma, de crear algo especial, para esa persona importante para nosotros, brindándole un obsequio que podrá guardar por mucho tiempo.
Este tipo, de detalles marcan la diferencia, porque sale de lo cotidiano, siendo algo original, quedando perfecto, para esa persona especial y elaborado por nosotros mismos (as).
A continuación, les presentó los materiales y pasos, para su elaboración:

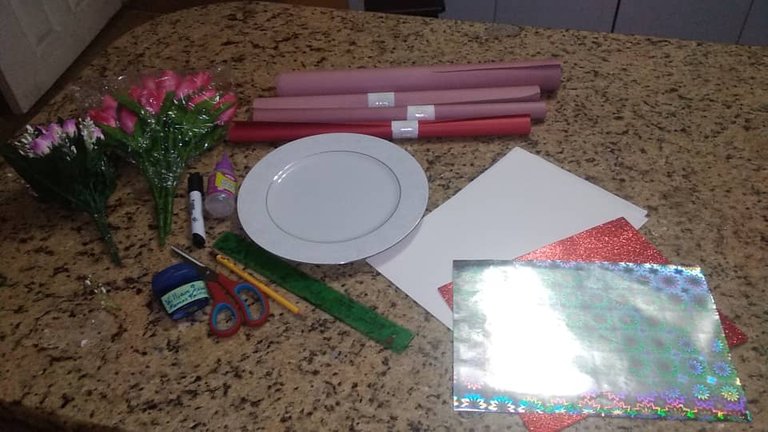
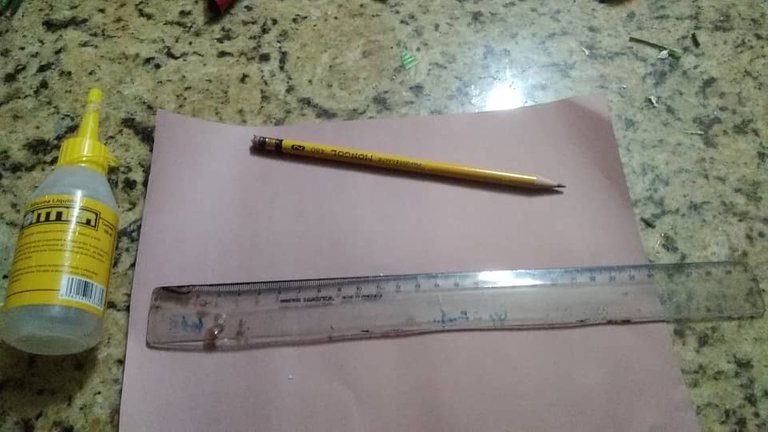
Materials:
(For 4 Artificial Bouquets)
4 cards (the color of your choice)
frosty foami
2 bouquets of artificial flowers
Scissor
Silver Metallic Paper (to decorate)
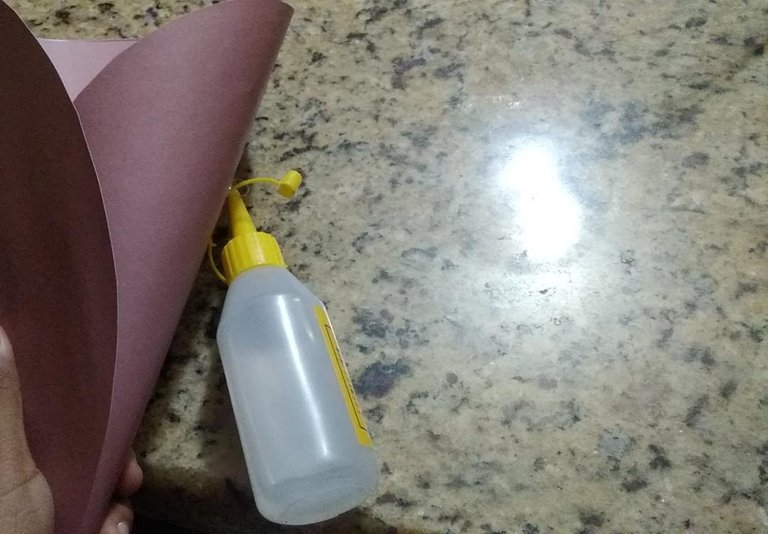
Liquid silicone
black marker
Pencil
Rule
White sheets
1 large round plate
Materiales:
(Para 4 Ramos Artificiales)
4 cartulinas (el color de su preferencia)
Foami escarchado
2 ramos de flores artificiales
Tijera
Papel Metalizado Plateado (para decorar)
Silicon líquido
Marcador negro
Lápiz
Regla
Hojas blancas
1 plato redondo grande
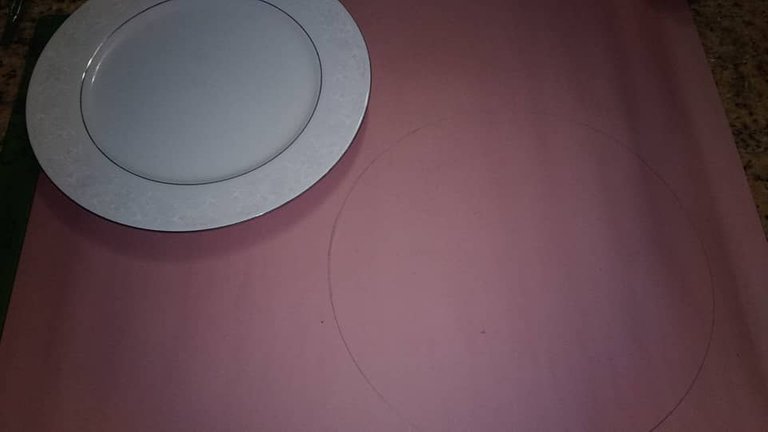
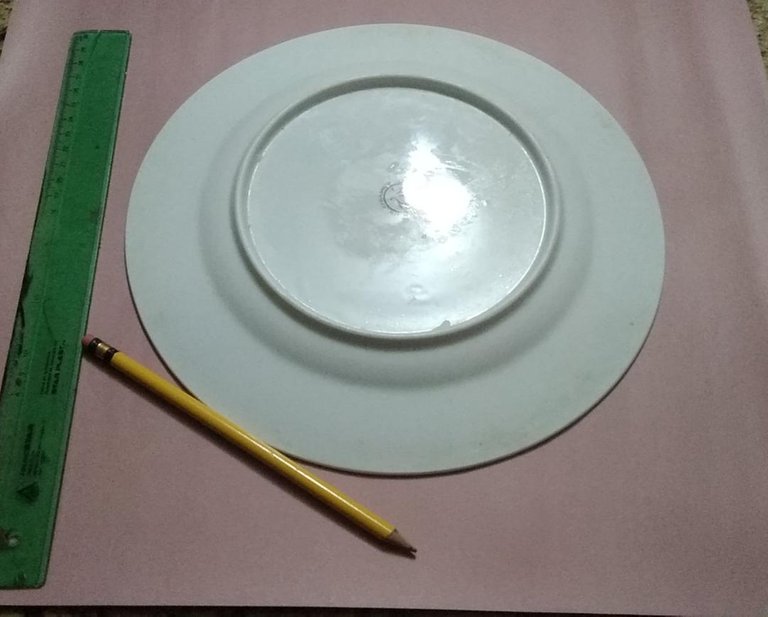
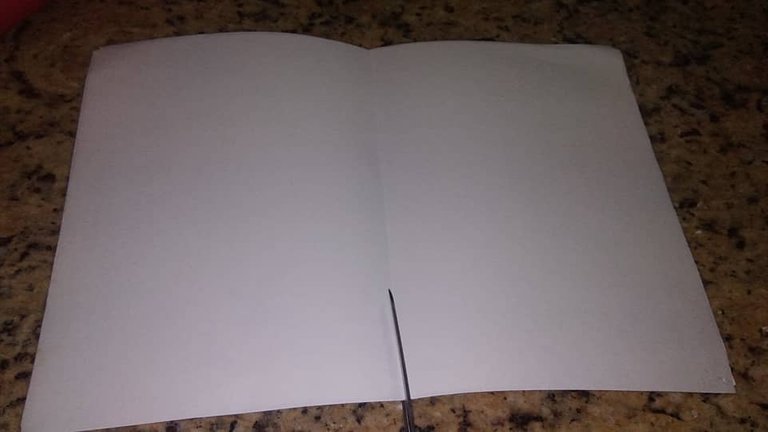
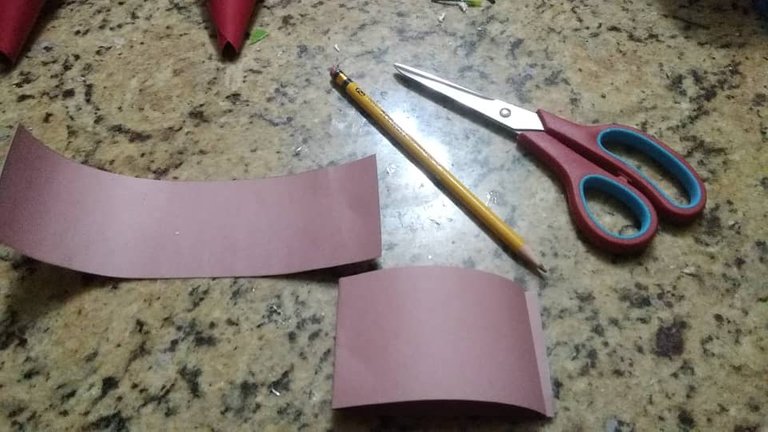
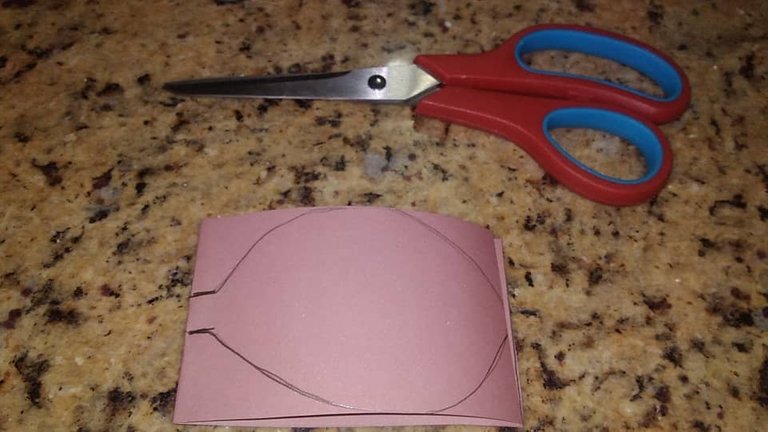
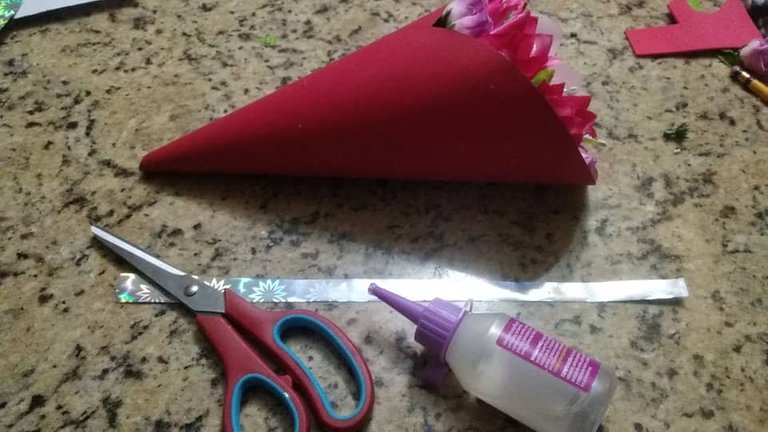
First step:
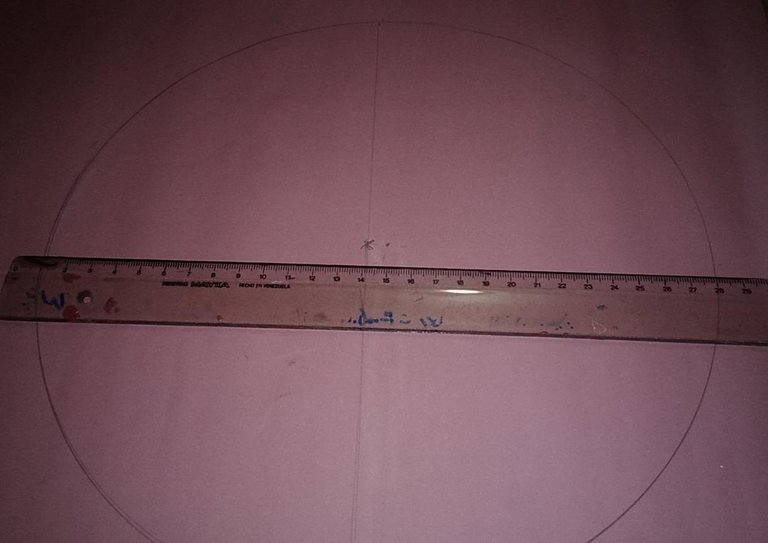
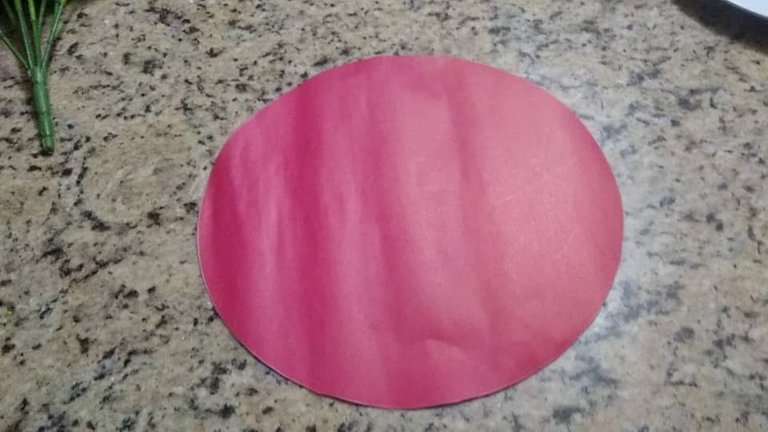
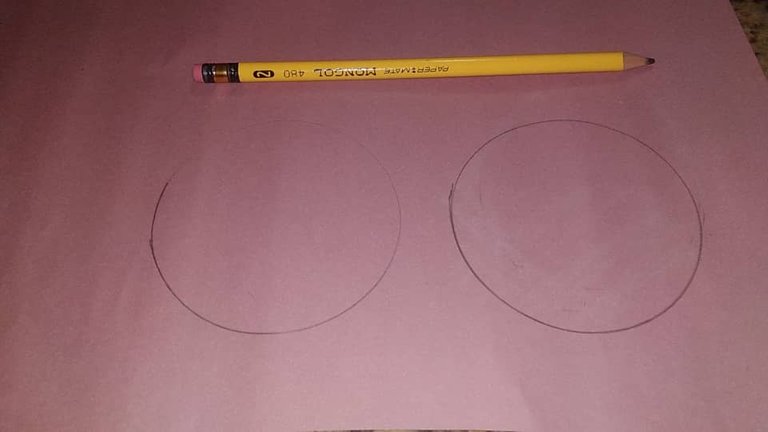
We will start, to elaborate the shape of the bouquet in the following way: On the cardboard, we will place the large plate and with a pencil, we will draw a circle, with a ruler and a pencil we will mark the center, in our case it was 14 cm wide and long , this, to measure the size that the cone will give us.
Primer Paso:
Iniciaremos, a elaborar la forma del ramo de la siguiente manera: Sobre la cartulina, ubicaremos el plato grande y con un lápiz, dibujaremos un círculo, con una regla y un lápiz marcaremos el centro, en nuestro caso fue 14 cm de ancho y largo, esto, para medir, el tamaño, que nos dará el cono.
Second step:
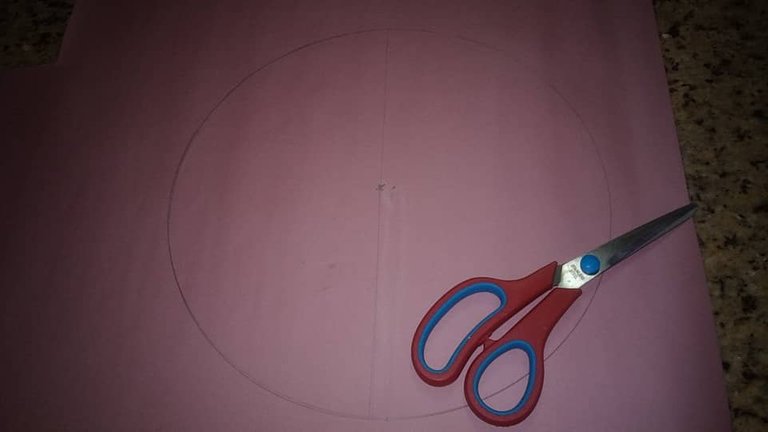
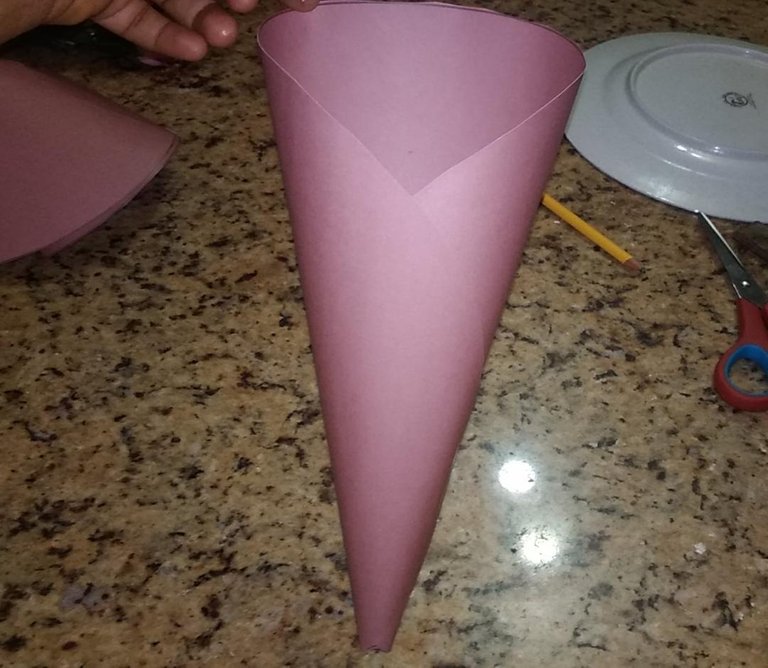
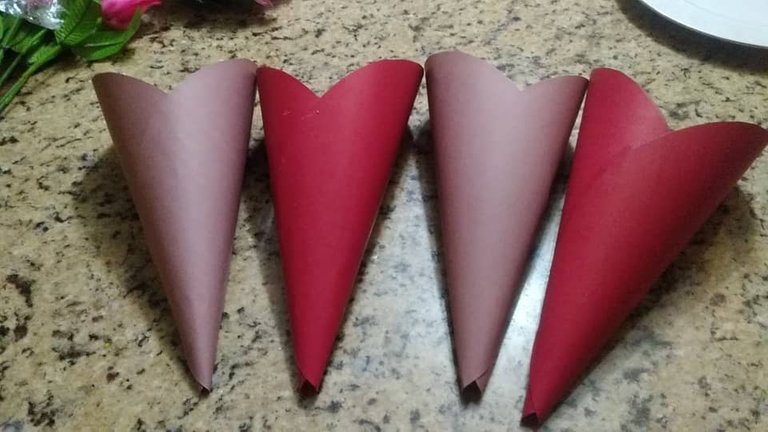
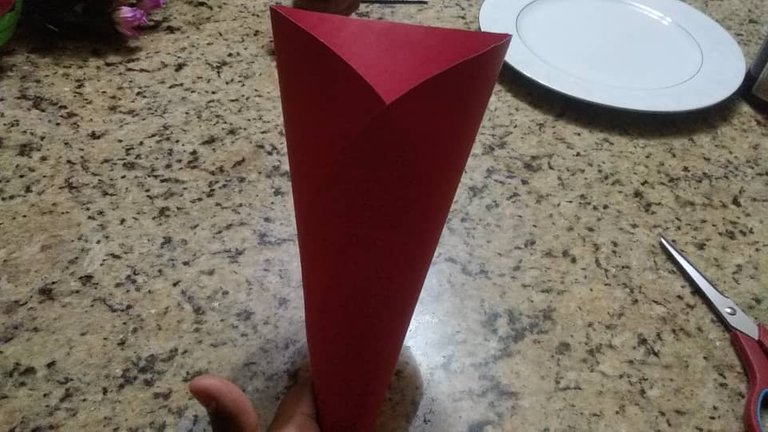
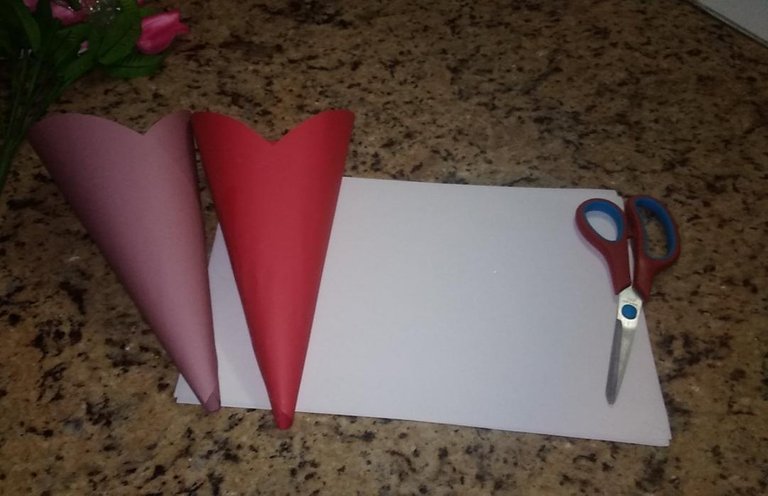
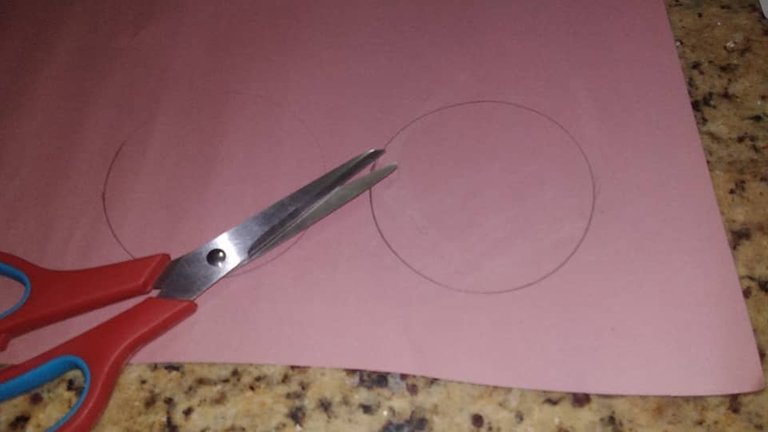
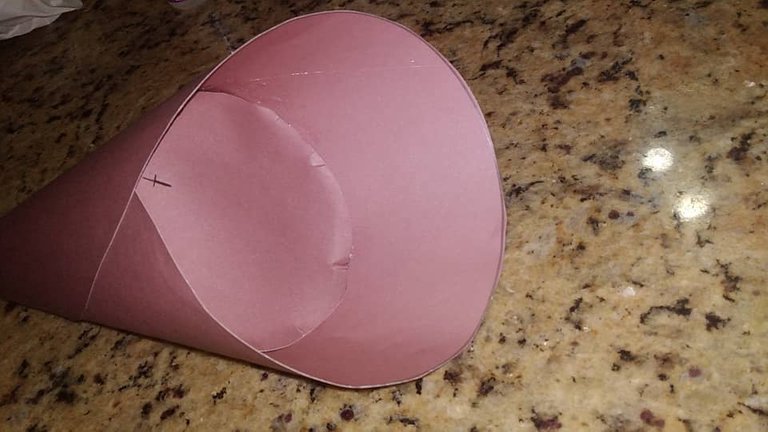
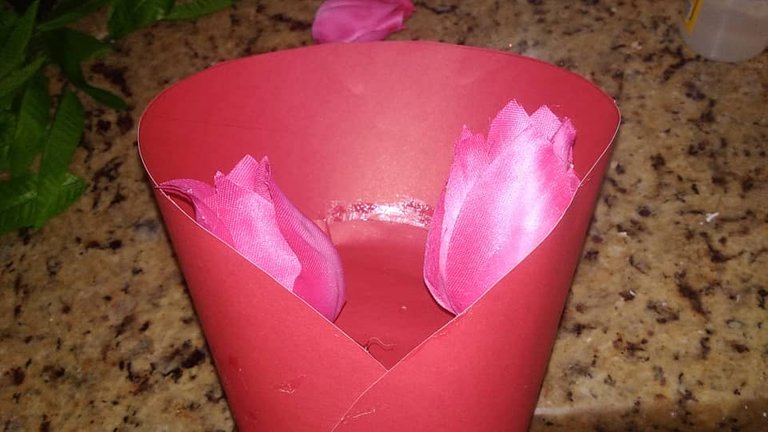
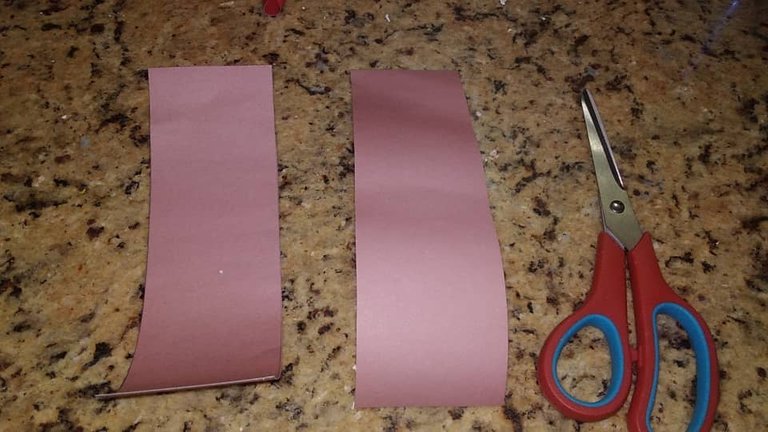
With scissors, we will cut out the silhouette of the circle and we will begin to roll it into a cone shape, you will observe the measure you want, if it is wider or thinner, we will glue the excess part with silicone.
It is important that the central part remains in the shape of a v, to provide more design to the base of the bouquet.
Note: a photo was taken of one of the cones (red), so that you can observe the process of rolling it up and gluing it, in our case, we made 4 of them.
Segundo Paso:
Con una tijera, recortaremos la silueta del círculo y comenzaremos a enrollar en forma de cono, usted va observando la medida que desee, si más ancho o delgado, pegaremos con silicón la parte sobrante.
Es importante, que la parte central, nos quede en forma de v, para brindarle más diseño a la base del ramo.
Nota: se le tomó, foto a uno de los conos (rojo), para que observarán, el proceso de enrollarlo y pegarlo, en nuestro caso, realizamos 4 de ellos.

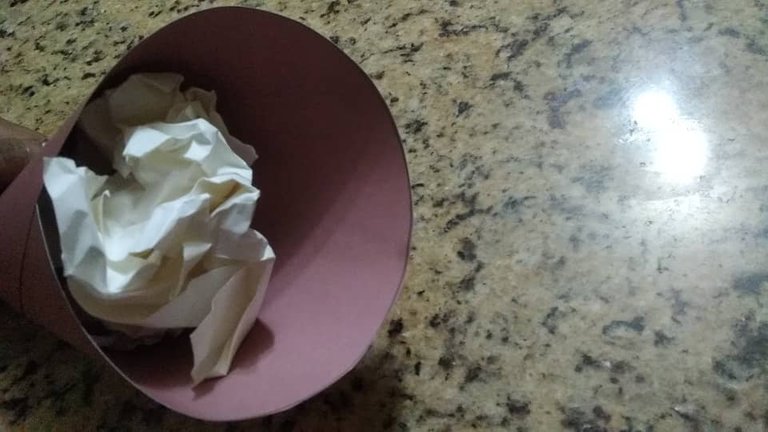
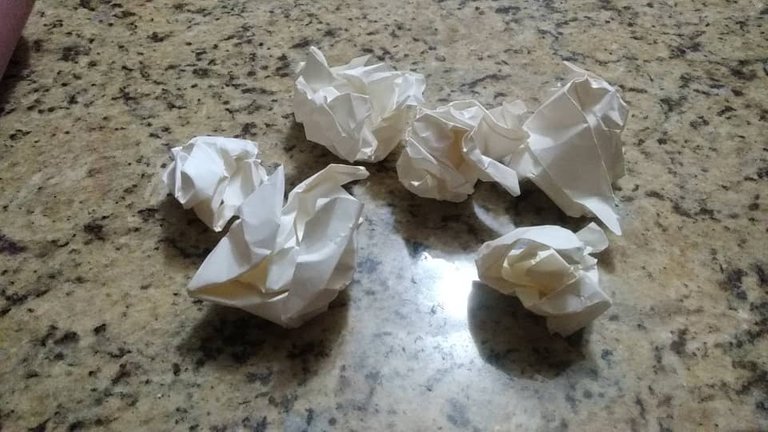
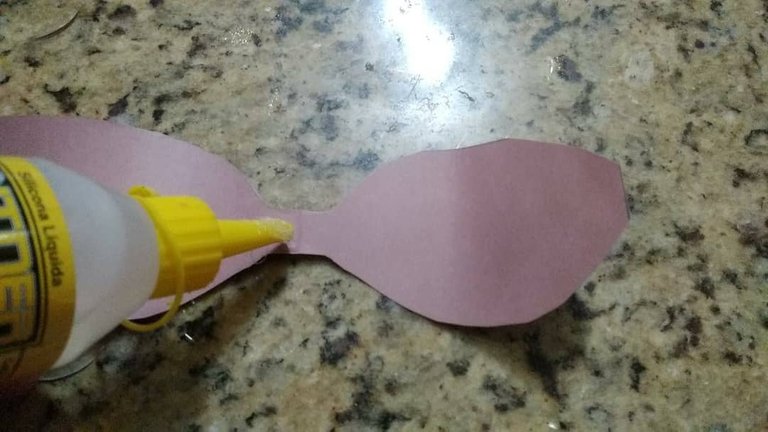
Third step:
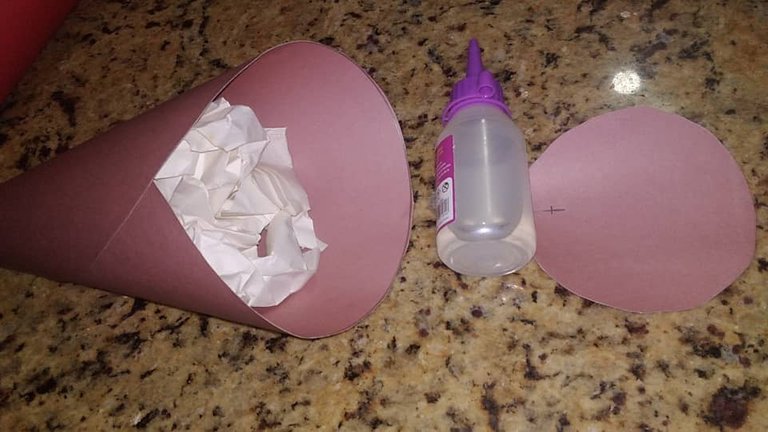
Then, when we have the base of the bouquet ready, made and glued, we will start with the white leaves, fold them in half and with scissors we will cut, to make balls of paper and fill it inside the cone, in order to give it more strength and toughness to the bouquet.
Next, with a piece of cardboard and a pencil, we will draw a circle, with the measurement of the bottom of the cone, then, we will cut it and with a liquid silicone, we will glue the lid that we made, inside the cone, to cover the paper balls.
Note: It is important that the circle covers all the spaces inside the cone, since it will be the base to place the buttons of artificial flowers. (to see photos)
Tercer Paso:
Luego, que tenemos listo, elaborado y pegado la base del ramo, comenzaremos, con las hojas blancas, doblarlas a la mitad y con una tijera recortaremos, para hacer bolas de papel e ir rellenándolo dentro del cono, con la finalidad, de darle más fuerza y dureza al ramo.
Seguidamente, con un retazo de cartulina y un lápiz, dibujaremos un círculo, con la medida del fondo del cono, luego, recortaremos y con un silicón líquido, pegaremos la tapa que elaboramos, dentro del cono, para tapar las bolitas de papel.
Nota: Es importante, que el círculo, cubra todos los espacios dentro del cono, ya que será la base, para colocar, los botones, de flores artificiales. (ver fotos)
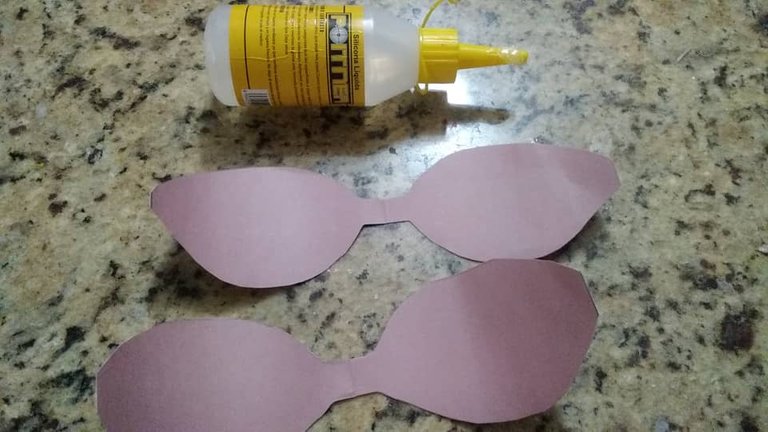
Fourth step:
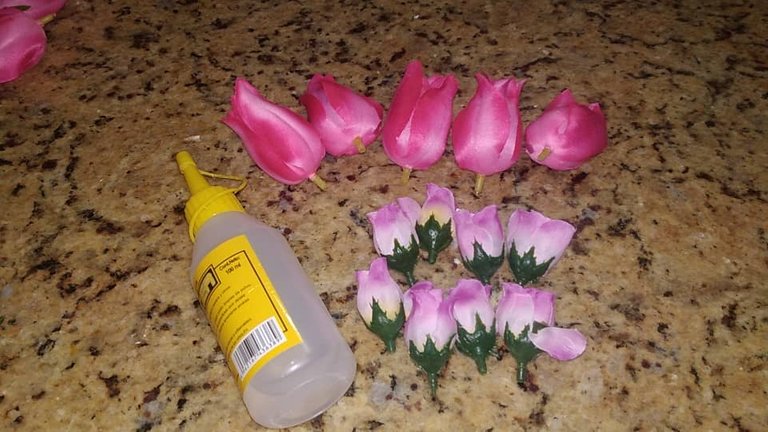
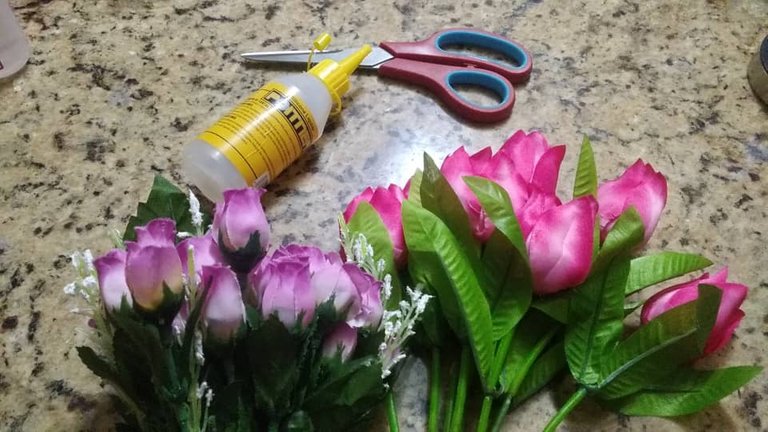
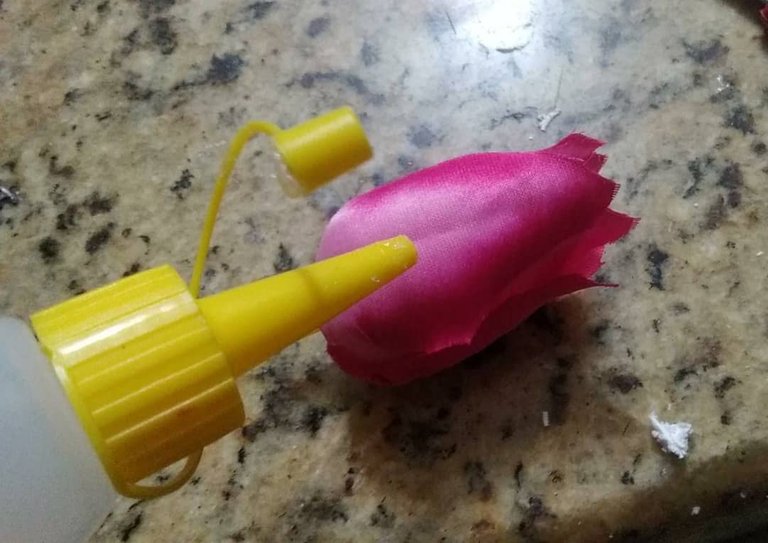
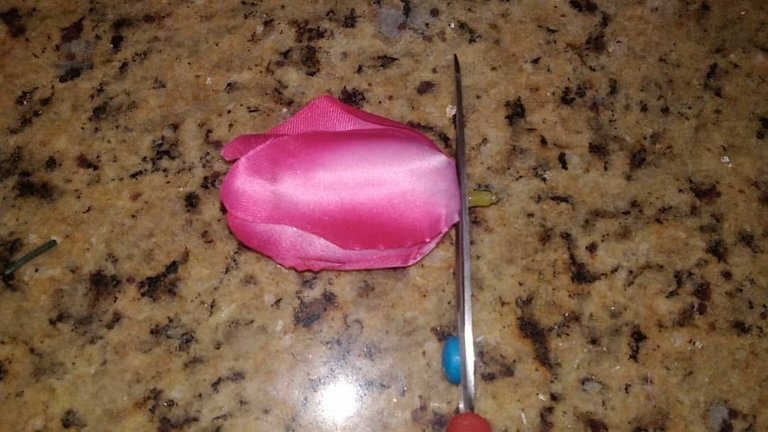
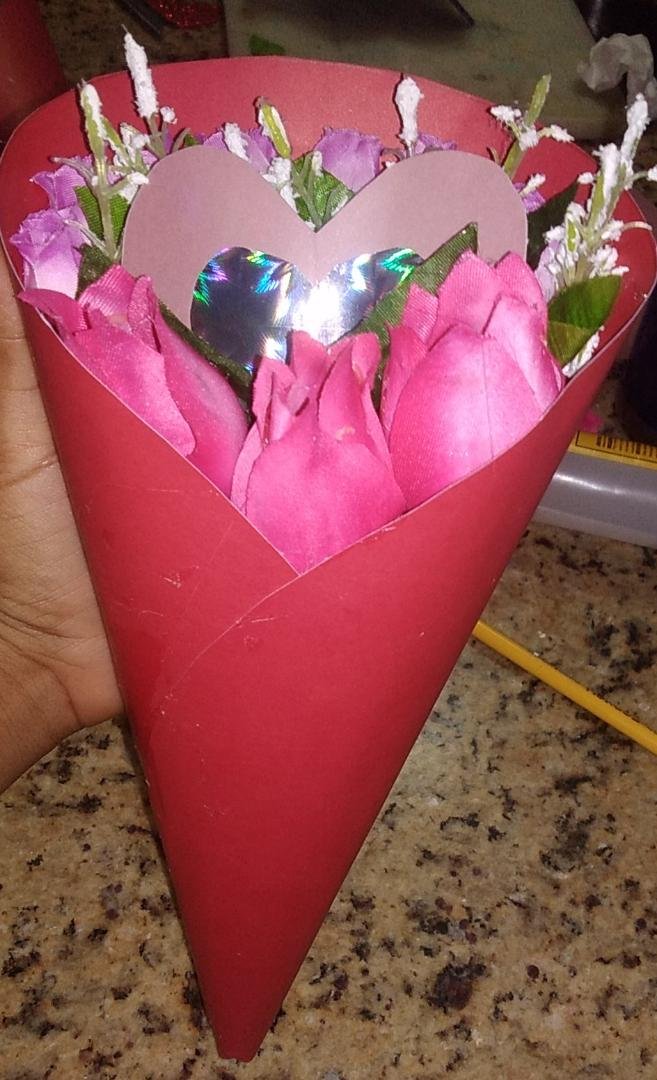
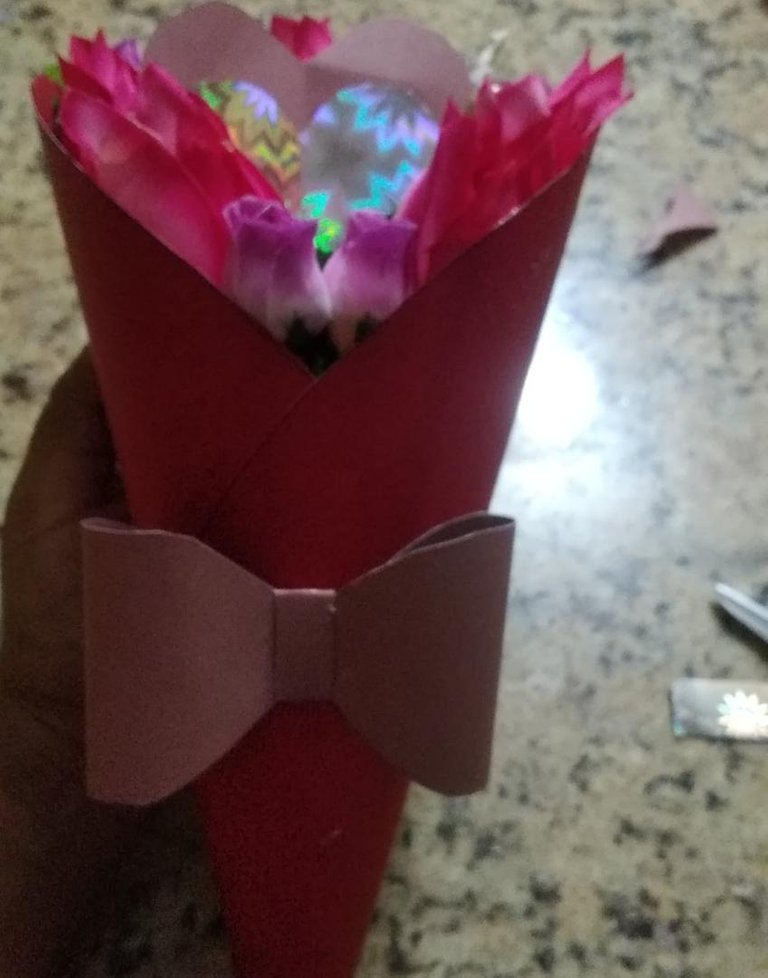
We will begin with the design of the bouquets of flowers, with scissors we will cut the ends, to be able to paste with liquid silicone, the large and small flowers around the bouquet, inside we will locate and glue the leaves with silicone, then, if you wish, You can place, inside the flowers, a heart of the same color as the base of the bouquet. You can design it as you like. (to see photos)
Cuarto Paso:
Comenzaremos, con el diseño de los ramos de flores, con una tijera recortaremos las puntas, para poder pegar con silicón líquido, las flores grandes y pequeñas alrededor del ramo, adentro ubicaremos y pegaremos con silicón las hojas, luego, si usted lo desea, puede colocar, dentro de las flores, un corazón del mismo color de la base del ramo. Usted puede diseñarlo a su gusto. (ver fotos)

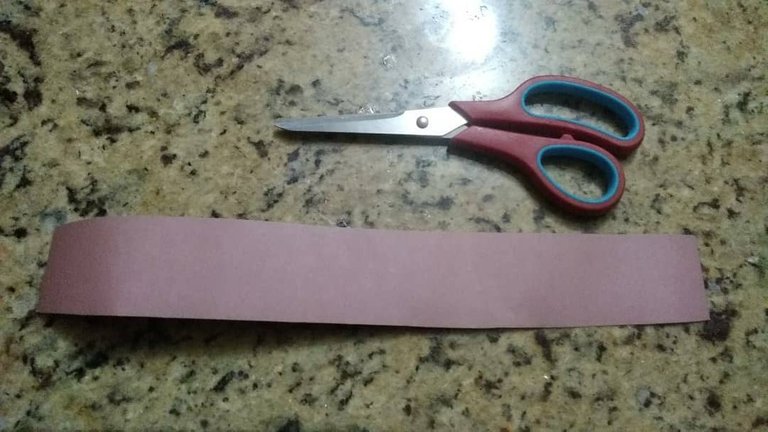
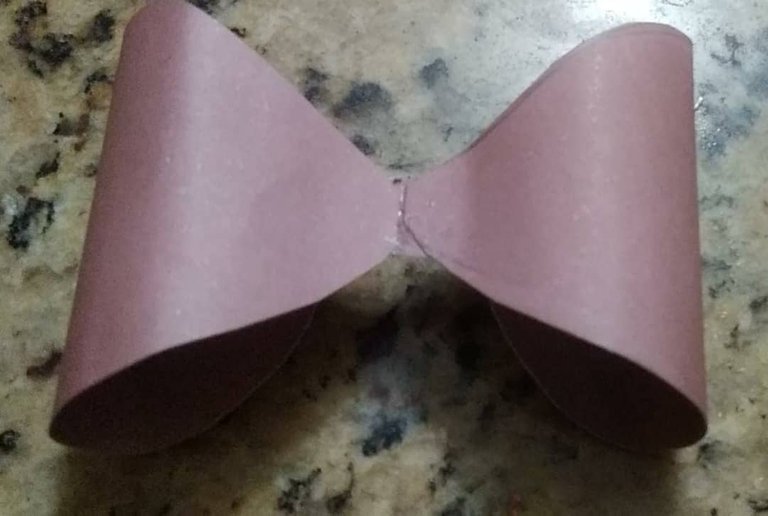
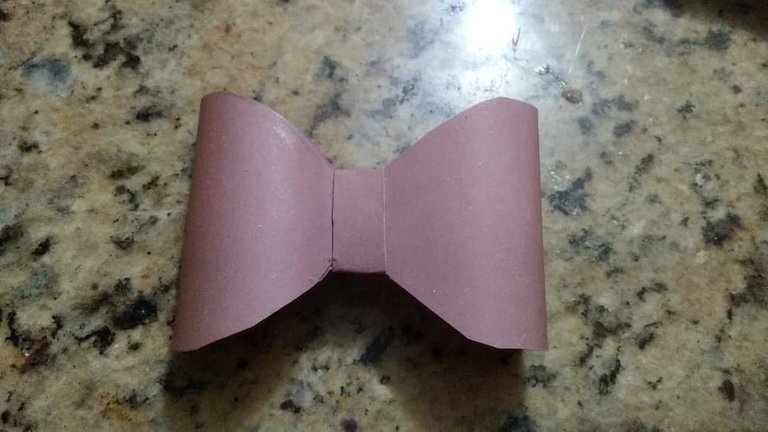
Fifth step:
Elaboration of the Simple Bow:
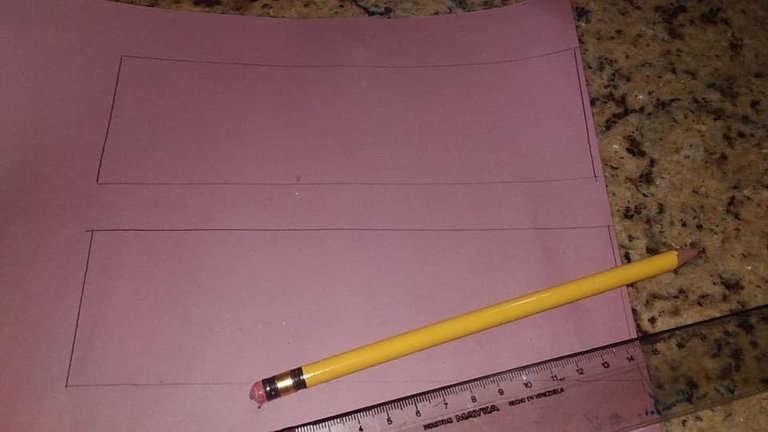
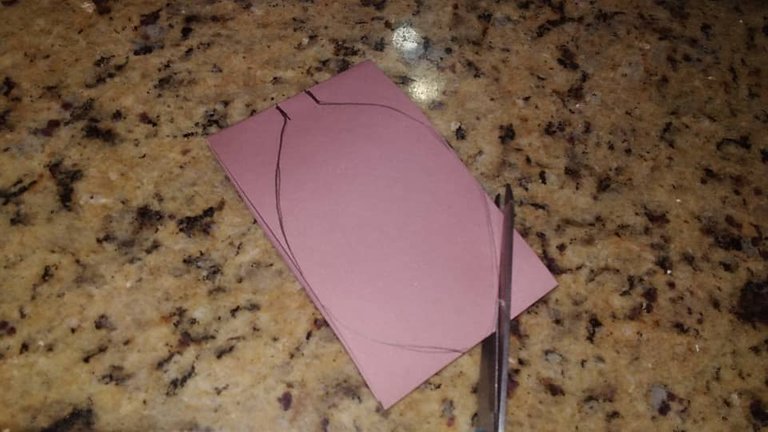
With a piece of cardboard, a pencil and a ruler, we will measure, 6 cm wide and 14 long, they will be the measures for the elaboration of the bow, with scissors, we will cut the silhouette, folding it in half and along the line that we mark , to draw the shape of a leaf with a pencil. (to see photos)
Next, we will join the ends with silicone, forming the structure of the bow, with a piece of cardboard, we will cut a strip, to roll it in the middle part and glue it with silicone.
And so, we would have ready, our simple bows, to decorate, our bouquets, (you can select the colors of your preference)
Quinto Paso:
Elaboración del Lazo Sencillo:
Con un retazo de cartulina, un lápiz y una regla, mediremos, 6 cm de ancho y 14 de largo, serán las medidas para la elaboración del lazo, con una tijera, recortaremos la silueta, doblándola a la mitad y por la línea que marcamos, para diseñar con un lápiz la forma de una hoja. (ver fotos)
Seguidamente, uniremos las puntas con silicón, formando la estructura del lazo, con un retazo de cartulina, recortaremos una tira, para enrollarla en la parte del medio y pegarla con silicón.
Y así, tendríamos listo, nuestros lazos sencillos, para decorar, nuestros ramos, (usted puede seleccionar los colores de su preferencia)
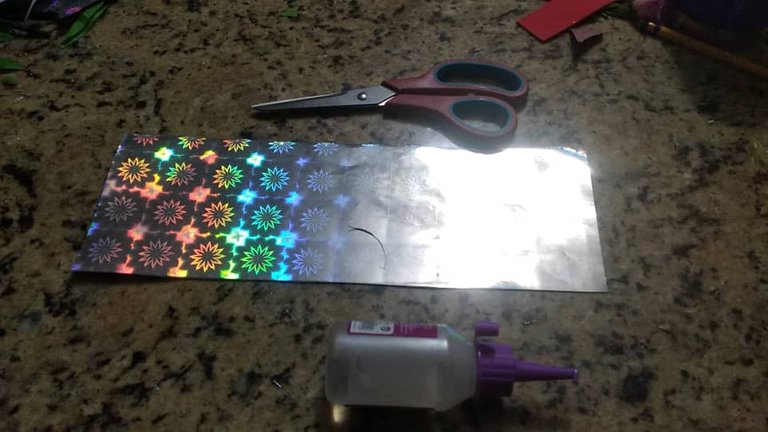
flower bouquets design
With the metallic paper, we will cut strips, to place them around the bouquet and the already made bow, we will paste it, two fingers, below the central part of the union of the v, placing it in the same row, of the heart, which was made , the same color.
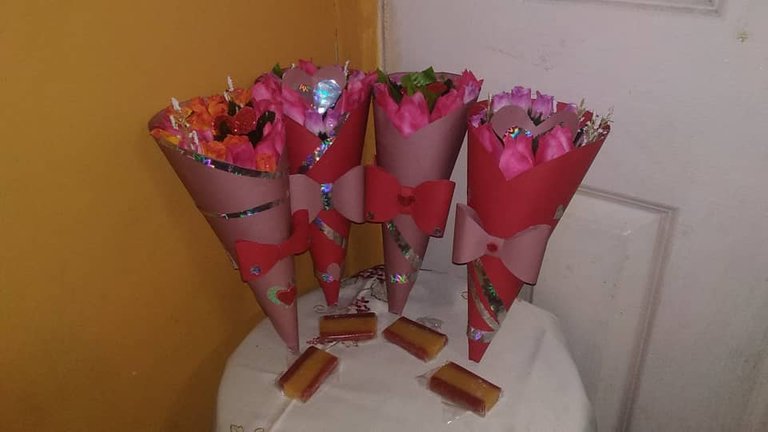
In my case, I made 4 of them, different, for a detail, to the teachers, from my son's school.
Diseño De Los Ramos de Flores
Con el papel metalizado, recortaremos tiras, para colocarlas alrededor del ramo y el lazo ya elaborado, lo pegaremos, dos dedos, más abajo de la parte central de la unión de la v, ubicándola en la misma hilera, del corazón, que se realizó, del mismo color.
En mi caso, elaboré 4 de ellos, diferentes, para un detalle, a las maestras, del colegio de mi hijo.
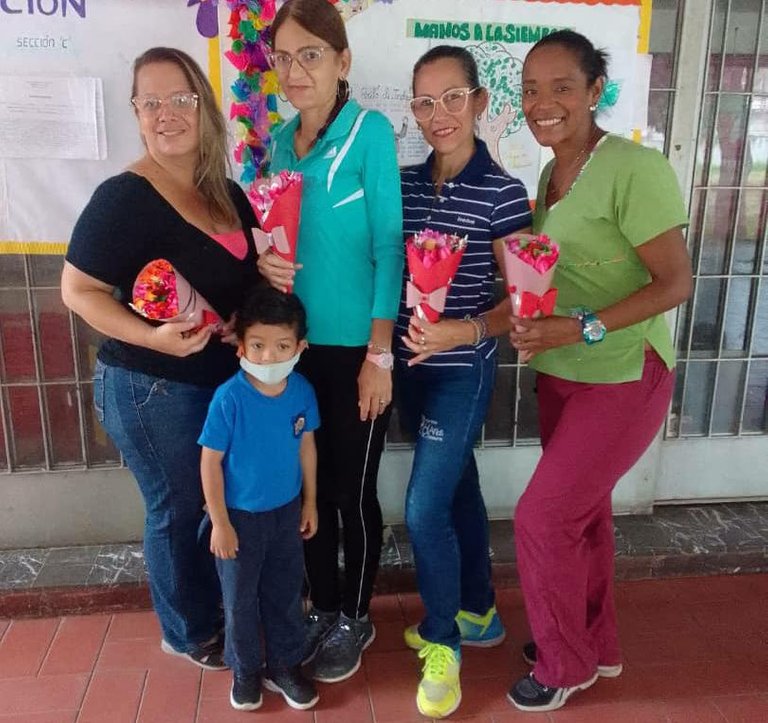
And so, we would have ready, the beautiful Bouquets, Of Artificial Flowers, for that special person, in my case, I decided to make it, so that my son will give it to his teacher and the other preschool teachers, for Mother's Day and in gratitude, to their great work, affection, effort and dedication, within the teaching - learning process, which they offer to the children.
A small sweet was added to each bouquet, for each teacher, you can add whatever you want.
Y así, tendríamos listos, los hermosos Ramos, De Flores Artificiales, para esa persona especial, en mi caso, decidí elaborarlo, para que mi hijo, se lo entregará a su maestra y las otras maestras del preescolar, por el Día de las Madres y en agradecimiento, a su gran labor, cariño, esfuerzo y dedicación, dentro el proceso de enseñanza - aprendizaje, que le brindan a los niños.
Se le integró, a cada ramo, un pequeño dulce, para cada maestra, usted puede añadirle, lo que usted desee.
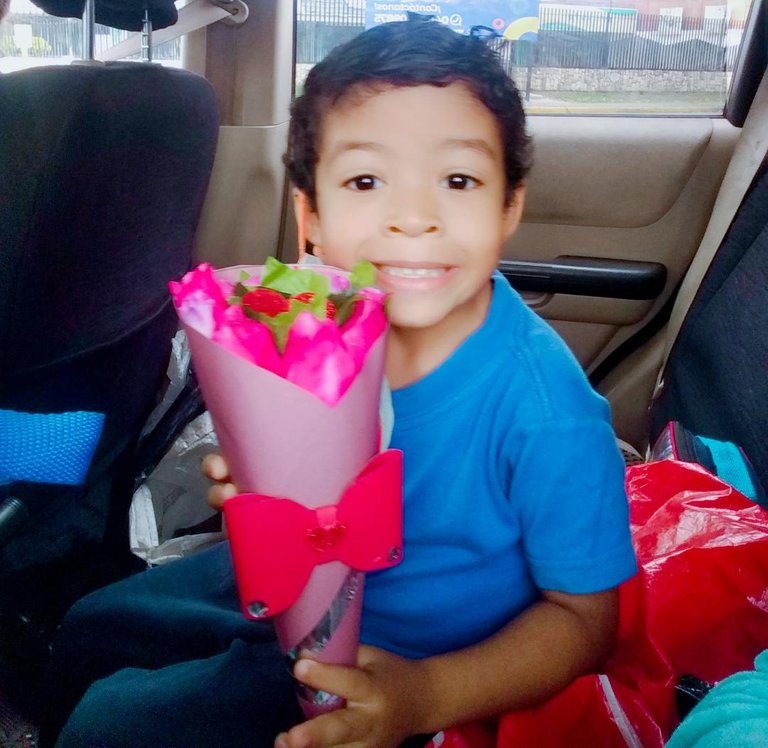
When my son arrived at his school, with the first bouquet of flowers, for his teacher, she was fascinated, with the detail that we had made, with much love, the other teachers, expressed that they wanted one and my son began, to give each of the teachers their little detail, which was a great surprise for them, because they did not expect it, that we would also give them that nice detail.
Cuando mi hijo, llegó a su escuela, con el primer Ramo de flores, para su maestra, ella quedó fascinada, con el detalle que le habíamos realizado, con mucho amor, las otras maestras, expresaban que querían uno y mi hijo, comenzó, a darle a cada una de las maestras, su detallito, que fue, una gran sorpresa para ellas, porque no se lo esperaban, que también, les daríamos, ese lindo detalle.
Waiting, you like this beautiful craft, for a special date, being a beautiful detail that will last over time, for its beautiful artificial flowers.
This would also be an alternative for those people who are allergic to flowers, to provide them with a beautiful detail on their day.
Thank you, each of you, for taking your time to read my post. Greetings
Esperando, les agrade, esta hermosa manualidad, para alguna fecha en especial, siendo, un hermoso detalle, que perdurará en el tiempo, por sus hermosas flores artificiales.
Esta, también sería una alternativa, para aquellas, personas, que son alérgicas a las flores, brindarles un hermoso detalle en su día.
Gracias, a cada uno de ustedes, por tomar de su tiempo, en leer mi post. Saludos

❤️Until next time ❤️ Hasta la Próxima❤️

❤️ All photos are my property taken with my Redmi Go smartphone
❤️ All separators are my property, free to use.
❤️ English it is not my native language, I help myself with translators to make these posts
❤️ ❤️ ❤️ ❤️ ❤️ ❤️
❤️ Todas las fotos son de mi propiedad tomadas con mi celular inteligente Redmi Go
❤️ Todos los separadores son de mi propiedad, libres de uso
❤️ El inglés no es mi idioma natal, me ayudo de traductor
I think those look great what a lovely M-day gift but I would love to try and make a cake version of it one day .
Hello, thanks for your comment, I'm glad you liked it. It would be a great idea, I hope to see it. Greetings @loadreaper
Thank you for sharing this amazing post on HIVE!
Your content got selected by our fellow curator @rezoanulvibes & you just received a little thank you via an upvote from our non-profit curation initiative!
You will be featured in one of our recurring curation compilations and on our pinterest boards! Both are aiming to offer you a stage to widen your audience within and outside of the DIY scene of hive.
Join the official DIYHub community on HIVE and show us more of your amazing work and feel free to connect with us and other DIYers via our discord server: https://discord.gg/mY5uCfQ !
If you want to support our goal to motivate other DIY/art/music/homesteading/... creators just delegate to us and earn 100% of your curation rewards!
Stay creative & hive on!
Hello, thank you for your unconditional support. Greetings @diyhub