Hola, colonias digitales que conforman el universo de Hive. Reciban un fuerte abrazo.
Hoy les traigo Un Viaje Creativo a través del Signo Piscis: La elegancia del Pez Koi
Hello, digital colonies that make up the Hive universe. Receive a big hug.
I hope you're doing well from the other side of the screen.
Today I bring you A Creative Journey through the Pisces Sign: The Elegance of the Koi Fish
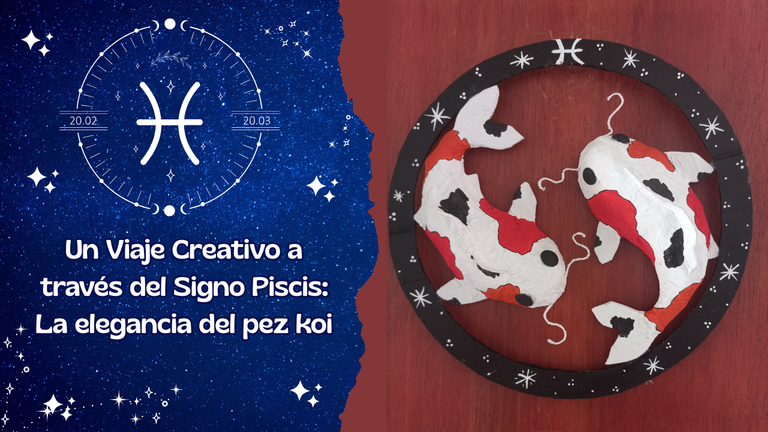
Hola a todos. Me emociona compartir con ustedes esta manualidad que combina creatividad, simbolismo y un toque personal. Este proyecto es muy especial para mí, ya que mi hijo mayor pertenece al signo Piscis, y quiero capturar la esencia de su signo en una creación que no solo sea divertida, sino que también celebre su personalidad única. Para darle vida, elegí como modelo el majestuoso pez koi, conocido por su elegancia y significado de perseverancia, transformación, fuerza y buena fortuna, cualidades que también se asocian con Piscis. Espero que lo disfruten tanto como yo al crear esta pieza única y significativa.
Acompáñenme mientras les muestro cómo esta idea toma forma.
Acompáñenme mientras les muestro cómo esta idea toma forma.
Hello everyone. I am excited to share with you this craft that combines creativity, symbolism and a personal touch. This project is very special to me, as my oldest son belongs to the sign of Pisces, and I want to capture the essence of his sign in a creation that is not only fun, but also celebrates his unique personality. To bring it to life, I chose as my model the majestic koi fish, known for its elegance and meaning of perseverance, transformation, strength and good fortune, qualities that are also associated with Pisces.I hope you enjoy it as much as I did creating this unique and meaningful piece.
Join me as I show you how this idea takes shape.
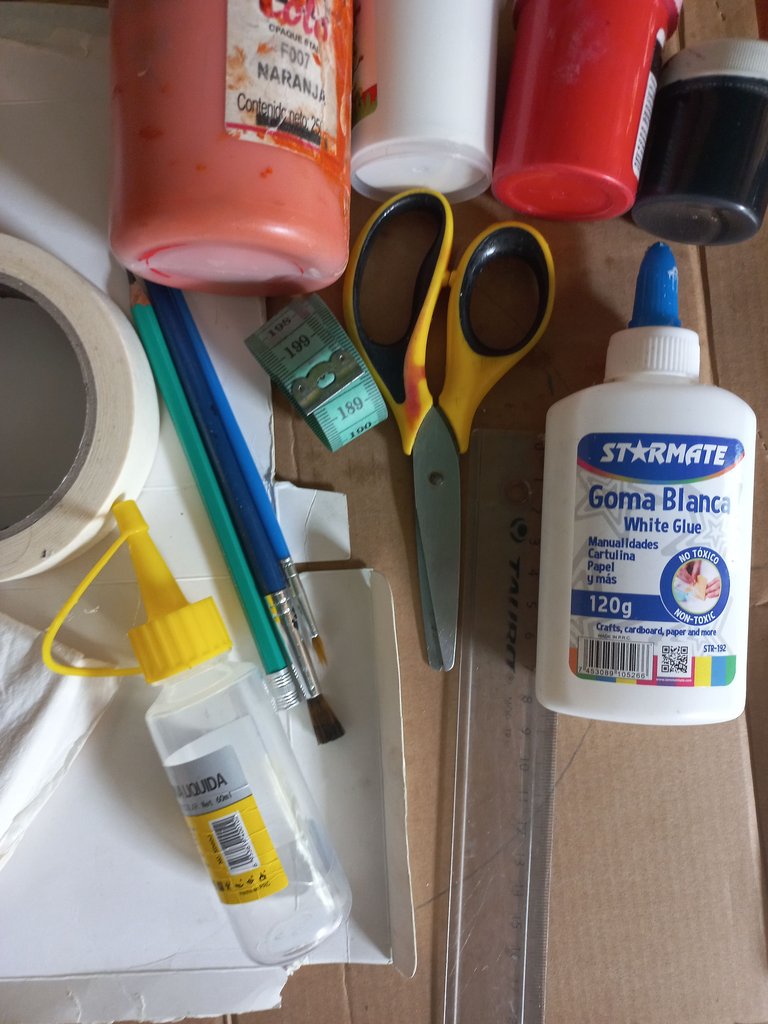
Materiales
1. Cartón Duro.
2. Cartón de Caja de cereal o de medicamentos.
3. Pega escolar.
4. Regla.
5. Cinta Métrica.
6. Tijeras.
7. Servilletas.
8. Cinta adhesiva de papel (Tirro).
9. Silicon Liquido.
10. Pinceles (Mediano y Fino).
11. Pintura al frio (Blanca, Roja, Naranja y Negra).
12. Diseño de pez Koi.
13. Cordón Fino (24 centímetros).
14. Trozo de foami negro.
Materials
1. Hardboard.
2. Cereal or medicine box cardboard.
3. School glue.
4. Ruler.
5. Tape measure.
6. Scissors.
7. Napkins.
8. Adhesive paper tape (Tirro).
9. Liquid Silicon.
10. Brushes (Medium and Fine).
11. Cold paint (White, Red, Orange and Black).
12. Koi fish design.
13. Thin cord (24 centimeters).
14. Piece of black foami.
 |  |
|---|
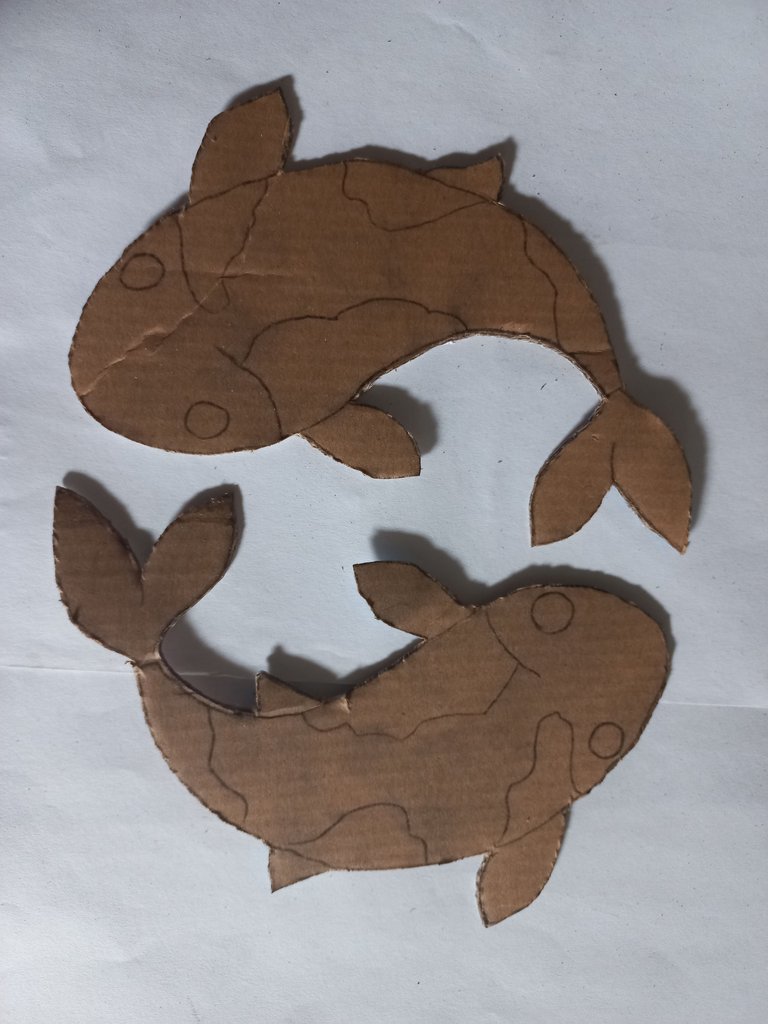
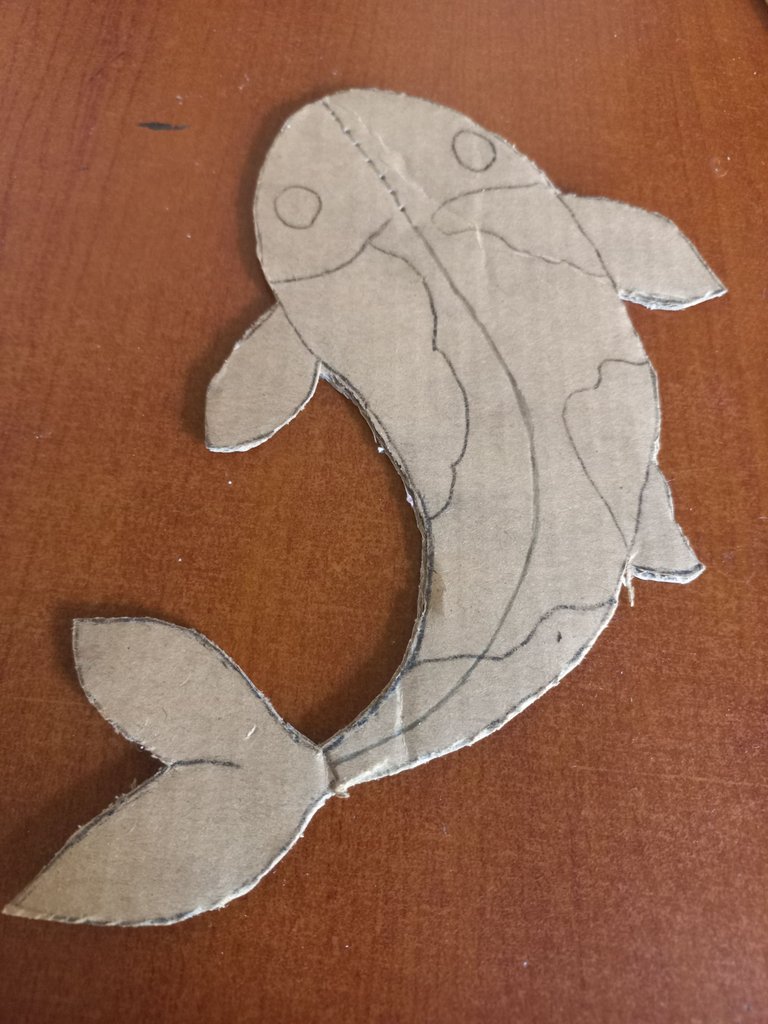
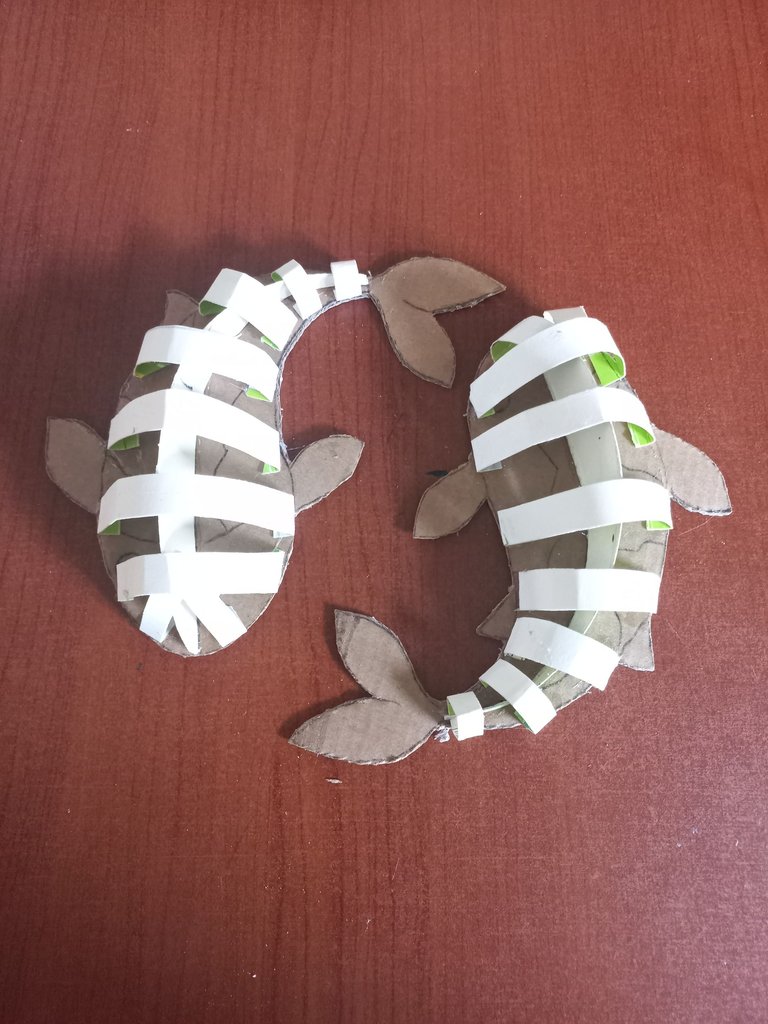
Para comenzar, recortaremos cuidadosamente las imágenes de los peces koi siguiendo sus contornos. Luego, utilizando una regla, trazamos una línea que divida el diseño por la mitad. Esta línea debe ir desde la punta de la cabeza del pez hasta el inicio de su cola, tenemos que ser cuidadosos y precisos en el trazado.
To begin, carefully cut out the koi fish images following their outlines. Then, using a ruler, we draw a line that divides the design in half. This line should go from the tip of the fish's head to the beginning of its tail, we have to be careful and precise in the drawing.
 |  |  |
|---|
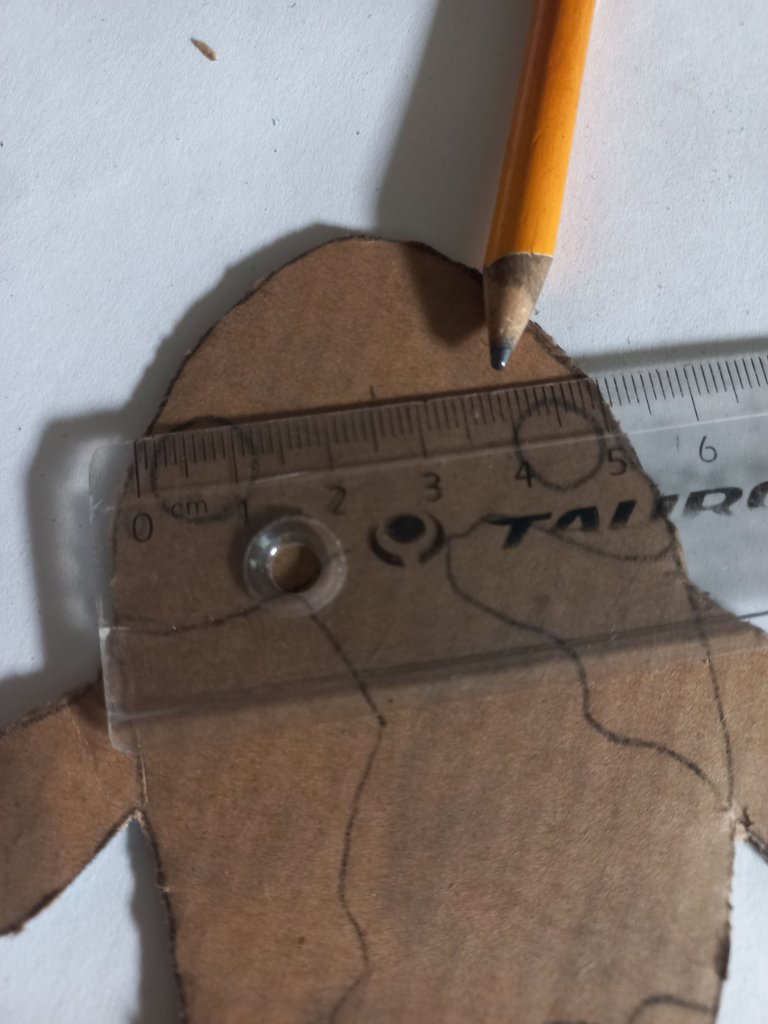
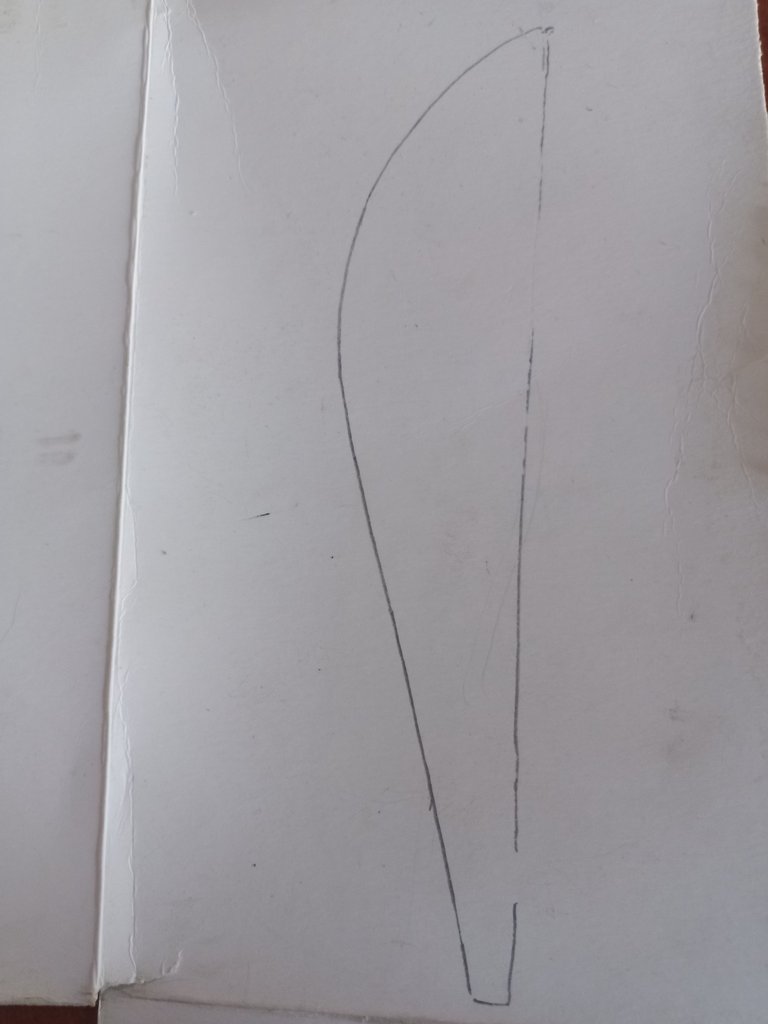
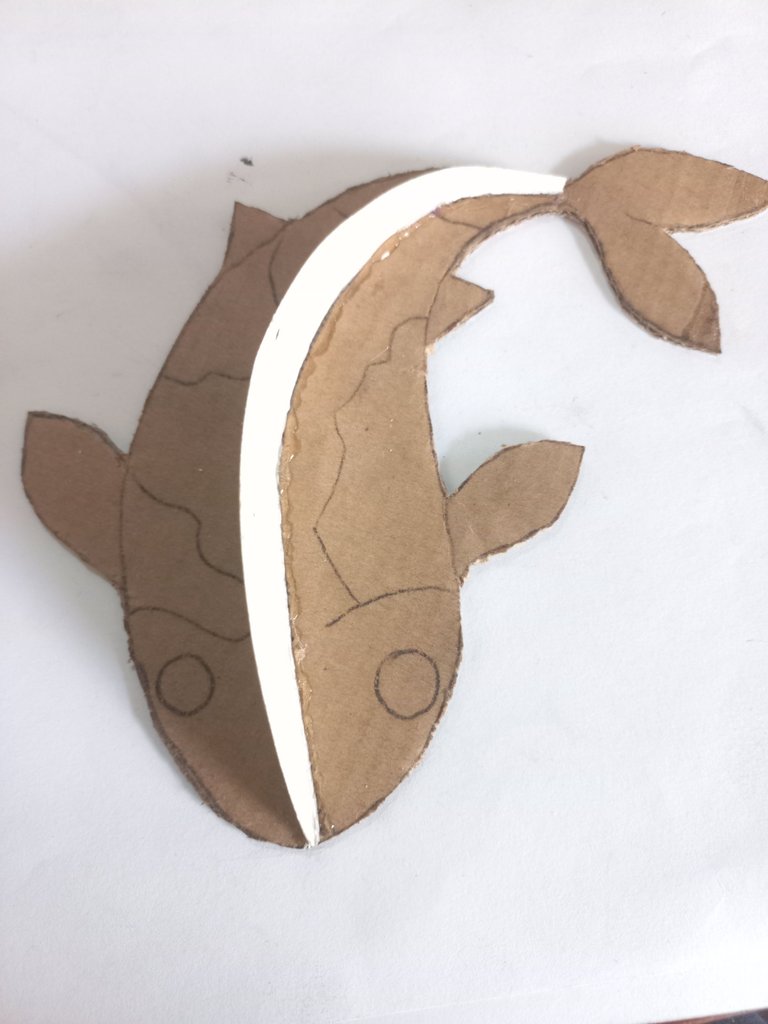
Con el centro ya definido, utilizaremos esta medida para diseñar una plantilla. Para ello, recortamos un pedazo del cartón de una caja de cereal o de medicamentos, ya que su flexibilidad lo hace ideal para adaptarse a la curvatura del diseño. La plantilla representará la mitad del diseño. Para determinar el largo exacto, usaremos la cinta métrica y seguiremos la línea que trazamos previamente, asegurándonos de tomar la medida con precisión. Luego, recortaremos la plantilla según la medida y la pegamos cuidadosamente con silicón a lo largo de la línea ya marcada.
With the center already defined, we will use this measurement to design a template. To do this, we cut out a piece of cardboard from a cereal or medicine box, since its flexibility makes it ideal for adapting to the curvature of the design. The template will represent half of the design. To determine the exact length, we will use the tape measure and follow the line we previously drew, making sure to take the measurement accurately. Then, we will cut the template according to the measurement and carefully glue it with silicone along the line already marked.
 |  |
|---|
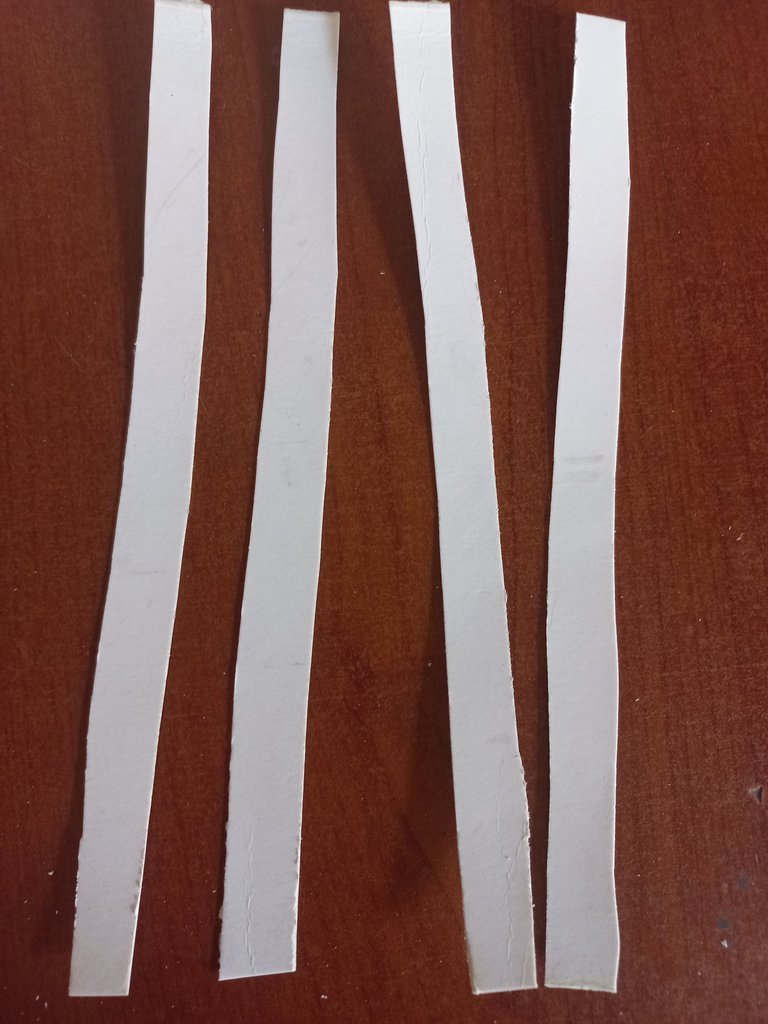
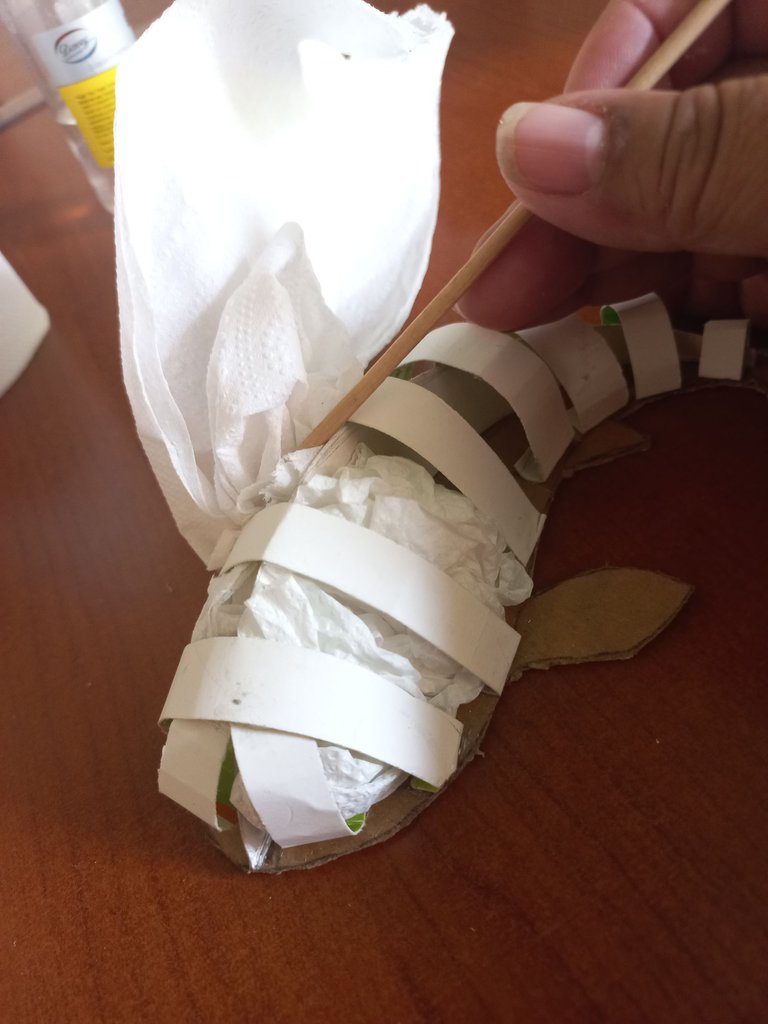
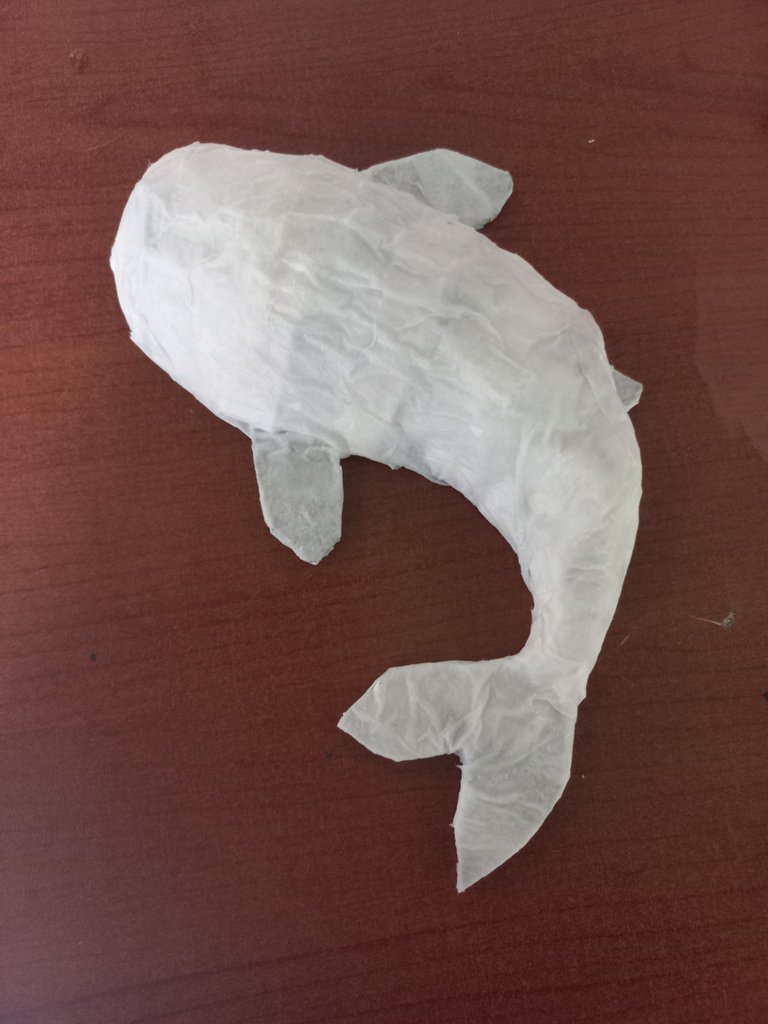
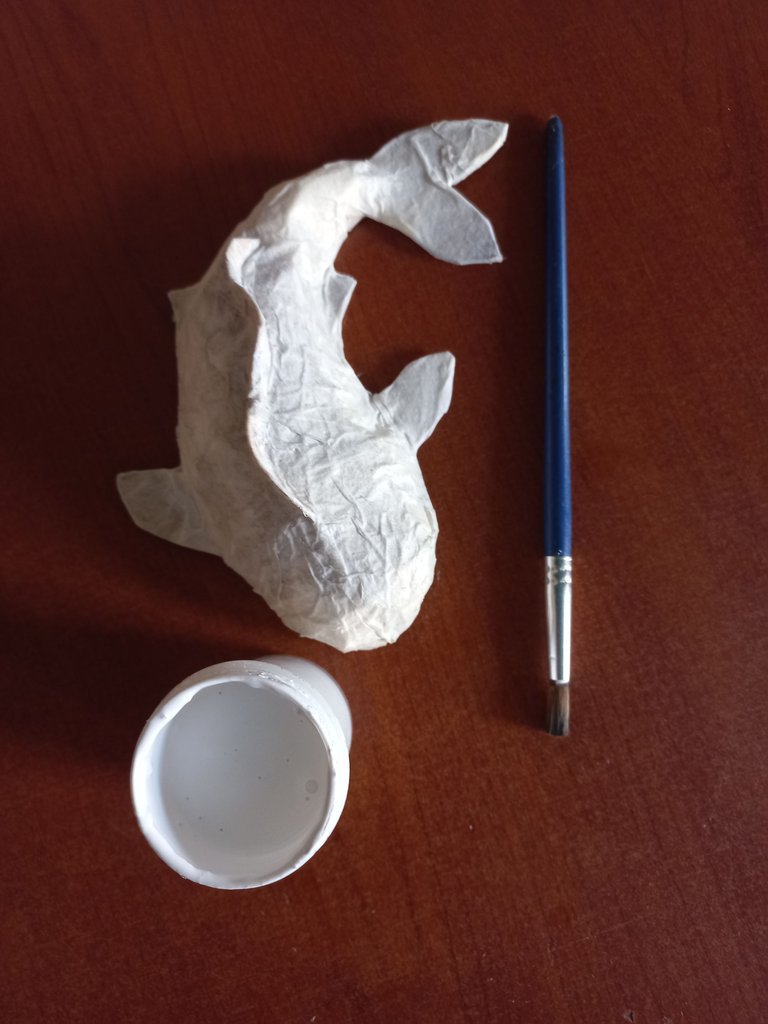
El siguiente paso cortaremos tiras del cartón flexible de aproximadamente un centímetro de ancho. Estas tiras servirán para cubrir todo el cuerpo del pez, asegurándonos que quede completamente recubierto. A continuación, procedemos a rellenar el interior del pez con servilletas, utilizando un objeto fino como un palillo o un pincel. Esto facilitará que las servilletas se acomoden correctamente y cubran todos los espacios interiores de manera uniforme.
The next step is to cut strips of flexible cardboard about one centimeter wide. These strips will be used to cover the entire body of the fish, making sure it is completely covered. Next, we proceed to fill the inside of the fish with napkins, using a thin object such as a toothpick or a paintbrush. This will make it easier for the napkins to fit correctly and cover all the interior spaces evenly.
 |  |
|---|---|
 |  |
| - | - |
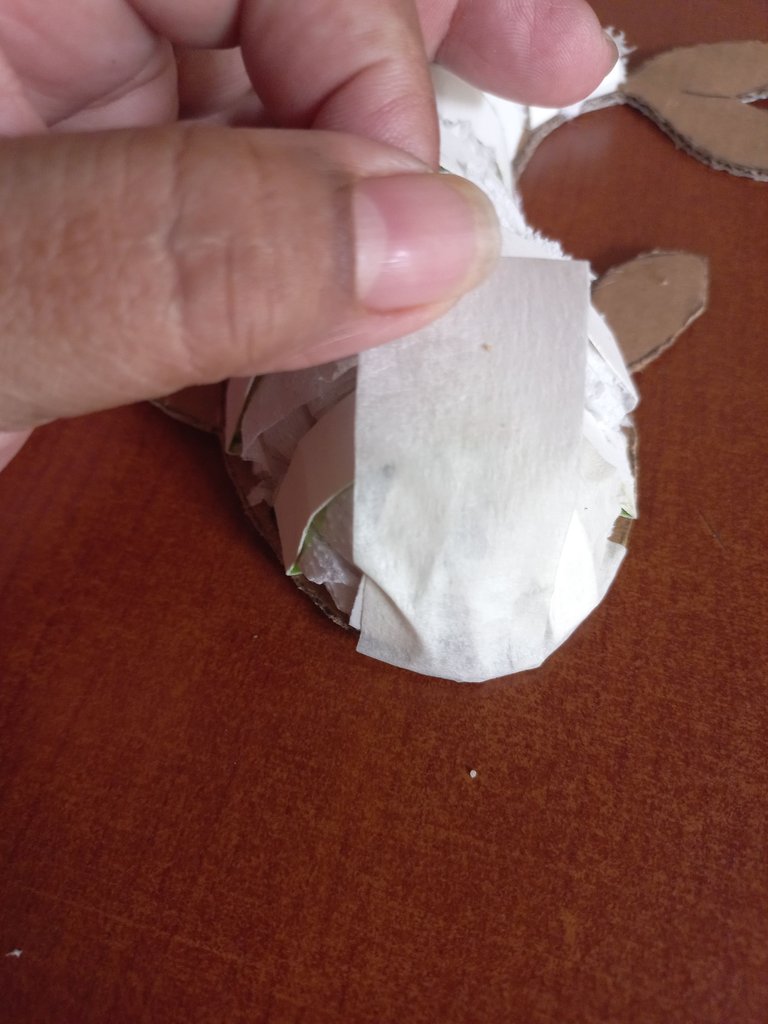
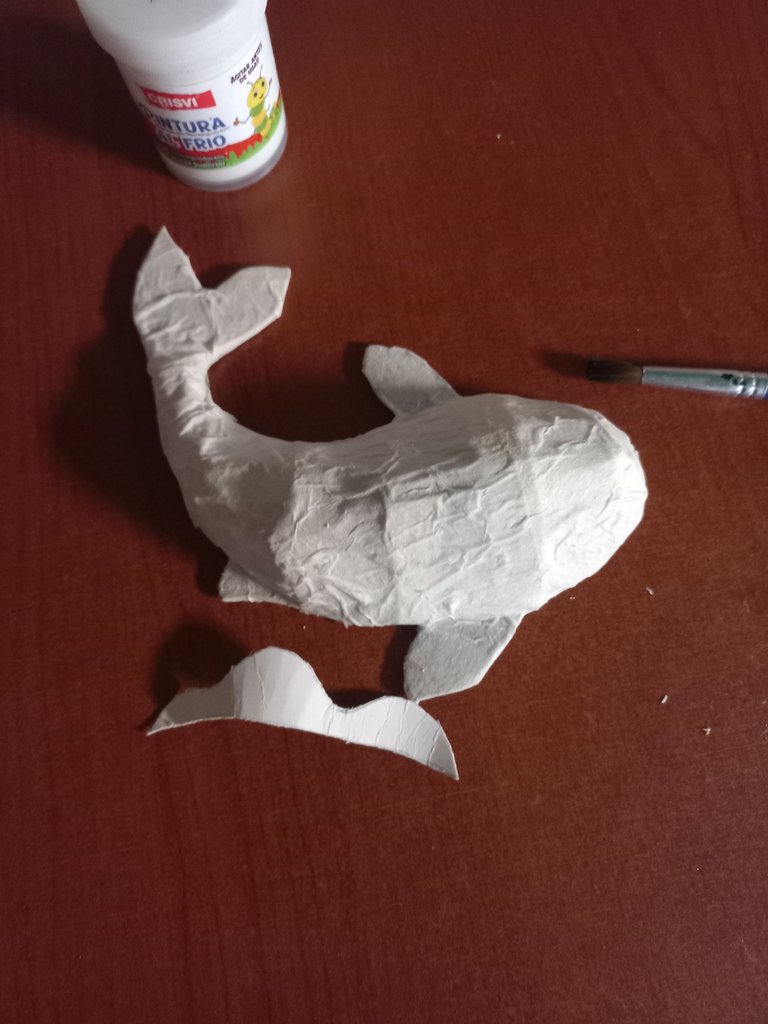
En este paso, cubriremos todo el cuerpo del pez con tirro, asegurándonos de que quede completamente sellado. A continuación, prepararemos una mezcla utilizando 70% de pega escolar y 30% de agua, lo mesclaremos bien hasta obtener una consistencia uniforme. Cortaremos las servilletas en pequeños trozos y, con la ayuda de un pincel, sumergiremos cada trozo en la mezcla. Utilizaremos estos trozos para cubrir todo el pez, aplicándolos cuidadosamente hasta que toda la superficie esté cubierta de manera uniforme.
In this step, we will cover the entire body of the fish with tyro, making sure it is completely sealed. Next, prepare a mixture using 70% school glue and 30% water, mix well until a uniform consistency is obtained. We will cut the napkins into small pieces and, with the help of a brush, we will dip each piece into the mixture. Use these pieces to cover the entire fish, applying them carefully until the entire surface is evenly covered.
 |  |  |
|---|
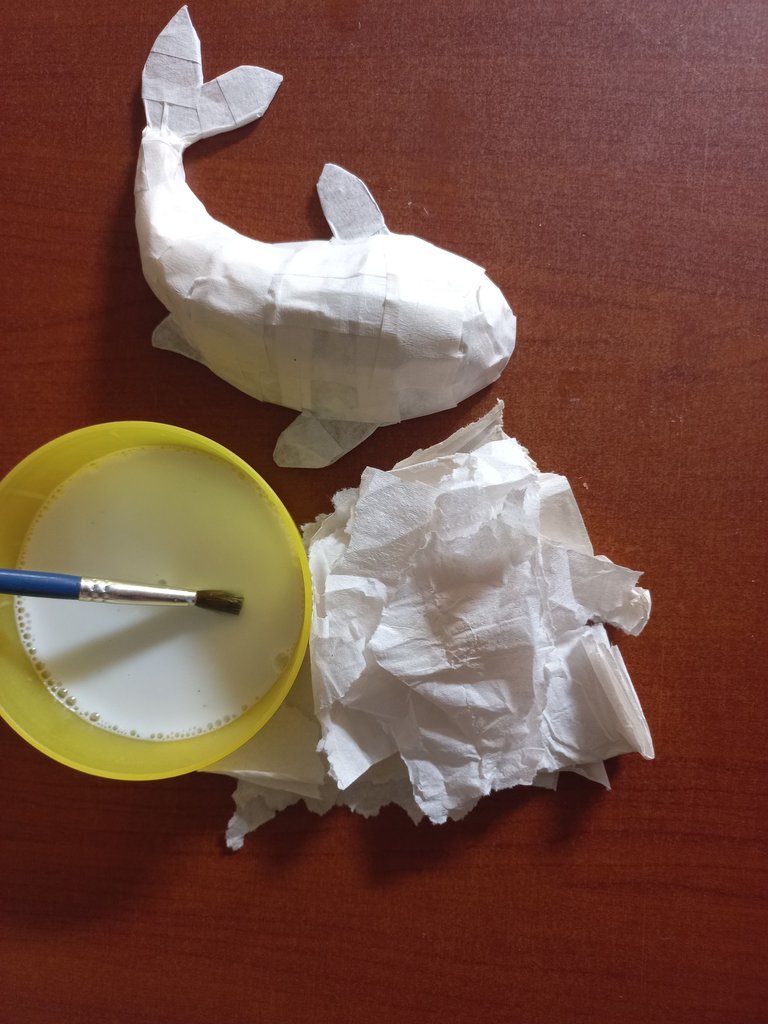
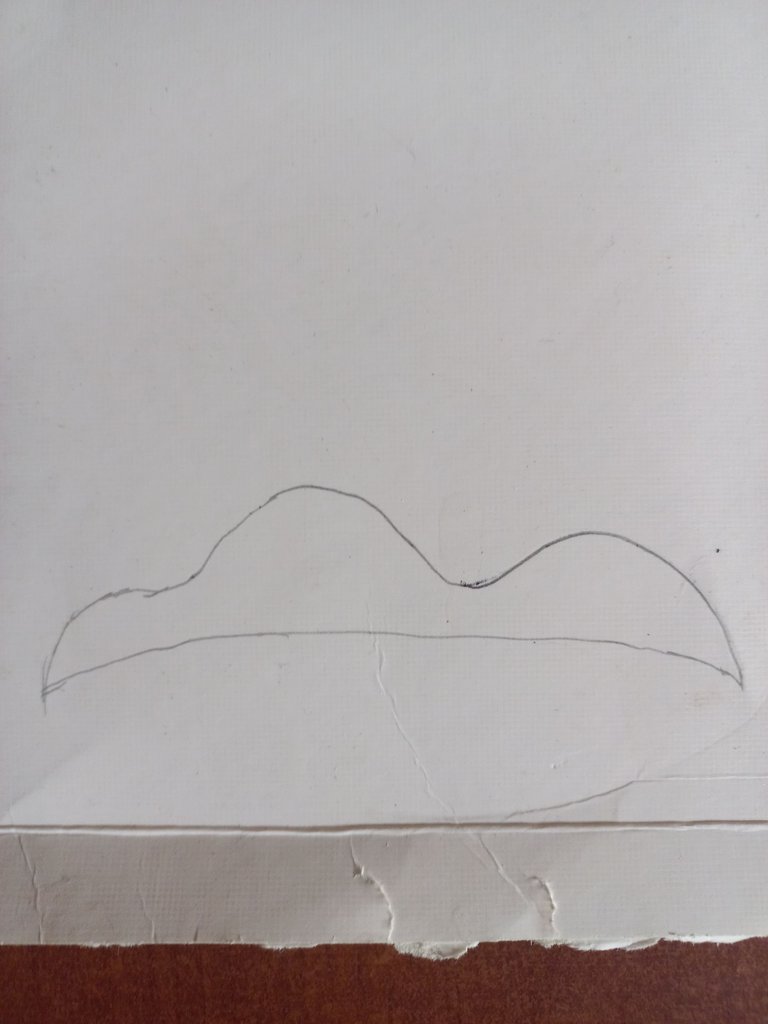
En este paso vamos a darle vida a la aleta dorsal. Para ello, tomaremos nuestro cartón flexible y trazaremos una línea con forma semi curva de aproximadamente 8 centímetros (recuerden que esta medida puede variar según el tamaño de la pieza principal). Para darle ese toque especial de realismo, dibujaremos pequeñas ondas en la parte superior de la aleta.
Una vez lista, con ayuda de silicón, la fijaremos en el lomo de la pieza principal, cuidando de darle una ligera curvatura para que luzca aún más dinámica. Luego, aplicaremos la misma técnica de cobertura con servilletas que usamos para el cuerpo del pez.
Una vez lista, con ayuda de silicón, la fijaremos en el lomo de la pieza principal, cuidando de darle una ligera curvatura para que luzca aún más dinámica. Luego, aplicaremos la misma técnica de cobertura con servilletas que usamos para el cuerpo del pez.
In this step we are going to give life to the dorsal fin. To do this, we will take our flexible cardboard and draw a semi-curved line of approximately 8 centimeters (remember that this measurement may vary depending on the size of the main piece). To give it that special touch of realism, we will draw small waves on the upper part of the fin.
Once ready, with the help of silicone, we will fix it on the back of the main piece, taking care to give it a slight curvature to make it look even more dynamic. Then, we will apply the same napkin covering technique we used for the body of the fish.
 |  |  |
|---|
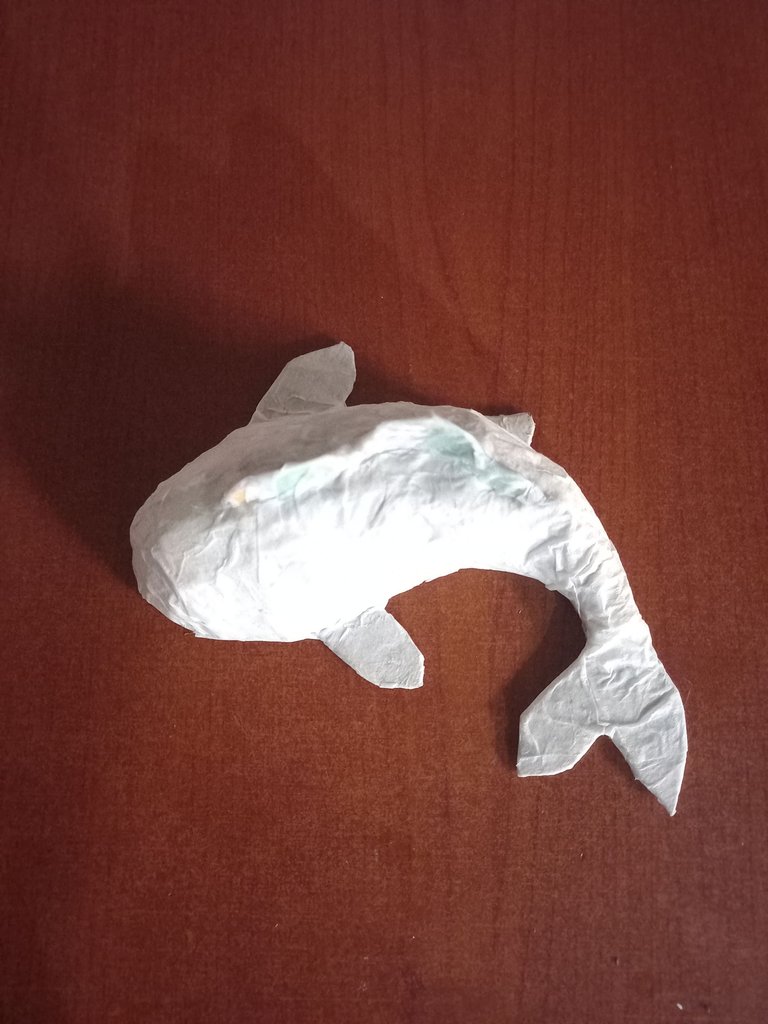
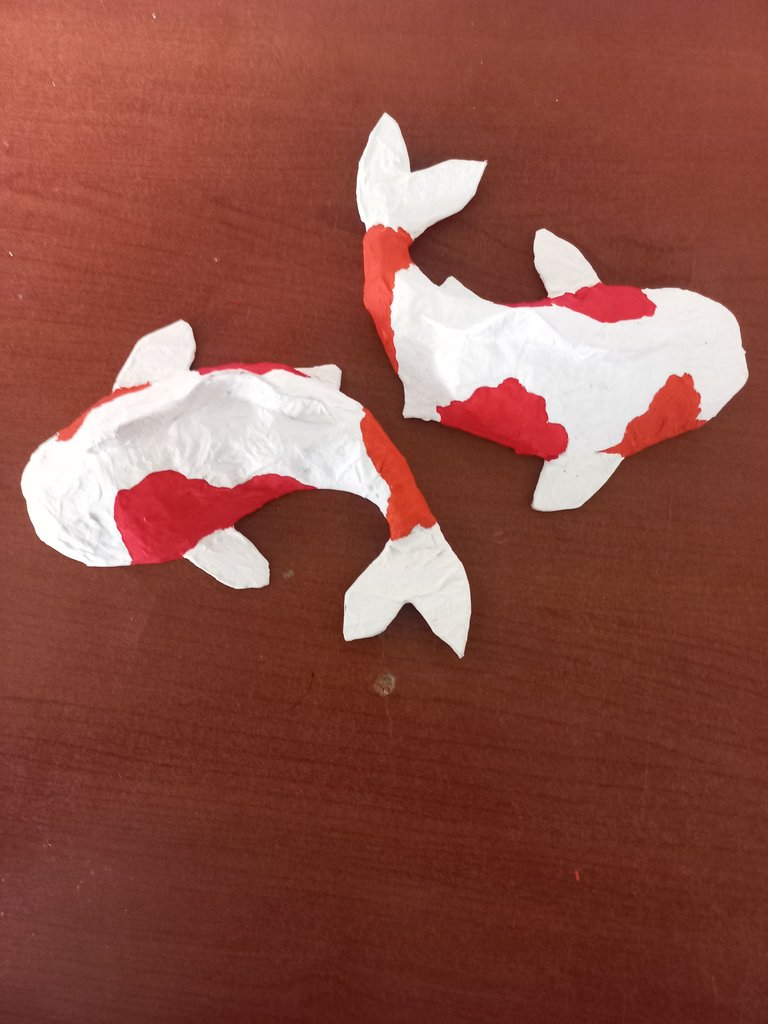
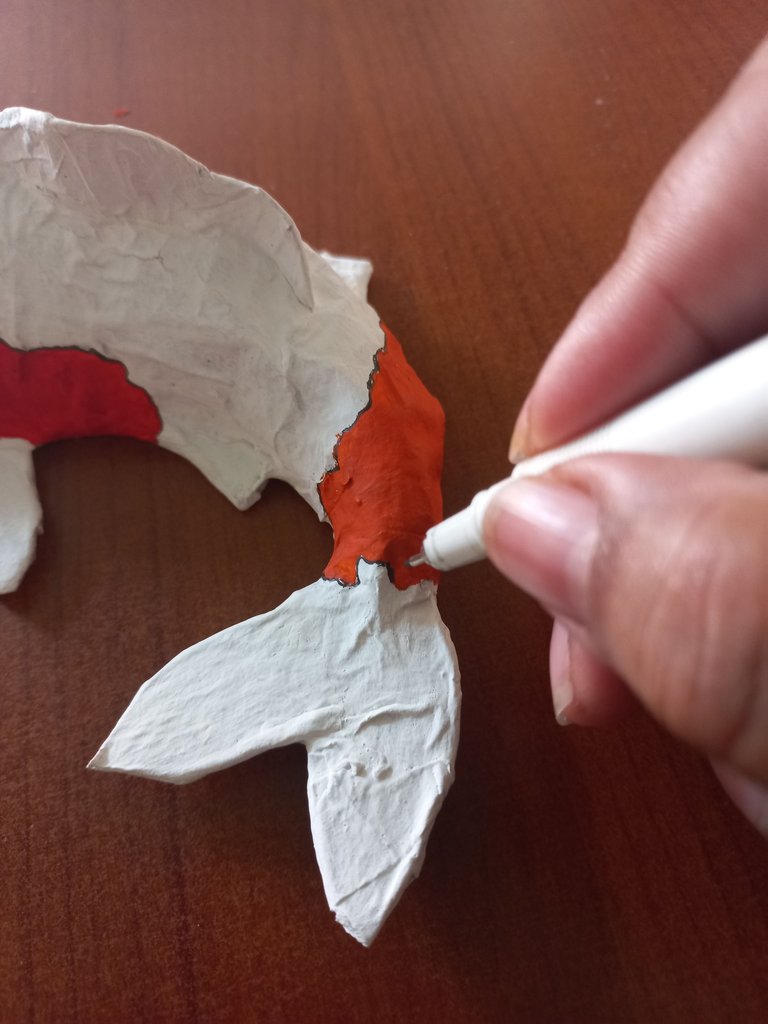
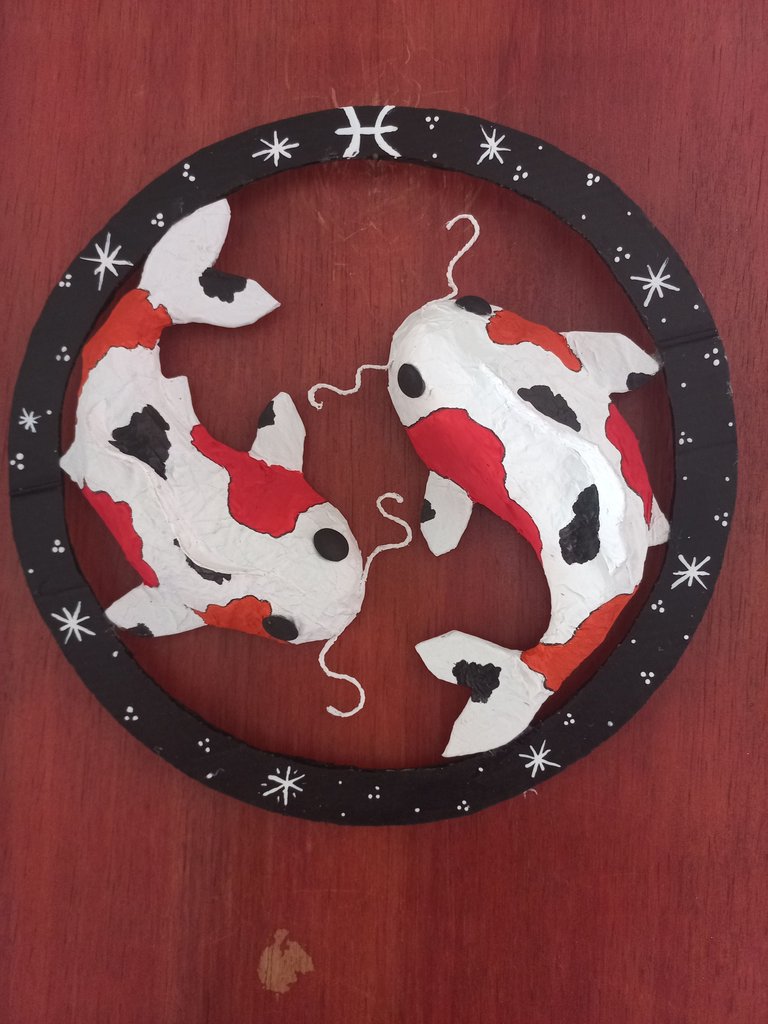
Es hora de darle el característico colorido del pez Koi. Comenzaremos pintando toda la pieza con un fondo blanco, asegurándonos de cubrir cada rincón para crear una base uniforme y brillante. Una vez que la pintura esté completamente seca, daremos el siguiente paso: añadiremos las icónicas manchas en tonos naranja, rojo y negra. Las manchas deben ser de diferentes tamaños y formas para lograr un efecto natural y realista. Para finalizar, delinearemos con un marcador negro de punta muy fina las manchas rojas y naranja que aportarán contraste.
It's time to give it the characteristic Koi fish coloring. We'll start by painting the entire piece with a white background, making sure to cover every corner to create a uniform, glossy base. Once the paint is completely dry, we'll take the next step: we'll add the iconic spots in shades of orange, red and black. The spots should be of different sizes and shapes to achieve a natural and realistic effect. Finally, we will outline with a very fine black marker the red and orange spots that will provide contrast.
 |  |  |
|---|
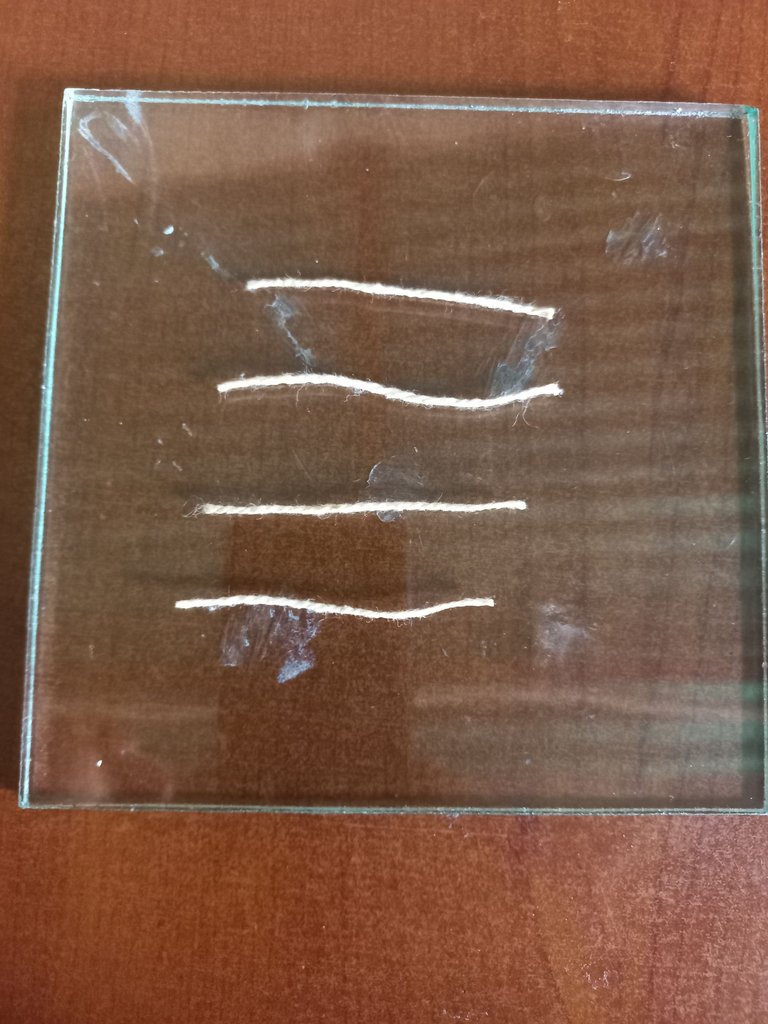
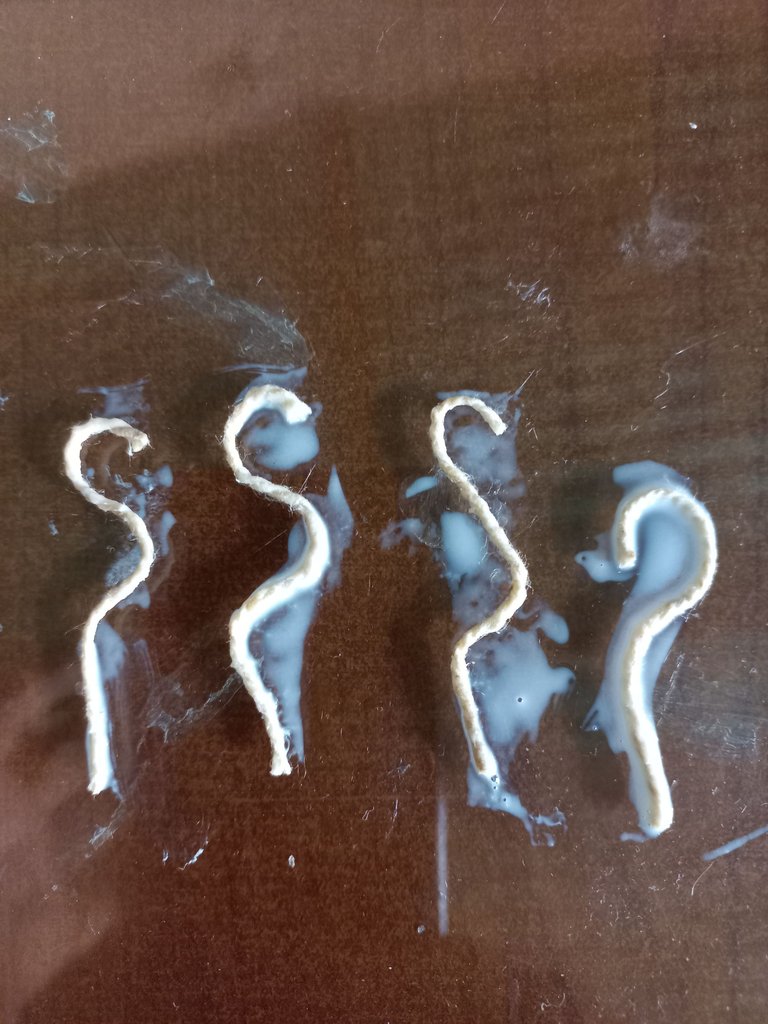
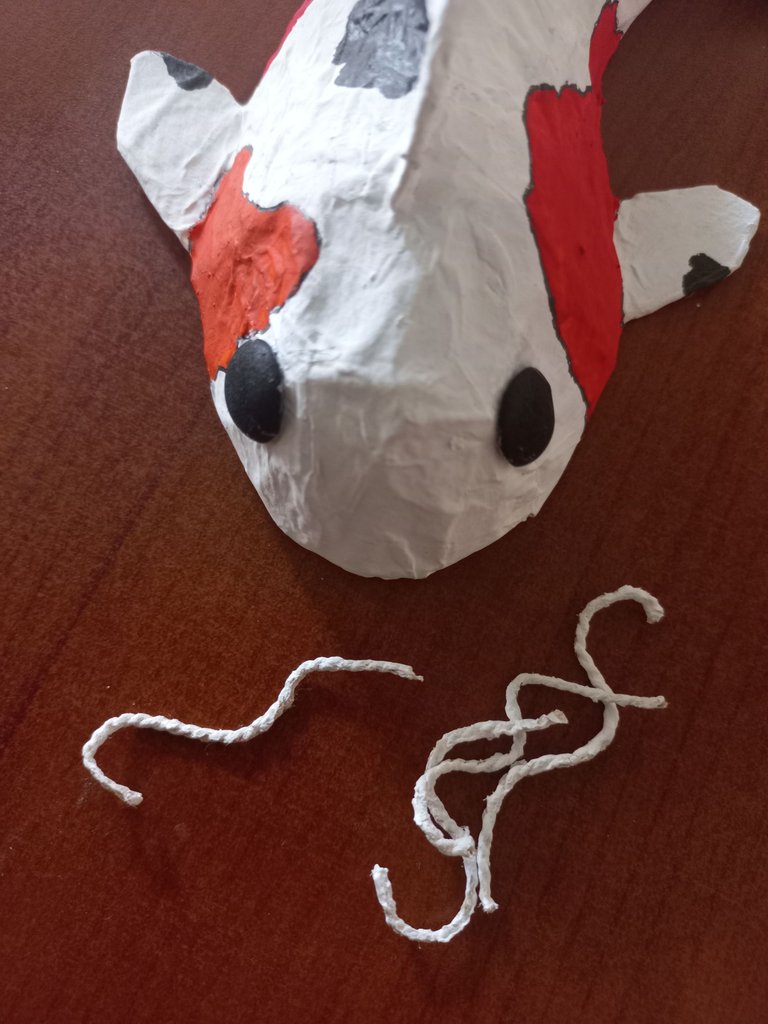
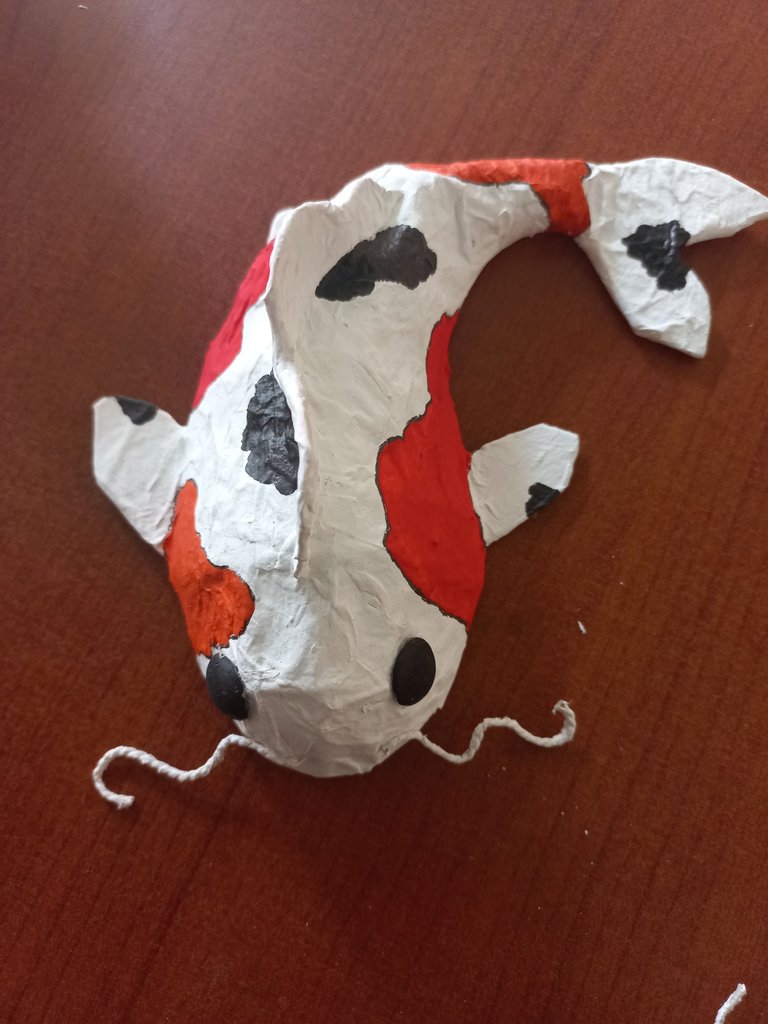
Llegó el momento de añadir los detalles. Para los elegantes bigotes, cortaremos el cordón fino en cuatro partes de aproximadamente 6 centímetros cada una. Las colocaremos sobre una superficie de vidrio, aplicaremos pegamento para endurecerlas antes que sequen les daremos forma curva que imiten el movimiento natural y las pintaremos de blanco para integrarlas con el diseño.
Para los ojos, cortaremos cuatro pequeños círculos de foami negro. Con cuidado, los termoformaremos para darles un aspecto tridimensional y los colocaremos a ambos lados de la cabeza del pez. Lista nuestra pieza principal.
Para los ojos, cortaremos cuatro pequeños círculos de foami negro. Con cuidado, los termoformaremos para darles un aspecto tridimensional y los colocaremos a ambos lados de la cabeza del pez. Lista nuestra pieza principal.
Now it's time to add the details. For the elegant whiskers, we will cut the thin cord into four parts of approximately 6 centimeters each. We will place them on a glass surface, apply glue to harden them before they dry, give them a curved shape to imitate natural movement and paint them white to integrate them with the design.
For the eyes, we will cut four small circles of black foami. Carefully thermoform them to give them a three-dimensional look and place them on both sides of the fish's head. Our main piece is ready.
 |  |
|---|---|
 |  |
| - | - |
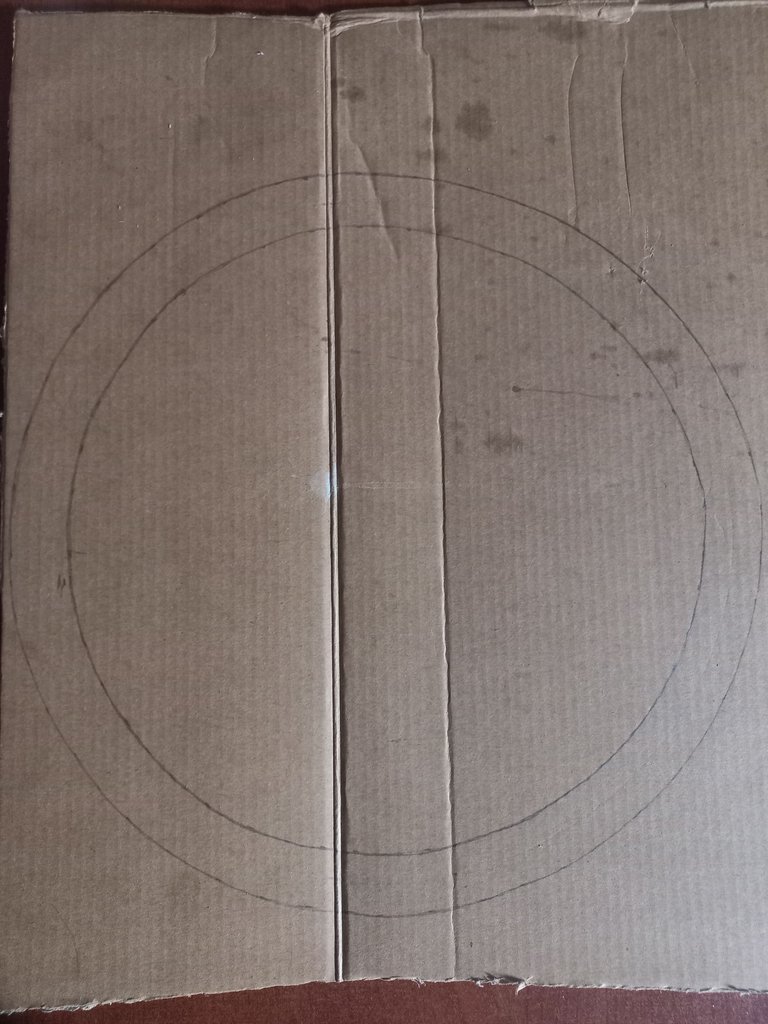
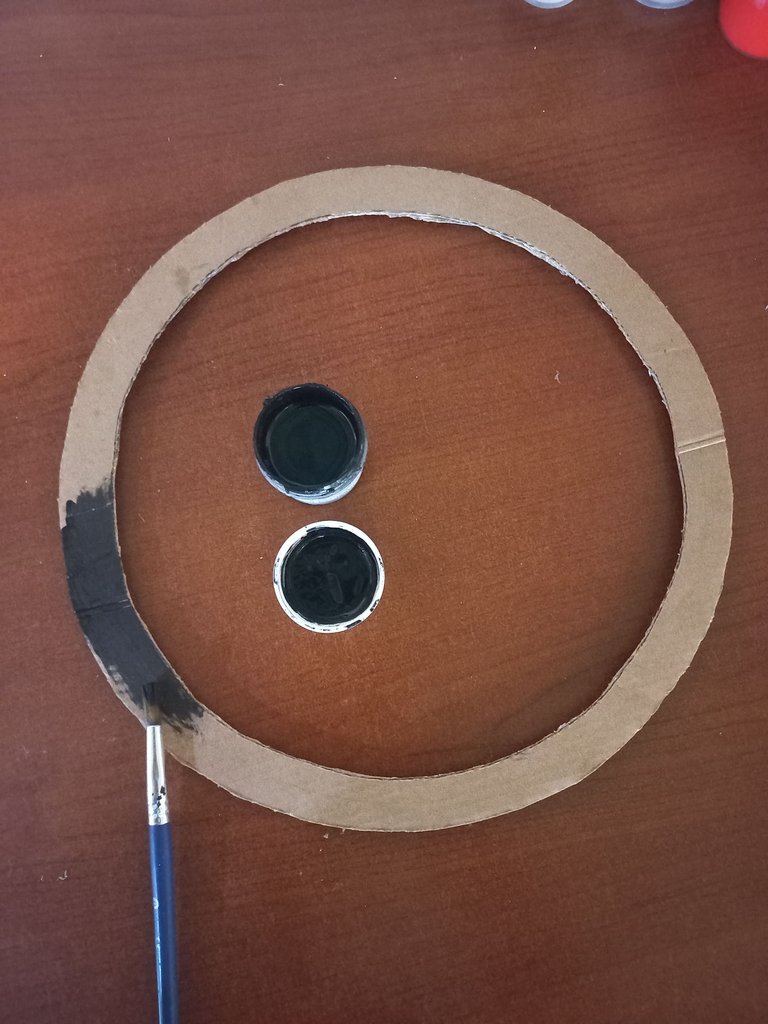
Ahora vamos a crear el marco que enmarcará a nuestros peces. Tomaremos un pedazo de cartón duro. Cortaremos un círculo de 26 centímetros de diámetro y le daremos un grosor de 2 centímetros. Recuerden que estas medidas pueden adaptarse según el tamaño de los peces para garantizar que encajen perfectamente y se sostengan con seguridad. Una vez cortado el círculo, lo pintaremos completamente de negro.
Now let's create the frame that will frame our fish. We will take a piece of hard cardboard. We will cut a circle of 26 centimeters in diameter and give it a thickness of 2 centimeters. Remember that these measurements can be adapted according to the size of the fish to ensure that they fit perfectly and are held securely. Once the circle is cut, we will paint it completely black.
 |  |
|---|
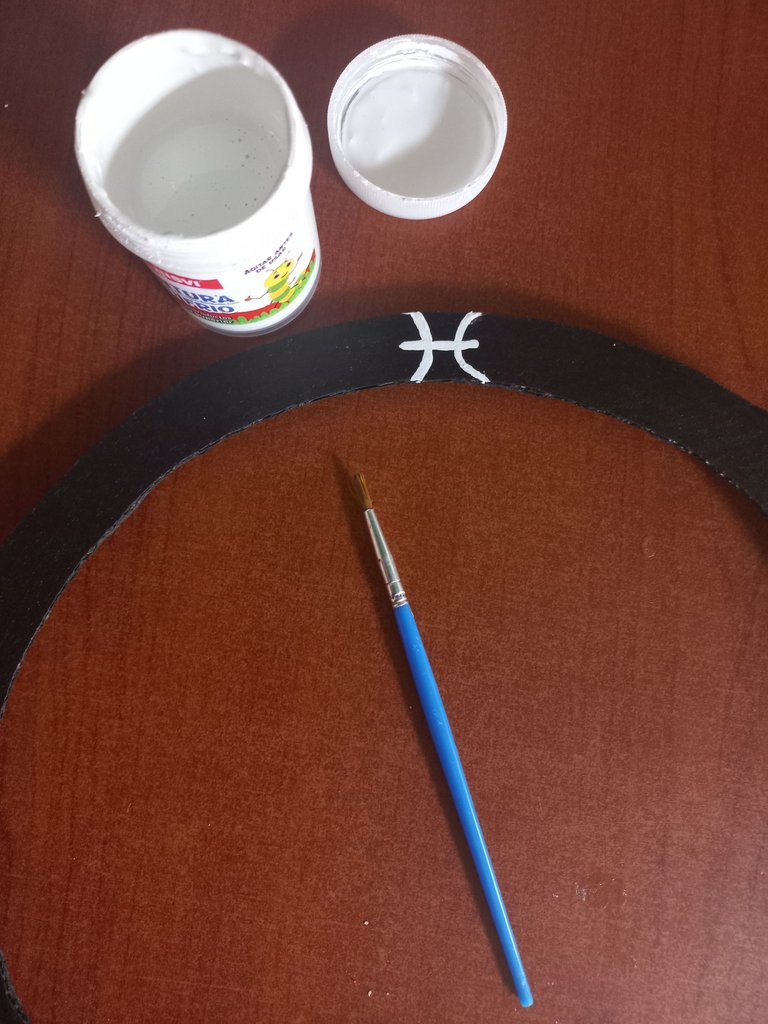
Es momento de añadir esos toques decorativos que harán brillar el marco. Comenzaremos incorporando el símbolo del signo de Piscis, que será el elemento principal y representativo. Añade cualquier otra decoración a tu gusto. Y listo finalizado nuestro hermoso proyecto.
It's time to add those decorative touches that will make the frame shine. We will start by incorporating the symbol of the sign of Pisces, which will be the main and representative element. Add any other decoration of your choice. And that's it, our beautiful project is finished.
 |  |
|---|
Foto de mi autoría / Photo by me
Traducción: DeepL Translate / Translation: DeepL Translate
Traducción: DeepL Translate / Translation: DeepL Translate
Posted Using INLEO
Te quedó genial, es un trabajo bastante creativo y que resalta muchísimo de manera decorativa.
!discovery 30
Muchas gracias. Me alegra mucho que te haya gustado. Siempre es un placer crear algo que resalte y aporte un toque especial. 😊
This post was shared and voted inside the discord by the curators team of discovery-it
Join our Community and follow our Curation Trail
Discovery-it is also a Witness, vote for us here
Delegate to us for passive income. Check our 80% fee-back Program
An excellent recycling project alluding to the Pisces sign. It's quite creative and brilliant. Thanks for sharing your step-by-step instructions.
Gracias por sus palabras tan amables. Me alegra saber que les gusto el proyecto y que las instrucciones les hayan sido útiles. 😊
Congratulations @mily0202! You have completed the following achievement on the Hive blockchain And have been rewarded with New badge(s)
Your next target is to reach 2750 upvotes.
You can view your badges on your board and compare yourself to others in the Ranking
If you no longer want to receive notifications, reply to this comment with the word
STOPQue belleza. Me gustó tanta creatividad
Muchas gracias. ✨Me alegra saber que te ha gustado. La creatividad es una herramienta maravillosa para expresar ideas y emociones.😊
a pair of interesting koi fish, you are very creative👍