
✨🌷✨🌷✨🌷✨🌷✨🌷✨🌷✨🌷✨🌷✨
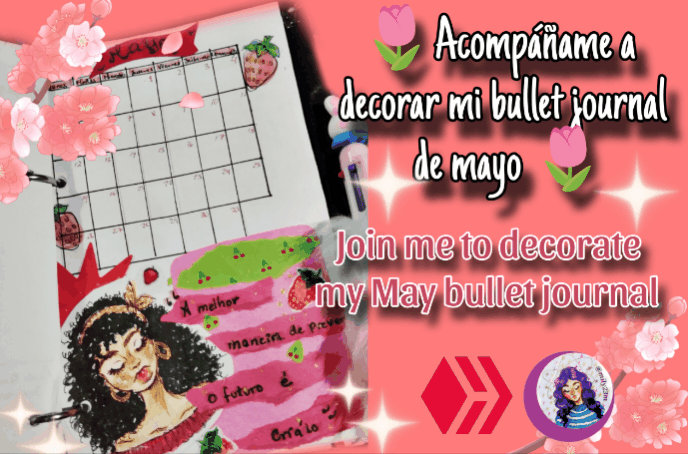
Hola manualistas y artesanos , como están ? , hoy les traigo una decoración de una nueva decoración para adornar mi bullet journal de mayo, como cada mes al iniciar, mi forma más fácil de organizarme un poco y ver de forma física las cosas que tengo que hacer es está manera,con el método de llevar un bullet journal/ agenda con todo lo que debo hacer en el mes y junto a un calendario mensual, parte de que ya se ha transformado en un "ritual" para desestresarme creando un collage y una decoración bonita alusiva al mes, la idea de este método es tu mismo crear diversas llaves o apartados para registrar tanto tu objetivos , asignaciones o elementos de tu rutina diaria y poder ir viendo tanto tu progreso como las veces que no cumpliste lo que hace una buenas forma de observar de manera más fácil cuáles son esas tareas u objetivos que no estás pudiendo cumplir o que están llevando más Acá te dejo todas las imágenes del paso a paso.

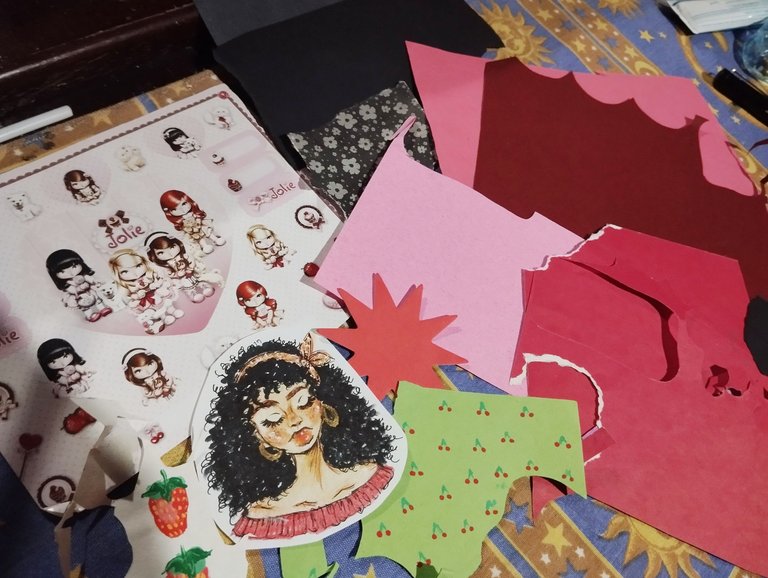
🌷Papeles y cartulinas de colores y decorativas
🌷Stickers ,pegatinas
🌷Dibujos y recortes
🌷 Marcadores y resaltadores
🌷 Bolígrafo de color rojo
🌷Marcador punta fina negra
🌷Regla y tijera
🌷 Hoja blanca
🌷Saca hueco
🌷 Pintura dorada
Manos a la obra
English Version
✨🌷✨🌷✨🌷✨🌷✨🌷✨🌷✨🌷✨🌷✨🌷✨
**Hello crafters and artisans, how are you? , today I bring you a decoration of a new decoration to decorate my bullet journal for May, like every month at the beginning, my easiest way to get a little organized and physically see the things I have to do is this way, with the method of keeping a bullet journal / agenda with everything I have to do in the month and next to a monthly calendar, part of which has already become a "ritual" to de-stress by creating a collage and a nice decoration alluding to the month, the idea of this method is for you to create various keys or sections to record both your goals, assignments or elements of your daily routine and be able to see both your progress and the times you did not comply with what makes a good way to observe more easily which are those tasks or objectives that you are not able to fulfill or that are taking longer Here I leave you all the images step by step. **
🌷Colored and decorative paper and cardstock
🌷Stickers
🌷Drawings and scraps
🌷Markers and highlighters
🌷Red pen
🌷Black fine-point marker
🌷Ruler and scissors
🌷White paper
🌷Hollow-out pencil
🌷Gold paint
Let's get to work

 |  |  |
#1 Para el formato de la hoja uso la mitad de la hoja de tamaño carta, la corto a la mitad ,y la agujereó con un saca bocado para que coincida con las anillas de mi agenda/bullet journal, para el calendario, hago casillas de 1,5cm de ancho x 2 cm de largo, haremos
7 casillas en fila para los 7 días de la semana, y 5 casillas que será columnas para las semanas del mes, primero hago la cuadrilla , y luego le agrego 7 apartados de 0,5 cm para donde irán los títulos de cada día, luego de hacer todo en grafito lo paso a limpio con un marcador negro punta fina.
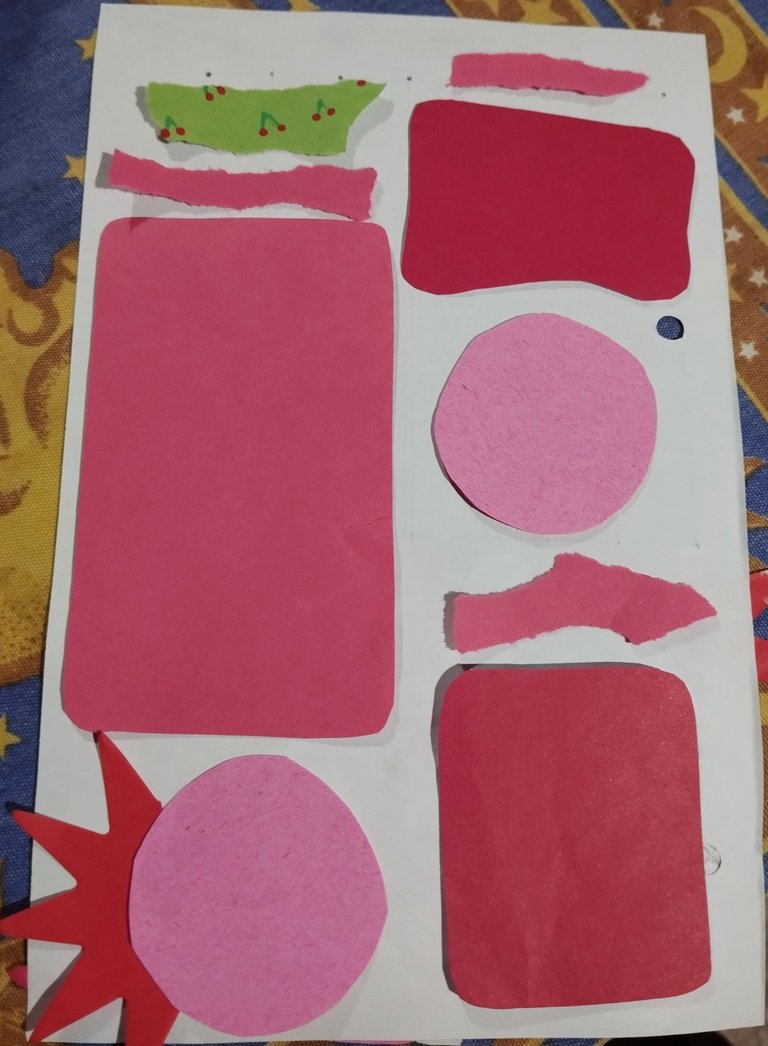
Escogí algunas materiales para la Decoración, este mes me enfoque en usar tonalidades de rojo, y el diseño central será un dibujo que tenía de una chica con un hermoso cabello rizado , usé de fondo un papel rojo y razgue algunos retazos de un papel verde con cerecitas para la composición, rasgué en tiras más papel rojo de una tonalidad más clara para poner allí una frase, y encontré unas lindos dibujos de fresas que había pintado y combinaban perfecto, allí con la composición acomoda pude darme una idea de como quedaría todo antes de pegar.
English Version
#1 For the sheet format I use half of the letter-sized sheet, cut it in half, and punch it with a hole punch to match the rings of my agenda/bullet journal, for the calendar, I make boxes 1.5cm wide x 2cm long, we will make 7 boxes in a row for the 7 days of the week, and 5 boxes that will be columns for the weeks of the month, first I make the grid, and then I add 7 sections of 0.5cm for where the titles of each day will go, after doing everything in graphite I clean it up with a fine-point black marker.
I chose some materials for the decoration, this month I focused on using shades of red, and the central design will be a drawing I had of a girl with beautiful curly hair, I used red paper as a background and tore some scraps of green paper with cherries for the composition, I tore more red paper of a lighter shade into strips to put a phrase there, and I found some cute drawings of strawberries that I had painted and they combined perfectly, there with the arranged composition I was able to get an idea of how everything would look before gluing.
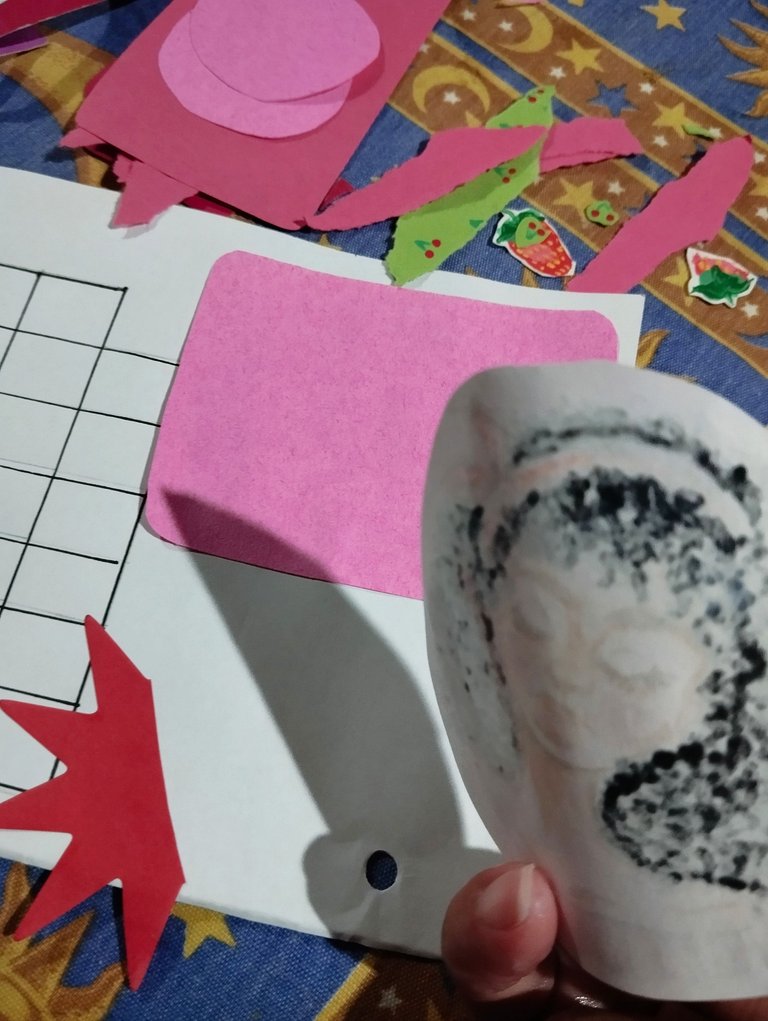 |  |  |
#2 Ya con el diseño acomodado , con pega escolar blanca fui pegando todos los elementos, primero lo que iban de tras como el post-it rojo que corte a la mitad y lo puse a modo de corona de la chica, y agregué algunos detalles para poner el título en espacio del papel rojo, y también aparte de la fresita ,puse algunas cerecitas en el espacio para la frase.
English Version
#2 With the design in place, I used white school glue to glue all the elements, first the ones that were on the back, like the red post-it that I cut in half and put as the girl's crown, and I added some details to put the title in the space of the red paper, and also apart from the strawberry, I put some cherries in the space for the phrase.
 |  | 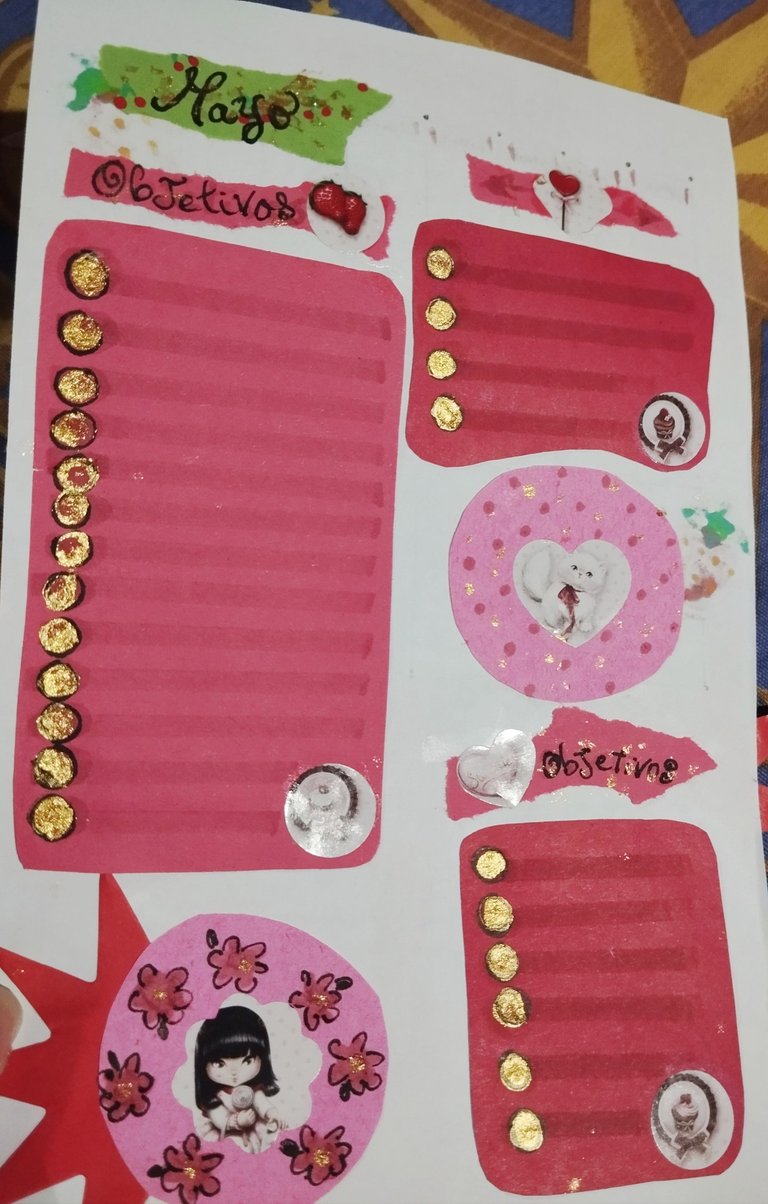 |
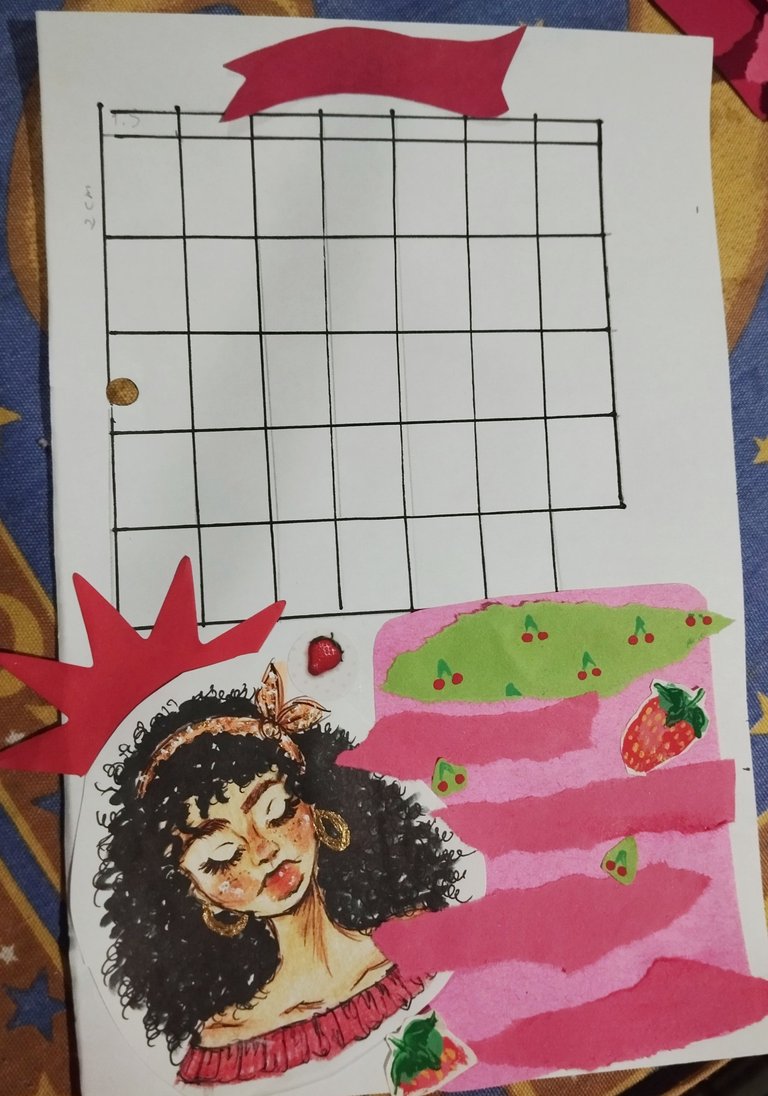
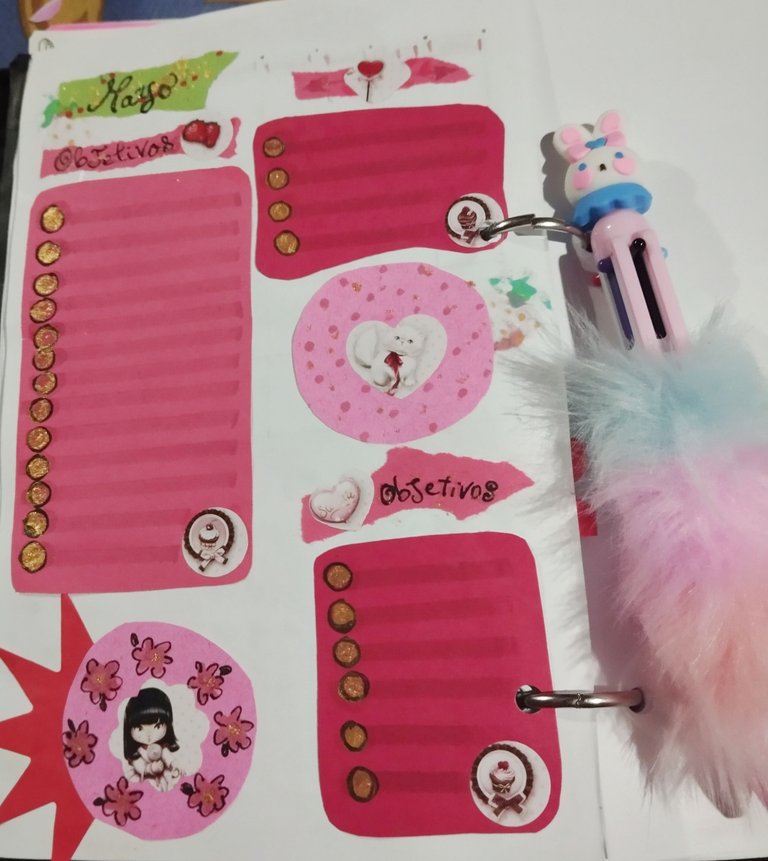
#3 Para la parte de atrás corté unos rectangulos de cartulina y papel rojo de varios tamaños con las esquinas redondeadas ,estos serán los espacios para los apartados , también recorté unos círculos para destacar allí los stickers, hice algunas razgaduras de papel en tiras para los títulos ,y también un detalle del papelito de cerezas verde.Luego de acomodarlo en las hojas lo pegué con pega blanca escolar. Para poner los reglones usé un resaltador rosa viejo pastel, agregué el nombre de los títulos , objetivos y mayo en marcador negro punta fina,en los círculos puse stickers que tenía guardado, son d unas libretas que estaban demasiado de moda hace años , y yo como típica niña ansiosa guardaba todos los stickers para usarlos después y nunca los usaba, decidí darle uso a todos los que tenía por allí y usé unos lindos que tenían muñecas y un perrito, además de algunas fresas, y cupcake. Para hacer darle detalles brillantes usé pintura dorada y marqué círculos para tachar cuando se completen las tareas, también aquí le agregué unos detallitos en los centros de las flores y algunos en los títulos.
English Version
#3 For the back I cut some rectangles out of cardstock and red paper of various sizes with rounded corners, these will be the spaces for the sections, I also cut out some circles to highlight the stickers there, I made some paper rips into strips for the titles, and also a detail of the green cherry paper. After arranging it on the sheets I glued it with white school glue. To put the lines I used an old pastel pink highlighter, I added the name of the titles, objectives and May in a fine-point black marker, in the circles I put stickers that I had saved, they are from notebooks that were too fashionable years ago, and as a typical anxious girl I saved all the stickers to use them later and never used them, I decided to give use to all the ones I had there and I used some cute ones that had dolls and a puppy, as well as some strawberries, and a cupcake. To give it some shiny details I used gold paint and marked circles to cross off when the tasks are completed, also here I added some little details in the centers of the flowers and some in the titles.
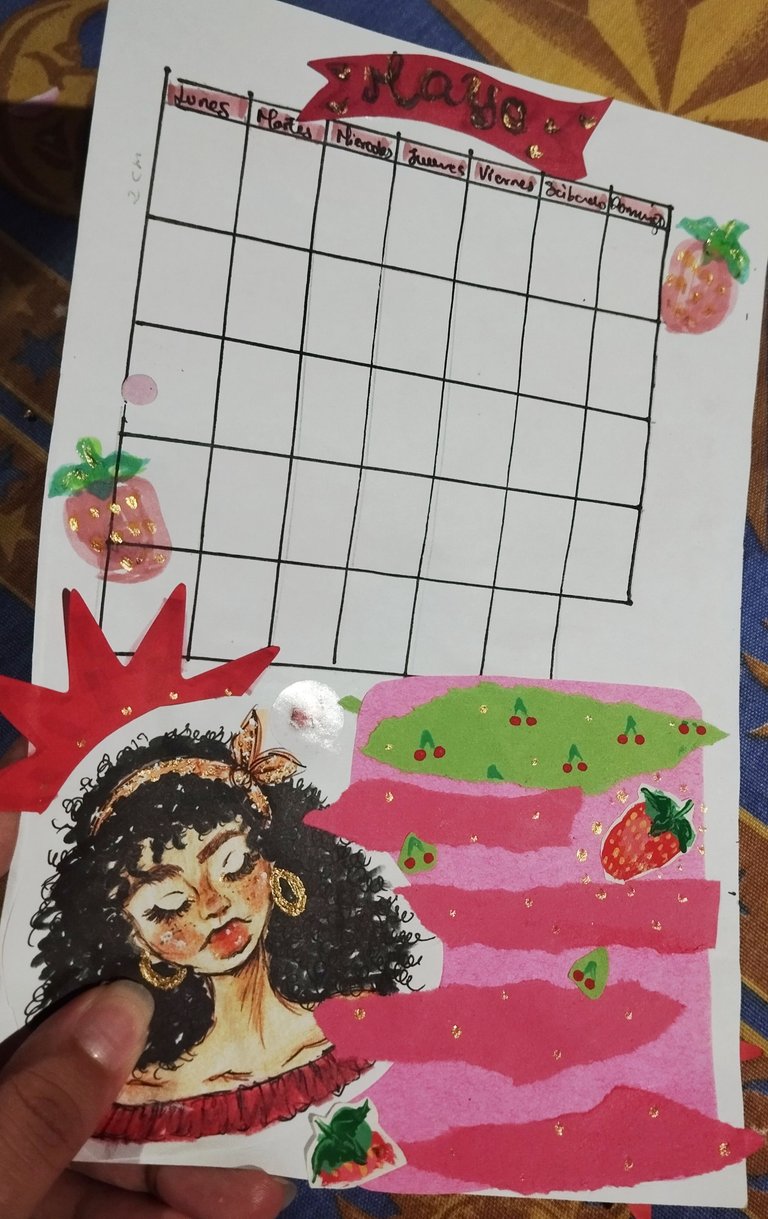 | 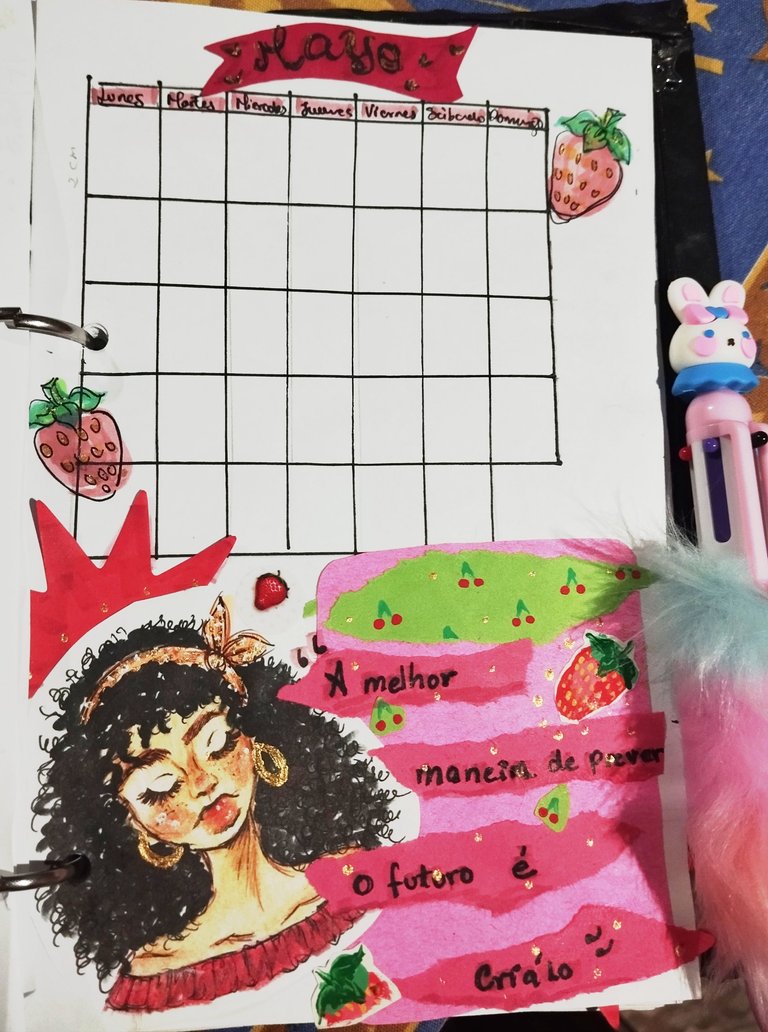 | 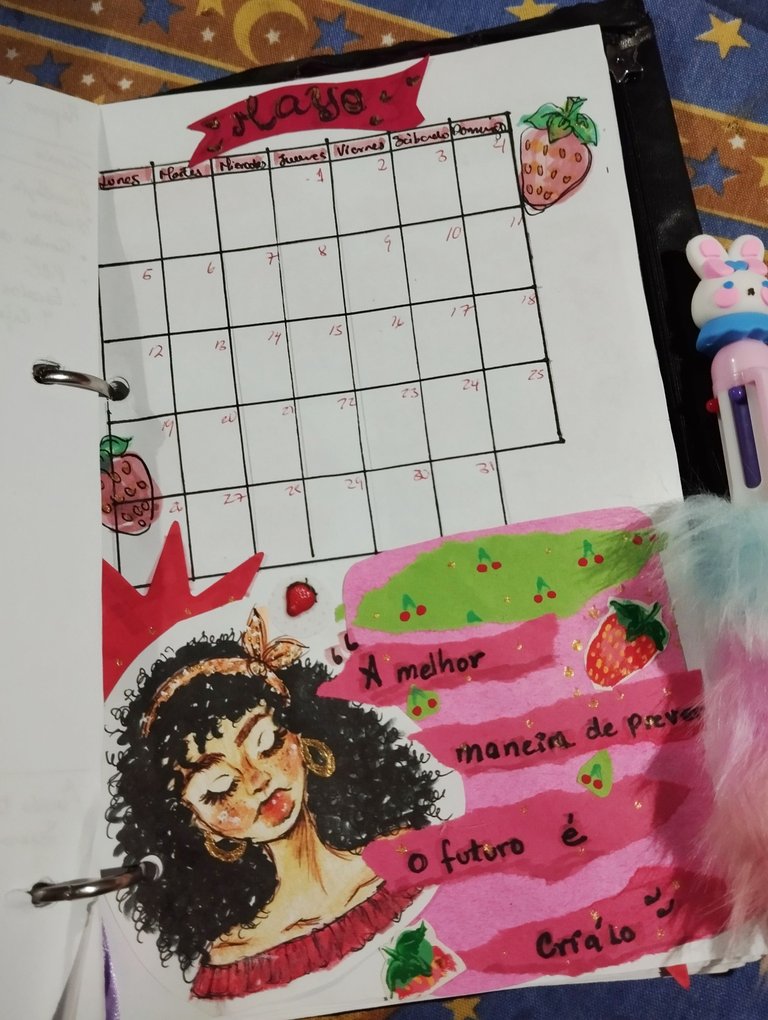 |
#4 Para terminar la decoración de la hoja principal puse el título de mayo en marcador negro , y también pinte algunas fresas con Resaltadores pasteles. Agregué en las rasgaduras de papel la frase de este mes , y puse unos detallitos con pintura dorada para darle mejor aspecto, por último agregué en bolígrafo rojo los números de cada día.
English Version
#4 To finish decorating the main page, I added the May title in black marker and also colored in some strawberries with pastel highlighters. I added this month's phrase to the paper tears and added some little details with gold paint to give it a better look. Finally, I added the day numbers in red pen.
|  | 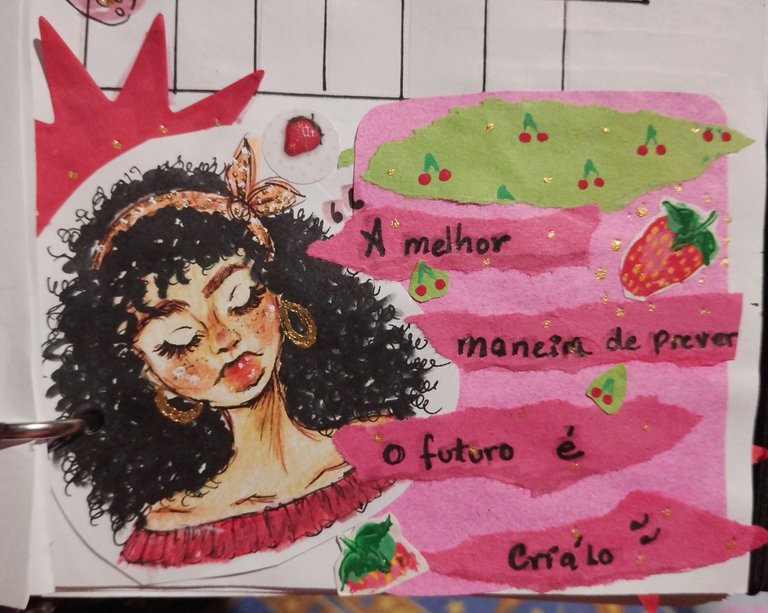 |
Y listo ✨🍓 acá tendríamos el resultado ,una temática roja con fresas ,cerecitas y cupcakes, con detallitos en dorado y una linda chica rizada como pieza central , la frase de este mes es :"A melhor maneira de prever o futuro é criálo" en portugués y que sería en español "La mejor manera de predecir el futuro es crearlo" ,para tener en cuant,a que realmente que los sueños no solo son planes difusos para más adelante, sí no objetivos que llevan acciones que se se tiene que ir trabajando para poder cumplirlas , eso es lo que va a ir haciendo ese futuro, y me pasa mucho que tiendo a dejar que no tomar ciertas decisiones o acciones por incomodidad ,por x razón,miedo, incertidumbre o por procrastinación y eso solo me deja en una situación en dónde no avanzo como quisiera, entonces de nada sirve pensar en las cosas que quieres en un futuro mientras en el presente no estás haciendo las cosas orientadas para que ese futuro se haga realidad 🤷✨, pero bueno fin de la frases de auto ayuda jaja 😅espero que les haya gustado este diseño de mayo.
🍓✨Espero que les haya gustado mi post 🩷 y gracias por leerlo✨🍓
Fotos tomadas por mí en mi equipo Redmi note 12 editadas en Pics art y gif realizado en app creador de GIFs texto traducido en Google traductor.
English Version
And that's it ✨🍓 here we would have the result, a red theme with strawberries, cherries and cupcakes, with little details in gold and a cute curly-haired girl as the centerpiece, the phrase of this month is: "A melhor maneira de prever o futuro é criálo" in Portuguese and which would be in Spanish "The best way to predict the future is to create it", to keep in mind that dreams are not only diffuse plans for later, but objectives that take actions that have to be worked on to be able to fulfill them, that is what that future will do, and it happens to me a lot that I tend to let certain decisions or actions go by discomfort, for x reason, fear, uncertainty or procrastination and that only leaves me in a situation where I do not advance as I would like, so it is useless to think about the things you want in the future while in the present you are not doing things oriented so that that future becomes reality 🤷✨, but anyway, that's the end of the self-help quotes haha 😅 I hope you liked this May design.
🍓✨ I hope you liked my post 🩷 and thanks for reading it ✨🍓
Thank you very much for reading me! 🤭💜✨ I hope you liked the post!
Photos taken by me on my Redmi note 12 device edited in Pics art and gif made in the GIF creator app, text translated in Google translator.
El billete journal es una poderosa herramienta para organizarnos, plasmar nuestras ideas y emociones, yo llevo ya tres años aplicandolo, y la verdad ayuda mucho, te quedó muy bonito, saludos.