



🇪🇸Spanish🇪🇸
Los cumpleaños traen alegría y felicidad, celebraciones y muestras de cariño para el cumpleañero, detalles, también trae gastos, Jejeje, pero lo que realmente importa es que ese ser que alcanza un escalón más en la escalera de su vida, se sienta especial.
El cumpleaños de mi hija es en el mes de enero, dónde el presupuesto se hace más corto, Jejeje. Éste 14 lo celebramos en casa con la familia cercana, unas amiguitas de mi niña, y los regalos que aunque ella no esperaba, no podían faltar 🤭.
Lo cierto es que, siempre me gusta hacer todo para su cumple desde montar las decoraciones, que ahora es más fácil, como hacer los arreglos de dulces. Éste último en particular llevaría su regalo de cumpleaños 📲, algo que no esperaba, porque la teníamos engañada de que no teníamos dinero, Jejeje. Les muestro como realicé éste arreglo de cumpleaños, quédense conmigo...📝
Los materiales que utilicé fueron los siguientes:▪️(2) Cortinas recicladas metalizadas,▪️Cinta plástica transparente,▪️(1) Globo tipo burbuja con soporte, ▪️Globo metalizado dorado en forma de corazón con soporte, ▪️Globo dorado elástico,
▪️(3) Pliegos de papel seda,▪️Tijeras, ▪️Caja dorada de cartón de 25x25 cm,▪️1 mts cinta raso color rosa vieja #3,▪️1 mts de cinta de organza #3,▪️Apliques,▪️Inflador manual de globos,▪️Pistola para silicón caliente, ▪️1/2 pliego de papel hojilla, ▪️Un Topper de feliz cumpleaños en ingles,▪️Silicón frío.
El procedimiento
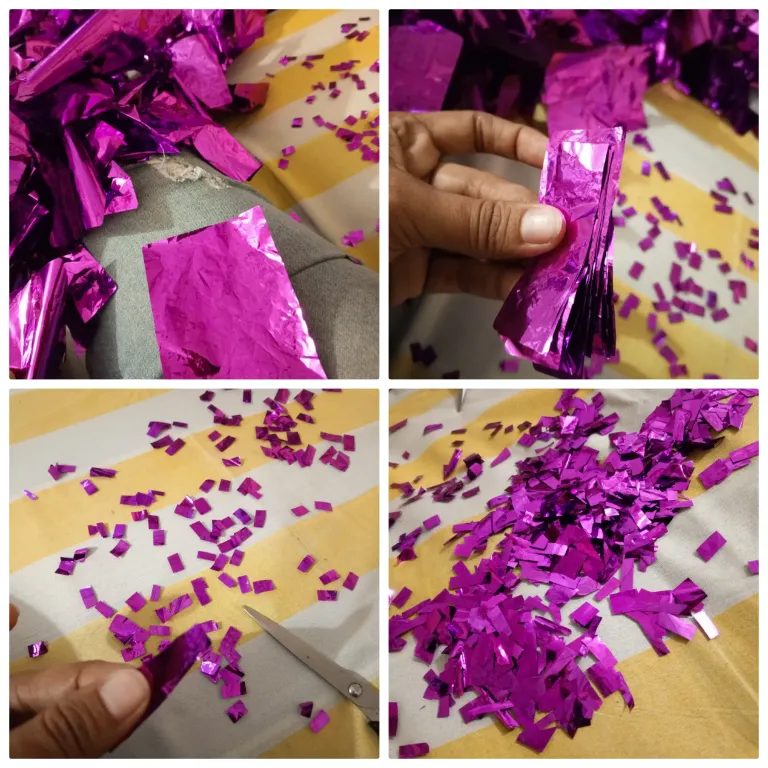
Para comenzar vamos a recortar una cortinita metalizada de color lila 🟣 que tenía guardada para volverla confeti. La cortamos en cuadros, hasta que el tamaño sea mínimo.
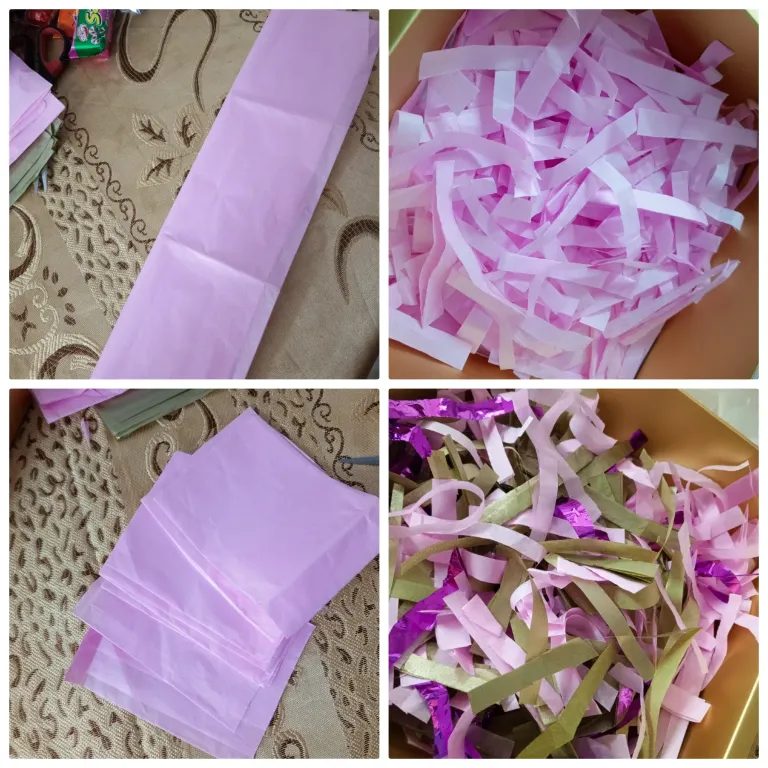
Lo siguiente es cortar tiras de 1 cm a partir del papel seda, éste proceso se aplicara a los 3 pliegos.
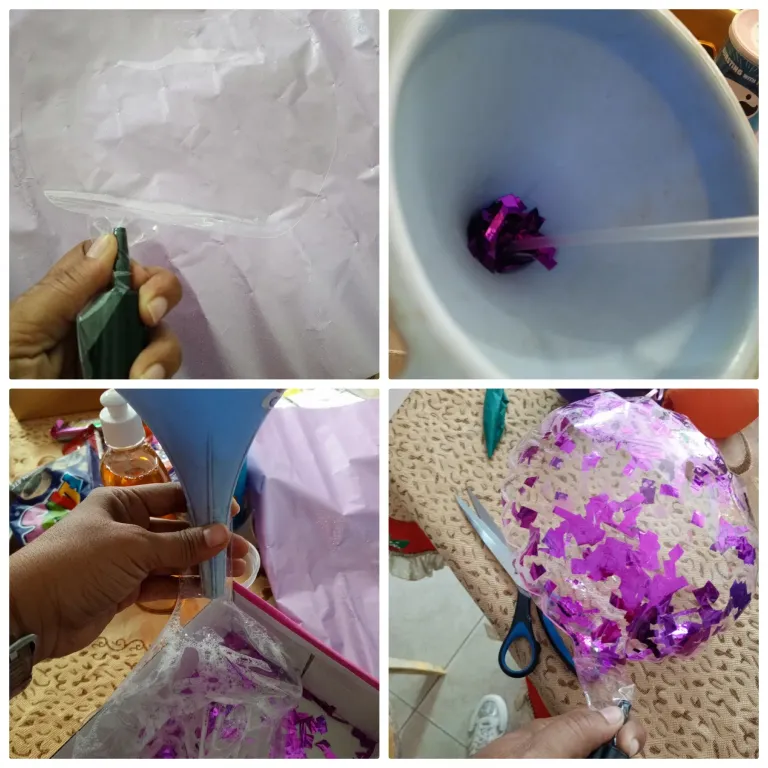
Para que el globo tipo burbuja se pueda inflar sin tanto problema, es importante estirarlo un poco con las manos, inflarlo en éste caso con el inflador manual para que se estire aun más, y luego vaciarlo. La idea es poder incluir el material que deseamos colocar al interior. El confeti en color lila que corte anteriormente, lo incluí con ayuda de un embudo y un palillo, y para que se fije a las paredes del globo se puede utilizar un poco de jabón líquido o aceite de bebe.
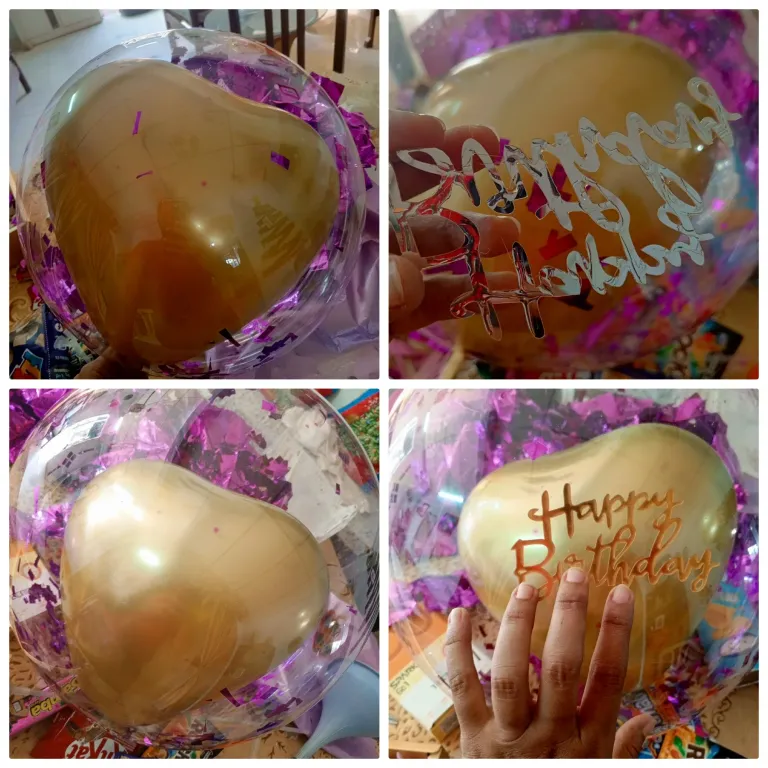
Decidí introducir un globo elástico en forma de corazón en color dorado para que se viera diferente y bonito, solo lo introduje dentro del globo burbuja y lo infle con el soplador manual. Ya para éste momento se llena el globo burbuja con el resto de los elementos al interior y se aseguran. Para darle un toque más al globo le pegue un tope de Happy Birhtday que recorte de su base, con silicón frío. Quedó más lindo aún.
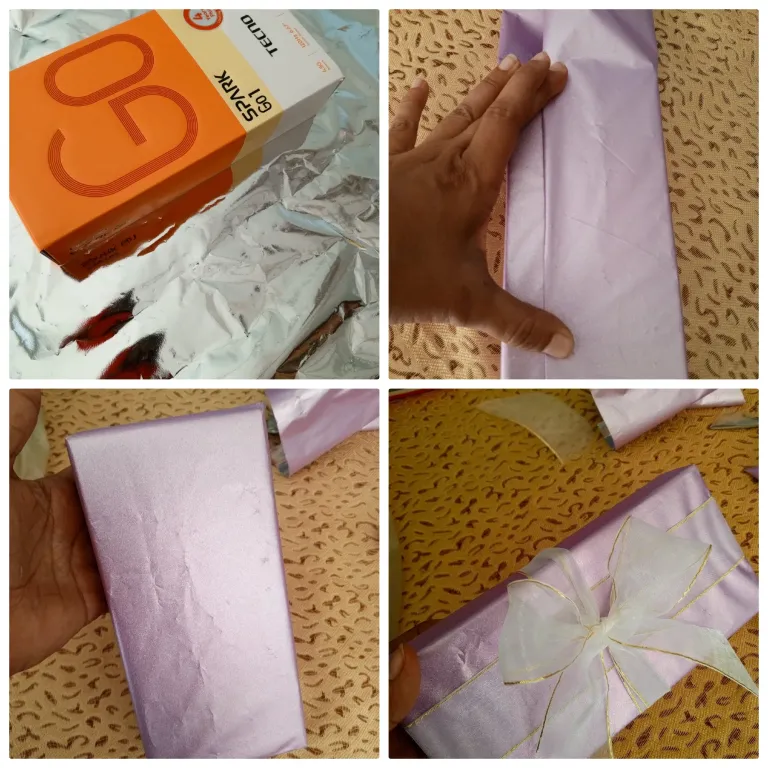
En éste punto, lo siguiente será envolver el regalo 🎁, en éste caso le compramos un teléfono inteligente📲, siendo éste su primer celular. Compré para envolver la caja del teléfono, papel hojilla color rosa, lo envolví y asegure con cinta plástica y para darle un toque especial le coloque una cinta de organza alrededor de la caja por los cuatro lados, cerrando con un moño.
Teniendo el globo burbuja listo, lo aseguramos en su base, igualmente el globo dorado pequeño metalizado en forma de corazón, aseguramos a la base de la caja de cartón con silicón caliente, e introducimos las tiras de papel seda que cortamos formando una especie de cama.
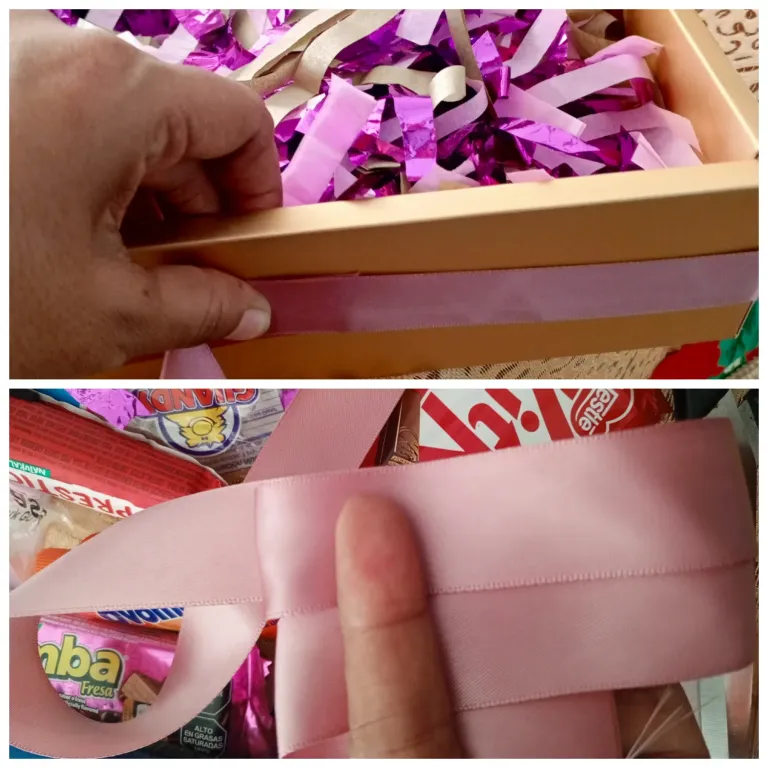
Para finalizar le agregamos un toque elegante a la caja de cartón dorada, colocando una cinta de color rosa a su alrededor, un mini lazo 🎀 y un aplique de corona. El resto de los detalles que no quería al descubierto los oculte con lazos en cinta y apliques. Era el momento ideal para incluir todos los dulces y snacks que compré para mi hija y por supuesto el regalo 🎁.
Es primera vez que trabajo con éste tipo de globos burbuja, y se pueden hacer cosas bellísimas con el. Éste arreglo tiene más amor, porque lo hizo mamá, Jejeje, sin embargo espero seguir aprendiendo para hacerlos cada vez mejor para otras ocasiones. Lo mejor de éste trabajo es la sonrisa de mi princesa al recibir éste bonito detalle, y por otro lado puedo seguir reutilizando ♻️ diferentes materiales que usé para éste arreglo.
Es todo por éste post. Gracias a todos los que fueron tan amables de visitar mi blog 🩷🎁🎀♻️...
🇺🇸 English🇺🇸
Birthdays bring joy and happiness, celebrations and displays of affection for the birthday boy or girl, details, it also brings expenses, hehe, but what really matters is that the person who reaches another step on the ladder of his or her life feels special.
My daughter's birthday is in January, where the budget gets shorter, hehe. This 14th we celebrated at home with close family, some of my daughter's friends, and the gifts that although she didn't expect, they couldn't be missing 🤭.
The truth is, I always like to do everything for her birthday from setting up the decorations, which is easier now, to making the candy arrangements. This last one in particular would bring her birthday present 📲, something she didn't expect, because we had her fooled that we didn't have money, hehe. I show you how I made this birthday arrangement, stay with me... 📝
The materials I used were the following: ▪️ (2) Metallic recycled curtains, ▪️ Transparent plastic tape, ▪️ (1) Bubble balloon with support, ▪️ Gold metallic heart-shaped balloon with support, ▪️ Gold elastic balloon,
▪️ (3) Sheets of tissue paper, ▪️ Scissors, ▪️ Gold cardboard box 25x25 cm, ▪️ 1 meter old pink satin ribbon # 3, ▪️ 1 meter organza ribbon # 3, ▪️ Appliqués, ▪️ Manual balloon pump balloons,▪️Hot glue gun,▪️1/2 sheet of parchment paper,▪️A Happy Birthday topper in English,▪️Cold glue.
The procedure
To start, we are going to cut out a lilac metallic curtain 🟣 that I had saved to turn into confetti. We cut it into squares, until the size is minimal.
The next step is to cut 1 cm strips from the tissue paper, this process will be applied to the 3 sheets.
So that the bubble balloon can be inflated without too much trouble, it is important to stretch it a little with your hands, inflate it in this case with the manual inflator so that it stretches even more, and then empty it. The idea is to be able to include the material that we want to place inside. The purple confetti that I cut earlier, I included it with the help of a funnel and a toothpick, and to fix it to the walls of the balloon you can use a little liquid soap or baby oil.
I decided to introduce an elastic heart-shaped balloon in gold so that it looked different and pretty, I just introduced it inside the bubble balloon and inflated it with the manual blower. At this point, the bubble balloon is filled with the rest of the elements inside and they are secured. To give the balloon a more touch, I glued a Happy Birhtday cap that I cut from its base, with cold silicone. It looked even prettier.
At this point, the next thing will be to wrap the gift 🎁, in this case we bought a smartphone📲, this being his first cell phone. I bought pink foil paper to wrap the phone box, wrapped it and secured it with plastic tape and to give it a special touch I placed an organza ribbon around the box on all four sides, closing it with a bow.
With the bubble balloon ready, we secured it to its base, as well as the small metallic gold heart-shaped balloon, we secured it to the base of the cardboard box with hot silicone, and we inserted the strips of tissue paper that we cut forming a kind of bed.
To finish, we added an elegant touch to the gold cardboard box, placing a pink ribbon around it, a mini bow 🎀 and a crown appliqué. The rest of the details that I didn't want exposed I hid with ribbon bows and appliqués. It was the perfect time to include all the candy and snacks I bought for my daughter and of course the gift 🎁.
It's the first time I've worked with this type of bubble balloons, and you can make beautiful things with them. This arrangement has more love, because mom made it, hehe, however I hope to continue learning to make them better and better for other occasions. The best thing about this work is my princess's smile when she received this beautiful detail, and on the other hand I can continue reusing ♻️ different materials that I used for this arrangement.
That's all for this post. Thanks to everyone who was kind enough to visit my blog 🩷🎁🎀♻️...
Creditos - Credits
Traductor English translator
Stickers realizado en Bitmoji | Stickers made in Bitmoji.
Fotografias capturadas con mi teléfono Tecno Spark 10 pro | Photos captured with my Tecno Spark 10 pro phone.

For the best experience view this post on Liketu


Amiga quedó precioso el arreglo y me imagino la cara de felicidad de tu hija cuando vió su bello arreglo con ese detalle súper especial que fue el teléfono. Te felicito porque quedo bien bonito. Gracias por compartir, saludos y Bendiciones
¡Enhorabuena!
✅ Has hecho un buen trabajo, por lo cual tu publicación ha sido valorada y ha recibido el apoyo de parte de CHESS BROTHERS ♔ 💪
♟ Te invitamos a usar nuestra etiqueta #chessbrothers y a que aprendas más sobre nosotros.
♟♟ También puedes contactarnos en nuestro servidor de Discord y promocionar allí tus publicaciones.
♟♟♟ Considera unirte a nuestro trail de curación para que trabajemos en equipo y recibas recompensas automáticamente.
♞♟ Echa un vistazo a nuestra cuenta @chessbrotherspro para que te informes sobre el proceso de curación llevado a diario por nuestro equipo.
🥇 Si quieres obtener ganancias con tu delegacion de HP y apoyar a nuestro proyecto, te invitamos a unirte al plan Master Investor. Aquí puedes aprender cómo hacerlo.
Cordialmente
El equipo de CHESS BROTHERS
I used to want to buy a birthday balloon like this and it was expensive. After seeing your tutorial, I think it looks easy to make. Looks great! Great work!
This is the first time I've used this type of balloon, without having to pay to decorate it, and for the first time it didn't turn out so bad, however with practice you can make nice things, you can try.🤗🤗
Yo no sabía como hacen para meterle esas cosas a los globos, se ve que es algo delicado, yo prefiero comprar un globo sencillo y ya jajaja, pero que bien que sepas hacerlo, y le realizaste esta linda decoración a tu hija, estos cumpleañeros de Enero han salido suertudos jeje, saludos.