Saludos, apreciados amigos de Hive y especialmente a los miembros de la Comunidad HiveDiy, en la cual me encuentro por primera vez presentando mi primera publicación en Hive sobre una manualidad realizada por mí. Si revisan mi blog, se darán cuenta que no acostumbro hacer este tipo de presentaciones pero es por falta de tiempo quizás, aunque ya tengo guardado algunos de mis trabajos artesanales con registros fotográficos pensando en poder publicarlos en algún momento. Por cierto, una amiga hace unos mese me animó a que publicara y diera a conocer mi otra faceta. Bien, llegó la ocasión oportuna y es ésta, al pensar en el día de las madres quienes merecen un detalle especial. No sé si mi amiga pueda darse cuenta que pude hacer mi primera publicación sobre mis manualidades pero voy a mencionarla con mucho cariño, ella se llama @aurodivys.
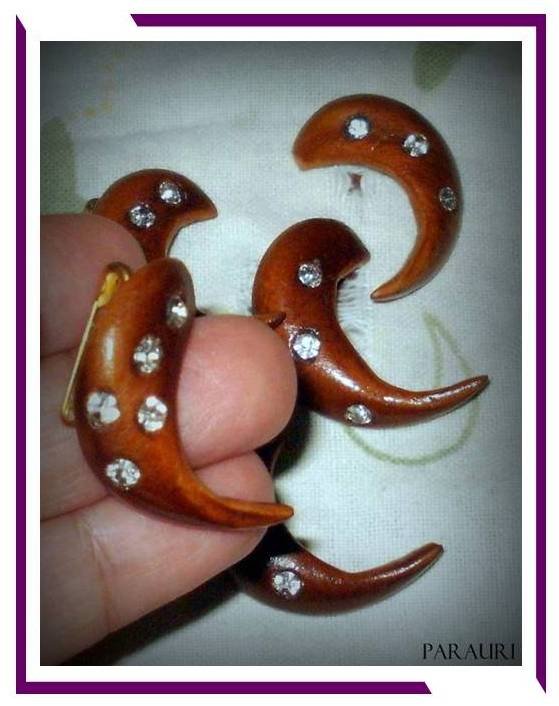
Les comparto unos prendedores que realicé pensando en esas madres que se rodean de hijos amorosos y quienes buscan siempre como obtener un detalle para obsequiarles en su día. Particularmente, me gusta pensar en opciones accesibles para que no solo hijos, sino, nietos, sobrinos, cuñados, yernos y todas las personas que pueden rodear a una madre tengan la oportunidad de darle un hermoso presente.
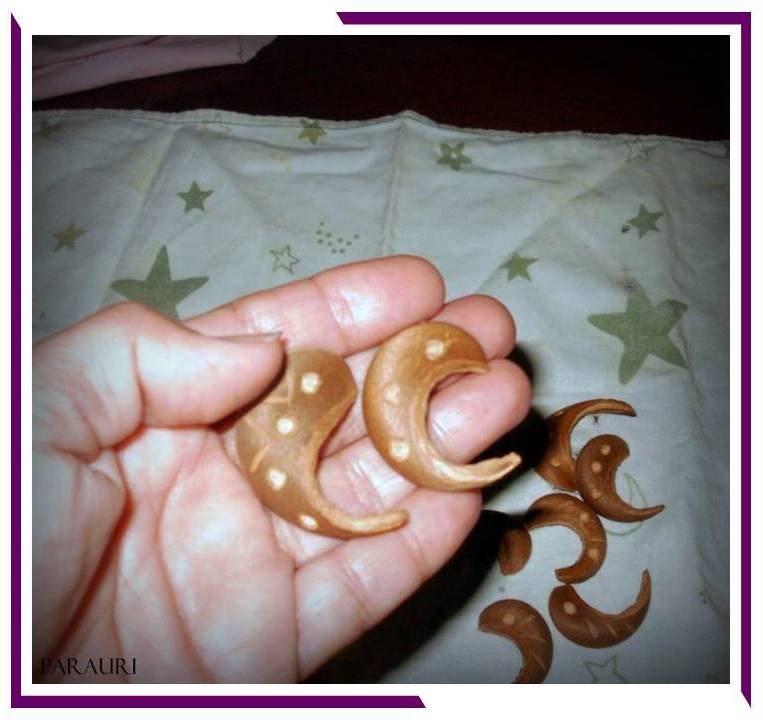
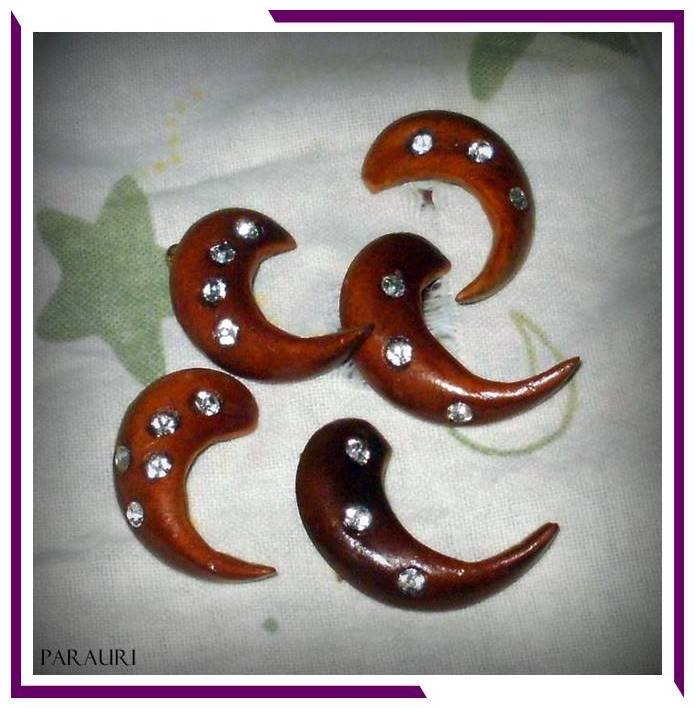
Así que un buen día decidí retomar mis implementos para hacer manualidades y me dispuse a hacer estos prendedores con materiales fáciles de conseguir y también sencillo de hacer inspirado en un cachito de madera como joya natural.
Quizás les resulten conocidas estas conchas o cachitos y es porque son parte del fruto del árbol de Jabillo o Ceiba, que son los nombres con los que conozco este árbol desde mi infancia pero científicamente se llama Hura crepitans. Estos cachitos son el resultado del estallido de las frutas del árbol y particularmente recuerdo que desde niña me gustaba tomarlas cuando iba a algún parque donde hubiera, porque siempre pensaba que quizás podía crear algo con ellas. Desde muy pequeña ya tenía la vena creativa.

Conozcamos la lista de materiales:
Materiales
- Cachitos de madera
- Navaja
- Lija fina
- Pedrería brillante (yo use las de un adorno roto)
- Silicón líquido
- Barrita de silicón
- Pistola para silicón
- Pincel plano
- Broches para prendedor (es lo ideal pero yo usé alfileres de seguridad pequeños)
- Barniz para cerámica (puede ser para uñas pero que no esté espeso)
Ya con los materiales ubicados, procedamos a la presentación del paso a paso para hacer este prendedor de cachito. Aunque debo aclarar que por fallas en mi computadora con el disco duro que se dañó, he perdido parte de algunas de mis fotos pero la mayor parte del proceso está muy bien registrado visualmente.
Procedimiento 👓
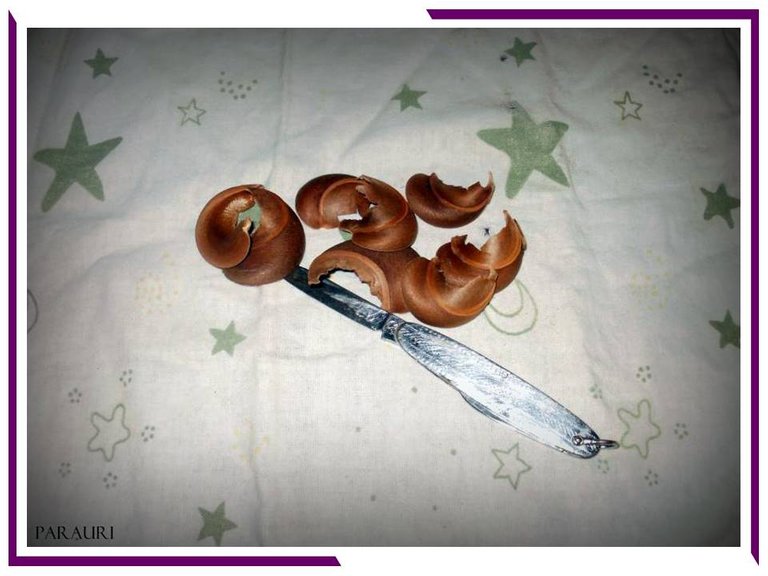
Paso 1
Con la navaja, quitar el borde sobrante de madera para estilizar la figura del cachito. Este paso es el más trabajoso por la dureza de la madera de este tipo conchas. Especialmente para mi ya representa mayor esfuerzo, ya que mis manos están un poco afectadas por la artritis.


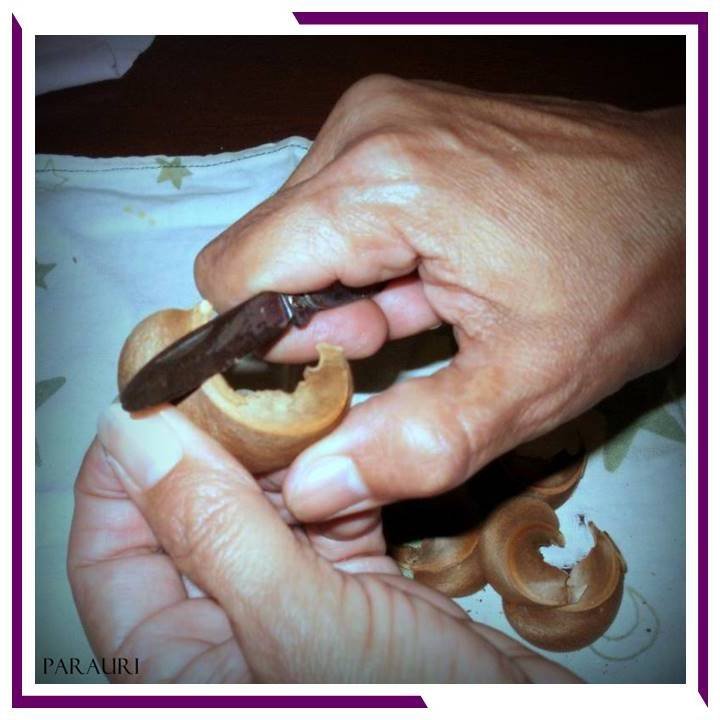
Paso 2
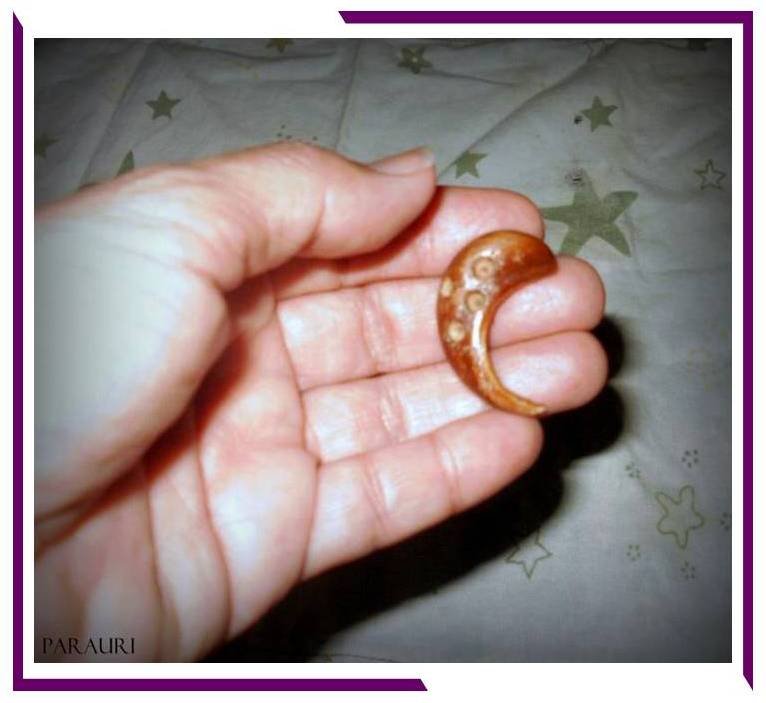
Con la navaja, hacer hendiduras y orificios al cachito. En este paso déjense llevar por la creatividad.
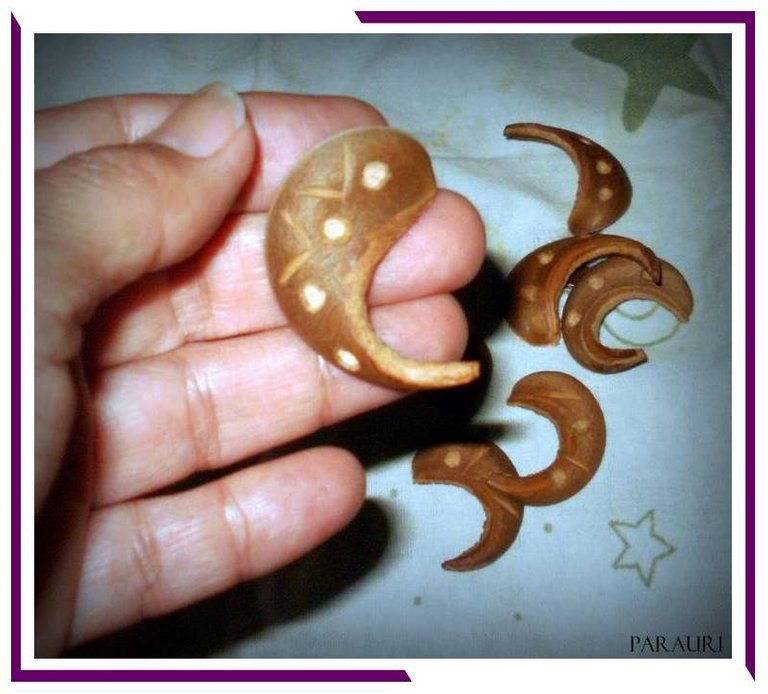
Paso 3
Con la lija, pulir el cachito de madera para terminar de emparejar, suavizar y mejorar su apariencia.
Paso 4
Con el barniz y el pincel darle brillo. Primero aplique una capa de barniz, deje secar por unos minutos y proceda a colocar una segunda capa.
Paso 5
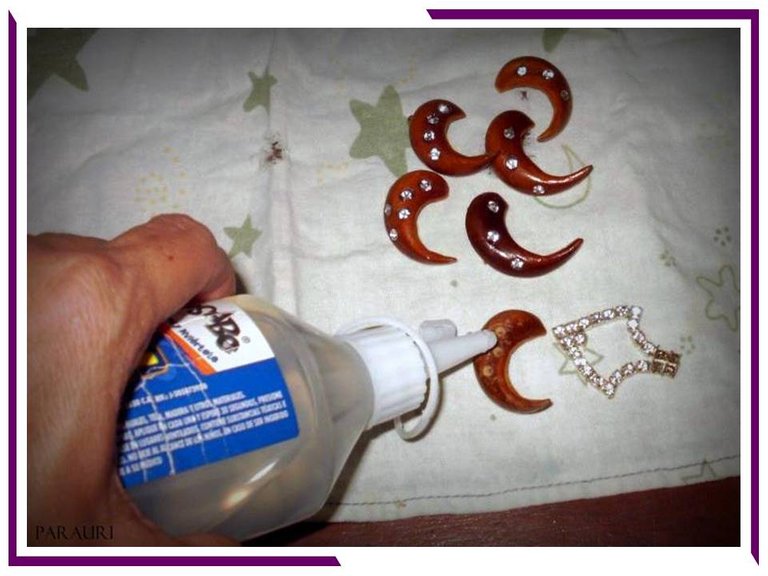
Con el silicón líquido, proceder a pegar la pedrería en los orificios.
Paso 6
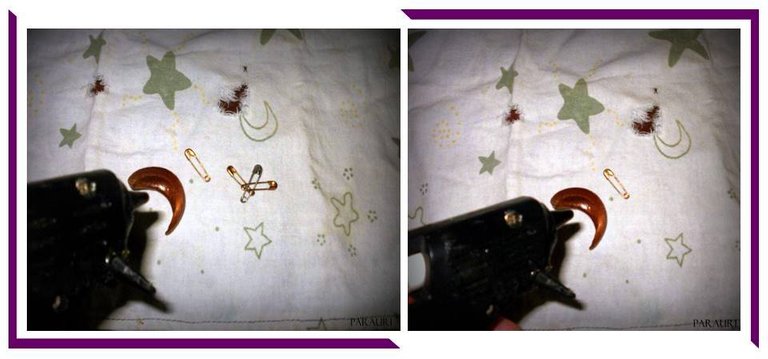
Con la pistola de silicón, pegar los broches o en este caso alfileres de seguridad, en la parte posterior del cachito.

Paso 7
Luego de estar endurecido el silicón, hacer pruebas con los broches para verificar que estén bien pegados.

¡Listo!
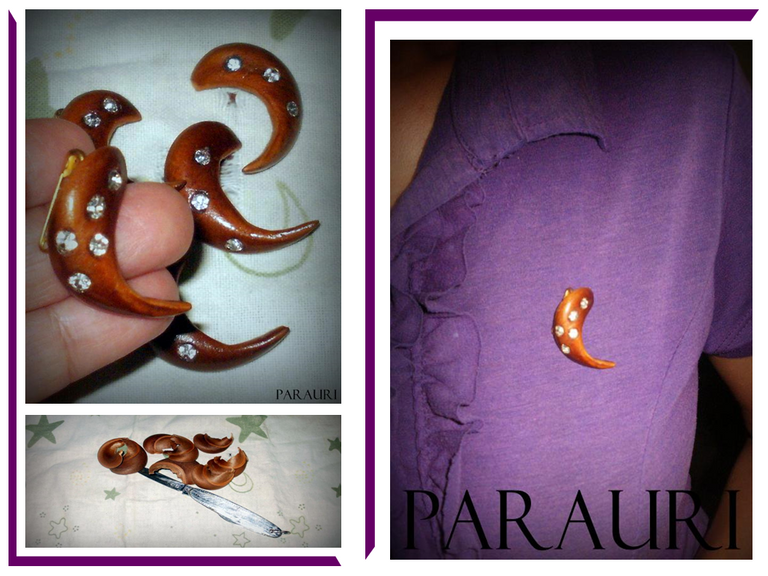
Aquí los Prendedores de Cachito
Un lindo detalle para las madres 💜

Greetings, dear friends of Hive and especially to the members of the HiveDiy Community, in which I find myself for the first time presenting my first publication in Hive about a craft made by me. If you check my blog, you will notice that I don't usually do this kind of presentations but maybe it's because of lack of time, although I have already saved some of my crafts with photographic records thinking of publishing them at some point. By the way, a friend of mine encouraged me a few months ago to publish and make known my other facet. Well, the right occasion has arrived and this is it, thinking of Mother's Day, when I think of mothers who deserve a special detail. I don't know if my friend could realize that I was able to make my first publication about my crafts but I'm going to mention her with much affection, her name is @aurodivys.
I share with you some pins that I made thinking of those mothers who are surrounded by loving children and who are always looking for a detail to give them on their day. I particularly like to think of affordable options so that not only children, but also grandchildren, nieces, nephews, brothers-in-law, sons-in-law and all the people who may surround a mother have the opportunity to give her a beautiful present.
So one day I decided to take up my craft supplies and I decided to make these pins with easy to find materials and also simple to make, inspired by a piece of wood as a natural jewel.
You may be familiar with these shells or small pieces because they are part of the fruit of the Jabillo or Ceiba tree, which are the names by which I have known this tree since my childhood, but scientifically it is called Hura crepitans. These little pieces are the result of the bursting of the fruits of the tree and I particularly remember that since I was a child I liked to take them when I went to a park where there were some, because I always thought that maybe I could create something with them. From a very young age I already had the creative streak.
Let's get to know the list of materials:
Materials
- Wooden cachitos
- Razor
- Fine sandpaper
- Shiny rhinestones (I used the ones from a broken ornament)
- Liquid silicone
- Silicone stick
- Silicone gun
- Flat brush
- Brooch pins (this is ideal but I used small safety pins)
- Ceramic varnish (can be nail polish but not thick)
Already with the materials located, let's proceed to the step by step presentation to make this cachito pin. Although I must clarify that due to failures in my computer with the hard drive that was damaged, I have lost part of some of my photos but most of the process is very well recorded visually.
Procedure 👓
Step 1
With the knife, remove the excess edge of wood to stylize the figure of the shell. This step is the most laborious because of the hardness of the wood of this type of shells. Especially for me it represents more effort, since my hands are a little affected by arthritis.
Step 2
With the razor, make indentations and holes to the cachito. In this step let your creativity take over.
Step 3
Using the sandpaper, polish the wood cube to finish matching, smoothing and improving its appearance.
Step 4
Using the varnish and brush give it a shine. First apply a coat of varnish, let dry for a few minutes and proceed to put on a second coat.
Step 5
Using the liquid silicone, proceed to glue the rhinestones into the holes.
Step 6
Using the silicone gun, glue the clasps or in this case safety pins, to the back of the cachet.
Step 7
After the silicone has hardened, test the snaps to make sure they are well glued.
Ready!
Here are the Cachito Pins
A nice touch for mothers 💜
¿Qué les parece?
Me siento feliz de haber compartido esta creación en esta Comunidad donde la Creatividad es la reina de todos los que hacen vida aquí.
I am happy to have shared this creation in this Community where Creativity is the queen of all who make life here.
De @parauri para el mundo ♥


¡Conoce y se parte del mundo azul en Hive¡
C/ Mundo Autismo

Ese cachito me trae hermosos recuerdos, me encantaba hacer el dije de delfín 🐬 ya que es uno de mis animales favoritos.
Hola @rodnellys31. Que bueno, que te hice evocar recuerdos agradables con este prendedor. Gracias por pasar y apreciar, me siento muy feliz de haber venido hasta esta comunidad. Lamento haber atendido tu comentario tarde, pero donde vivo, a los pocos minutos después de presentar esta publicación estuvimos afectados por un apagón de muchas horas y luego la señal de internet ha estado muy mal. Hoy es que logro incorpórame.
Un abrazo virtual ♥
Saludos 🤗 estimada, me que desagradable noticiaa, me alegra que ya estés de vuelta, lo bueno de todo es que hallas podido recibir mi mensaje y responderlo con esas palabras emotivas.
Congratulations @parauri! You have completed the following achievement on the Hive blockchain and have been rewarded with new badge(s):
Your next target is to reach 2250 replies.
You can view your badges on your board and compare yourself to others in the Ranking
If you no longer want to receive notifications, reply to this comment with the word
STOPCheck out the last post from @hivebuzz:
Greetings friends, thanks for always being active 🐝
De nada @parauri, es un placer 😊🌹 ¡Gracias por su participación de lesiones!
Me hiciste recordar mi infancia cuando hacías esos prendedores. Siempre me parecieron muy ingeniosos y muy bonitos. Qué bueno que los traes a esta comunidad para que otras personas puedan aprender a hacerlos.
Un abrazo, hermana.
Hola hermano, me sorprendiste con esos recuerdos de infancia que tienes sobre mí, una buena época cuando era más activa con las manualidades y sin tantos dolores.
Me ha agradado presentar esta idea para un detalle sencillo, lindo y útil para las madres 😊
Mi abrazo para ti ♥
The rewards earned on this comment will go directly to the person sharing the post on Twitter as long as they are registered with @poshtoken. Sign up at https://hiveposh.com.