Eng
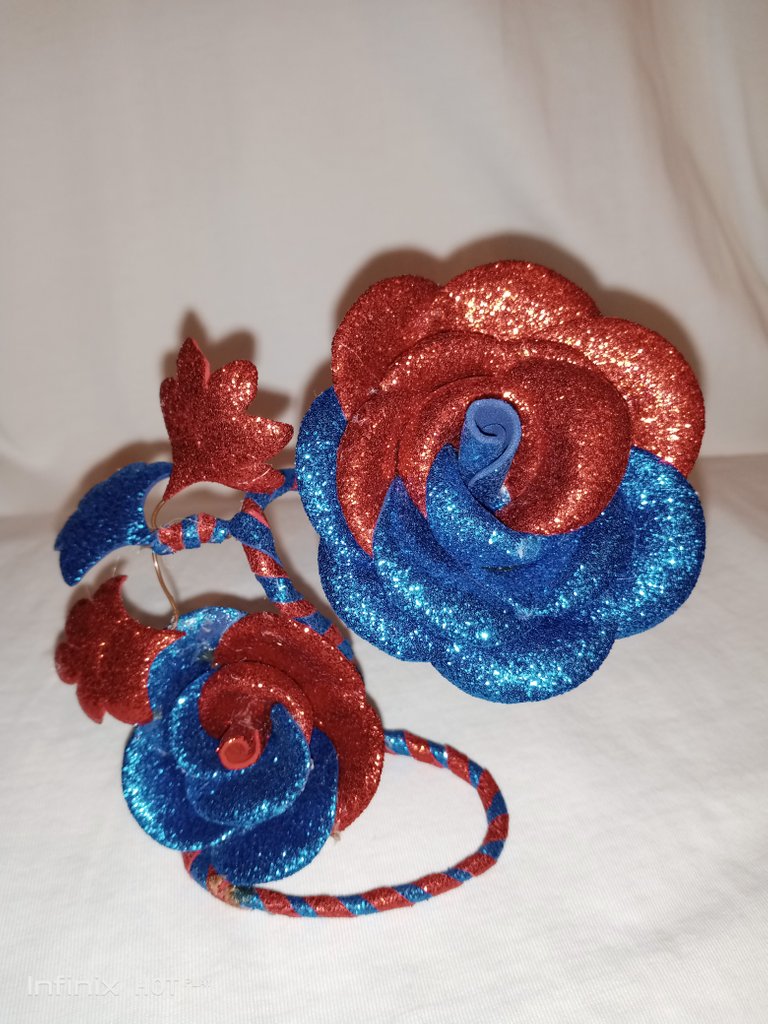
Greetings friends of this beautiful community, I hope everyone is very well this day, before all, happy start to the week, that this week is full of blessings and good wishes. I know it had been a while since I wrote but I did not stop doing one of the things that I like the most, which is sharing with you these beautiful crafts and especially what leads us to build them, recently I made this beautiful center of two roses for my virgin of the valley, we always decorate everything with Christmas decorations that this year I felt obliged to add some brightness to this table and make it stand out a bit, despite the fact that natural flowers are placed on it, this flower with the The simple fact of seeing her gives you a touch that she is always there as God as the virgin, despite gift they are there guiding our steps and opening new paths for us. That is why in this post I show you how I went step by step to do it.
Esp
Saludos amigos de esta hermosa comunidad, espero todos se encuentren muy bien este día, antes de todo feliz inicio de semana, que esta semana este cargada de bendiciones y buenos deseos. Sé que llevaba un tiempo que no escribía pero no deje de hacer unas de las cosas que más me gusta el cual es compartir con ustedes estas hermosas manualidades y sobre todo lo que nos lleva a construirlas, hace poco realice este hermoso centro de dos rosas para mi virgen del valle, siempre adornamos todo con los adornos de navidad que este año me vi en la obligación de agregarle algo de brillo a esta mesa y hacer que resaltara un poco, a pesar de que se le colocan flores naturales, esta flor con el simple hecho de verla te da un toque de que ella siempre está ahí como dios como la virgen, a pesar de doto están ahí guiando nuestros pasos y abriendo nuevos caminos para nosotros. Es por ello que en este post le muestro como fue mí paso a paso para realizarla.
Eng
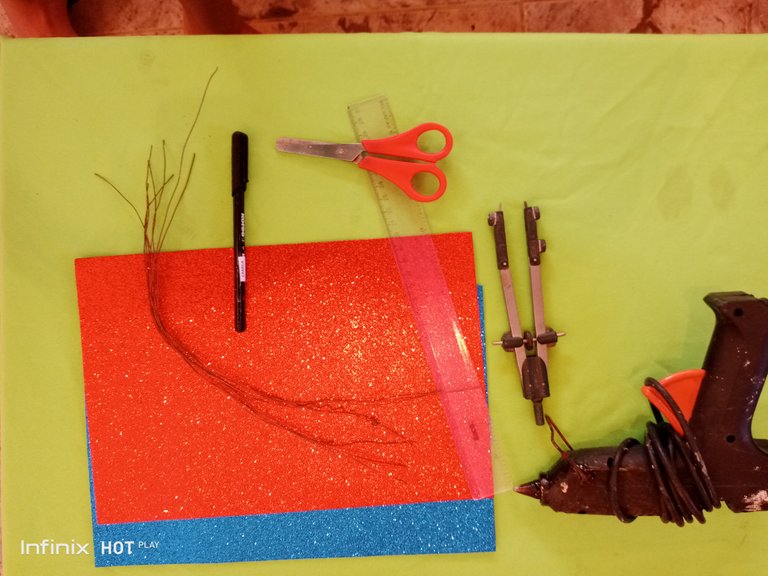
Materials you use:
🌹Black pencil
🌹 Bendable wire
🌹 Scissors
🌹 Compass
🌹 Rule
🌹 Hot silicone
🌹 Two sheets of foami or frosted Eva rubber, two different colors
🌹 Clothes iron
Esp
Materiales que utilice:
🌹 Lapicero color negro
🌹 Alambre moldeable
🌹 Tijera
🌹 Compas
🌹 Regla
🌹 Silicón caliente
🌹 Dos hojas de foami o goma Eva escarchada, dos colores diferentes
🌹 Plancha de ropa
Eng
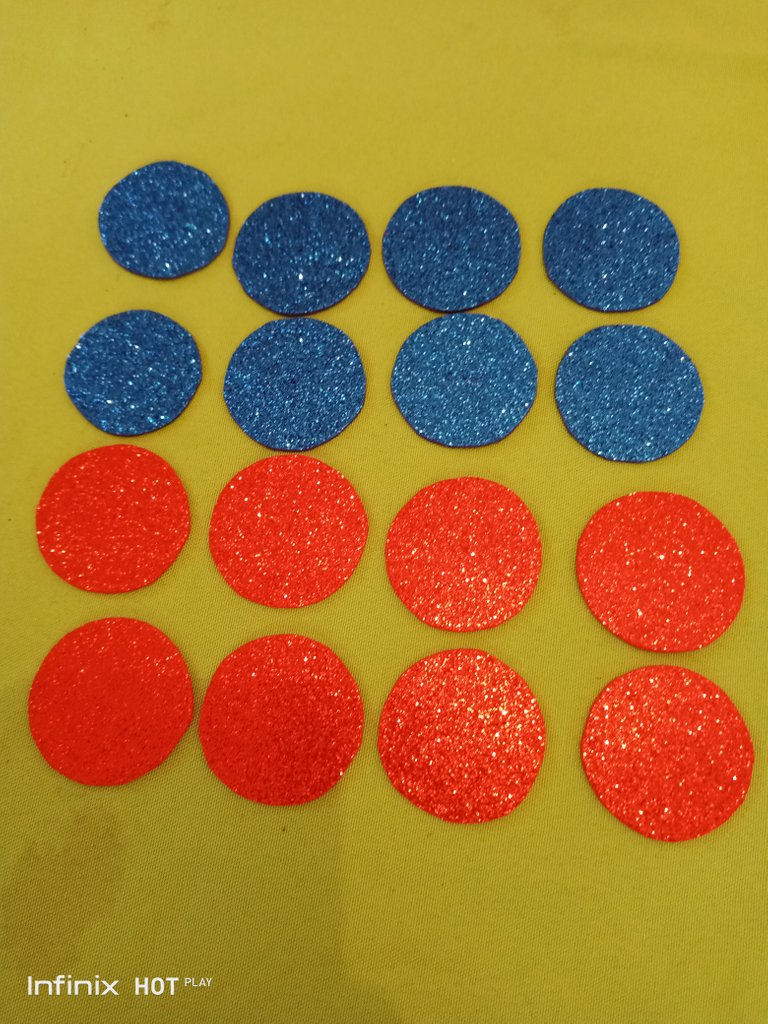
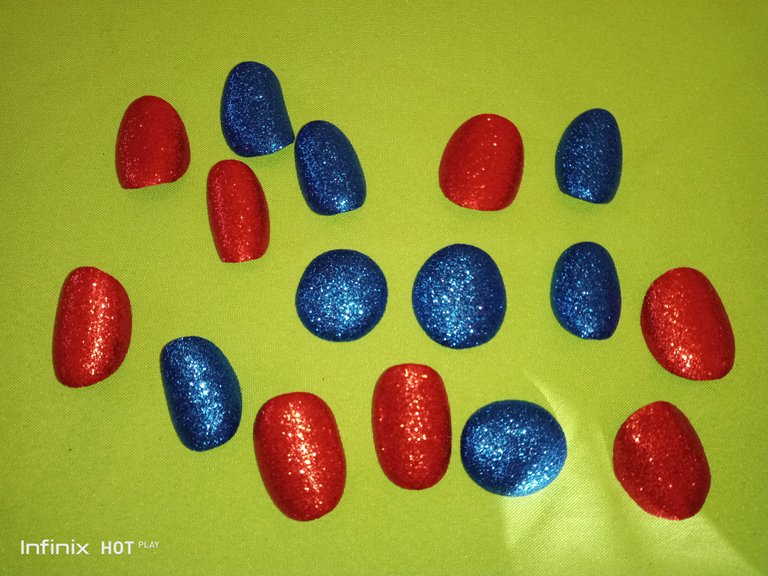
🌹 Step 1🌹
We are going to take the ruler and place it on a flat surface, we proceed to open the compass to 2.5 cm, we can do this accurately by placing the iron tip of the compass at 0 on the ruler and the pencil tip at 2.5 cm from the ruler, take the blue eva rubber sheet and make 8 blue circles and repeat this same process with the red eva rubber sheet, cut out all the circles and they should look like this
Esp
🌹 Paso 1 🌹
Vamos a tomar la regla y la ubicaremos en una superficie plana, procedemos abrir el compás a 2,5 cm, esto lo podemos hacer con exactitud colocando la punta de hierro del compás en 0 de la regla y la punta de lápiz en 2,5 cm de la regla, tomamos la lámina azul de goma eva y hacemos 8 círculos azules y repetimos este mismo proceso con la lámina de goma eva color roja, recortamos todos los círculos y nos deben quedar así
Eng
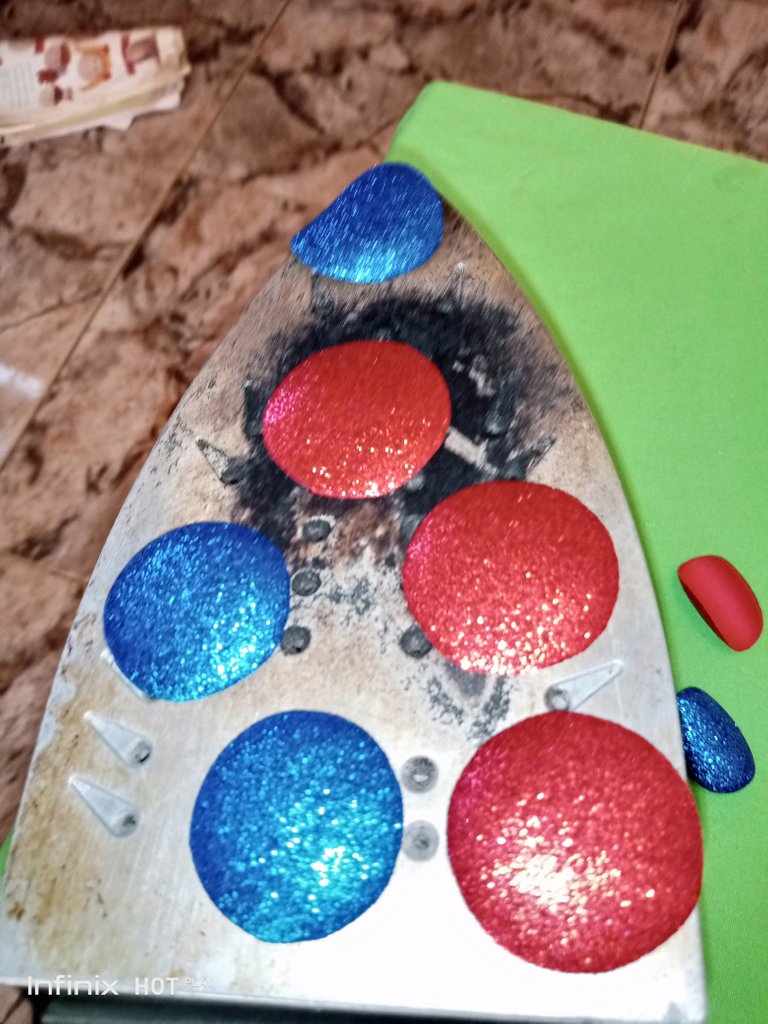
🌹 Step 2 🌹
We heat the clothes iron, once hot we will place it face up and we will place the circles with the frosty part on the opposite side of where the iron heats, when they begin to detach from the iron it is because they are ready and we remove them of the calo, this process helps us to give it the double we need so that the petals look more real.
Esp
🌹 Paso 2 🌹
Ponemos a calentar la plancha de ropa, una vez caliente la vamos a colocar boca arriba e iremos colocando los círculos con la parte escarchada al lado contrario de donde calienta la plancha, cuando comiencen a despegarse de la plancha es porque ya están listo y los retiramos del calo, este proceso nos sirve para darle el dobles que necesitamos para que los pétalos se vean más reales.
Eng
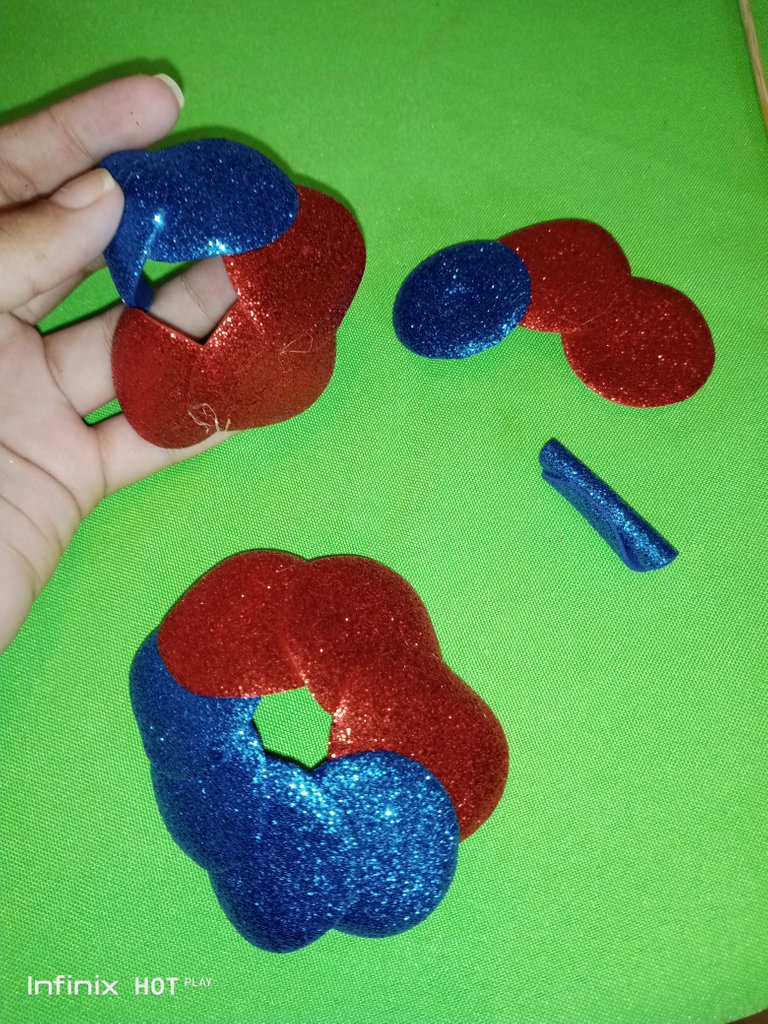
🌹 Step 3🌹
In this part we will begin to assemble the largest rose, first we take a circle and we will roll it up and with the help of silicone we seal it so that it does not fall apart, this will be the center of our rose, then we take a blue circle and two red ones and glue it on the ends. sides, then we take two blue and three red and we stick it on the sides and to finish we take 3 red circles and 4 blue circles.
Esp
🌹 Paso 3 🌹
En esta parte comenzaremos armar la rosa más grande primero tomamos un circulo y los enrollaremos y con ayuda del silicon lo sellamos para que no se desarme, este será el centro de nuestra rosa, luego tomamos un circulo azul y dos rojos y lo pegamos por los laterales, después tomamos dos azules y tres rojos y lo pegamos por los laterales y para finalizar toamos 3 círculos rojos y 4 círculos azules.
Eng
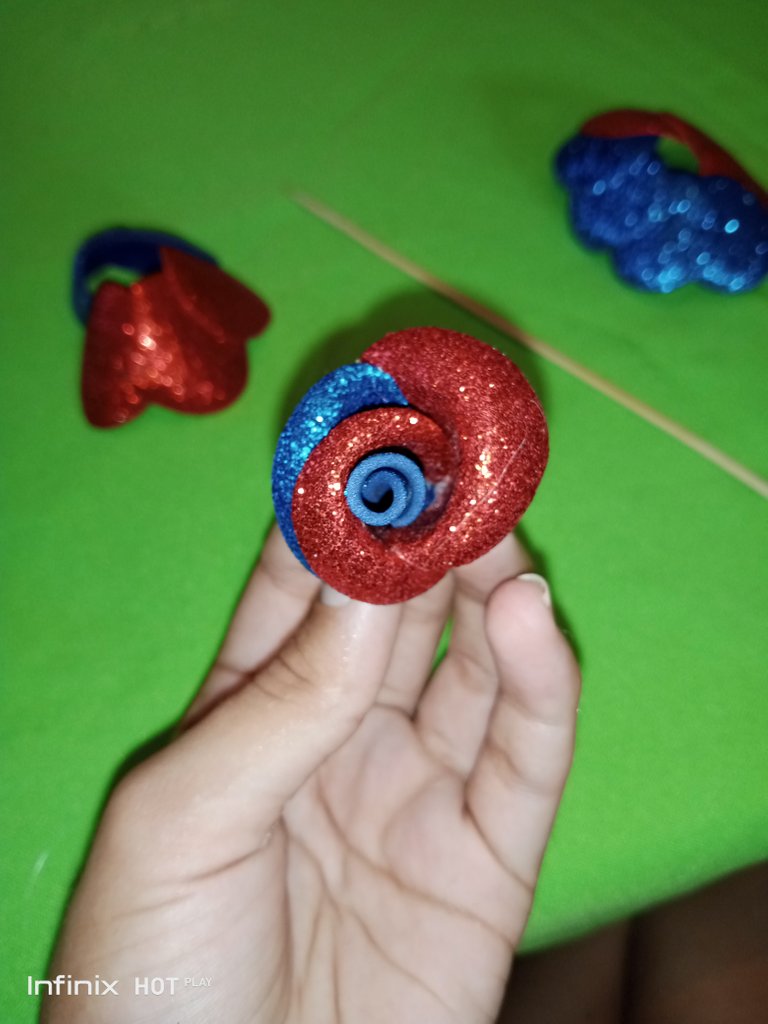
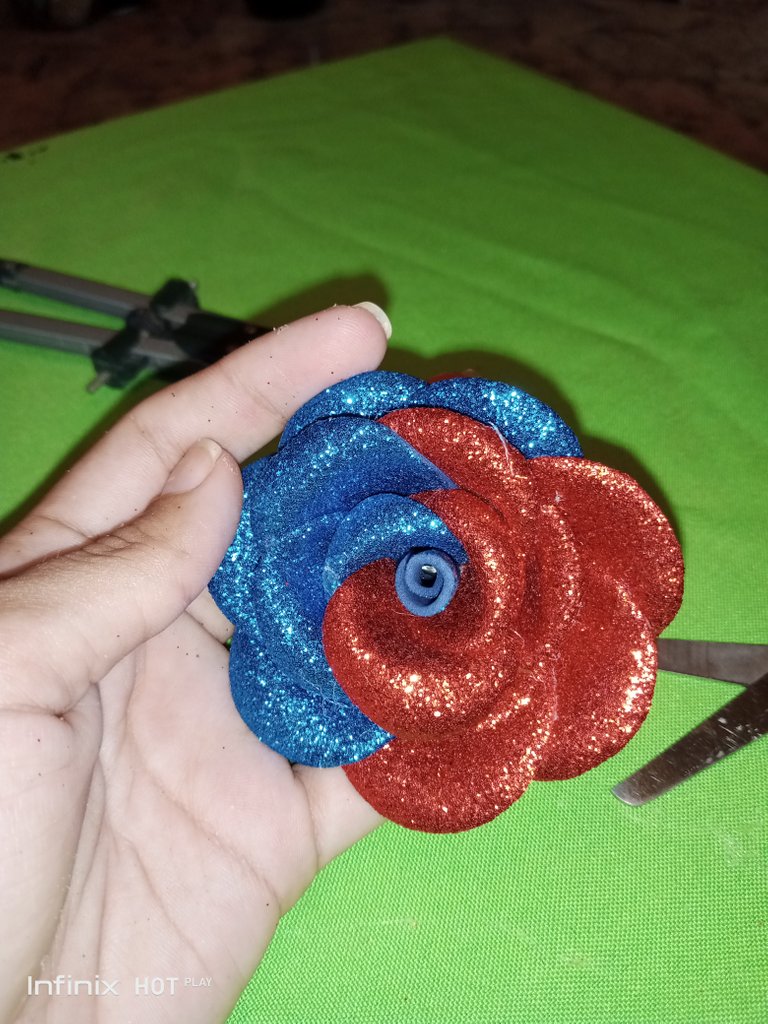
🌹 Step 4🌹
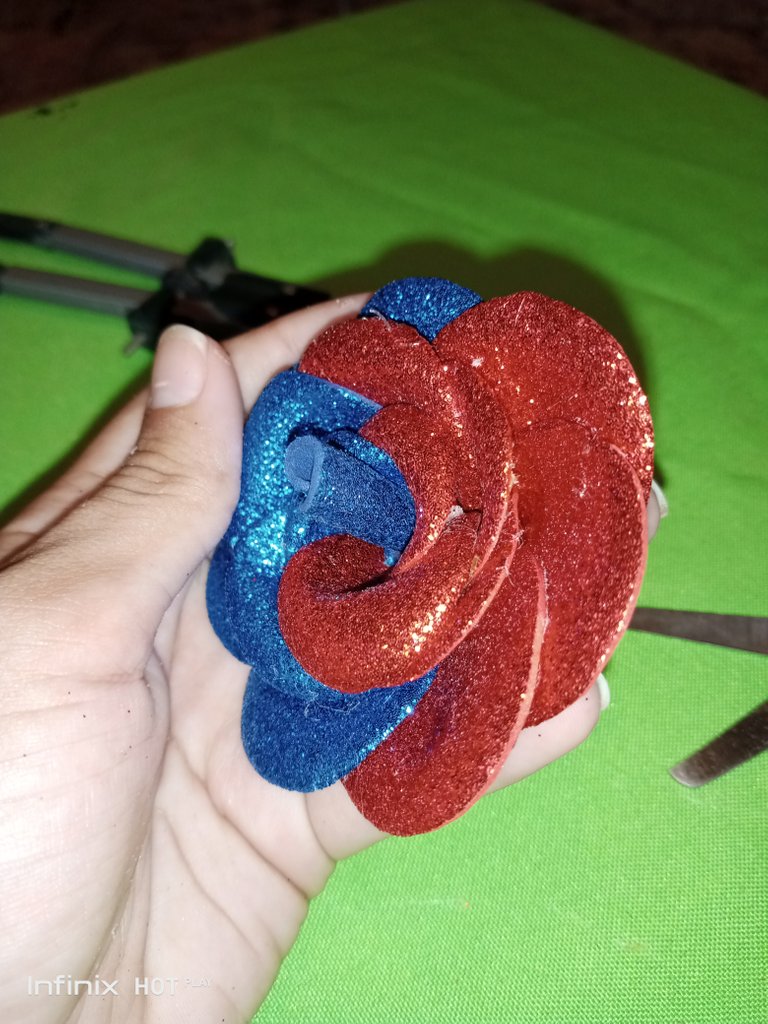
We take the piece of three circles and we are going to glue it around the blue roll that we put together, as it appears in the first image. Then we glue the piece of 5 circles in the same way that we glued the previous one and to finish we glue the last piece of 7 circles, leaving the rose as it appears in the image shown.
Esp
🌹 Paso 4 🌹
Tomamos la pieza de tres círculos y la vamos a pegar alrededor del rollito azul que armamos, como aparece en la primera imagen. Luego pegamos la pieza de 5 círculos de la misma manera que pegamos la anterior y para terminar pegamos la última pieza de 7 círculos, quedándonos la rosa como aparece en la imagen mostrada.

Eng
🌹 Optional 🌹
Make a second rose with what is left of the Eva rubber sheets. The first piece being the roll in the middle of the rose, the second of three circles and the third of 5 circles. Keeping this pretty rose is a little smaller than the previous one but it still looks beautiful.
Esp
🌹 Opcional 🌹
Realizar una segunda rosa con lo que le sobra de las láminas de goma Eva. Siendo la primera pieza el rollito del medio de la rosa, la segunda de tres círculos y la tercera de 5 círculos. Quedándonos esta linda rosa es un poco más pequeña que la anterior pero igual se ve hermosa.

Eng
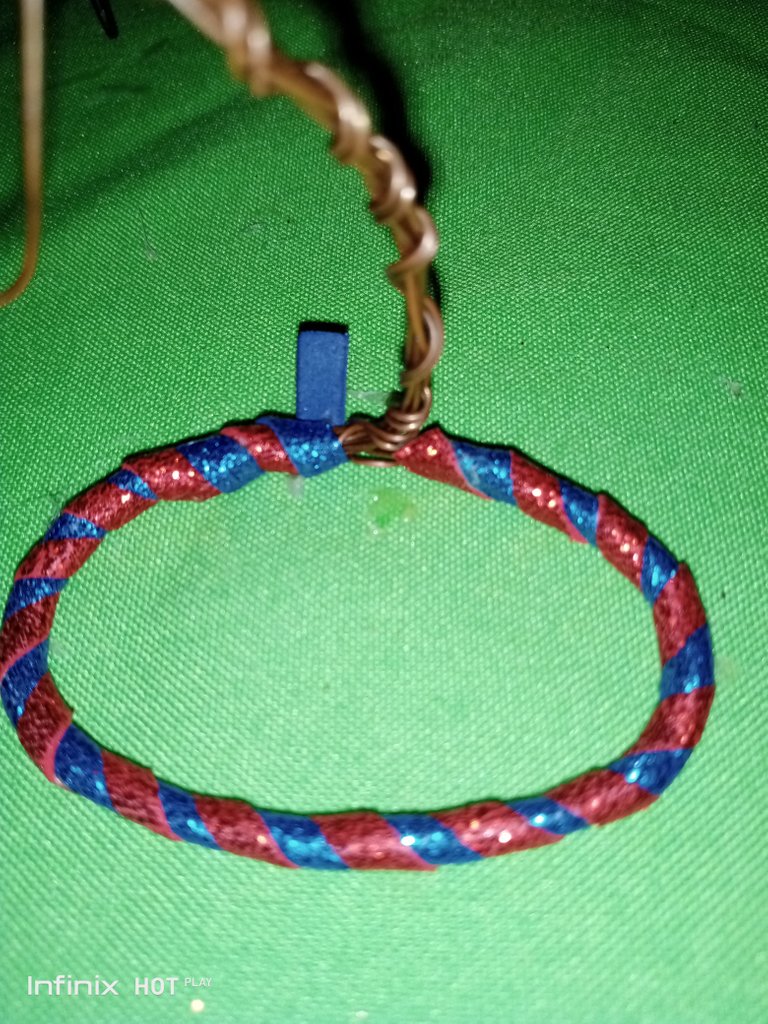
🌹 Step 5🌹
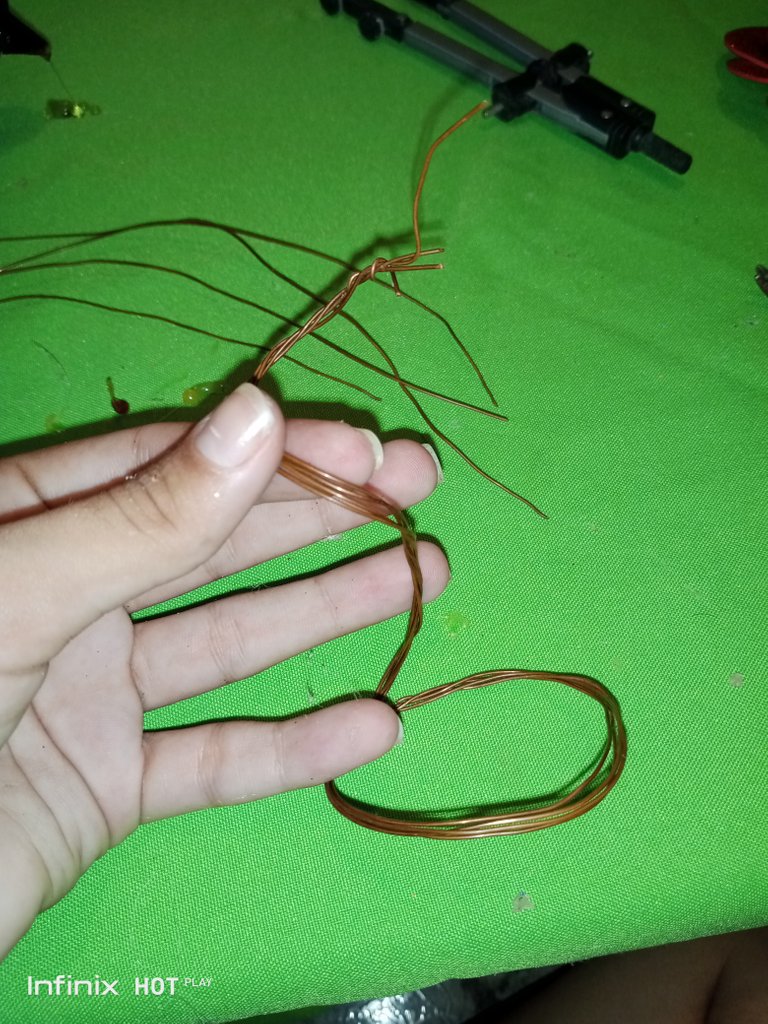
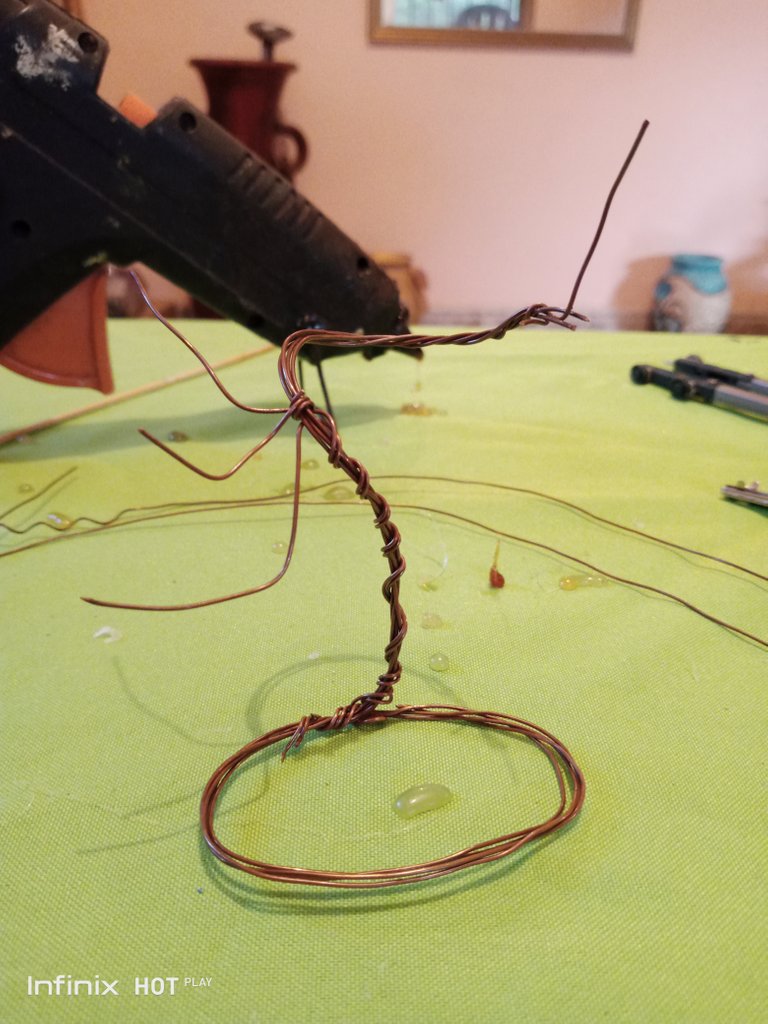
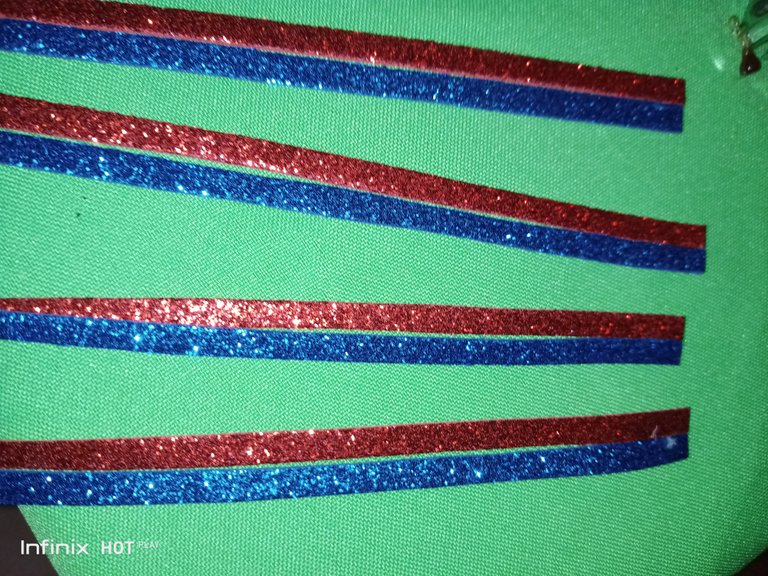
We are going to take 5 strips of moldable wire of 30 cm each, with our hands we are going to give it this circular shape at the bottom and we will try to make three branches on the right side to place the leaves of our roses, this wire is usually In general, it is easy to shape but if it makes it easier for you, you can use jewelery pliers to help yourself, then we will cut 4 red and blue strips 0.5 cm wide and 15 cm long, we will join a blue strip with a red one on the upper side so that the glue is not noticeable and we will cover our entire base with these strips, as shown in the images, once the lining is finished we let the silicone dry very well.
Esp
🌹 Paso 5🌹
Vamos a tomar 5 tiras de alambre moldeable de 30 cm cada una, con nuestras manos le vamos a dar esta forma circular en la parte inferior y trataremos de realizar tres ramas en el lado derecho para colocar las hojas de nuestras rosas, este alambre por lo general es fácil de moldear pero si se les hace más fácil pueden utilizar tenazas de bisutería para ayudarse, luego cortaremos 4 tiras de color rojo y de color azul de 0,5 cm de ancho y 15 cm de largo, vamos a unir una tira azul con una roja en la parte superior lateral para que no se note la pega e iremos forrando toda nuestra base con estas tiras, como muestra en las imágenes, una vez terminada de forrar dejamos que el silicón seque muy bien.


Eng
🌹 Step 6🌹
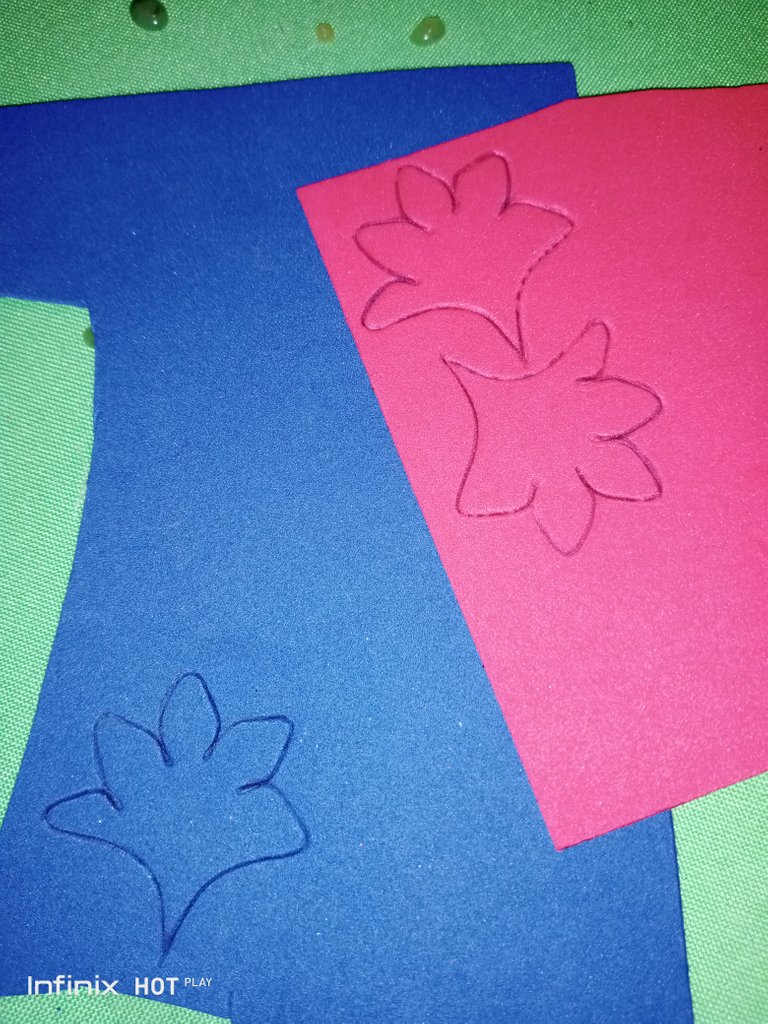
We take a bit of Eva rubber of the color that we have left over and we are going to make three leaves of the model that we like the most, in particular these pointed leaves look better on roses since it gives them a little more similarity, we are going to mark them in the foami and then we cut them, we glued to the base in the three branches that we left outside, in the way that it shows in the images, we have to try to hide in this case the wire, that is why the leaves should start with a very fine part.
Esp
🌹 Paso 6 🌹
Tomamos un poco de goma Eva del color que nos sobre y vamos a realizar tres hojas del modelo que más nos guste, en lo particular estas hojas puntiagudas se ven mejor en las rosas ya que le da un poco más de semejanza, las vamos a marcar en el foami y luego las recortamos , pegamos a la base en las tres ramas que dejamos por fuera, de la manera que muestra en las imágenes, tenemos que tratar de ocultar en este caso el alambre es por ello que las hojas deberán comenzar con una parte muy fina.

Eng
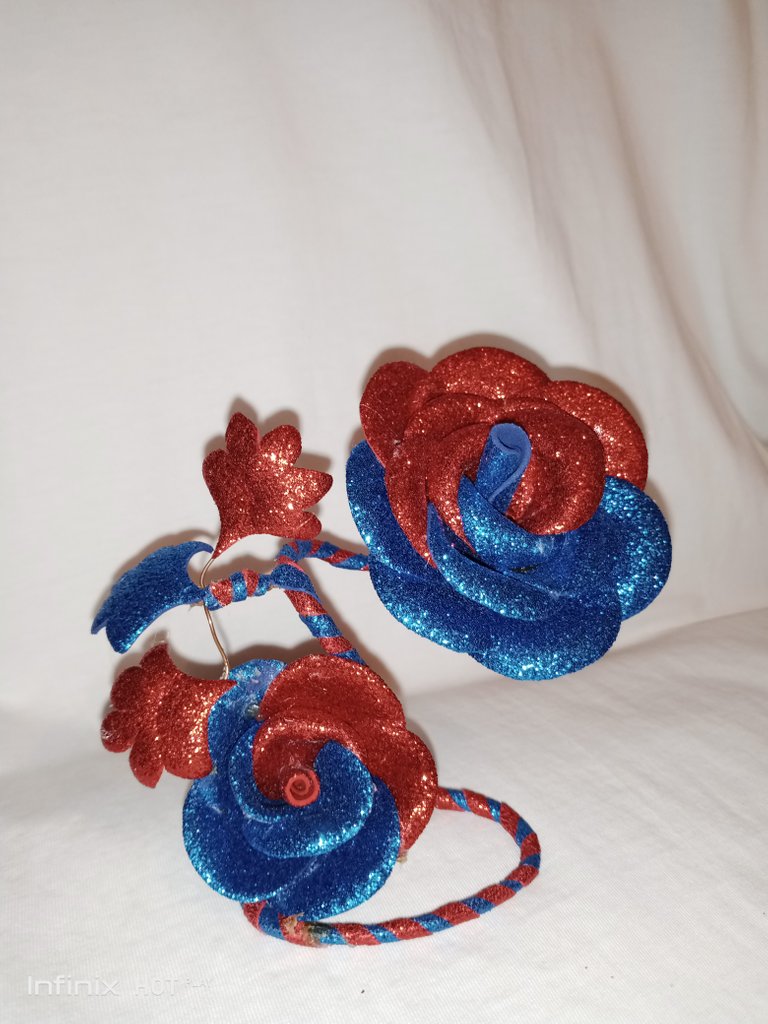
🌹 Step 7🌹
Then we glue our main rose on the other part of the wire that was uncovered in this way, we are going to remove all the remains of silicone that have been left over from the rose and that is how it should look.
Esp
🌹 Paso 7🌹
Luego pegamos nuestra rosa principal en la otra parte de alambre que quedo descubierta de esta manera, vamos a retirar todos los restos de silicón que hayan quedado sobrando en la rosa y así nos debe quedar.

Eng
🌹 Optional 🌹
As I had told you, the second rose is optional, but I really liked how it looked with both of them, so I placed it at the bottom and that's how it looks
Esp
🌹 Opcional 🌹
Como les había comentado la segunda rosa es opcional, pero a mí me gustó mucho como se veía con las dos entonces se la coloque en la parte inferior y así quedo

Eng
Thank you very much for reading, voting and commenting on my post, I really appreciate it.
Esp
Muchas gracias por leer, votar y comentar mi post, les agradezco mucho.
Eng
The photos are my own and were taken with an infinix hot 11 play and the text was translated into English using Google translator.🌹🌹
Esp
Las fotos son de mi autoría y fueron tomadas con un infinix hot 11 play y el texto fue traducido al inglés en Google traductor.🌹🌹
The rewards earned on this comment will go directly to the people( @kawsar8035 ) sharing the post on Twitter as long as they are registered with @poshtoken. Sign up at https://hiveposh.com.
Me gustó la rosa y la combinación que usaste, el detalle del alambre, quedó muy original además de esa forma peculiar de las hojitas. Me dieron ganas de recrear una. Gracias por compartir.
Me alegra un montón que les incentiven a recrear esta hermosa rosa, muchas gracias por leer y comentar 🌹😘
Congratulations @quijadita14! You have completed the following achievement on the Hive blockchain And have been rewarded with New badge(s)
Your next target is to reach 60 posts.
You can view your badges on your board and compare yourself to others in the Ranking
If you no longer want to receive notifications, reply to this comment with the word
STOPTo support your work, I also upvoted your post!
Check out the last post from @hivebuzz:
Support the HiveBuzz project. Vote for our proposal!
Está bellísimo, me encantan estos adornos 🤩