
YO TENIA A MERCURIO, VENUS, TIERRA Y LUEGO MARTE...
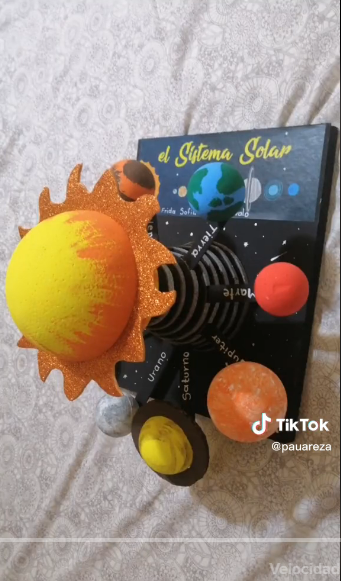
Hola amigos de HiveDIY, el día de hoy quiero compartir con ustedes el proceso para hacer una maqueta del Sistema Solar. Debo mencionar que la idea del modelo de esta maqueta no fue mía, de hecho un amigo quien acudió a mi para ayudarlo a realizarla, la vió en un video de Tiktok cuyo link les estaré dejando aquí:
Hello friends of HiveDIY, on this day I would like to share with all of you, the process of the making of a Solar System Maquette. I have to mention that the original idea of this model of Maquette wasn't mine, actually a frined that asked for my help saw a tiktok video which we used as a reference. I'll let you the image and link of the video right there:

📖 Dato Curioso /// Fun fact
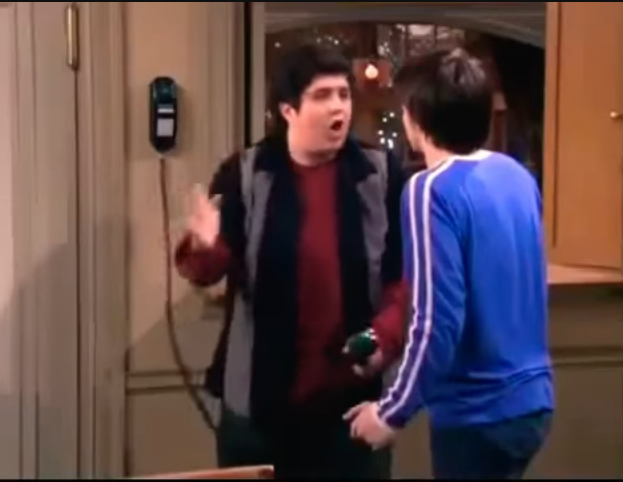
Aunque es un dato insignificante, cuando estaba pequeña me costaba aprenderme el orden de los planetas hasta que un día me vi un capítulo de una serie llamada "Drake y Josh" donde estaban participando en un concurso de radio y para ganar el concurso debían responder la pregunta de "¿Cual es el Octavo planeta mas cercano al Sol?" y para responderlo recordaron una canción donde dicen el orden de los planetas, desde esa vez me los aprendí gracias a esa canción.
Si quieren ver el vídeo les dejo el link en la imagen de abajo
Although it is an insignificant fact, when I was little I had a hard time learning the order of the planets until one day I saw an episode of a series called "Drake and Josh" where they were participating in a radio contest, and to win they had to answer the question of "What is the eighth closest planet to the Sun?" then they remembered a song where they say the order of the planets, from that time I learned them thanks to that song.
If you want to see the video I will leave the link in the image below:

✍️ Materiales Empleados /// Materials

Imagen de pvproductions en Freepik

🎨 Proceso de Maqueteado /// Maquette Process
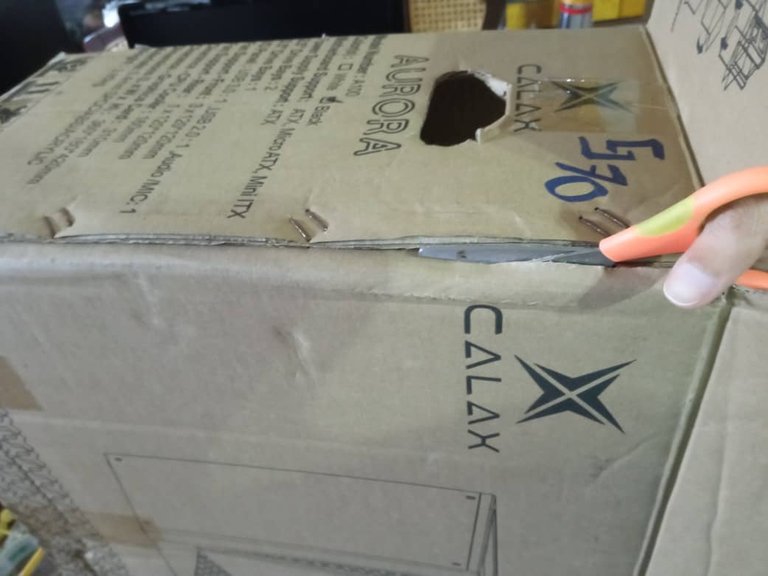
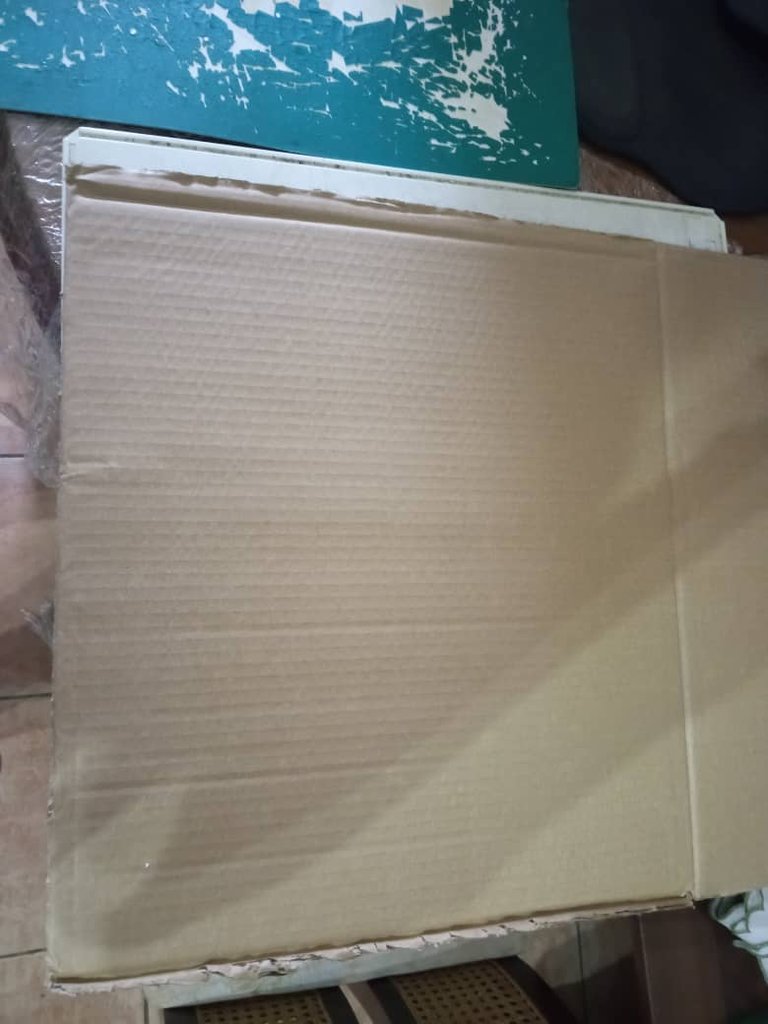
Ok, let's begin to explain the process to make the Maquette. As a first step we took a cardboard box and began to cut one of the faces of the box using the scissors, to have our base for the Maquette.
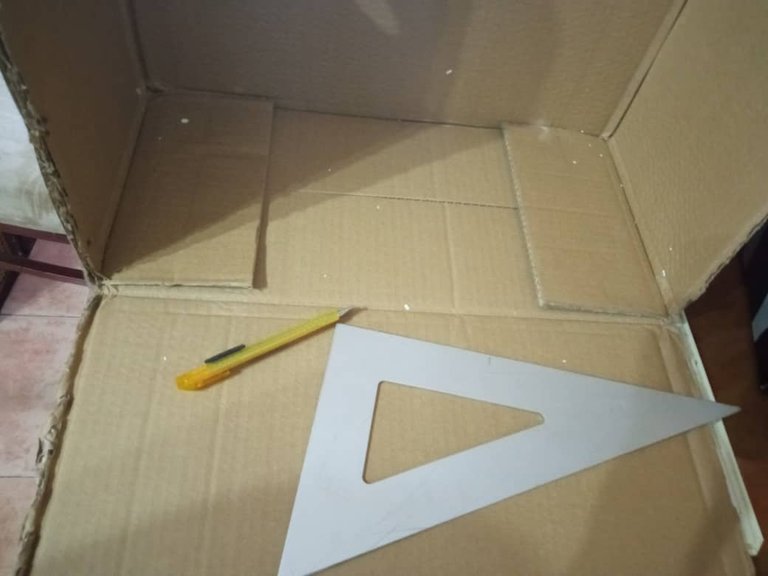
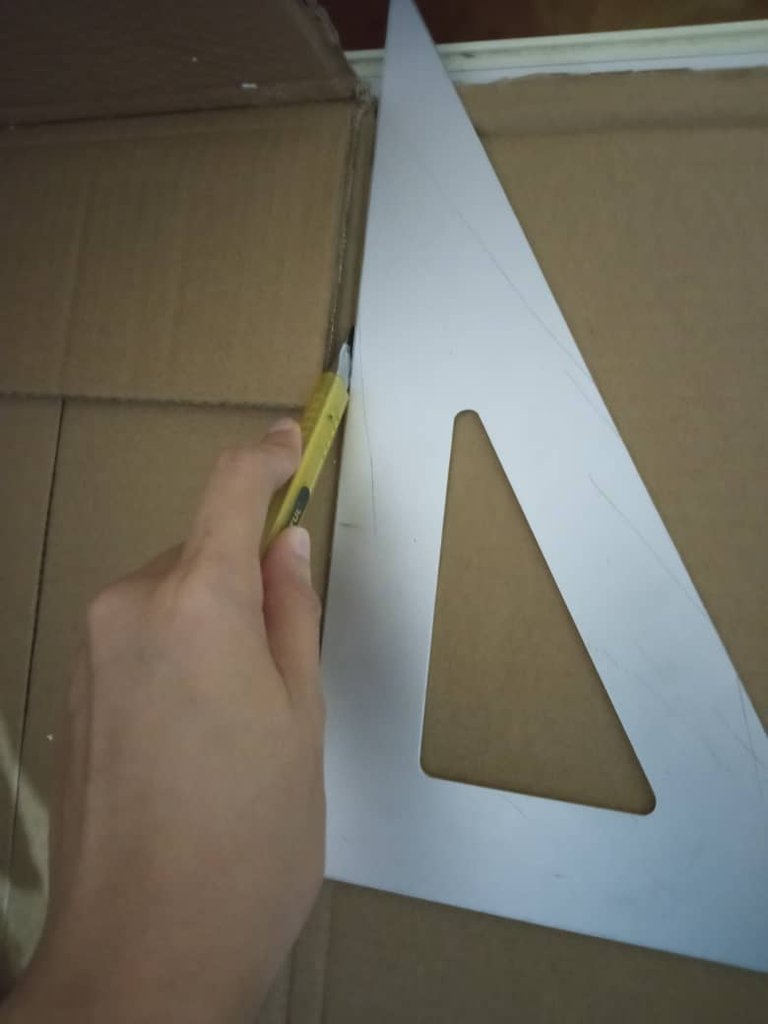
Luego, con ayuda del exacto/cuchilla y una escuadra, cortamos el extremo faltante de la cara de cartón que usaremos como base mas adelante. Las medidas eran aproximadamente de 40 centímetros de ancho por 55 centímetros de largo (podía hacerse mas pequeña pero nosotros quisimos hacer un poco mas grande la maqueta).
Then, with the help of the cutter and a square, we cut the missing end of the cardboard face that we will use as a base later on. The measurements of the base were aproximately 40 centimetters of width and 55 centimetters of lengh (It could be smaller but we wanted to make a bigger maquette than the one of the video)
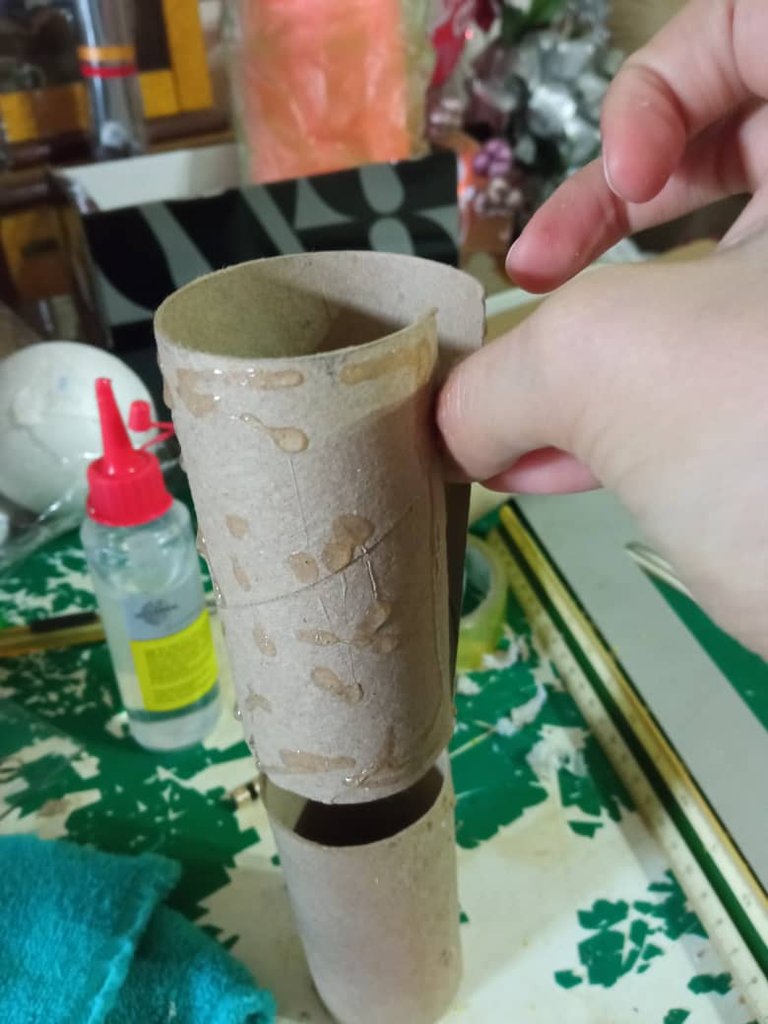
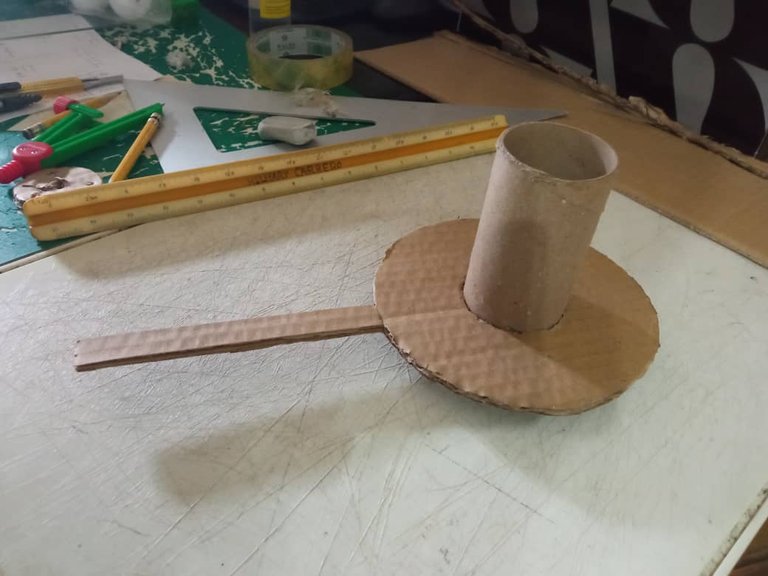
El siguiente paso fue el realizar el cilindro que irá en el medio de la base, ya que si prestamos atención al vídeo de referencia, la base tiene un cilindro de cartón en el medio donde irán insertados los círculos de cartón que sostienen cada planeta. Para realizar esto tomamos 2 cilindros del papel higiénico.
The next step was to make the cylinder that will go in the middle of the base, because if we pay attention to the reference video, the base has a cardboard cylinder in the middle where the cardboard circles that hold each planet will be inserted. To do this we took 2 cylinders of toilet paper.
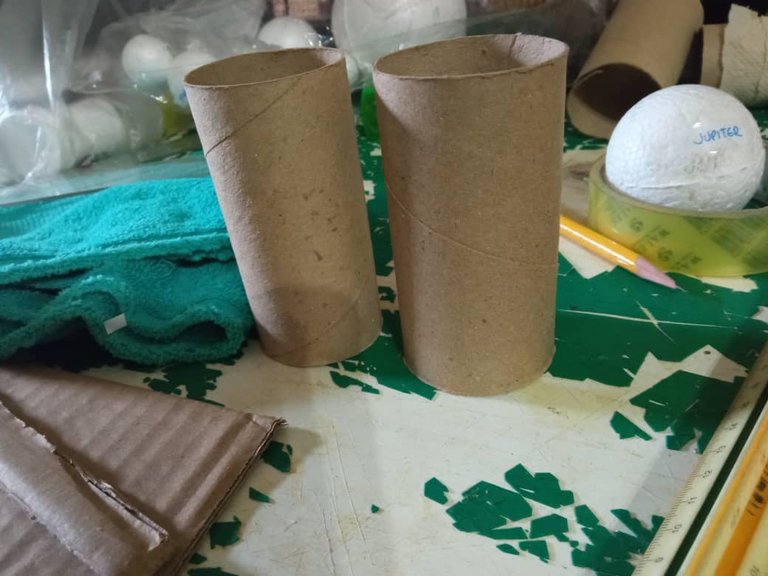
Ya que usar solo 1 cilindro de cartón era un poco complicado debido a que no era muy resistente, decidimos picar un cilindro verticalmente para reforzar por dentro el otro cilindro.
Since using only 1 cardboard cylinder was a bit complicated because it was not very resistant, we decided to cut a cylinder vertically to reinforce the other cylinder from the inside.
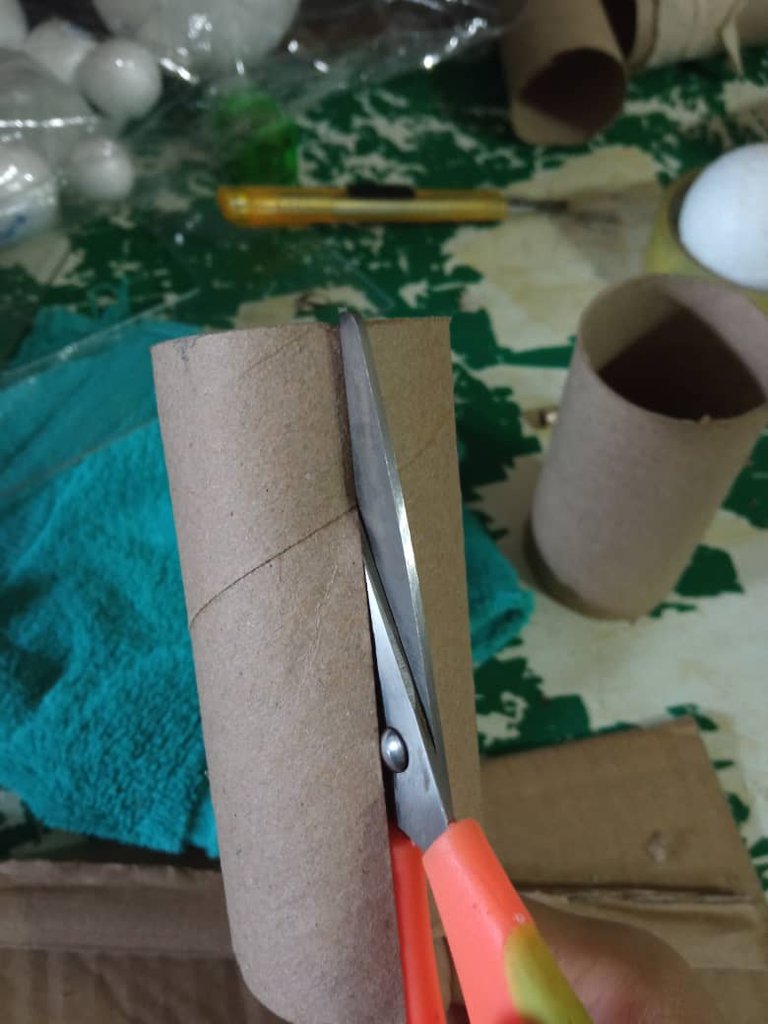
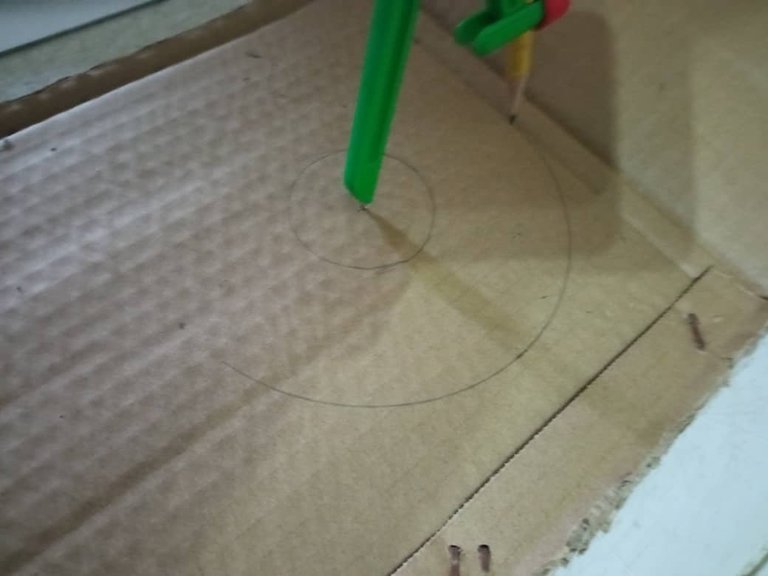
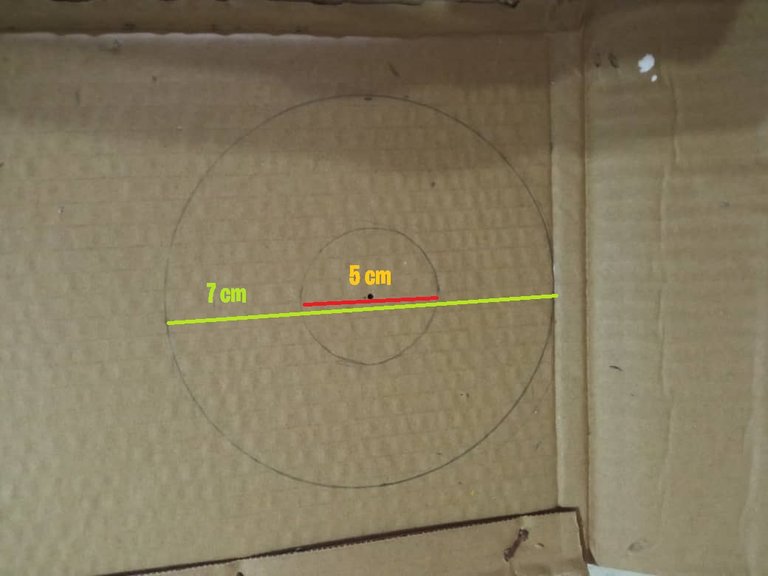
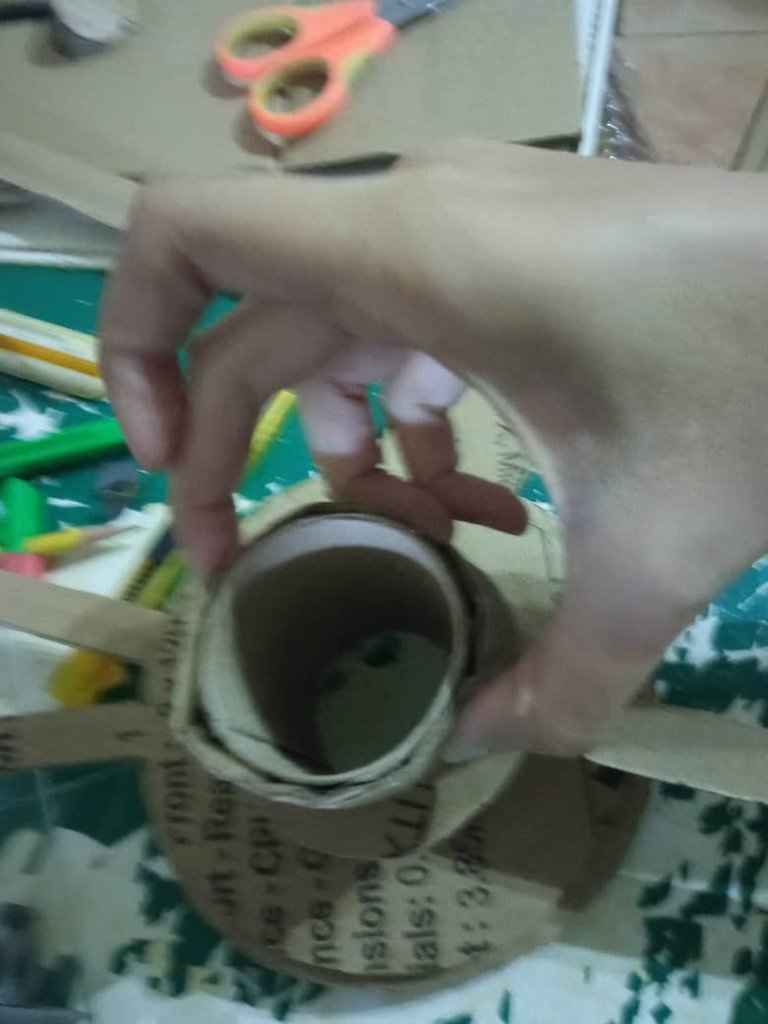
Una vez listo nuestro cilindro, lo usamos como guía para dibujar la circunferencia central que tendríamos que cortar al momento de sacar las bases circulares para cada planeta.
Once our cylinder is ready, we use it as a guide to draw the central circumference that we would have to cut when removing the circular bases for each planet.

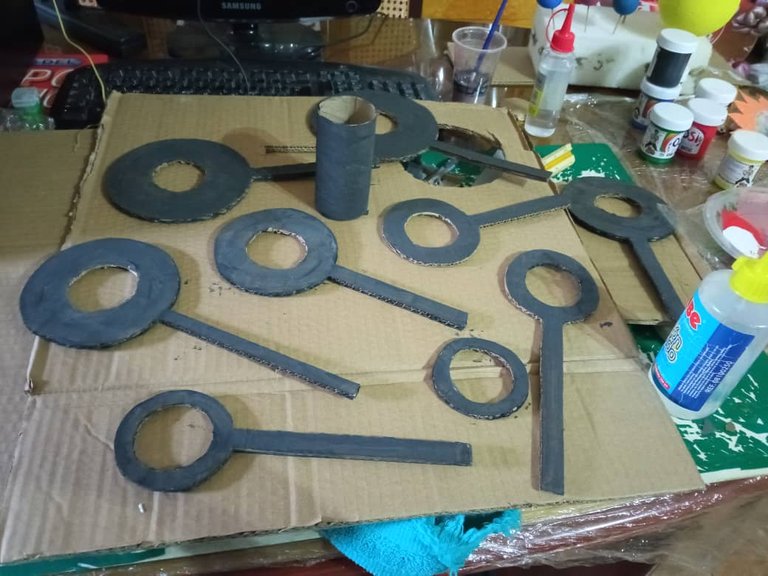
El diámetro era de 5 centímetros, por lo que ubicaríamos el punto central para, con ayuda de nuestro compás, dibujaríamos el circulo externo de nuestra primera base circular. Nosotros comenzamos a hacer la mas grande, la que correspondería a Neptuno, su diámetro era de 7 centímetros.
The diameter was 5 centimeters, so we would locate the central point and, with the help of our compass, we would draw the outer circle of our first circular base. We began to make the largest, the one that would correspond to Neptune, its diameter was 7 centimeters.
Luego de dibujar nuestra base circular, procedimos a dibujar una tira de cartón en esa misma pieza, que fuera de aproximadamente 1cm de ancho y 10cm de largo, ya que el planeta iría pegado en el extremo final de esa tira.
After drawing our circular base, we proceeded to draw a cardboard strip on that same piece, which was approximately 1cm wide and 10cm long, since the planet would be glued to the end of that strip.
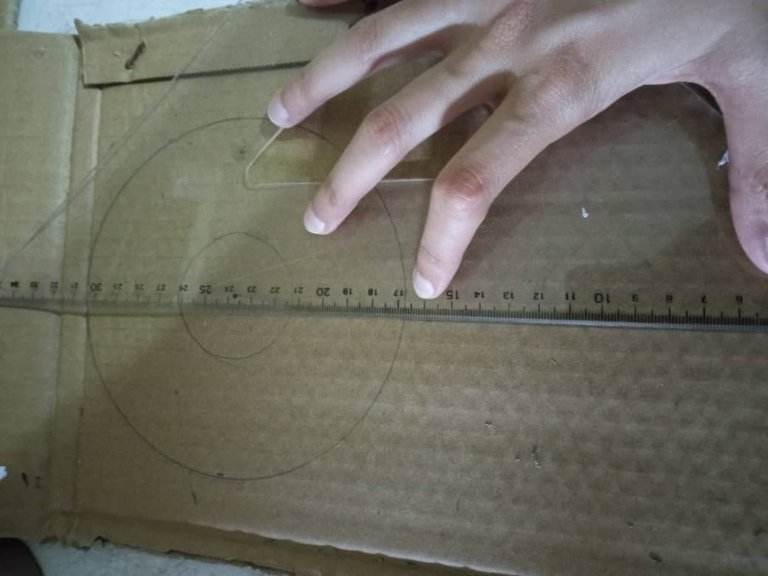
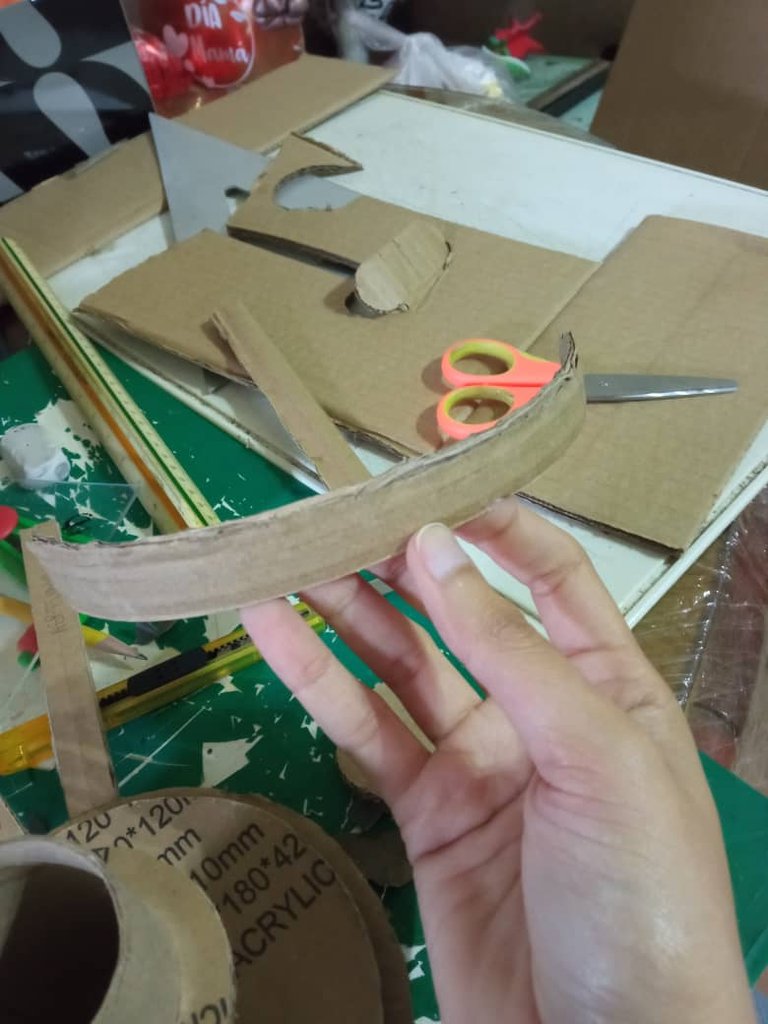
Una vez dibujada toda la pieza, procedimos a cortarla con tijera en las partes curvas, y con el exacto/cuchilla en las partes rectas. Después de esto procedimos a probar si encajaba sin problemas en el cilindro (en caso de que no encaje con facilidad puedes usar papel de lija y pasarlo cuidadosamente los bordes del cartón).
Once the entire piece was drawn, we proceeded to cut it with scissors in the curved parts, and with the exacto/blade in the straight parts. After this we proceeded to test if it fit smoothly in the cylinder (in case it doesn't fit easily you can use sandpaper and carefully go over the edges of the cardboard).
Este proceso para sacar las piezas circulares lo repetimos hasta tener las 8 piezas, decreciendo cada vez 1cm del diámetro total del circulo.
We repeat this process to remove the circular pieces until we have 8 pieces, each time decreasing 1 cm from the total diameter of the circle.
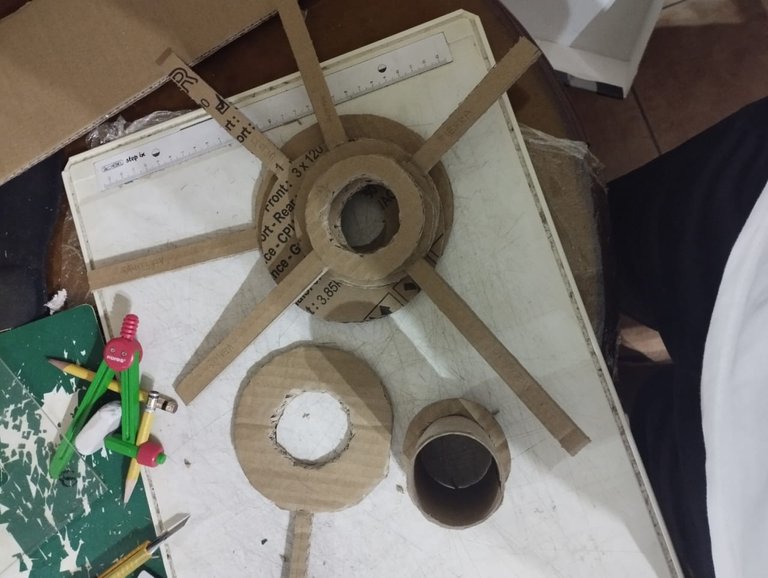
Como siguiente paso, procedimos a sacar una tira de cartón de 1cm de ancho y ajustarla a la medida del cilindro central, ya que lo usaríamos a modo de tapa para el Sol.
As the next step, we proceeded to take out a strip of cardboard of 1 centimetter of width and adjust it to the size of the central cylinder, since we would use it as a cover for the Sun.
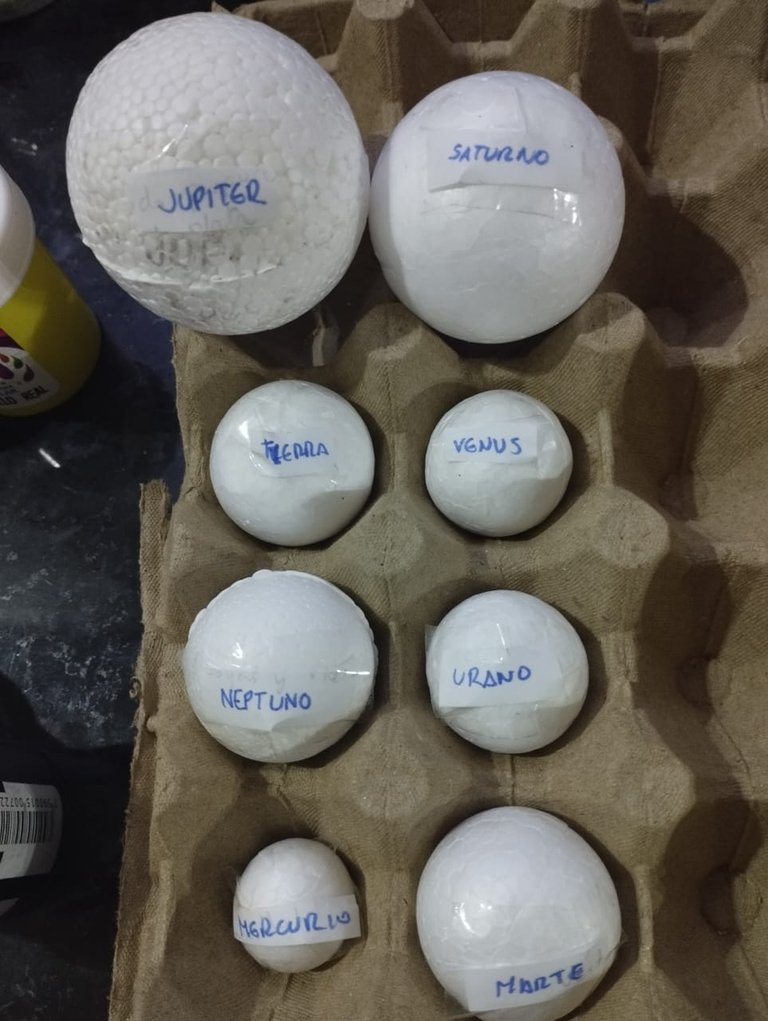
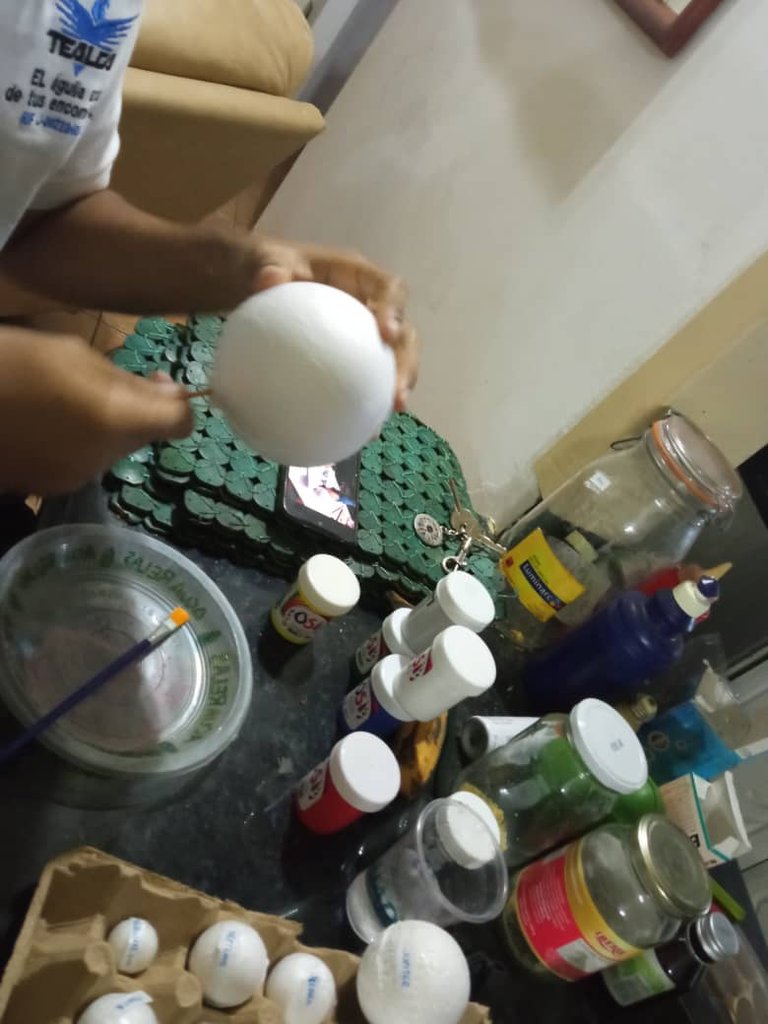
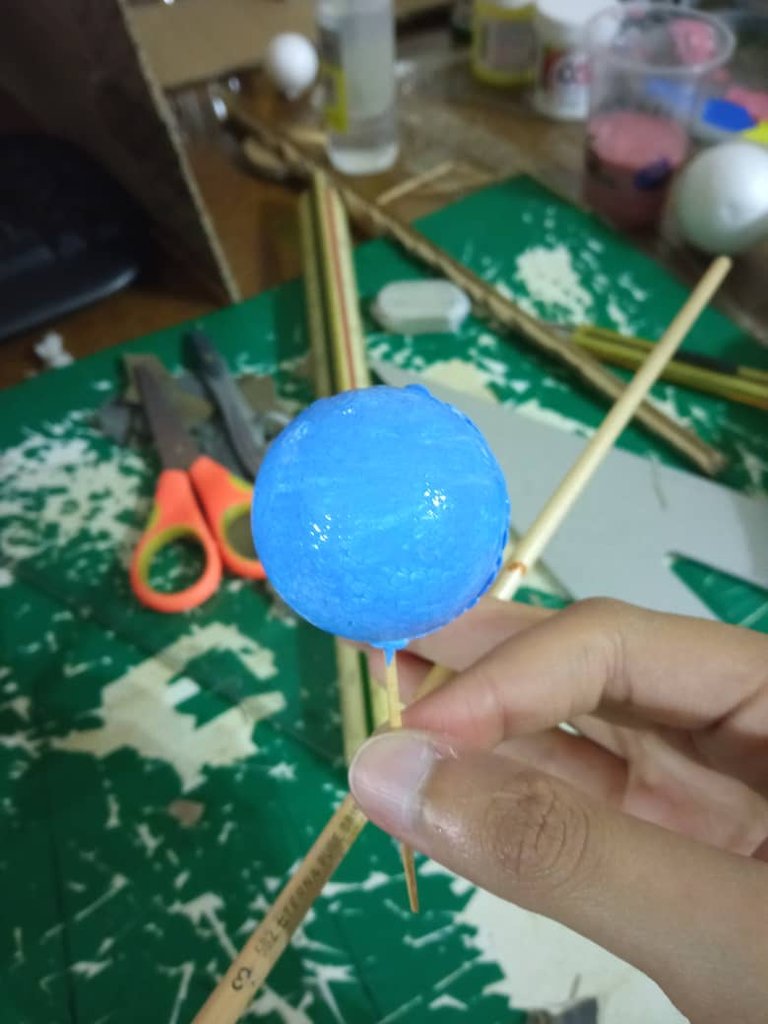
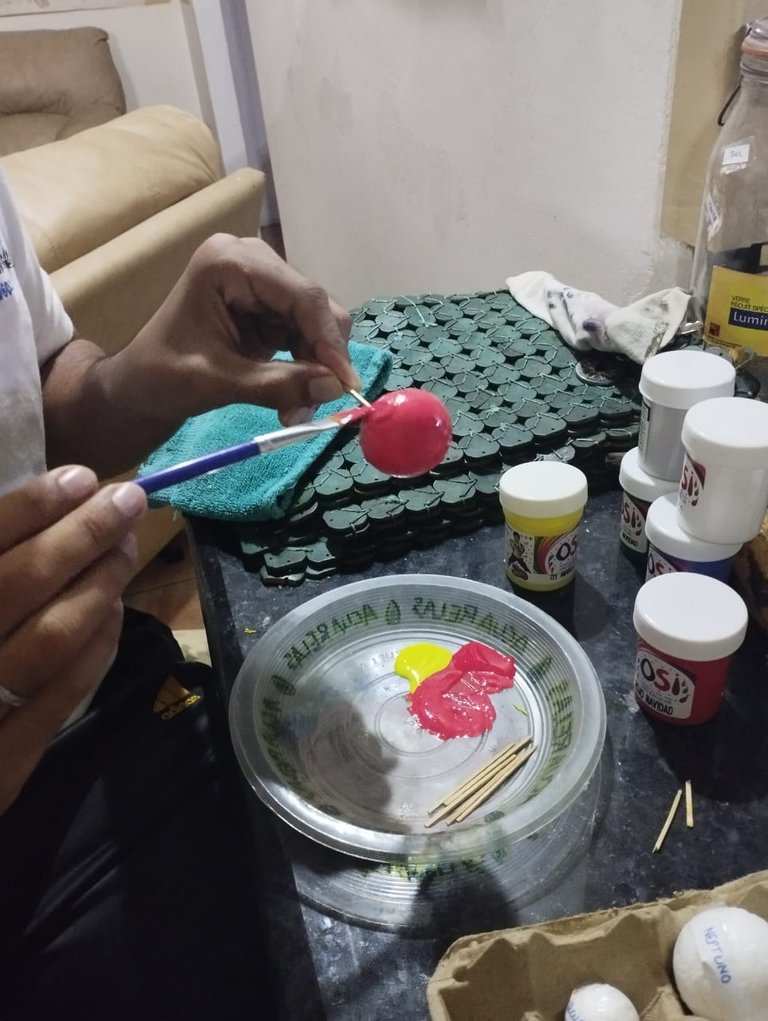
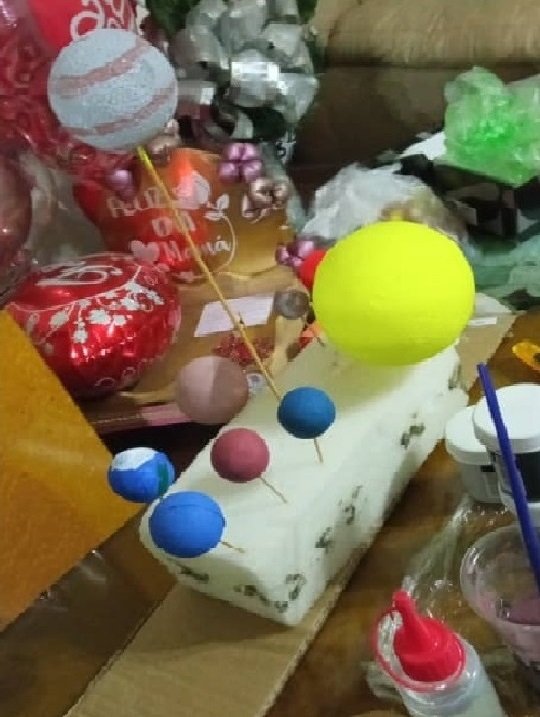
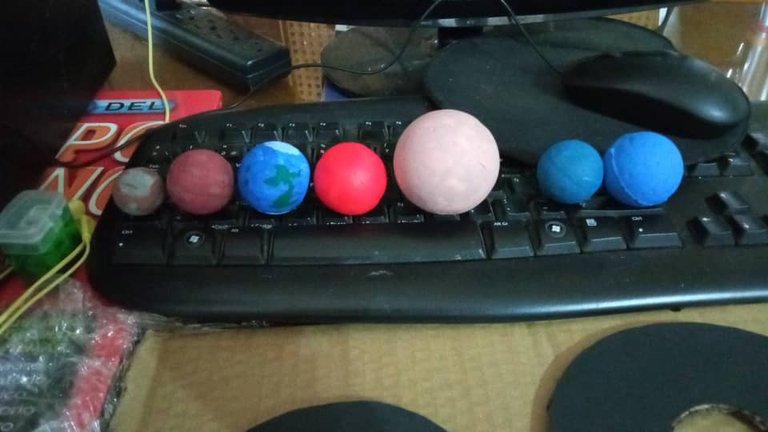
Nuestro siguiente paso fue marcar cada pelota de anime con su nombre para no confundirnos al momento de pintar. Luego cada uno fue tomando una pelota de anime y la clavamos en sus respectivos palitos de altura para pintar mas cómodamente.
Our next step was to mark each anime ball with its name so as not to get confused when painting. Then each one was taking an anime ball and we stuck it in their respective height sticks to paint more comfortably.
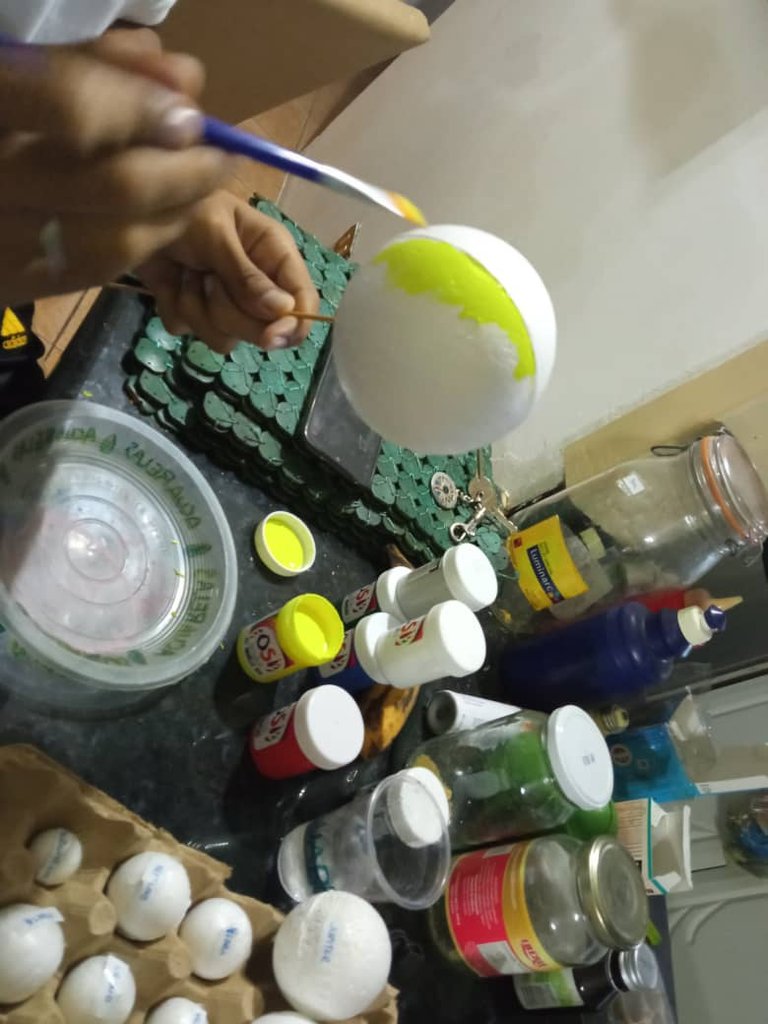
Como siguiente paso, comenzamos a pintar las bases en color negro.
As the next step, we began to paint the bases in black.
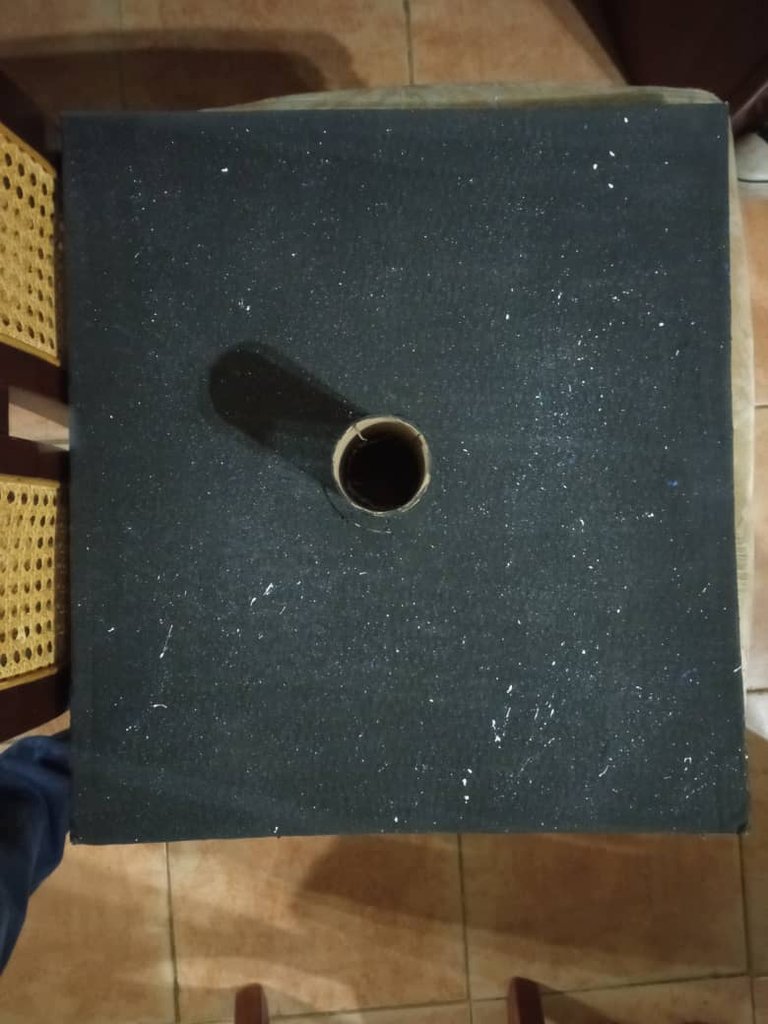
Para la base principal de la maqueta, aplicamos 2 capas de color negro, y luego con un cepillo de dientes comenzamos a dar pequeñas salpicaduras de color blanco para dar un efecto del espacio. Luego pegamos el cilindro en el medio de la base.
For the main base of the maquette, we applied 2 layers of black, and then with a toothbrush we began to give small splashes of white to give an effect of space. Then we glue the cylinder in the middle of the base.

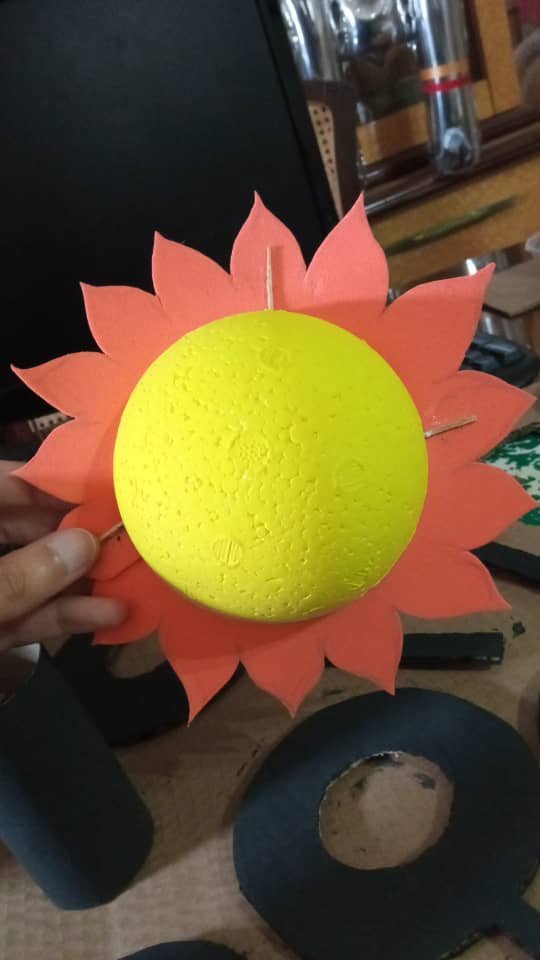
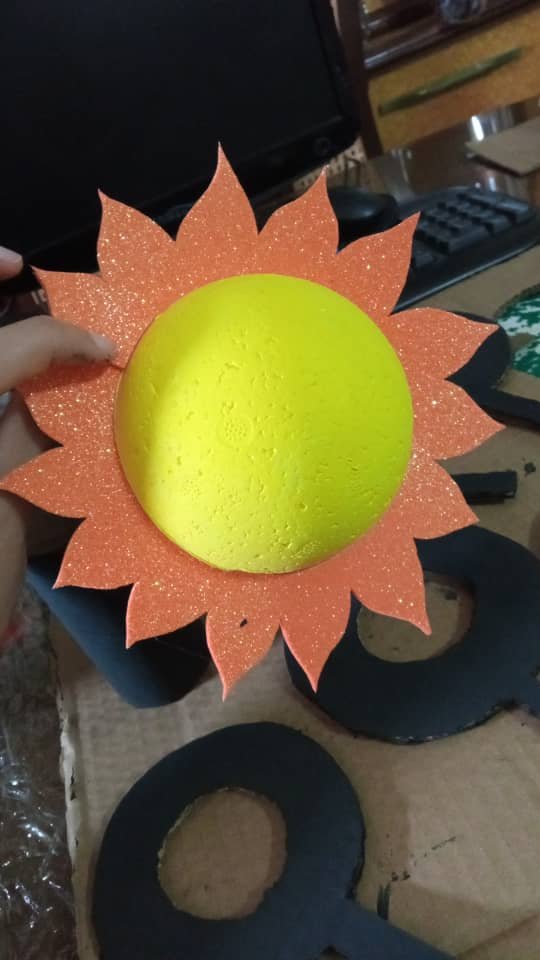
Como últimos pasos, procedimos a dibujar en un foami naranja escarchado la forma del fuego del sol, luego lo pegamos en unos palillos para los dientes para que se mantuviera en el medio de la pelota de anime del sol. También procedimos a sacar el anillo de Saturno en cartón y a pegarlo.
As the last steps, we proceeded to draw the shape of the sun's fire on a frosty orange foami, then we glued it on some toothpicks so that it would stay in the middle of the anime ball of the sun. We also proceeded to take out the ring of Saturn on cardboard and glue it on.
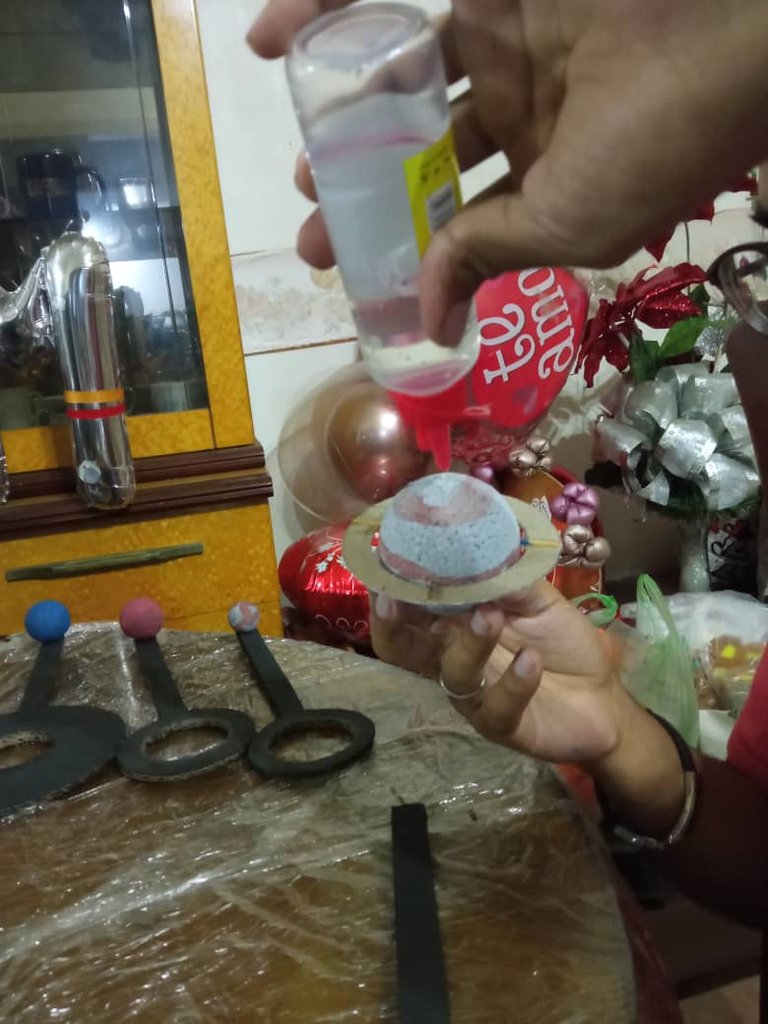
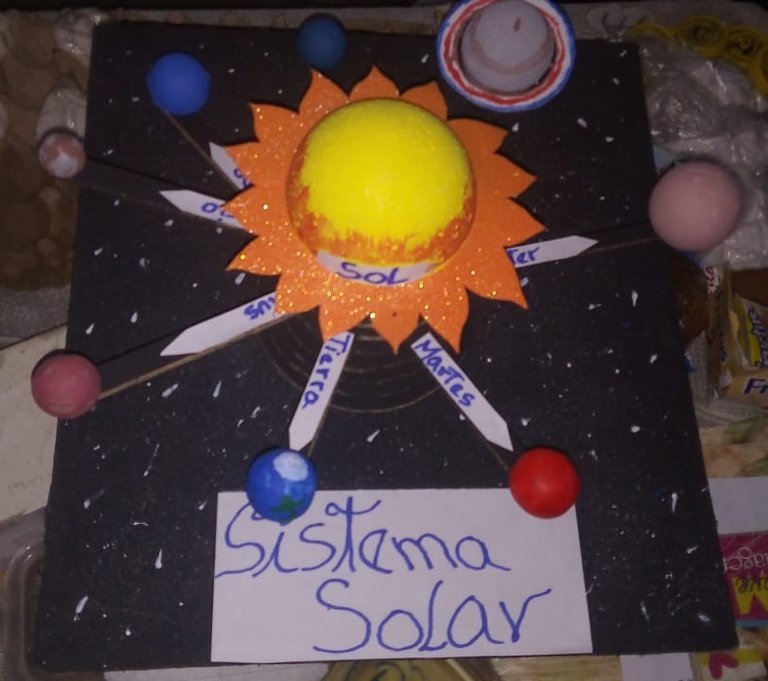
Como toque final, ya que nos quedábamos sin tiempo y mi amigo se tuvo que llevar la maqueta sin terminar, procedió a sacar los nombres con un marcador y los pegó en la maqueta, también hizo unos retoques de pintura en el Sol y en la base de la maqueta para que se vieran punteadas blancas mas grandes simulando las estrellas.
As a final touch, since we were running out of time and my friend had to take the unfinished Maquette with him, he proceeded to take out the names with a marker and paste them on the model, he also did some paint touch-ups on the Sun and on the base of the model so that bigger white dots could be seen simulating the stars.
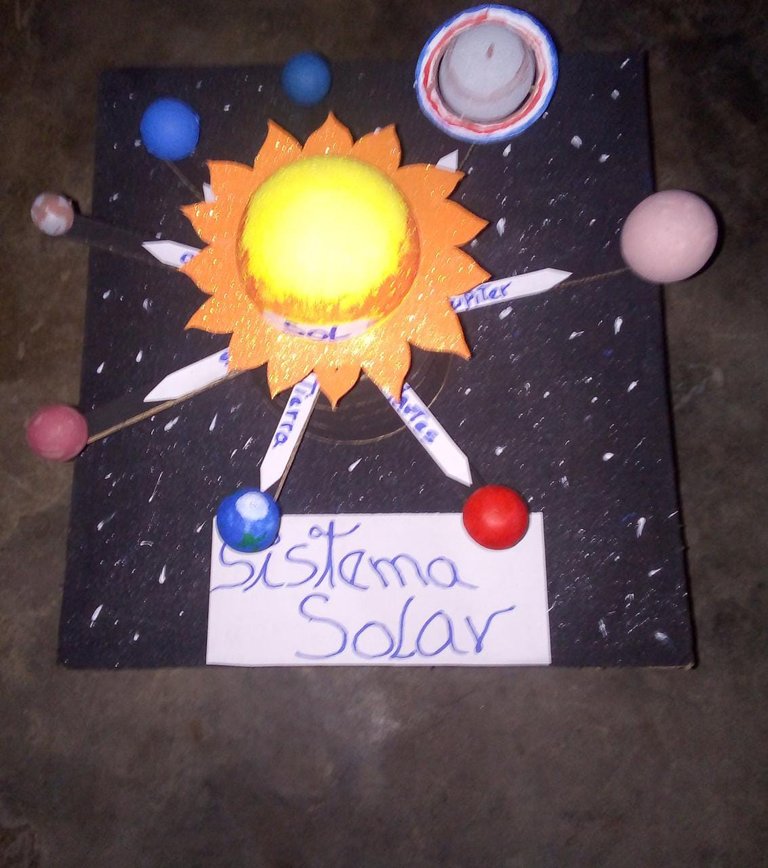

¡Gracias por leer hasta acá! Aquí les dejo una imagen del resultado final del dibujo, espero que les haya gustado, no duden en dejarme su comentario mas abajo ^^
Thanks for reading this far! Here I leave an image of the final result of the drawing, I hope you liked it, do not hesitate to leave me your comment below ^^
📱 ¡Sígueme en mis redes! /// ¡Follow me on my RRSS!
👀You can follow me on my social networks so that you are aware of my next works! 👇
💫 Twitter 💫 Deviantart 💫 Instagram 💫 My old Instagram 💫 Tiktok
Great work. I liked those tiny planets. @tipu curate 8
Upvoted 👌 (Mana: 0/75) Liquid rewards.
Congratulations @rioluerr! You have completed the following achievement on the Hive blockchain And have been rewarded with New badge(s)
Your next payout target is 100 HP.
The unit is Hive Power equivalent because post and comment rewards can be split into HP and HBD
You can view your badges on your board and compare yourself to others in the Ranking
If you no longer want to receive notifications, reply to this comment with the word
STOPCheck out our last posts: