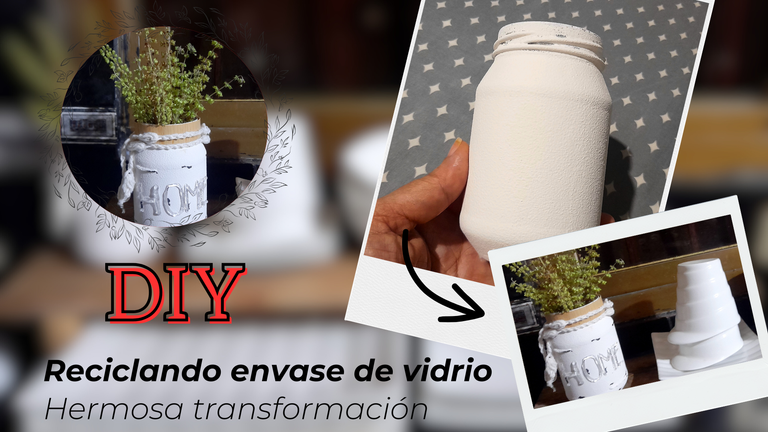

Creo que me van a ver muy seguido compartiendo algunas de las cositas que estoy haciendo en casa, y digo "algunas", porque no comparto todos mis proyectos, ya que algunos son sencillos y otros porque de verdad hacer un paso a paso mientras trabajamos en algo no es sencillo y nos demora un poco más, así que solo les los que tengo tiempo de documentar como esta linda transformación de un frasco de vidrio que utilizaré como decoración en mi cocina.
I think you are going to see me very often sharing some of the little things I am doing at home, and I say "some ", because I don't share all my projects, some are simple and others because really doing a step by step while working on something is not easy and takes us a little longer, so just the ones I have time to document like this nice transformation of a glass jar that I will use as decoration in my kitchen.
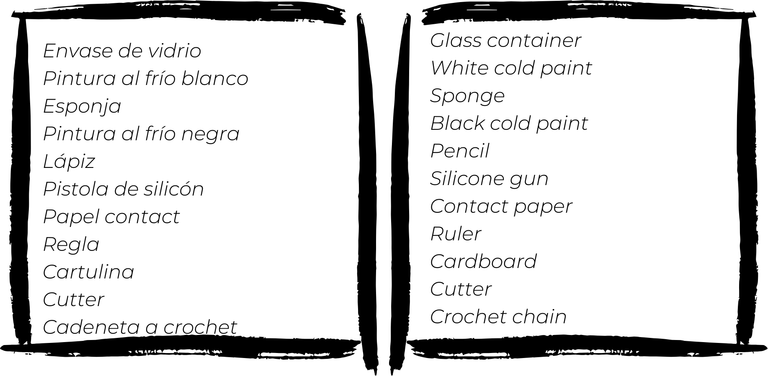
Este fue un proyecto bastante sencillo, pero quise compartirlo porque me pareció muy lindo el resultado, además fue un asunto pendiente pues intenté hacer algo así hace un tiempo y no resultó como quería, y la verdad es que no tenía pensado compartirlo porque trabajé de noche y las fotos no serían las mejores, pero igual decidí documentar el proceso, y por aquí les dejo los materiales y el paso a paso.
This was a pretty simple project, but I wanted to share it because I thought the result was very nice, it was also a pending issue because I tried to do something like this a while ago and it did not turn out as I wanted, and the truth is that I had not planned to share it because I worked at night and the photos would not be the best, but I still decided to document the process, and here I leave the materials and the step by step.


Lo primero por supuesto, es pintar el envase de vidrio, y en esta oportunidad no usé la pintura a la tiza pues quería una superficie más lisa, así que solo usé la esponja y pintura al frío. Solo bastaron dos capas para cubrirla bien.
The first thing to do, of course, is to paint the glass container, and this time I did not use the chalk paint because I wanted a smoother surface, so I just used the sponge and cold paint. Only two coats were enough to cover it well.

Después que secó bien la pintura, con un lápiz escribí la palabra Home, y luego con la pistola de silicón tracé las letras con la pega y dejé secar. Este proceso lo hice varias veces hasta que las letras quedaron lo mejor posible, porque la verdad no es fácil hacer líneas derechas con el silicón, por suerte si no me gustaba como se veían lo podía retirar una vez seco y volver a intentar hasta que que estuviese conforme.
After the paint dried well, with a pencil I wrote the word Home, and then with the silicone gun I traced the letters with the glue and let it dry. I did this process several times until the letters were as good as possible, because the truth is not easy to make straight lines with the silicone, luckily if I did not like how they looked I could remove it once dry and try again until I was satisfied.
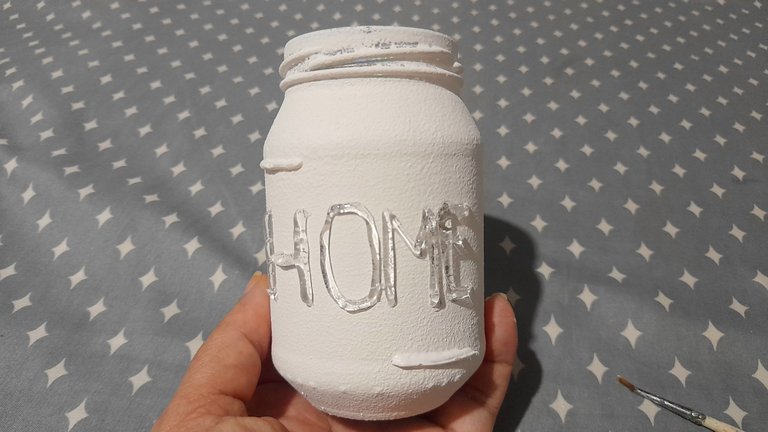
Mi idea era pintar las letras de silicón en blanco, pero Miranda estaba a mi lado y me dijo que así se veían lindas, así que decidí dejarlas tal cual y solo darle algunos toques en negro para simular que está desgastado. Y hasta ese punto se veía bastante bien.
My idea was to paint the silicone letters in white, but Miranda was next to me and told me that's how they looked nice, so I decided to leave them as is and just give them a few touches of black to simulate that it's worn. And up to that point it looked pretty good.
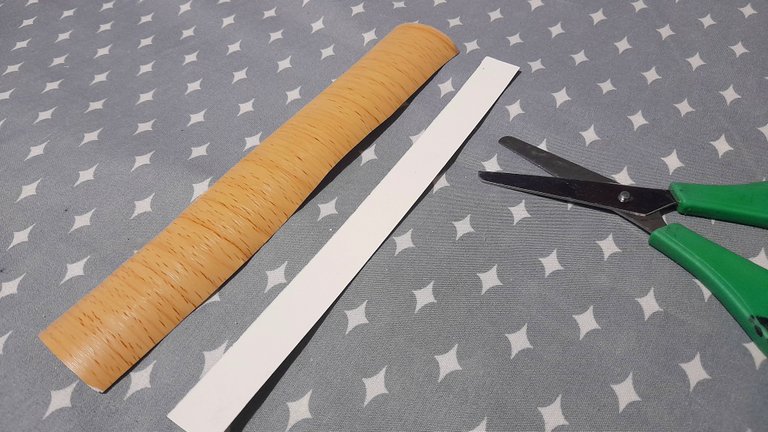
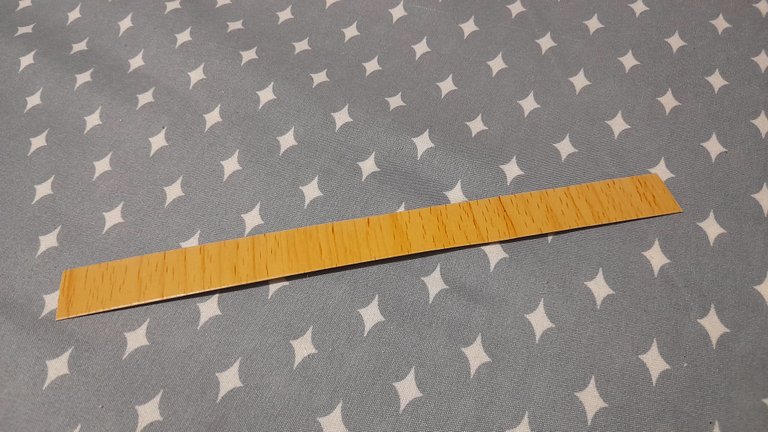
El siguiente paso fue hacer un listón de "madera" para cubrir la rosca del envase y esto lo hice cortando un trozo de cartulina y forrandolo con el papel contact de madera para finalmente pegarlo con silicón al rededor de la boca del envase.
The next step was to make a "wooden " ribbon to cover the container's thread and I did this by cutting a piece of cardboard and lining it with the wooden contact paper and finally gluing it with silicone around the mouth of the container.
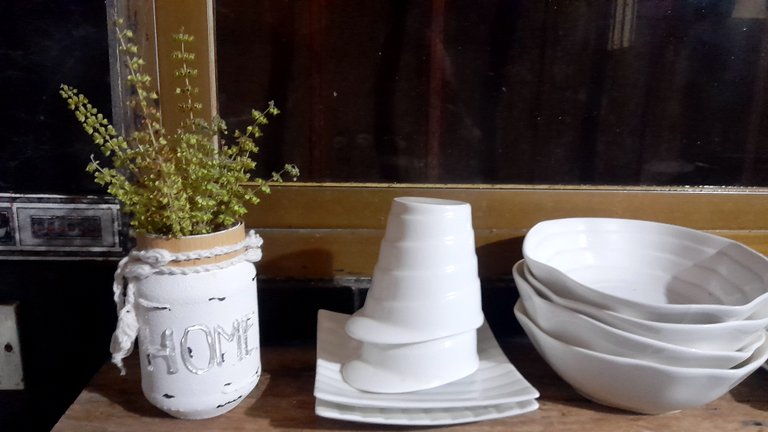
Y para finalizar, y darle un toque especial le agregué un cadeneta a crochet con pompones y quedó realmente bonita. Lista para lucirse en mi cocina.
And to finish it off, and give it a special touch, I added a crochet chain with pompoms and it was really pretty. Ready to show off in my kitchen.
Como les digo, es un proyecto bastante sencillo, de hecho estaba dudando si lo compartía o no pero el resultado es tan bonito que no podía dejar de mostrarlo, y espero que a ustedes les guste tanto como a mí.
As I say, it's a pretty simple project, in fact I was hesitating whether to share it or not but the result is so beautiful that I couldn't help but show it, and I hope you like it as much as I do.

Posted Using INLEO
Está lindo Ami, nunca nada es demasiado sencillo como para no mostrarlo, esos detalles es lo que hacen más personal nuestro hogar. Si que le has sacado provecho al papel contact, Jejeje, que no se termine para ver más cositas 🤗
Gracias amiga tengo muchas cositas que he hecho y no las he traído. Un día quizá solo las muestre para dejar ideas jeje
Hermosos reciclajes los que hace amiga
🤗🤗🤗
Gracias amiga
Hermoso trabajo. Me encantan las manualidades de reciclaje con ese estilo. Espero ver próximamente más trabajos tuyos de este tipo. Gracias por compartir. Saludos.
Muchísimas gracias. He traído algunas ya a la comunidad y tengo algunas más pendientes.
Gracias por compartir
Una belleza total! Yo quedó enamorada con estas ideas, siento que a mí no me quedarían igual 🤭
Gracias ami. Seguro que también te quedarían hermosas