Hola queridos amigos de Hive. En esta ocasión, quiero compartir con ustedes una manualidad muy sencilla que podemos realizar reciclando distintos materiales de uso cotidiano.
Apuesto que seguro tienen en casa frascos de vidrio que, aun no han desechado por alguna razón. Espero que este proyecto que les presento, los inspire a buscarlos y hacer una hermosa decoración de frascos con la técnica de nudos o macramé.
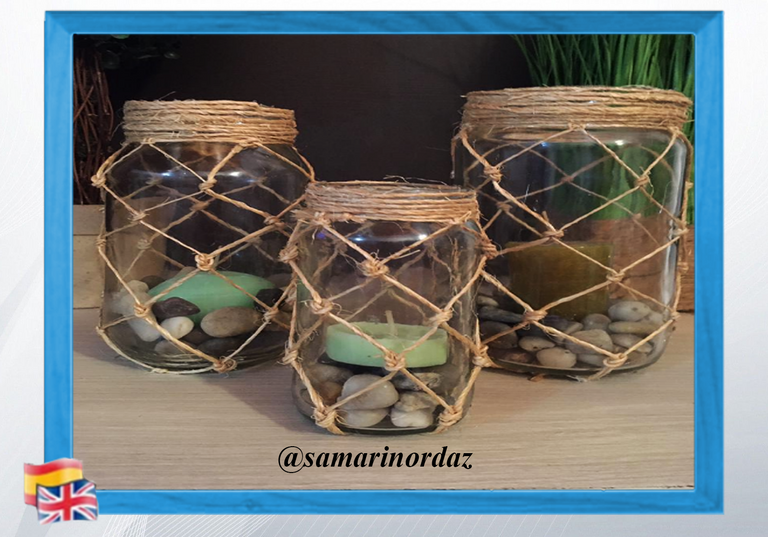
Puedes utilizar estos frascos decorados como candelabros, floreros, llenarlos con aroma y conchas de mar o simplemente solos. Lo que no puedes es dejar de intentar esta manualidad. A continuación, te presento los materiales y el paso a paso, sígueme y aprende como hacer esta bonita decoración para tu hogar.
Hello dear friends of Hive. On this occasion I want to share with you a very simple craft that we can make by recycling different everyday materials.
I bet you probably have glass jars at home that you haven't thrown away for some reason. I hope that this project that I present to you inspires you to look for them and make a beautiful decoration of jars with the technique of knots or macramé.
You can use these decorated jars as candle holders, flower vases, fill them with scent and sea shells or just stand alone. What you can not stop trying this craft. Next, I present the materials and the step by step, follow me and learn how to make this beautiful decoration for your home.
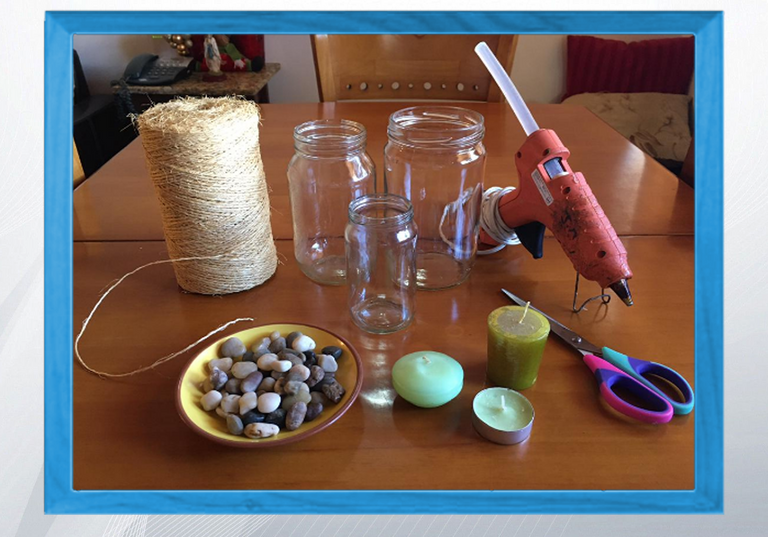
Materiales a utilizar:
• Frascos de vidrio.
• Cordón de yute.
• Silicon.
• Tijera.
• Velas.
• Piedritas decorativas.
Materials to use:
• Glass jars.
• Yute cord.
• Glue stick.
• Scissors.
• Candles.
• Decorative pebbles.
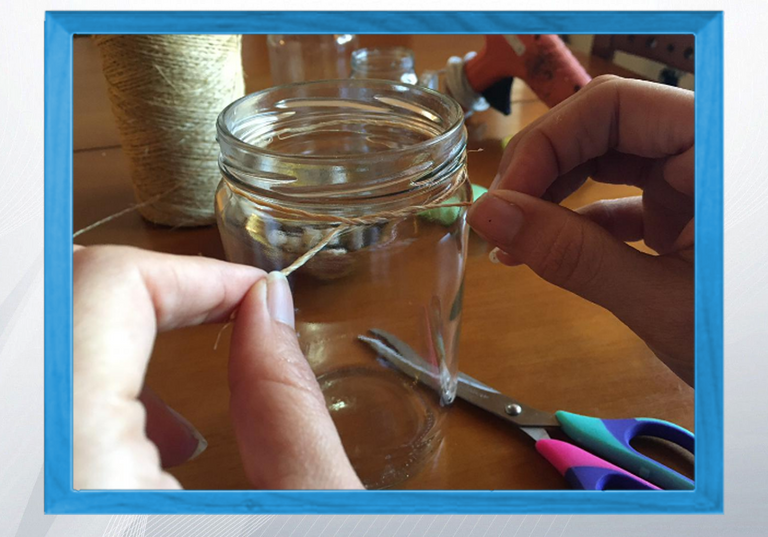
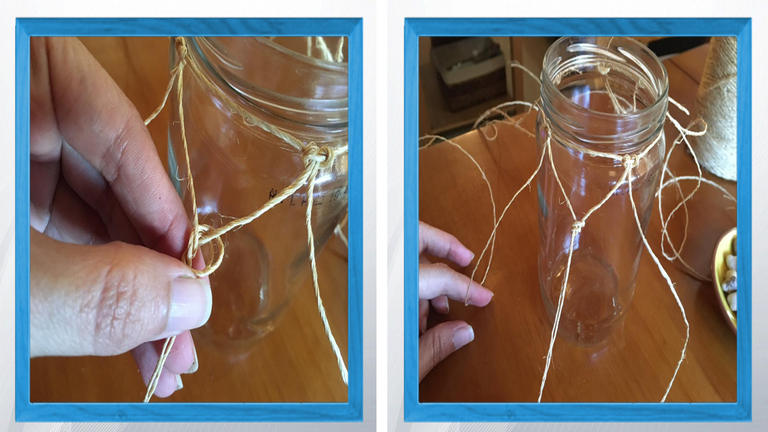
Paso 1:
Tomamos un trozo de cordón, rodeamos la boca del frasco y anudamos.
Step 1:
We take a piece of cord, surround the mouth of the jar and knot.
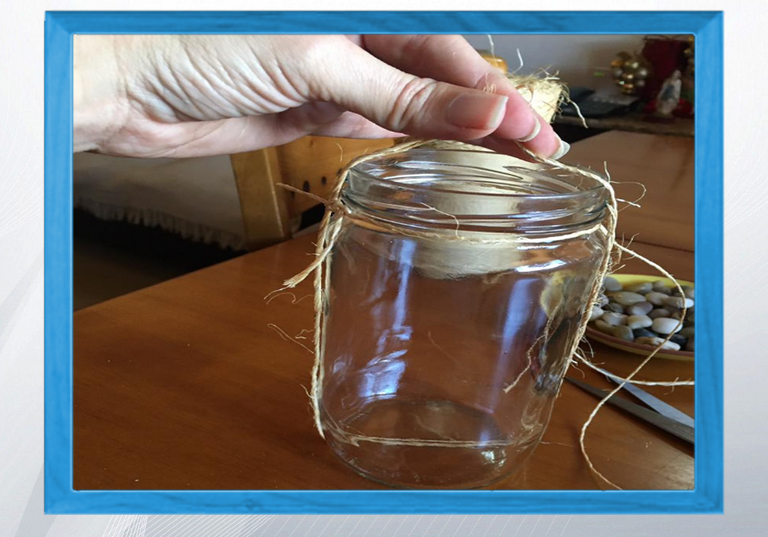
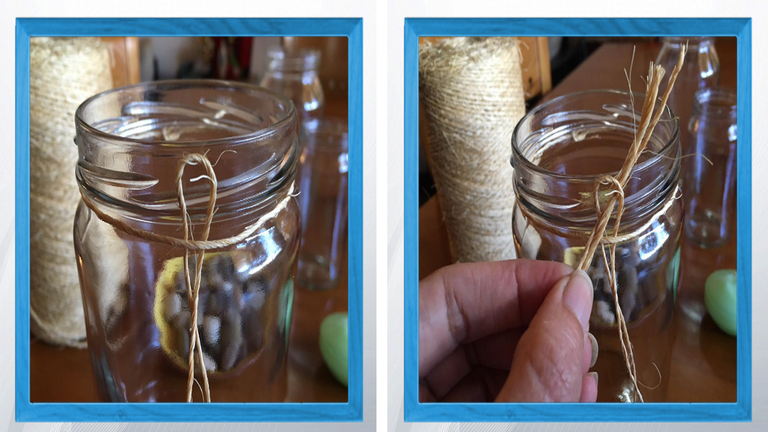
Paso 2:
Cortar cinco cuerdas, colócalas doble y mide tomando en cuenta la longitud del alto del frasco como te muestro en la foto.
Step 2:
Cut five strings, place them double and measure taking into account the length of the height of the jar as I show you in the photo.
Paso 3:
Tomamos cada cuerda doblada por la mitad y la colocamos por debajo de la cuerda que rodea la boca del frasco, tal como se muestra en la foto. Introducimos las puntas de la cuerda por dentro del orificio y halamos hasta formar un nudo.
Step 3:
We take each rope folded in half and place it under the rope that surrounds the mouth of the jar, as shown in the photo. We introduce the ends of the rope inside the hole and pull until we form a knot.
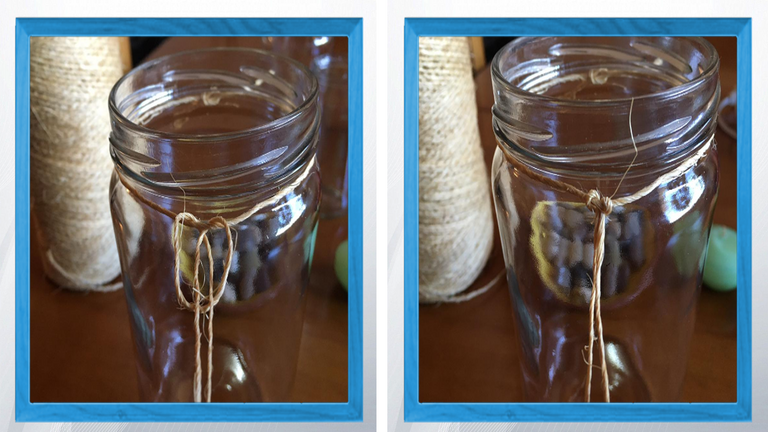
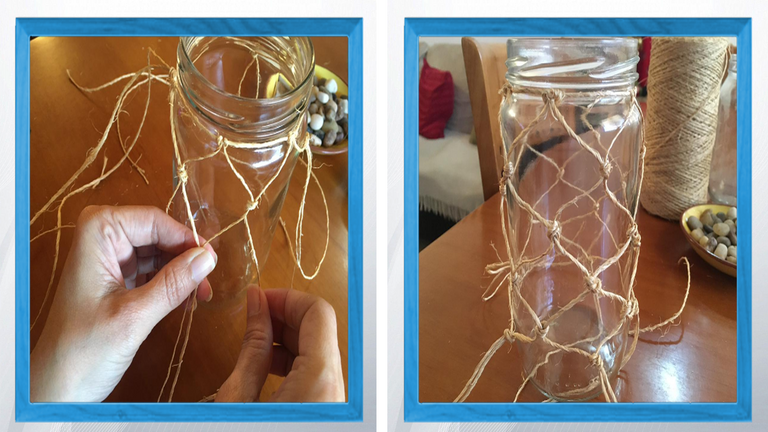
Paso 5:
Repetimos esta operación con las cuerdas restantes dejando una separación entre cada nudo.
Step 5:
We repeat this operation with the remaining strings leaving a gap between each knot.

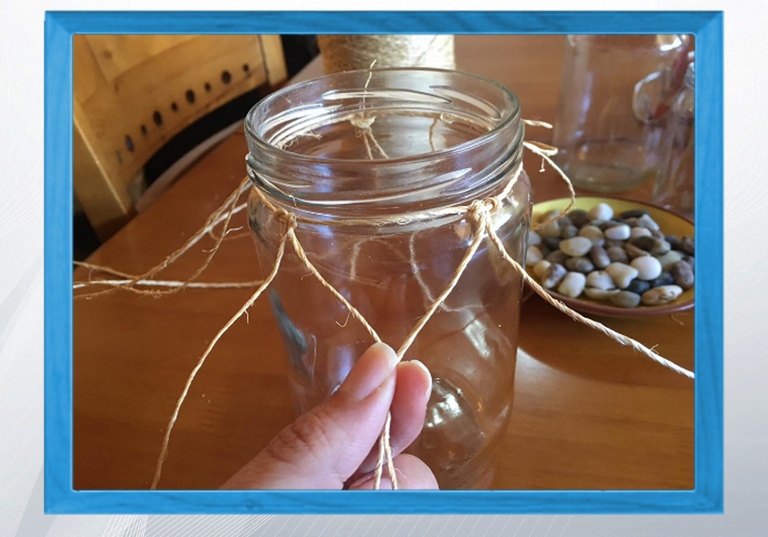
Paso 6:
Tomamos una cuerda de un nudo y otra del nudo de al lado, las juntamos y hacemos un nudo y así sucesivamente con el resto de las cuerdas.
Step 6:
We take a rope from one knot and another from the next knot, we join them and make a knot and so on with the rest of the ropes.
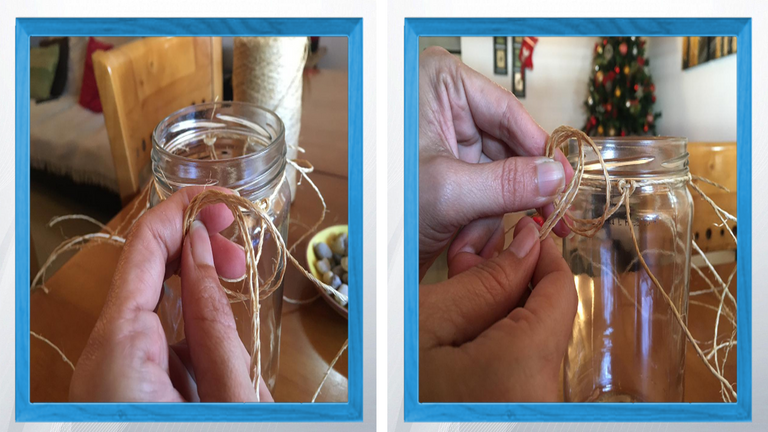
Paso 7:
Repetimos este paso, hasta llegar a la parte de abajo del frasco.
Step 7:
Repeat this step until you reach the bottom of the jar.
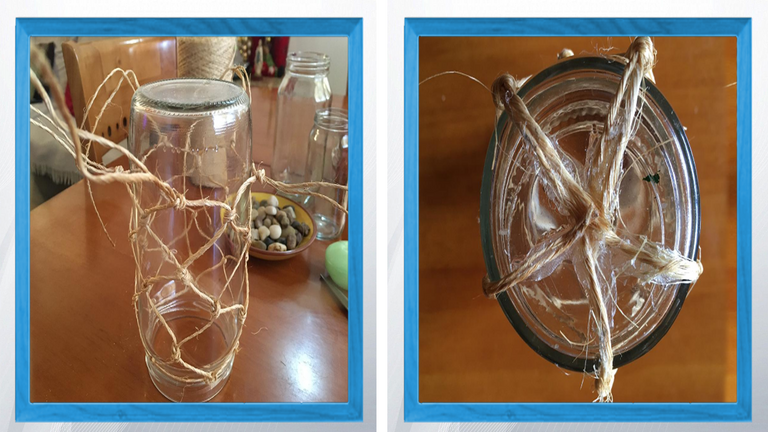
Paso 8:
Estiramos los extremos de cada cuerda y pegamos con silicon caliente. Corta el sobrante.
Step 8:
We stretch the ends of each string and glue with hot glue. Cut off the excess.
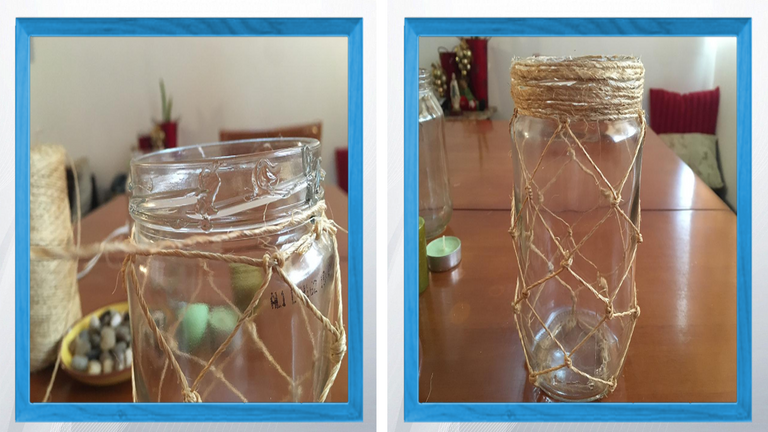
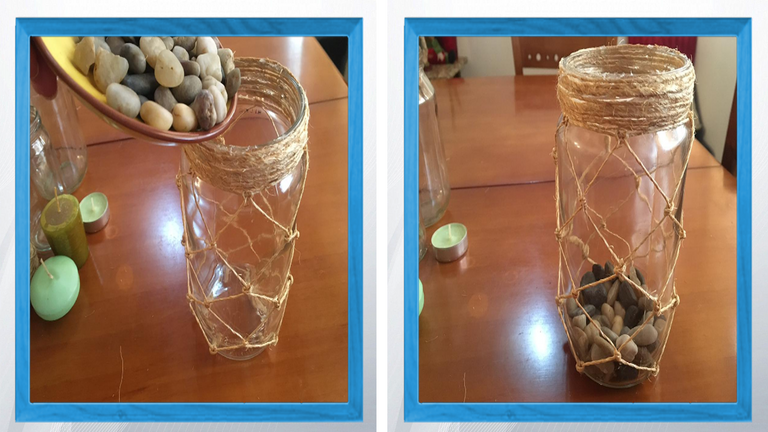
Paso 9:
Pasamos a decorar la parte superior del frasco. Colocamos pegamento y decoramos con el cordón alrededor de todo el contorno de la boca del frasco
Step 9:
We proceed to decorate the top of the jar. We put glue and decorate with the cord around the entire contour of the mouth of the jar.
Paso 10:
Para finalizar colocamos las piedritas dentro del frasco y una velita.
Step 10:
To finish, place the pebbles inside the jar and a candle.

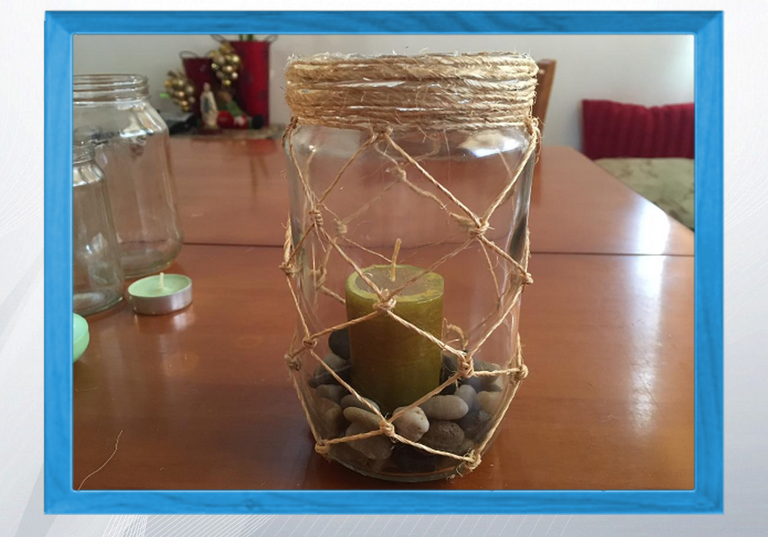
Amigos espero que les haya gustado este proyecto que no solo le da un toque especial a nuestro hogar, sino que además estaríamos reciclando, ayudando de esta manera a tener un planeta con menos contaminación. Recuerda que esta técnica la puedes aplicar también con botellas, lámparas, macetas o lo que ustedes deseen.
Me despido esperando que se inspiren y se atrevan a crear una decoración hermosa con esta sencilla técnica.
Friends, I hope you liked this project that not only gives a special touch to our home, but we would also be recycling, thus helping to have a planet with less pollution. Remember that you can also apply this technique with bottles, lamps, pots or whatever you want.
I say goodbye hoping that you will be inspired and dare to create a beautiful decoration with this simple technique.

Congratulations @samarinordaz! You have completed the following achievement on the Hive blockchain and have been rewarded with new badge(s):
Your next target is to reach 600 upvotes.
You can view your badges on your board and compare yourself to others in the Ranking
If you no longer want to receive notifications, reply to this comment with the word
STOPCheck out the last post from @hivebuzz:
Support the HiveBuzz project. Vote for our proposal!
Greetings, @samarinordaz!
Your article was featured on our Daily Newsletter! You've been rewarded with 500 liquid $BUIDL tokens - the native token for Build-it!
Build-it is a DIY (do it yourself) crafty social sharing platform that leverages Hive Network for scalability, decentralization and lighting speed. DIY'ers earn $BUIDL tokens when publishing their DIY and How-to tutorial/craft on our website or simply by using one of our tags: #build-it #buidl and #diy respectively. Keep up the creative spirit and keep adding value to the blockchain!.
Deposit Hive to your TribalDex account and purchase the token. The ticker is $BUIDL, or click the quick link below
==> TribalDex
Connect with us on our friendly socials: