🌸Español🌸
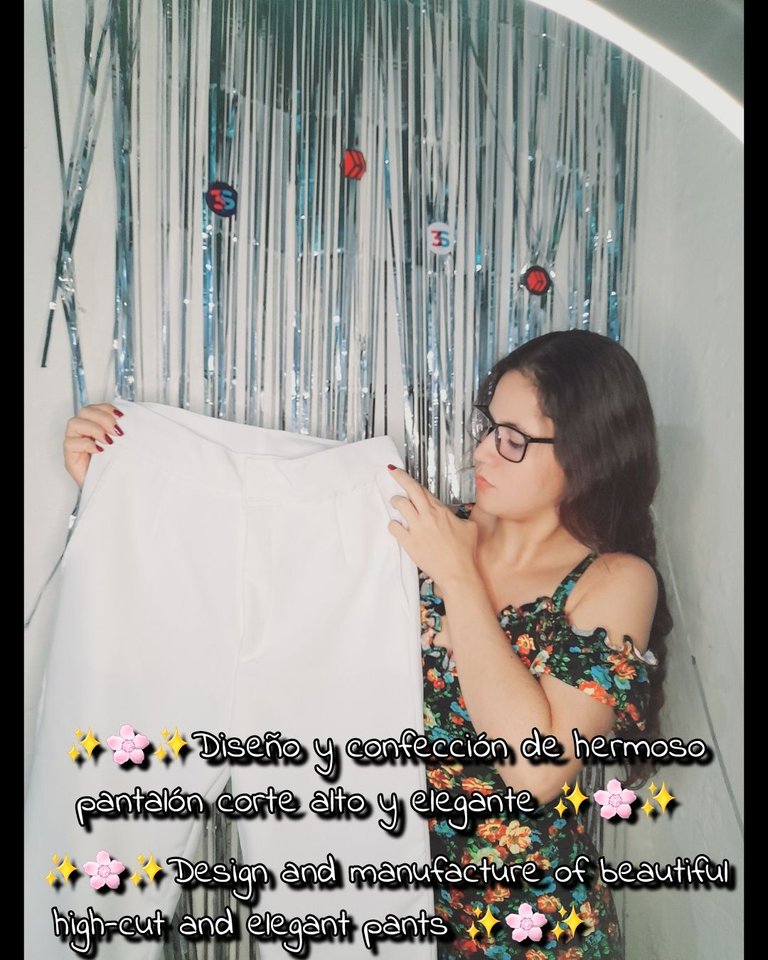
Hola mis queridos amigos de Hive 💕 saludos para todos y bienvenidos una vez más a este pequeño espacio dedicado a la costura ✨️ saludos especiales para todos en esta linda y talentosa comunidad de #Diy 🌸 hoy me complace mucho compartir con ustedes este hermoso diseño de pantalón elegante ideal para lucir en ocasiones formales 🤗 me gustaría que me acompañen en cada paso a seguir ❤️.
Estos fueron los materiales que use
• Máquina de coser
• Tijera
• Hilo de coser
• Tela
• Prenda de medida
• Botones
• Cremallera
✨️Pasos✨️
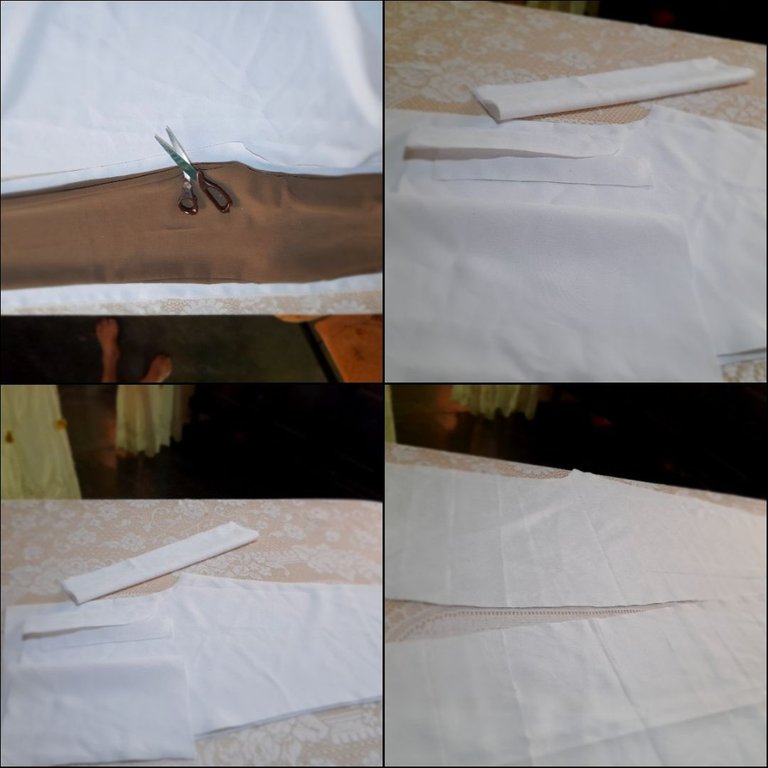
•✨️Voy a iniciar cortando todas las piezas de mi pantalón usando una prenda de medida como método de referencia y de la cual voy a obtener dos piezas frontales, dos traseras, dos forros para la cremallera, dos bolsillos, el contorno de cintura y 4 piezas para el forro del pantalón, esto debido a que la tela suele ser un poco transparente.
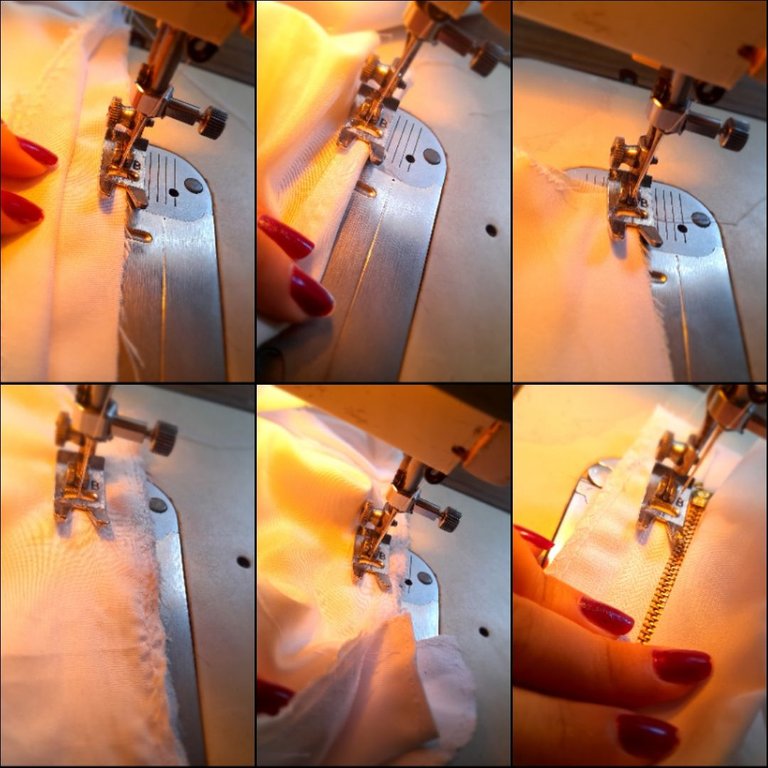
•✨️Continúo cosiendo la cremallera junto con uno de los forros que cortamos usando costura recta para luego coser el bolsillo junto con el forro y una pequeña pieza para ocultar las costuras esto lo haré con costura recta para luego coser la orilla del bolsillo con costura recta también.
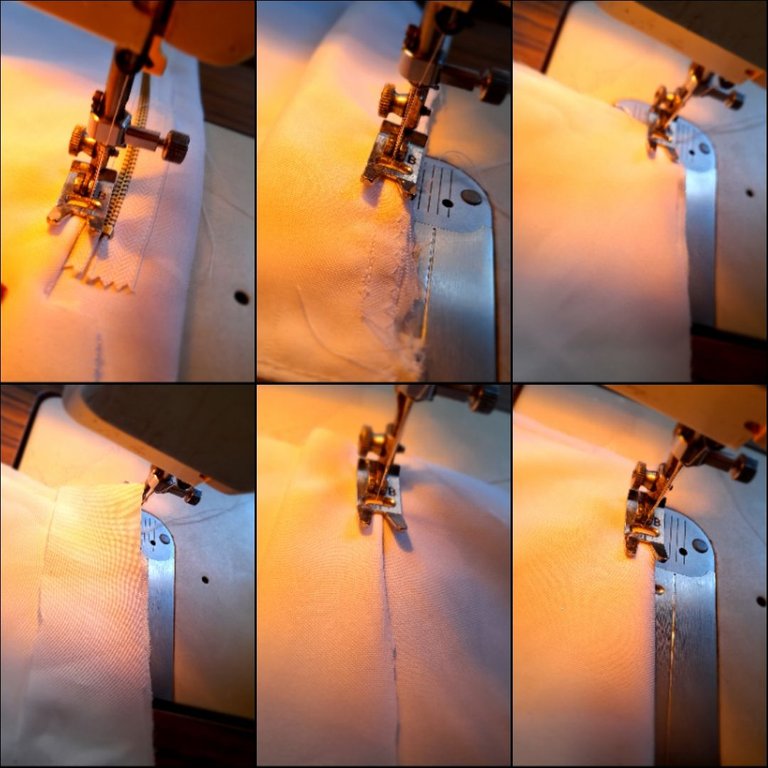
•✨️Luego voy a coser con costura recta y zigzag la parte interna del bolsillo para luego coser la pinza frontal doblando y cosiendo con costura recta luego voy a coser la pieza faltante de la cremallera alrededor con costura de zigzag para luego coser en la orilla frontal faltante.
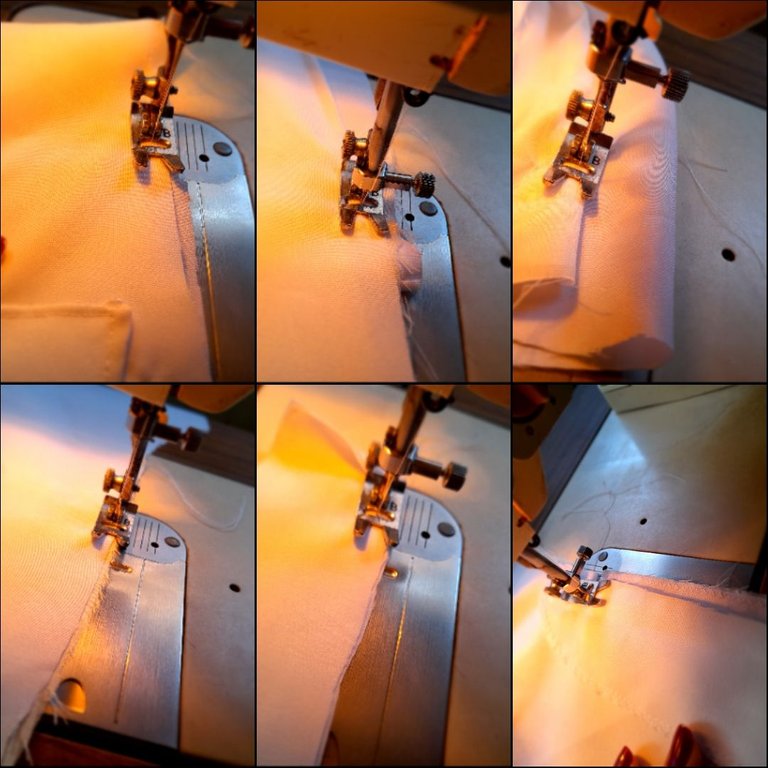
•✨️Voy a coser y asegurar bien la pieza de la cremallera para luego continuar cosiendo parte trasera junto con delantera en cada extremo con una costura recta y zigzag para asegurar luego voy a coser las pinzas traseras de aproximadamente 7 centímetros para luego asegurar bien cada extremo.

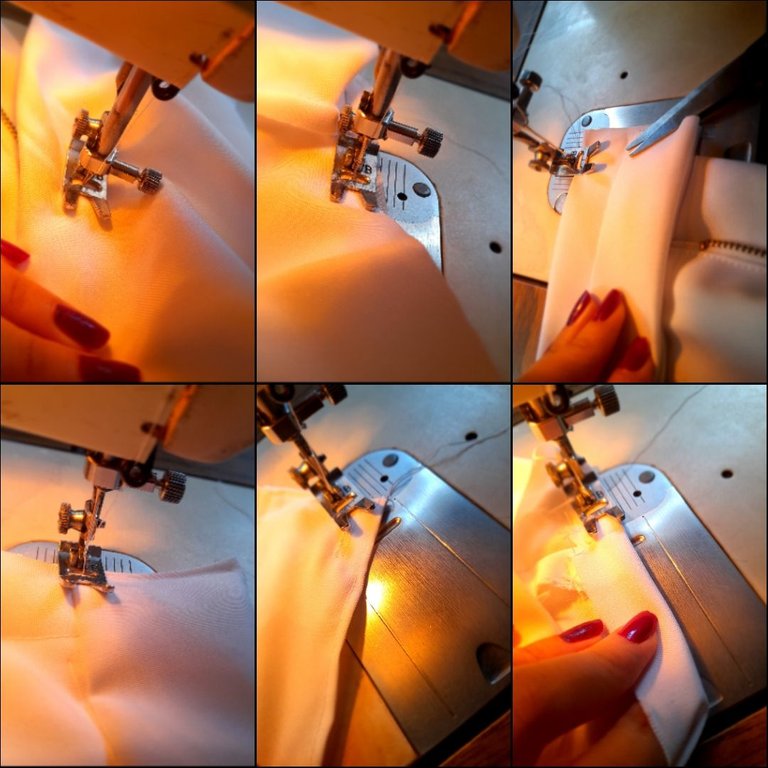
•✨️Continúo cosiendo con costura de zigzag los extremos por separado y evitar que el forro se mueva para luego unir ambas laterales con costura recta dos veces y luego zigzag para asegurar y continúo cosiendo la cremallera con costura recta.
•✨️Luego voy a coser por encima con costura recta para dar la forma de la cremallera luego voy a coser con costura recta el contorno de cintura colocandolo en el lado derecho de la tela para luego doblar el contorno de cintura y coser por encima con costura recta y así continuar cosiendo los ojales con la tensión en 1 y zigzag y luego para terminar voy a coser los ruedos doblando la tela y cosiendo con costura recta.
🌸Resultados🌸
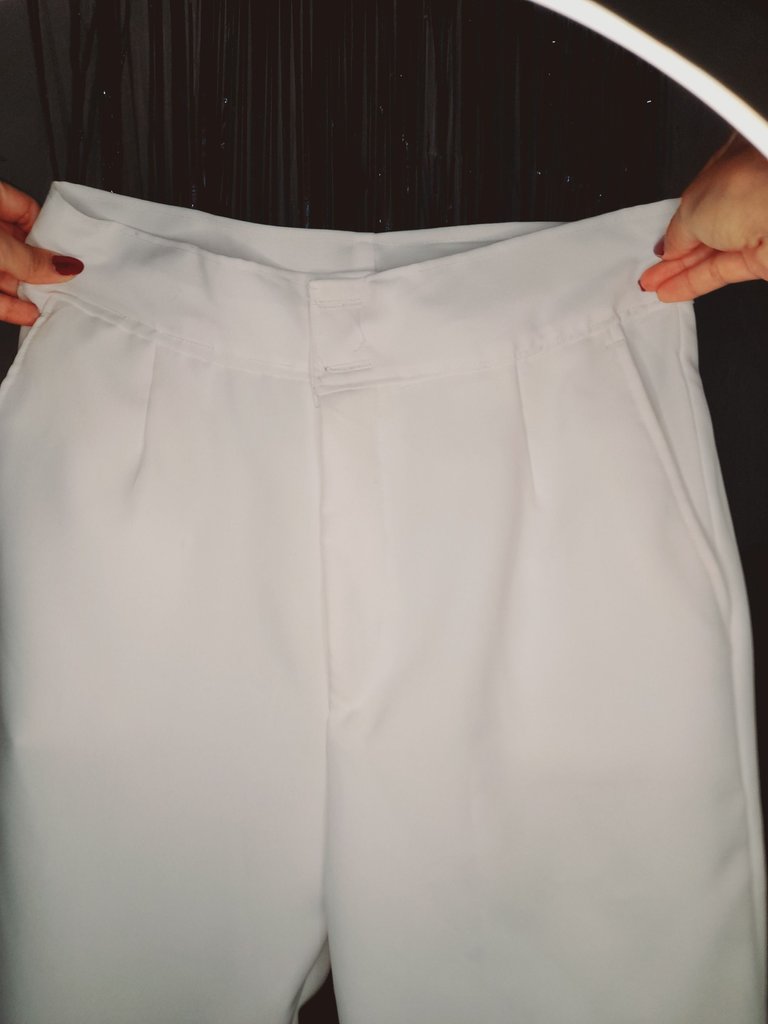
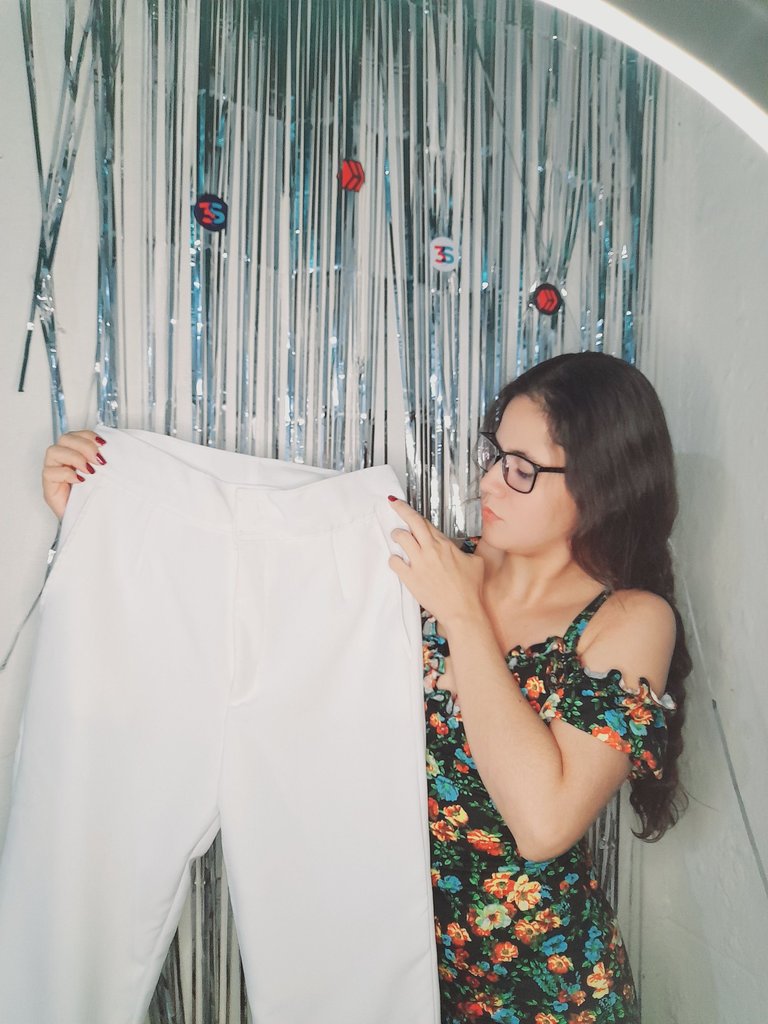
Sin duda alguna te convertirias en un icono del la moda luciendo estos hermosos atuendos y lo mejor es que son tus propios talentos expresados a través de la costura 🤗 muchas gracias por haber tomado un minuto para leer mi post 💕 saludos y linda noche para todos amigos de hive ♥️.
🌸English🌸
Hello my dear Hive friends 💕 greetings to everyone and welcome once again to this small space dedicated to sewing ✨️ special greetings to everyone in this beautiful and talented #Diy community 🌸 today I am very pleased to share with you this beautiful pants design elegant, ideal to wear on formal occasions 🤗 I would like you to accompany me in every step to follow ❤️.
These were the materials I used
• Sewing machine
• Scissors
• Sewing thread
• Fabric
• Measurement garment
• Buttons
• Zipper
✨️Steps✨️
•✨️I am going to start by cutting all the pieces of my pants using a garment measurement as a reference method and from which I am going to obtain two front pieces, two back pieces, two linings for the zipper, two pockets, the waist contour and 4 pieces for the lining of the pants, this is because the fabric is usually a little transparent.
•✨️I continue sewing the zipper together with one of the linings that we cut using a straight seam and then sew the pocket together with the lining and a small piece to hide the seams. I will do this with a straight seam and then sew the edge of the pocket with a straight seam. also.
•✨️Then I am going to sew the inside of the pocket with a straight and zigzag seam and then sew the front dart by folding and sewing with a straight seam, then I am going to sew the missing piece of the zipper around it with a zigzag seam and then sew on the front edge missing.
•✨️I am going to sew and secure the zipper piece well and then continue sewing the back together with the front at each end with a straight and zigzag seam to secure then I am going to sew the back clips of approximately 7 centimeters to then secure each end well .
•✨️I continue sewing the ends separately with a zigzag seam to prevent the lining from moving and then join both sides with a straight seam twice and then zigzag to secure and continue sewing the zipper with a straight seam.
•✨️Then I am going to sew over it with a straight seam to give the shape of the zipper, then I am going to sew the waist contour with a straight seam, placing it on the right side of the fabric and then fold the waist contour and sew over it with a seam. straight and thus continue sewing the buttonholes with the tension at 1 and zigzag and then to finish I am going to sew the hems by folding the fabric and sewing with a straight seam.
🌸Results🌸
Without a doubt you would become a fashion icon wearing these beautiful outfits and the best thing is that they are your own talents expressed through sewing 🤗 thank you very much for taking a minute to read my post 💕 greetings and a nice night to all friends from hive ♥️.
💁♀️Todas las fotografías son de mi autoría capturadas con mi Samsung Galaxy A12 y editadas en GridArt.
El texto y resumen es totalmente de mi autoría.
Texto traducido en el traductor Google.💁♀️
💁♀️All the photographs are my own, captured with my Samsung Galaxy A12 and edited in GridArt.
The text and summary is entirely my own.
Translated text in Google translator.💁♀️

Muy lindo talento te quedó bello