[Eng-Esp] Making a nice Christmas cane. --Haciendo un lindo bastón navideño.

in Hive Diy2 years ago

Making a nice Christmas cane.

Haciendo un lindo bastón navideño.


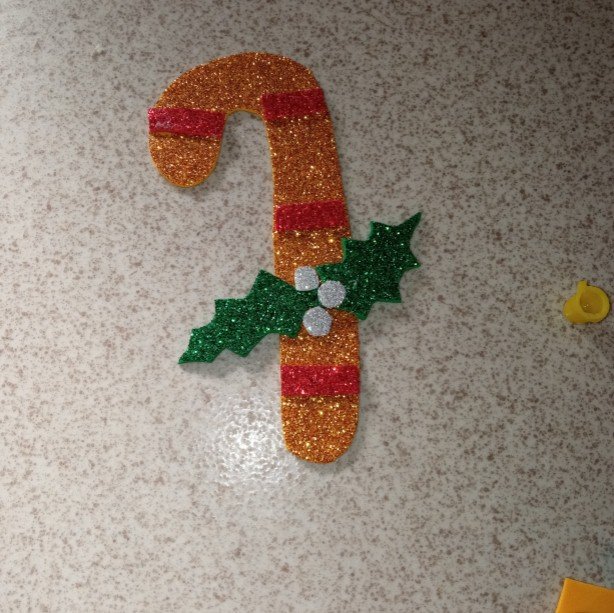
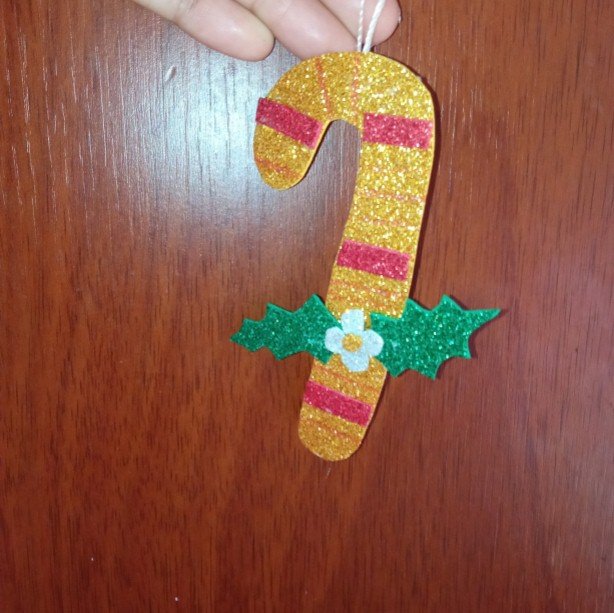
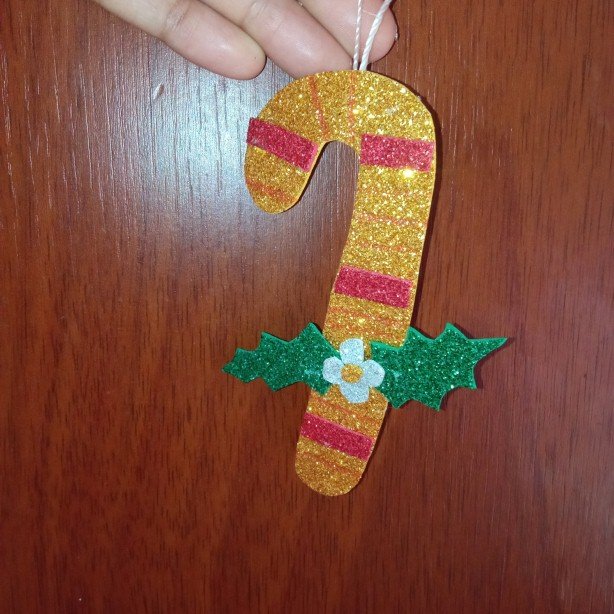
Hello reader friends, happy and blessed Thursday today as always I will be presenting a nice craft for the garlands it is a beautiful Christmas canes. Don't miss it and join me until the end of the post.

Hola amigos lectores, feliz y bendecido Jueves hoy como siempre les estaré presentando una linda manualidad para las guirnaldas se trata de unos hermosos bastones navideño. No te lo pierdas y acompáñame hasta el final del post.

portada.jpg


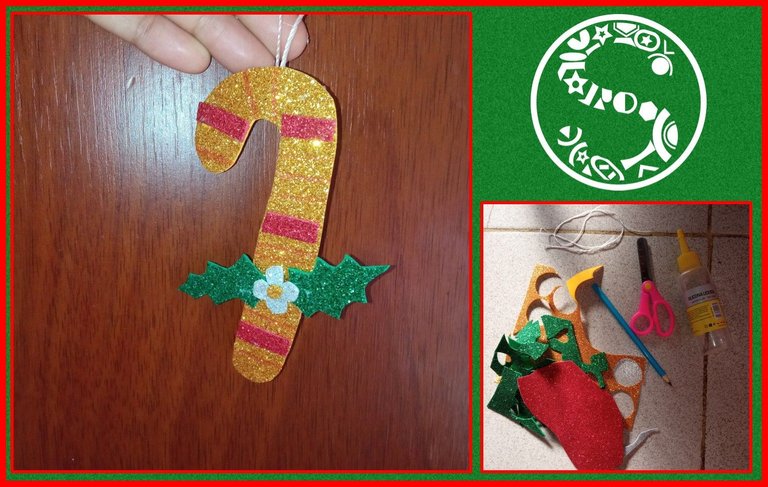
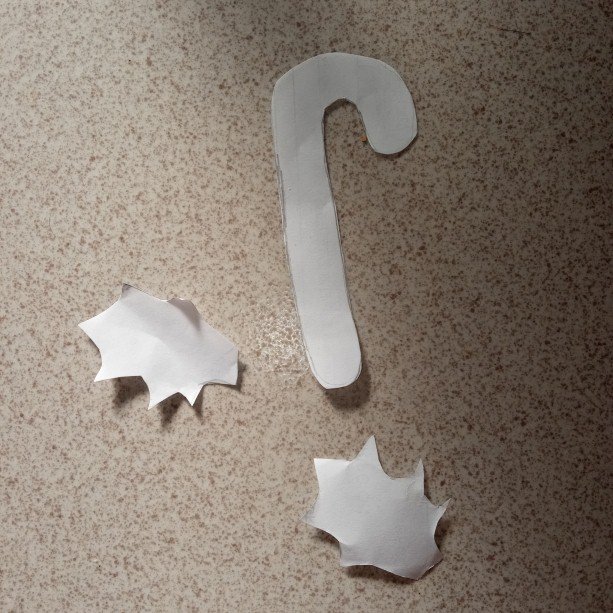
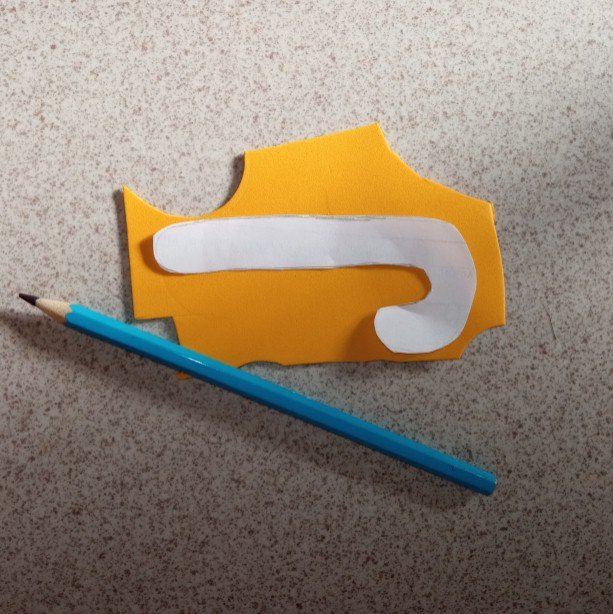
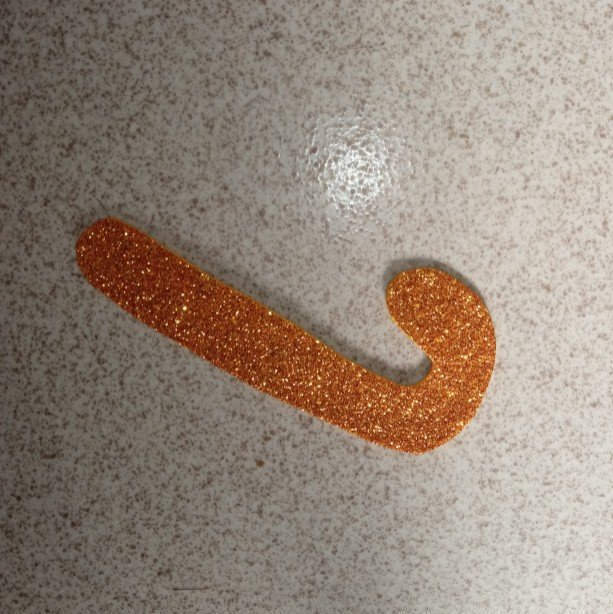
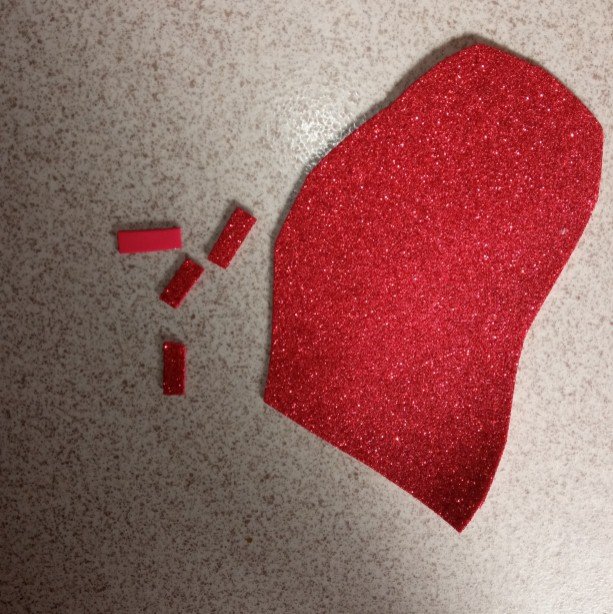
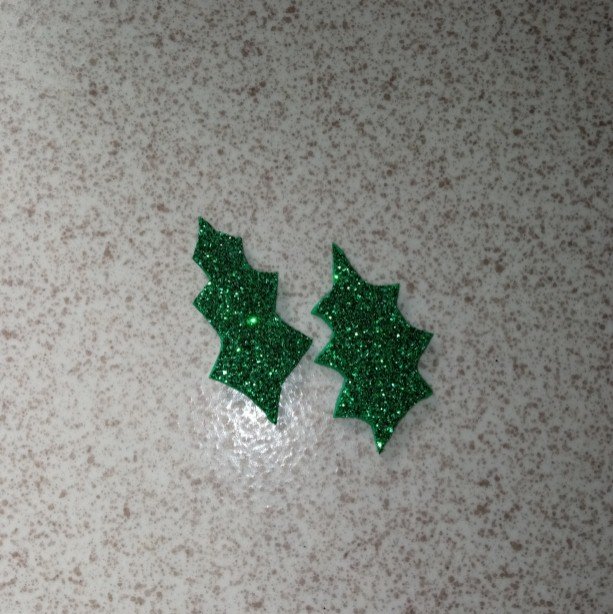
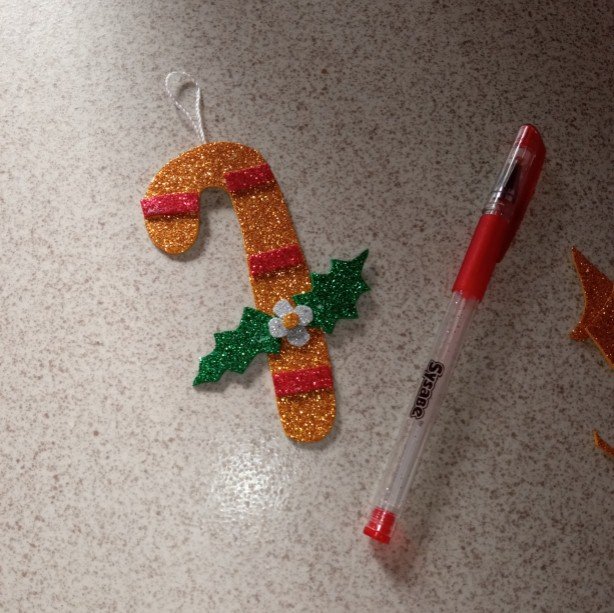
I'm quite excited about putting Christmas in my home and as you can see I like to make the figures I want and I don't have them, that doesn't stop me because I look for the solution and with bright eva rubber and Christmas colors you can make beautiful things and they look fantastic.

Ando bastante animada colocando la navidad en mi hogar y como ven me gusta realizar las figuras que deseos y no las tengo, eso no me detiene por busco la solución y con goma eva brillante y colores navideños se pueden hacer cosas hermosas y quedan fantástica.


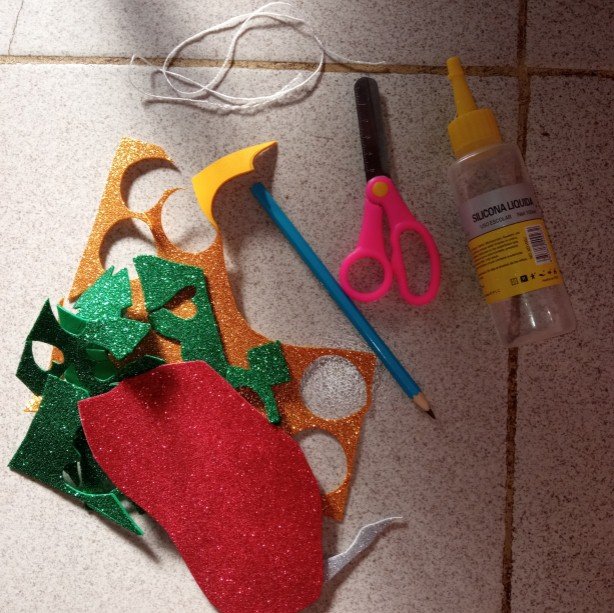
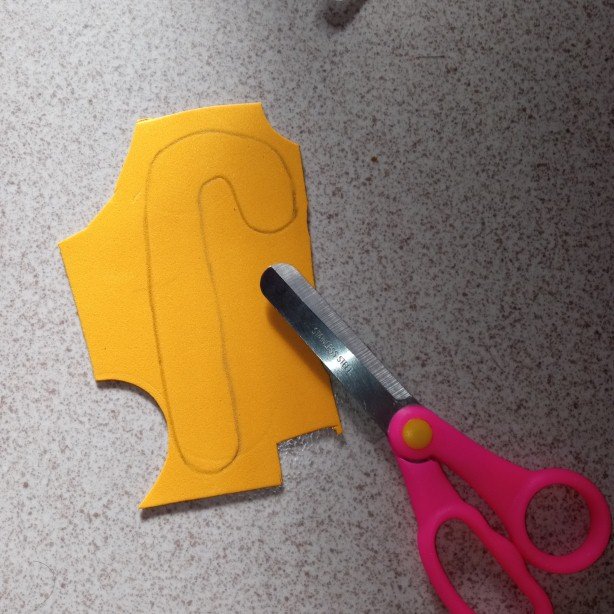
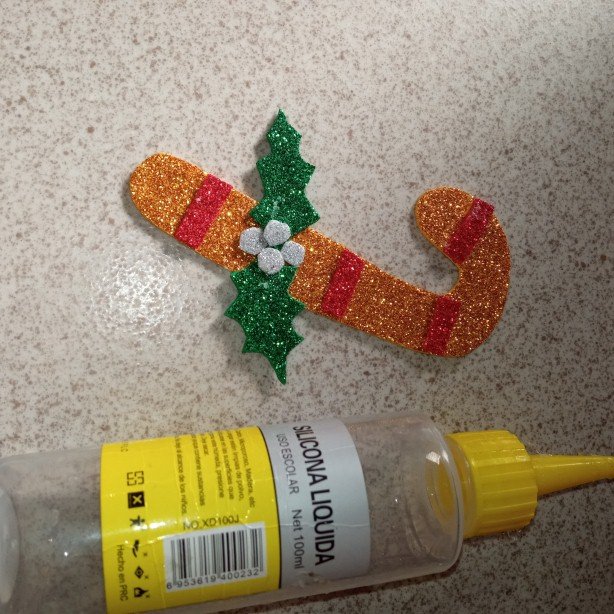
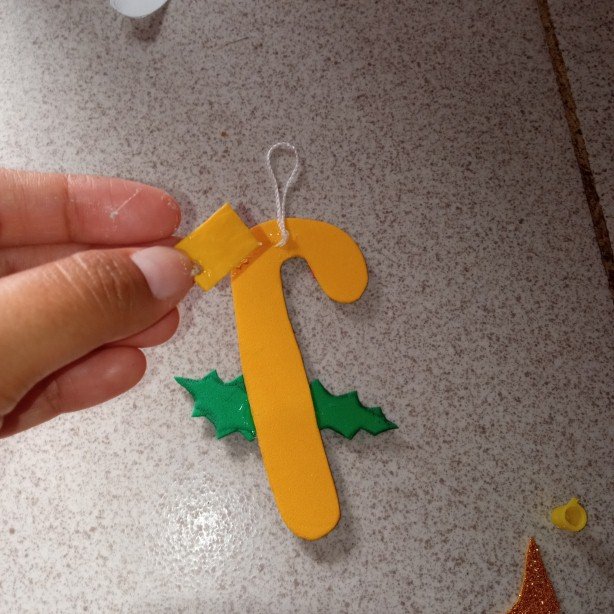
The materials I used were the following: eva rubber, scissors, pencil, silicone and a string to hang it.

Los materiales que utilice fueron los siguientes: goma eva, tijera, lápiz, silicón y un cordón para guindarla.

Imagen1.jpg

To start the making of the Christmas cane, I take the pieces of paper.
Para comenzar la realización del bastón navideño agarro y saco las piezas en papel.

Imagen2.jpg


After I have the molds I grab and mark them to the eva rubber and start cutting out the pieces.
Luego de tener los moldes agarro y los marco a la goma eva y comienzo a recortar las piezas.

Imagen3.jpg

Imagen4.jpg

Imagen5.jpg

Imagen6.jpg

Imagen7.jpg


In this step I proceed to glue with silicone each one of the pieces in its place and thus I assemble this nice Christmas cane.
En este paso procedo a pegar con silicón cada una de las piezas en su lugar y así voy armando este lindo bastón navideño.

Imagen8.jpg

Imagen9.jpg


Here I take out of the silver eva rubber 4 small circles forming a small flower and we proceed to paste on the cane right in the middle of the leaves, at the top in the center we place a smaller circle of gold color and thus the small flower will be seen.
Acá saco de la goma eva plateada 4 círculos pequeños formando una pequeña flor y procedemos a pegar en el bastón justo en el medio de las hojas, en la parte de arriba en todo el centro le colocamos un círculo más pequeño de color dorado y así se verá la pequeña flor.

Imagen10.jpg

Imagen11.jpg

Imagen12.jpg

Imagen13.jpg


Next, take a piece of cord of the desired size and tie a knot at the bottom of the cord as shown in the picture, put some silicone on it and seal it with a smaller piece of eva rubber to prevent it from coming loose.
Seguidamente se agarra un trozo de cordón del tamaño que se desee y se hace un nudo en la parte de abajo del cordón así como se podrá apreciar en la imagen, se le coloca un poco de silicón y con un pedacito de goma eva más pequeño sellamos para evitar que se suelte.

Imagen14.jpg


With the frosted pencil I made some small stripes but because of the frosted eva rubber it is not very noticeable, you could also put another color of your choice.
Con el lapicero escarchado le hice unas pequeñas rayitas pero por lo escarchado de la goma eva no se nota mucho, también le podrían poner otro color que deseen.

Imagen15.jpg

Imagen16.jpg


Finally, I leave you with some beautiful images so you can appreciate the final result.
Ya para finalizar les dejo unas hermosas imágenes para que aprecien el resultado final.

Imagen18.jpg

Imagen19.jpg

Imagen20.jpg


Without more to say and hoping that this craft post is to the liking of each reader I say goodbye with a big hug in the distance, loves and appreciates @shirahoshi. See you next time.

Sin más que decir y esperando que este post de manualidad sea del agrado de cada lector me despido con un gran abrazo en la distancia, los quiere y aprecia @shirahoshi. Nos vemos en una próxima oportunidad.

Logo sin sombra.gif


The photographs are my own and were taken by me with a Redmi 9 and were edited in powerpoint.

Las fotografías son de mi autoría y fueron tomadas por mí con un Redmi 9 y se editaron en powerpoint.


The Step by Step Gif was made by me in AdobePhotoshop CC2014.

El Gif de Paso a Paso fue realizado por mi en AdobePhotoshop CC2014.


The logo was designed by me in Adobe Illustrator CC 2015 and its animated version was made in After Effects CC 2017.

El logo fue diseñado por mí en Adobe Illustrator CC 2015 y su versión animada la realice en After Effects CC 2017.


Language corrector used Deepl.

Corrector de idioma utilizado Deepl.


Remember that you can purchase these beautiful pieces of art made and tokenized by me at Nftshowroom at an excellent price. Link to the gallery here

Sort:  

me encanta como elaboraste el blog, el paso a paso la colocación de las imágenes y la animación que creas en entre los textos e imágenes.bien logrado.


The rewards earned on this comment will go directly to the person sharing the post on Twitter as long as they are registered with @poshtoken. Sign up at https://hiveposh.com.