Hello, very blessed day to all hive friends in particular to this #HIVEDIY community that has opened its doors to publish my creations and thus get to know and increase more my knowledge of teachings- Learning through the other creations of my companions.
Esta vez les traigo una creación muy fácil de realizar con muy poco material es una flor y le puedes dar el uso que desees espero les guste.
This time I bring you a very easy creation with very little material is a flower and you can give you the use you want I hope you like it.
MATERIALES
MATERIALS
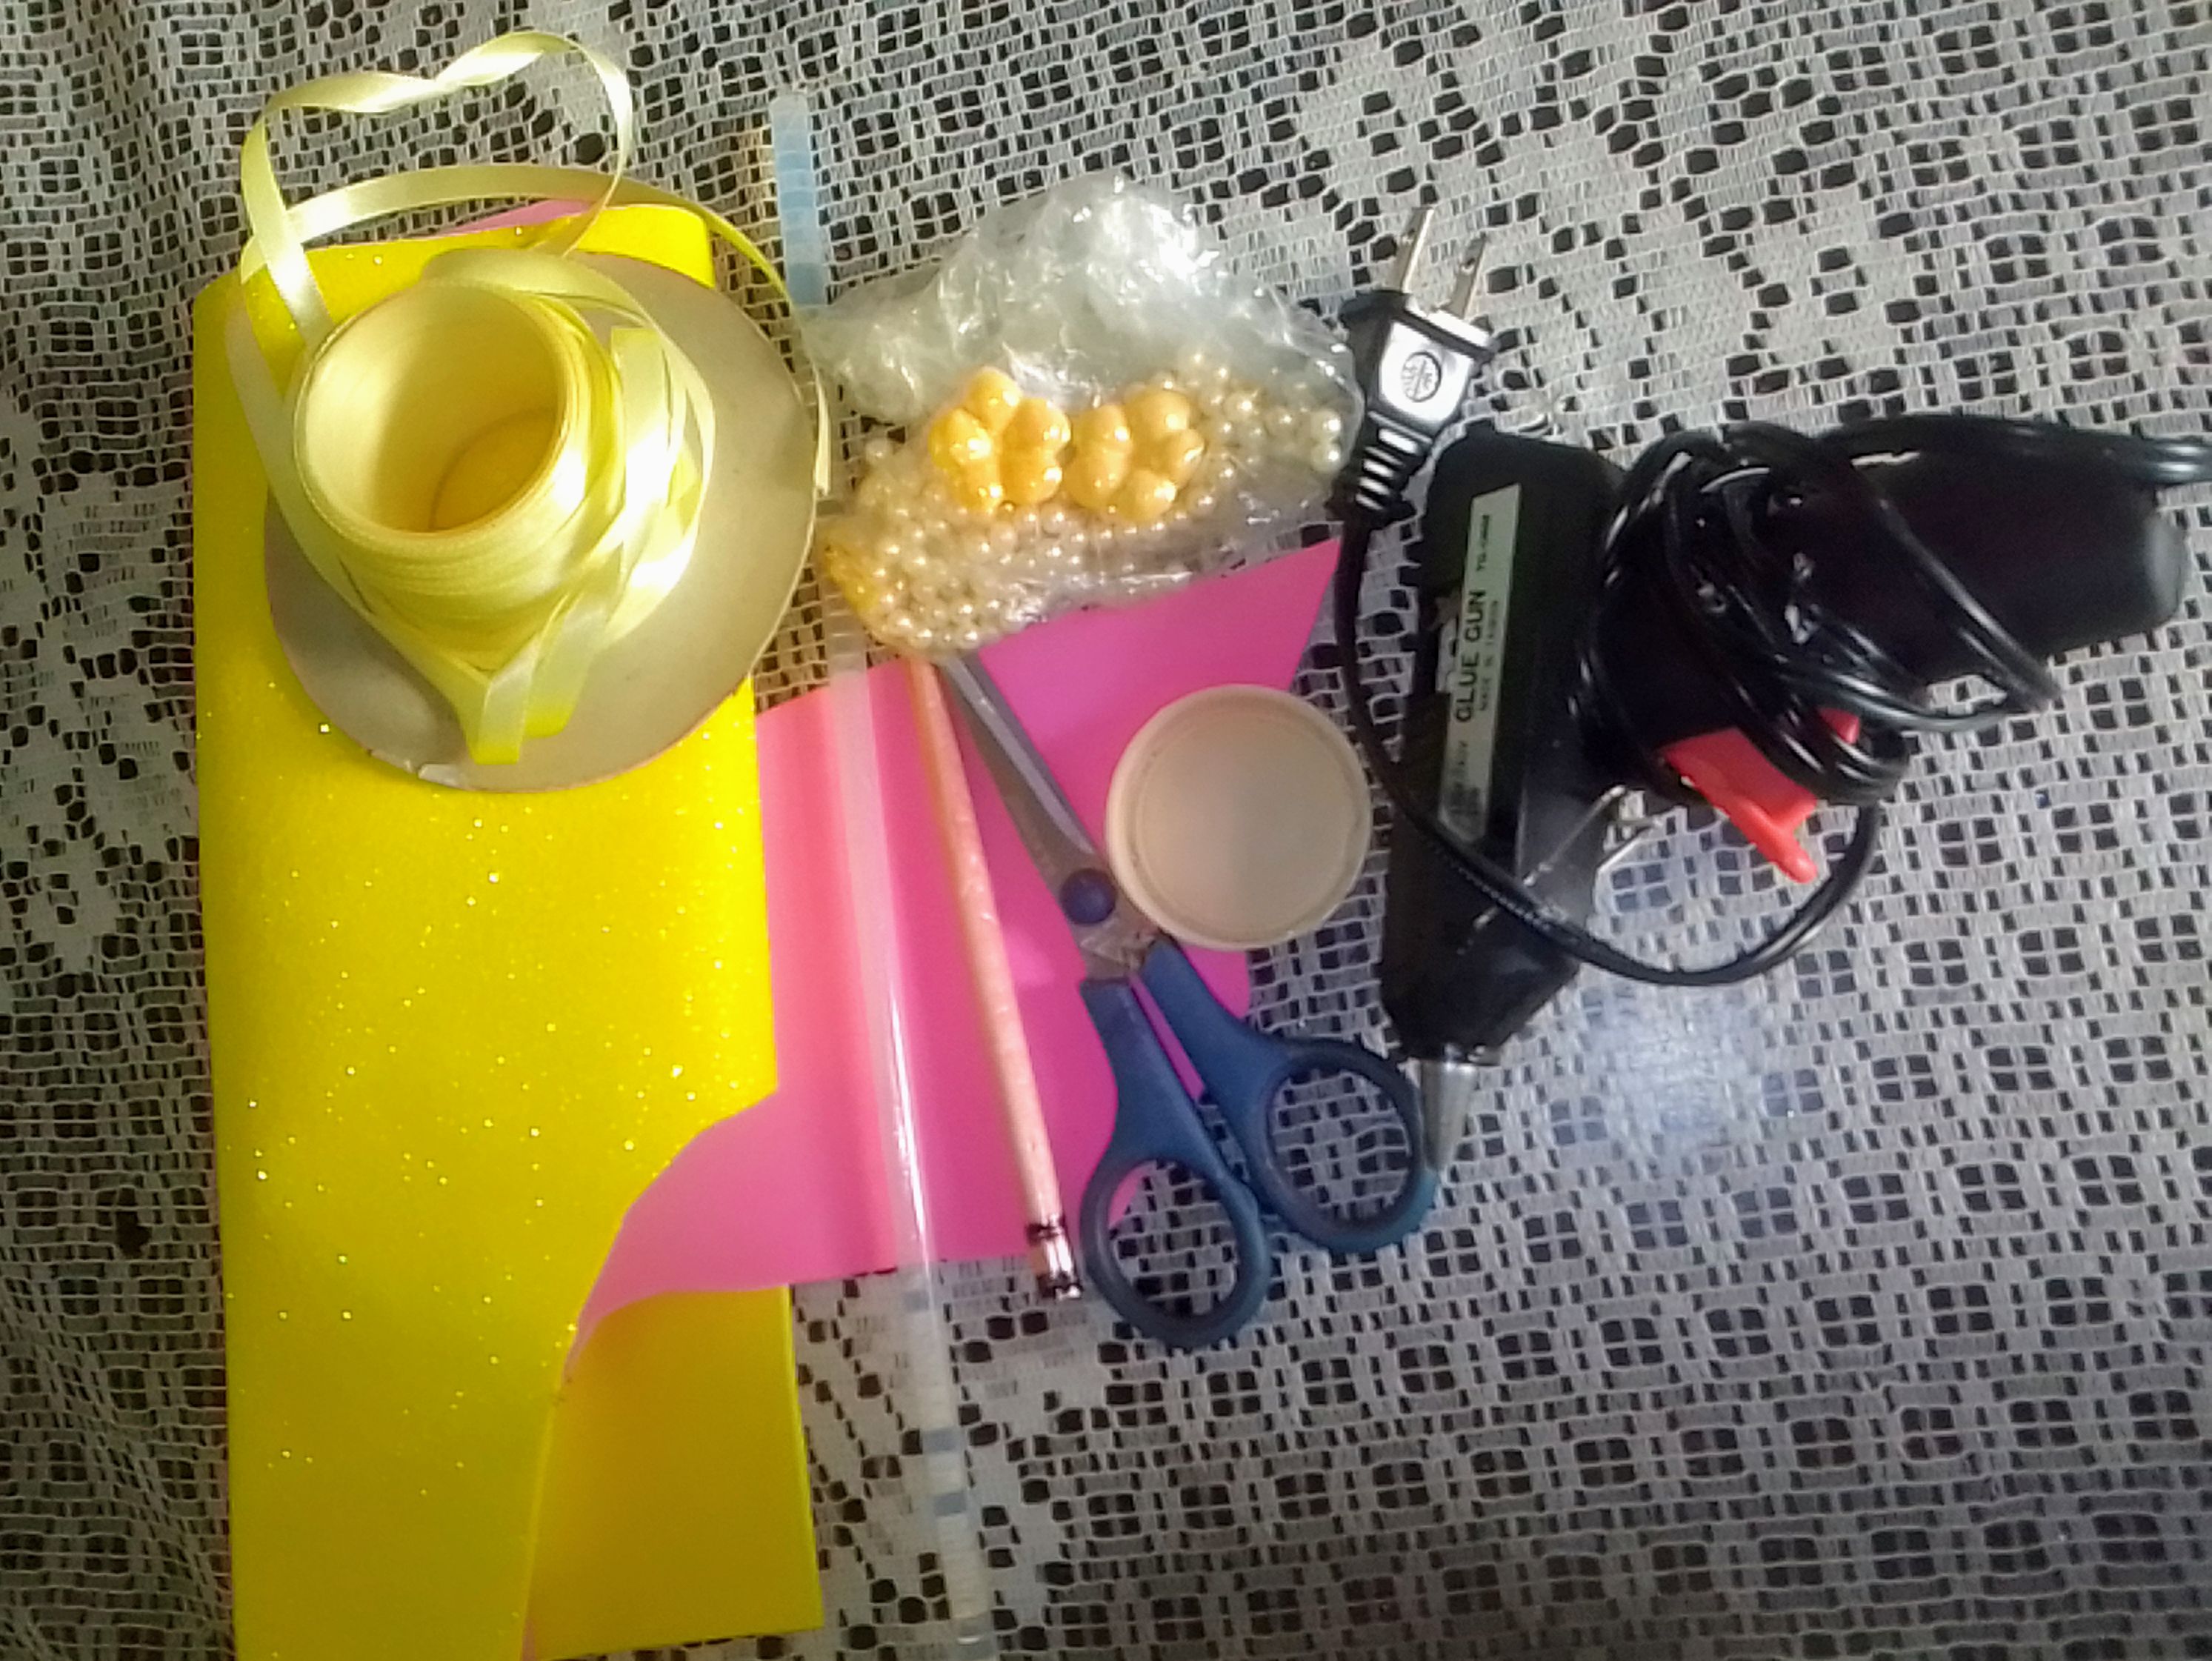
- Foami variados
- Cinta para decorar
- Perlitas
- Rositas
- Tijera
- Barra de silicón y pistola caliente
- Lápiz
- Una tapita en forma de círculo.
- Varied foami
- Tape to decorate
- Perlites
- Roses
- Scissors
- Silicone bar and hot gun
- Pencil
- A cap in the shape of a circle.
PROCEDIMIENTO
PROCEDURE
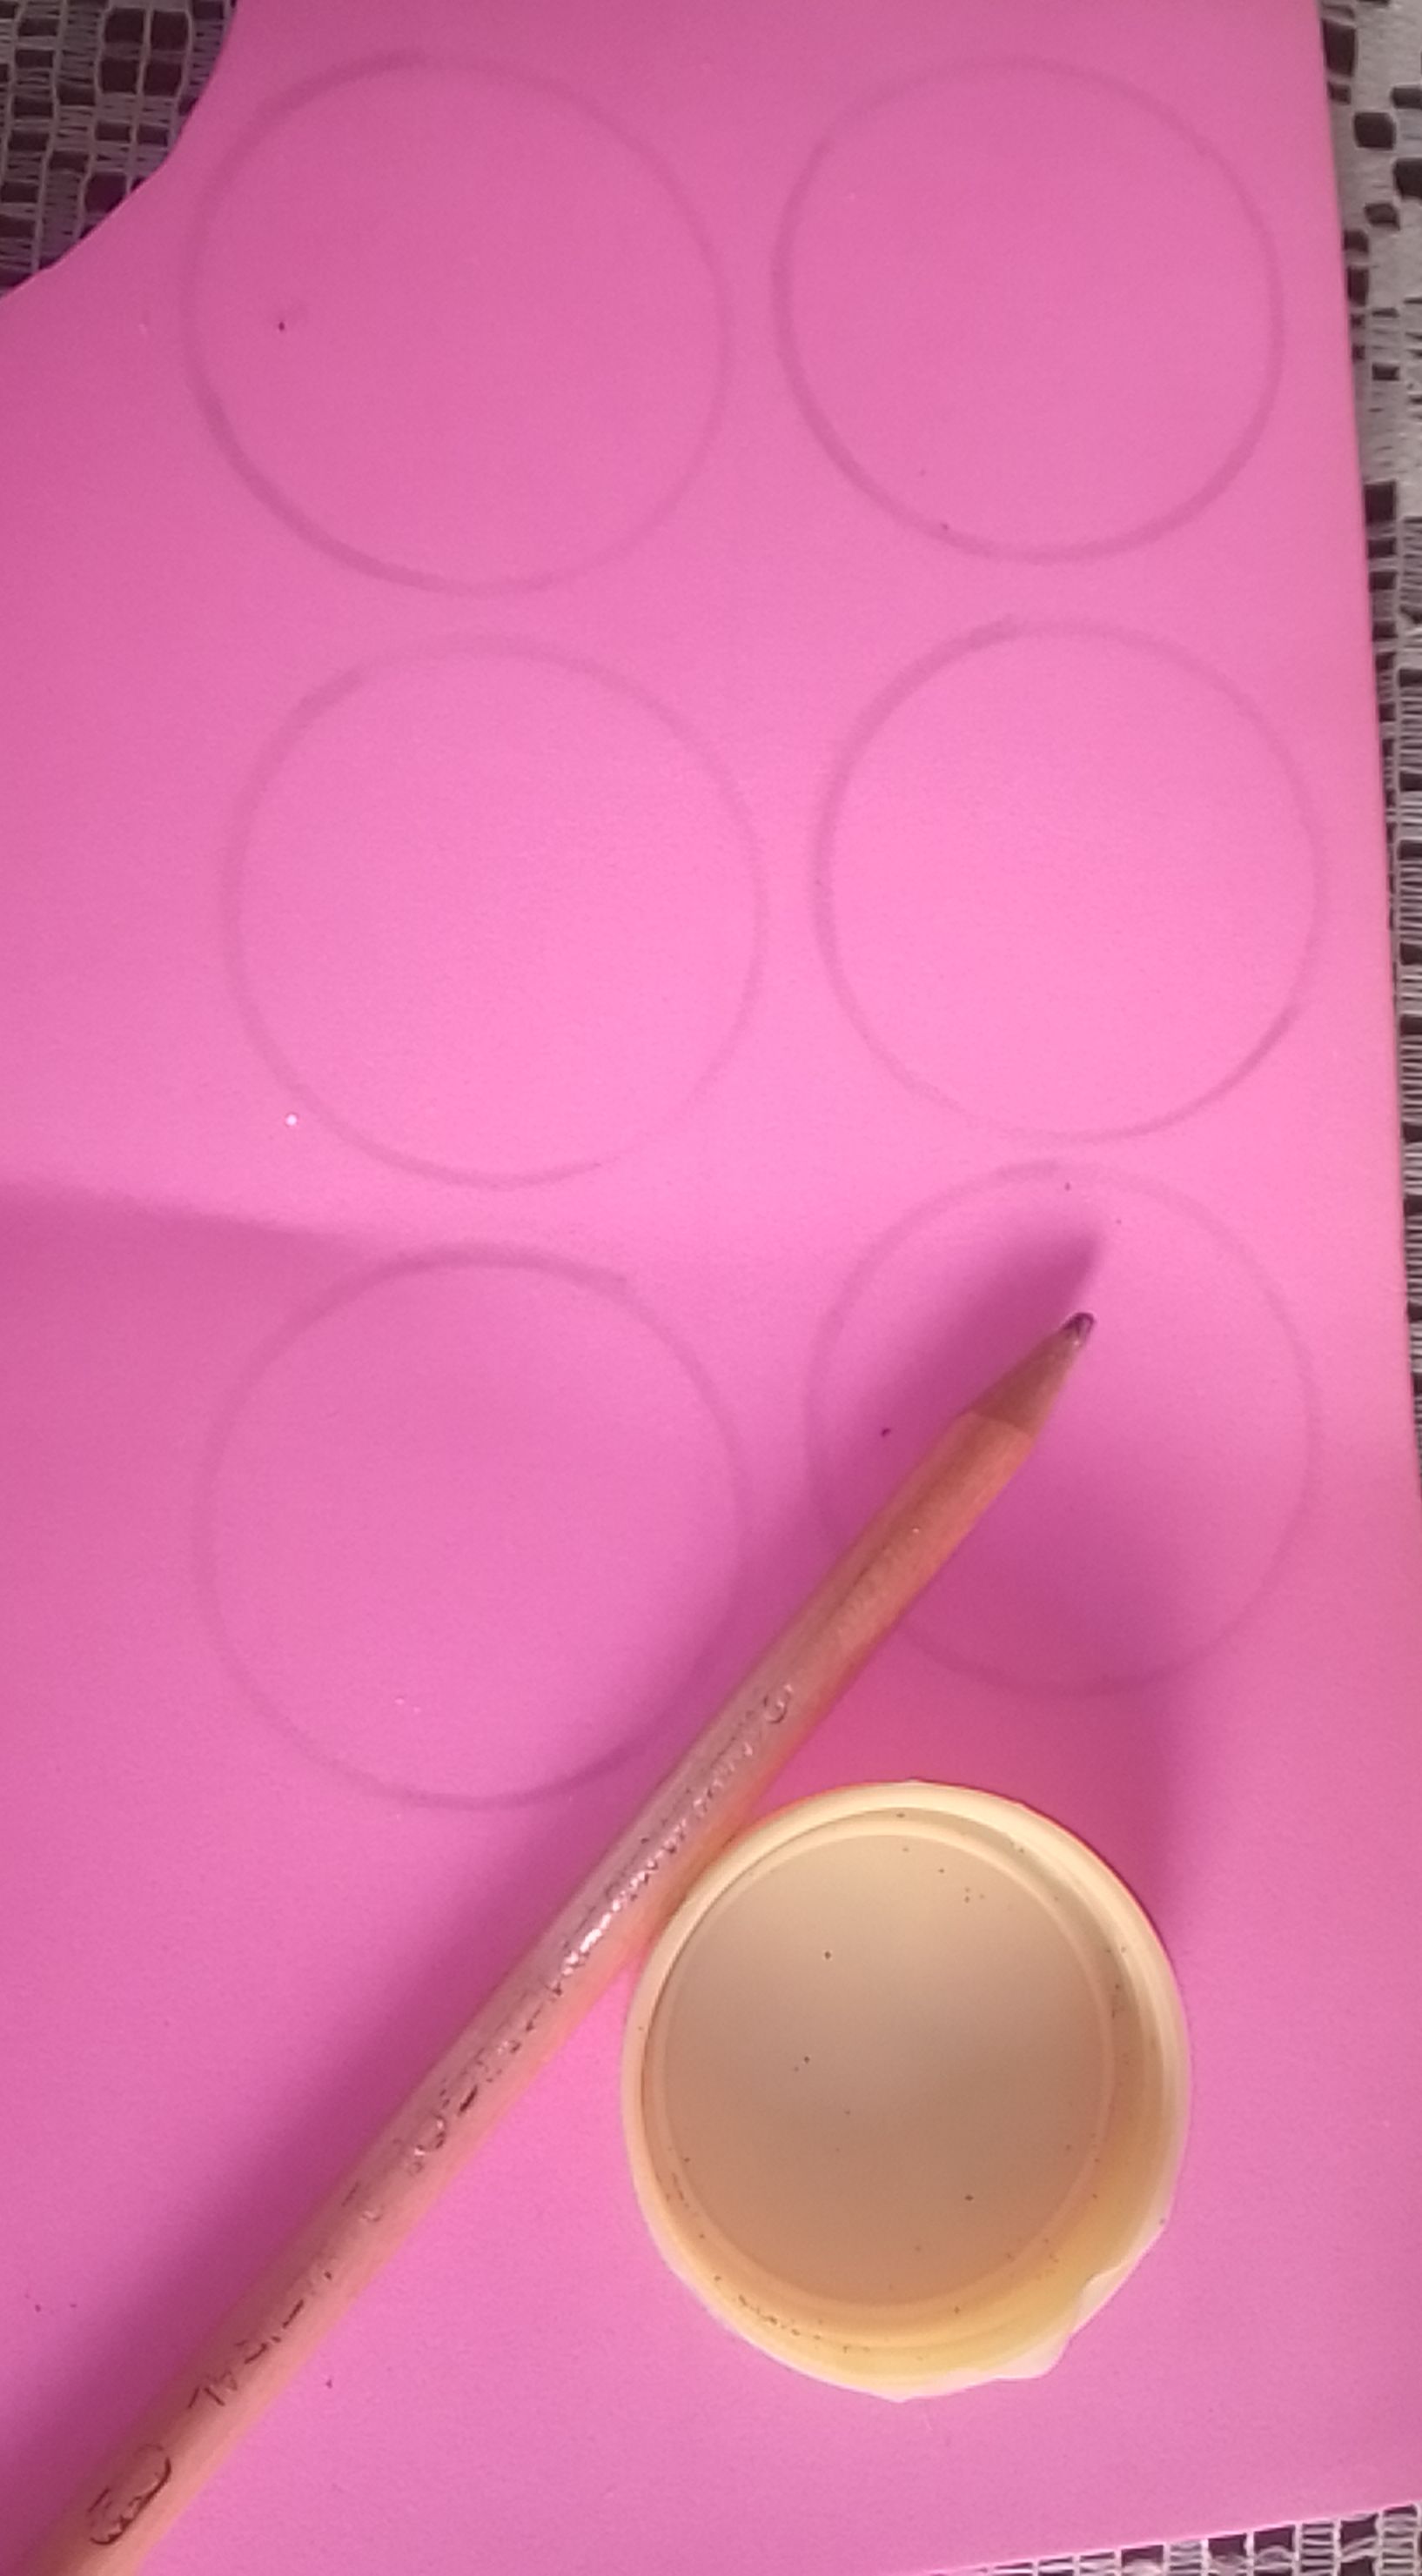
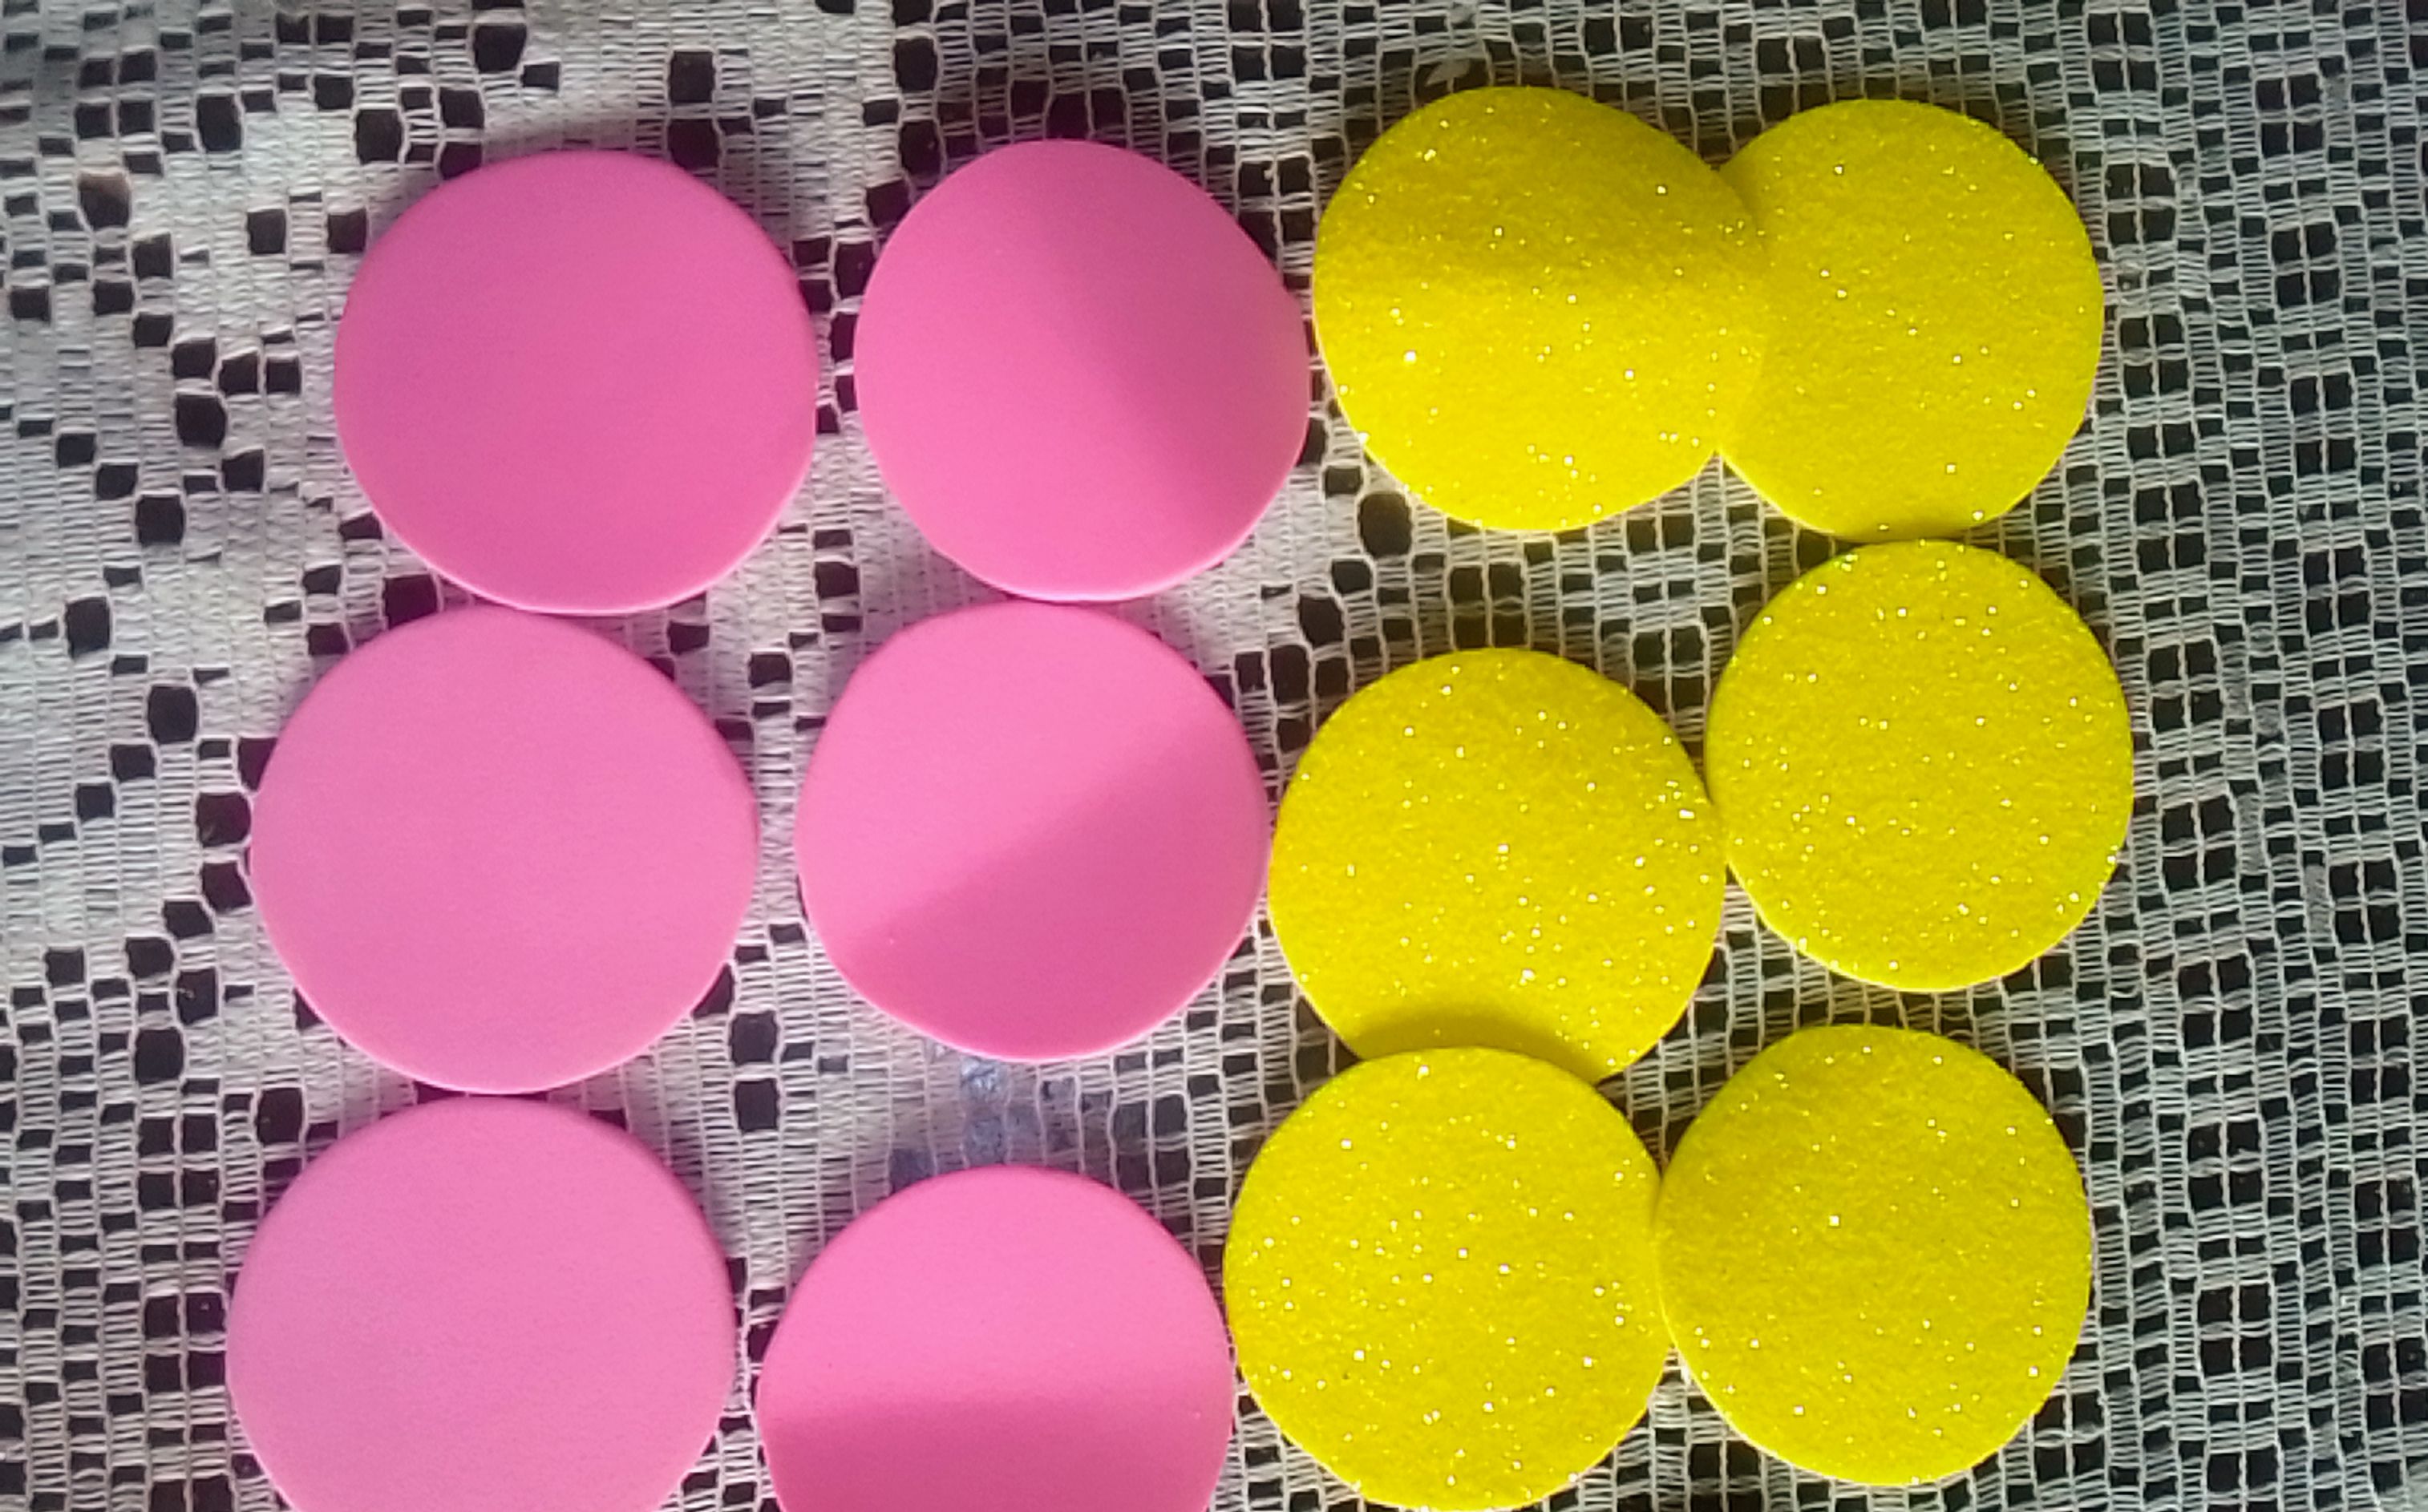
1.- Primeramente vas a tomar un foami el color de tu preferencia y con la tapita de un envase y con el lápiz vas a marcar 6 círculos la medida es de 5 1/2 de circunferencia todo depende del tamaño que quieras hacer tu flor.
1.- First you are going to take a foami the color of your preference and with the cap of a container and with the pencil you will mark 6 circles the measure is 5 1/2 of circumference everything depends on the size you want to make your flower.
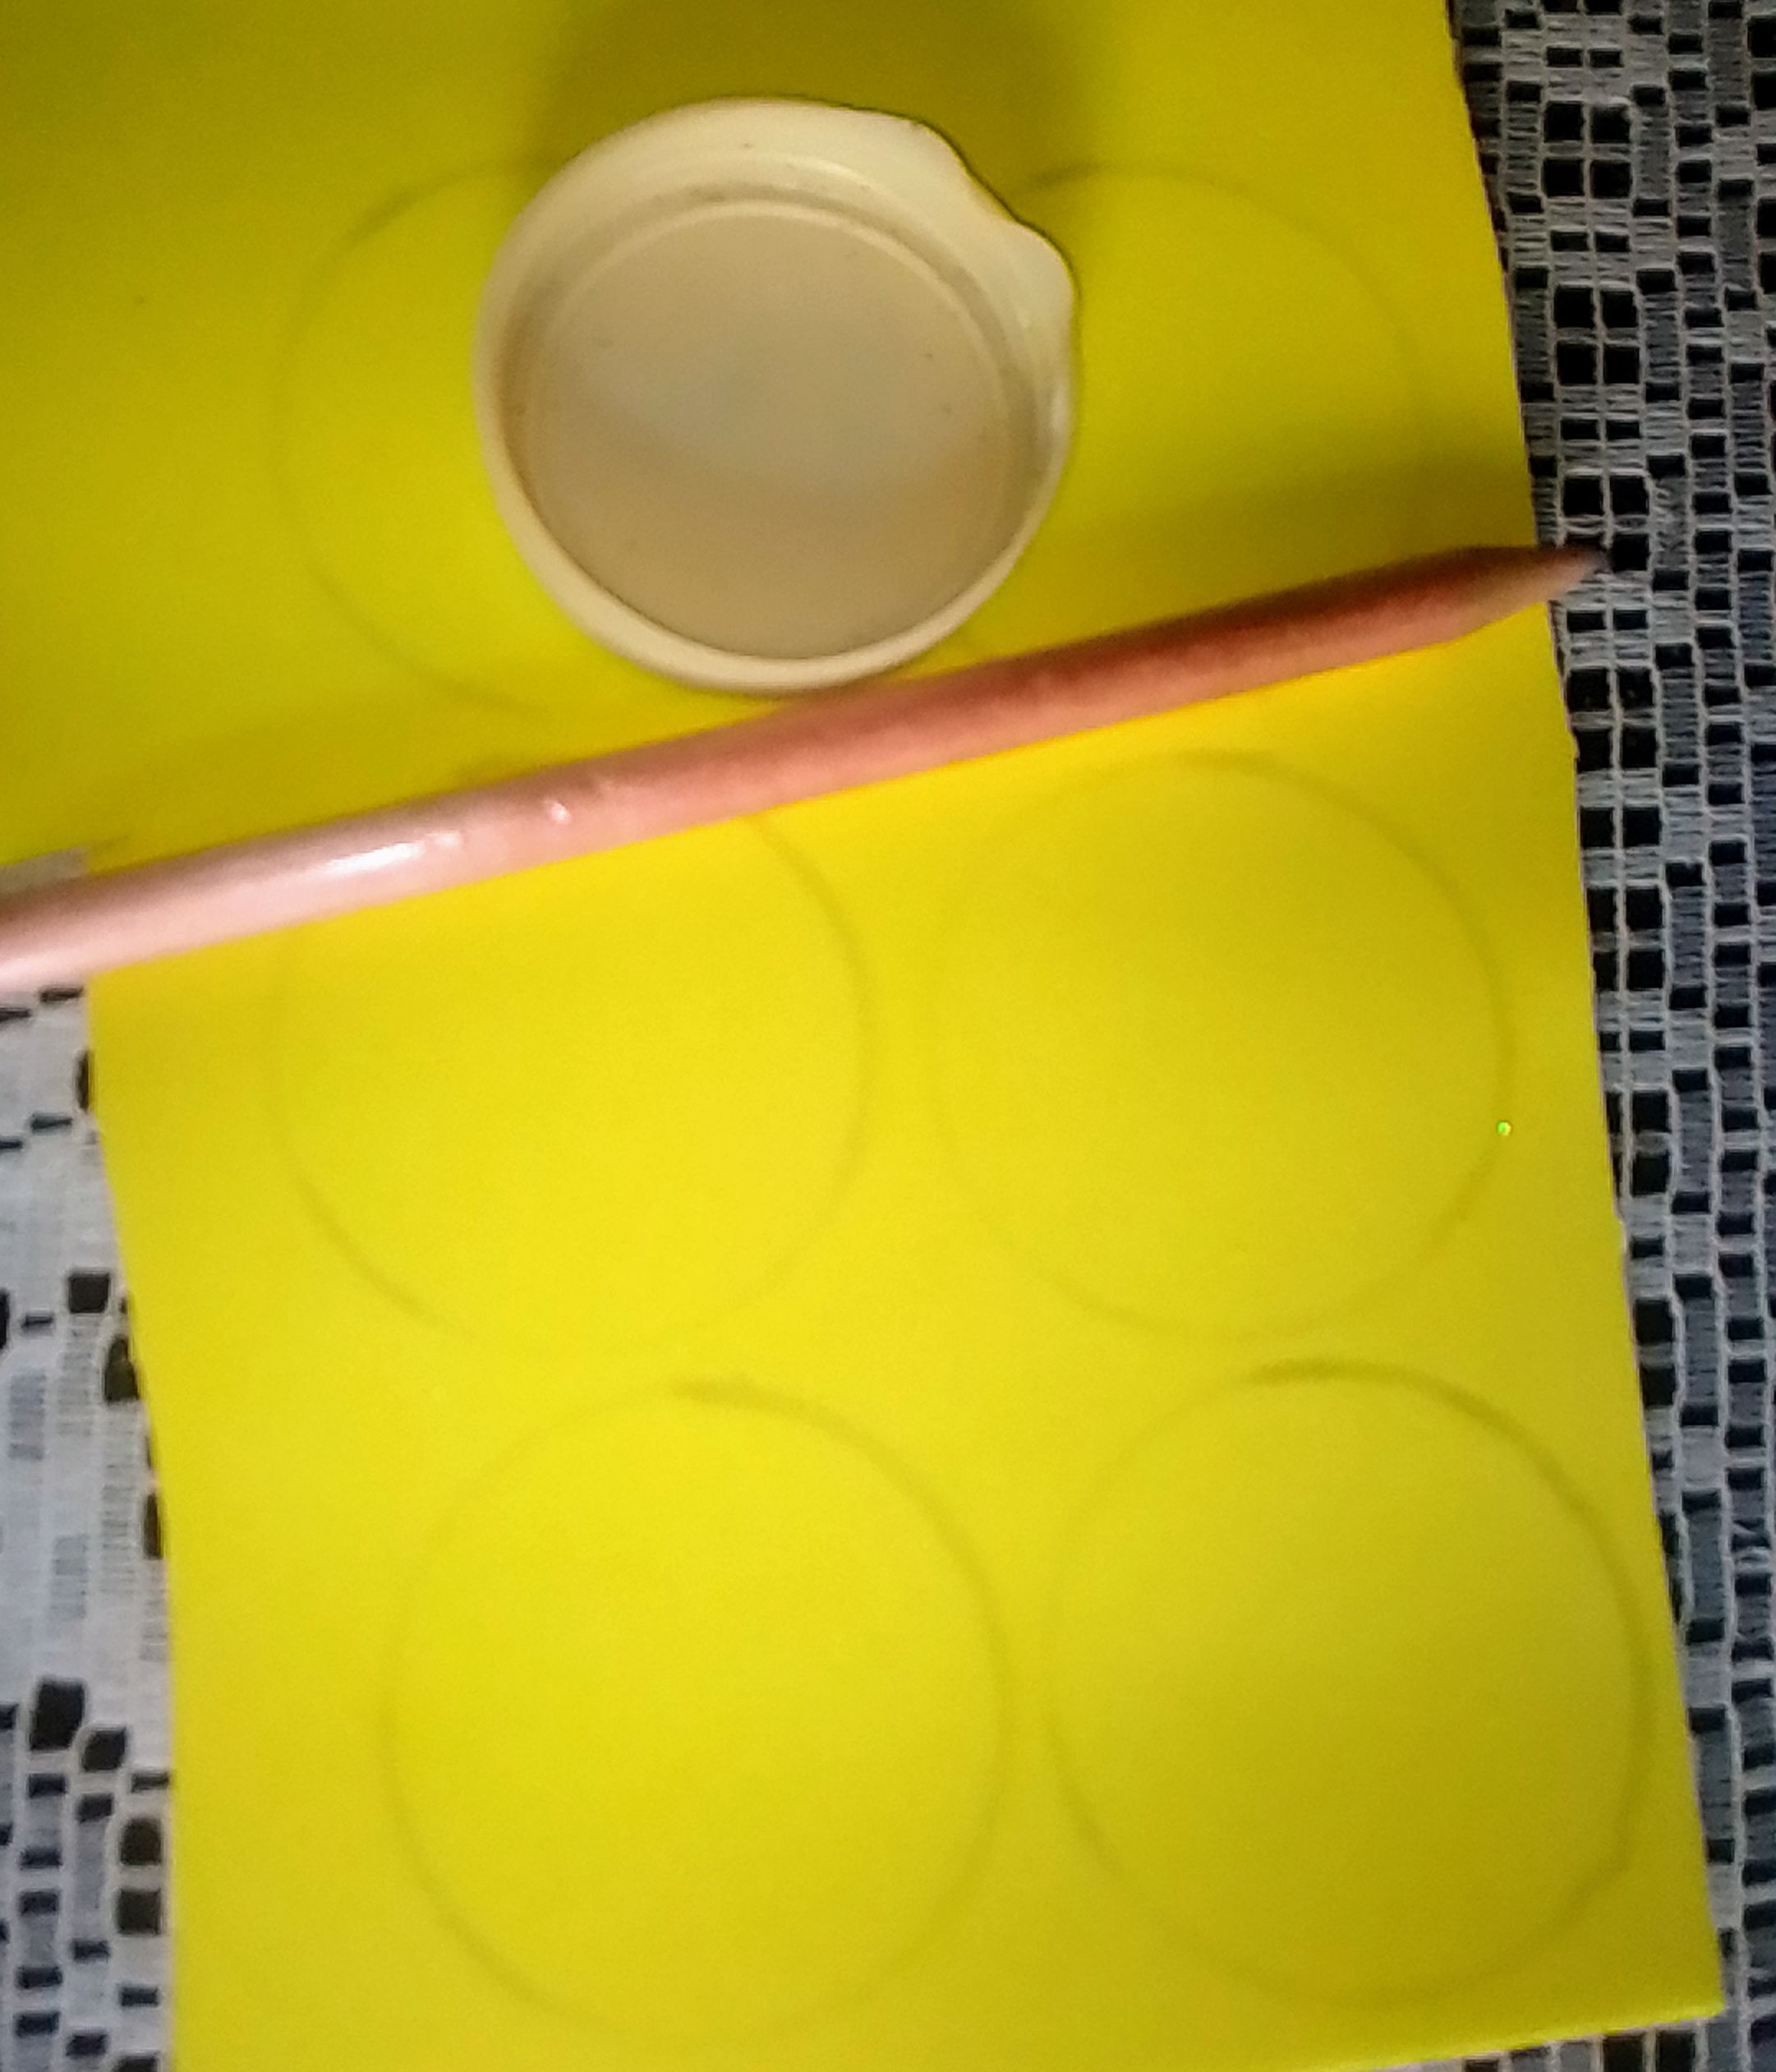
2.- Luego tomas otro color del foami y repite el mismo proceso del anterior pero esta vez este foami es escarchado y volteé el foami pra marcar los círculos.
2.- Then you take another color of the foami and repeat the same process of the previous one but this time this foami is frosty and I turned the foami pra mark the circles.
3.- Y acá tomé la tijera y el proceso de hacer tus círculos anteriores ahora lo recortas y en total son 12 círculos 6 rosados y 6 amarillo escarchado.
3.- And here I took the scissors and the process of making your previous circles now you cut it and in total there are 12 pink circles and 6 frosted yellow.
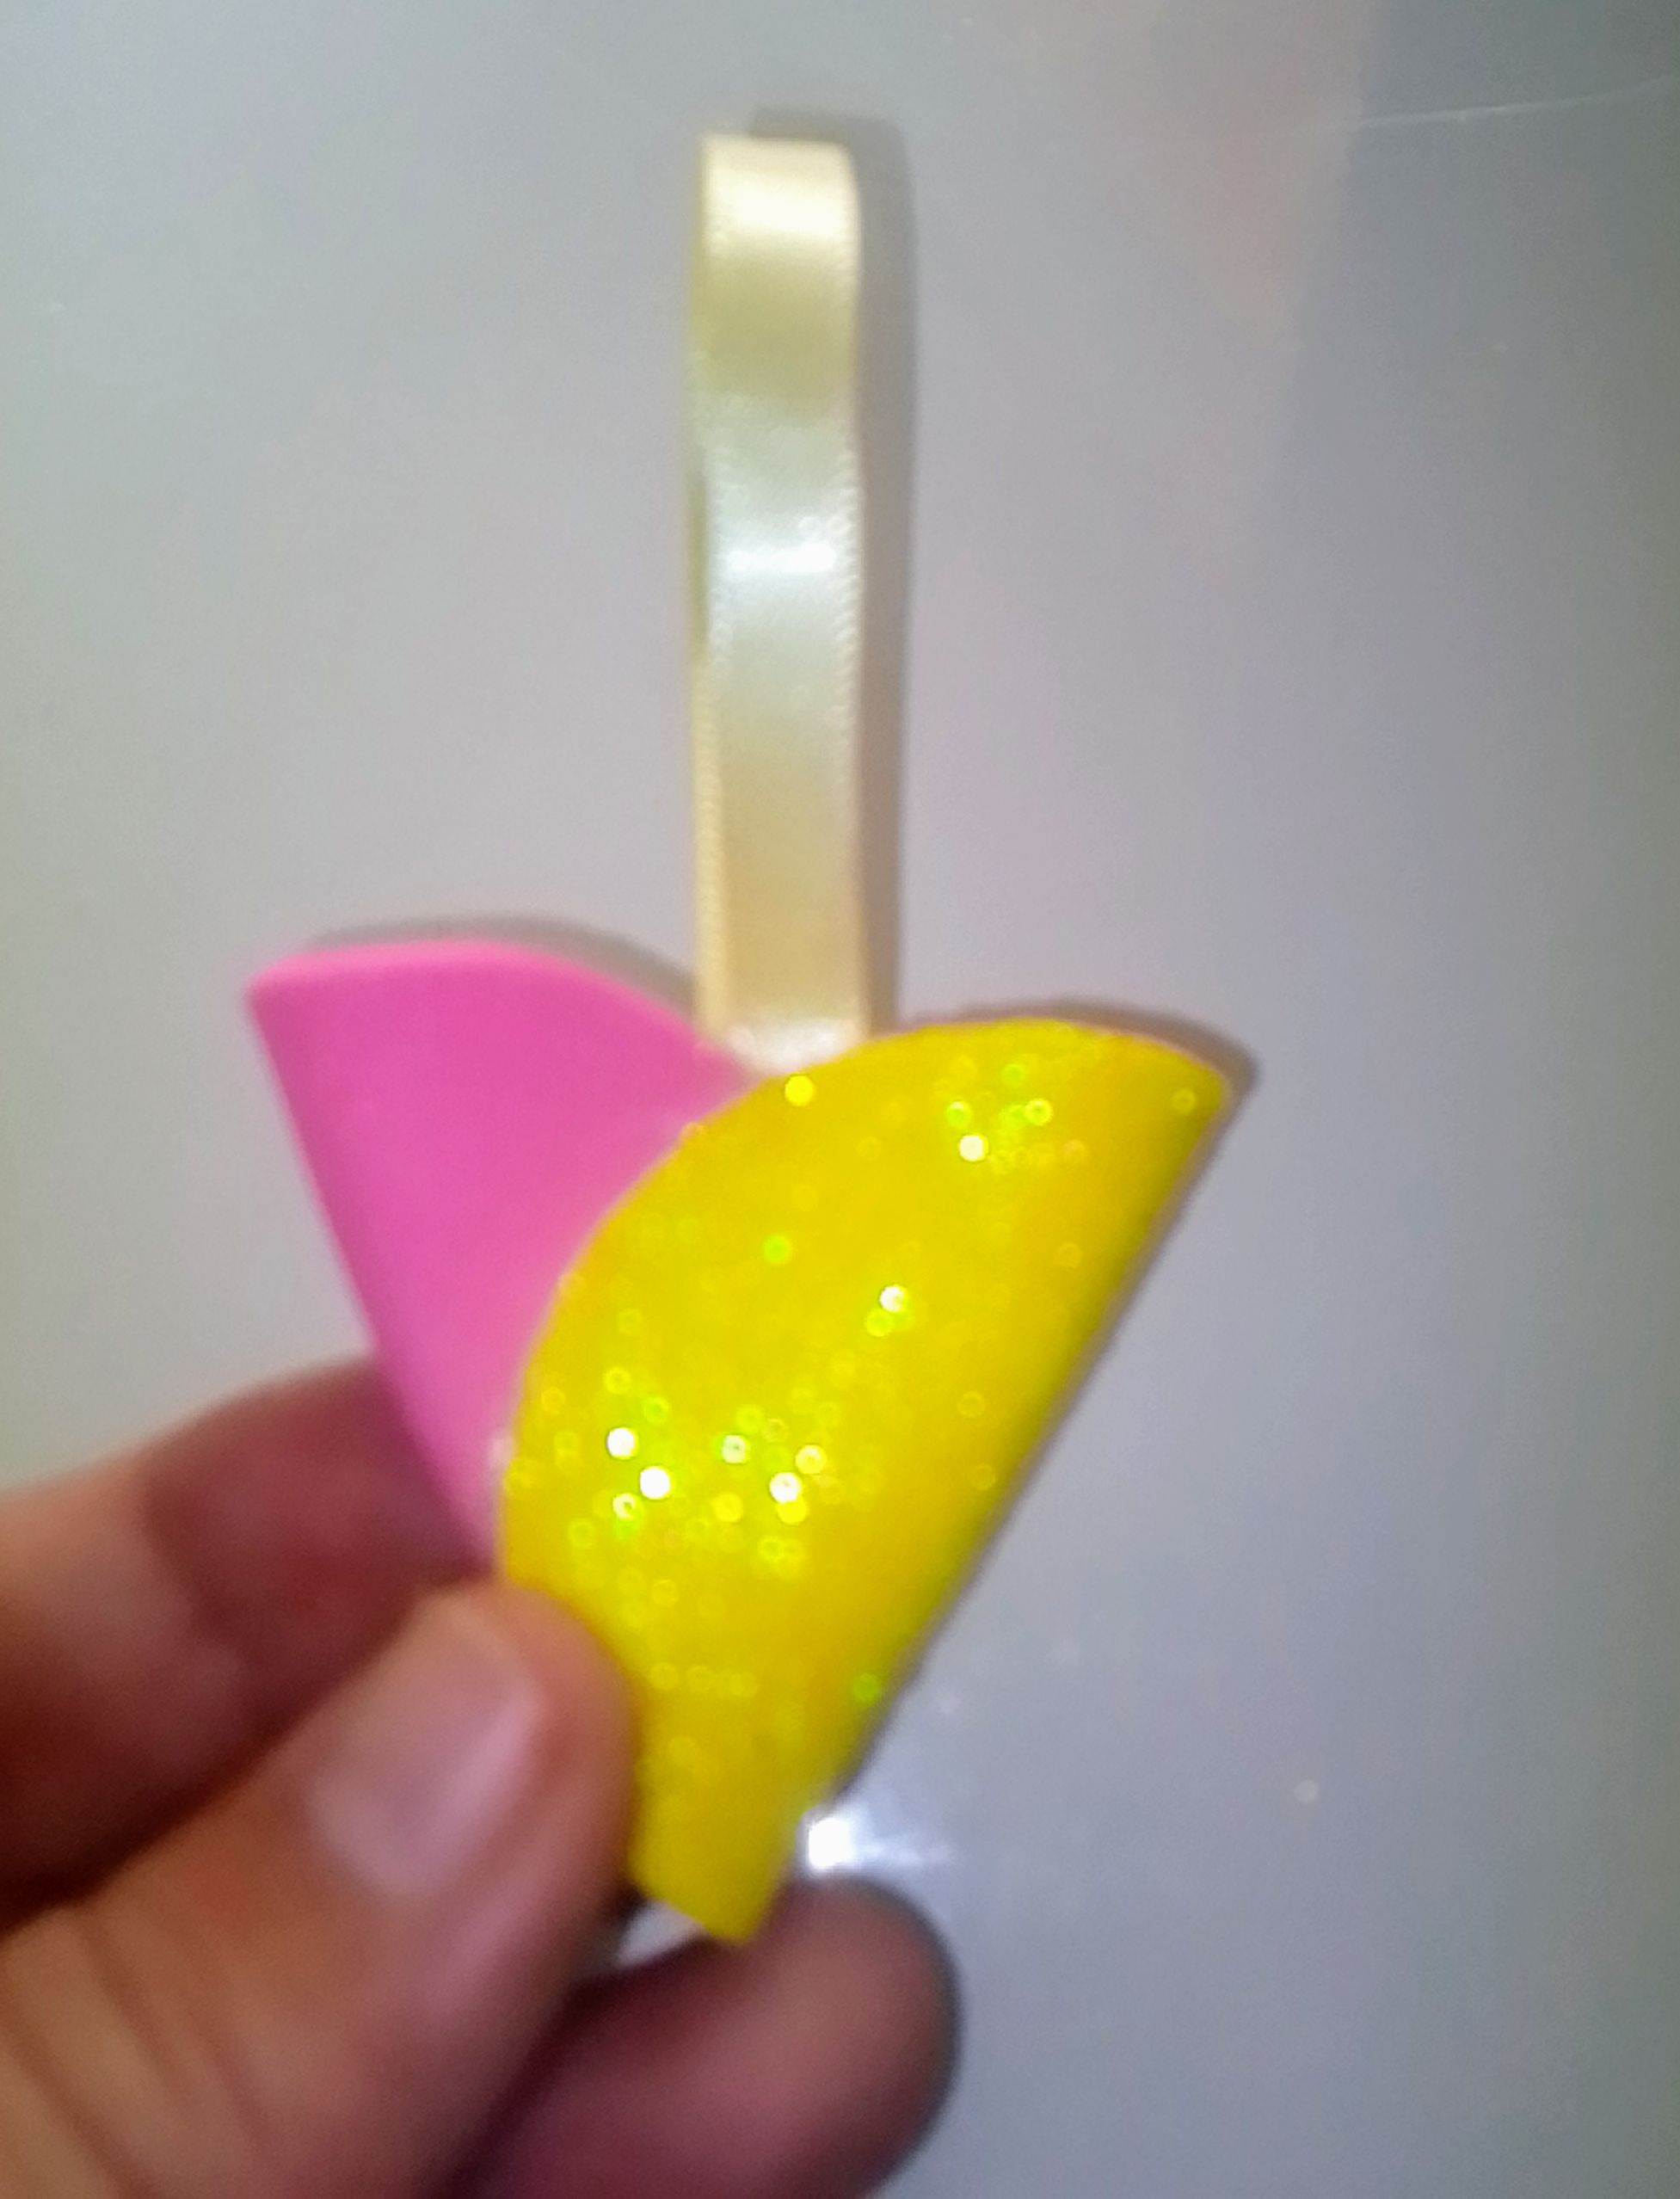
4.- Acá presta mucha atención tomas dos círculos uno de cada color y lo doblas a la mitad exactamente.
4.- Here pays close attention, take two circles one of each color and bent in half exactly.
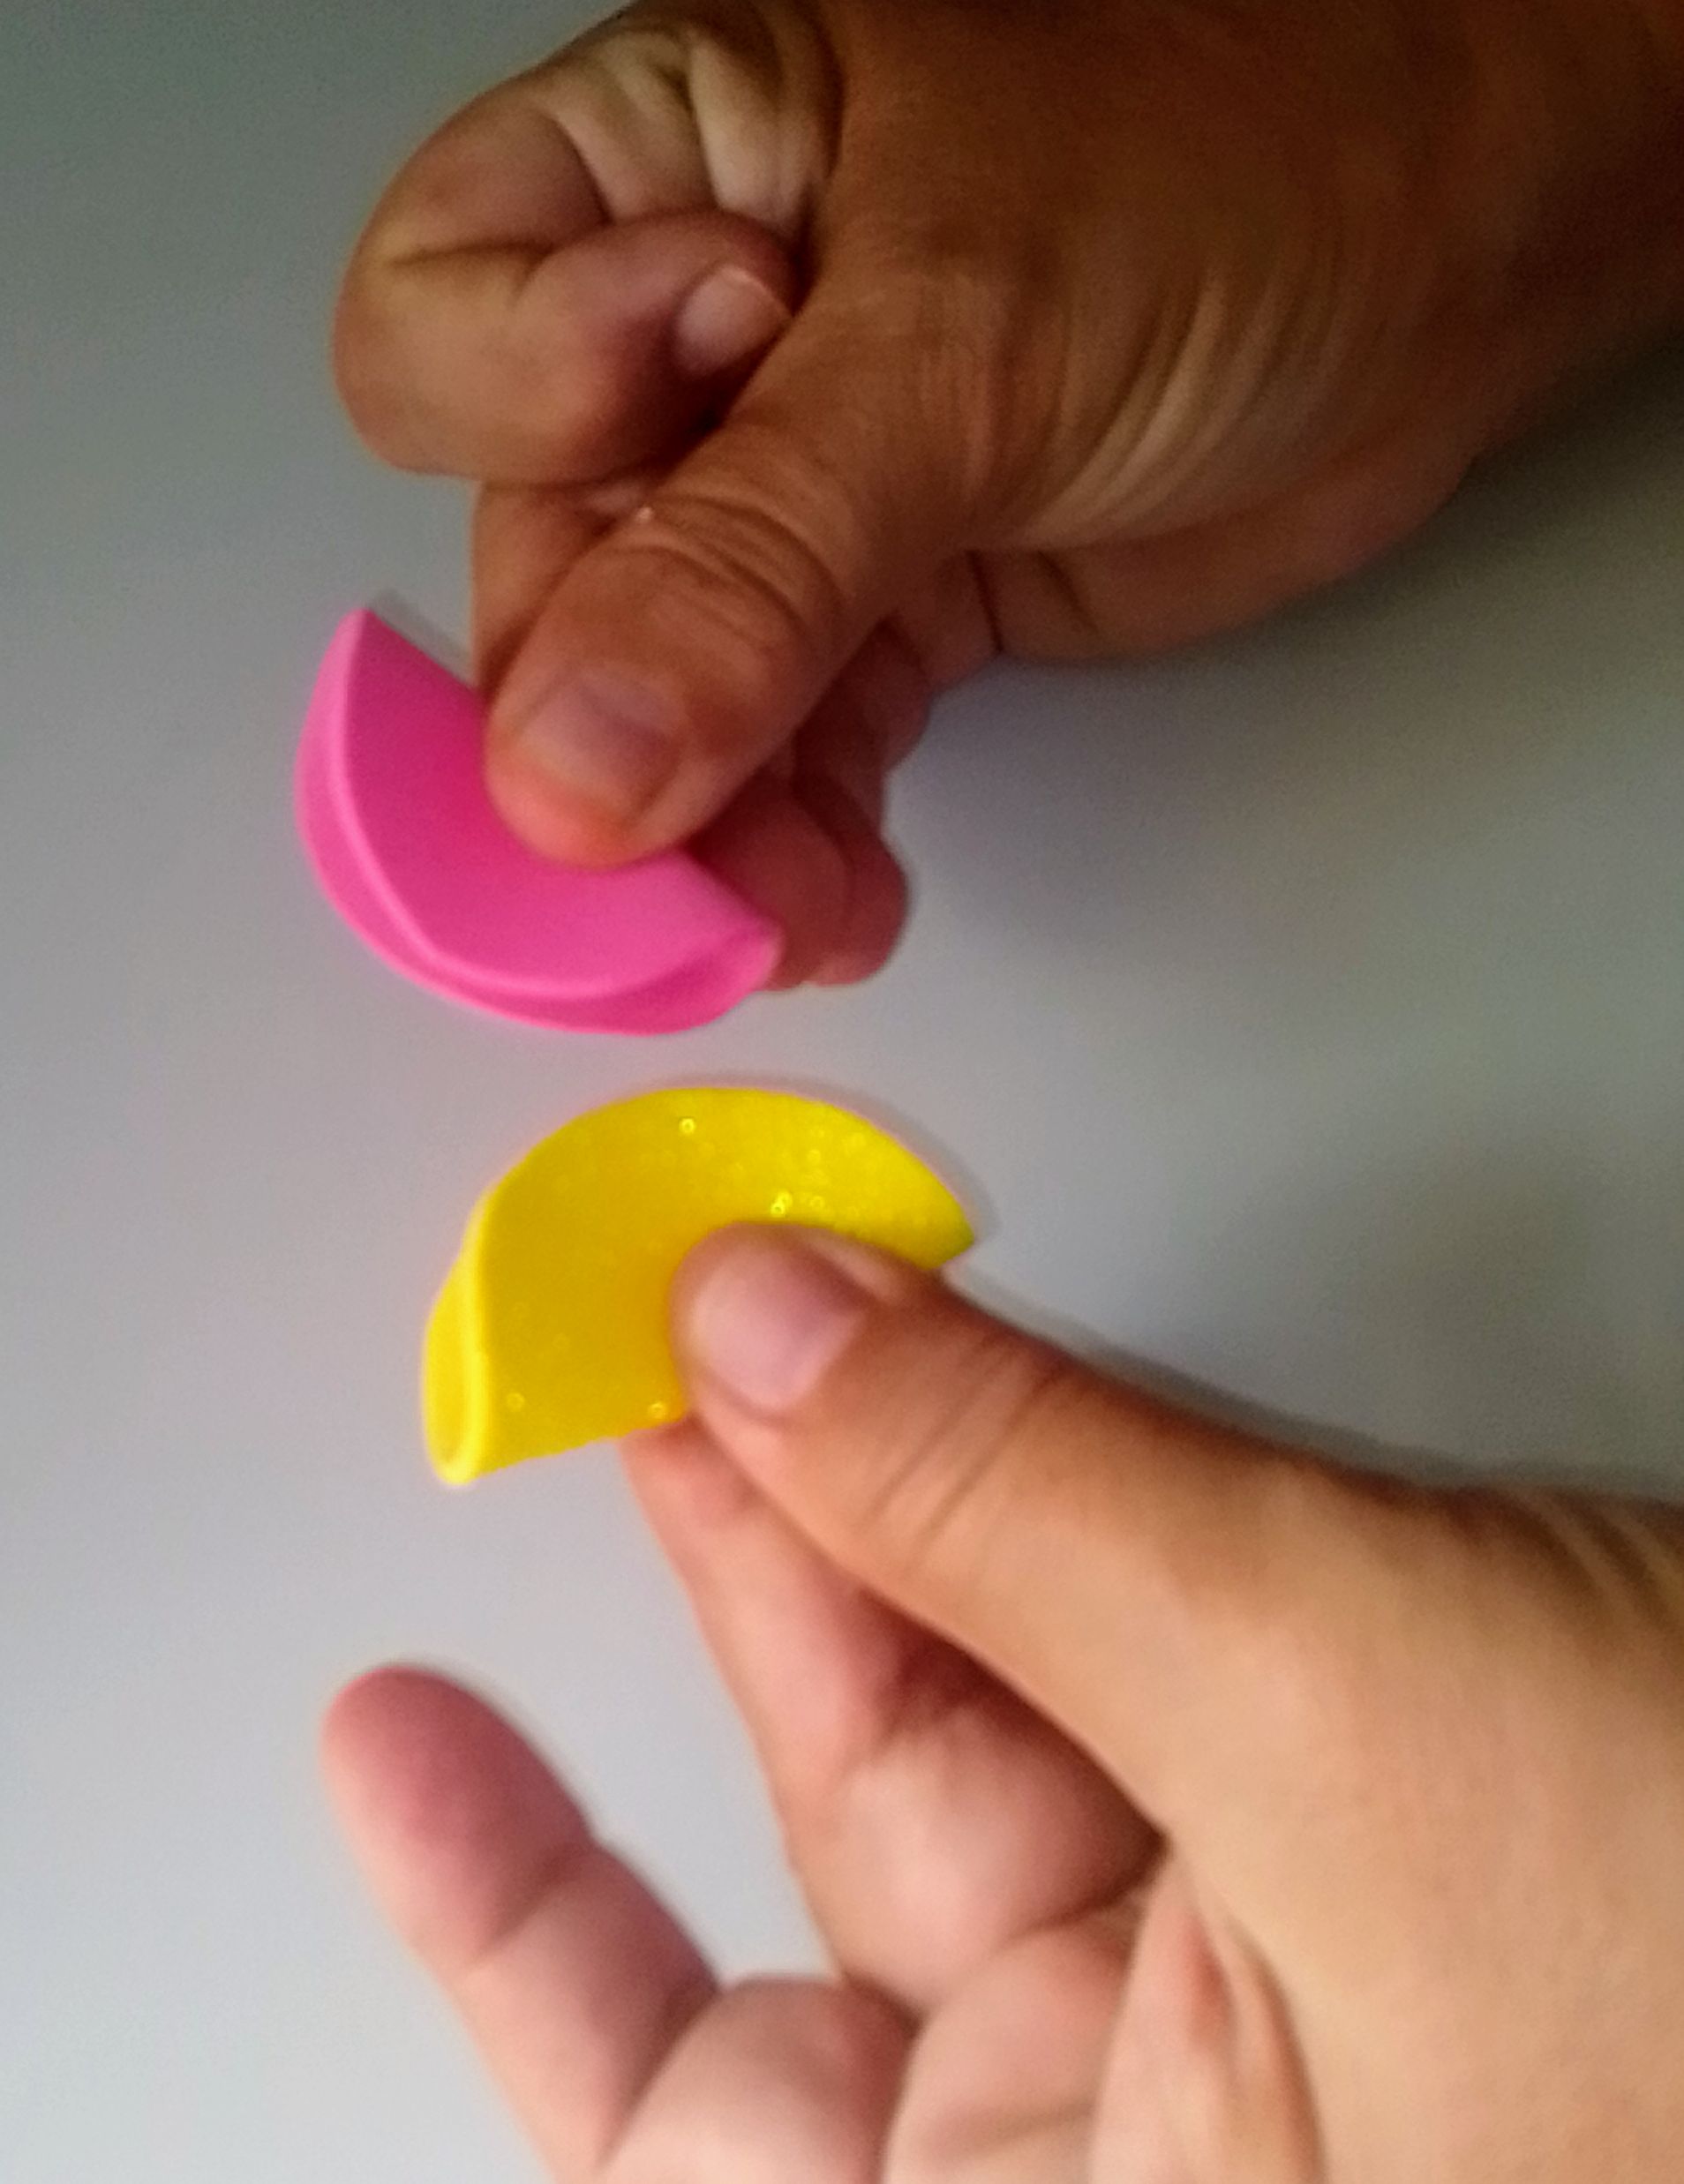
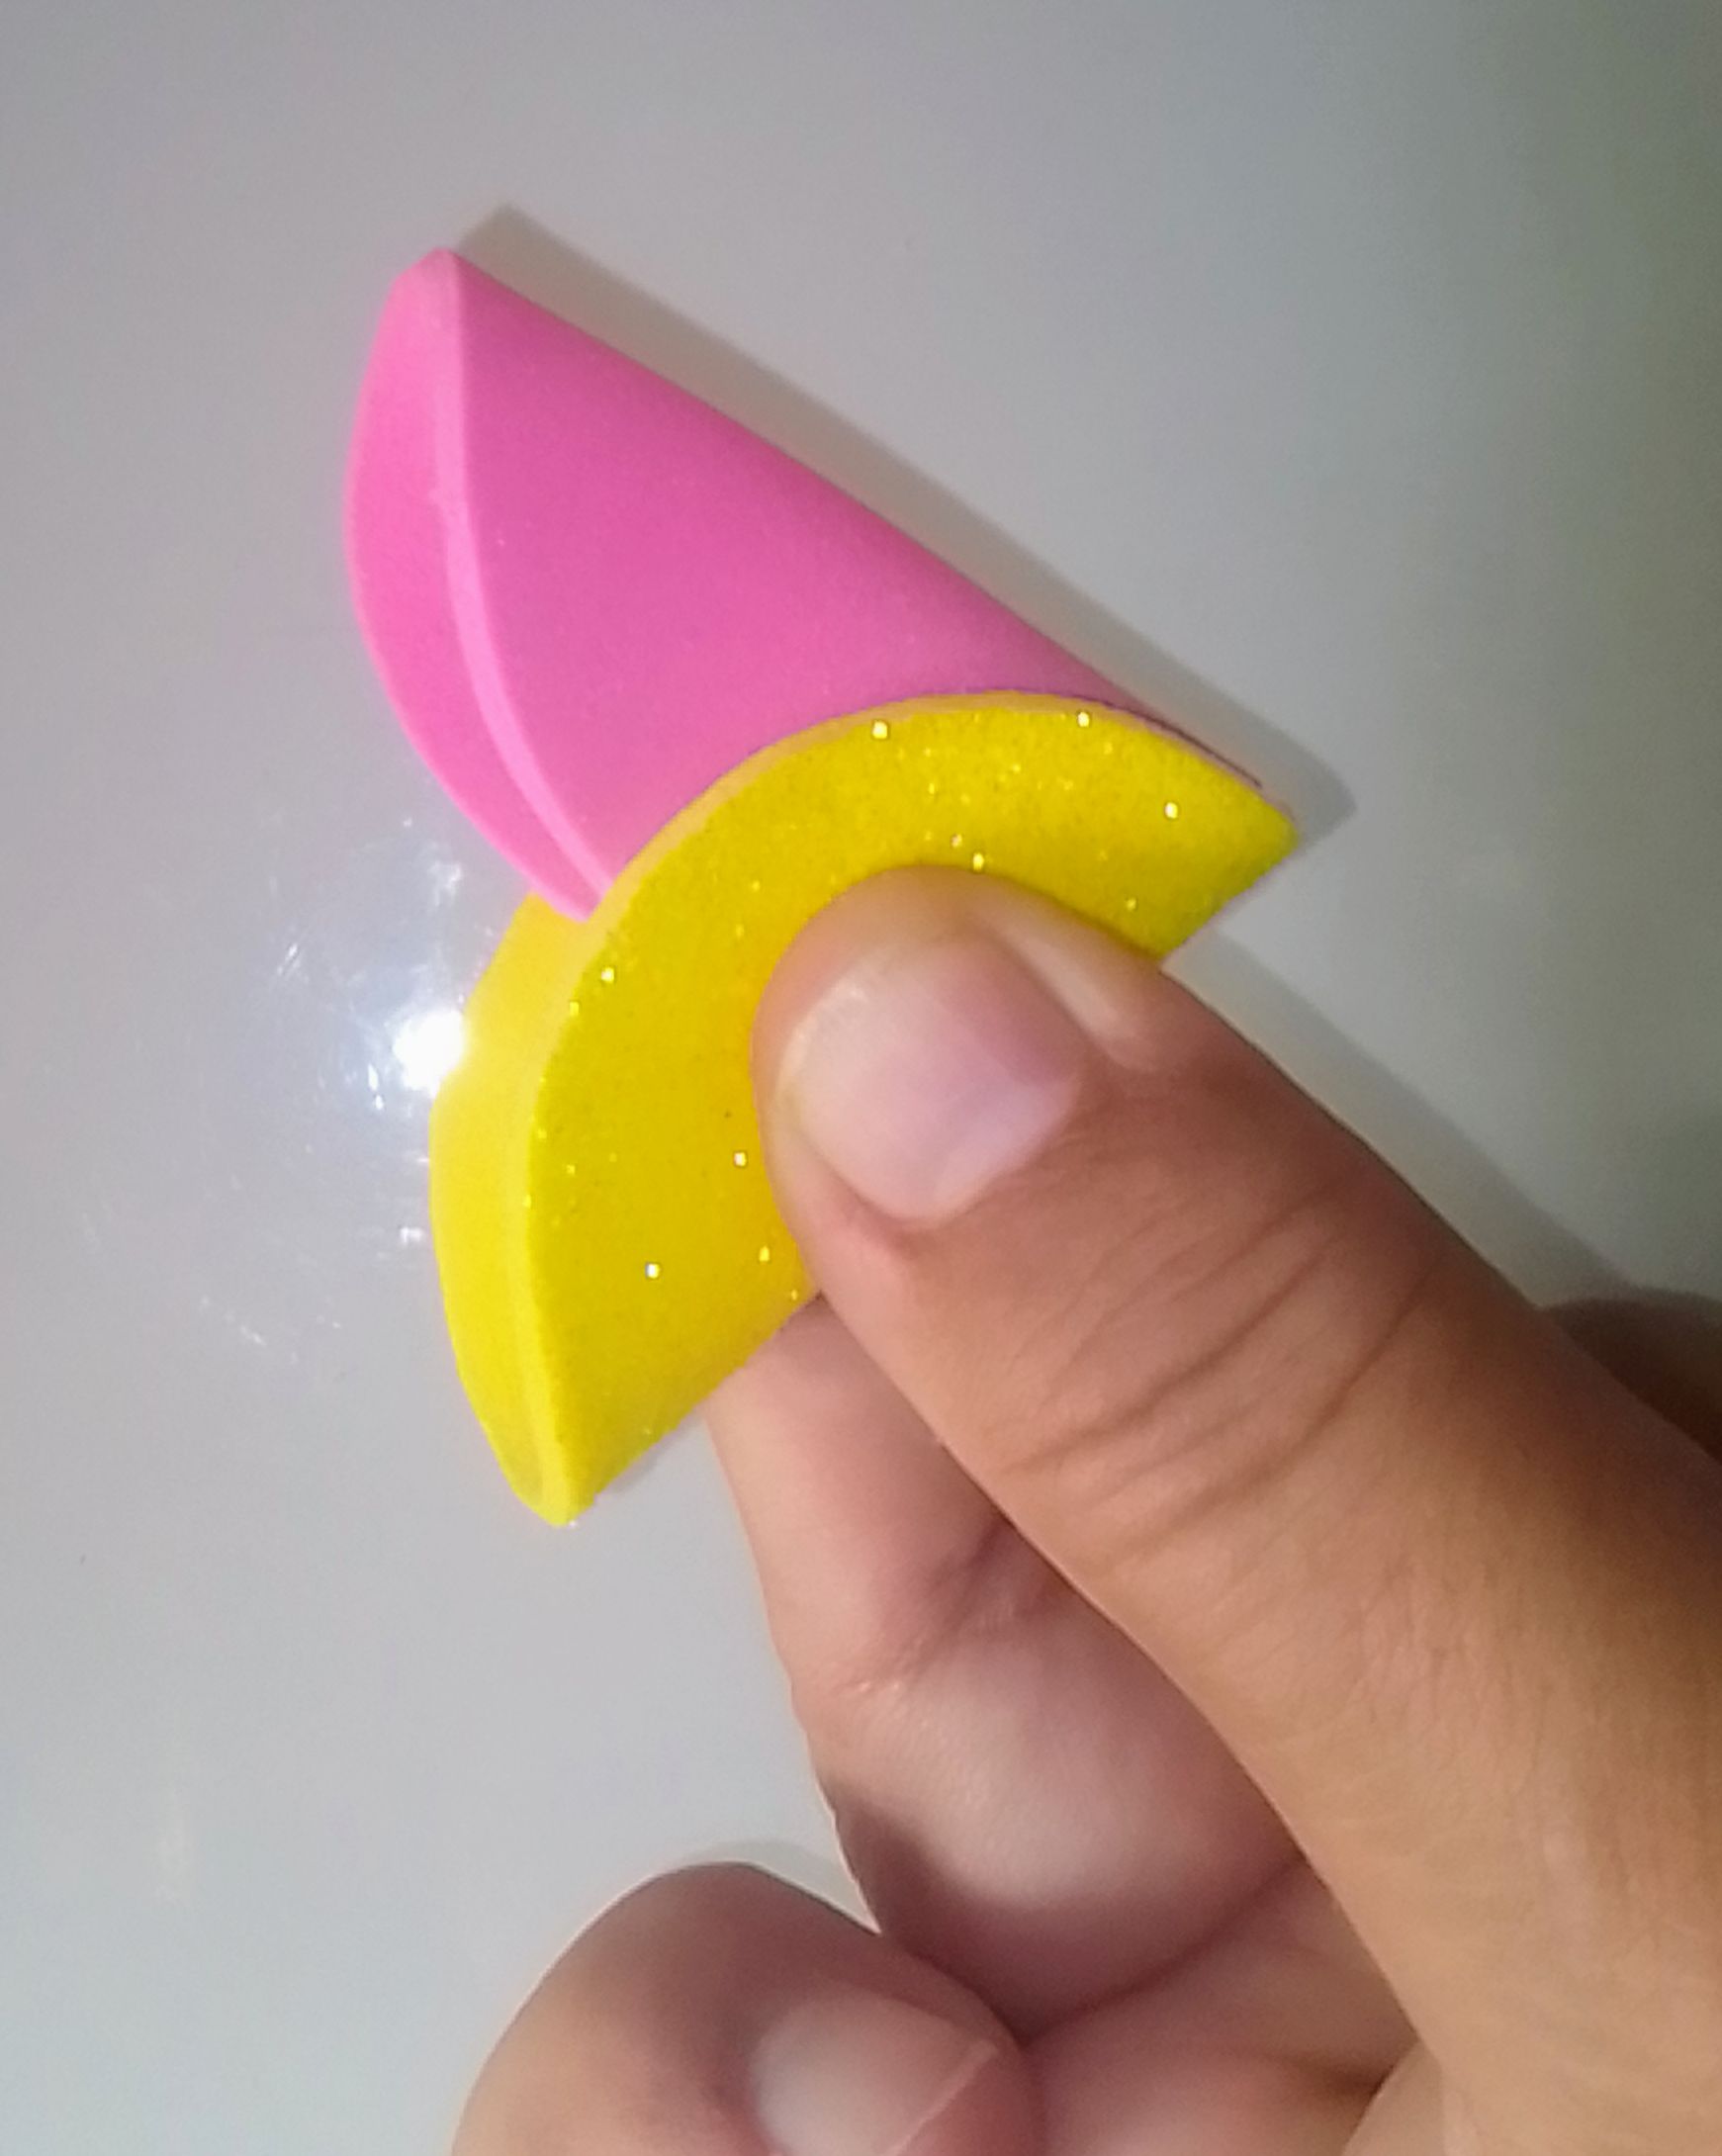
5.- Y aquí una vez doblado a la mitad ve como muestra la imagen lo vas a meter uno dentro del otro y que te quede de esta forma.
5.- And here once folded in half, see how the image is going to put it inside each other and that is left in this way.
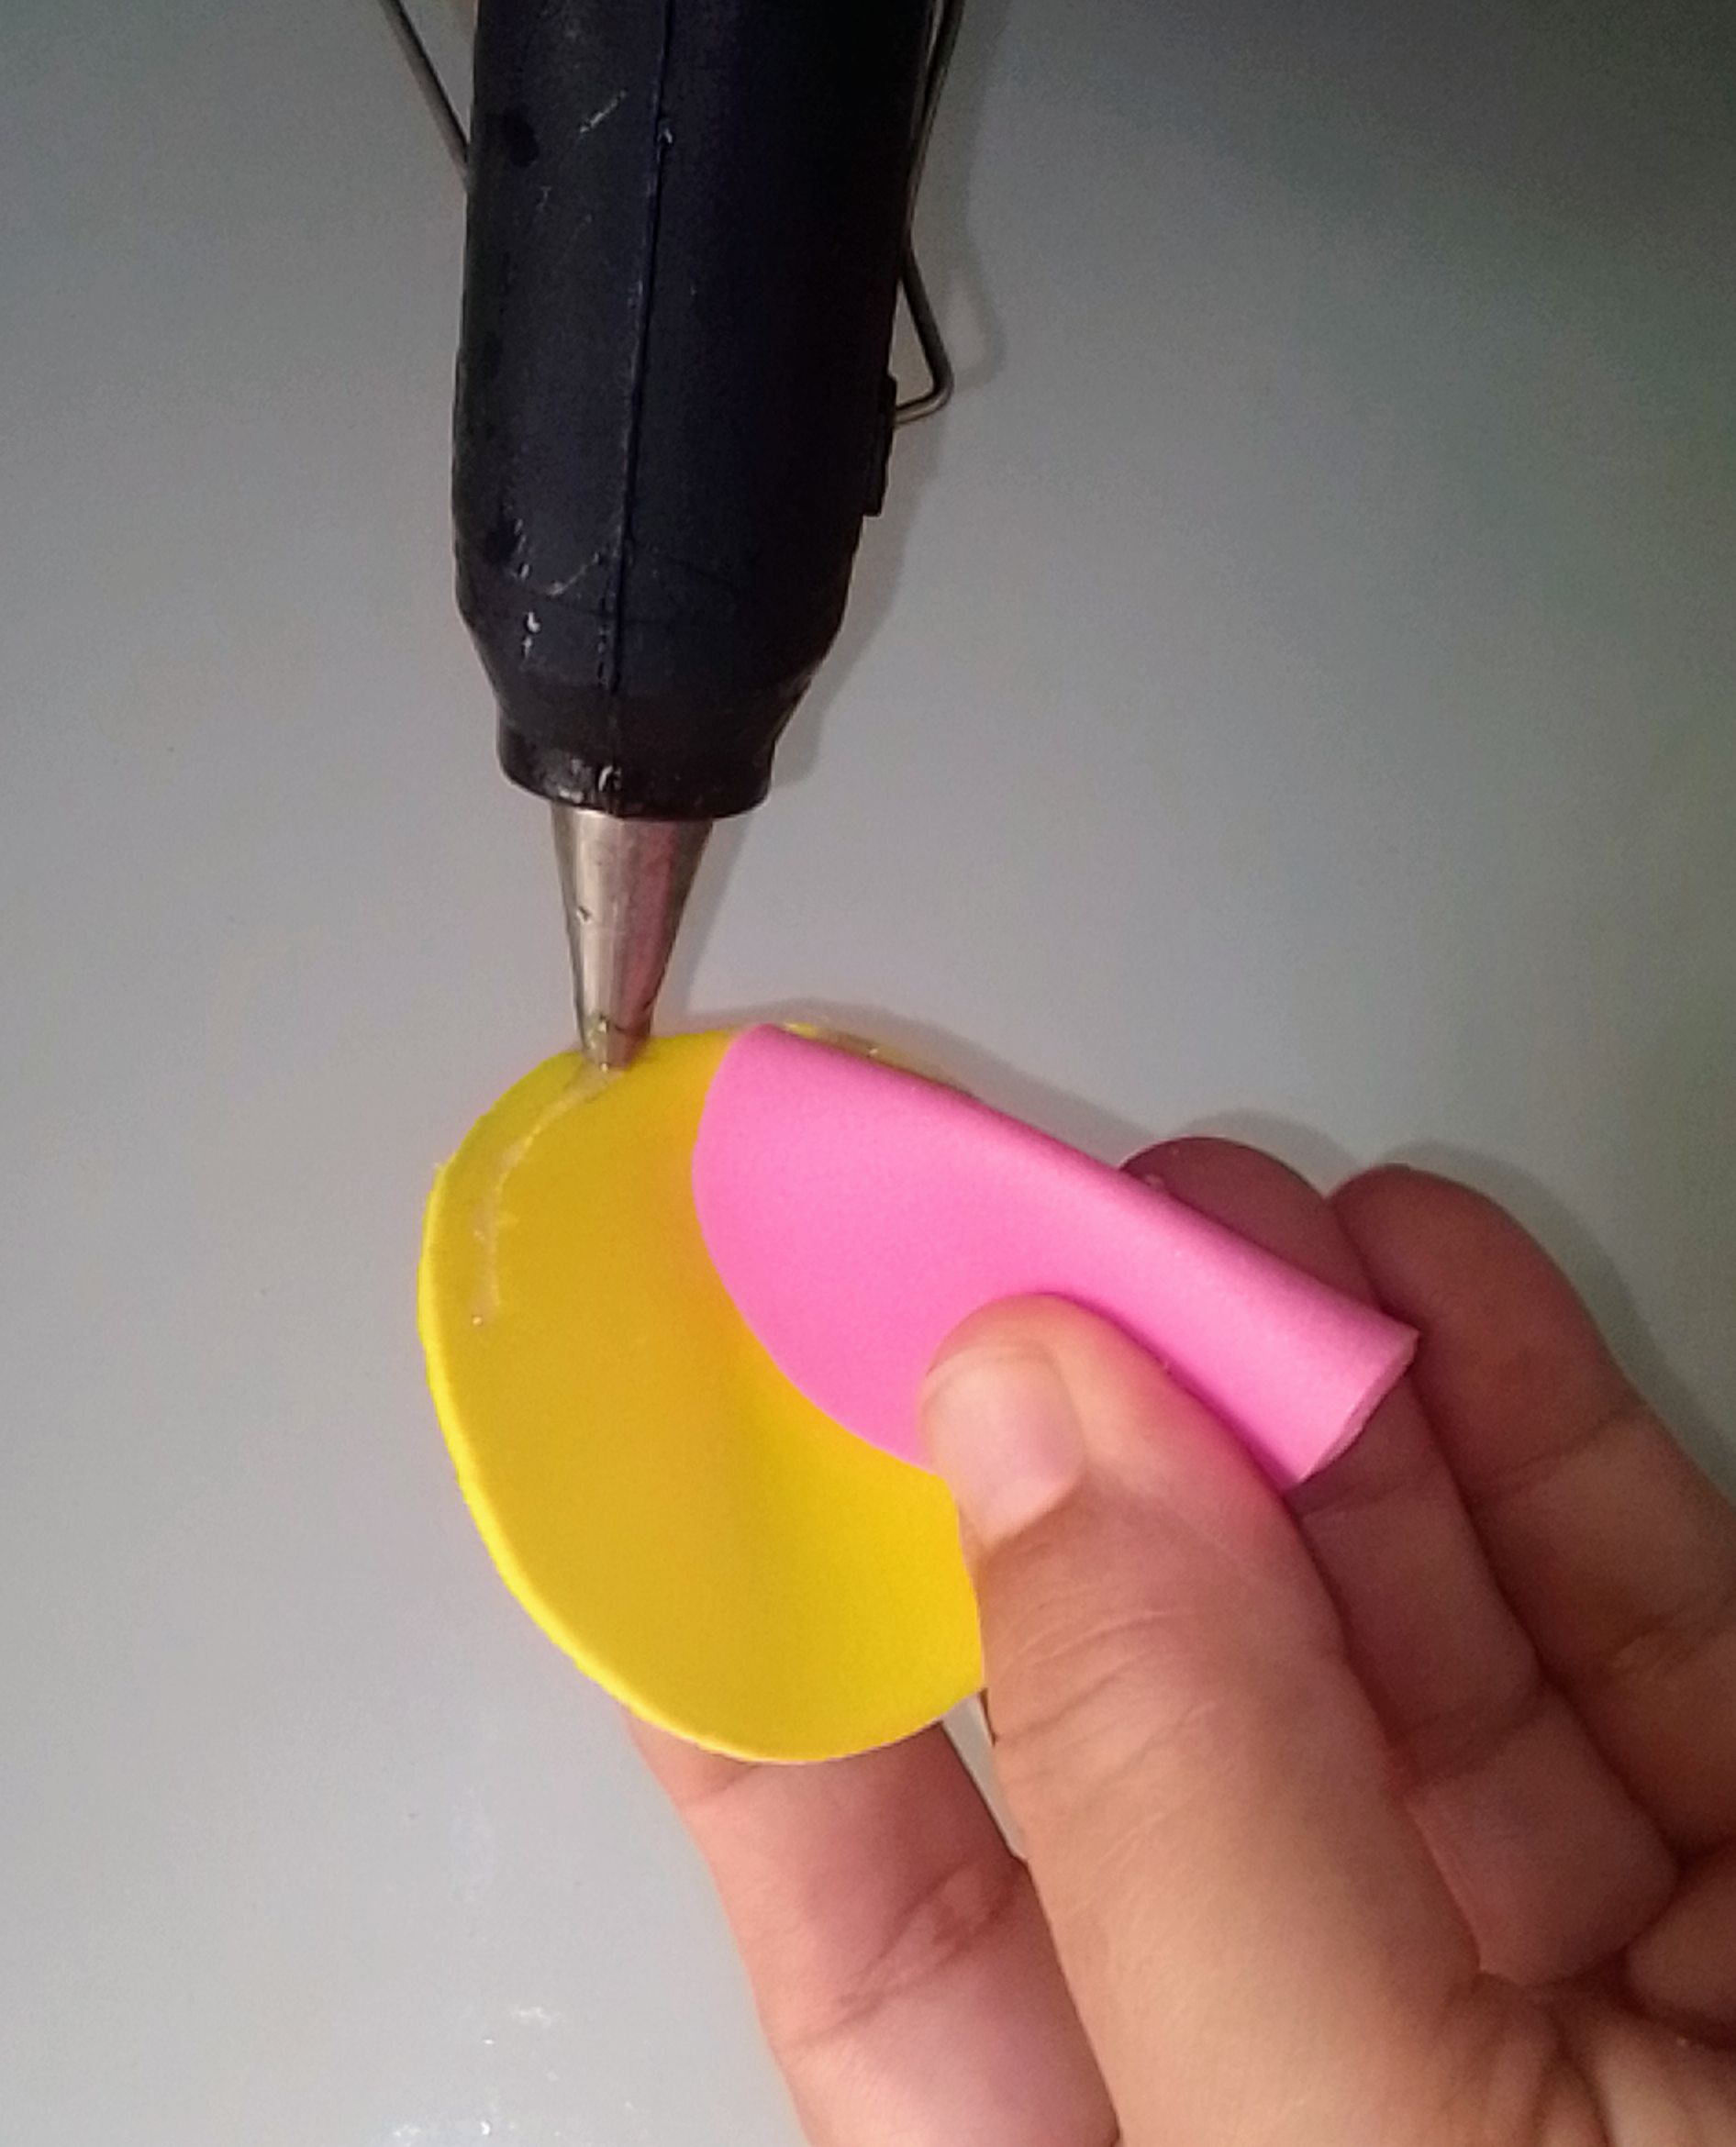
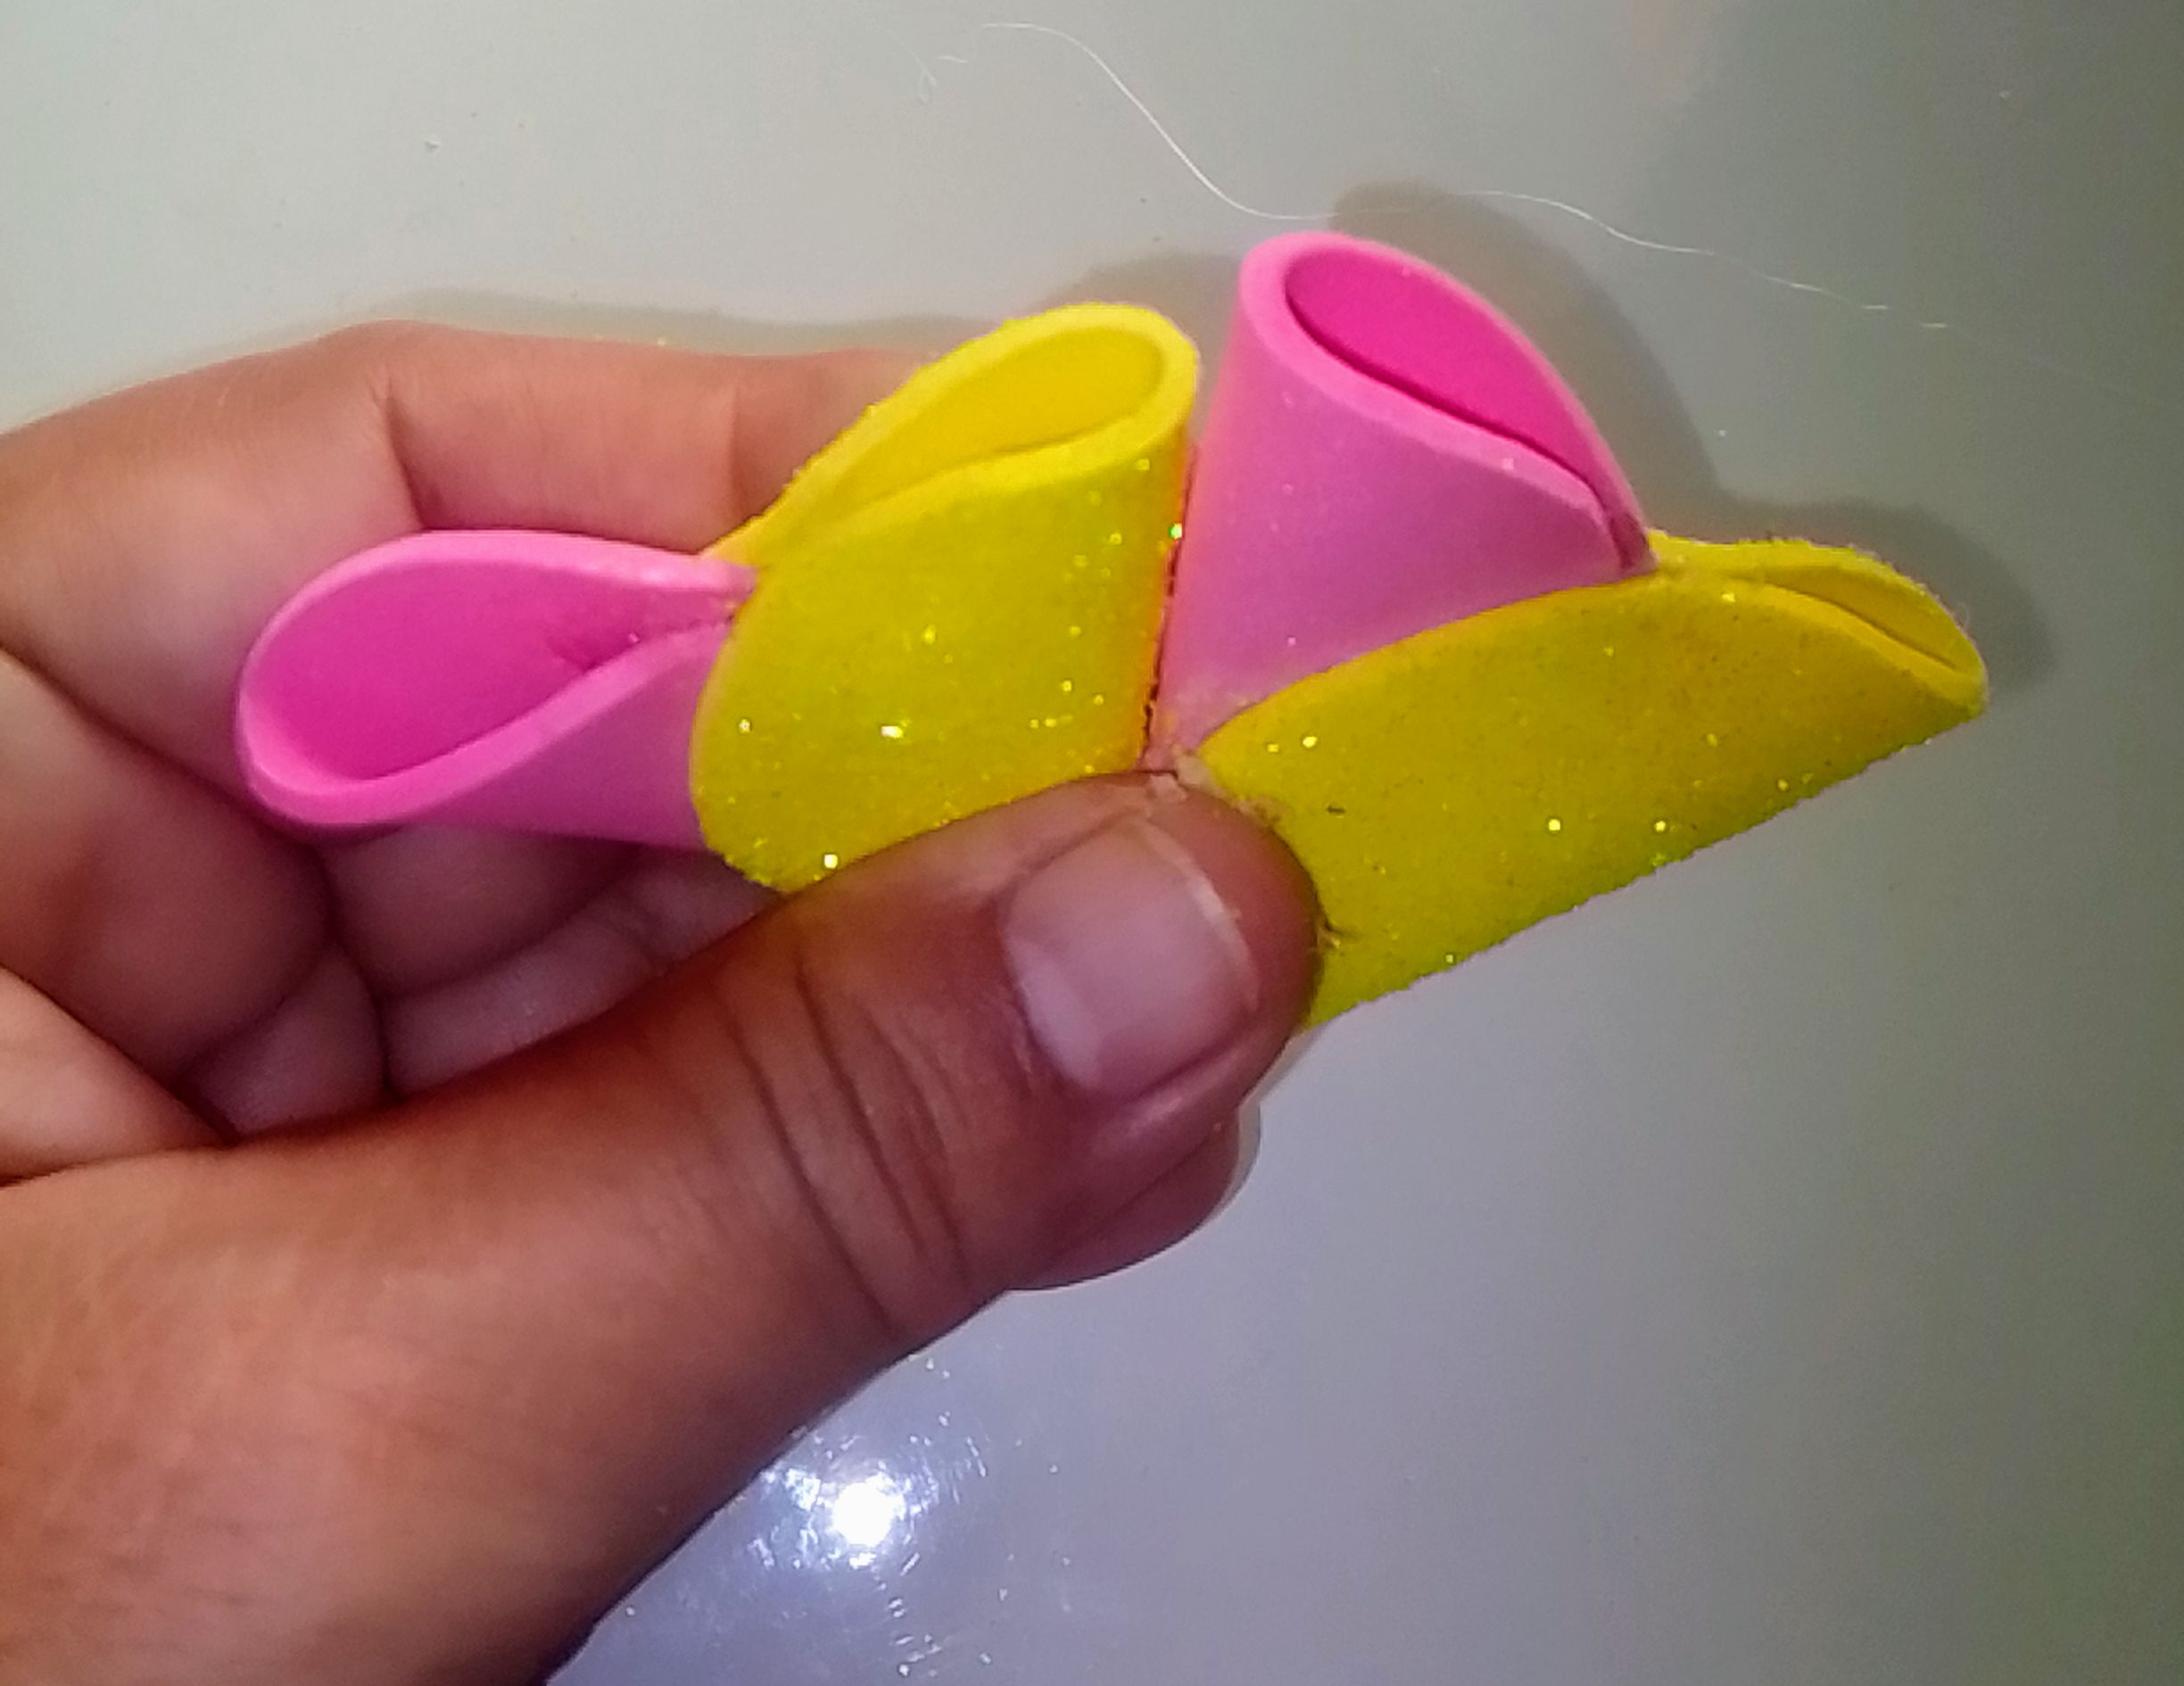
6.- Luego agarras la pistola previamente caliente y le agregas silicón alrededor del círculo.
6.- Then you grab the previously hot gun and add silicone around the circle.
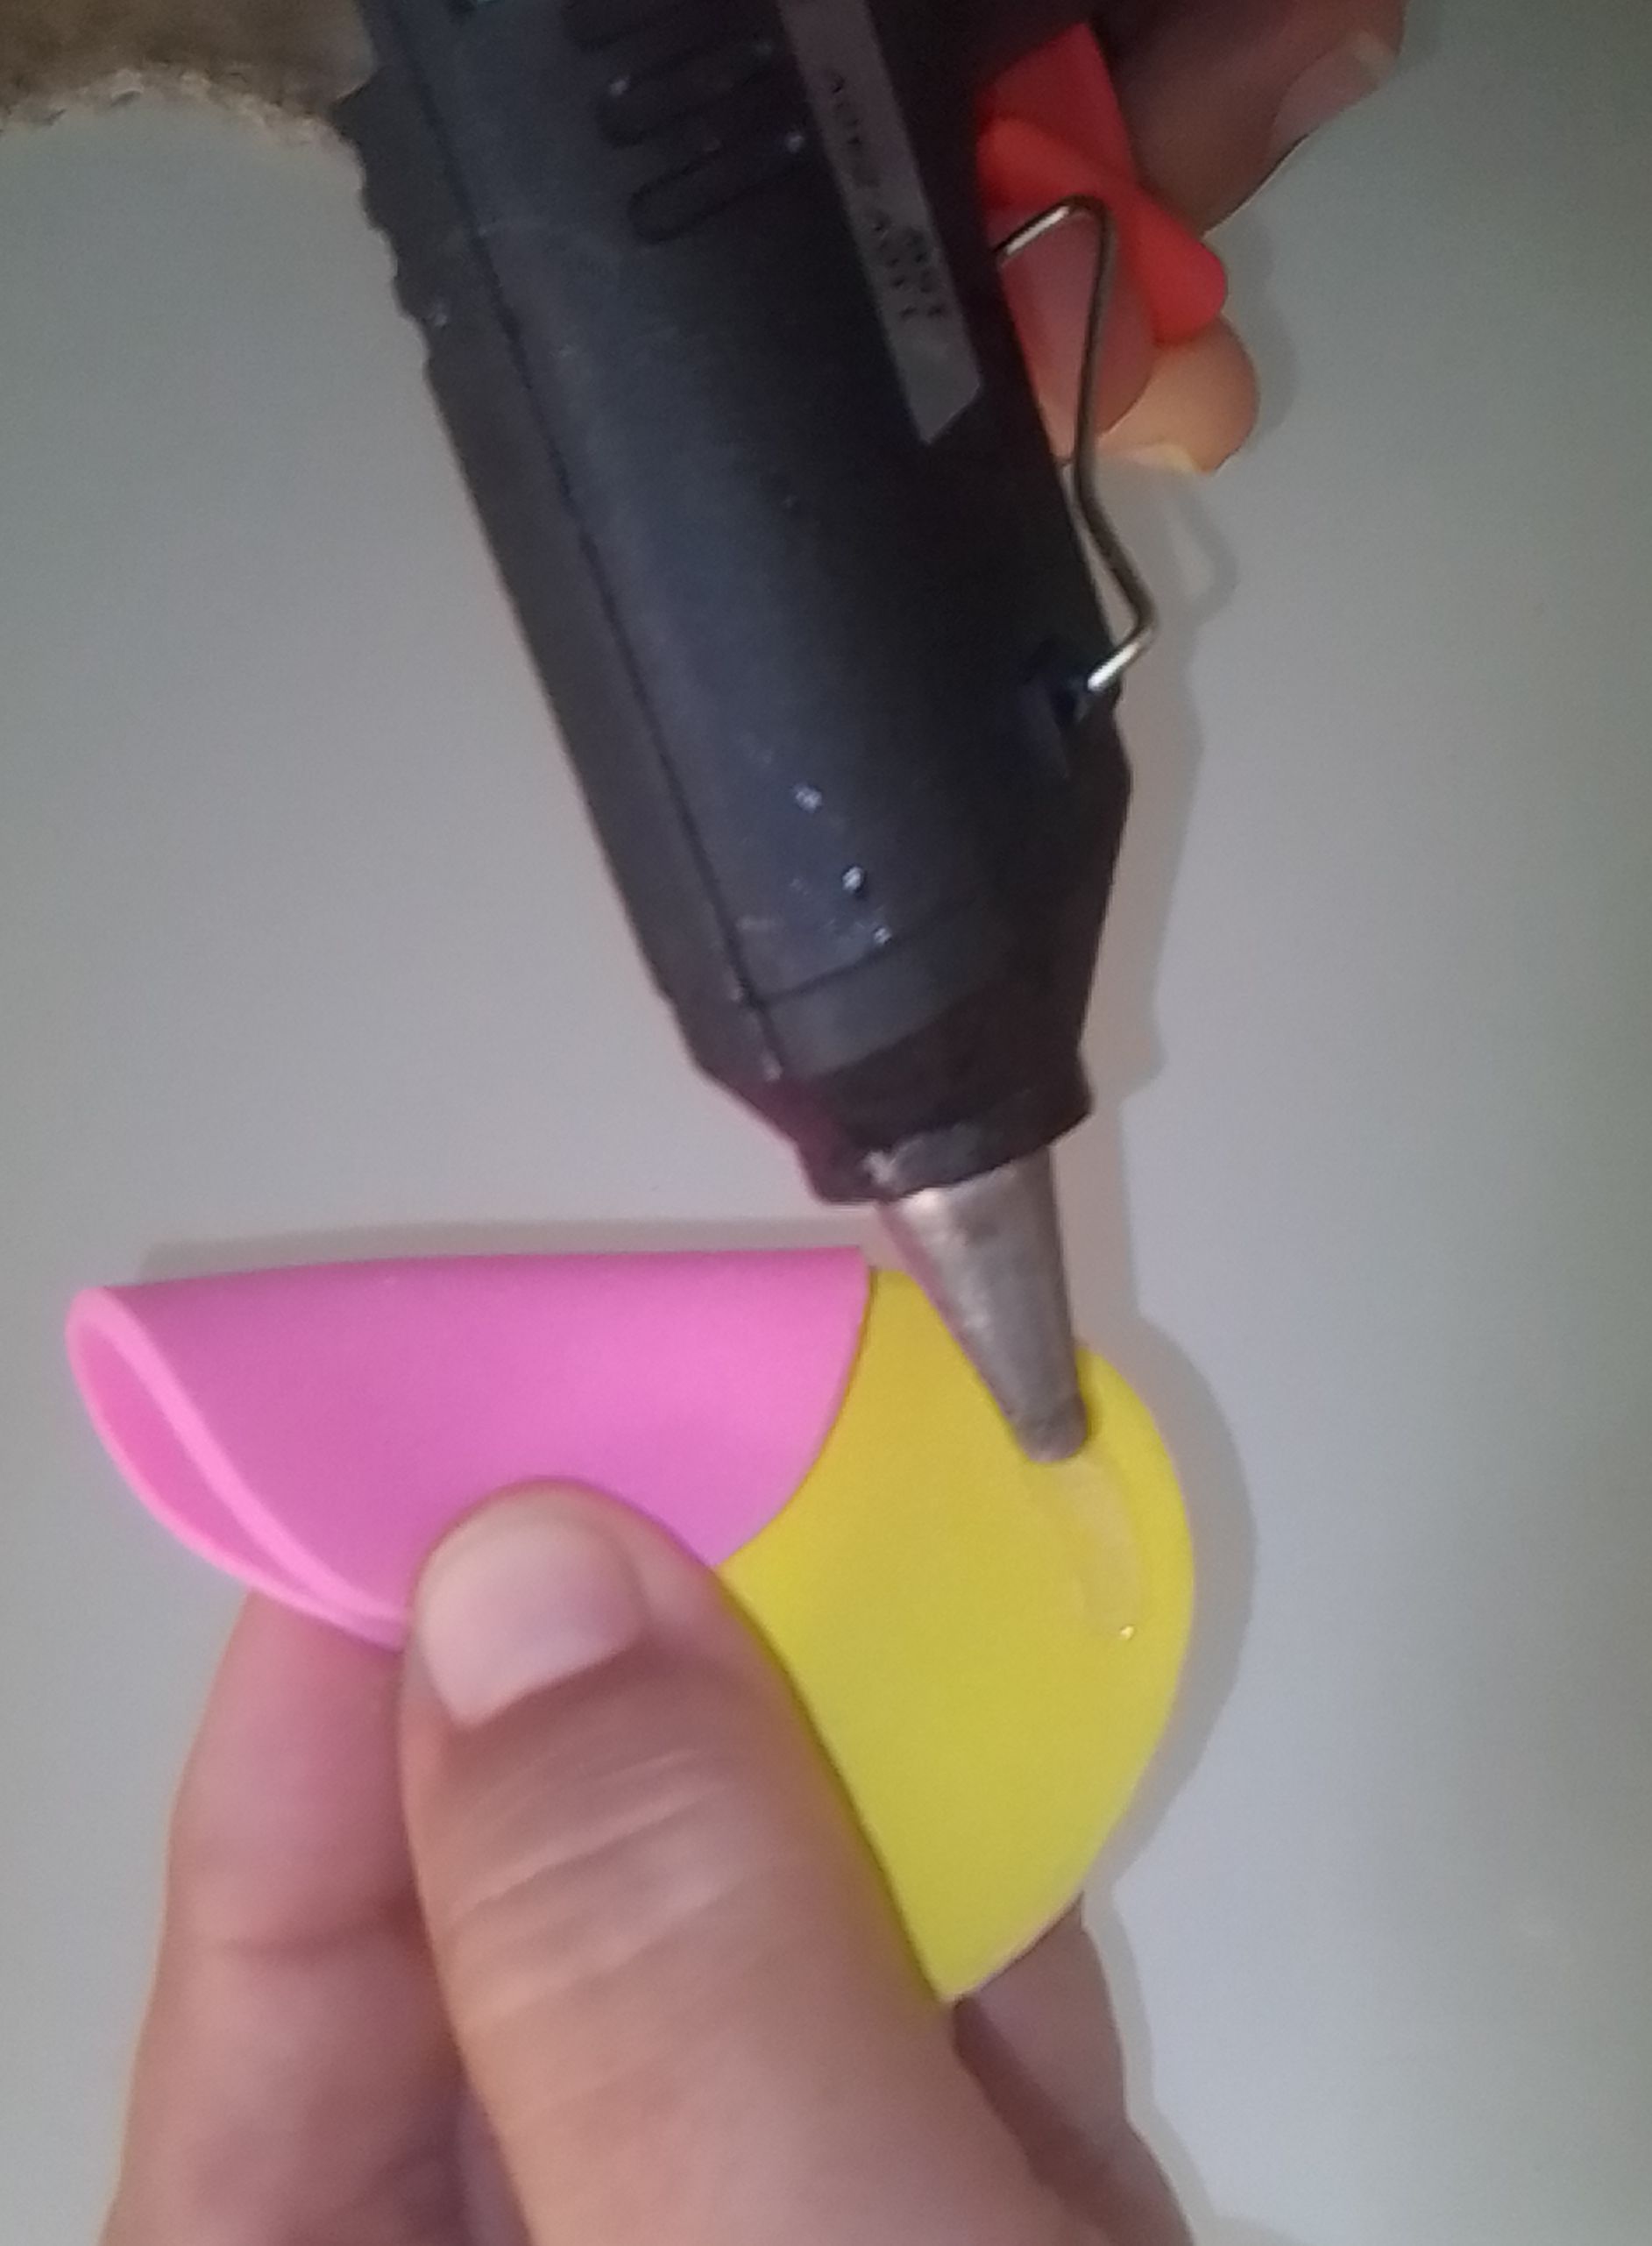
7.- Acá observa bien por donde le vas agregar pega.
7.- Here observes well where you are adding stick.
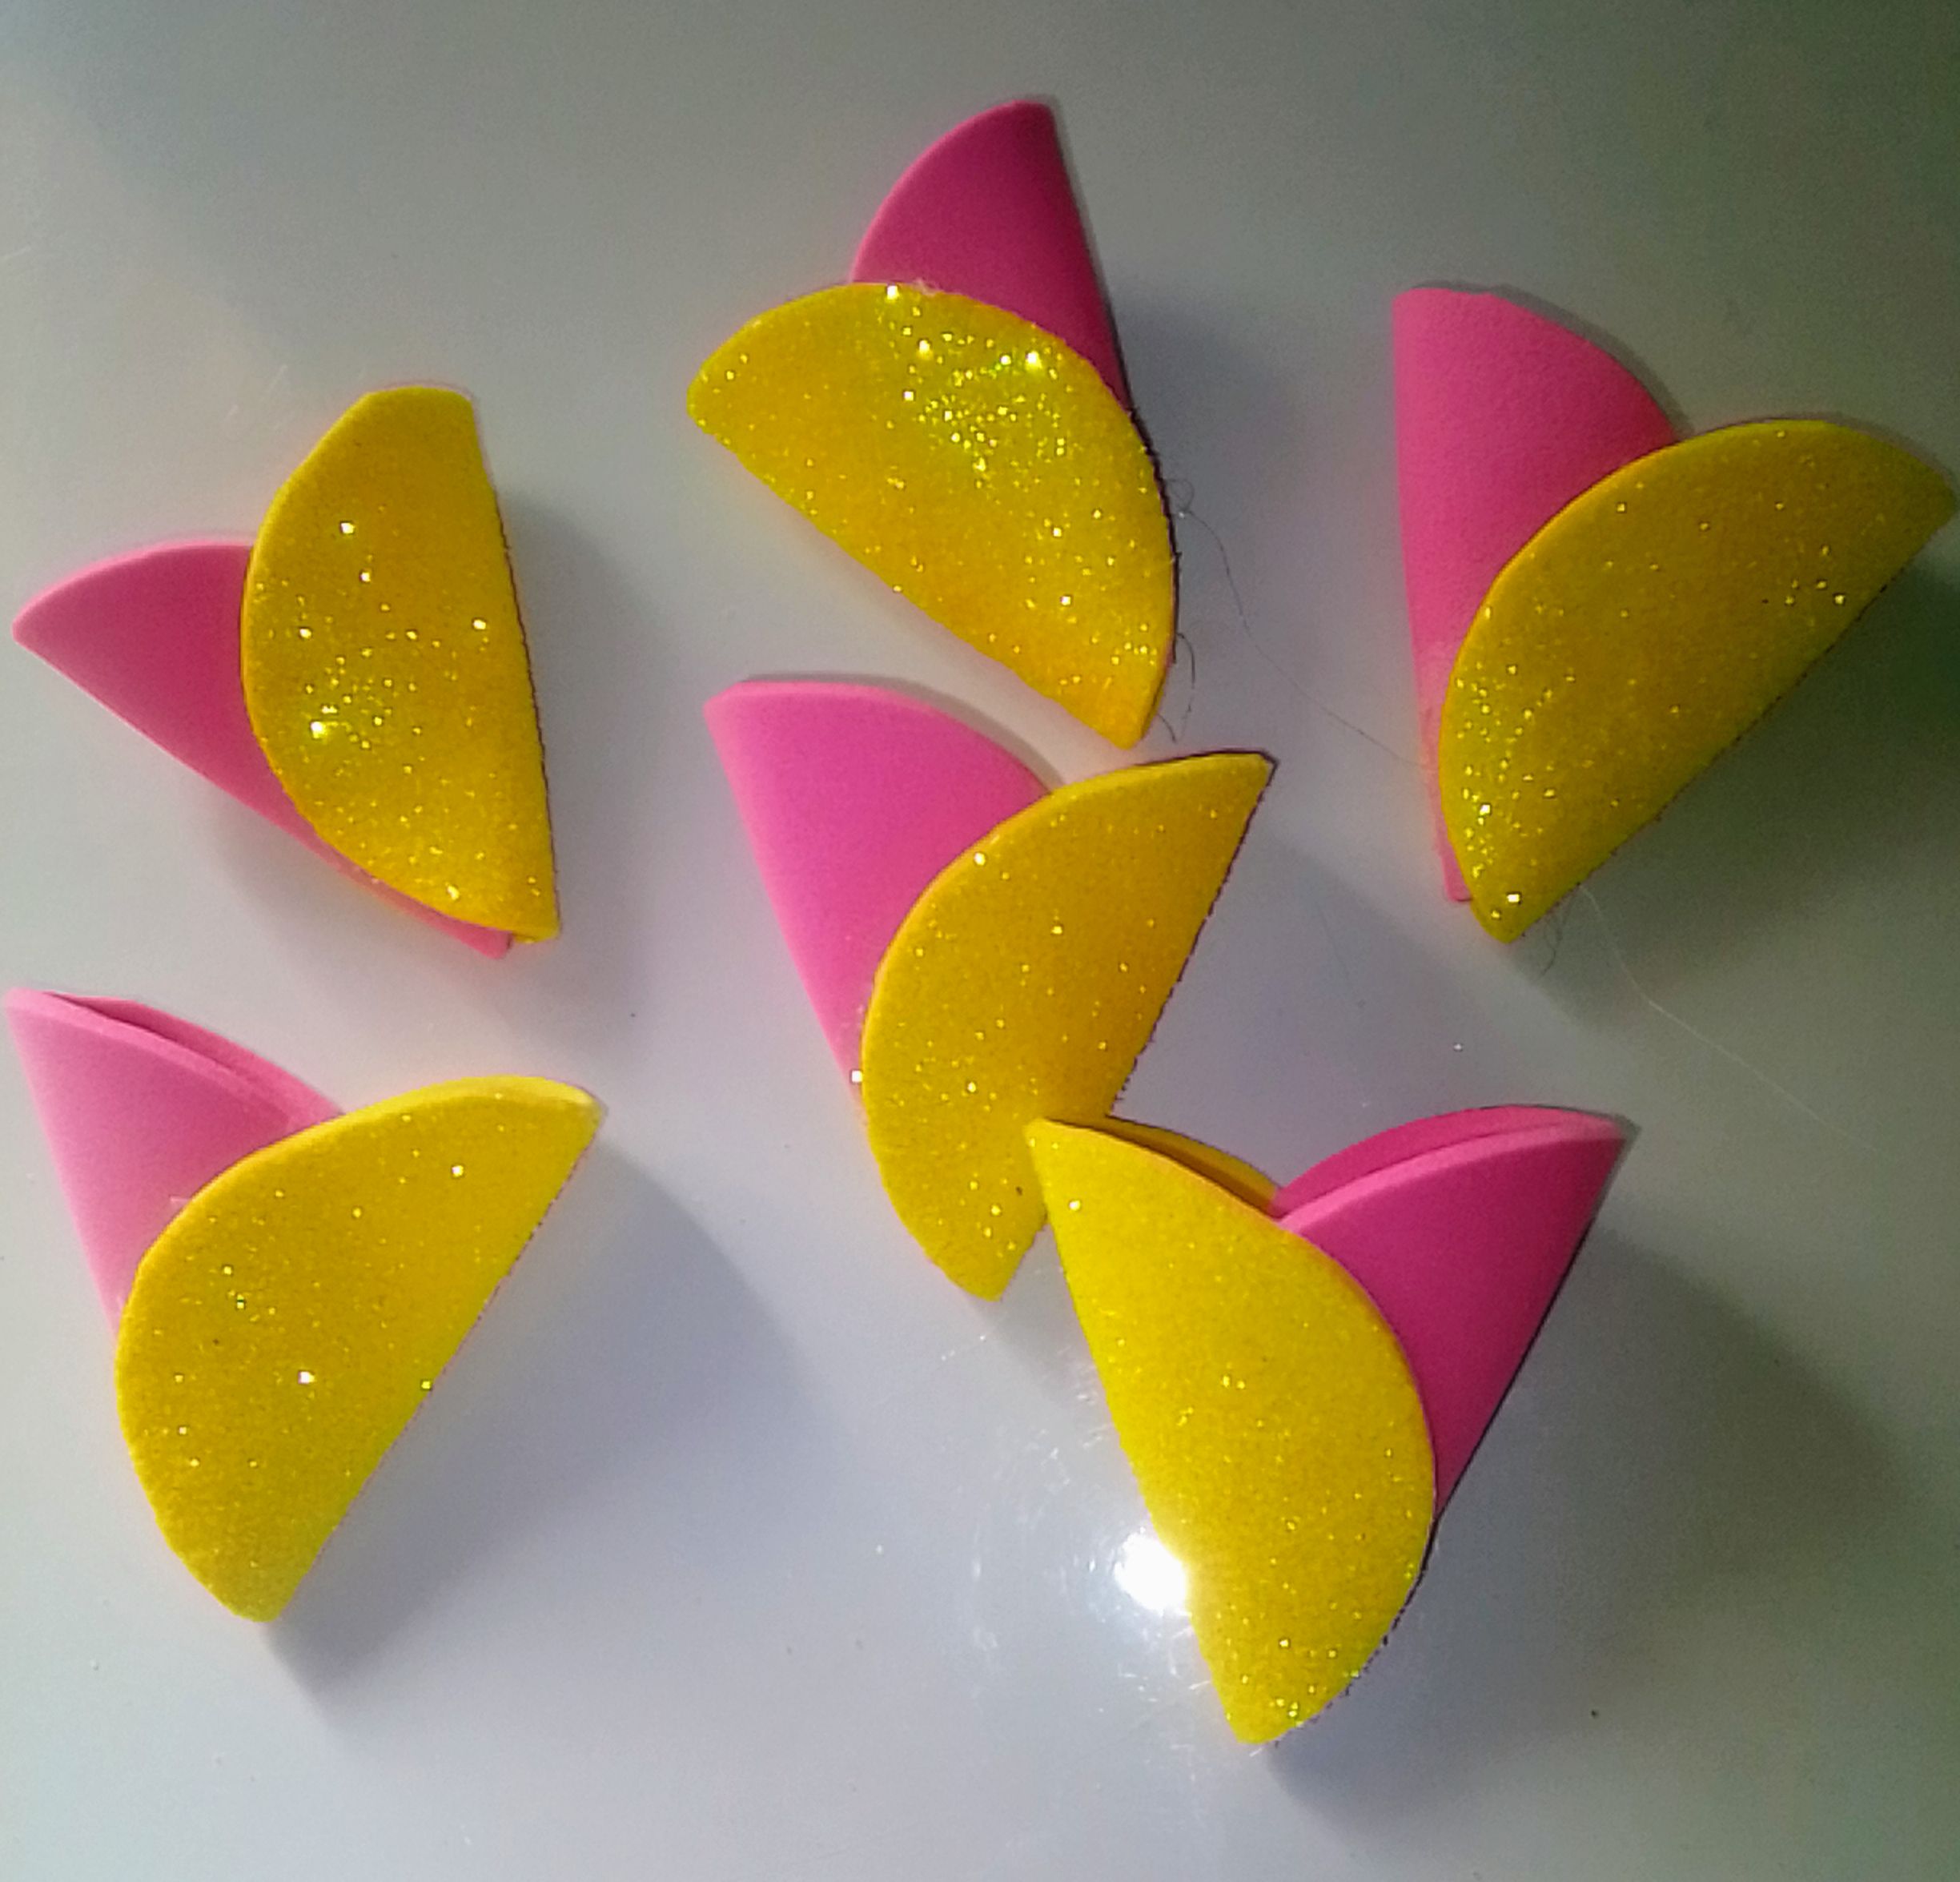
8.- Y de esta manera te quedan lista tus pétalos formado de la Flor ve que es fácil.
8.- And in this way your petals formed from the flower are ready, see that it is easy.
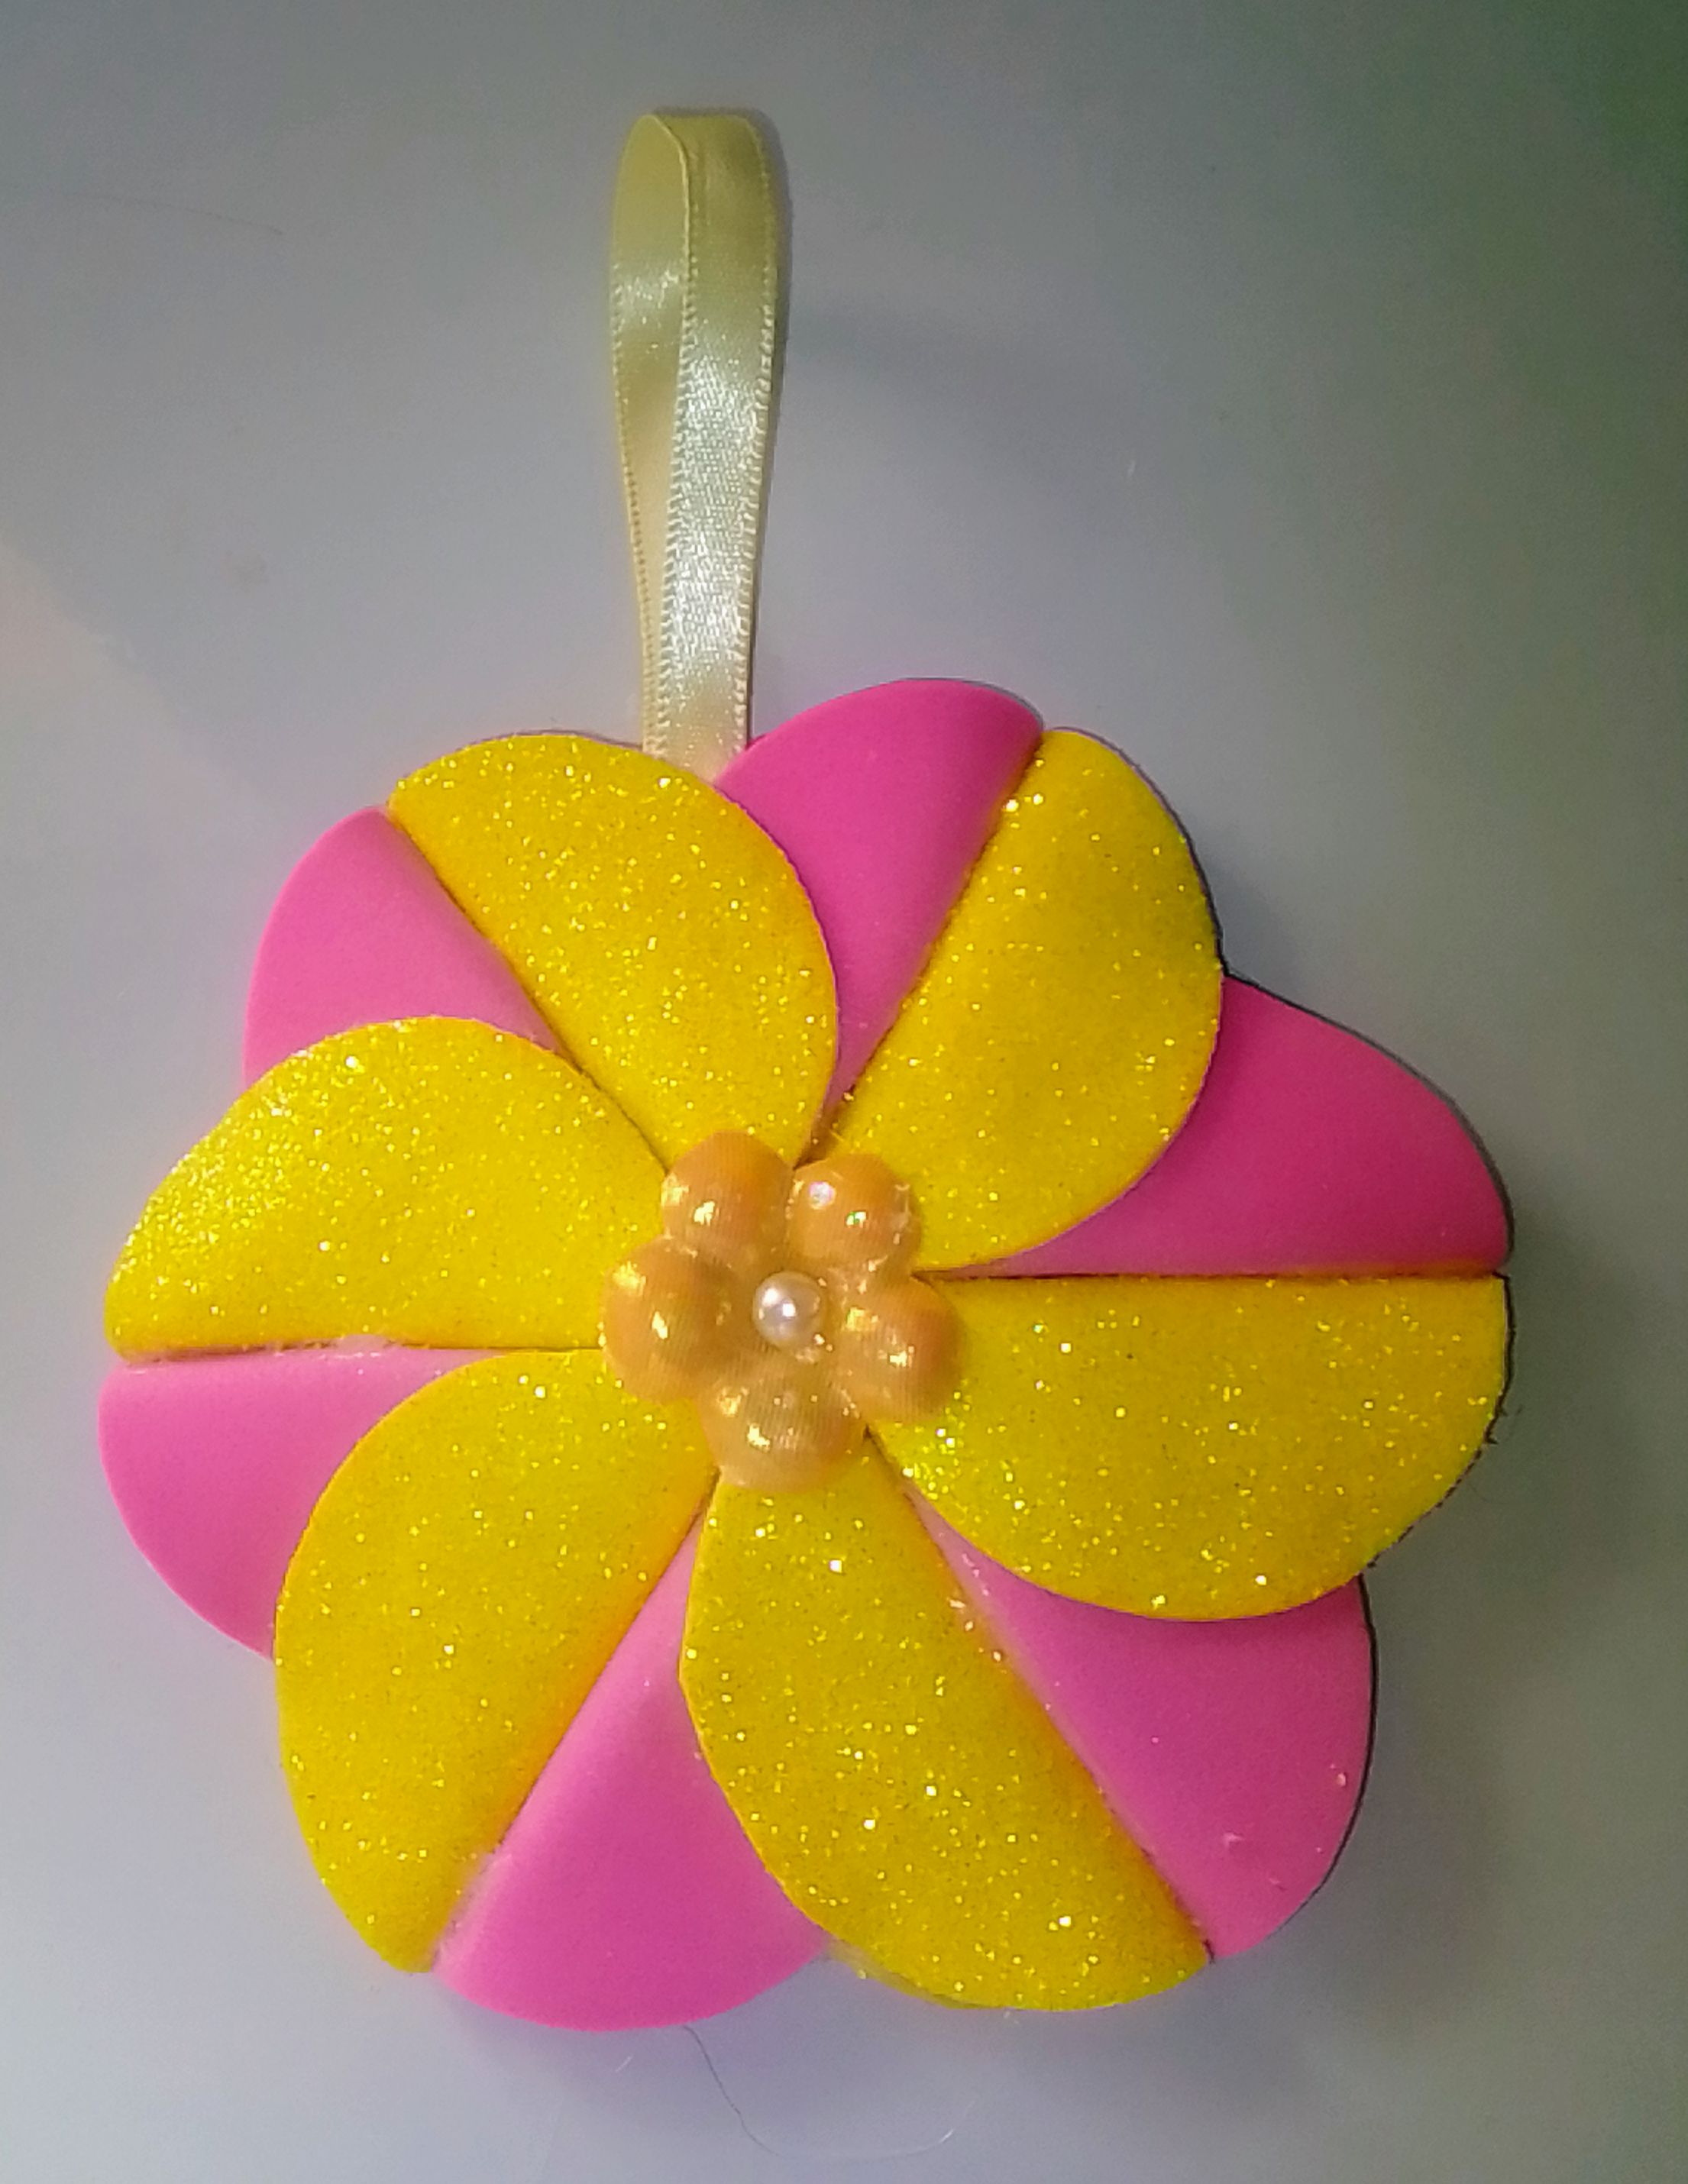
9.- Luego tomas un pétalo y mide más o menos el largo que quiere de la cinta que le vas a colocar y vas a insertarlo dentro del pétalo le agregas pega y aprieta un poquito hasta que seque.
9.- Then you take a petal and measures more or less the length you want from the tape that you are going to place and you will insert it into the petal you add sticks and squeeze a little until it dries.
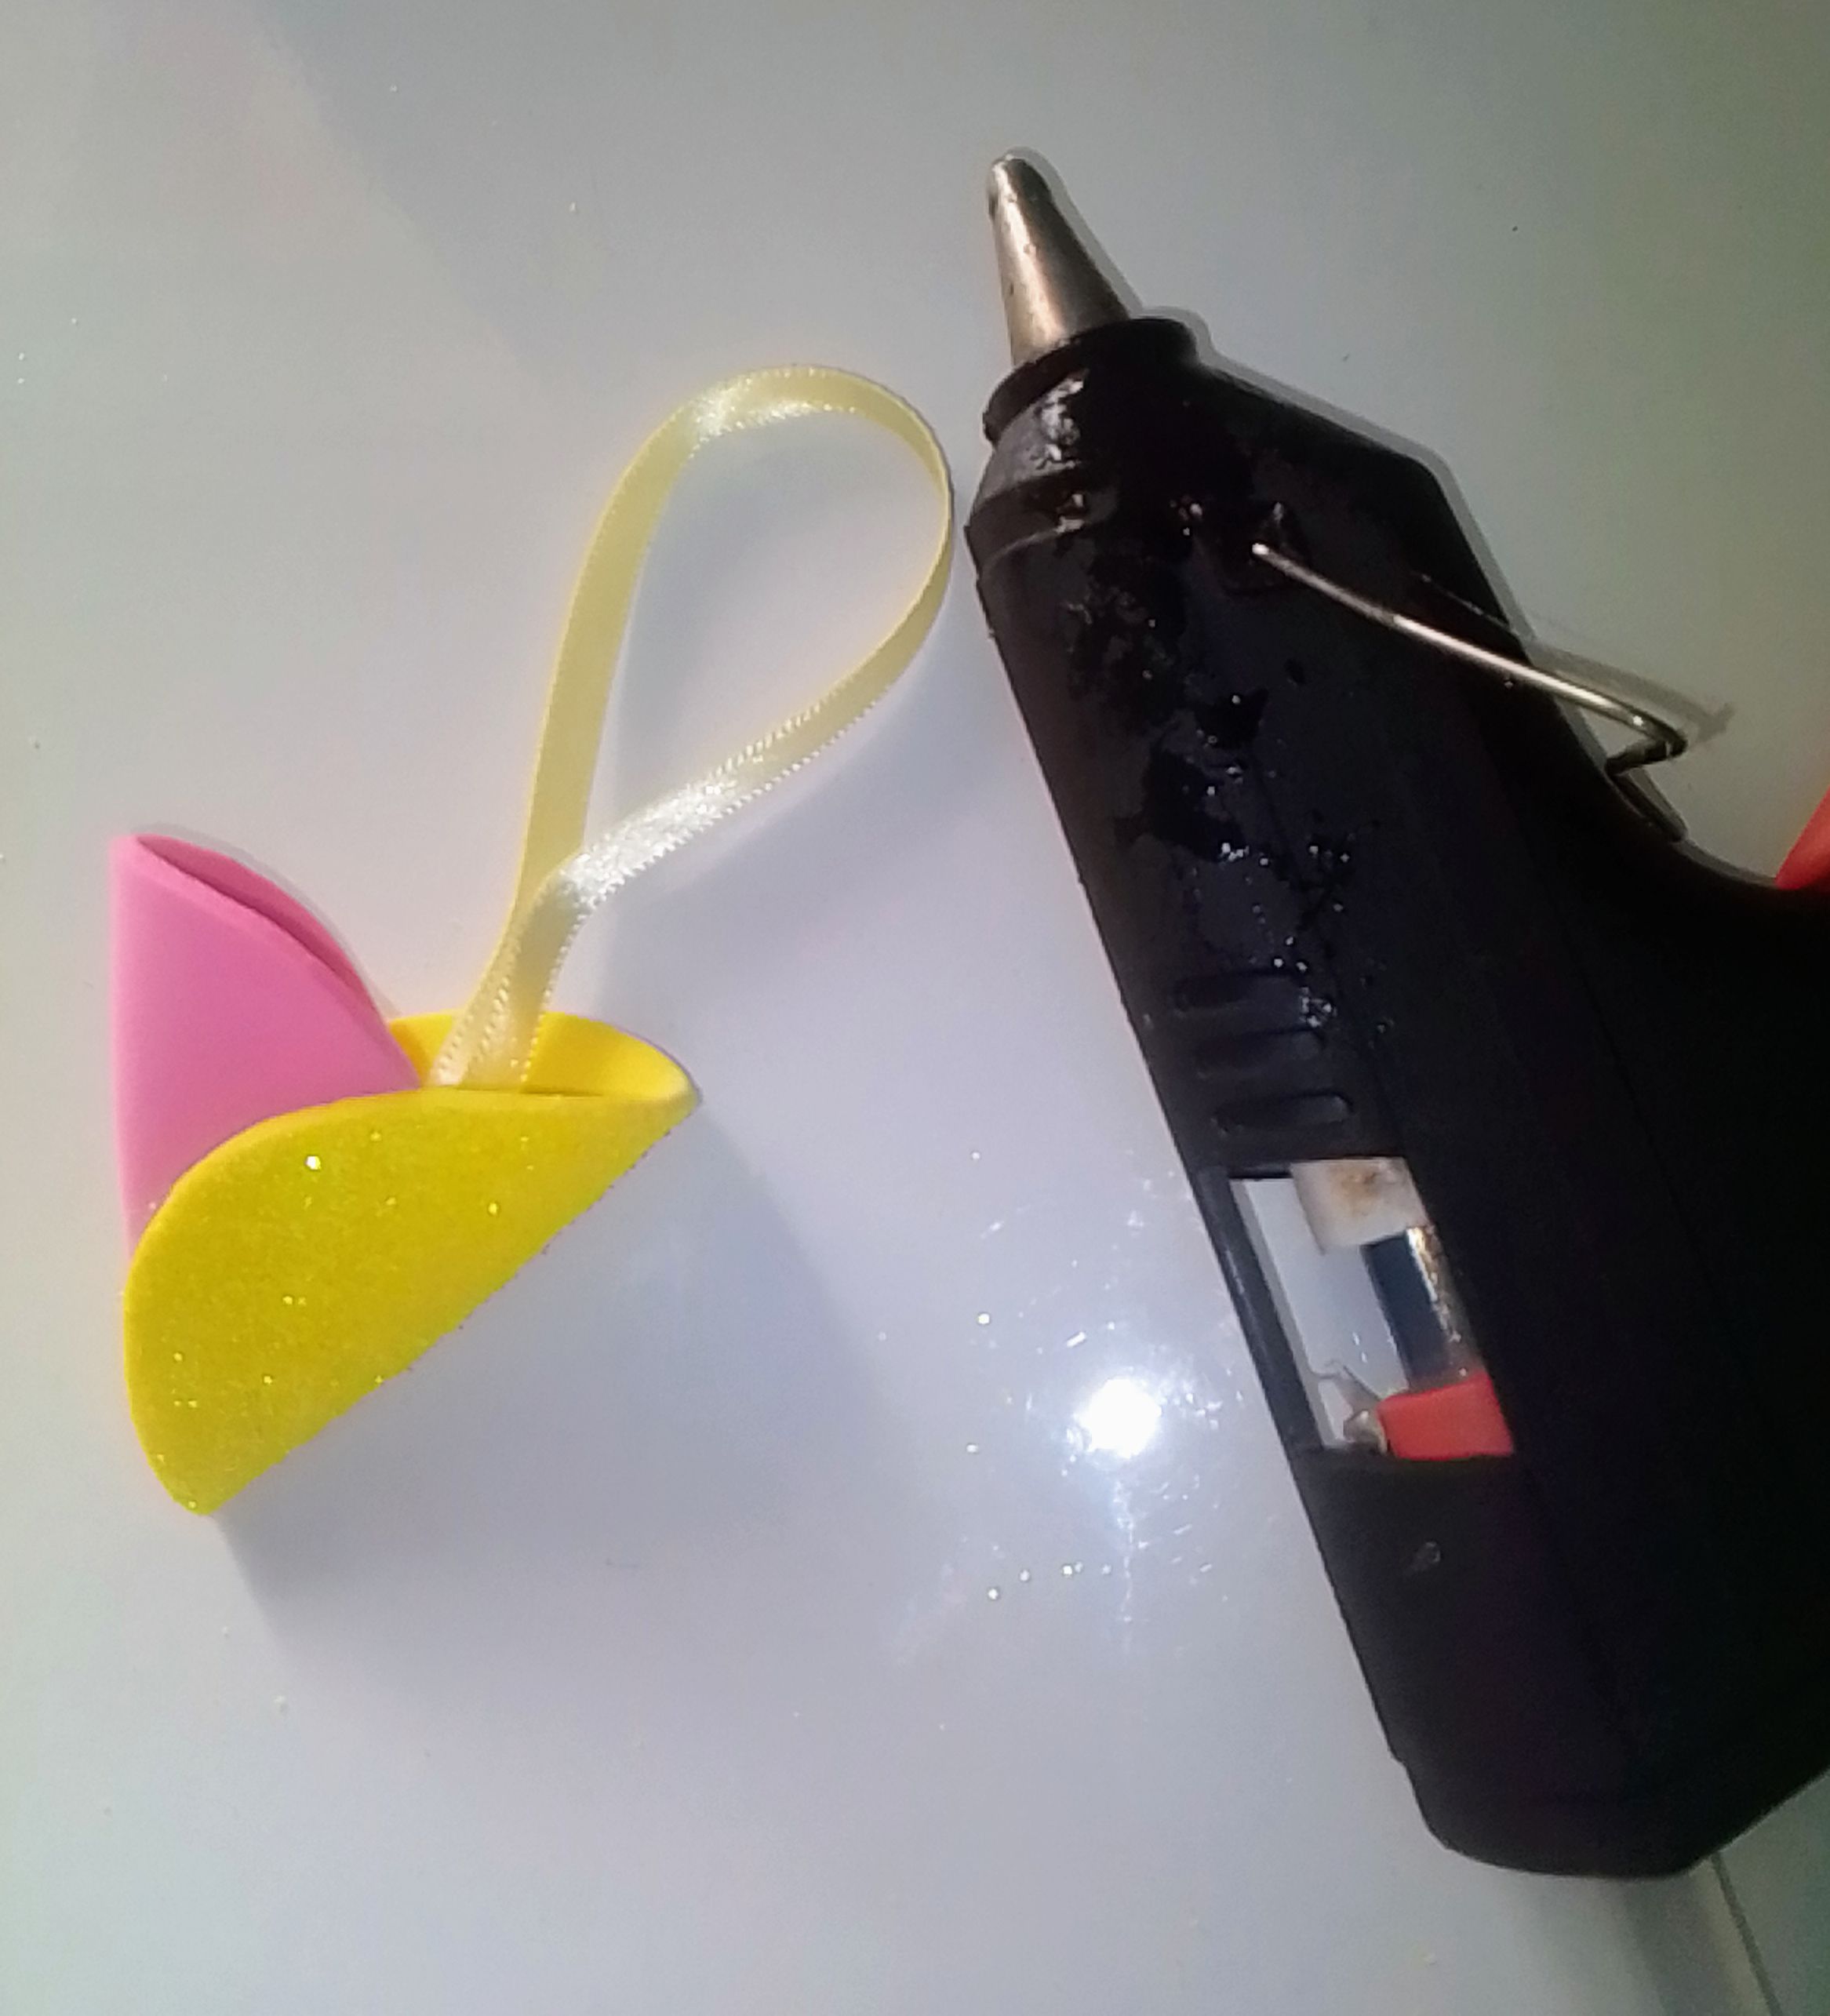
10.- Y de esta manera te queda pegada tu cinta que va ser para colgarla luego.
10.- And in this way your tape is attached to you to hang it later.
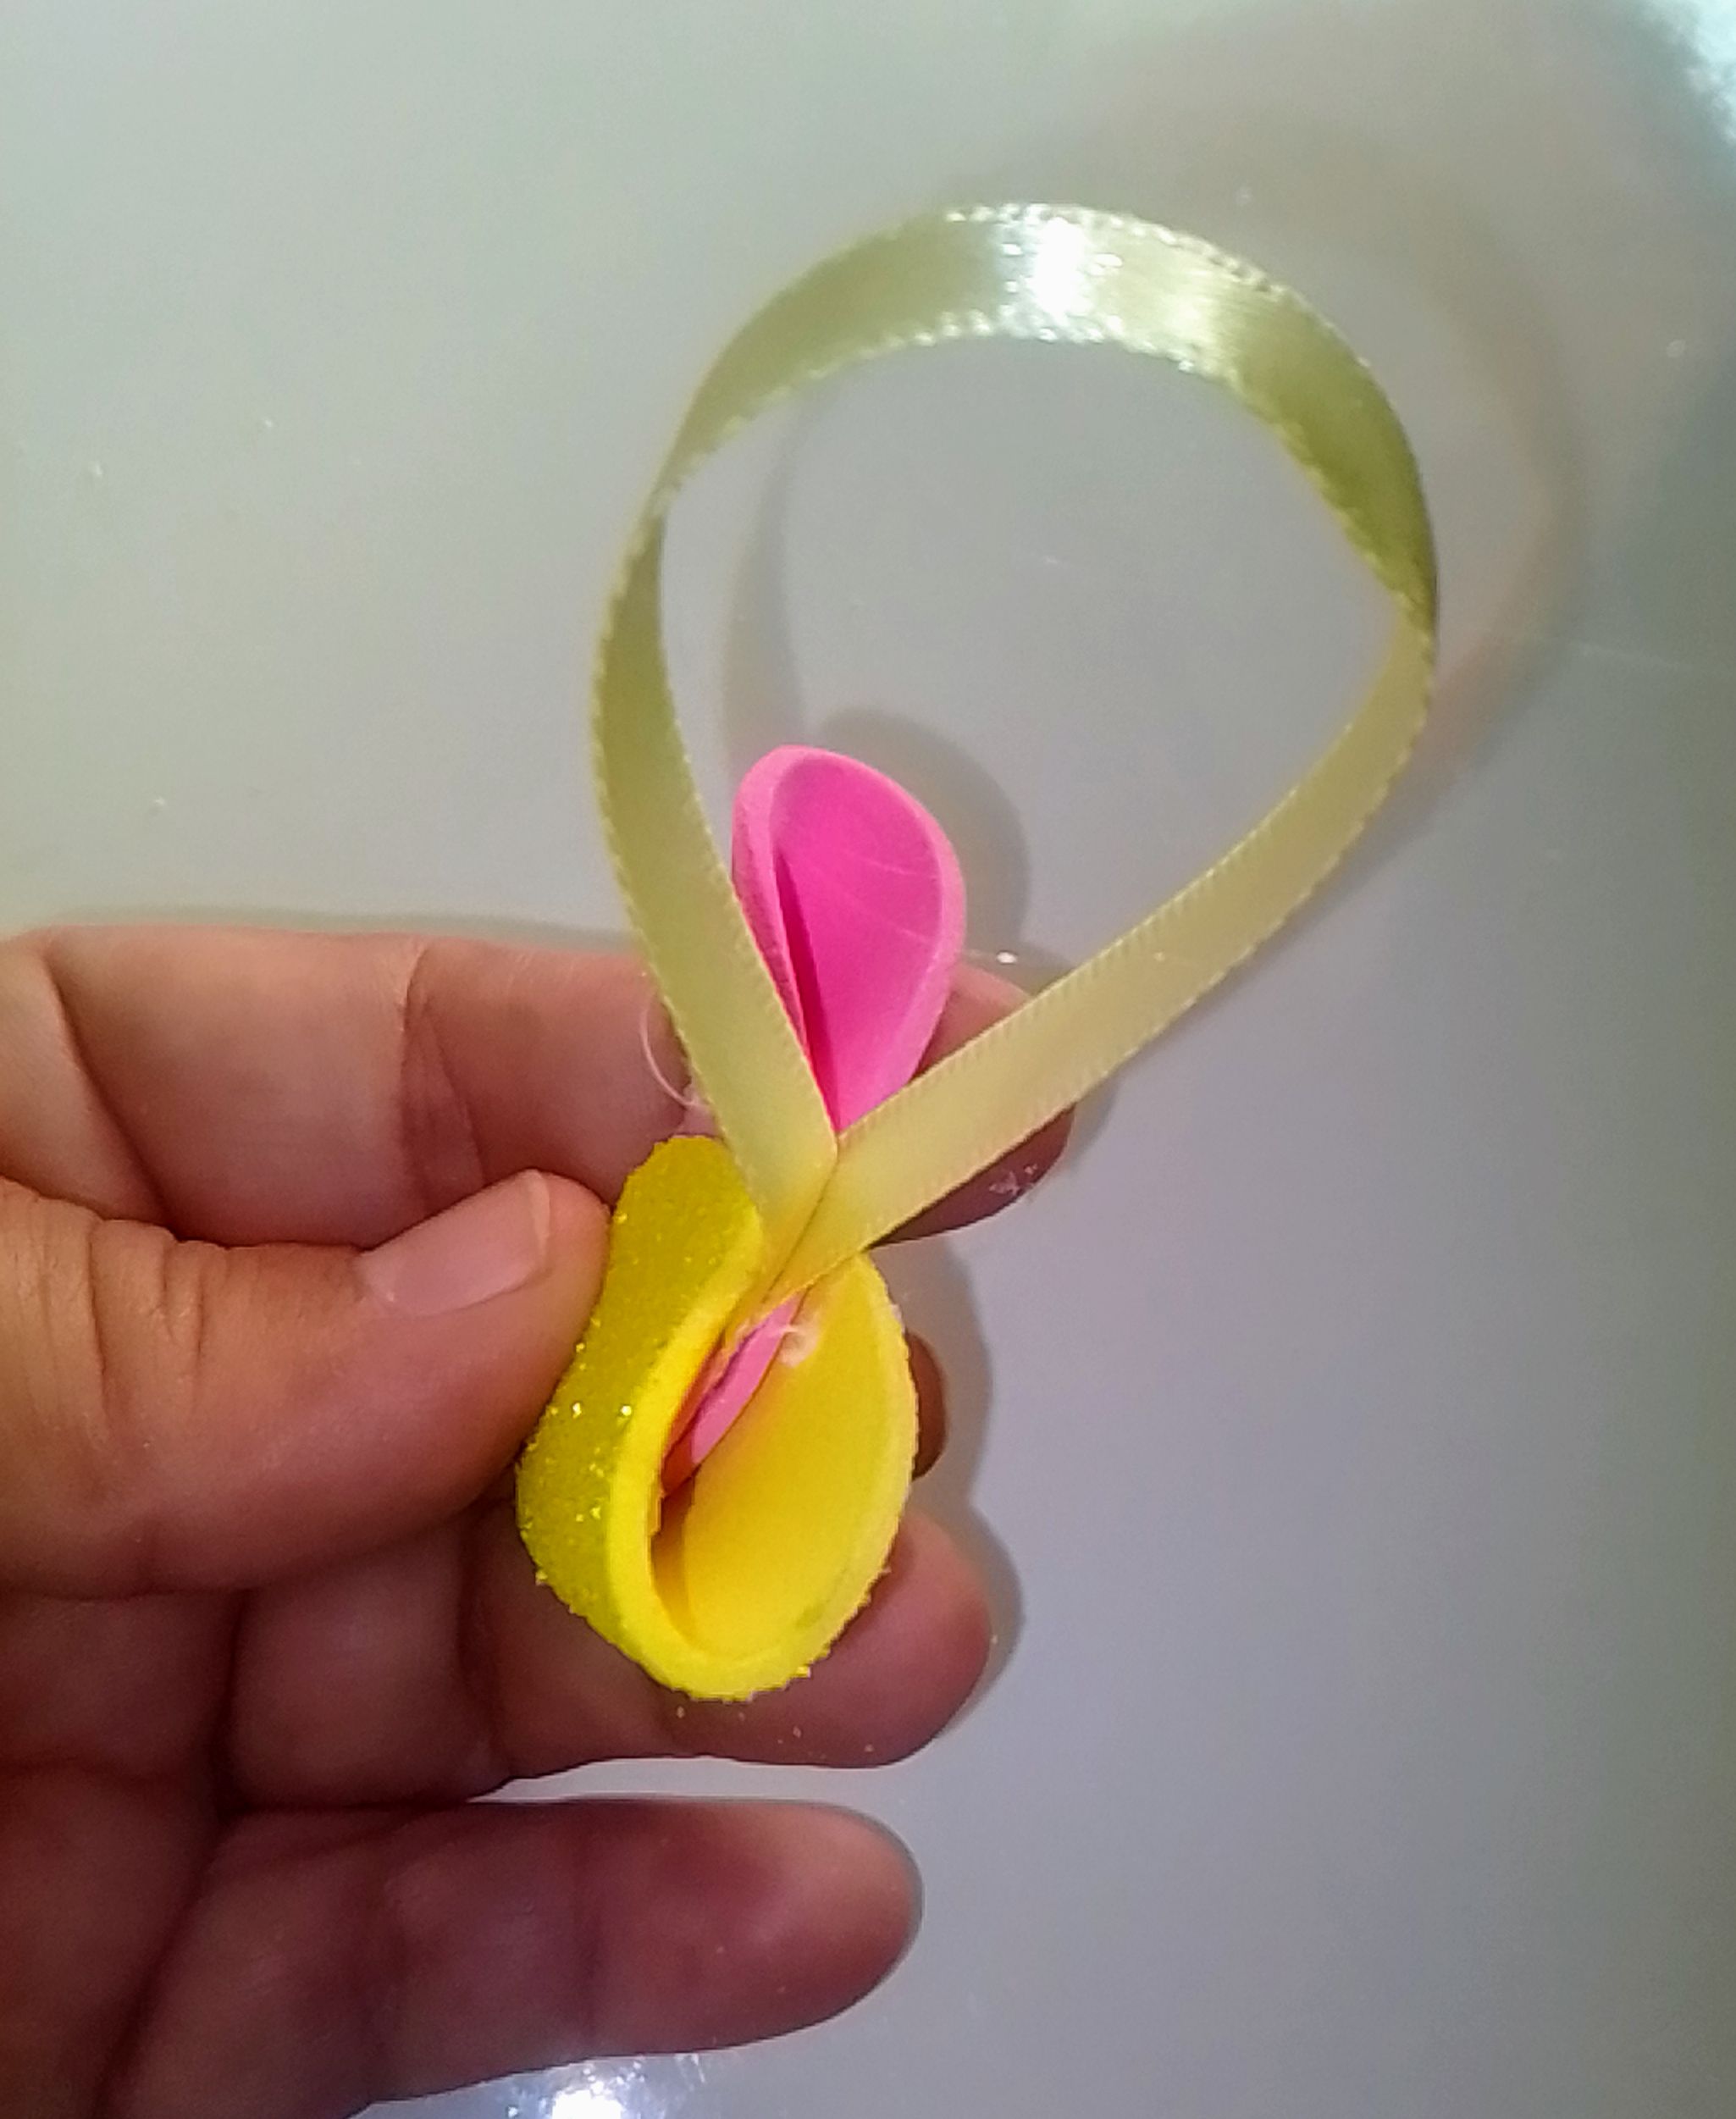
11.- Y así se ve de esta manera.
11.- And so you see this way.
12.- Ahora empezamos a ensamblar nuestra flor tomas un pétalo y le agregas silicon caliente en unas de las orillas y ve que tienes que colocarla amarillo con rosado o viceversa.
12.- Now we begin to assemble our flower you take a petal and add hot silicon on some of the banks and see that you have to place it yellow with pink or vice versa.
13.- Ve como vas a ir colocandola una a una las seis juntas bien pegaditas.
13.- See how you are going to place it one by one the six well-stuck together.
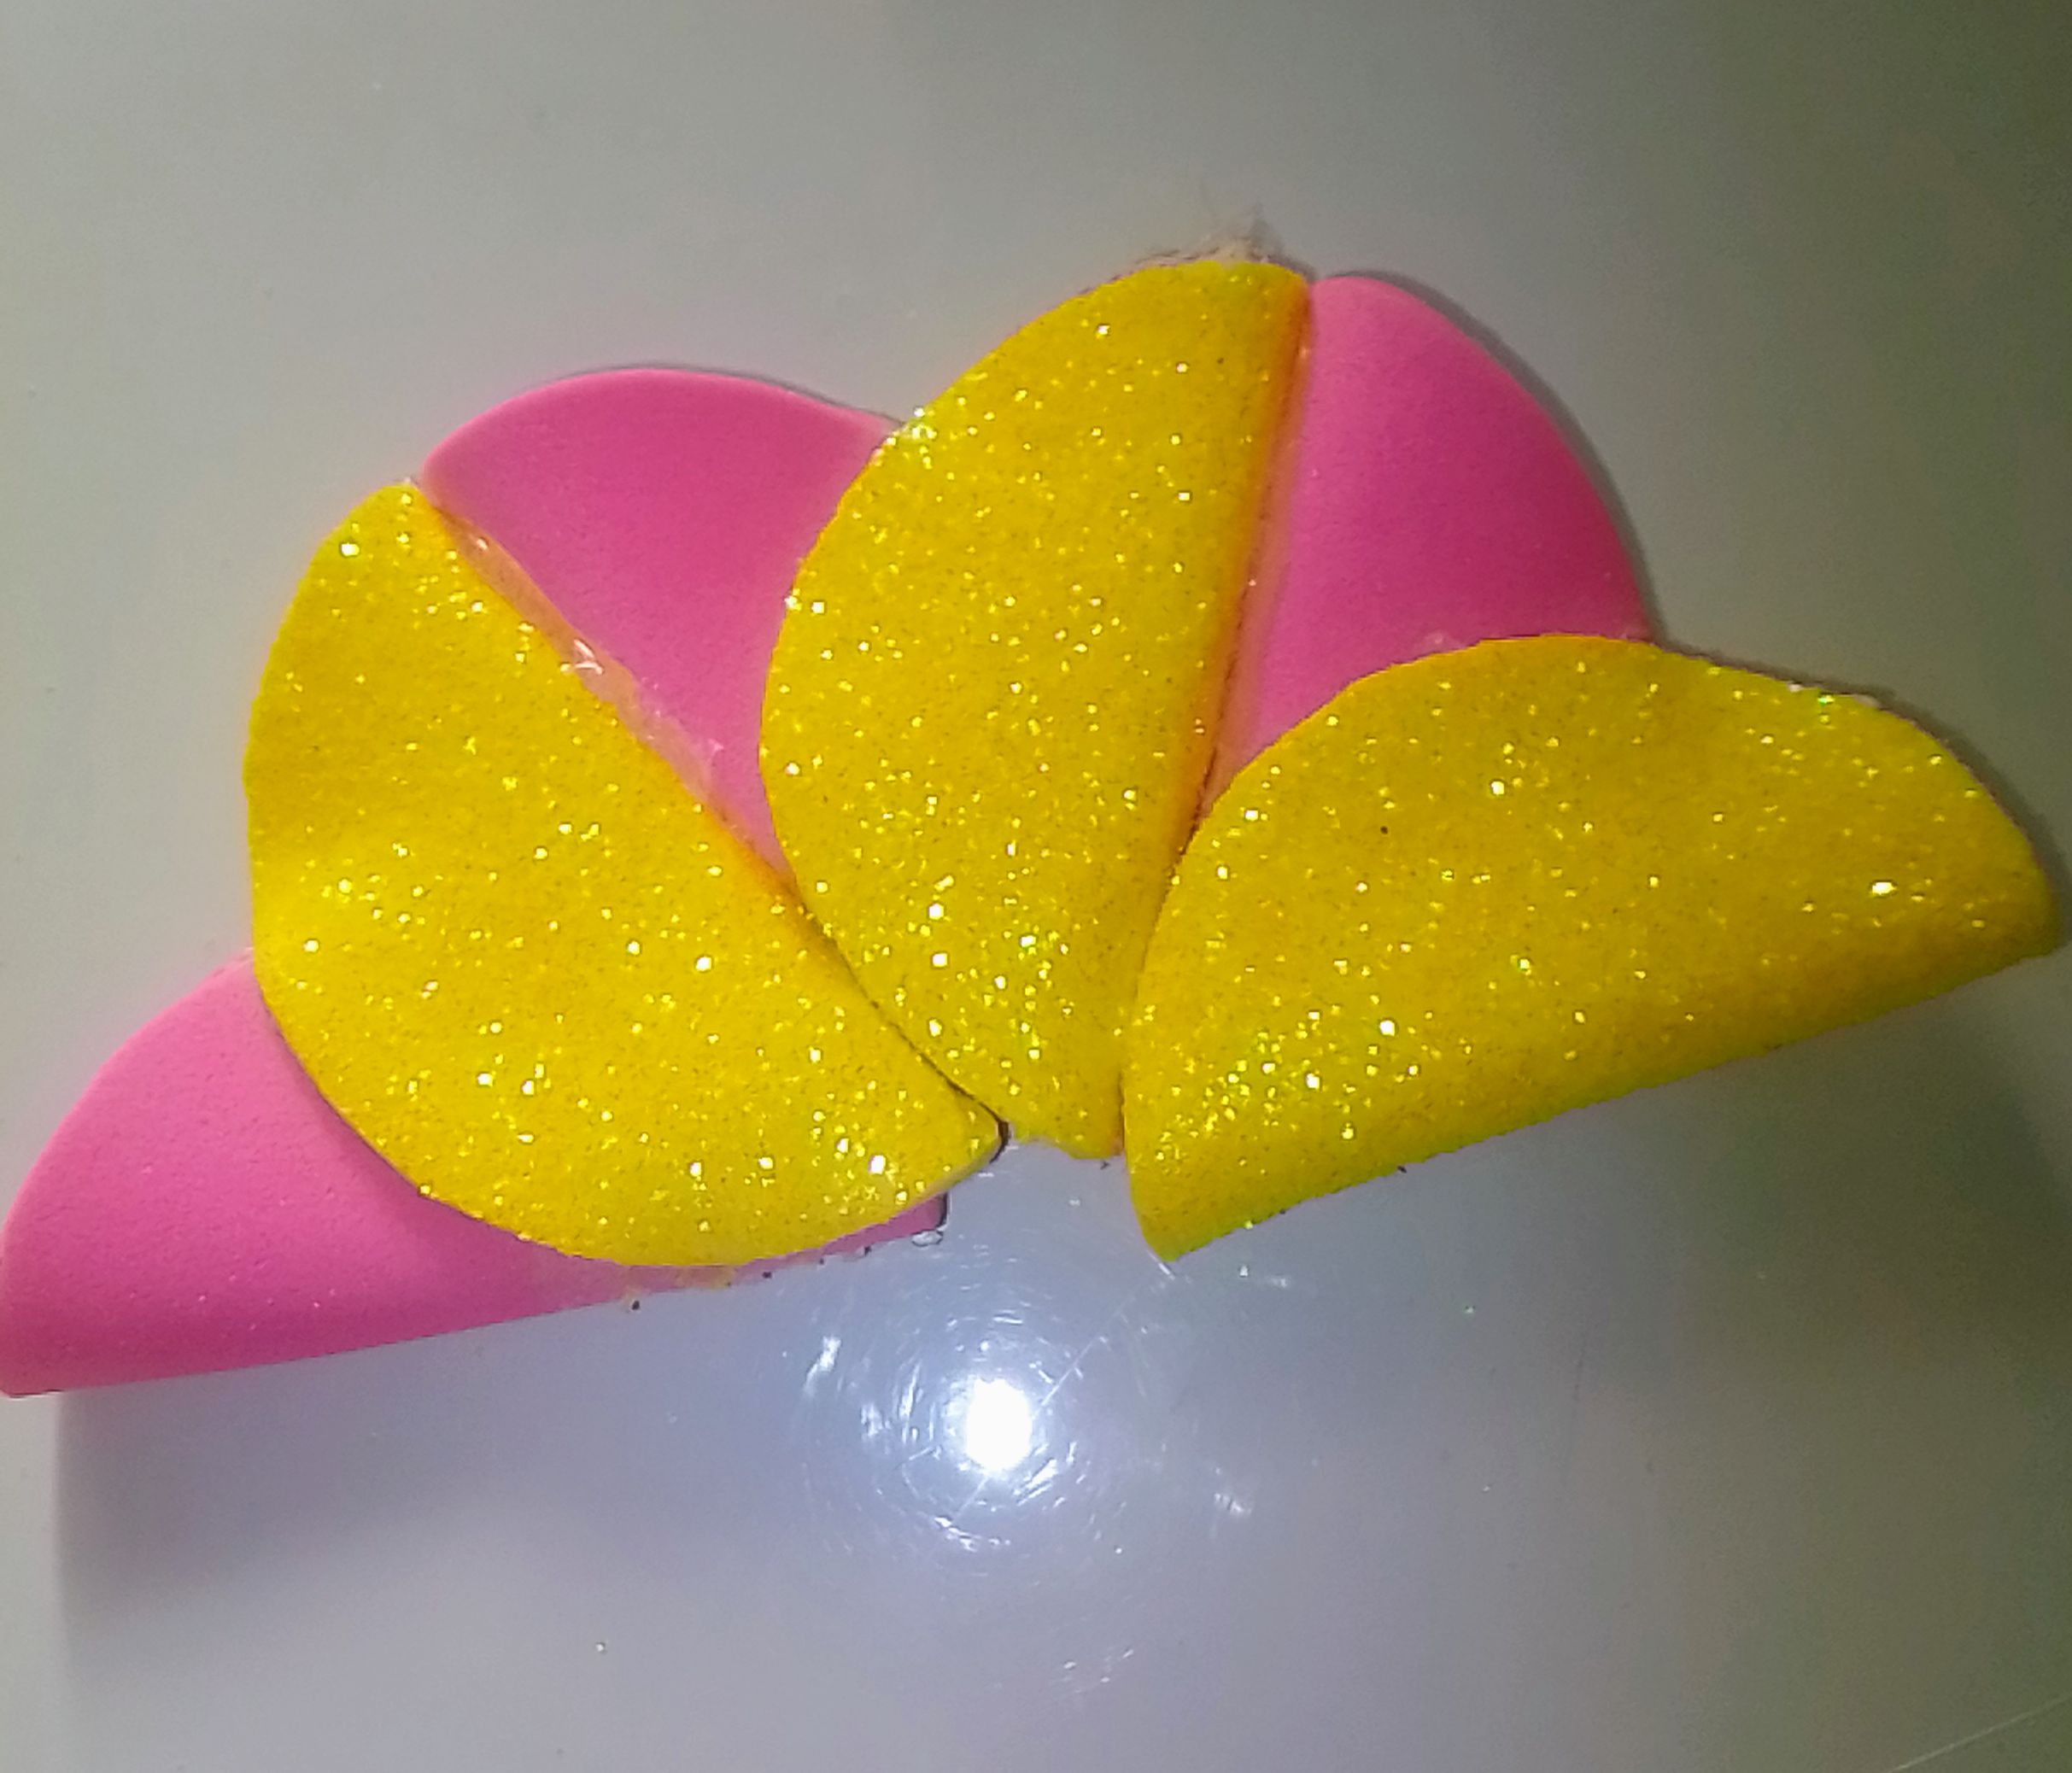
14.- Y te queda de esta manera ve que fácil es todo es prestando atención su proceso.
14.- And you have this way you see how easy it is everything is paying attention to your process.

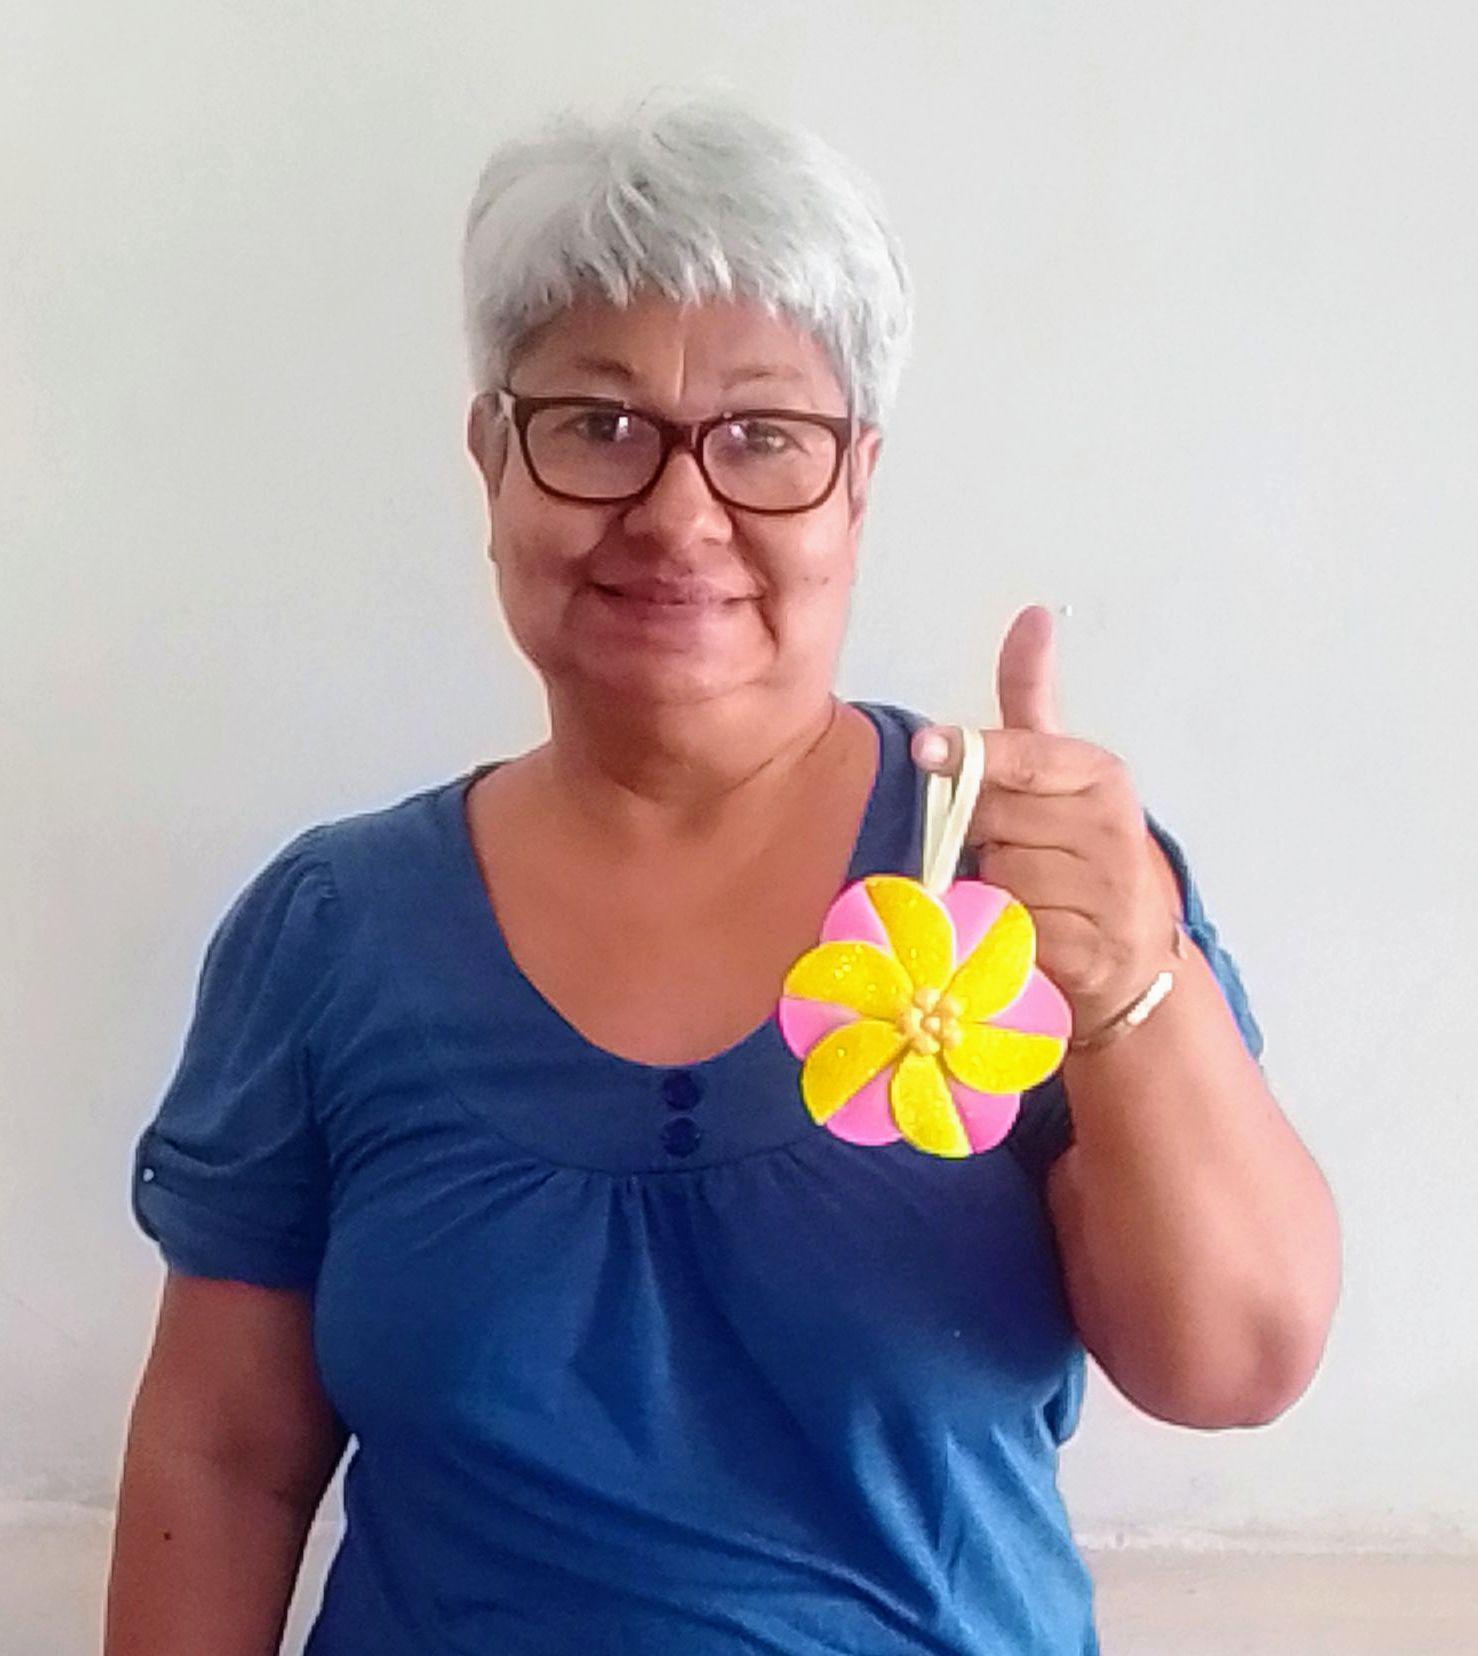
15.- Acá para finalizar lo decora con esta florecita y la perlita y ve que hermosa quedó ya lista para decorar un espacio en tu hogar.
15.- Here to finish it decorates it with this flower and the perlita and sees how beautiful it was ready to decorate a space in your home.
Gracias por acompañarme hasta el final y me alegro que te haya gustado y te invito a que la hagas y después me cuente como te fué.
Thanks for accompanying me to the end and I am glad you liked it and I invite you to do it and then tell me how it went.
Todas las imagenes son de mi propiedad tomada con mi celular Logicl55b.
Traducido a través de TRANSLATE.GOOGLE.CO.VE
All the images are my property taken with my logicl55b cell phone.
Translated through translate.google.co.ve
HASTA MUY PRONTO.
SEE YOU SOON.