✨🌹¡Hola amigos amantes de la creatividad! Espero que hayan pasado un muy buen comienzo de semana.🌹✨
🔸Sin más que añadir, a continuación los dejo con el paso a paso:
✨🌹¡Hello friends who love creativity! I hope you had a very good start to the week.🌹✨
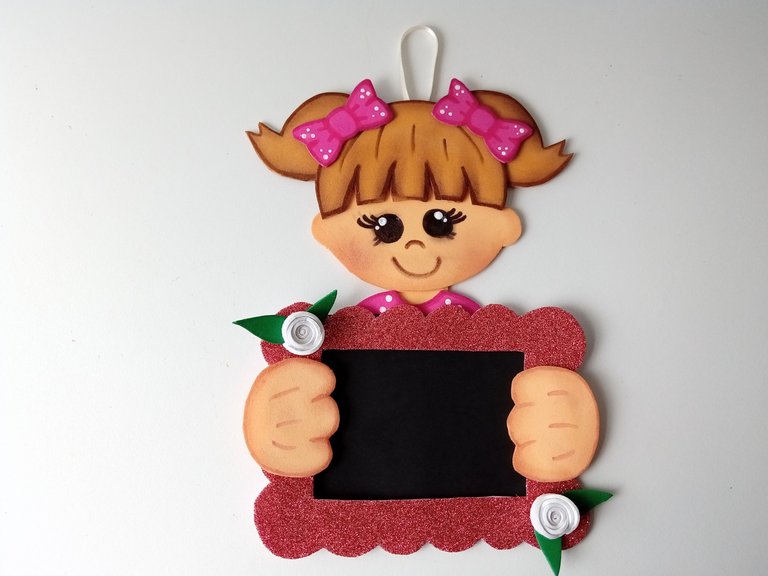
I hope you are well and have had a nice Monday. In my case, a little tired and with cervical pain, but I hope it passes soon, because it has me quite discouraged. Well, this time I'm sharing the step by step to make a nice picture frame to hang in your baby's room and we already know that we can't put common portraits, since they would always be throwing them on the floor, so think a little and looking for ideas I came up with this nice idea to hang on a wall or door in the children's room. In addition, as it is personalized, you can make it with the design that you like the most or, as in this case, the characteristics that the child has.
🔸Without more to add, then I leave you with the step by step:

♥️ESPERO QUE TE GUSTE,
¡Empecemos!
♥️I HOPE YOU LIKE IT,
Let's start!

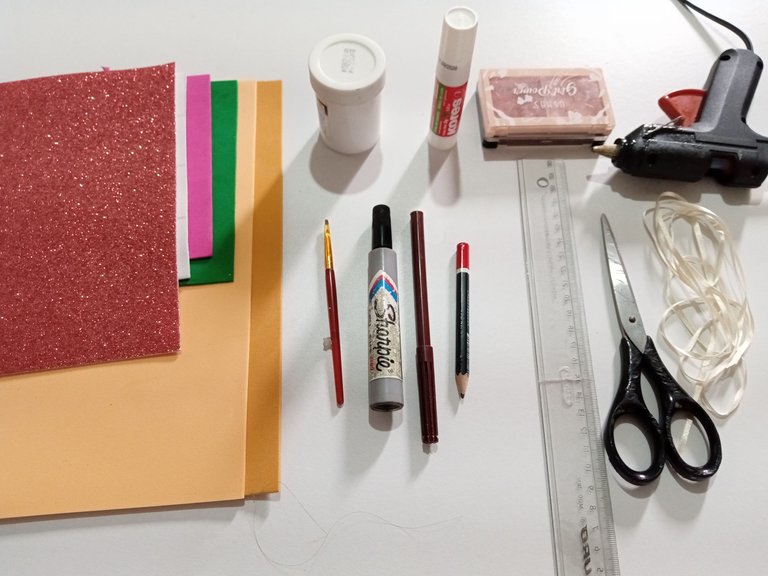
🌹 MATERIALES | 🌹 MATERIALS
- Cartón delgado.
- Cartulina escolar negra.
- Foami escarchado rosado.
- Foami marrón claro.
- Foami color piel.
- Foami blanco.
- Foami verde.
- Foami fucsia.
- Marcadores de colores.
- Sombras o tizas.
- Pegamento.
- Hoja blanca.
- Regla.
- Lápiz.
- Thin cardboard.
- Black school cardboard.
- Pink frosty foami.
- Light brown foam.
- Skin colored foam.
- White foam.
- Green foam.
- Fuchsia foami.
- Colored markers.
- Shadows or chalks.
- Glue.
- White sheet.
- Ruler.
- Pencil.
🌹 PROCEDIMIENTO | 🌹 PROCESS
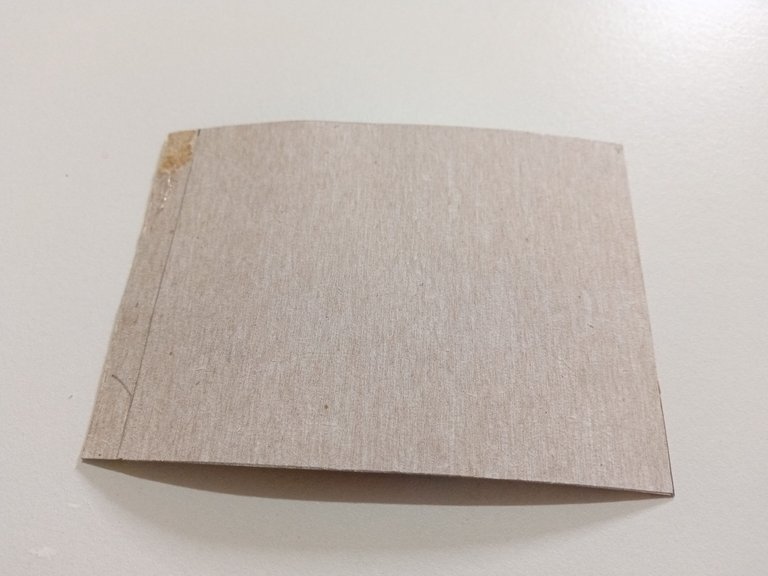
- PASO 1:
Lo primero que hice fue un rectángulo en cartón delgado, en mi caso; 12.5 cm x 9 cm, pase estas medidas al cartón delgado, recorte y para que se vea prolijo, pegué por ambos lados cartulina escolar negra.
- STEP 1:
The first thing I did was a thin cardboard rectangle, in my case; 12.5 cm x 9 cm, transfer these measurements to the thin cardboard, cut it out and to make it look neat, I glued black school cardboard on both sides.

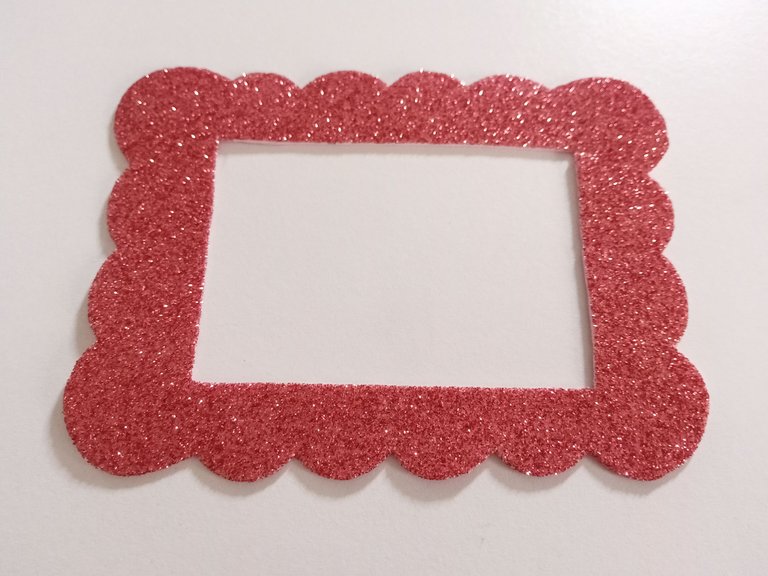
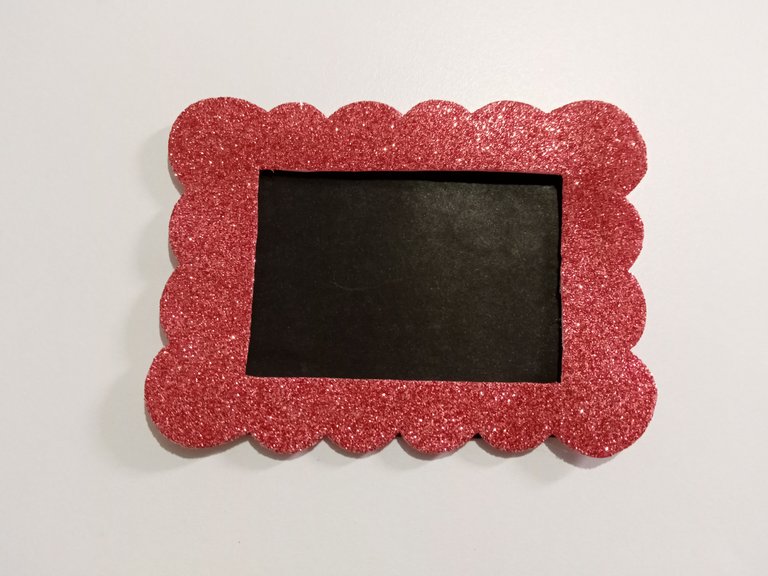
- PASO 2:
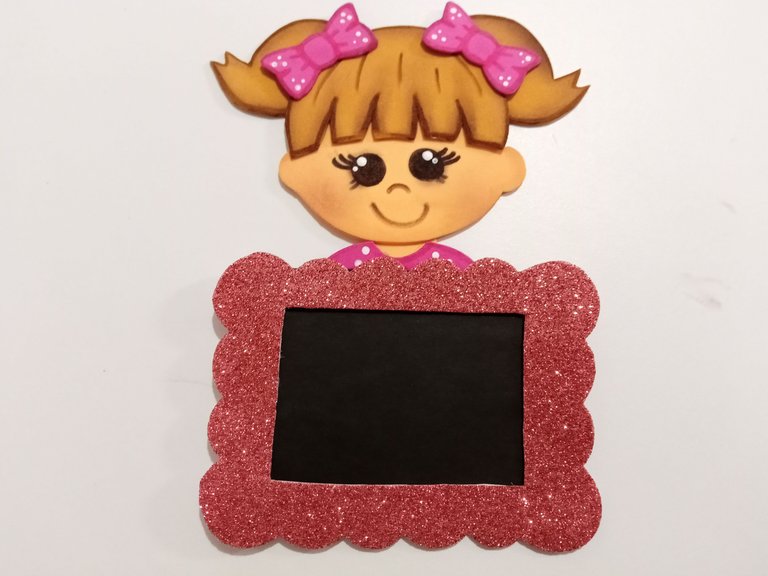
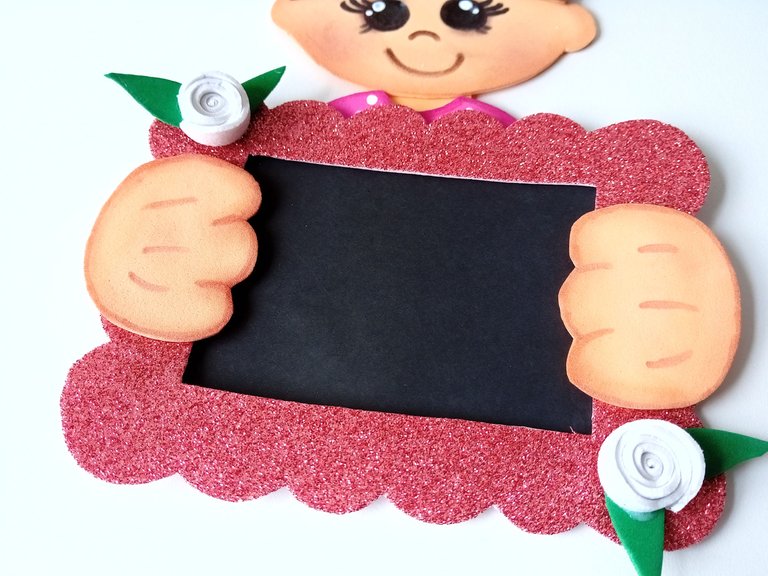
Luego recorte lo que sería el marco del portarretrato, así que recorté un rectángulo de 10 cm x 10.5 cm, al borde le di una forma ondulada y en medio, recorte un rectángulo de 9 cm x 6.5 cm y pegué al rectángulo de cartón dejando el borde superior sin pegar, pues por ahí entran y salen las fotos.
- STEP 2:
Then I cut out what would be the frame of the portrait of the photo, so I cut a rectangle of 10 cm x 10.5 cm, I gave a wavy shape to the edge and in the middle, I cut a rectangle of 9 cm x 6.5 cm and I glued it to the cardboard rectangle, leaving the upper edge unglued, because that's where the photos go in and out.
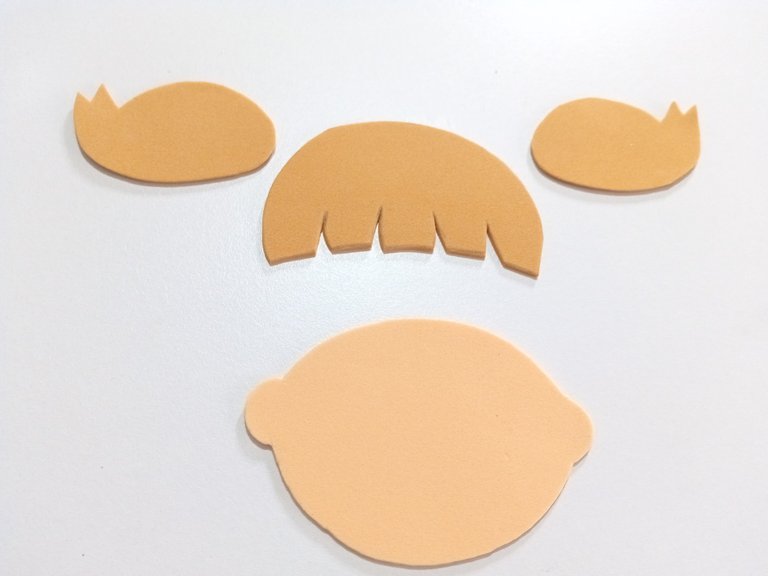
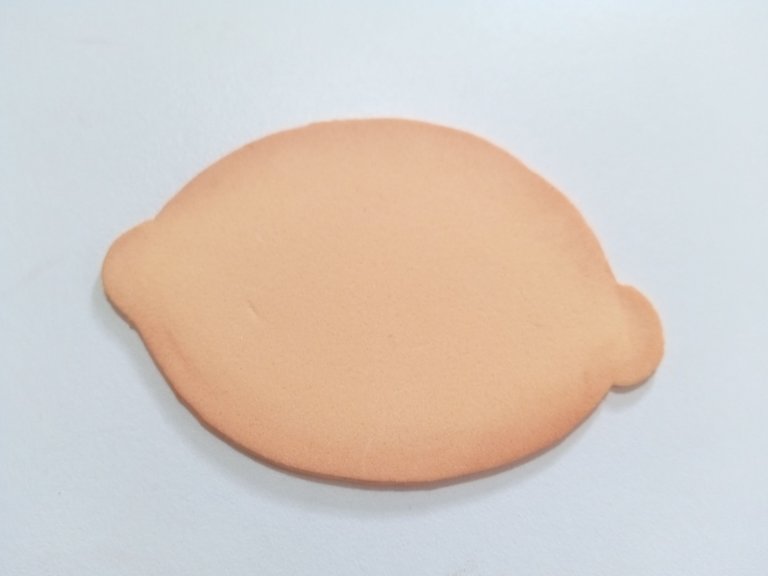
- PASO 3:
Luego de esto, busque el dibujo de una niña, dibujé el patrón y los pase al color correspondiente de foami. En mi caso; la cabeza en foami color piel de 8.5 cm x 6.5 cm. El cabello en foami marrón claro de 8 cm x 5 cm y los moños de 6 cm x 4 cm.
- STEP 3:
After this, I looked for the drawing of a girl, I drew the pattern and I passed it to the corresponding color of foami. In my case; the head in skin-colored foami 8.5 cm x 6.5 cm. The hair in light brown foami of 8 cm x 5 cm and the bows of 6 cm x 4 cm.

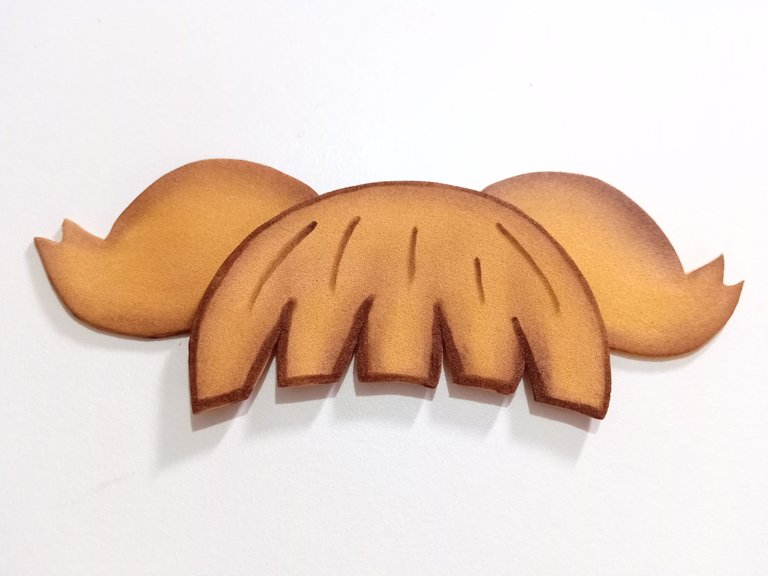
- PASO 4:
Después le di un poco de color con sombras alrededor del borde de la cabeza y el cabello un tono más oscuro al color del foami, también le agregué algunos detalles al cabello con un marcador y pegué ambas piezas.
- STEP 4:
Afterwards, I gave some color with shadows around the edge of the head and the hair a darker tone to the color of the foami, I also added some details to the hair with a marker and glued both pieces together.
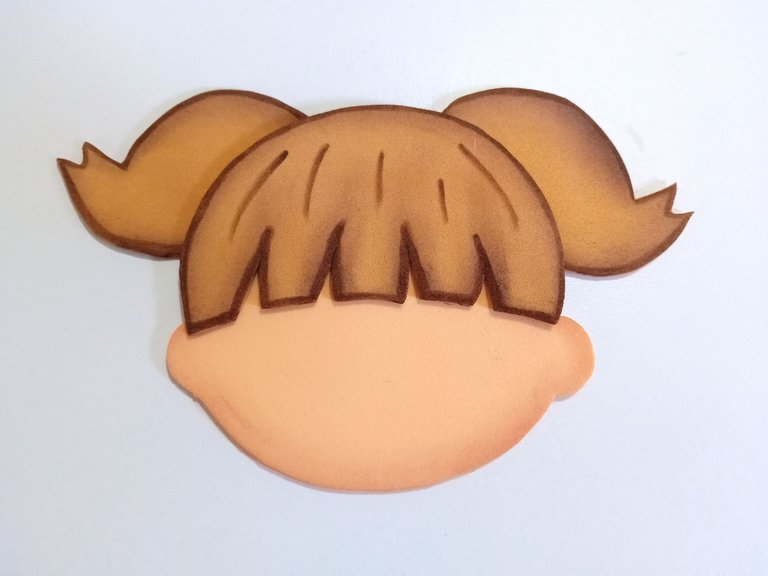
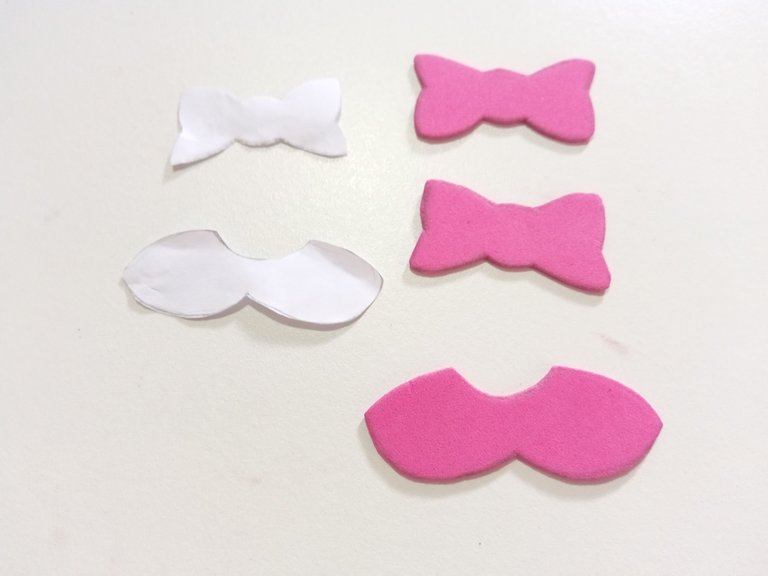
- PASO 5:
Por otra parte, también dibujé accesorios, los lazos en foami fucsia de 4 cm x 2 cm y la ropa de 6 cm x 2 cm. Y también les di color con marcador por todo el borde y dando un poco de diseño a los lazos.
- STEP 5:
On the other hand, I also drew accessories, the 4 cm x 2 cm fuchsia foam bows and the 6 cm x 2 cm clothes. And I also gave them color with a marker all over the edge and giving a little design to the ties.

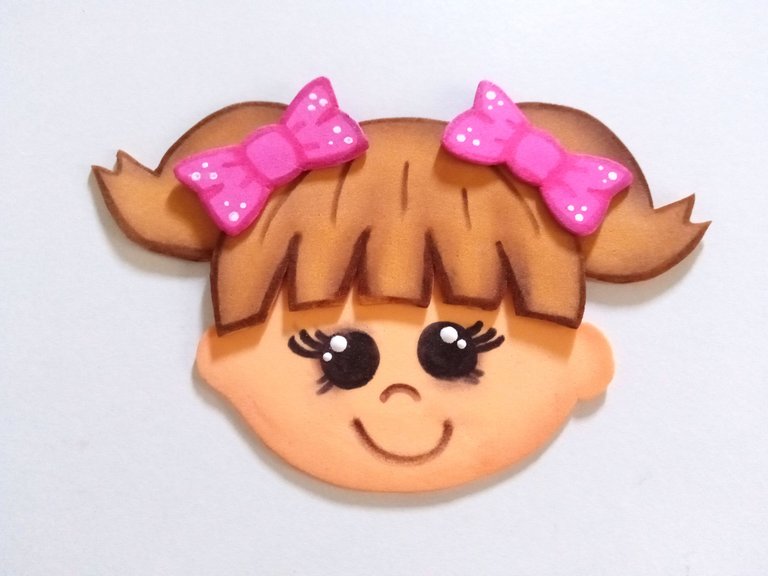
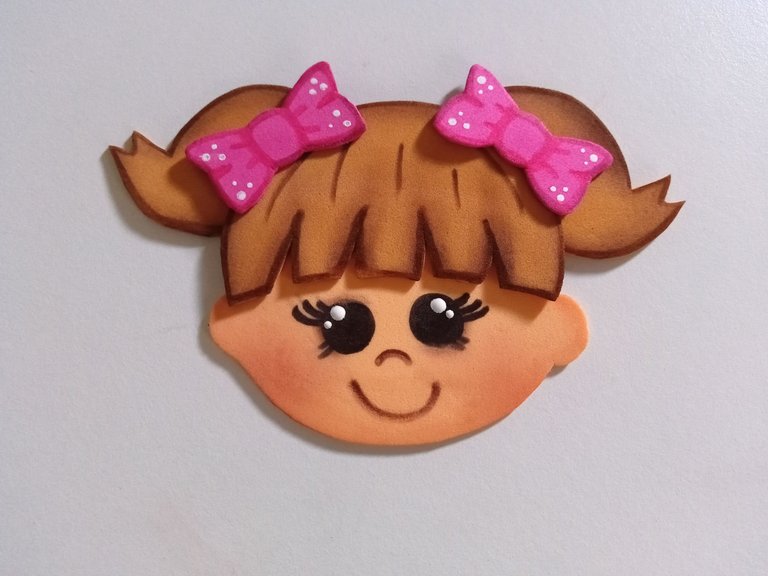
- PASO 6:
Pegué los lazos al cabello, pinté sobre ellos unos puntos blancos con pintura blanca. Dibujé los ojos, la nariz, la boca y pinté los puntos de luz en los ojos. Además, pinté las mejillas con un poco de sombra de ojos rosa.
- STEP 6:
Glue the bows to the hair, I painted on them a few white dots with white paint. I drew the eyes, the nose, the mouth and painted the points of light in the eyes. Also, I painted the cheeks with some pink eyeshadow.
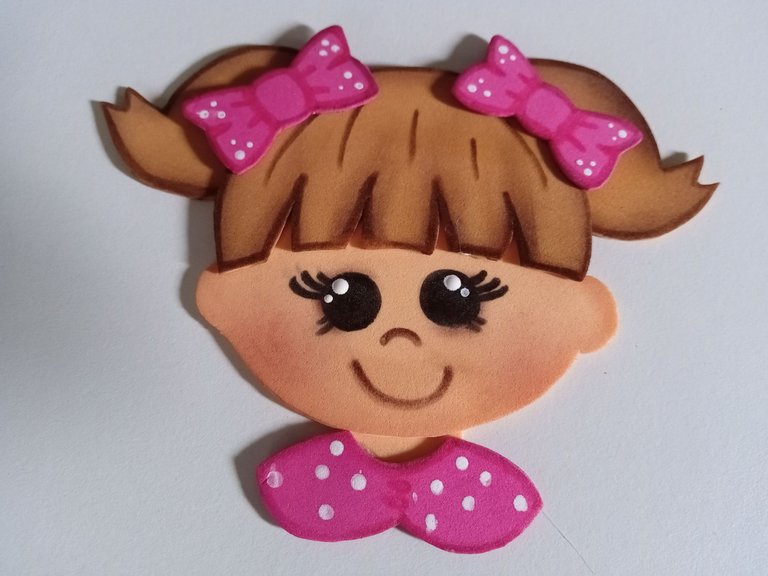
- PASO 7:
Luego, recorté el cuello y pegué la ropa, a la que le pinté unos puntitos blancos a juego con los lazos y en medio de la ropa pegué el marco.
- STEP 7:
Then, I cut out the neck and glued the clothes, to which I painted some white dots to match the ties and in the middle of the clothes I glued the frame.
- PASO 8:
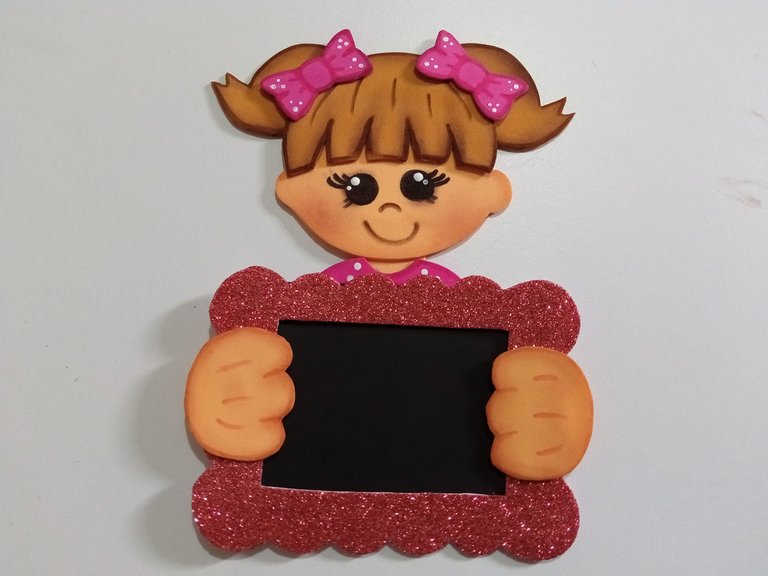
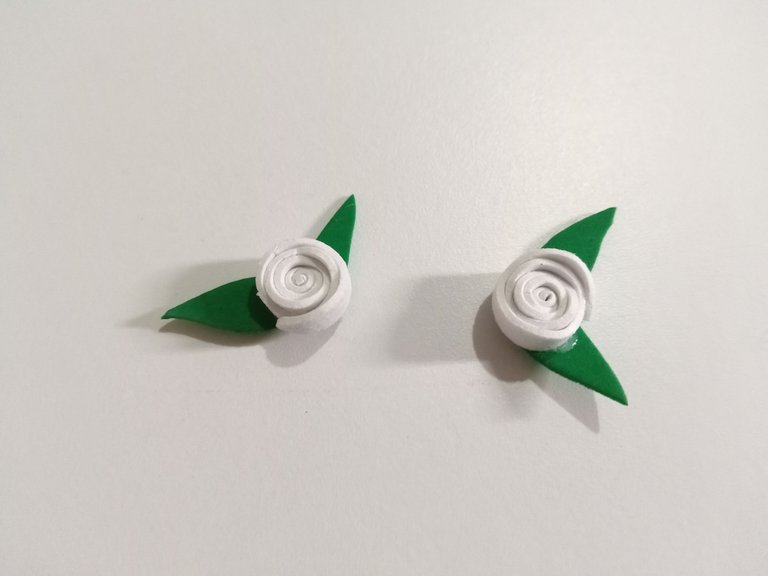
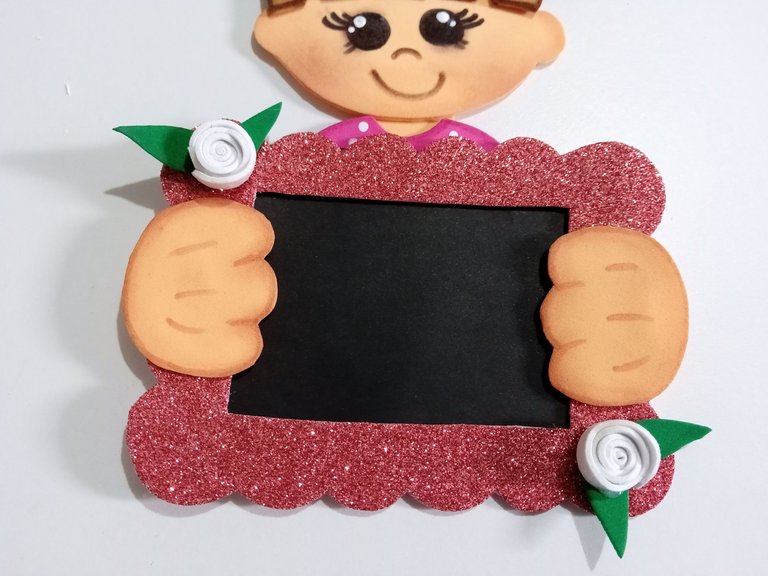
Luego dibujé y recorté las manos, las coloreé con sombras, di detalles con marcador y las pegué a los lados de los marcos de las fotos. Corté dos tiras con un borde ondulado, enrollé cada una y pegué al final. También dibujé un par de hojas, pegué las rosas y las coloqué en las esquinas del marco. Finalmente, pegué la cinta para colgar detrás del cabello.
- STEP 8:
Then, I drew and cut out the hands, I colored them with shadows, details with a marker, and I glued them to the sides of the photo frames. Cut two strips with a wavy edge, I rolled each one and glued at the end, I also drew a couple of leaves and glued to the roses and placed them in the corners of the frame. Finally, I glued the ribbon to hang behind the hair.
✨🌹¡Y listo!🌹✨ De esta forma puedes hacer un bonito marco de fotos para tus hijos. Me parece una idea muy bonita y original. La verdad no quede muy satisfecha con los ojos de la muñequita, como ya he mencionado, me cuesta un poco hacer el rostro, pero por lo demás me encanto por completo cada detalle. Espero les haya gustado y se animen a elaborar el paso a paso de esta bonita idea
❤️Hasta la próxima publicación.
✨🌹¡And ready!🌹✨ In this way you can make a nice photo frame for your children. I think it's a very nice and original idea. The truth is that I was not very satisfied with the doll's eyes, as I already mentioned, she told me a little about how to make her face, but otherwise I completely loved every detail. I hope you liked it and are encouraged to elaborate the step by step of this beautiful idea
❤️Until the next post.
✨RESULTADO: | ✨RESULT:


Todas las fotografías son de mi propiedad.
Separador y Fotos editadas en Canva
All photographs are my property.
Photos edited in Canva
Amiii tenemos que ver cómo hacemos para hacerle llegar todas esas cosas a @evelynchacin.
Esto está precioso, la niña te quedó absolutamente bella. Amé sus ojitos.
Tienes muchísima habilidad ami.
Abrazos
Es verdad, ya tengo muchas cositas para bebes y una elaborada específicamente para Olivia.
Muchas gracias mi Rosa, siempre dejándome comentarios bellos 💗
Siii, te quedó muy hermoso como todo lo que haces mi Valen ❤️❤️
This post has been rewarded with an upvote from city trail as part of Neoxian City Curation program
 . We are glad to see you using #neoxian tag in your posts. If you still not in our discord, you can join our Discord Server for more goodies and giveaways.
Do you know that you can earn NEOXAG tokens as passive income by delegating to @neoxiancityvb. Here are some handy links for delegations: 100HP, 250HP, 500HP, 1000HP. Read more about the bot in this post. Note: The liquid neoxag reward of this comment will be burned and stake will be used for curation.
thank you very much for the support friends 💗
Ay no😍😍😍 eso esta cuchisimooo ami, tu como siempre trayendo cositas bellas
Ay gracias Mili bella! 💗 A mi no me convencía mucho, pero el marco me encantó.
Muchas gracias por pasarte y darme ánimos amiga 💗
Que belleza! Me encanta lo tierna y cuchi que quedó esa muñeca mi Valen, te quedó demasiado hermoso 🥰🥰❤️
Muchas gracias mi Vane! Tú siempre dejándome lindos comentarios.
Me alegra mucho que te haya gustado 💗😘
Demasiado bello ese porta retratos, quedo muy hermosa la muñeca con sus detalles y tu paso a paso muy bien explicado, 👏❤️
Muchas gracias ☺️ Me alegra mucho que te haya gustado el diseño y el paso a paso.✨
Congratulations @valenpba! You have completed the following achievement on the Hive blockchain And have been rewarded with New badge(s)
Your next target is to reach 45000 upvotes.
You can view your badges on your board and compare yourself to others in the Ranking
If you no longer want to receive notifications, reply to this comment with the word
STOPCheck out our last posts:
Congratulations, your post has been upvoted by @dsc-r2cornell, which is the curating account for @R2cornell's Discord Community.
Enhorabuena, su "post" ha sido "up-voted" por @dsc-r2cornell, que es la "cuenta curating" de la Comunidad de la Discordia de @R2cornell.
Amiga bella pero esto te quedó demasiado bello, hermoso precioso! ❣️❣️
Me encanta, gracias por como siempre compartirnos un tutorial tan completo ✨
Te mando un mega abrazo!!
Siempre te botas con todo lo que haces amiga, como siempre hermoso y original. Felicidades mi valen 💜😍
Que linda creación de marcos, me encanto, excelente creatividad,.
Saludos.
Que linda muñequita con su marco para fotos, de inmediato pensé que se verían hermosos varios en la pared de una guardería o preescolar con las fotos de cada niña, y para los niños hacer la versión de muñequito. Me encantó. Gracias por compartir 🤗
Que belleza mi Valen ❤️ me encantó el diseño de la muñequita, super tierno y lindo, me parece una idea muy original para colocar las fotos, amé 🥰