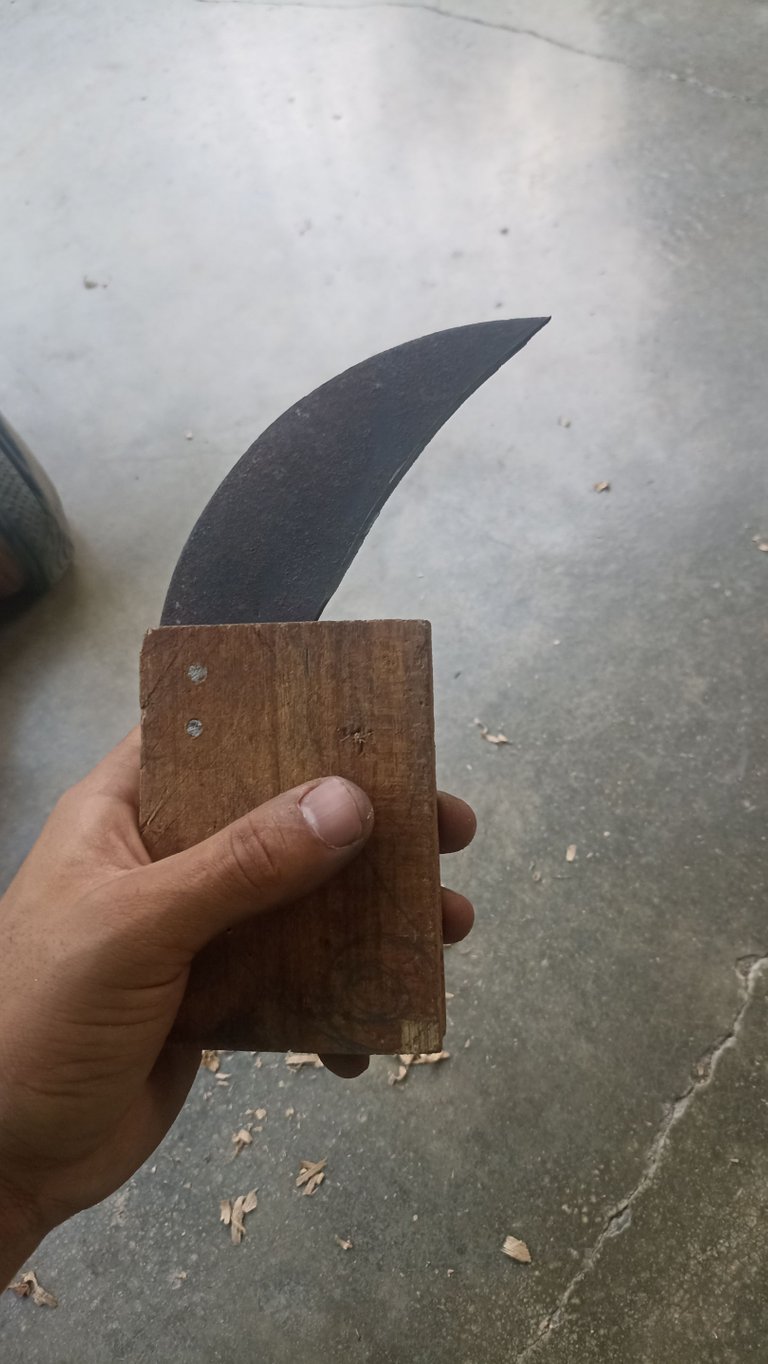
Hola es un placer volver a saludarlos, el día de hoy les quiero mostrar una de mis creaciones espero que les gusten, he pasado una larga temporada en casa haciendo múltiples trabajos en la hacienda de mi familia ayudando a mi padre y ha sido complicado seguir activo en Hive, pero esta vez me emociona mucho mostrarles este nuevo proyecto, reutilizando materiales para crear un arma completamente nueva.
Hello it is a pleasure to greet you again, today I want to show you one of my creations I hope you like it, I have spent a long time at home doing multiple jobs in my family farm helping my father and it has been complicated to remain active in Hive, but this time I am very excited to show you this new project, reusing materials to create a completely new weapon.
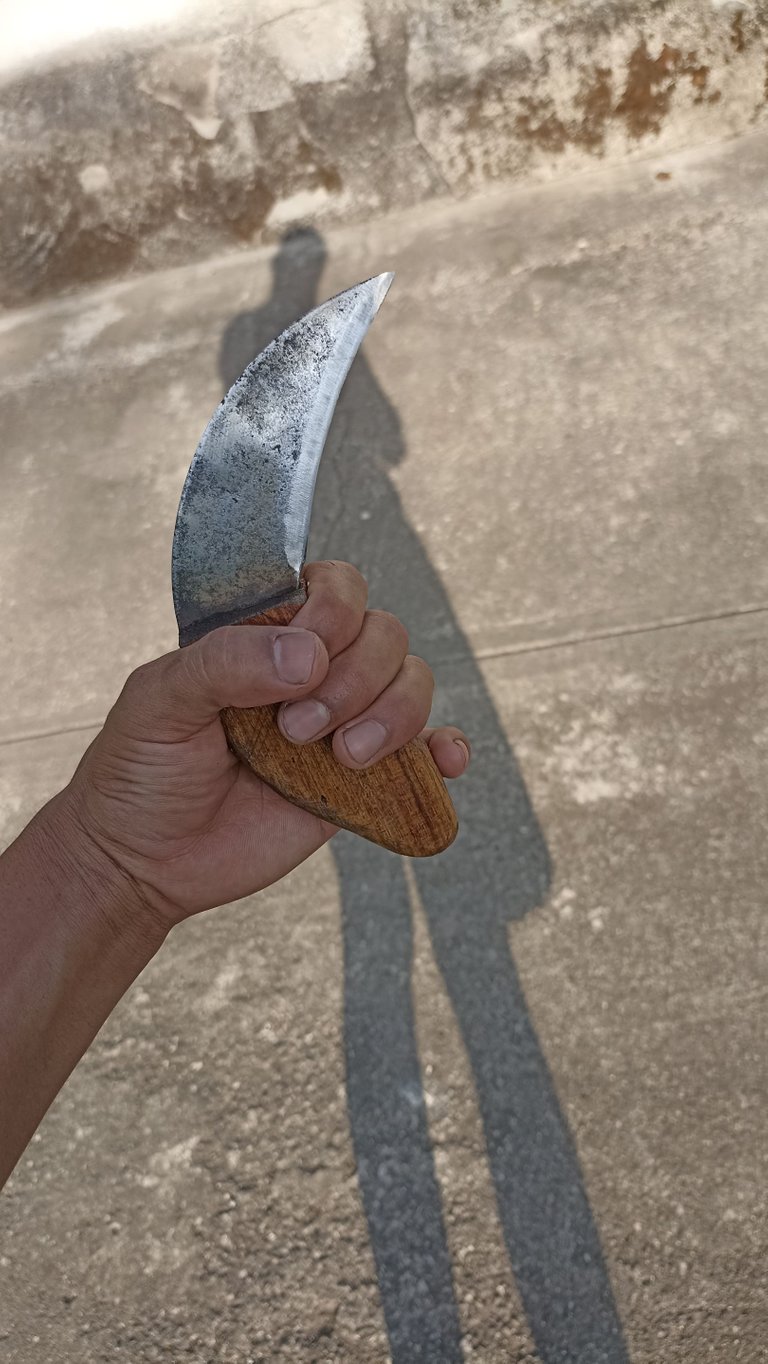
La forma de este cuchillo inspirado en un karambit la cual es un arma blanca que me gusta mucho su forma y diseño, la cual es un arma cuyo origen se remonta a indonesia y filipina donde y su forma esta inspirada en la garras del tigre por lo que los nativos creen que porta los poderes del animal, es usada como herramienta o arma de defensa personal, para saber mas visita el siguiente link del cual obtuve esta información Karambit
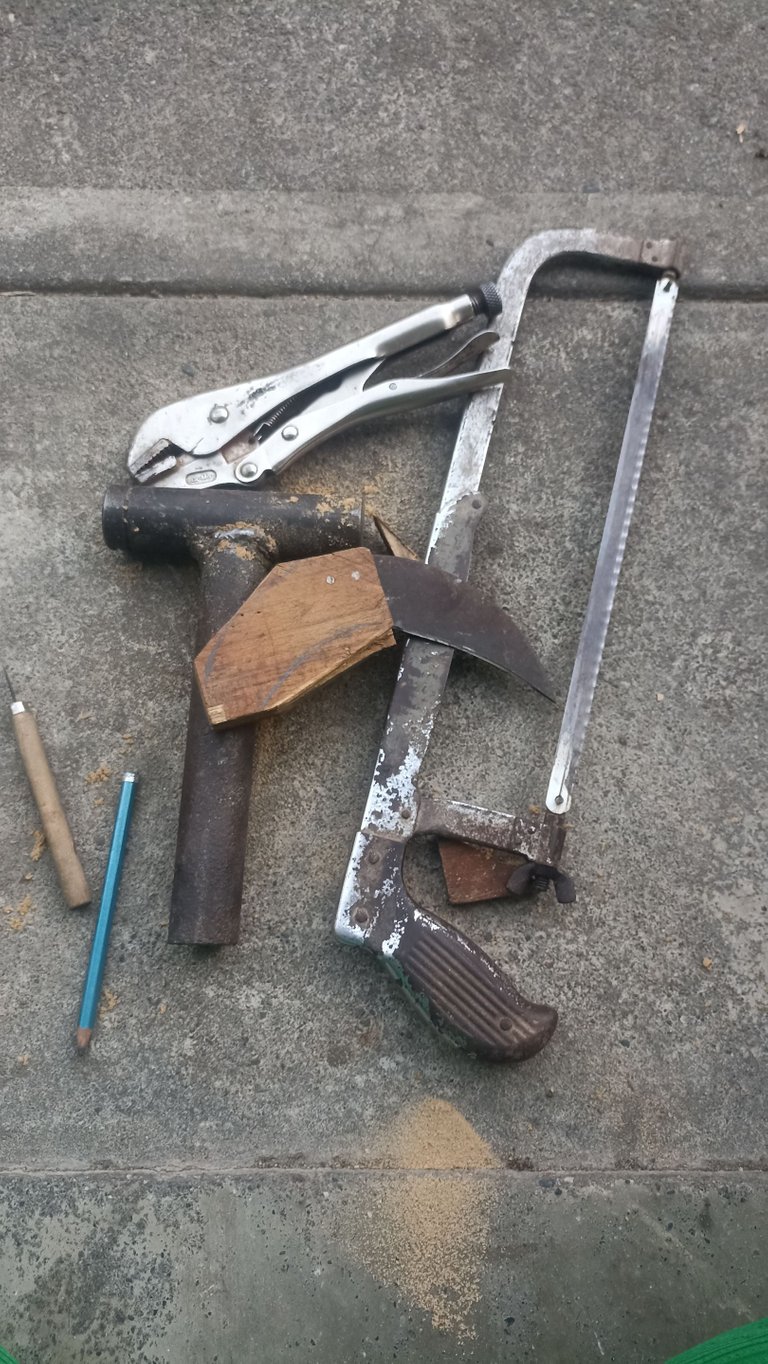
A continuación les voy a mostrar algunos de los materiales que utilice en este proyecto.
The shape of this knife is inspired by a karambit which is a white weapon that I really like its shape and design, which is a weapon whose origin dates back to Indonesia and the Philippines where its shape is inspired by the claws of the tiger so the natives believe that carries the powers of the animal, is used as a tool or weapon of self-defense, to learn more visit the following link from which I got this information Karambit
Next I am going to show you some of the materials I used in this project.
Materials
- A piece of iron left over from a sheet of sheet metal.
- Two pieces of wood to make the handle
- Aluminum wire
- Electric drill
- Polishing machine
- Pencil
- Scissors
- White glue
- Sandpaper
- Reamer
- Gouge
- Hammer
Materiales
- Un pedazo hierro que sobro de una lámina de metal
- Dos trozos de madera para hacer la cacha
- Alambre de aluminio
- Taladró eléctrico
- Pulidora
- Lápiz
- Tijeras
- Pega blanca
- Lijas
- Segueta
- Gubia
- Martillo
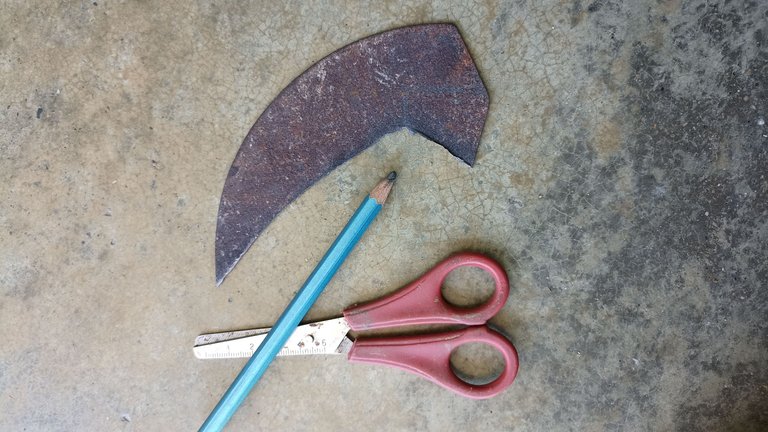
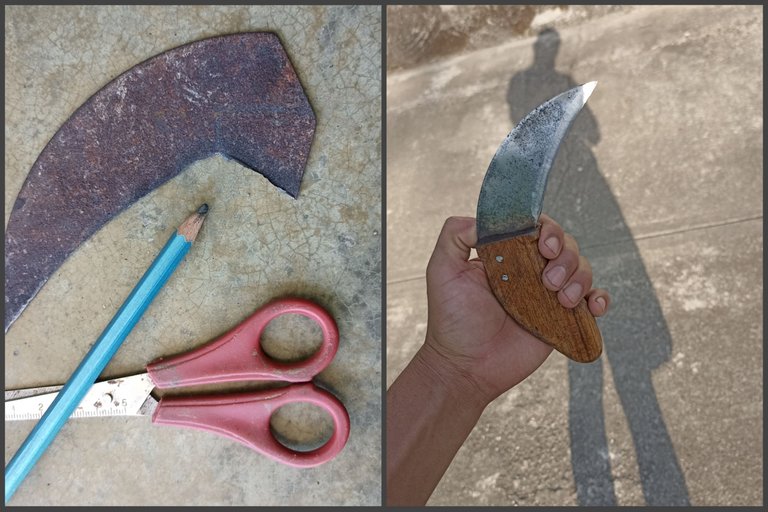
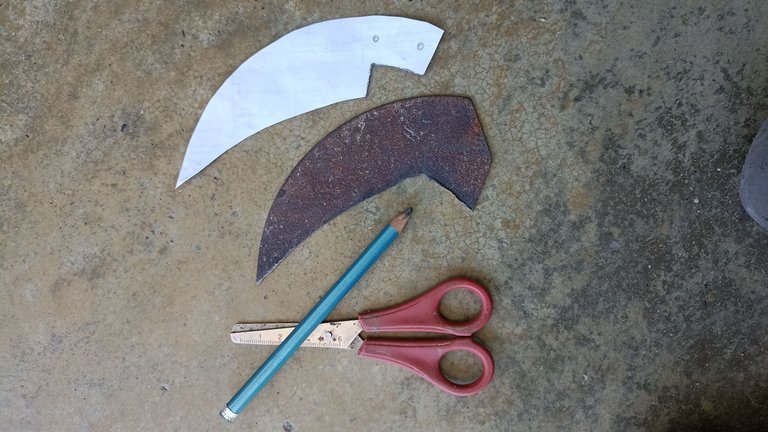
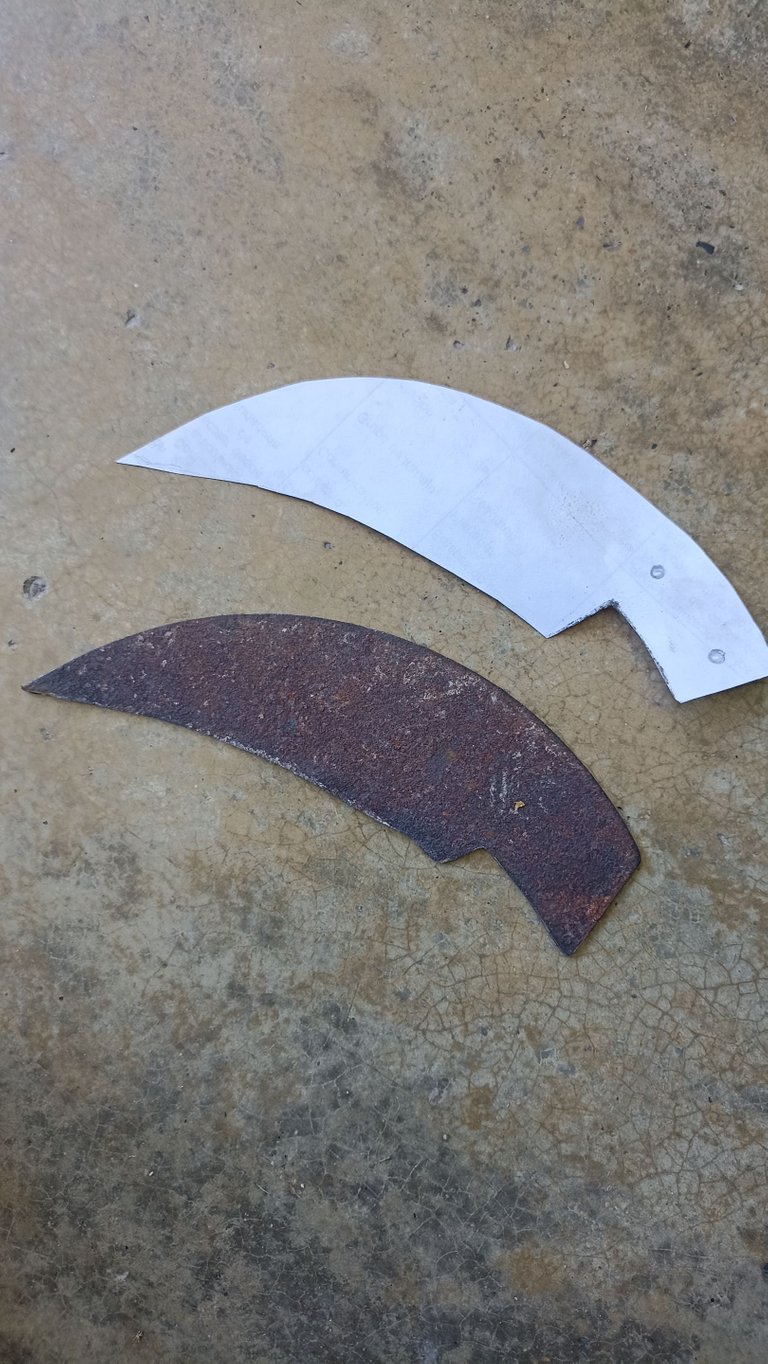
Lo primero que hice fue hacer el patrón del cuchillo en un hoja blanca que luego asegure y recorte sobre el metal, también hice dos marcas donde perforaría los orificios para sostener posteriormente la cacha.
The first thing I did was to make the pattern of the knife on a white sheet that I then secured and cut out on the metal, I also made two marks where I would drill the holes to hold the handle later.
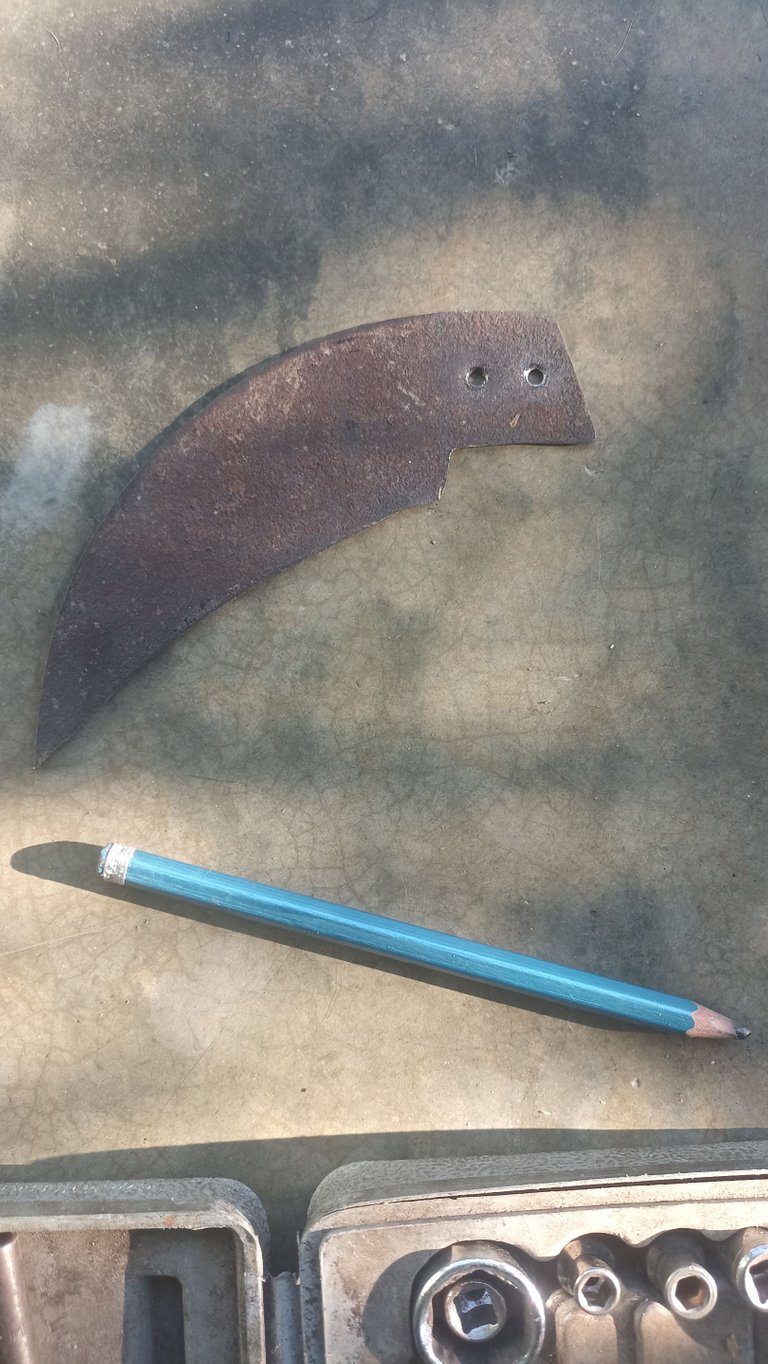
Para hacer los orificios utilice un taladro con una broca fina, siendo este el resultado del trabajo hasta este punto.
To drill the holes use a drill with a fine drill bit, this being the result of the work up to this point.
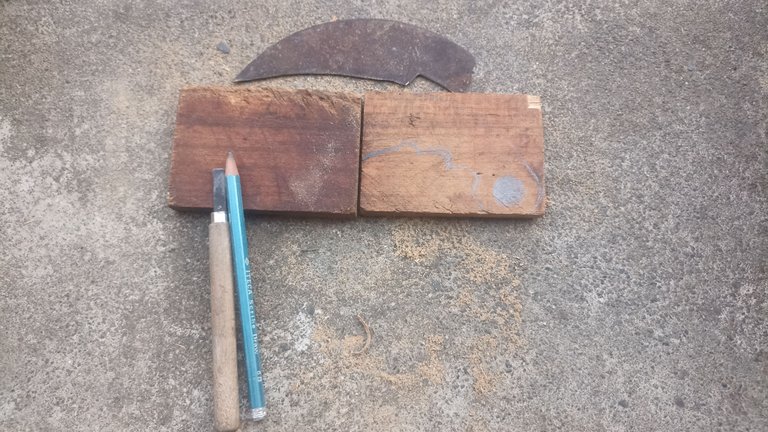
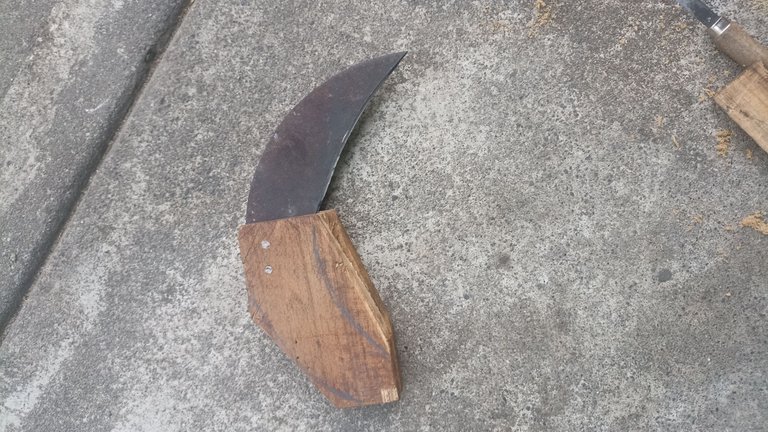
Después procedí a hacer el diseño de la cacha siguiendo la forma del cuchillo haciéndolo parecer una media luna o una garra curva y haciendo que coincida con orificios de la hoja del cuchillo para luego cortarla y pulirla.
I then proceeded to make the design of the handle following the shape of the knife making it look like a half moon or a curved claw and matching holes in the knife blade and then cutting and polishing it.
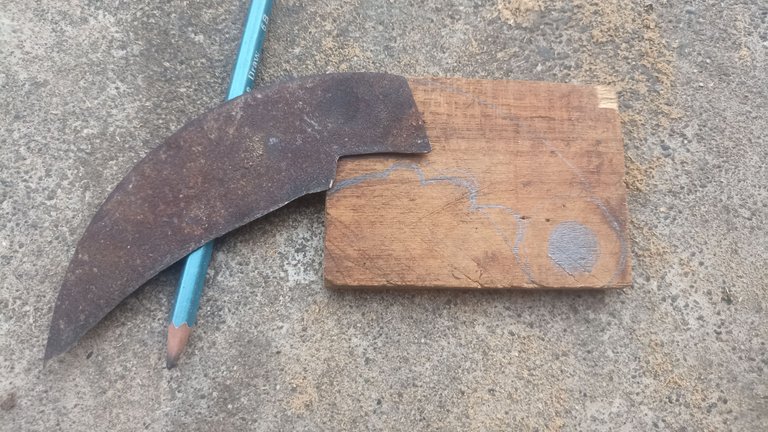
Pero antes de cortar y pulir la madera tuve que unir el cuchillo a los trozos de madera con la ayuda de alambre de aluminio que pase a través de los orificios en pequeños pedazos como de 3 cm de largo cada uno, luego sobre una superficie plana y resistente, golpear suave y firmemente los pedazos de alambre sobrante, para crear un remache que sostuviese todo en su lugar.
But before cutting and polishing the wood I had to attach the knife to the pieces of wood with the help of aluminum wire passing through the holes in small pieces about 3 cm long each, then on a flat, sturdy surface, gently and firmly tap the pieces of excess wire, to create a rivet to hold everything in place.
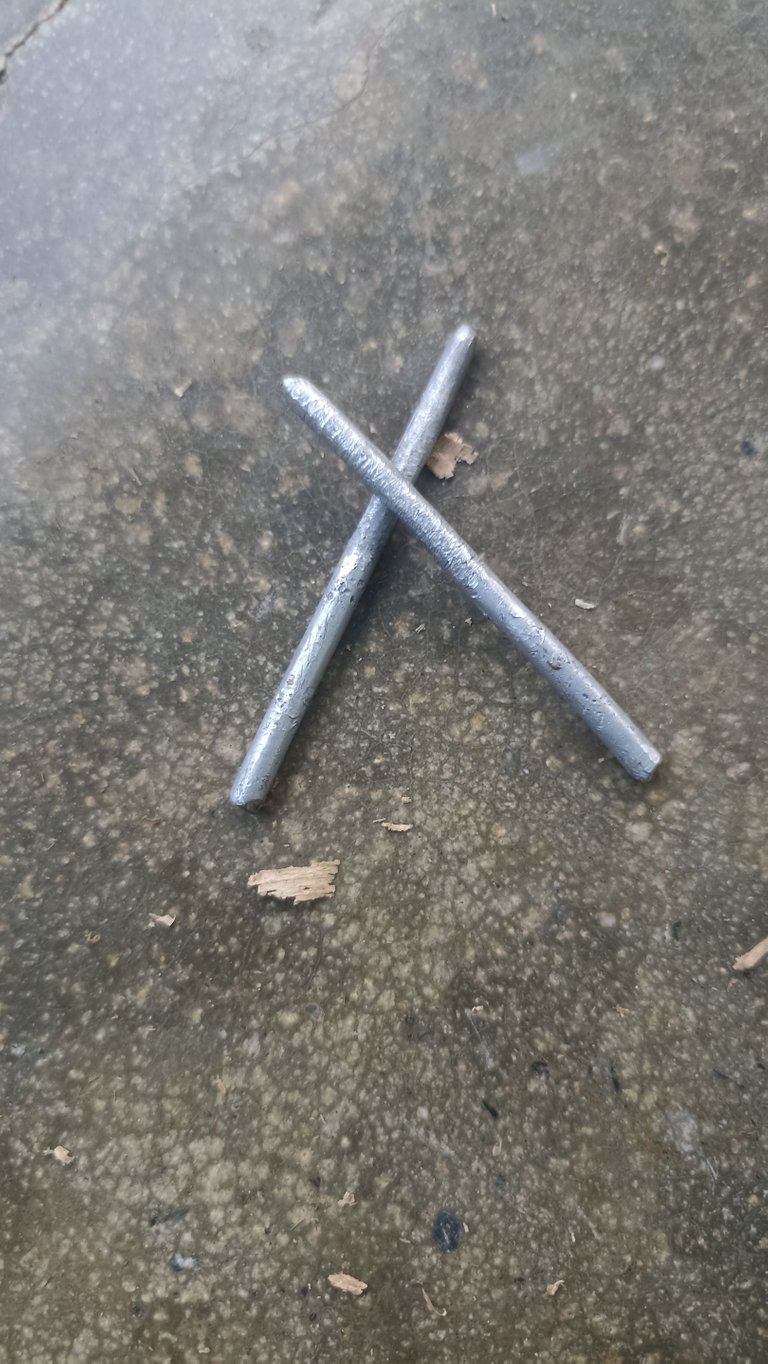
Alambre pasado a través de los orificios.
Wire passed through the holes.
Recorte el exceso
Trim excess
Luego de aplastar el material queda asegurado de la siguiente manera
After crushing, the material is secured as follows
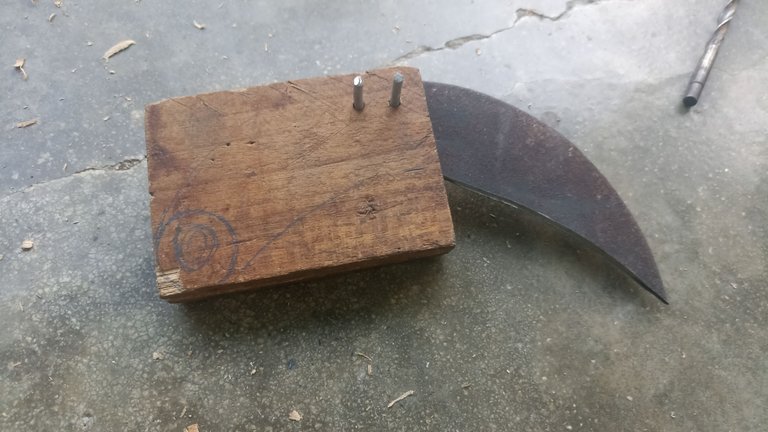
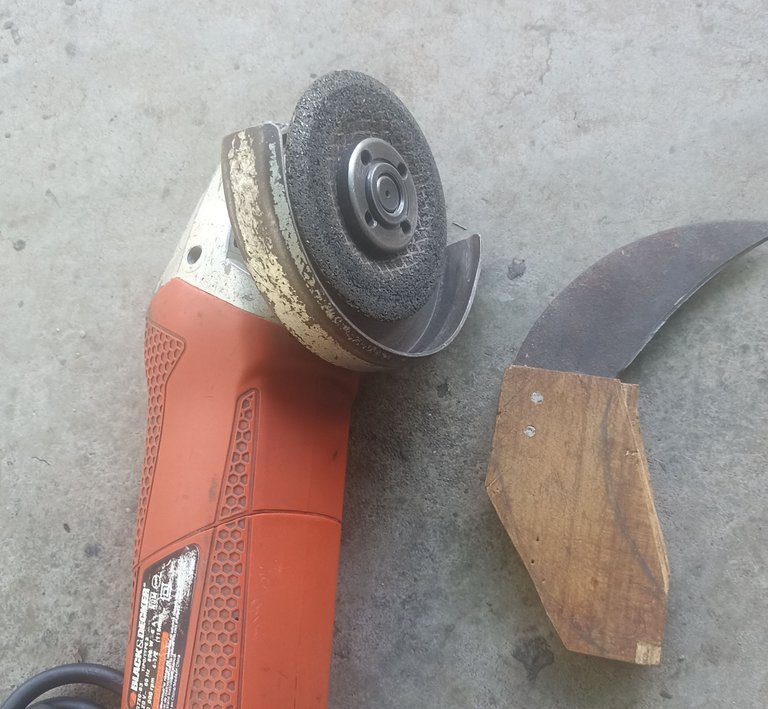
Ahora si llego la hora de darle forma a la cacha, para ello emplee varias herramientas, especialmente la segueta con la cual recorte la madera para darle la forma que había dibujado previamente, luego use herramientas mas finas y luego la pulidora para dar el acabado final a la madera.
Now it was time to shape the handle, for this I used several tools, especially the saw with which I cut the wood to give it the shape I had previously drawn, then I used finer tools and then the polisher to give the final finish to the wood.
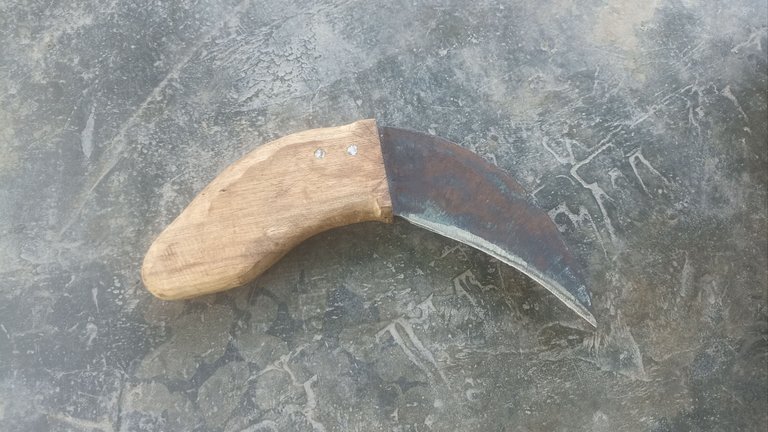
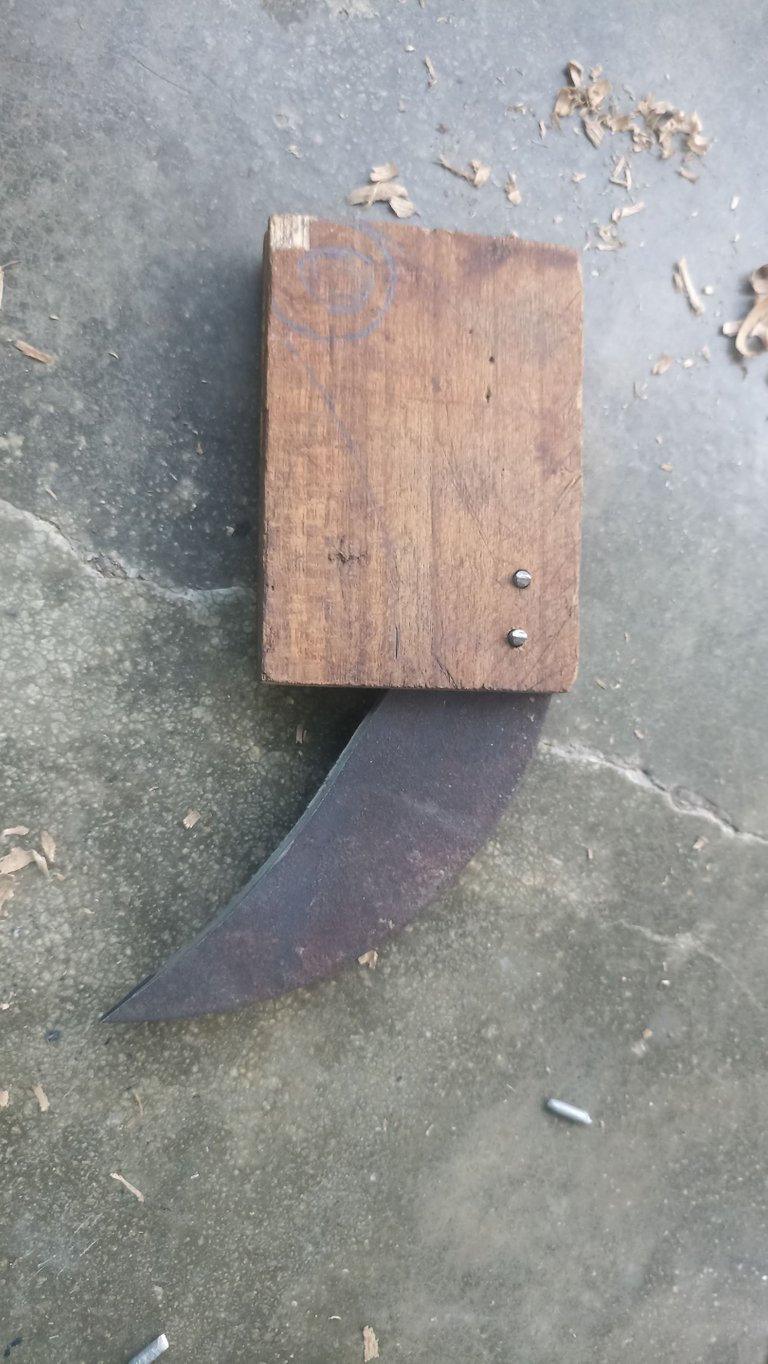
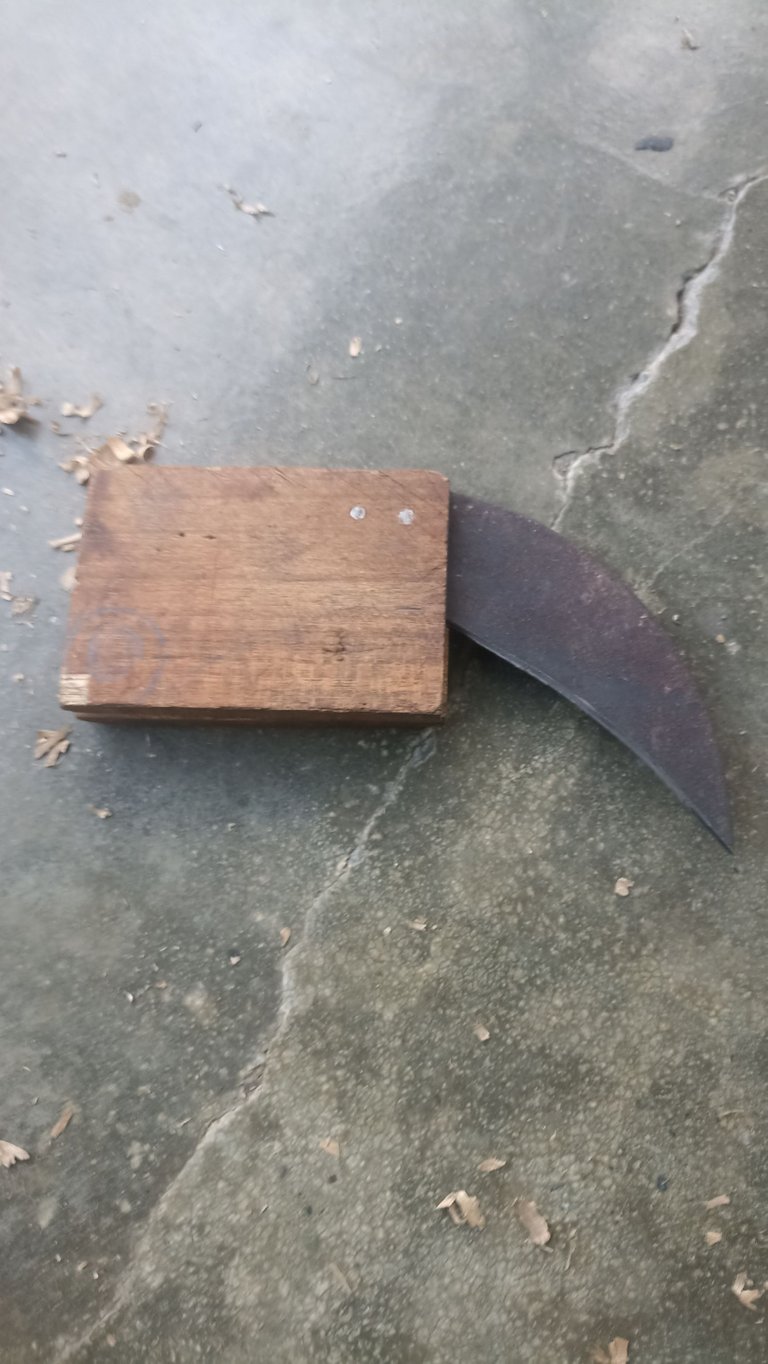
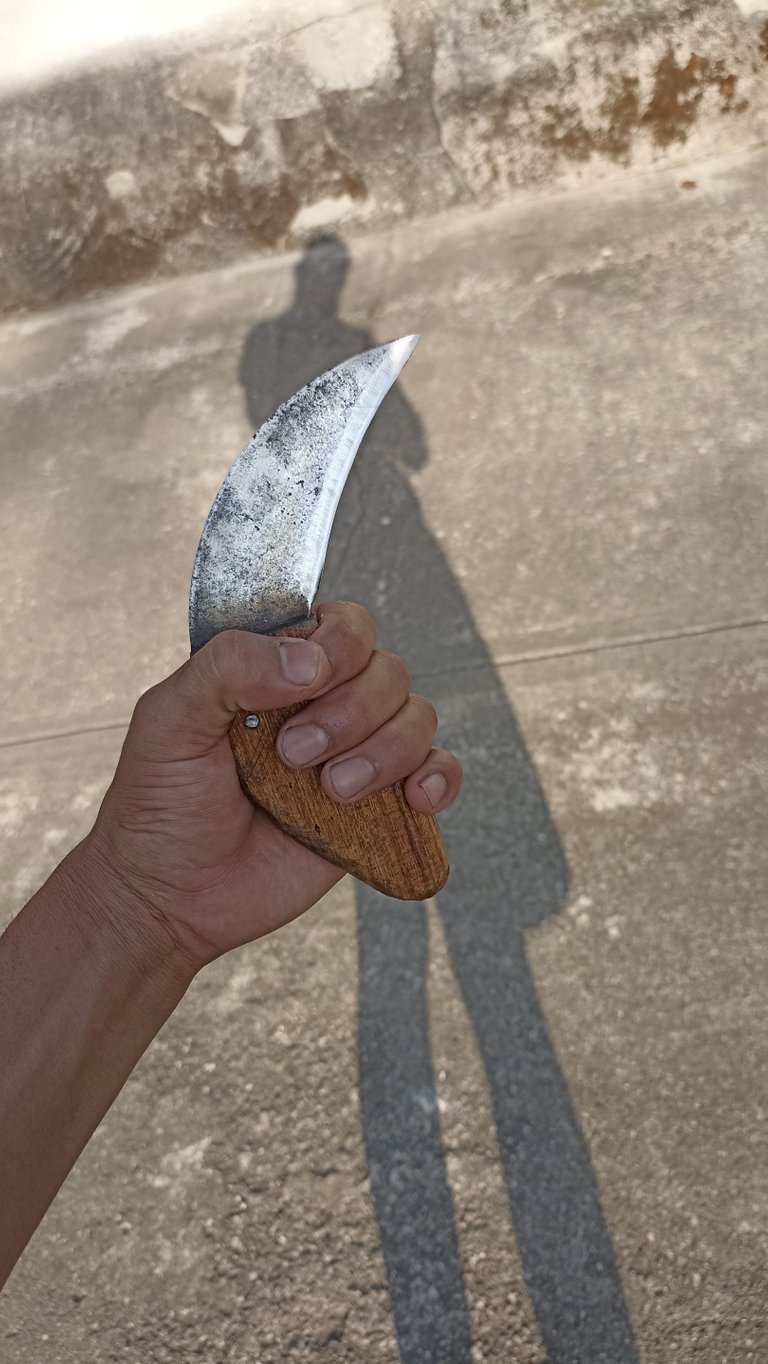
Luego se darle forma a la cacha surgió un pequeño inconveniente, cono los remaches estaban muy arriba, la madera tendía a abrirse en la parte de abajo, para resolver este problema coloque pegamento blanco en medio de la cacha y mantuve presionado hasta que estuvo seco, este ha sido el resultado de este proyecto y se ha convertido en una herramienta muy útil para mis trabajos en casa...
Es mi primero experiencia haciendo un arma desde cero, espero seguir mostrándoles mas proyectos como este, espero haya sido de su agrado, a todos muchas gracias por leer!
After shaping the handle a small problem arose, as the rivets were very high, the wood tended to open at the bottom, to solve this problem I put white glue in the middle of the handle and kept pressed until it was dry, this has been the result of this project and has become a very useful tool for my work at home...
This is my first experience making a gun from scratch, I hope to continue showing you more projects like this, I hope you like it, thank you all for reading!
Bravo Hermanito! me encanta lo que has logrado de algunos materiales, admiro tu creatividad! sigue creando! ✨
Gracias hermana por siempre apoyarme te quiero mucho 😘
Creatividad al 100✨
Wow, me encanta que lograste un súper cuchillo, con una temática de otra cultura!
Quiero uno inspirando en los vikingos jajaja
Muchas gracias prima, quedaría súper bueno uno de vikingos cuando puedo lo voy a intentar 👍
#posh
Me encanta, siempre he admirado este arte, me la pasaba viendo el programa Desafío sobre fuego porque es muy entretenido, te ha quedado muy genial el cuchillo. Te felicito 👏