
Bienvenidos, amigos creativos🎨💜
En esta oportunidad les mostraré el paso a paso de cómo hice un topper de flores para el cumpleaños N°14 de mi sobrina menor, el cual decidí hacerlo en foami usando colores elegidos por ella y que se combinaran un poco con la decoración, sin más a que hacer referencia…
Welcome, creative friends🎨💜
🙋♀️ Hello everyone, I hope you are doing great and have had a nice day full of pleasant moments✨, wishing you a great week full of good health, on this side of the screen all is well thanks to God.
This time I will show you the step by step of how I made a flower topper for the 14th birthday of my youngest niece, which I decided to do in foami using colors chosen by her and that matched a little with the decoration, without more to make reference to...
¡Llegó la hora de crear! / It's time to create!🎨
|
|---|
¿Cómo la haremos? / How will we do it?⬇️
💖 Paso 1: En un foami escarchado color rosado realice el número 14 siendo la edad de la cumpleañera, para este en forma al revés realice la forma del mismo y así evitar dañar la escarcha que trae el foami.
💖 Paso 2: En foami rosado claro recorte dos pequeñas tiras y las pegue para de esta forma dar un porqué de relieve al momento de pegar el número, para ello en la parte trasera del número pegue pequeños recortes de la tira antes mencionada.
💖 Paso 3: Al momento en que seco muy bien el paso anterior, pegue el número sobre un foami escarchado blanco dejando un pequeño borde.
💖 Step 1:In a pink frosted foami make the number 14 being the age of the birthday girl, for this upside down make the shape of the same to avoid damaging the frost that brings the foami.
💖 Step 2: In light pink foami cut out two small strips and glue them together to give an embossed look when gluing the number. To do this, on the back of the number glue small cutouts of the aforementioned strip.
💖 Step 3: Once the previous step is very dry, glue the number on a white frosted foami, leaving a small border.
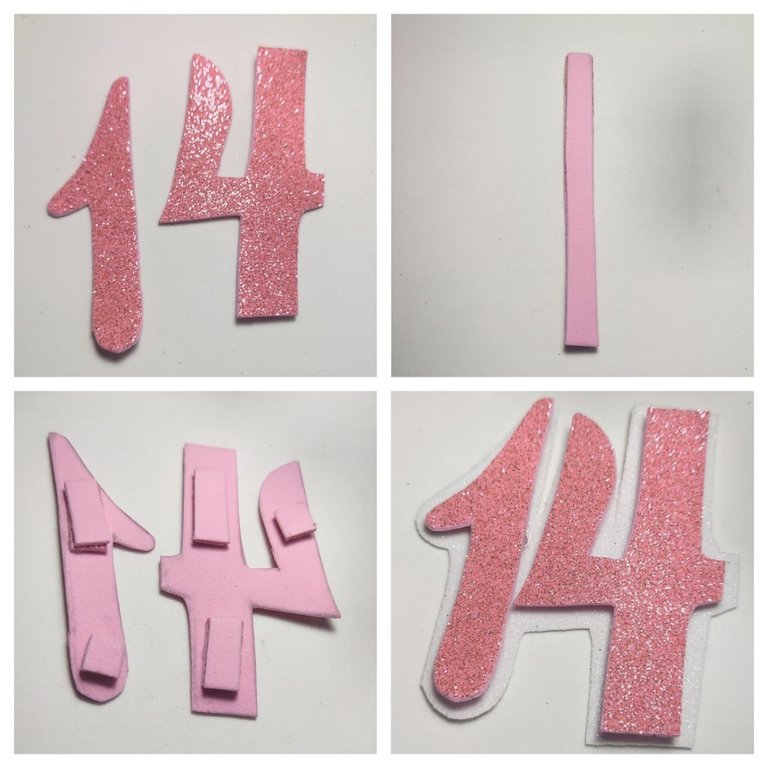
💖 Paso 4: En una cartulina blanca realice el nombre, siendo en este caso “Nathalya”, el cual pegue sobre un foami rosado escarchado dejando un pequeño borde, luego en uno blanco, dorado y por último nuevamente rosado.
💖 Step 4: On a white cardboard make the name, being in this case "Nathalya", which I glued on a frosted pink foami leaving a small border, then on a white, gold and finally pink again.

💖 Paso 5: Para los círculos me apoye de unas tapas que tengo una más grande que otra, para la más grande use foami rosado y para el dorado la siguiente , seguidamente pegue ambos círculos, posterior a ello pegue el número catorce y el nombre antes elaborado.
💖 Step 5: For the circles I used some lids that I have, one bigger than the other, for the biggest one I used pink foami and for the golden one I used the next one, then I glued both circles, after that I glued the number fourteen and the name I had previously elaborated.

💖 Paso 6: En foami blanco escarchado realice tres flores y aún lado de ellas pegue una pequeña hoja en color dorado y pegue sobre el círculo al lado izquierdo del número, para el derecho pegue unos pequeños círculos en foami blanco. Como otro detalle pegue dos hojas en dorado en diagonal al nombre.
💖 Paso 7: Para poder insertar el topper forre con foami rosado un palito de altura.
💖 Paso 7: Para poder insertar el topper forre con foami rosado un palito de altura.
💖 Step 6: In frosted white foami make three flowers and next to them glue a small leaf in gold color and glue on the circle on the left side of the number, for the right side glue some small circles in white foami. As another detail, glue two gold leaves diagonally to the name.
💖 Step 7: To be able to insert the topper, I lined with pink foami a stick of height.
💖 Step 7: To be able to insert the topper, I lined with pink foami a stick of height.

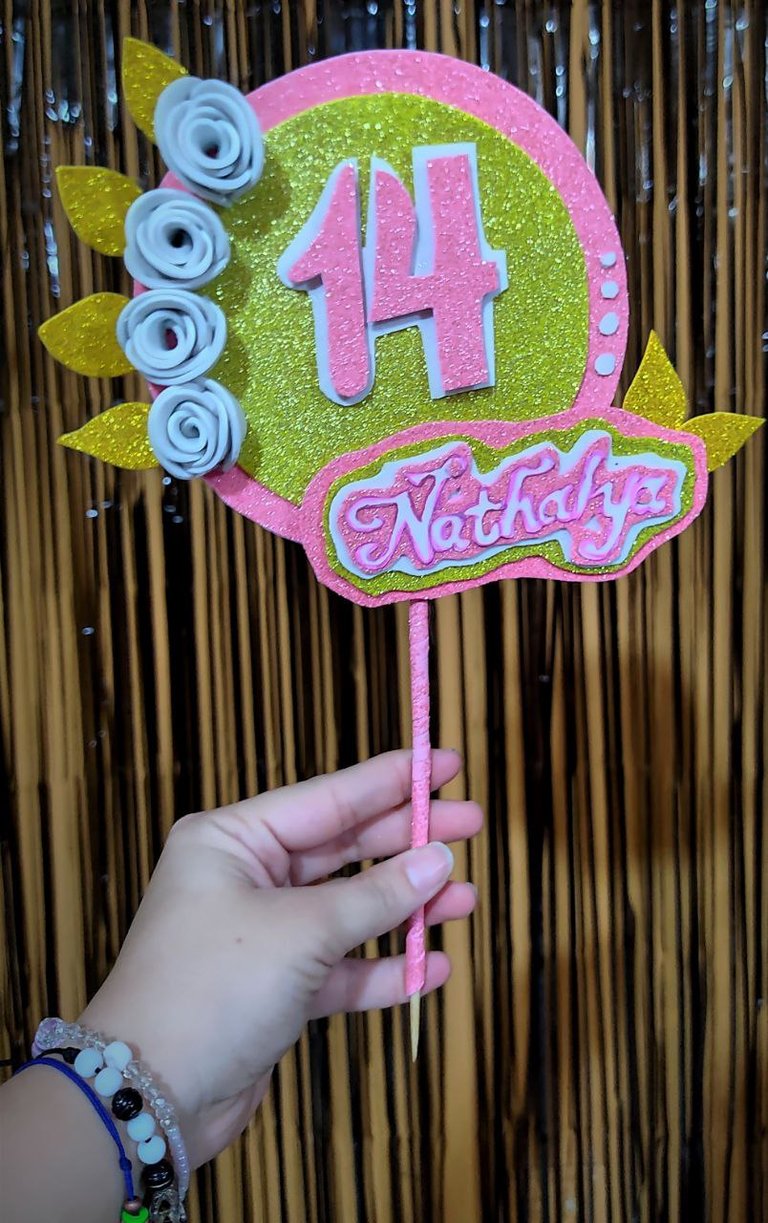
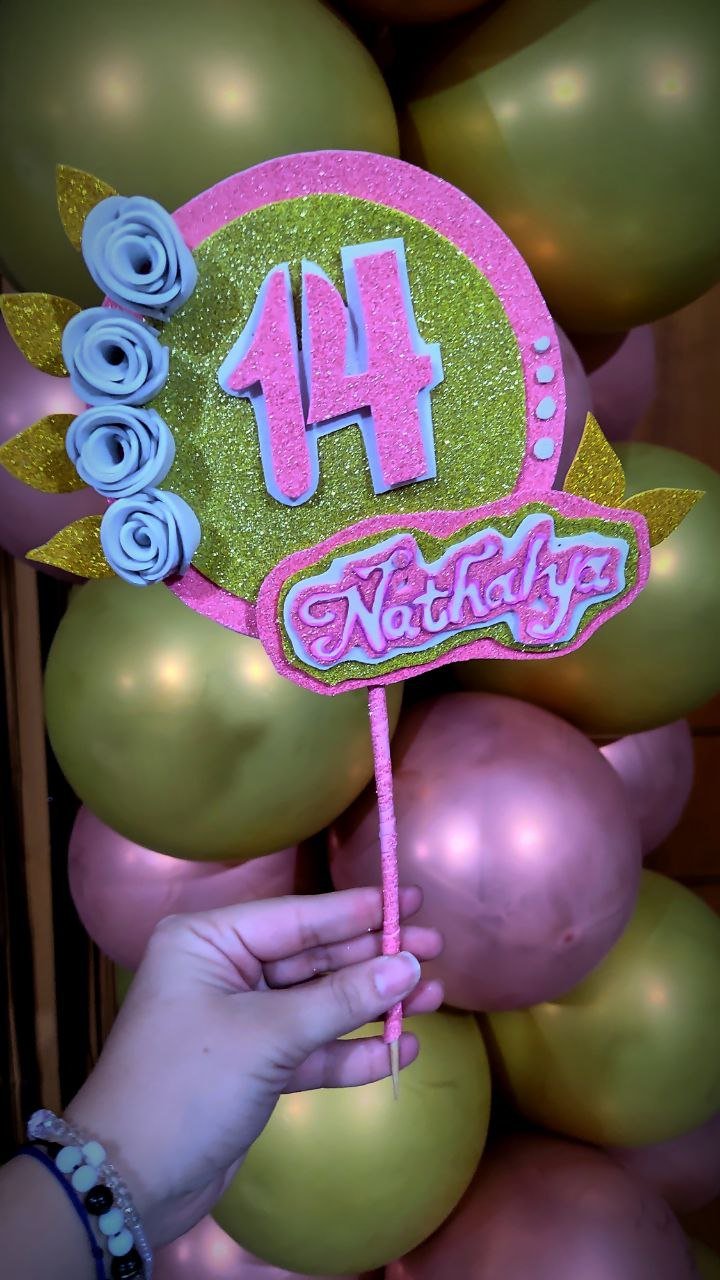
Creación finalizada / Creation completed⬇️
¡Y de esta forma personalice con flores un topper de cumpleaños!💖✨.
And this way you can personalize a birthday topper with flowers!💖✨.
Personally I loved it, every detail and the combination of it, it was the attraction of the cake and I was super happy to meet the expectations. The topper seems to me that they give a great touch to the cake and the birthdays apart from it being a nice souvenir since they are much more durable than the candles that we used to use before. If you like the idea you can customize it for any occasion and color.
See you in a new creation👩🎨


Mil gracias por leerme una vez
Nos vemos en una próxima publicación.
Muchas bendiciones y abrazos digitales🤗
Thank you very much for reading me once
See you in an upcoming post.
Many blessings and digital hugs🤗


buenos dias amiga te quedo mu hermoso la combinación de colores es perfecta y el paso a paso genial, te felicito
Hola amiga bella, muchísimas gracias❤️
Muy hermoso y fácil de hacer con el paso a paso bien explicado, gracias por compartir
Gracias a ti por pasarte✨
Precioso trabajo!
Gracias🤗
Que lindo amiga, se ve super delicado y la combinación de colores super linda 😍
Gracias Vane hermosa🤗, me alegro mucho que te gustará❤️
Te quedó precioso ese topper ami 😊 Y esa combinación de colores nunca falla, siempre luce linda y delicada, el dorado no puede faltar y las flores dan un toque único a nuestras creaciones 🥰
Muchas gracias Mary, también pienso lo mismo de los colores, a parte el dorado queda demasiado bello para resaltar.
Gracias por pasarte❤️✨
Que belleza Ami, te quedó tan lindo! Se ve muy delicado, me encantaron las flores. Gracias por compartir esta lindura amiga bella💕
Gracias valen hermosa❤️
¡¡¡Buen trabajo!!! Gracias por publicar tu excelente contenido en Hive Diy, me encanto las flores personalizadas que hiciste para embellecer más tu topper, excelente trabajo.
Tu comunidad artesana ahora es testigo

Gracias por el apoyo, lo aprecio mucho!