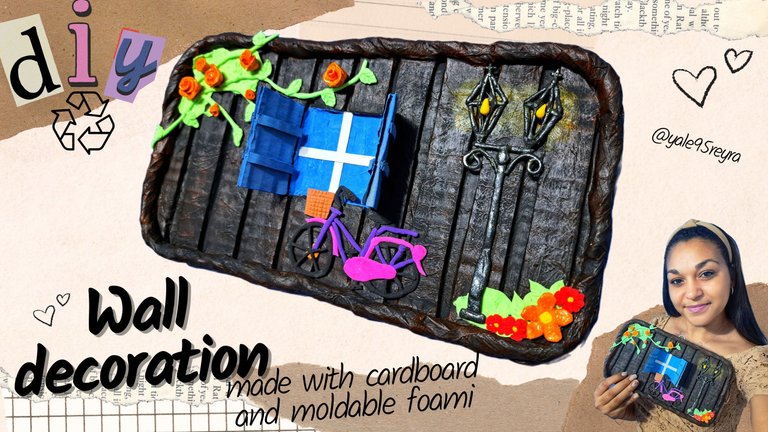
For some time now I have been thinking about changing the decoration of the office where I work and I think it is time to do it. To accomplish this task I have to create some ornaments to place on the wall since that is the area I want to beautify mainly. Today I want to show you the step by step of how I made one of the ornaments that I will soon place in my office.
The ornament in question is made with cardboard and moldable foami and is a representation of the exterior of a house. Additionally I added a bicycle made by me that is an almost exact replica of the one I currently have. But let's not dwell any longer and let's start with the tutorial.
Desde hace algún tiempo me ando planteando la idea de cambiar un poco la decoración de la oficina donde trabajo y creo que ya es hora de hacerlo. Para cumplir con esa tarea debo crear algunos adornos para colocar en la pared ya que ese es el área que quiero embellecer principalmente. En el día de hoy quiero mostrarles el paso a paso de como hice uno de los adornos que próximamente colocaré en mi oficina.
El adorno en cuestión está elaborado con cartón y foami moldeable y es una representación del exterior de una vivienda. Adicionalmente le agregue una bicicleta hecha por mí que es una replica casi exacta de la que tengo actualmente. Pero no nos entretengamos más y comencemos con el tutorial.

Materials // Materiales
- Recycled cardboard / Cartón reciclado
- Paper / Papel
- Silicone / Silicona
- Cutter / Cúter
- Paint / Pintura
- Ruler / Regla
- Pencil / Lápiz
- Brush / Pincel
- Liquid glue / Pegamento líquido
- Cooking paper / Papel de cocina
- Moldable Foami / Foami moldeable
Step by step // Paso a paso
 |
 |
 |
 |
 |
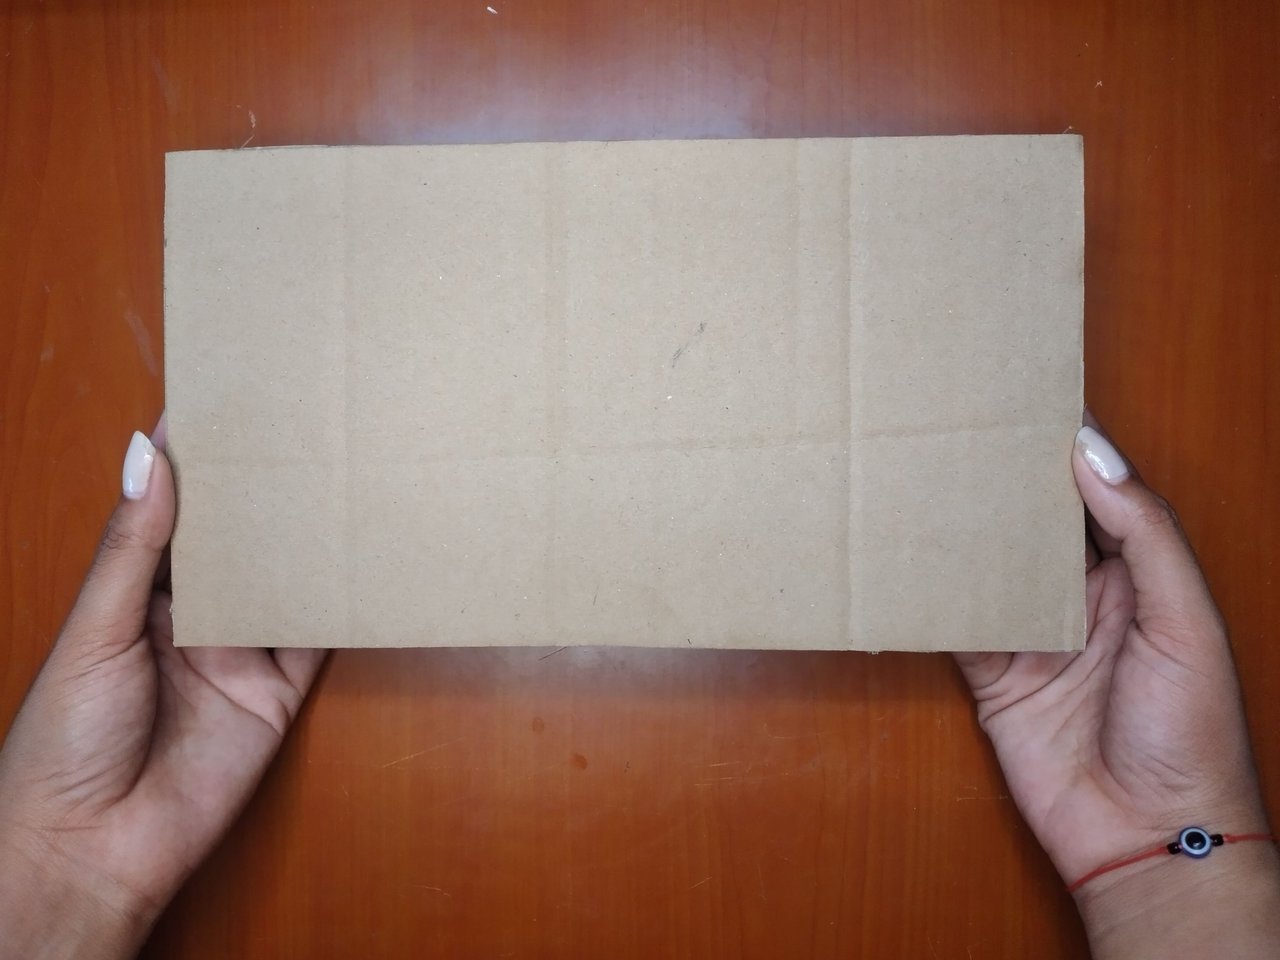
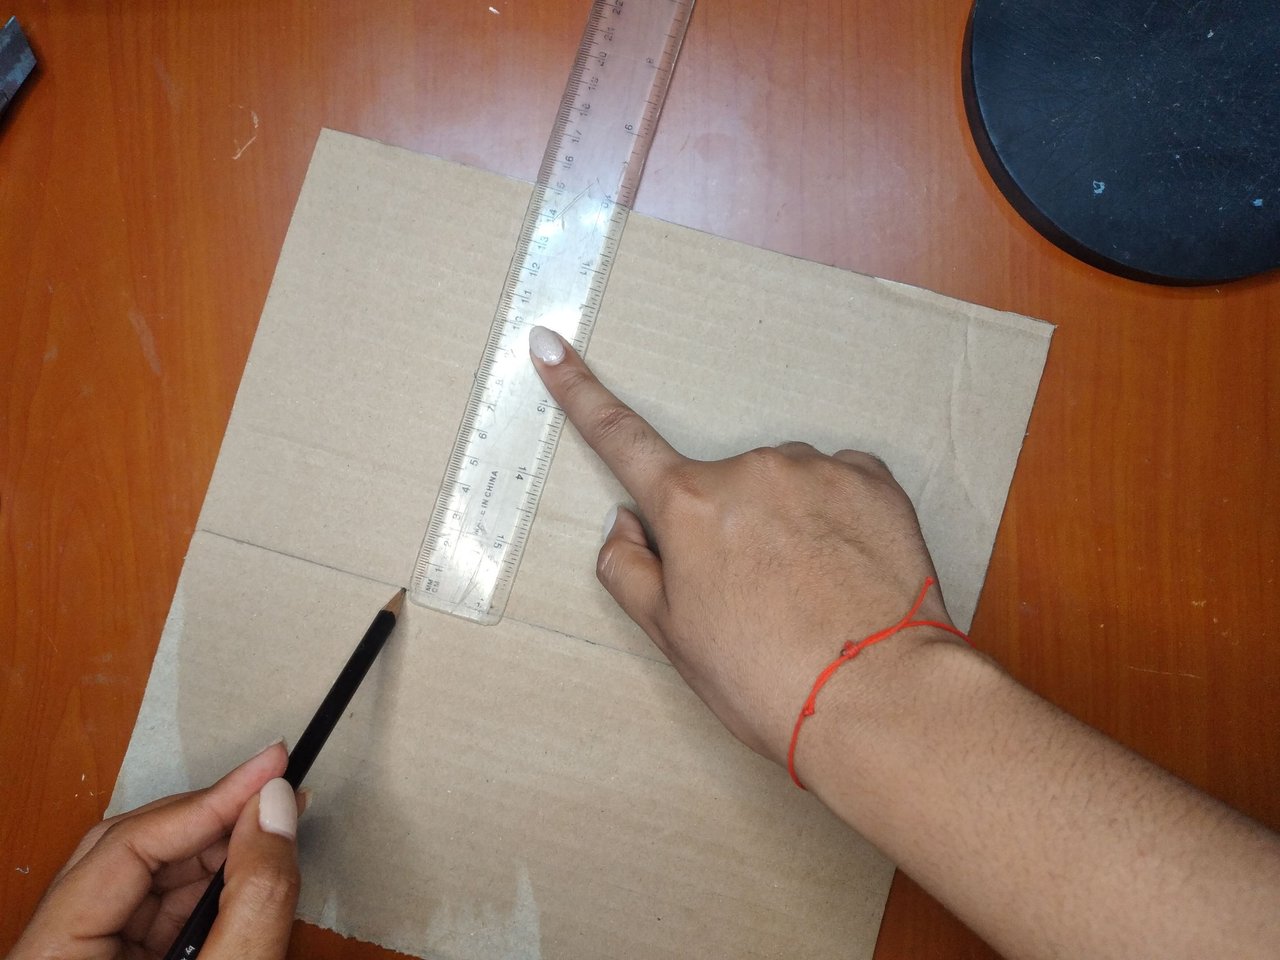
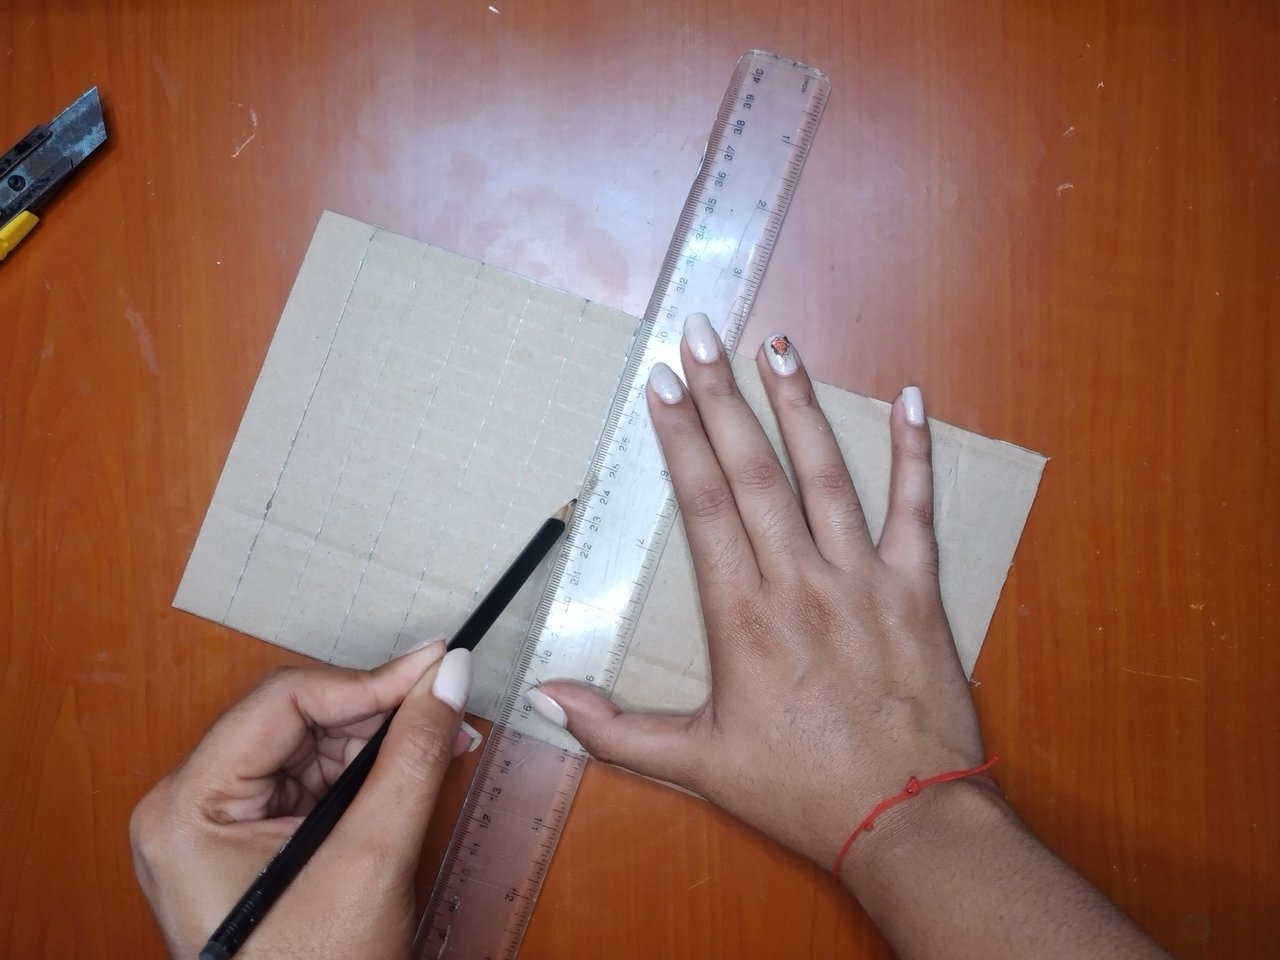
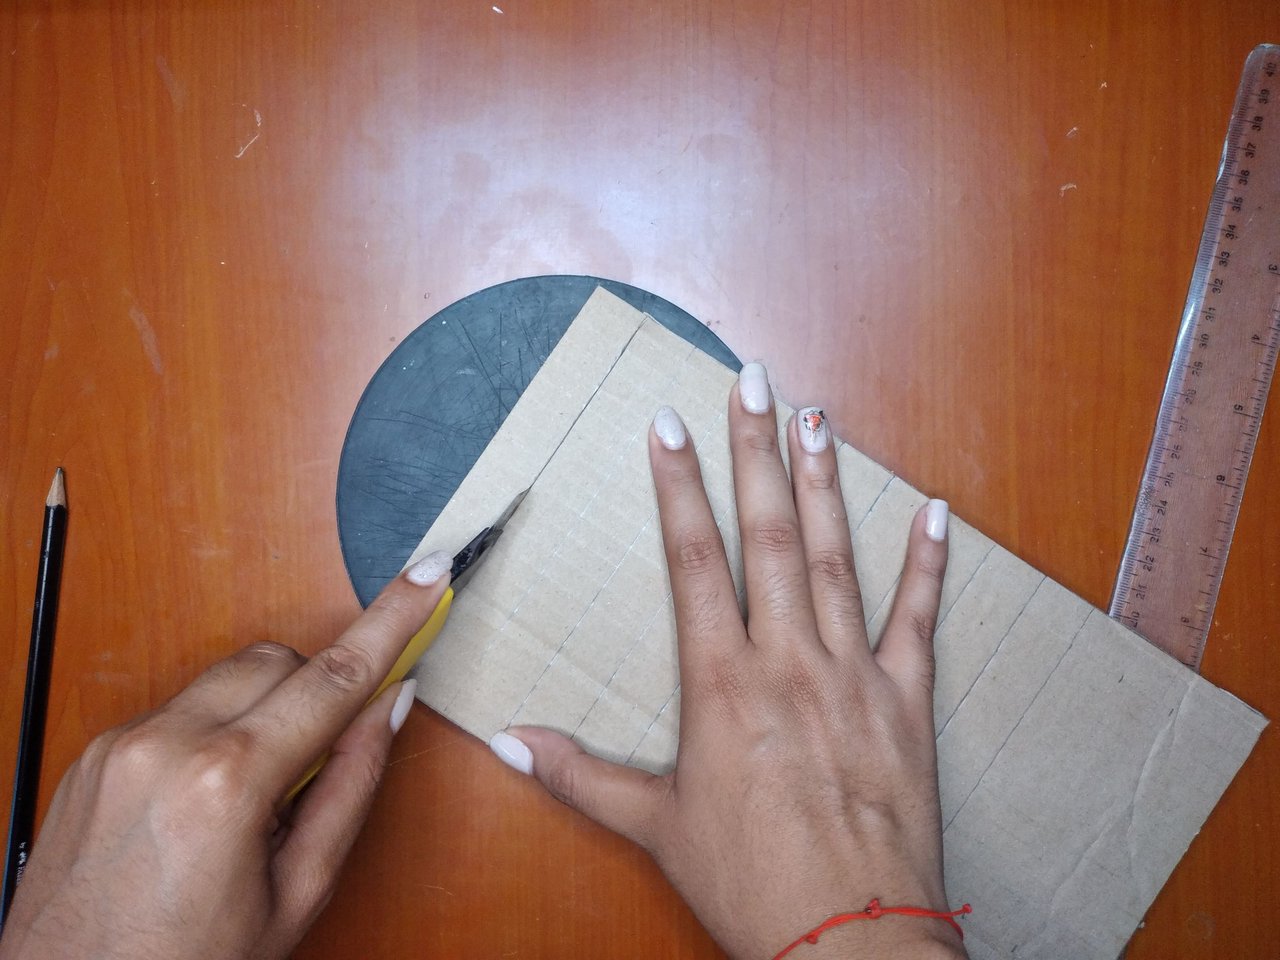
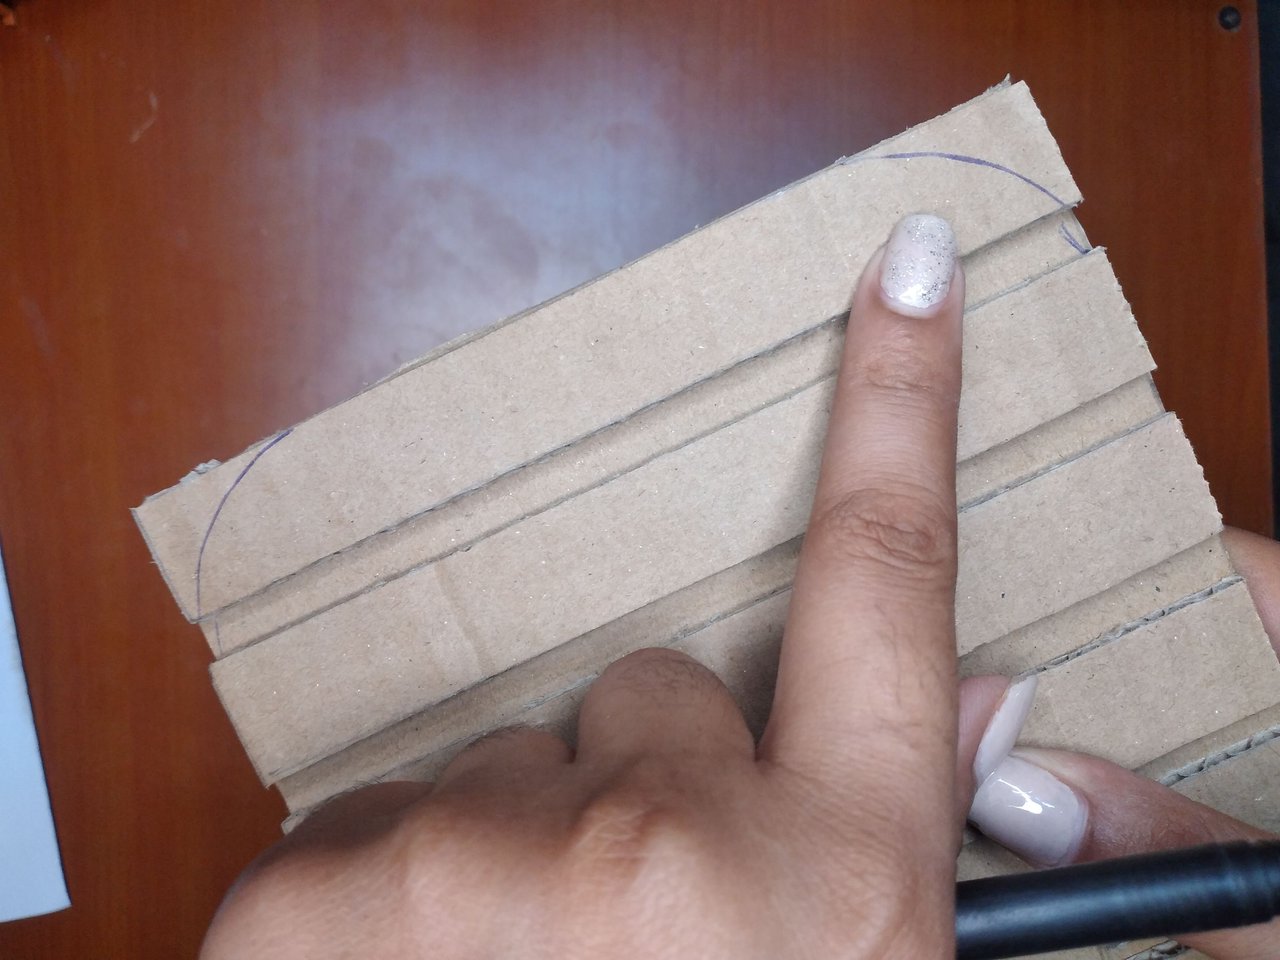
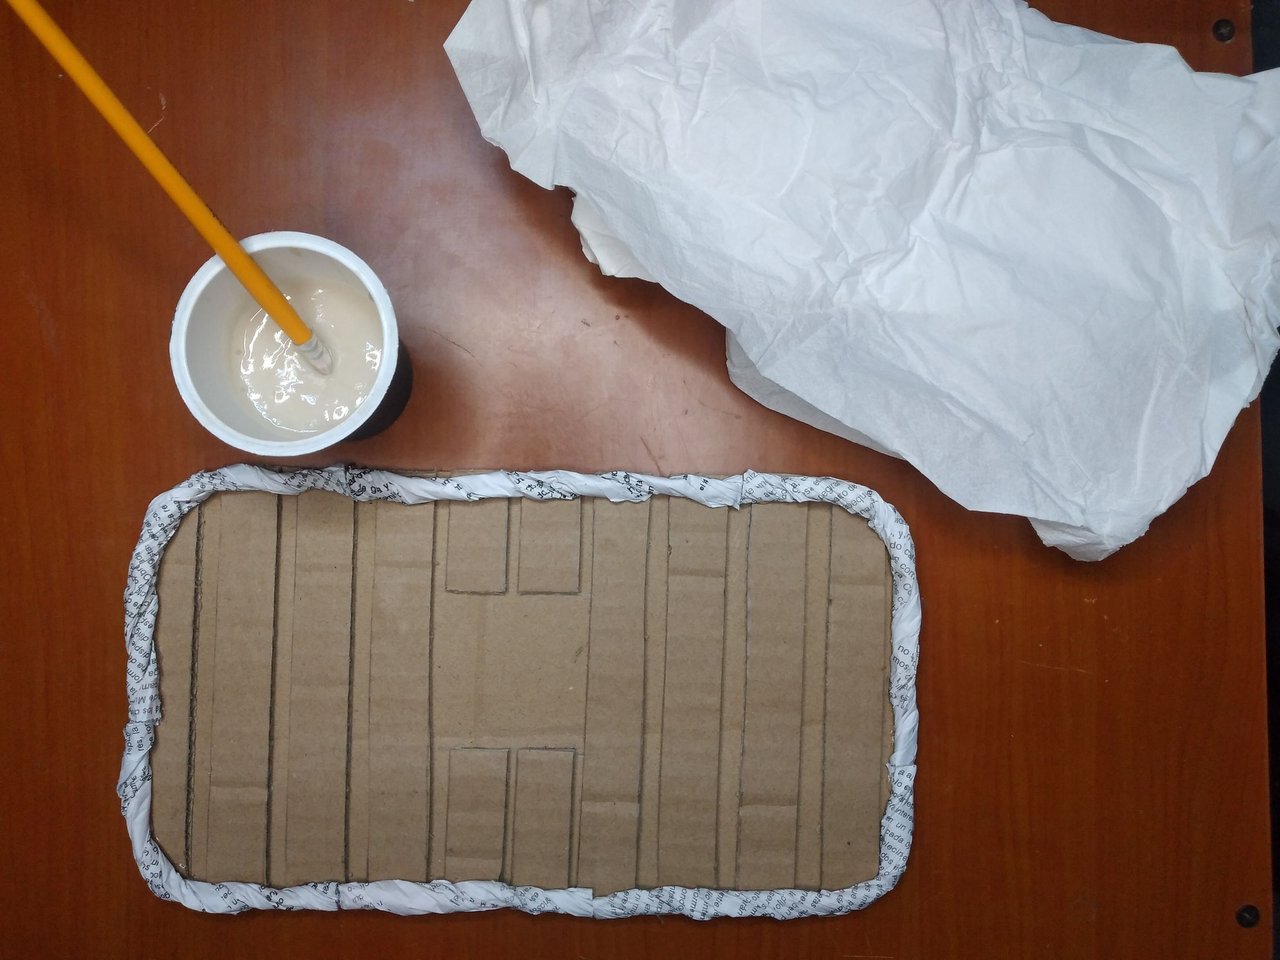
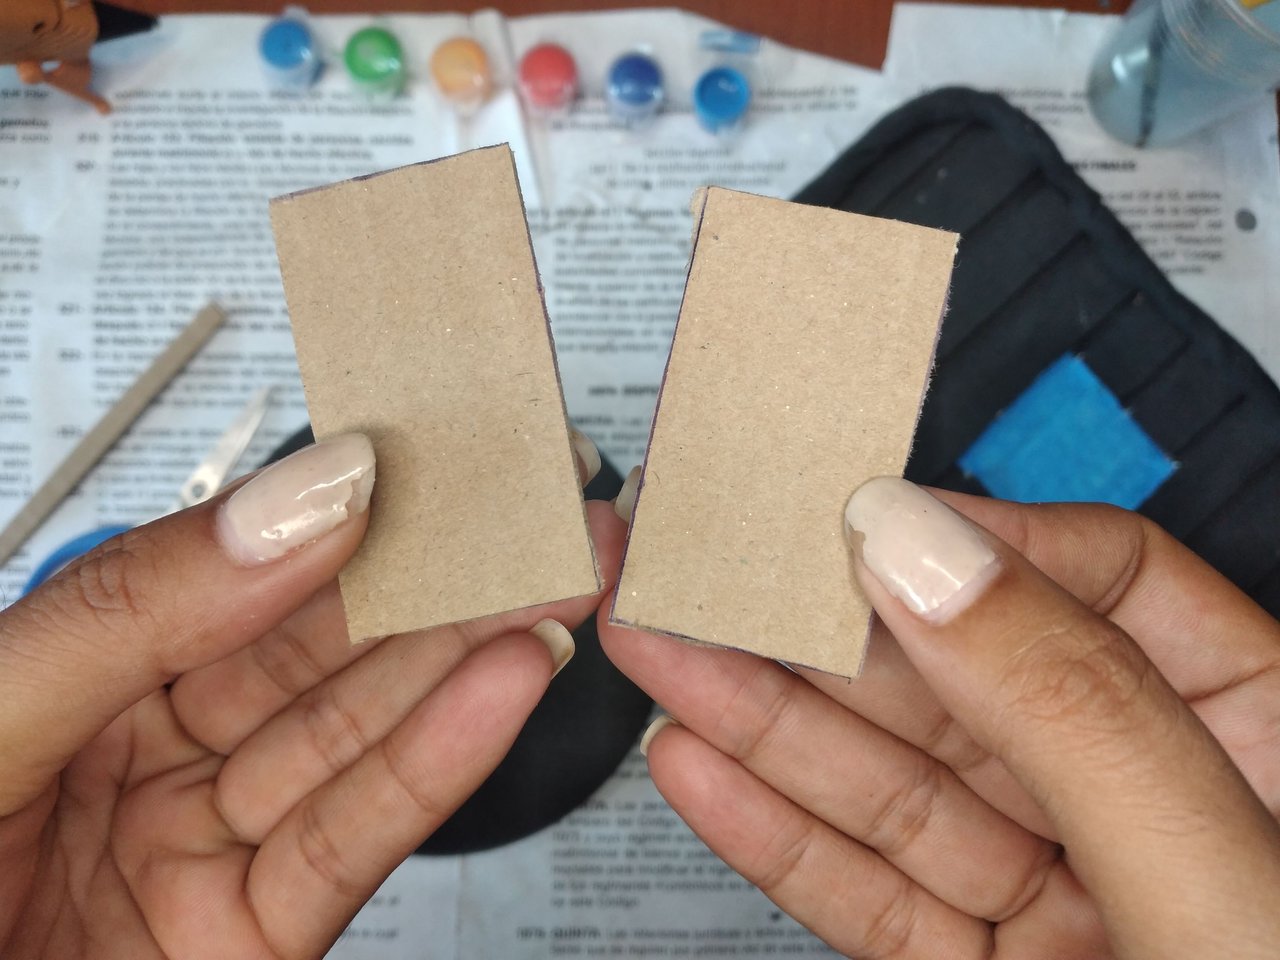
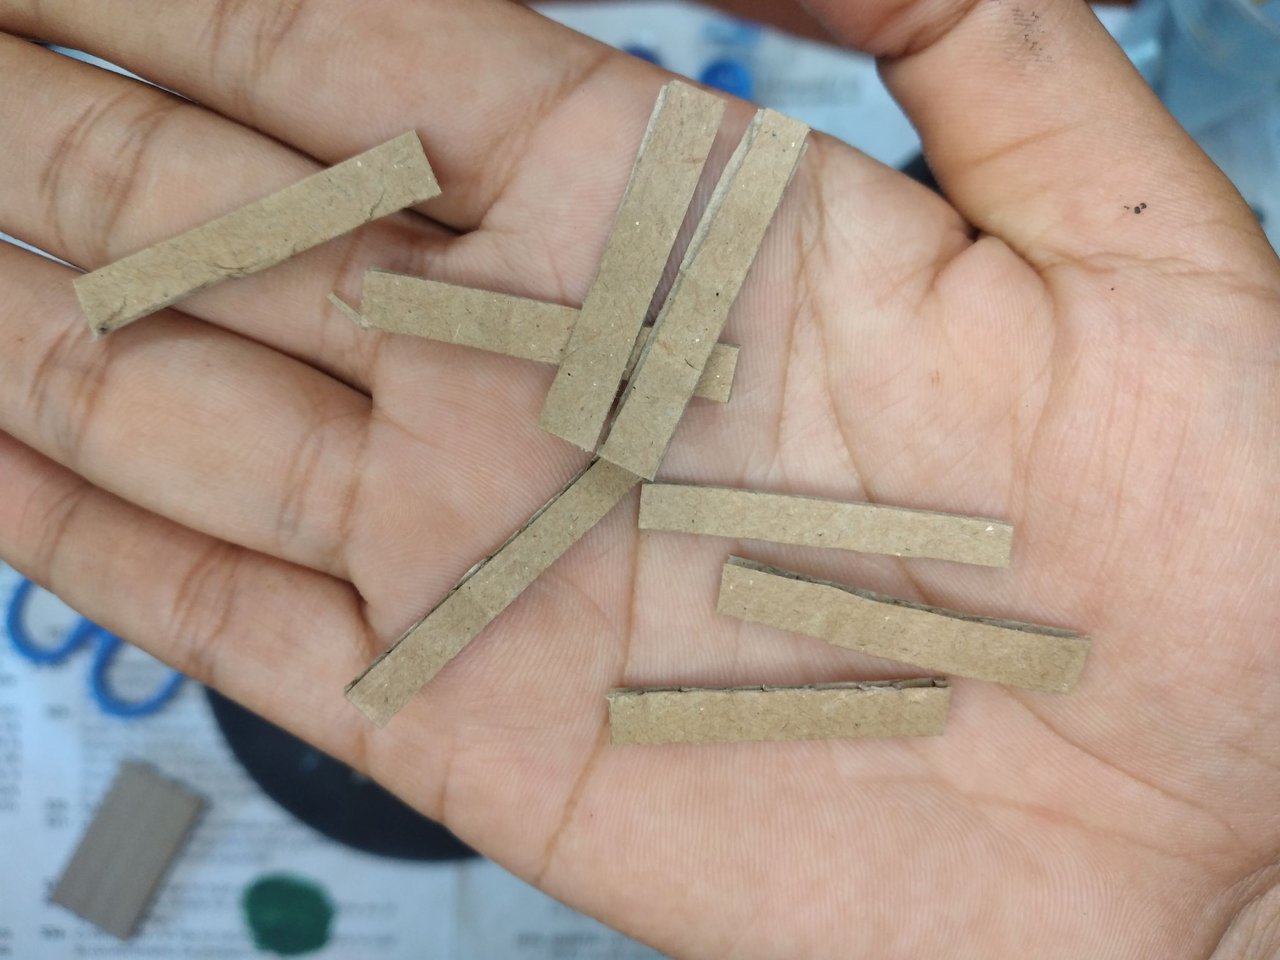
To begin, take a 26x15 cm piece of cardboard, this was the size I used, but you can make it any size you want. Make another identical piece, of the same size, to which you will make divisions with a pencil 2 cm wide and then cut them with the cutter or scissors, whichever is easier for you. These cardboard segments will be our boards.
Para comenzar, tomar una pieza de cartón de 26x15 cm, esta fue la medida que utilicé, puedes hacerlo del tamaño que desees. Hacer otra pieza idéntica, de la misma medida, a la cual se le harán divisiones con un lápiz de 2 cm de ancho para luego cortarlas con el cúter o una tijera, como te sea más fácil. Estos segmentos de cartón serán nuestras tablas.
 |
 |
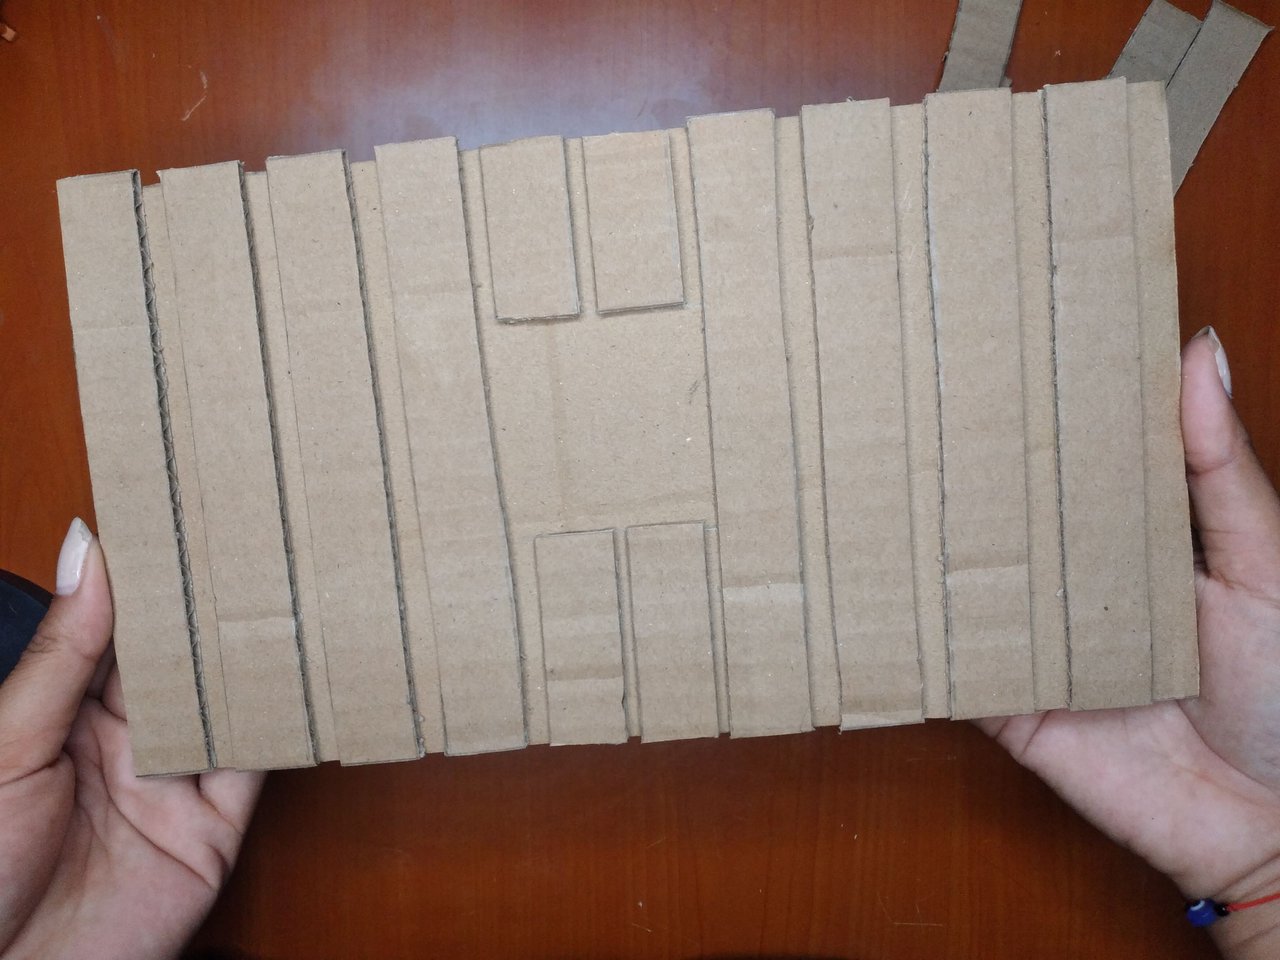 |
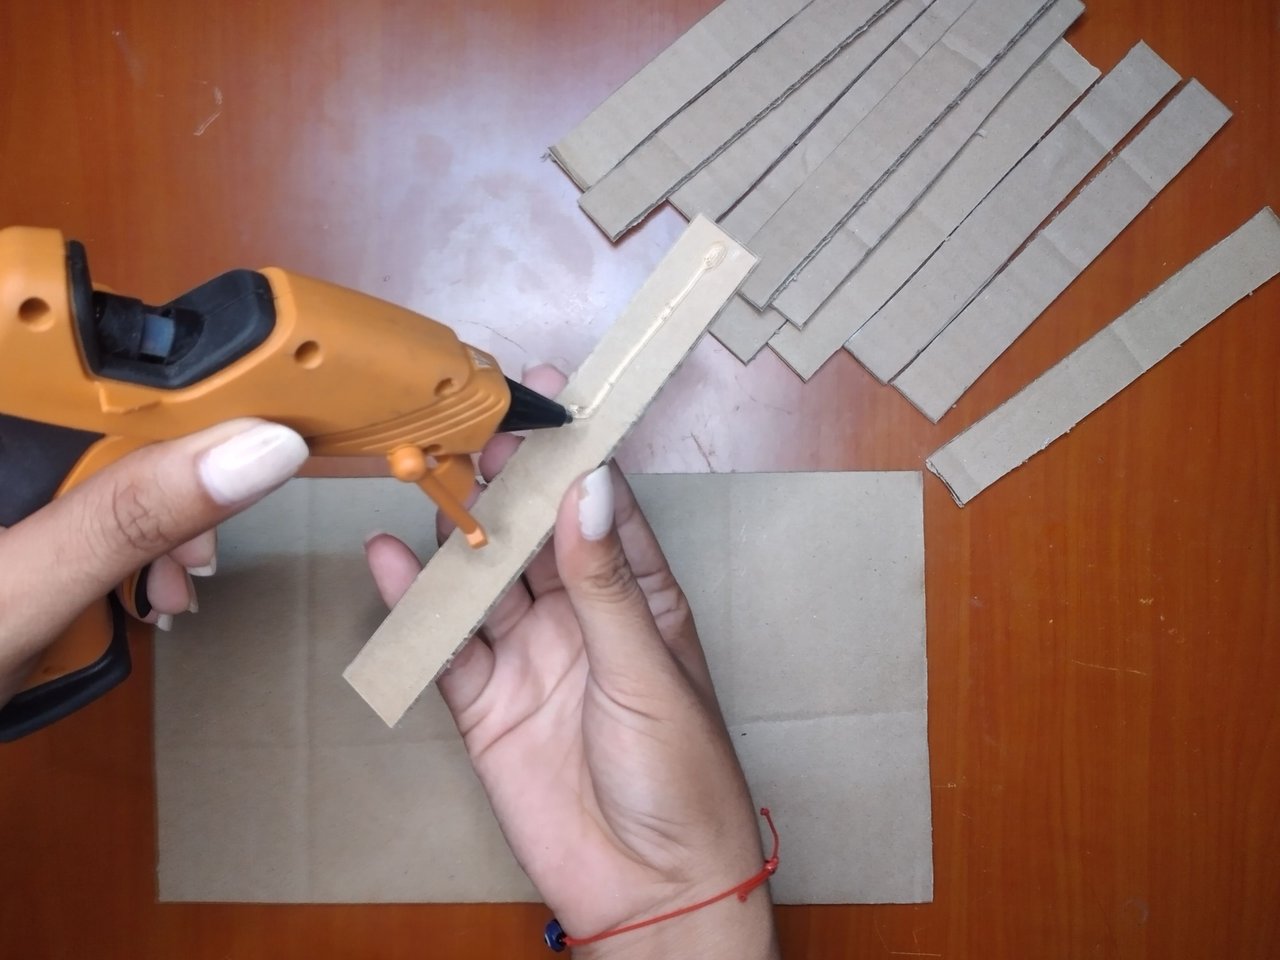
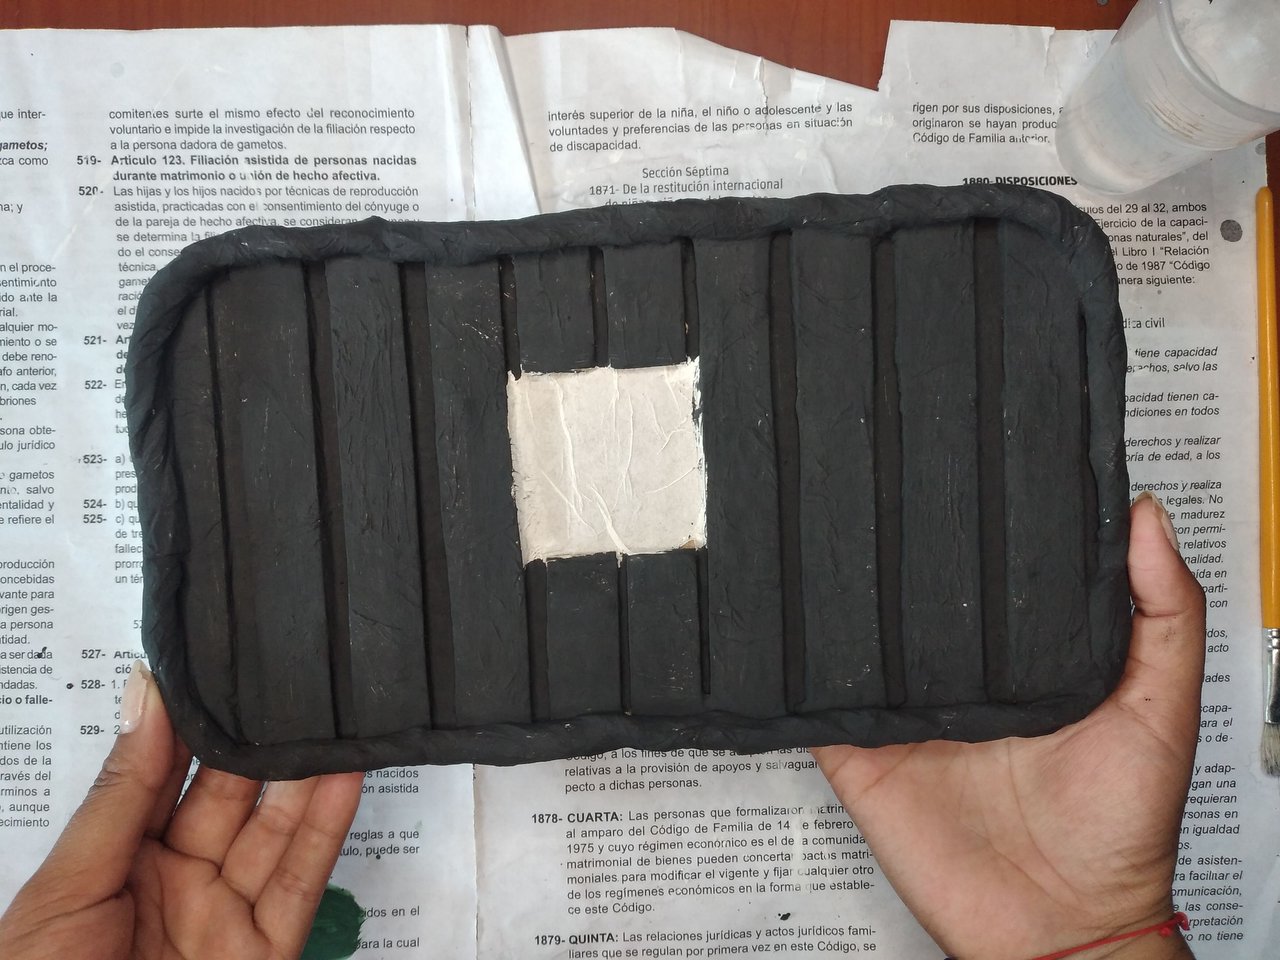
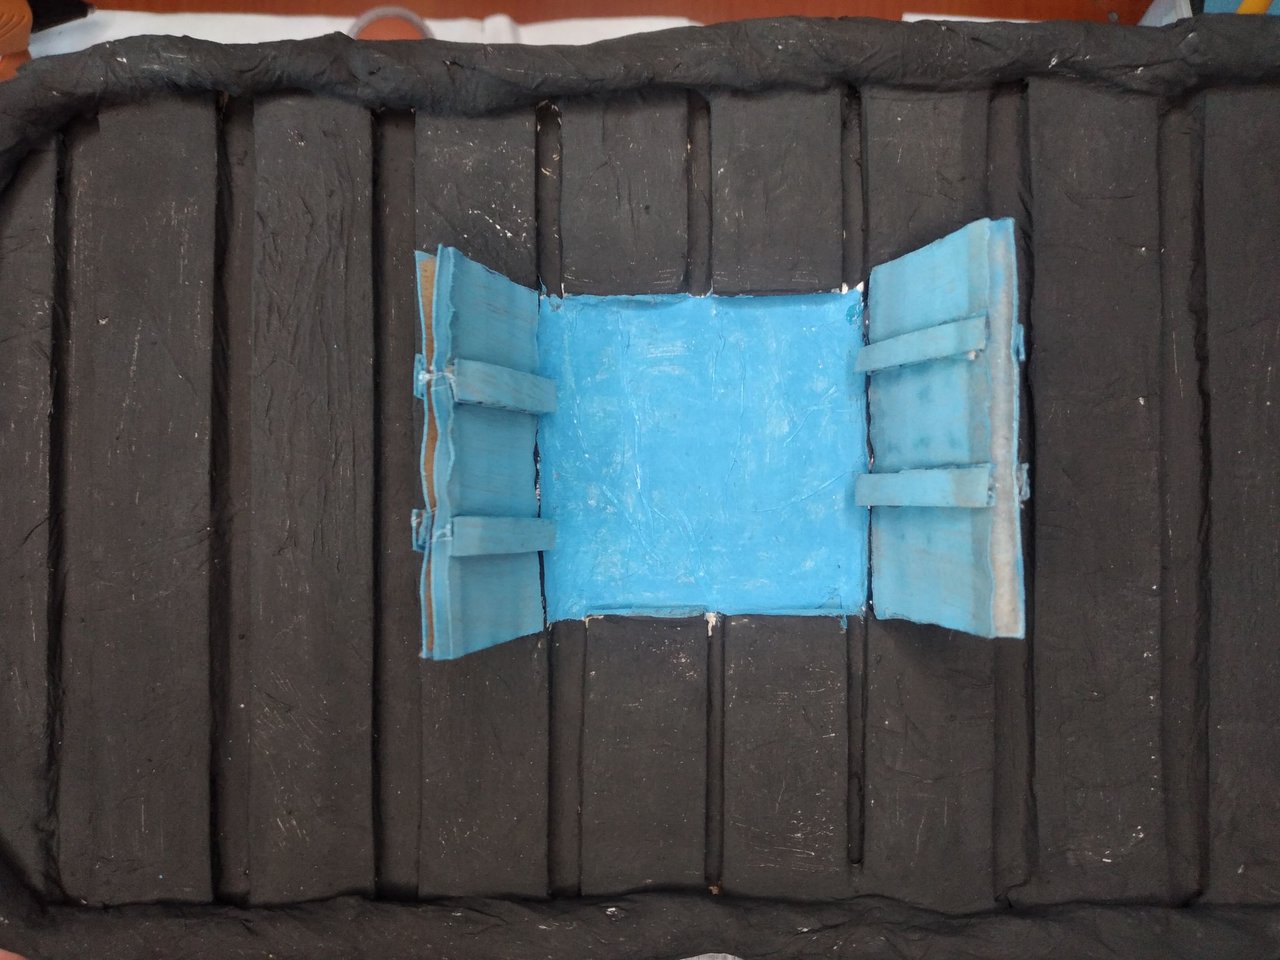
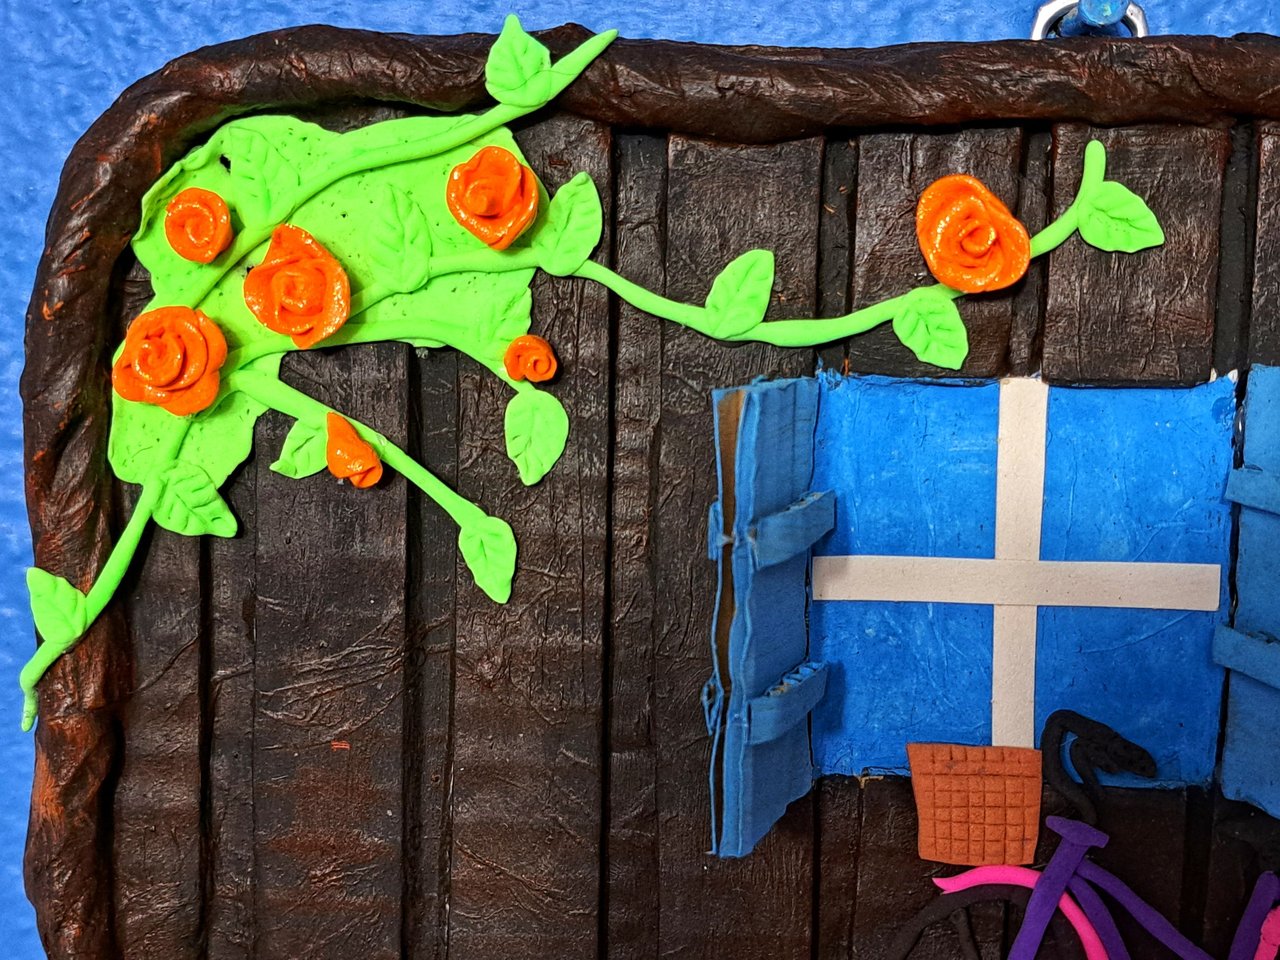
Glue with silicone side by side leaving a separation of 7 mm. Leave a space near the center where we will place a window.
Pegar con silicona una al lado de otra dejando una separación de 7 mm. Dejar un espacio cerca del centro donde colocaremos una ventana.
 |
 |
I didn't want the edges to be at right angles so I drew a curve at each corner and then cut them out.
No quería que los bordes fueran en ángulo recto por lo que dibujé una curva en cada esquina y luego los recorté.
 |
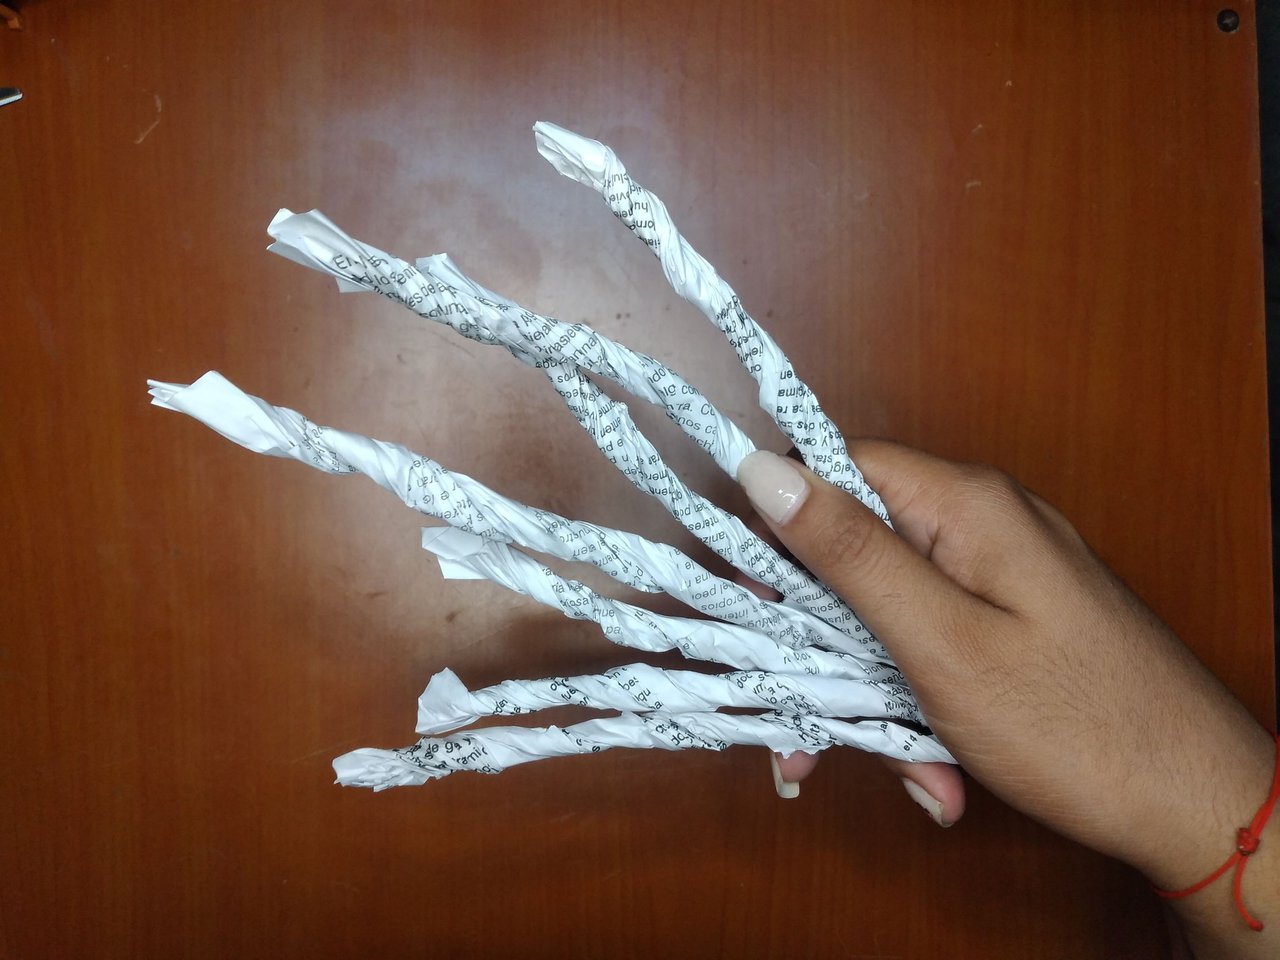 |
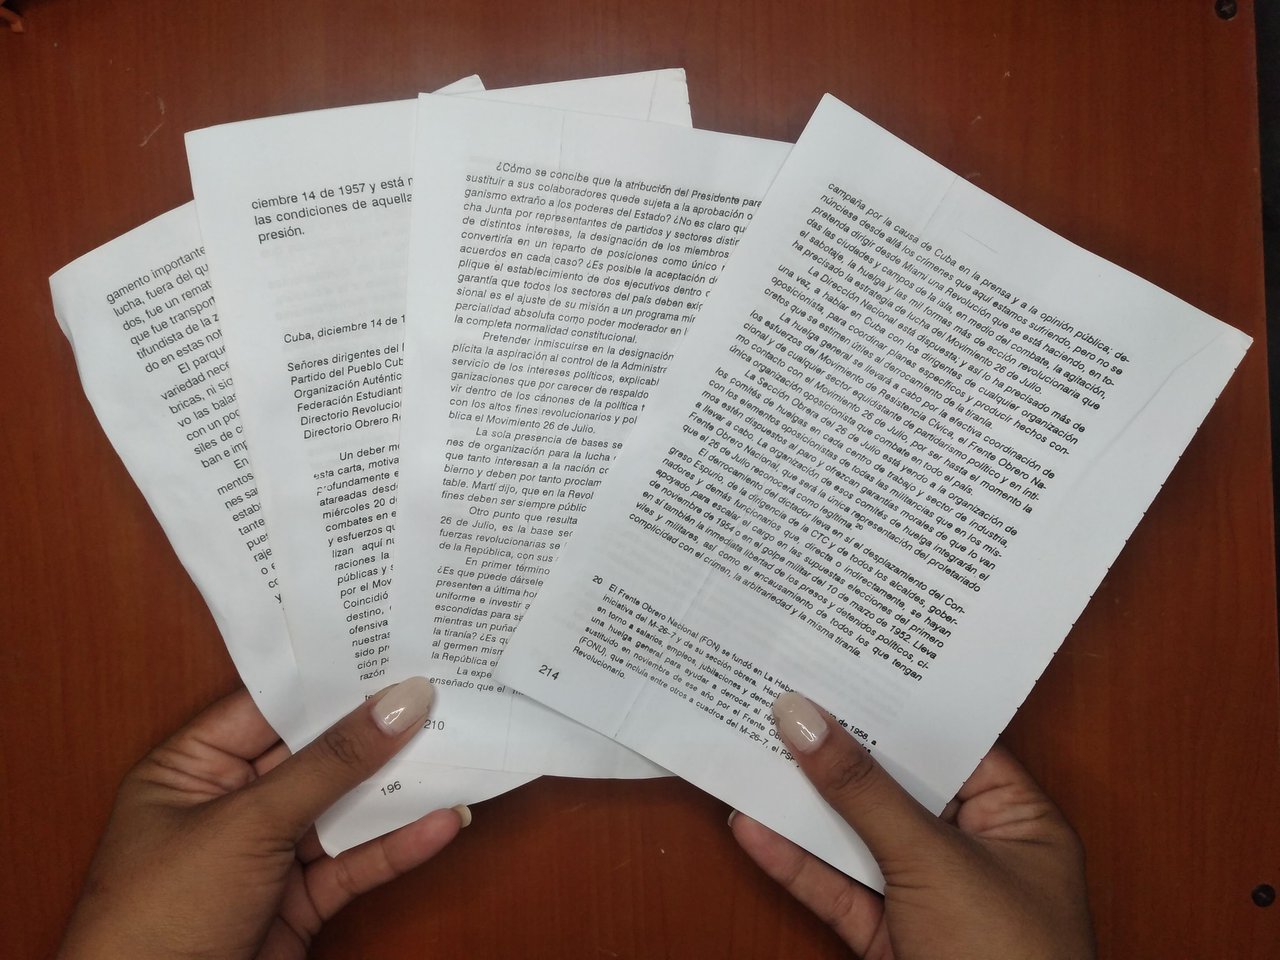
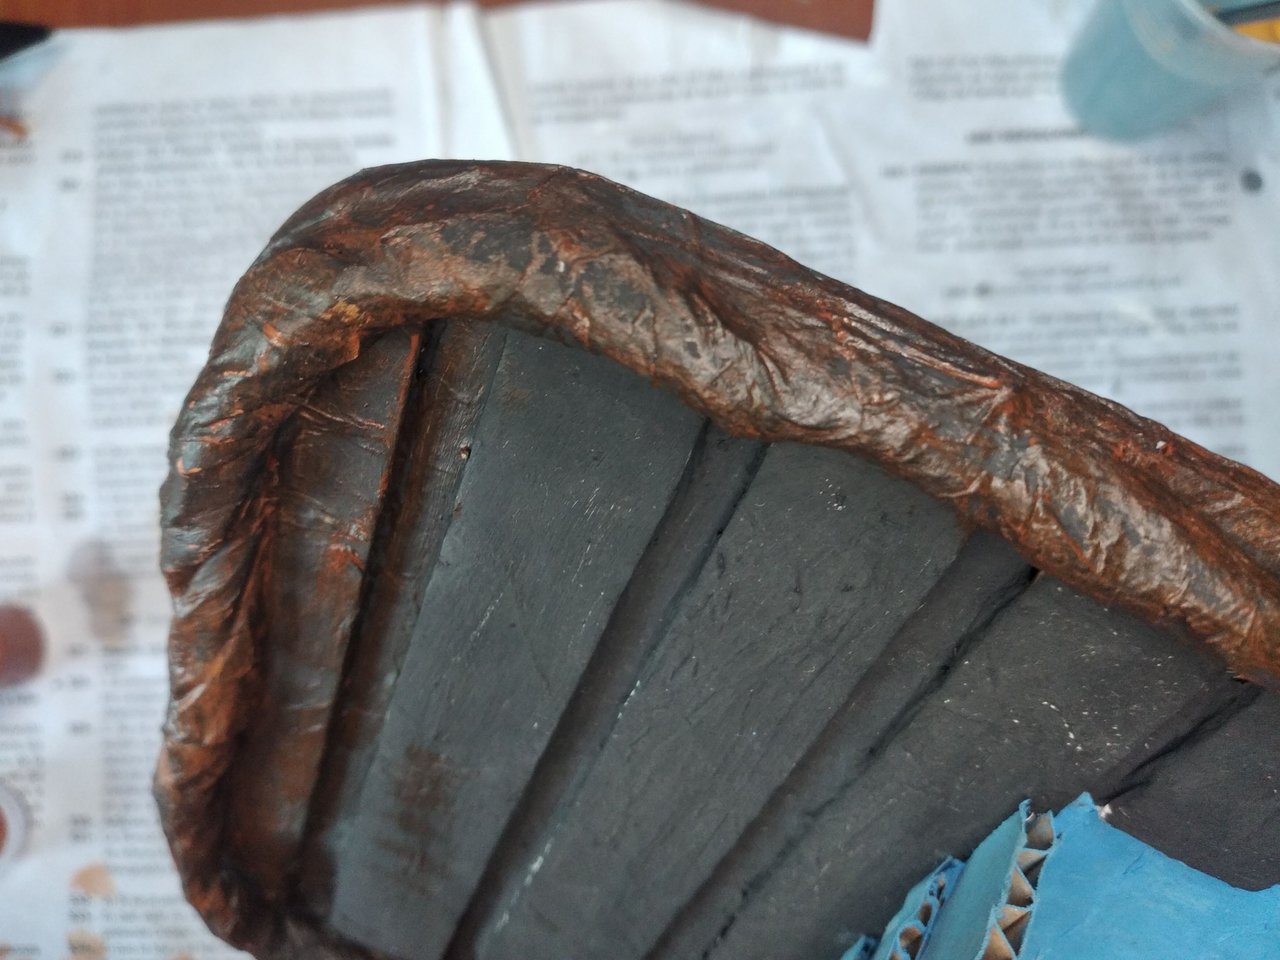
Take a few sheets of recycled paper and twist it lengthwise so that it looks like this. Then chop the ends so that the thickness is even.
Tomar unas hojas de papel recicladas y torcer a todo largo para que quede de esta manera. Luego picar las puntas para que quede parejo el grosor.
 |
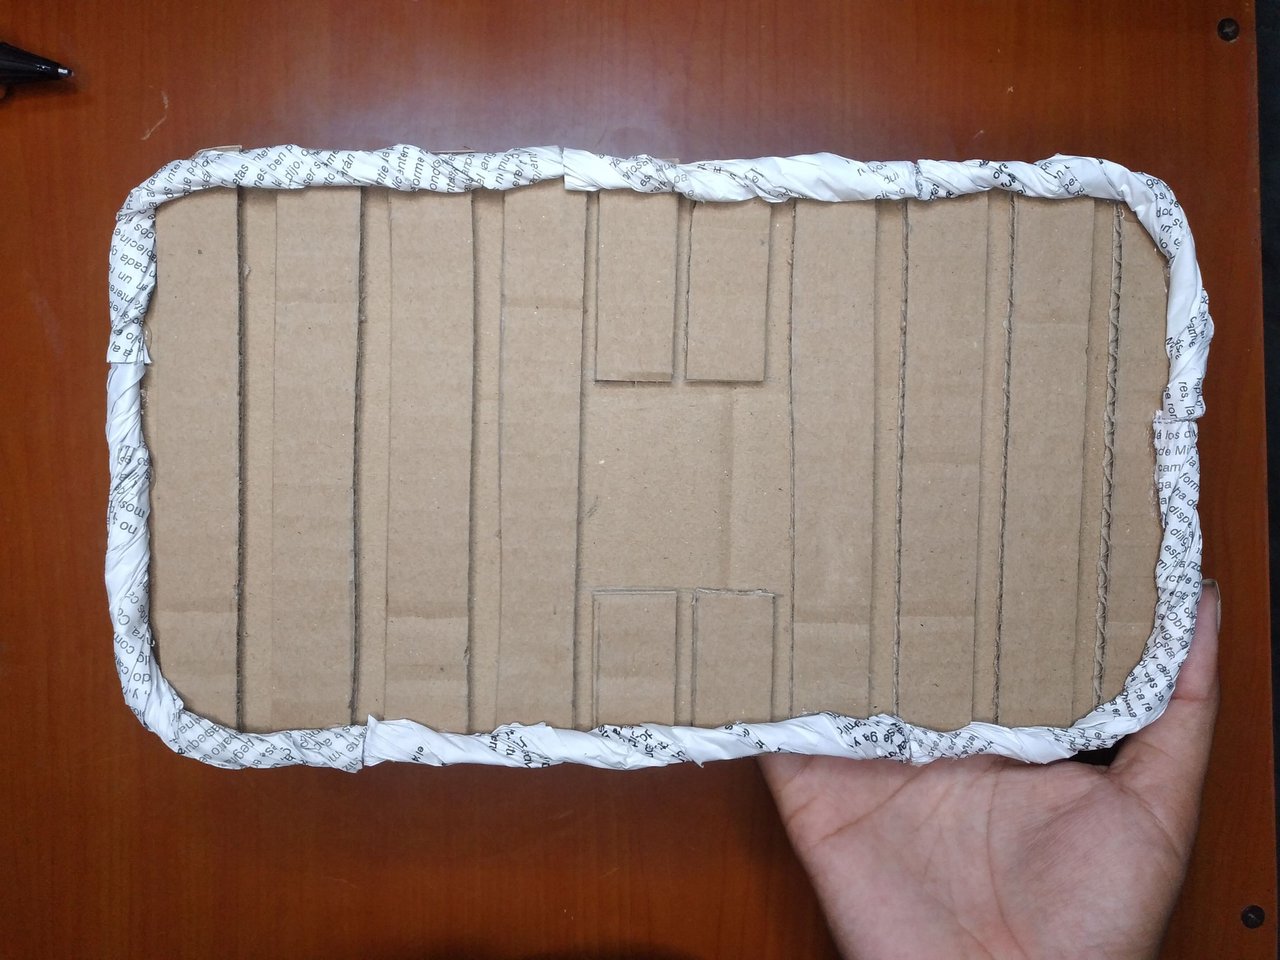 |
Glue the twisted strips all around the edge of the base of the frame.
Pegar las tiras torcidas por todo el borde de la base del cuadro.
 |
 |
 |
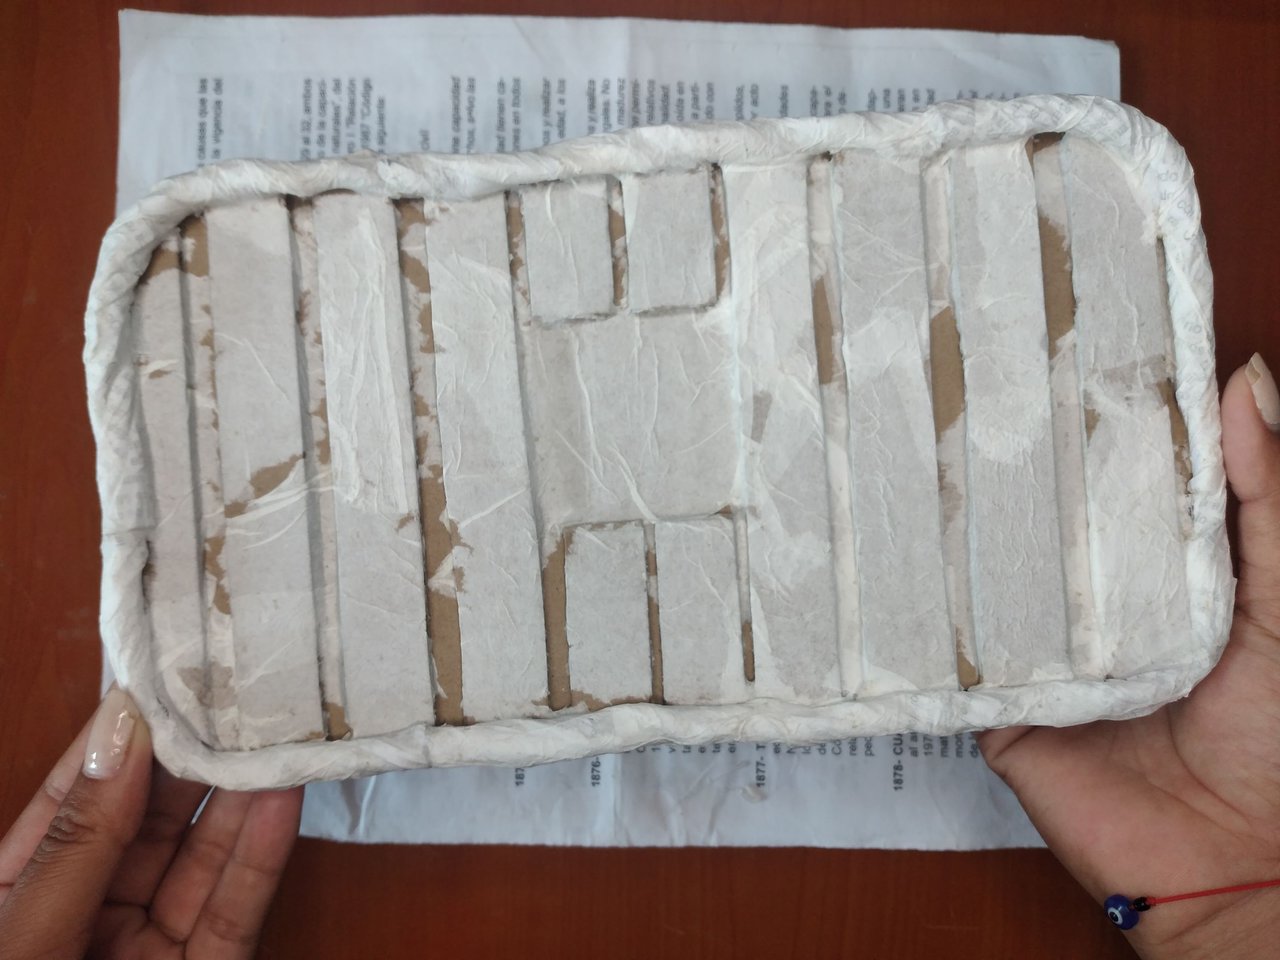 |
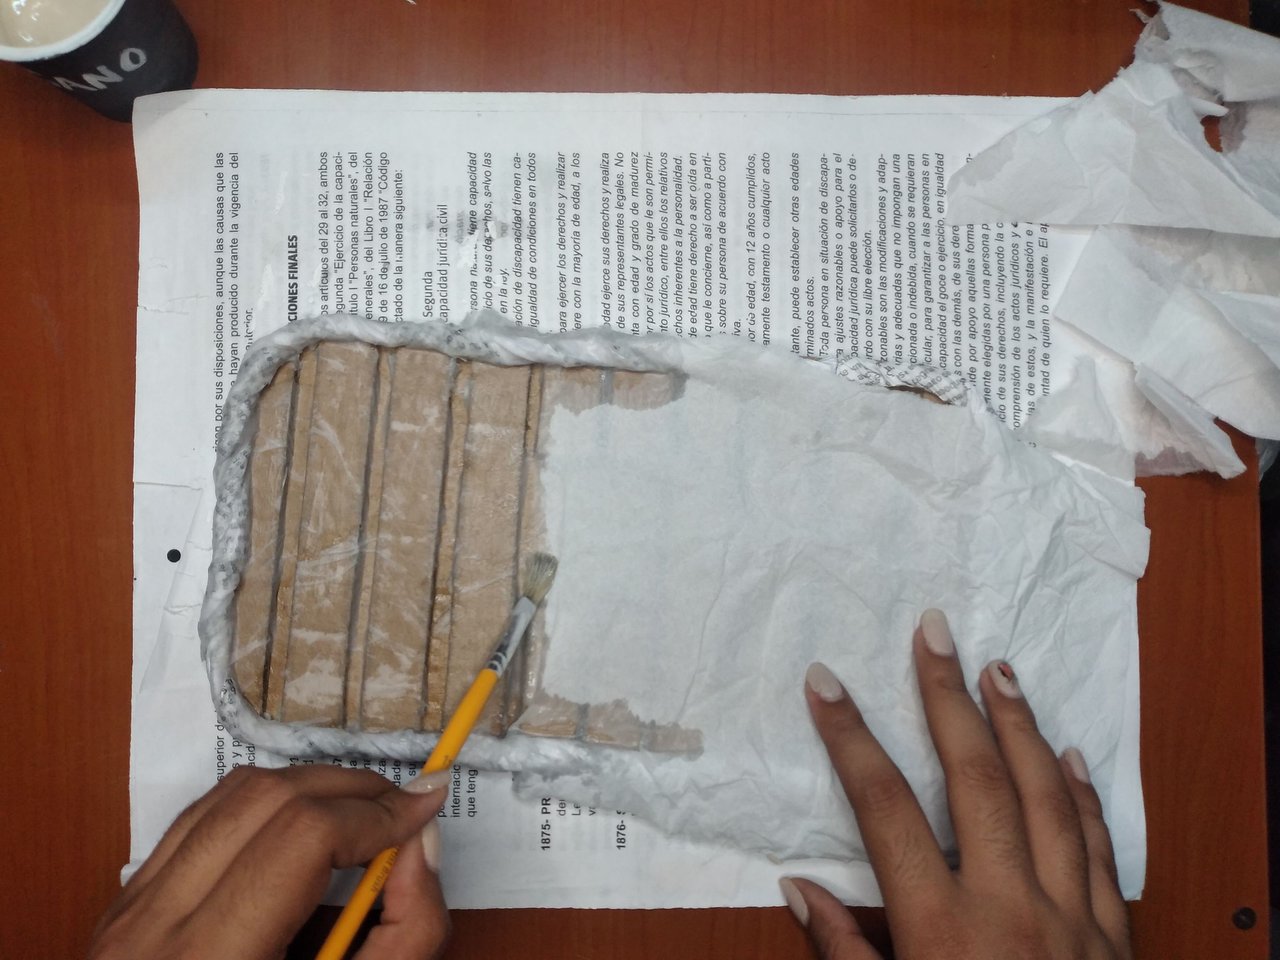
With liquid glue and kitchen paper cover the entire surface to strengthen the structure, cover the imperfections of the cardboard cuts and give it texture.
Con pegamento líquido y papel de cocina cubrir toda la superficie para fortalecer la estructura, tapar las imperfecciones de los cortes del cartón y darle textura.
 |
 |
 |
 |
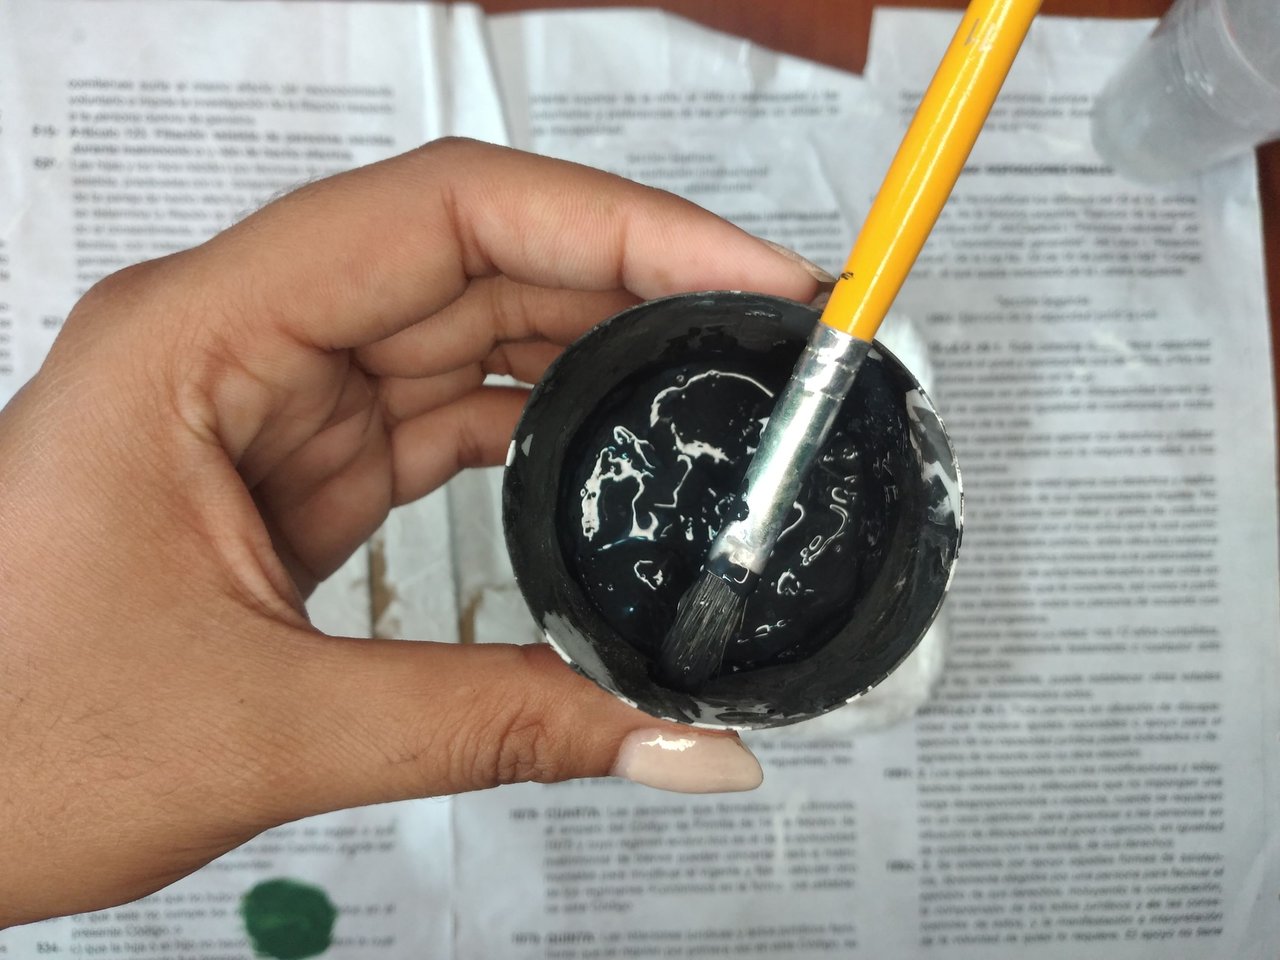
I used a matte black color as a base and the window frame in blue.
Utilicé un color negro mate como base y el cuadro de la ventana de color azul.
 |
 |
 |
 |
 |
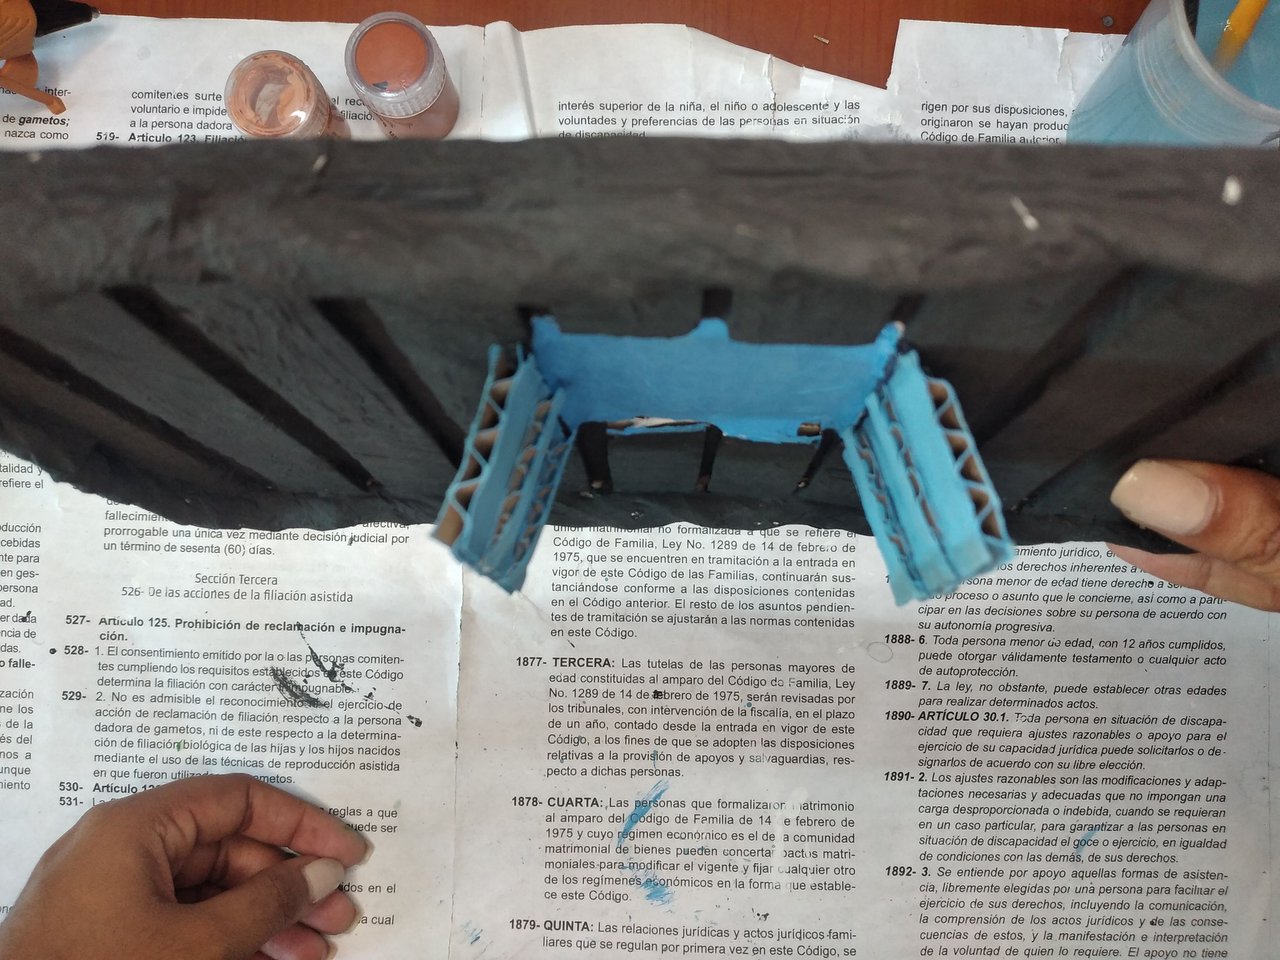 |
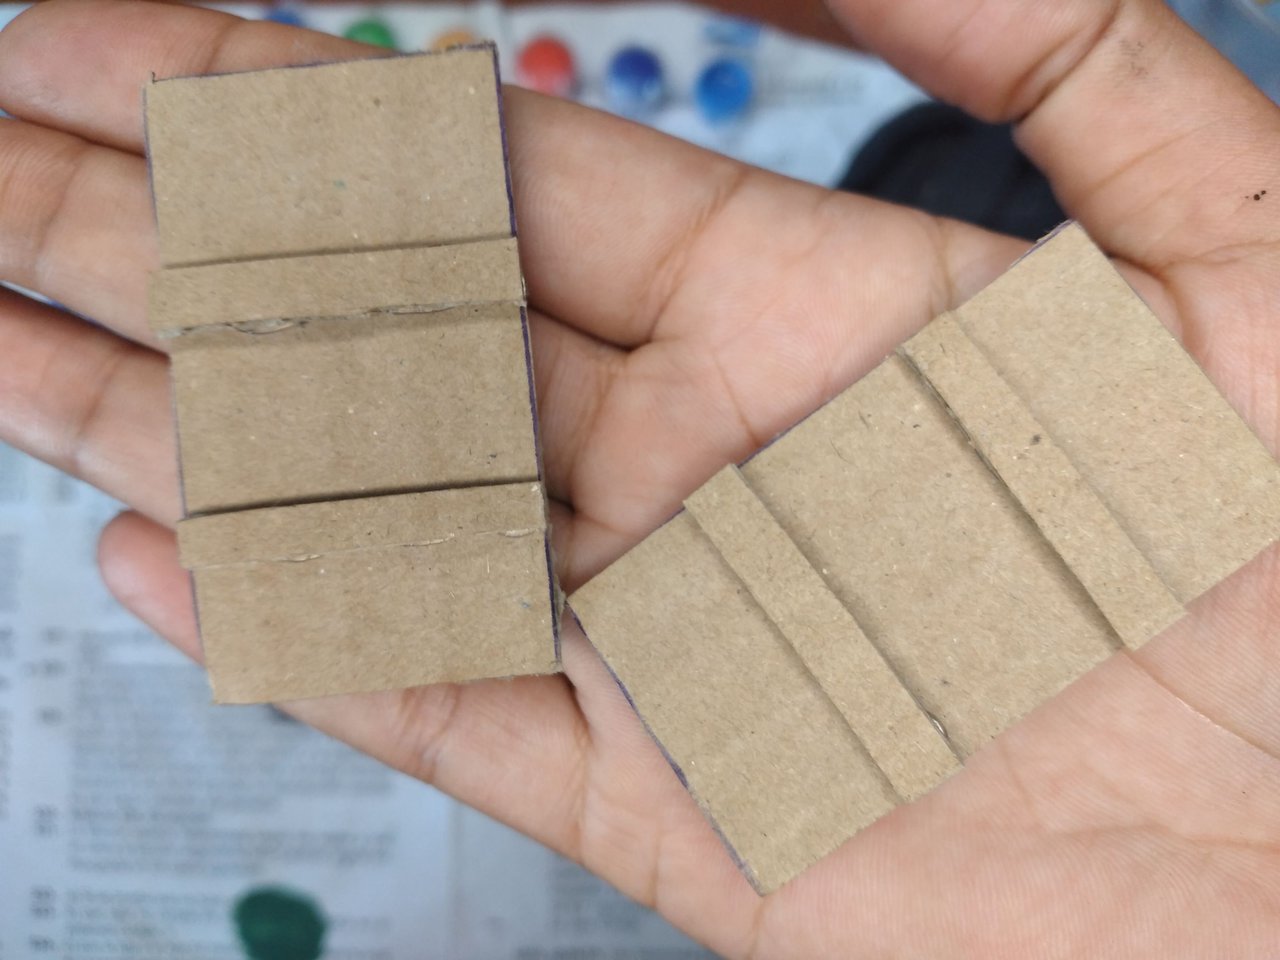
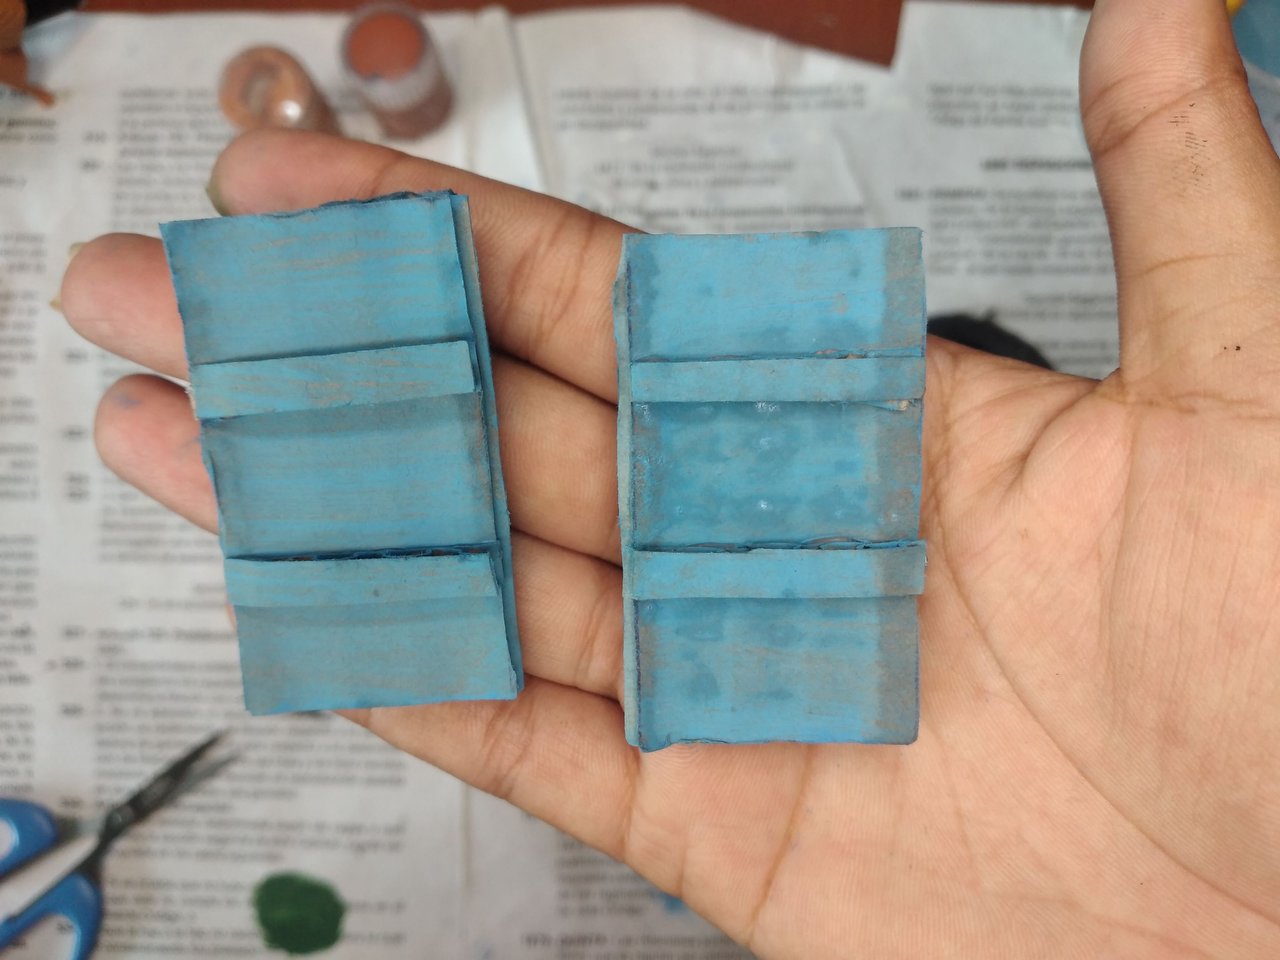
While the paint was drying, I made the windows. For this I cut two pieces of cardboard of 5.5 x 3 cm and some strips of ½ cm x 3 cm to glue them on top and on both sides. Then paint them blue and place them semi-open.
Mientras secaba la pintura, realicé las ventanas. Para ello corte dos piezas de cartón de 5.5 x 3 cm y unas tiras de ½ cm x 3 cm para pegarlas encima y por los dos lados. Luego pintar de color azul y colocar de forma semiabierta.
 |
 |
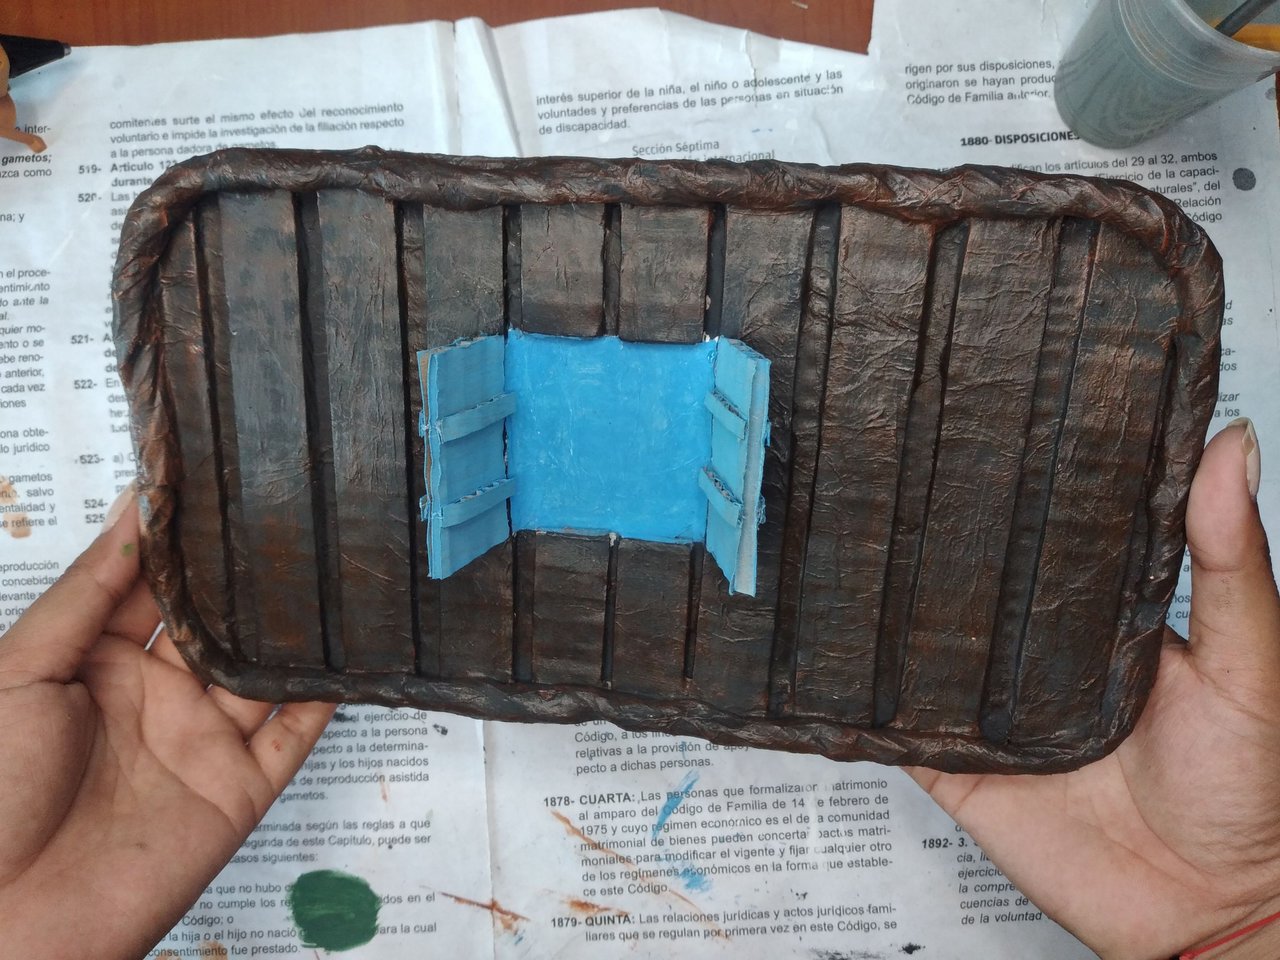 |
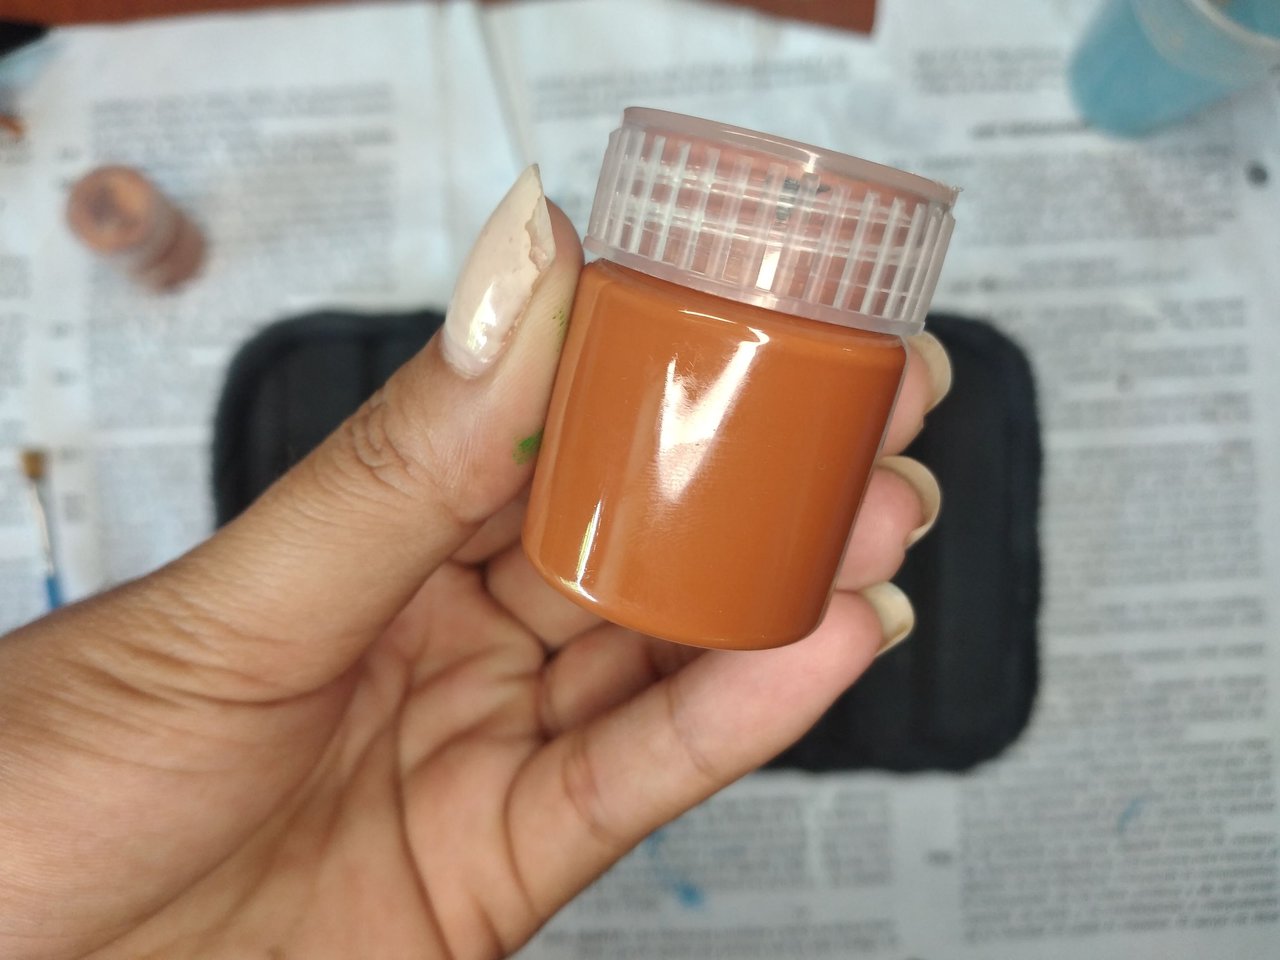
With carmelite paint, brush strokes are applied with an almost dry brush to give it a wood effect.
Con pintura carmelita se le dan pinceladas con el pincel casi seco para darle un efecto madera.
 |
 |
 |
 |
 |
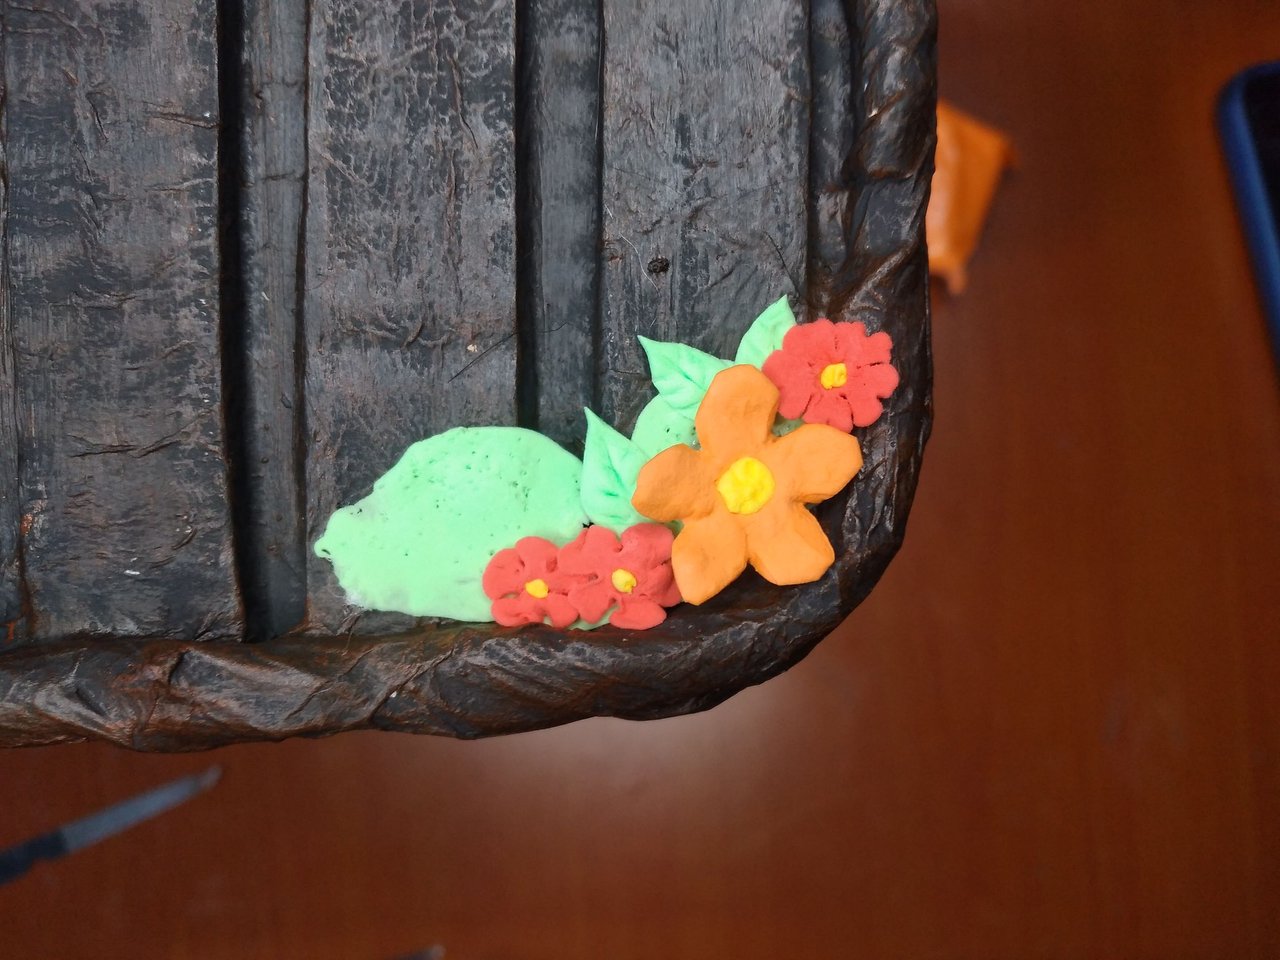 |
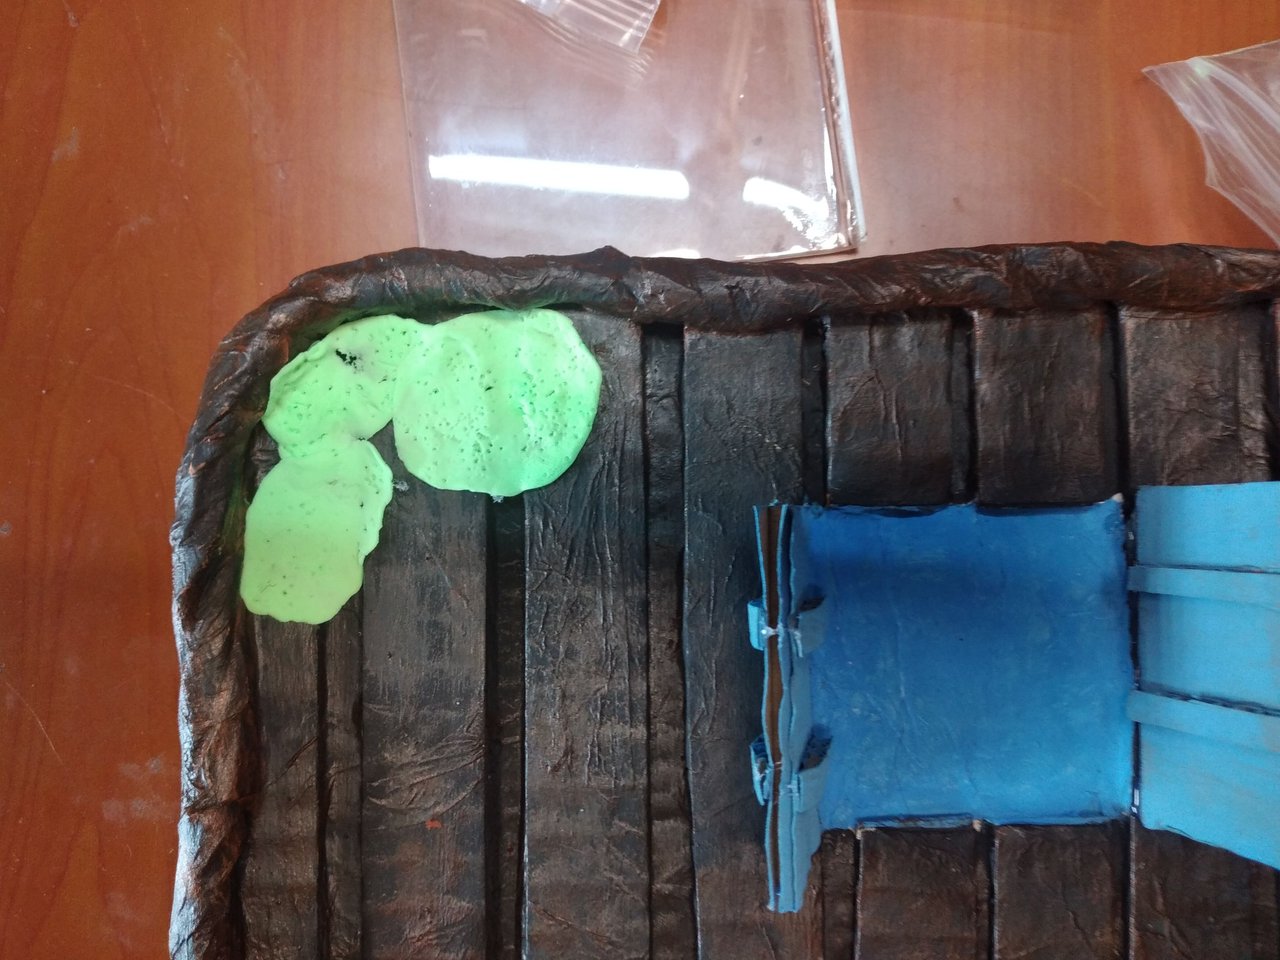
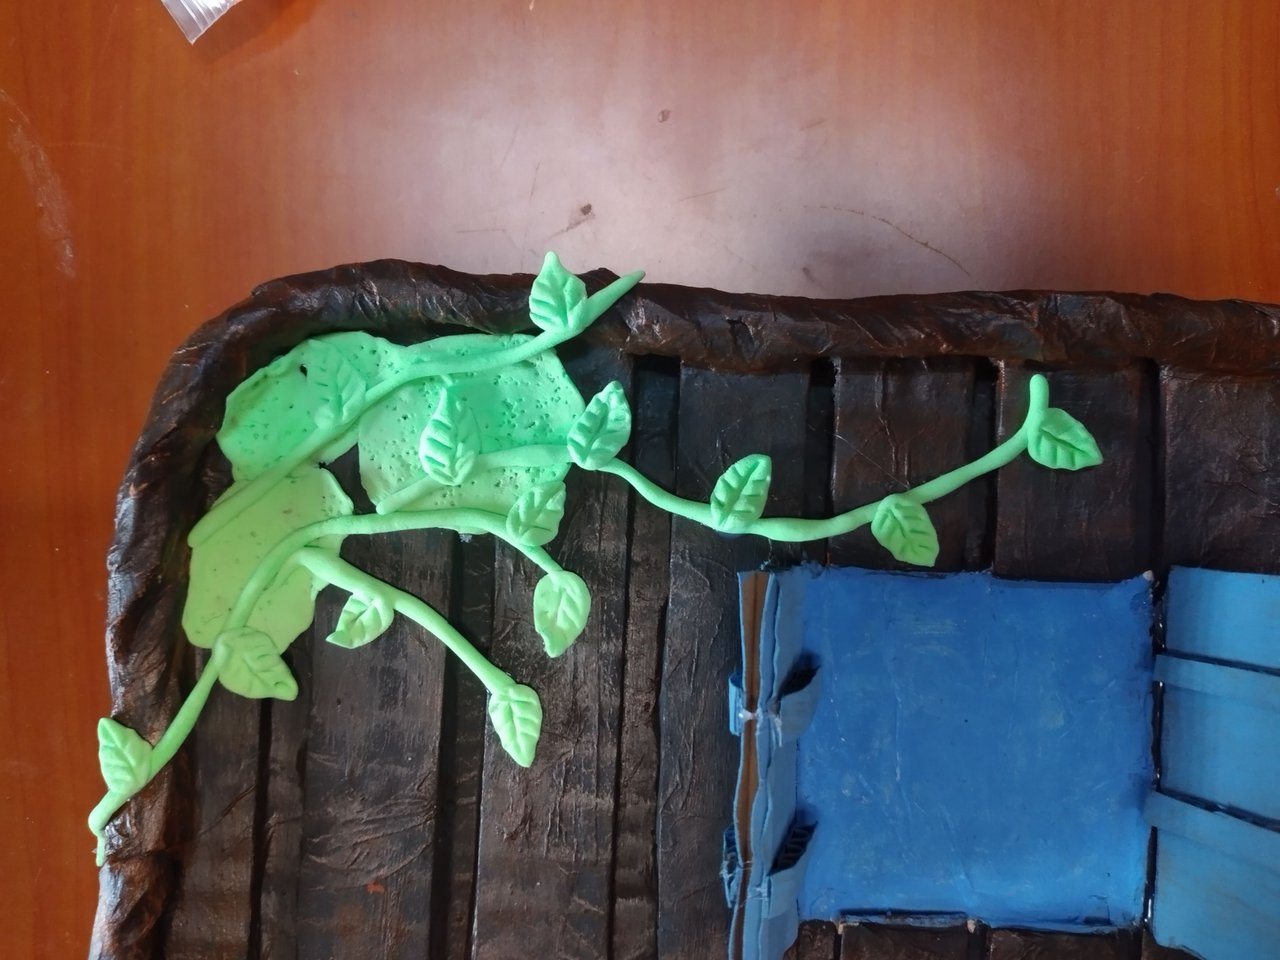
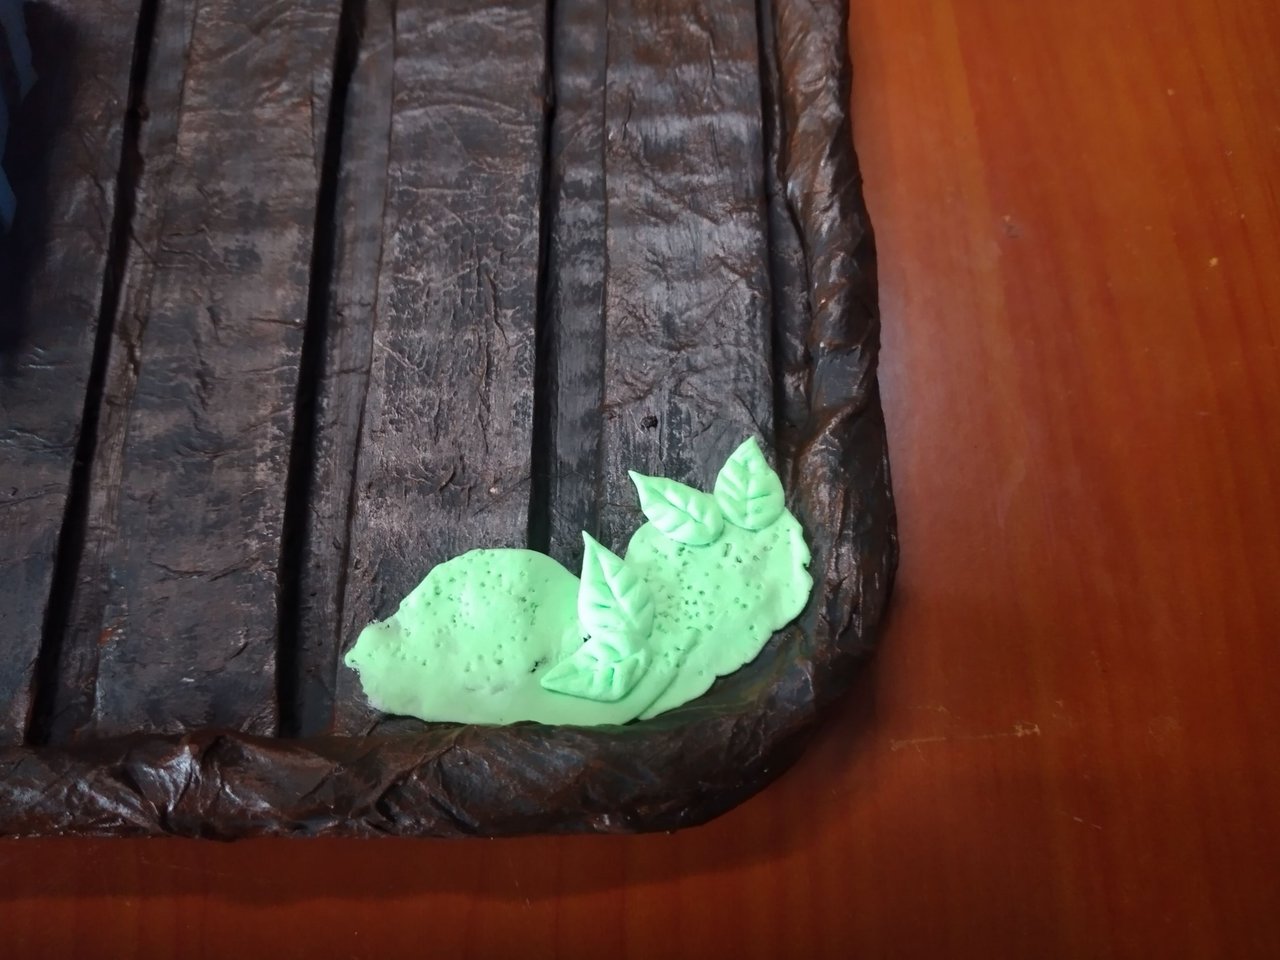
Now, with moldable foami the decorations will be made. First, with green color I made a vine in the upper left corner, placing some portions of foami underneath and making pores with a brush, then I made the stems and placed small leaves everywhere. In the lower right corner I did the same, but without the stems, as if it were a bush. Then I made some red and orange flowers and placed them on top.
Ahora, con foami moldeable se realizarán las decoraciones. Primeramente, con color verde realicé una enredadera en la esquina superior izquierda, colocando debajo unas porciones de foami y le hacía poros con un cepillo, luego hice los tallos y ubiqué pequeñas hojitas por doquier. En la esquina inferior derecha hice lo mismo, pero sin los tallos, como si fuera un arbusto. Después realicé unas flores rojas y naranjas y las situé encima.
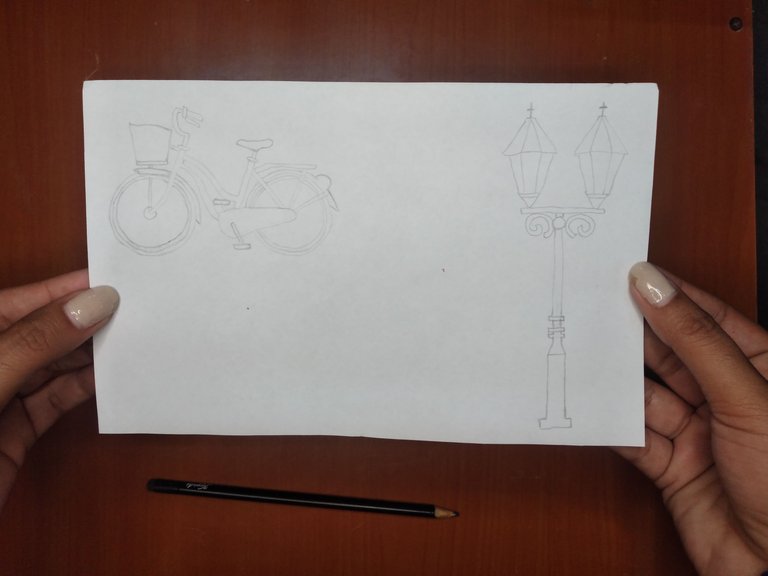
On a sheet of paper I drew a bicycle and a street lamp, these will be the decorative elements of this work of art.
En una hoja de papel dibujé una bicicleta y una farola de las que se encuentran en las calles, estos serán los elementos decorativos de esta obra de arte.
 |
 |
 |
 |
 |
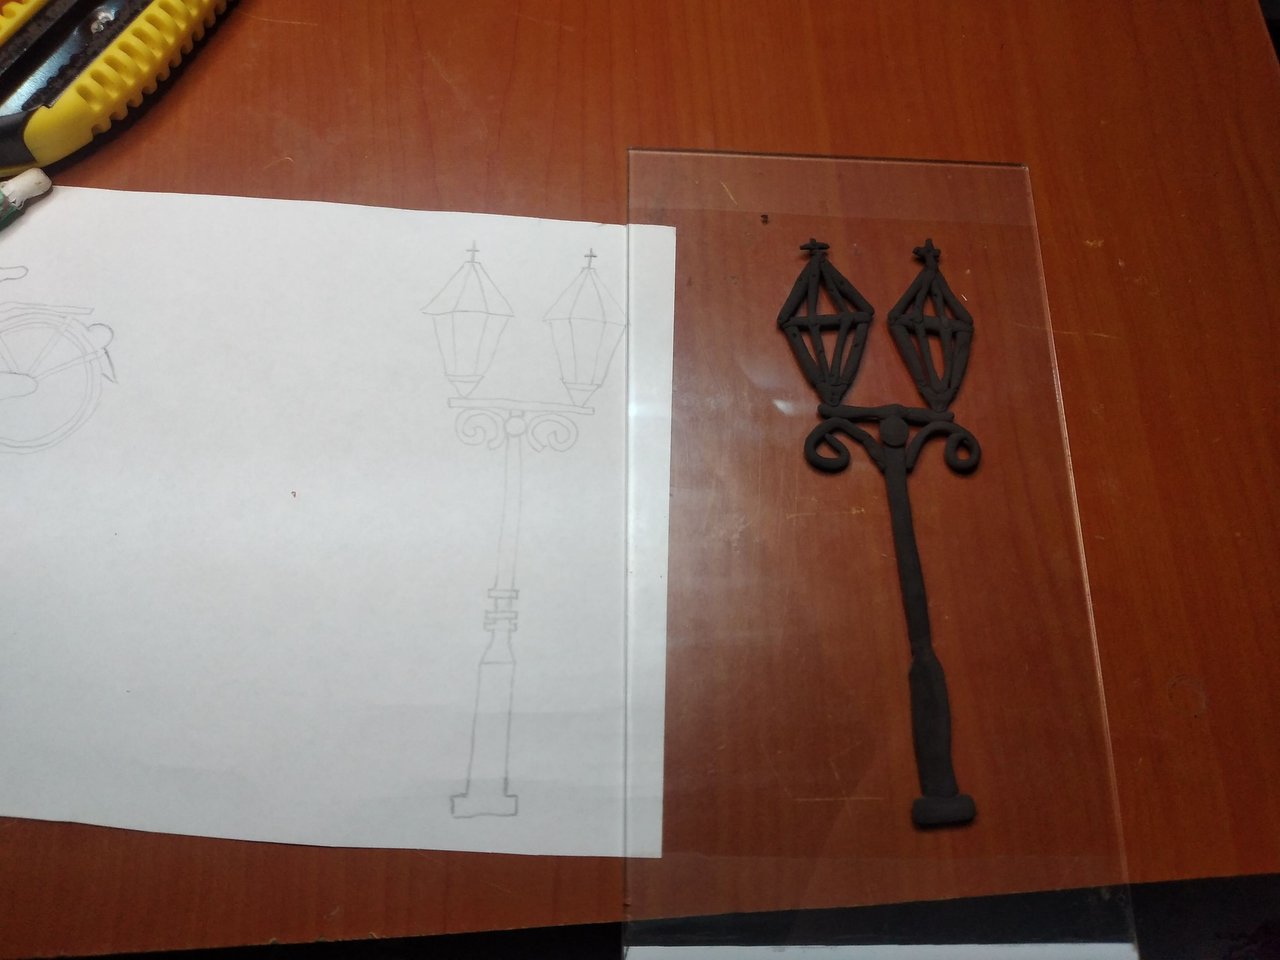 |
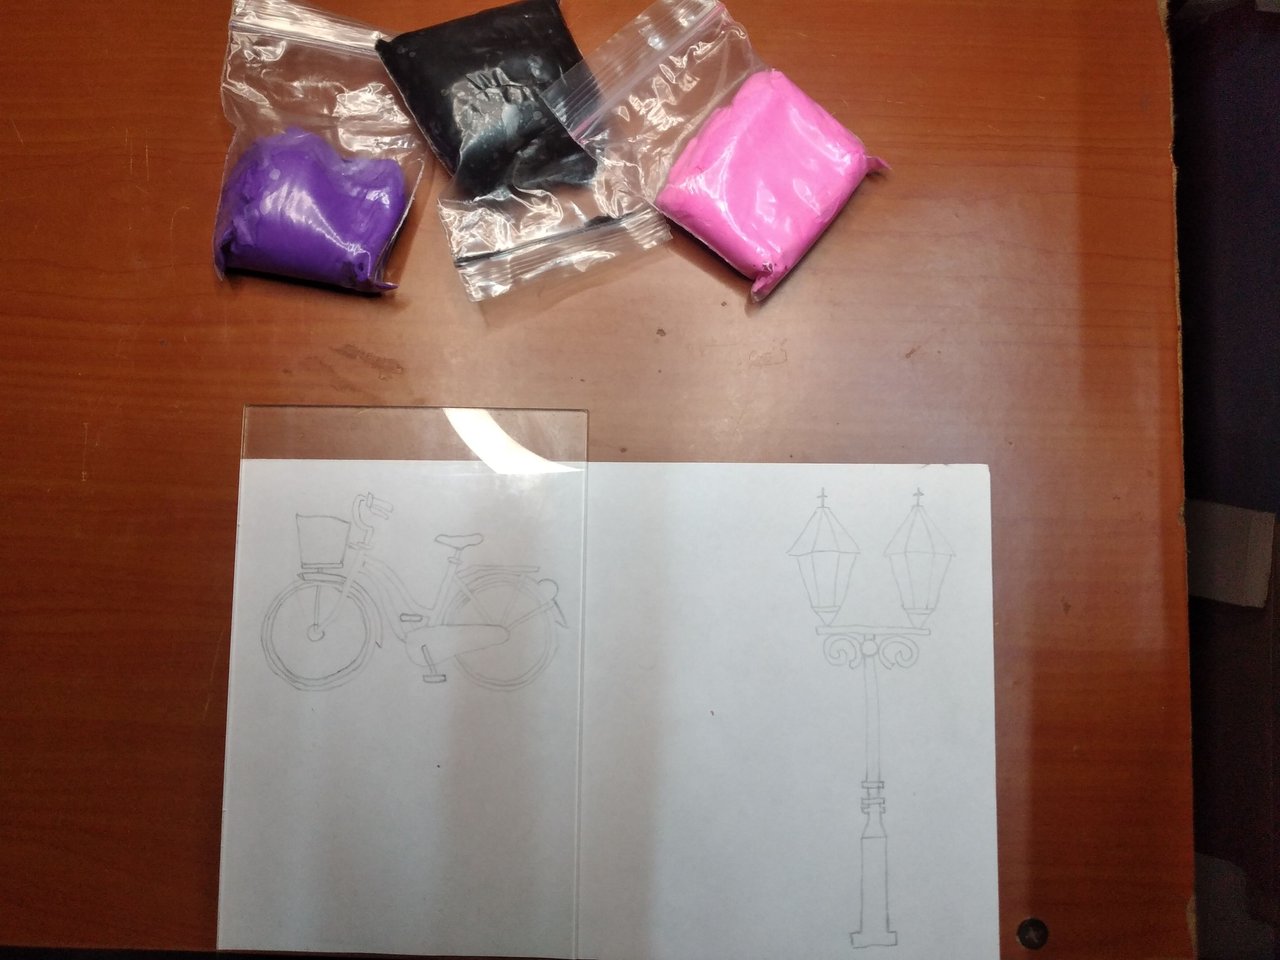
A transparent plate is placed on top of the drawing and as you can see the design is completely visible and this will allow to form these moldable foami figures. Little by little it will take shape until it is completely ready, let it dry for a while and then peel off easily.
Una placa transparente, se coloca encima del dibujo y como pueden apreciar se ve totalmente el diseño y esto permitirá ir formando estas figuras de foami moldeable. Poco a poco va tomando forma hasta que este completamente listo, dejar secar un rato y luego se despega con facilidad.
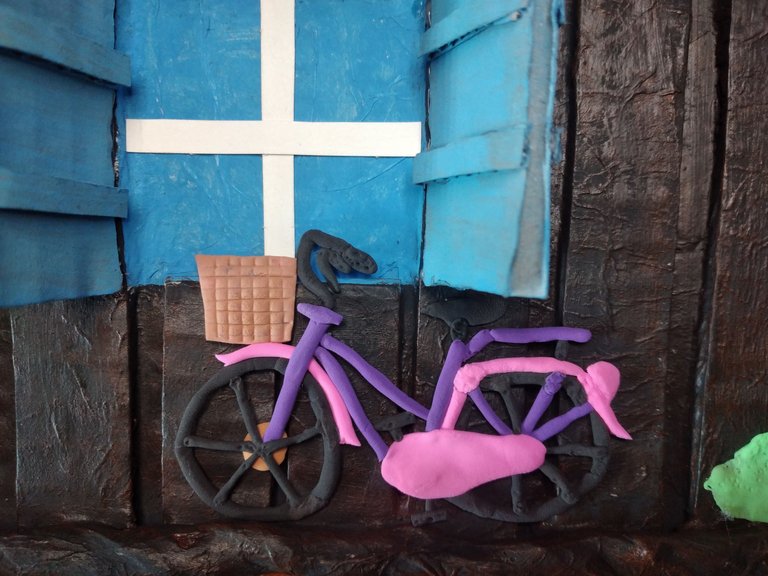
I placed the bicycle under the window using silicone because the foami was already dry.
La bicicleta la situé debajo de la ventana utilizando silicona porque ya el foami estaba seco.
 |
 |
 |
 |
 |
 |
 |
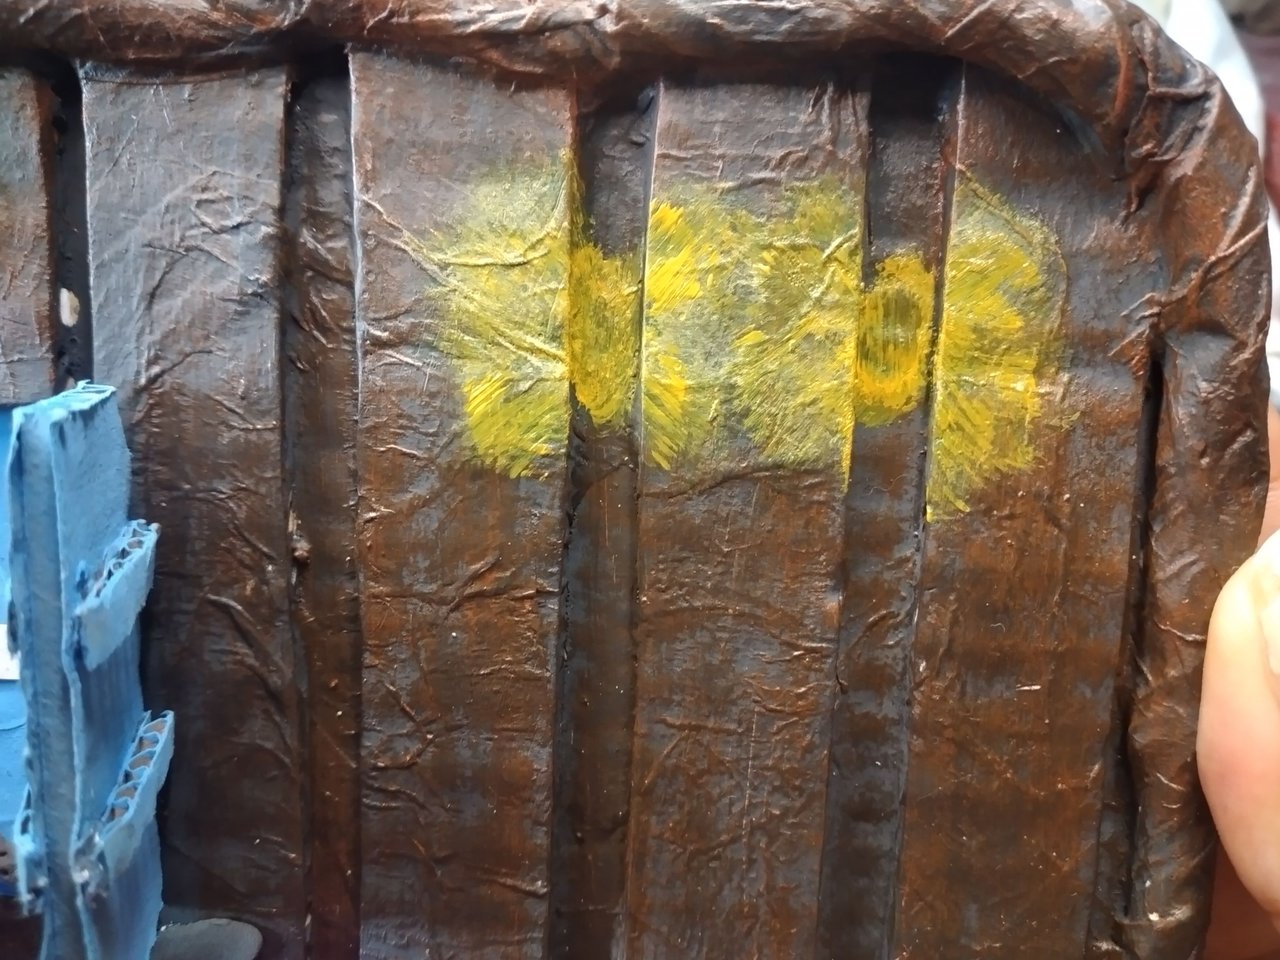
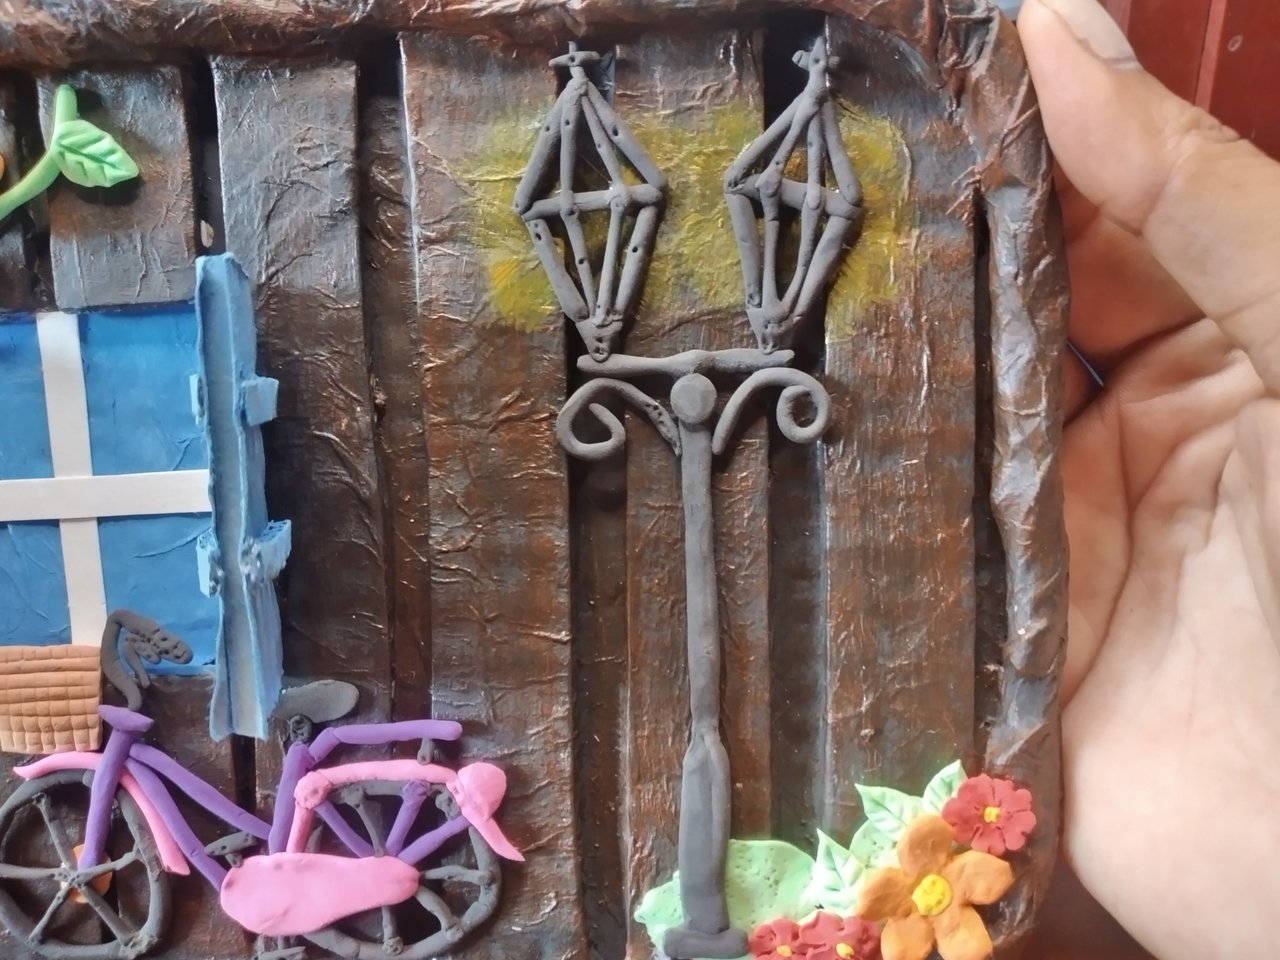
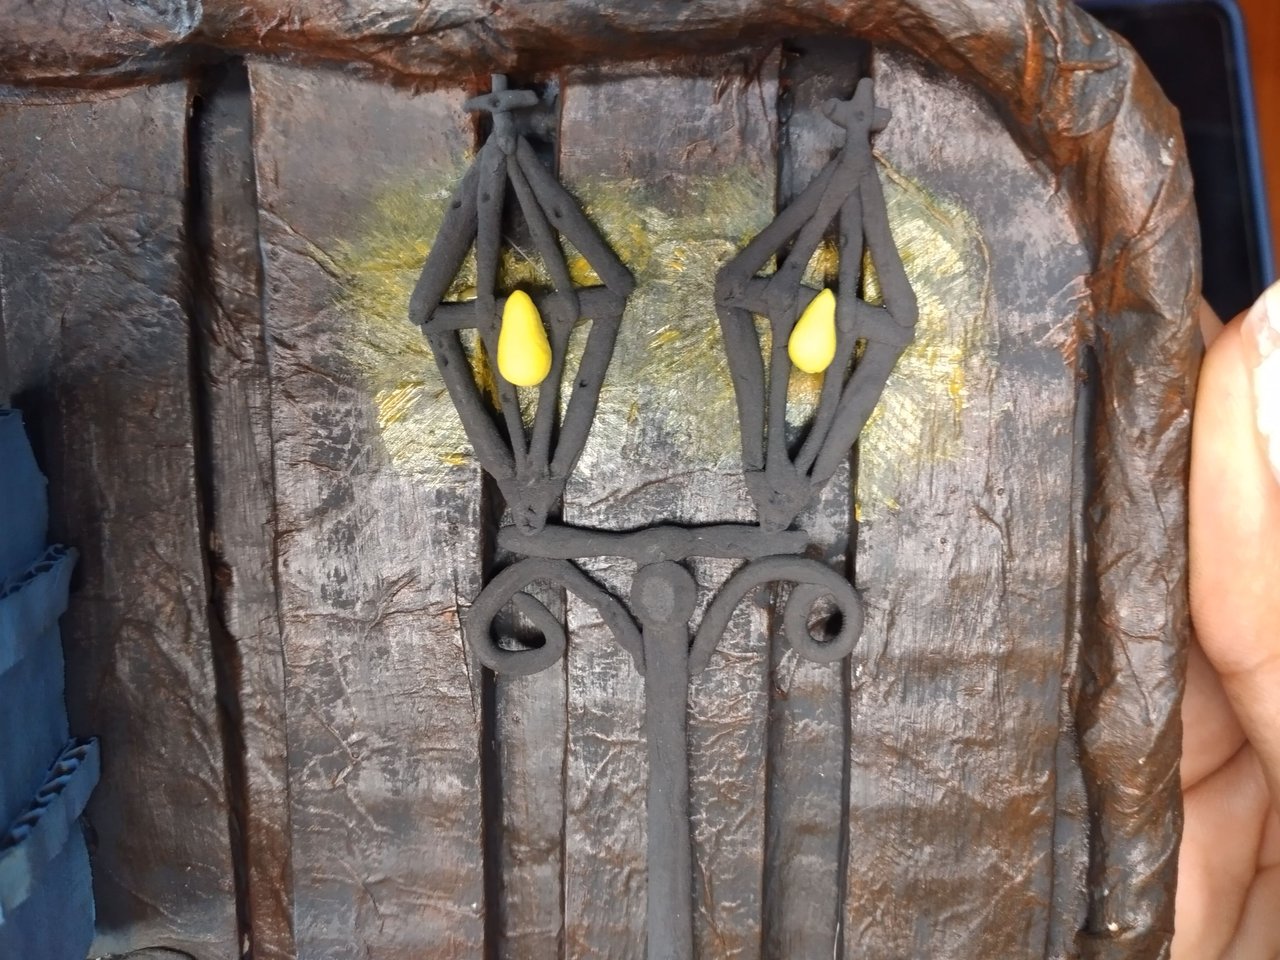
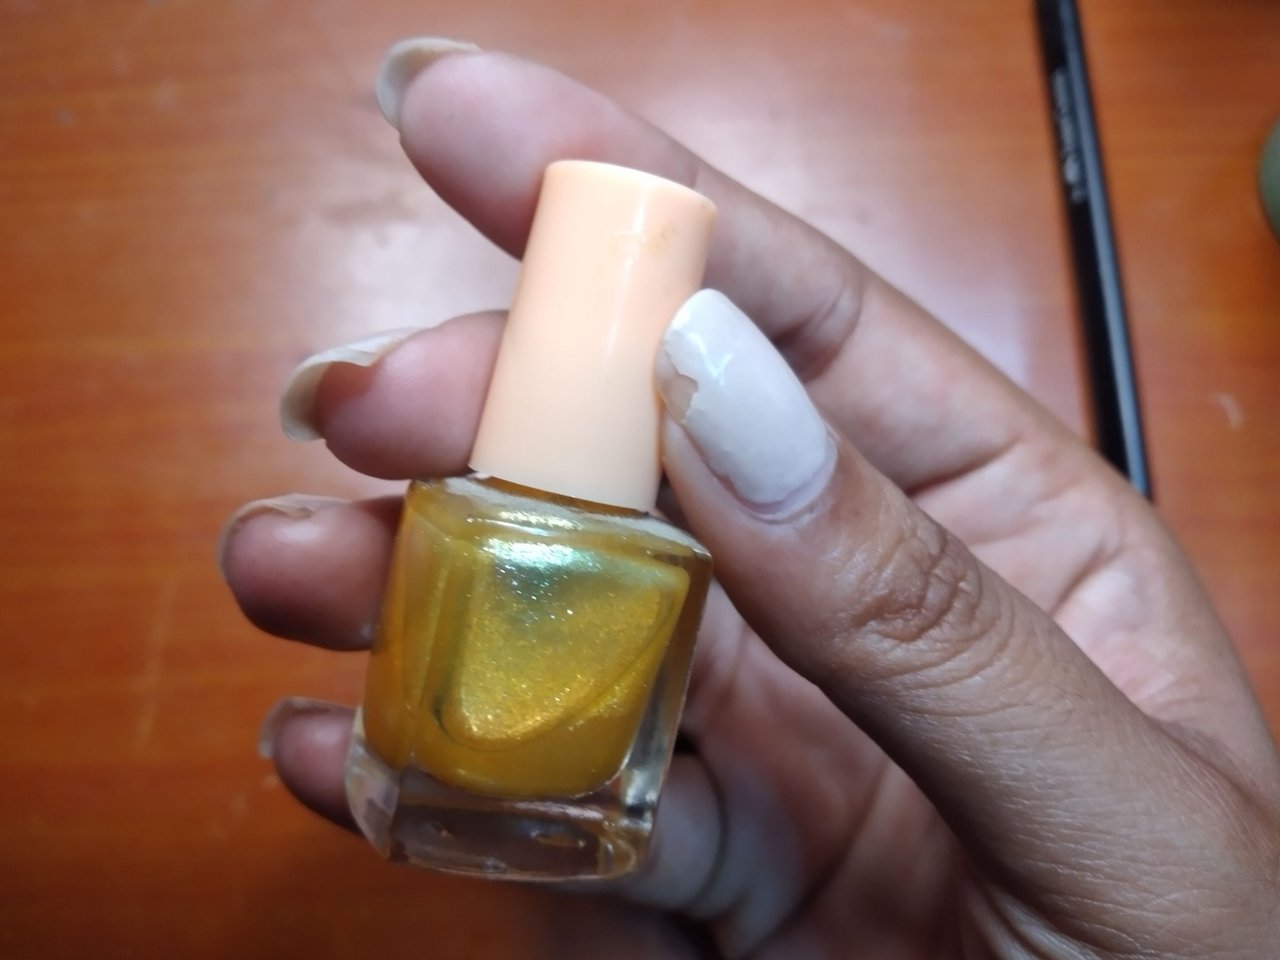
Before placing the lantern in its place, I painted the corresponding area in yellow to simulate the light of the bulbs, then I placed the lantern and made some miniature bulbs in the shape of a yellow water drop which I placed in the center of the lantern. To give the lantern a better look because the black foami is matte, I applied a coat of gold nail polish over it.
Antes de ubicar el farol en su lugar, pinté en la zona correspondiente de color amarillo para simular la luz de los bombillos, luego situé el farol y elaboré unos bombillitos en miniatura en forma de gota de agua de color amarillo los cuales puse en el centro del farol. Para darle más vista al farol porque el foami negro es mate, le pasé una manito de pintura de uña dorada por encima.
 |
 |
 |
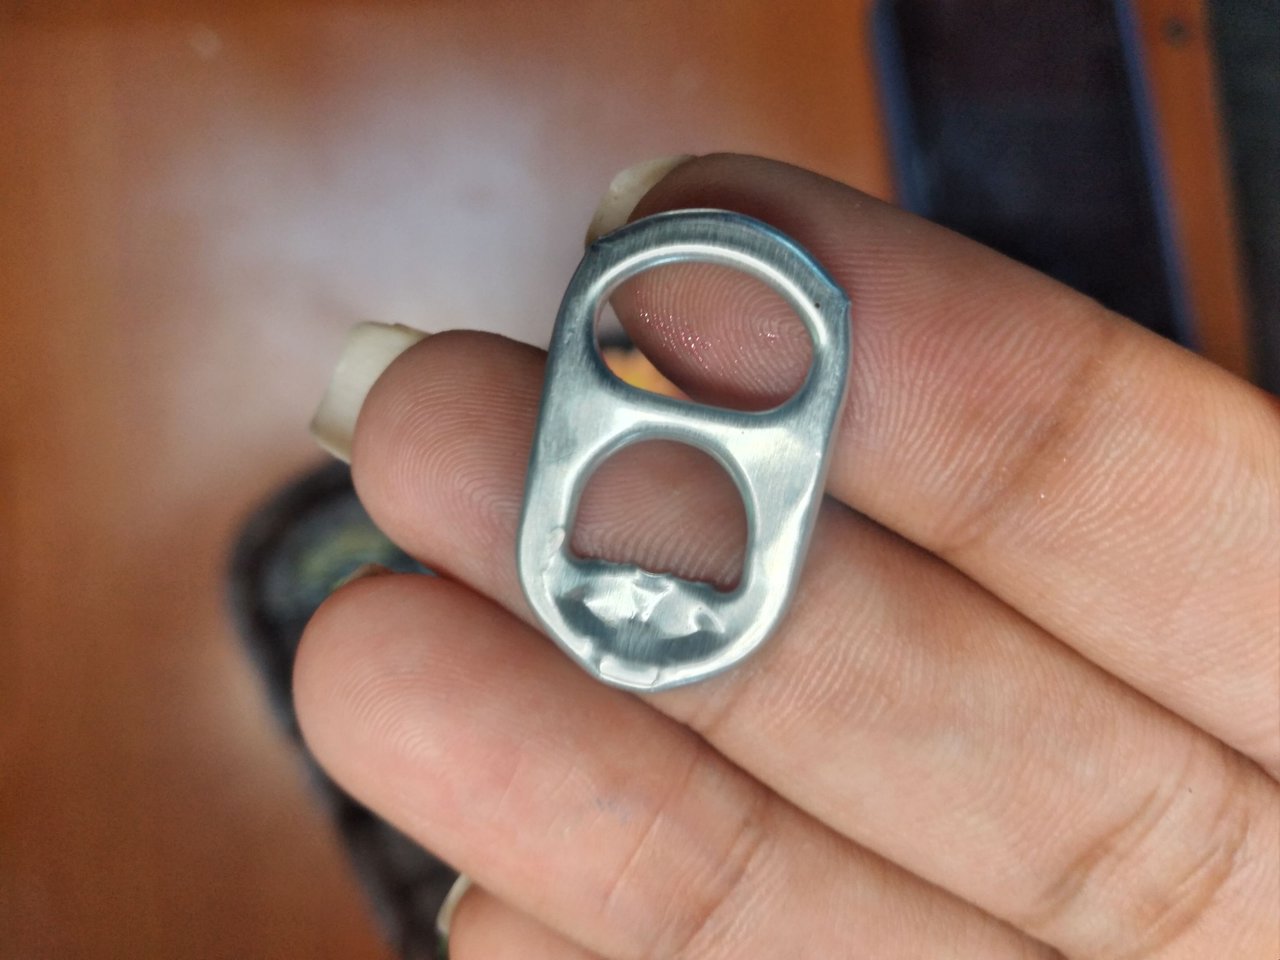
In order to place it on the wall, I glued the back of a beer or soda can, so that it can be hung on a nail.
Para poder colocarlo en la pared, pegué en la parte de atrás la chapita de una lata de cerveza o refresco, de esta forma se podrá colgar de un clavo.
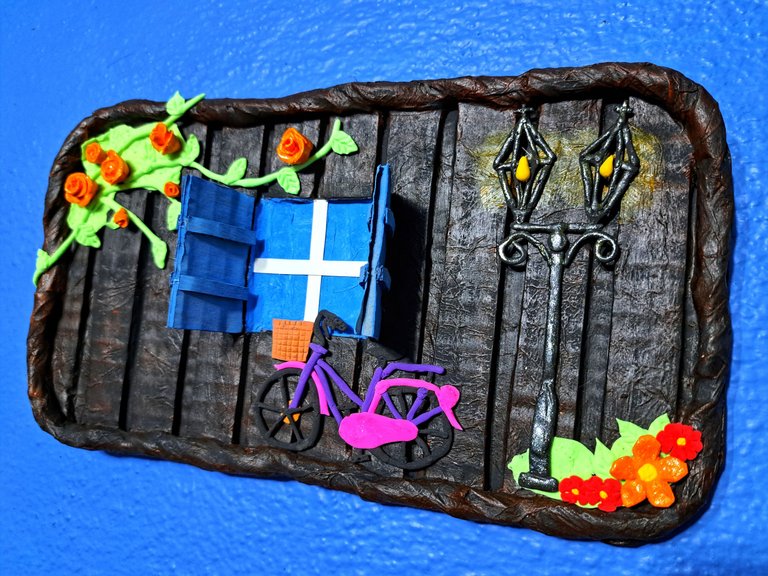
Final result // Resultado final

 |
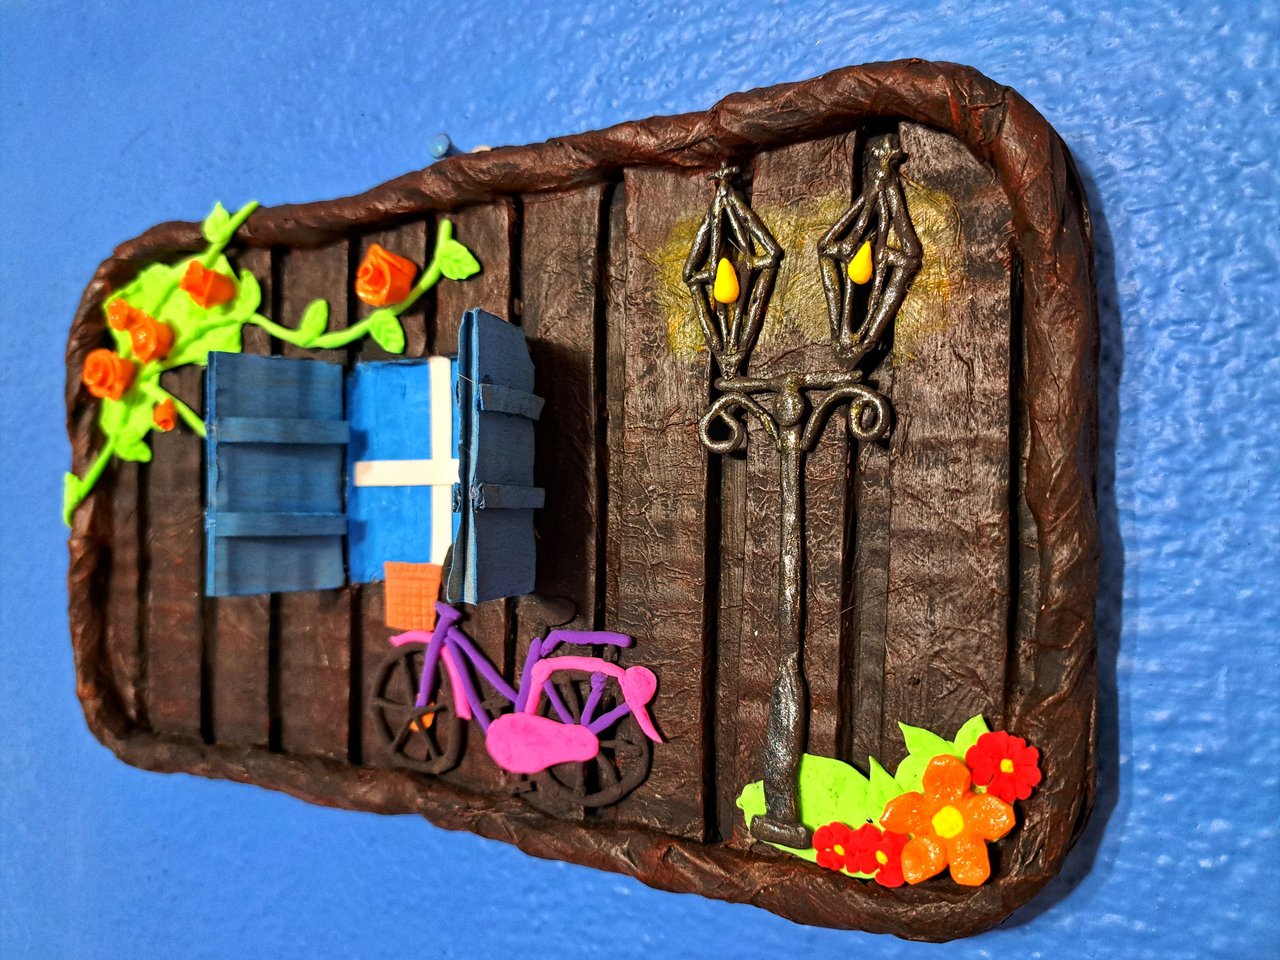 |
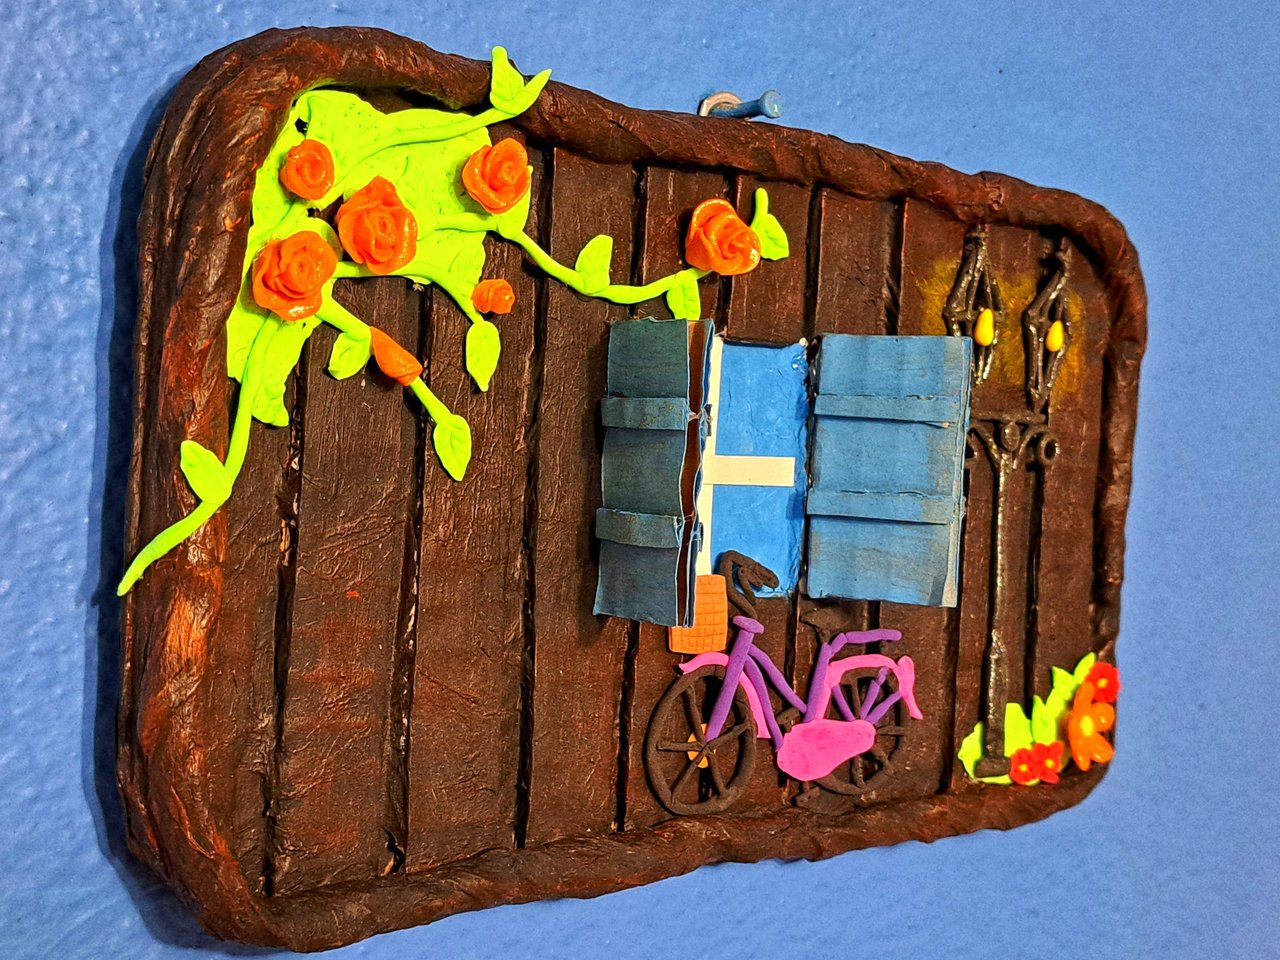
As you can see, this beautiful handmade decorative frame is already finished, using only cardboard and recycled paper and decorated with moldable foami. It is incredible the amount of crafts that we can create with these materials and in this way embellish any corner of our home or workplace and that you are left with the satisfaction that it was created by your own hands. Let me know in the comments what you thought, greetings to all.
Como pueden observar, ya está terminado este precioso cuadro decorativo elaborado completamente a mano, utilizando solamente cartón y papel reciclado y adornado con foami moldeable. Es increíble la cantidad de manualidades que podemos crear con estos materiales y de esta forma embellecer cualquier rincón de nuestro hogar o centro de trabajo y que te quede la satisfacción de que fue creado por tus propias manos. Déjenme en los comentarios que les pareció, un saludo a todos.
 |
 |
 |
Cover made in Canva
English is not my native language, translated by DeepL
wow you are so creative that looks so beautiful, thanks a lot for sharing keep up the good work.
Thank you very much, I am very grateful for your support. 🤗
Muy bonito, felicidades 💪🏻💪🏻🎉🎉🎉
Muchas gracias, 🥰🥰🥰
Que lindo quedó tu trabajo.
Felicidades y gracias por compartirlo.
Muchas gracias, me alegro que te haya gustado.🥰
Que linda es, quedara muy bonita y decorativa en tu oficina ❤️ a veces los cambios en la decoracion son necesarios para renovar las energias, espero puedas hacer mas decoraciones asi de bonitas 🦉
Muchas gracias, si haré algunas más porque la oficina necesita un cambio, tengo que darle más color y alegría. Saludos 🤗
Wow, very interesting
Thank you 😍