Hola a todos los amigos creativos de esta comunidad, del mundo entero y a todos los amantes de las manualidades. Espero y deseo que se encuentren muy bien, por mi parte yo me encuentro genial y agradecida con Dios por un nuevo despertar al lado de mi familia, ya con eso somos ganadores.
Como todos los que me conocen saben, amo las manualidades y la creatividad, así que cada vez que alguien cercano a mí necesita algo relacionado con ello me visan al momento, ya que aquí donde yo vivo es un poco lejos de la ciudad y no hacen estas cositas manuales.
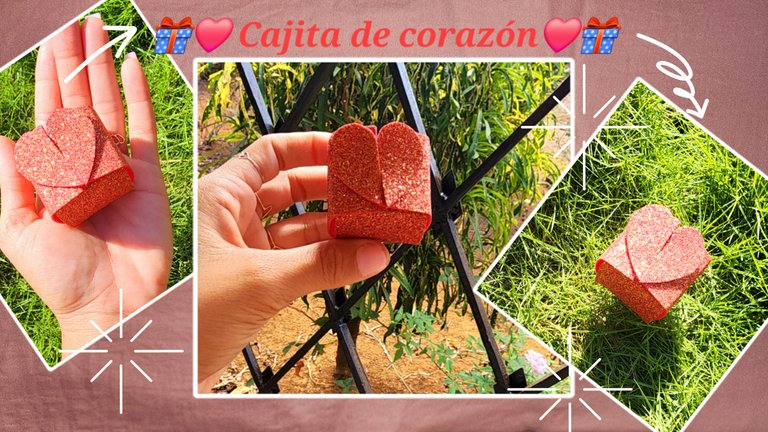
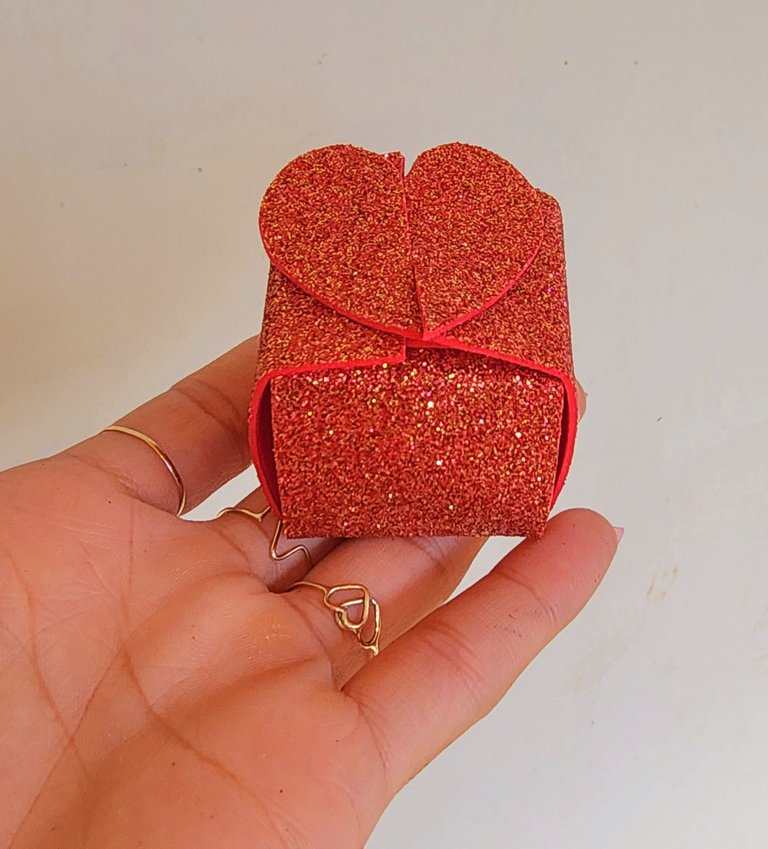
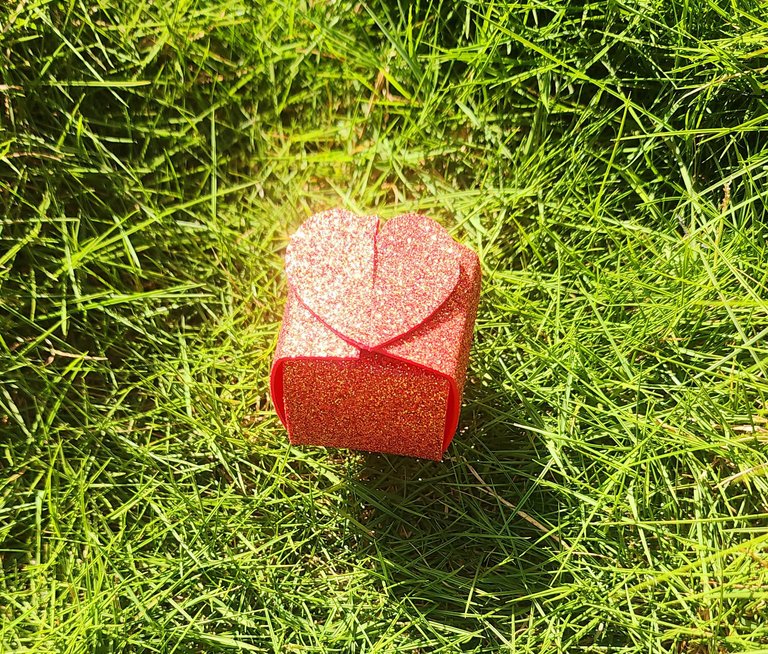
Para San Valentín una amiga me pidió que le hiciera una cajita bien pequeña para echar dentro un pulso y a mí que me encantan los proyectos nuevos me surgió la idea de hacer este modelo de cajita que cierra con un corazón, nunca la había hecho, queda muy bonita y su tamaño pequeño hace que sea un detalle muy tierno.
Hoy quiero compartir con ustedes el paso a paso de como la realicé para quienes amen las miniaturas en cajitas o para un regalo así pequeño como mi amiga que deseaba colocar un pulso dentro de ella.
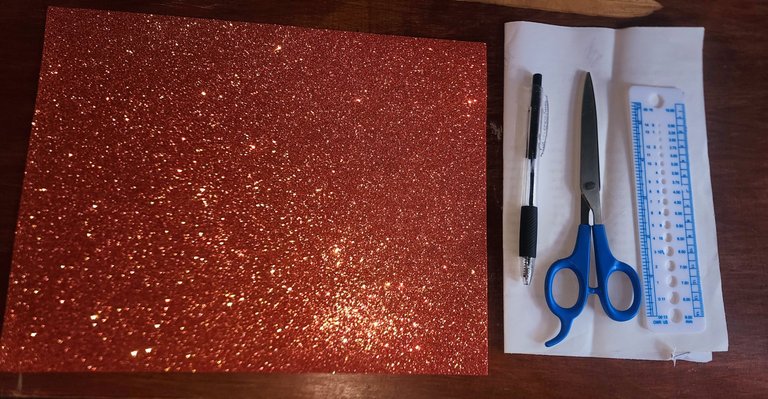
🎁❤️ Materiales ❤️🎁
- Foami escarchado rojo.
- Papel.
- Lapicero o lápiz.
- Tijera.
- Regla.
🎁❤️ Paso a paso ❤️🎁
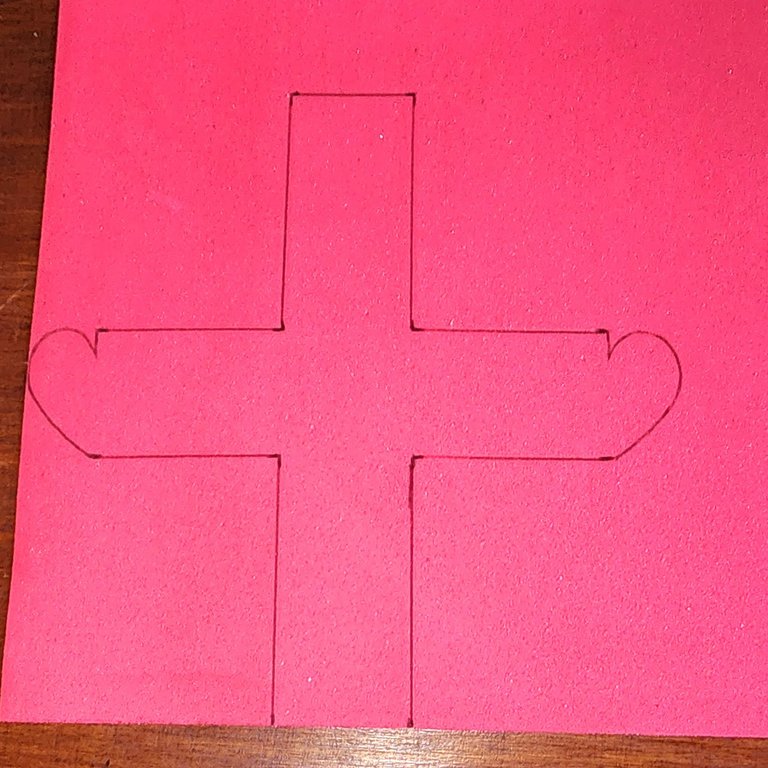
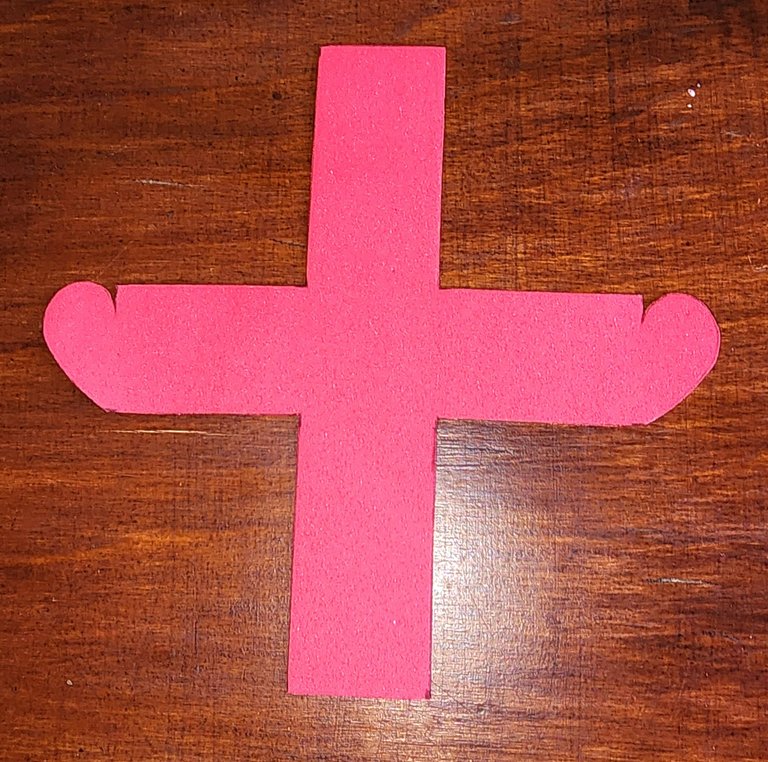
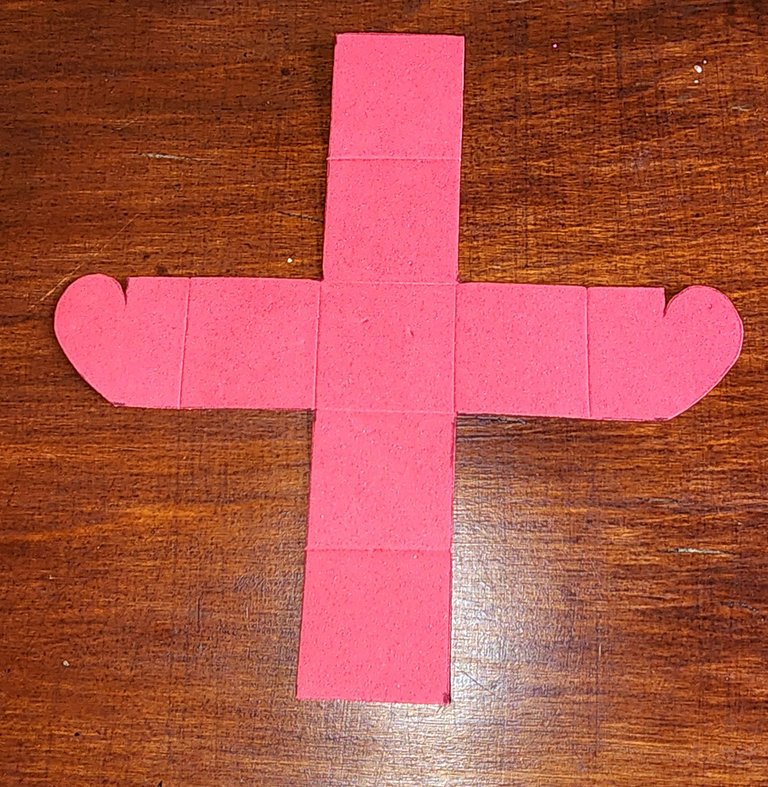
1- Primeramente hacemos en un papel esta forma que vemos en la foto.
El largo del rectángulo que forman los números 1, 2, 3, 4 y 5 es de 17, 5 cm y el ancho es de 3, 5 cm.
El largo del rectángulo que forman los números 6, 7, 3, 8 y 9 son de 17, 5 cm y el ancho es de 3, 5 cm.
Cada uno de esos rectángulos forman los cuadrados que están enumerados, donde todos sus lados miden 3, 5 cm.
Los cuadrados 6 y 9 los recorté en forma de corazón.

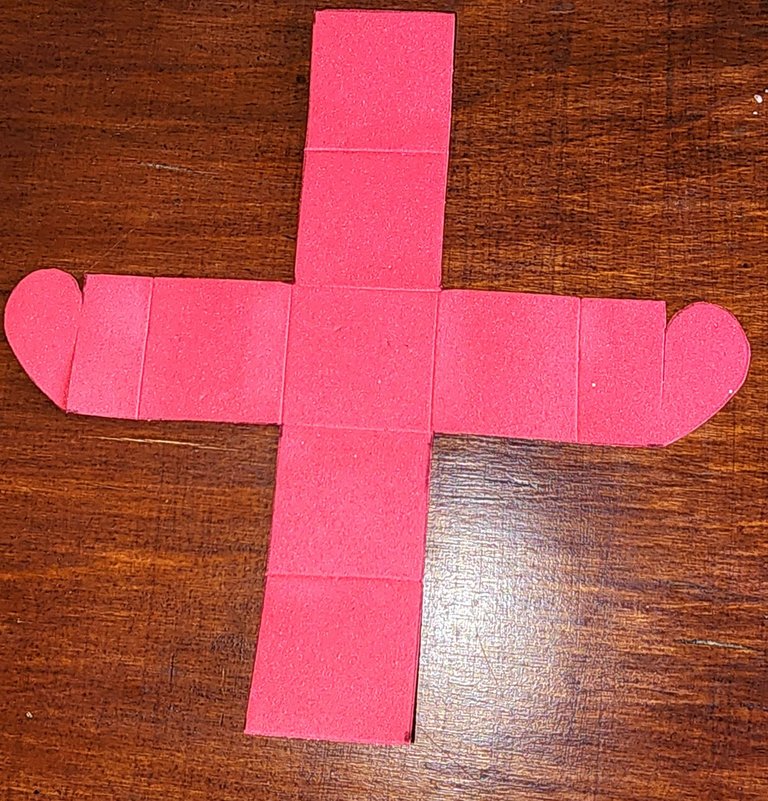
2- Ahora vamos a marcar en el foami esta forma.
3- Ahora debemos recortar la forma ya marcada.
4- Ahora vamos a marcar los cuadrados con la punta de la tijera si no tienen con que marcar el foami como yo que no tenía 😁.
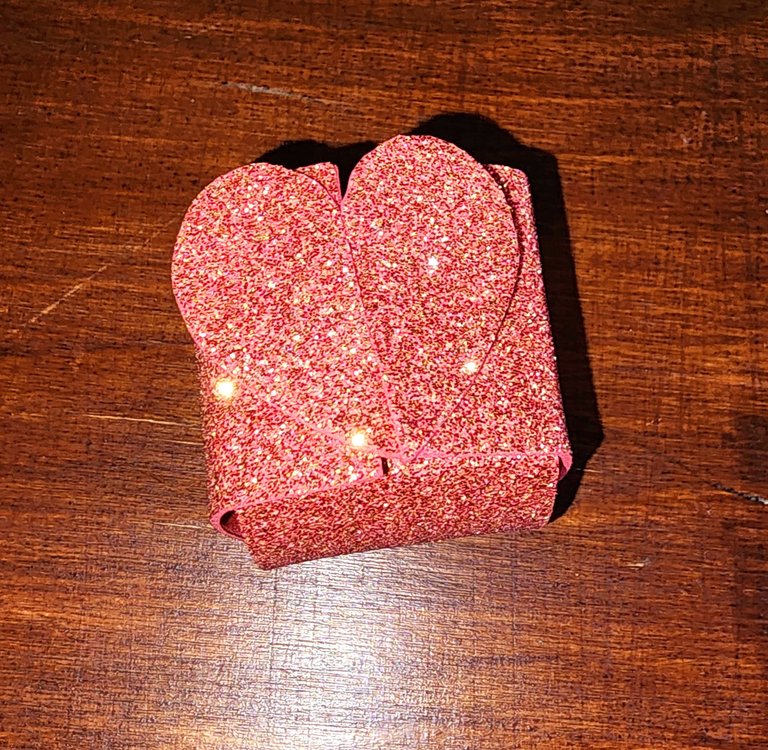
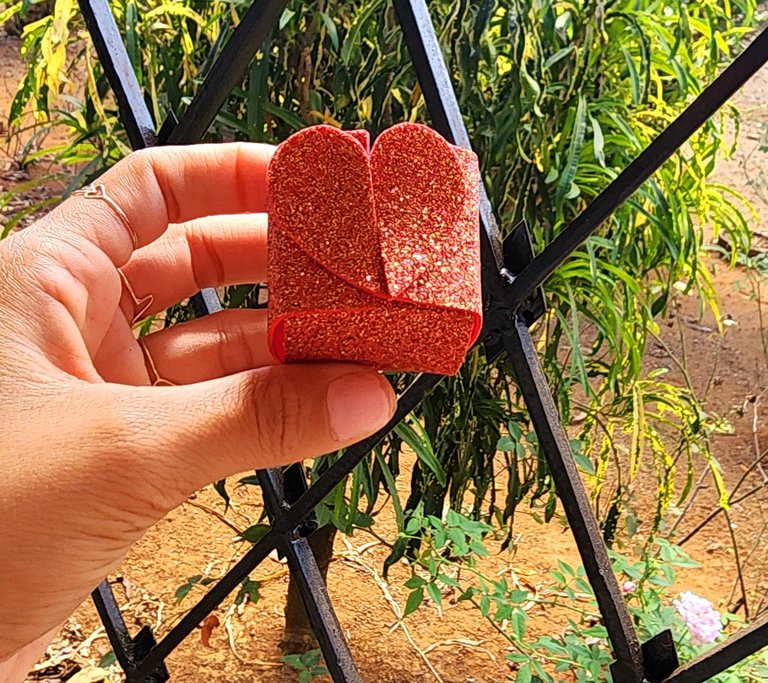
5- Ahora vamos a hacer estos cortes en el corazón como se ve en la foto, el de un extremo por la parte inferior y el de otro extremo por la parte superior.
6- Ahora solo nos queda cerrar la cajita, primeramente cerramos la parte que no tiene los corazones y luego la parte de los corazones, ya que los cortes que hicimos en el paso anterior es el que nos permite cerrar y abrir la cajita. 🎁❤️
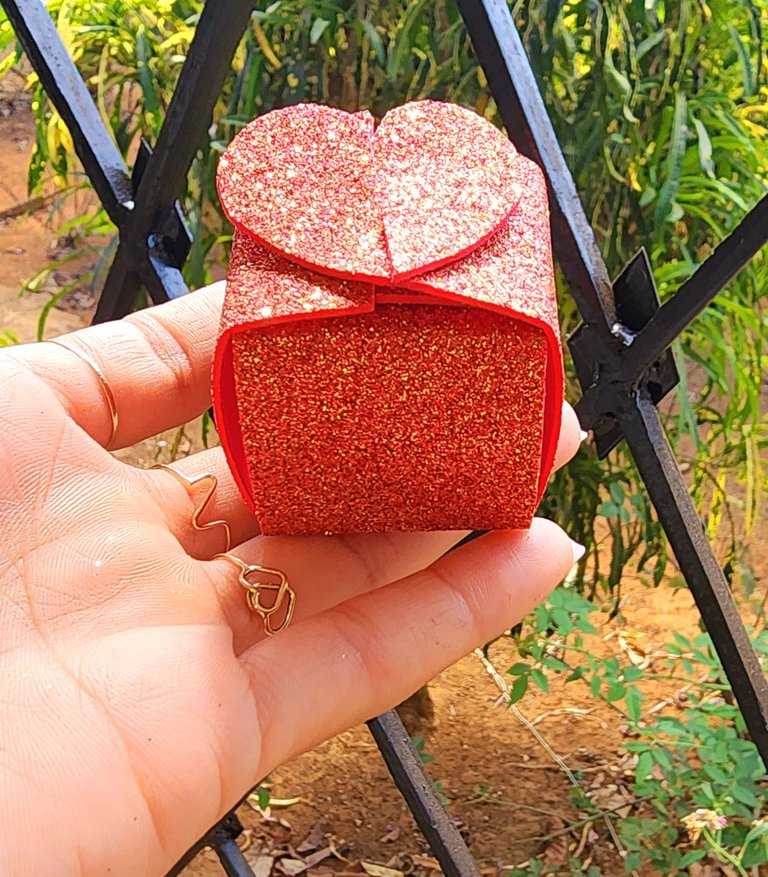
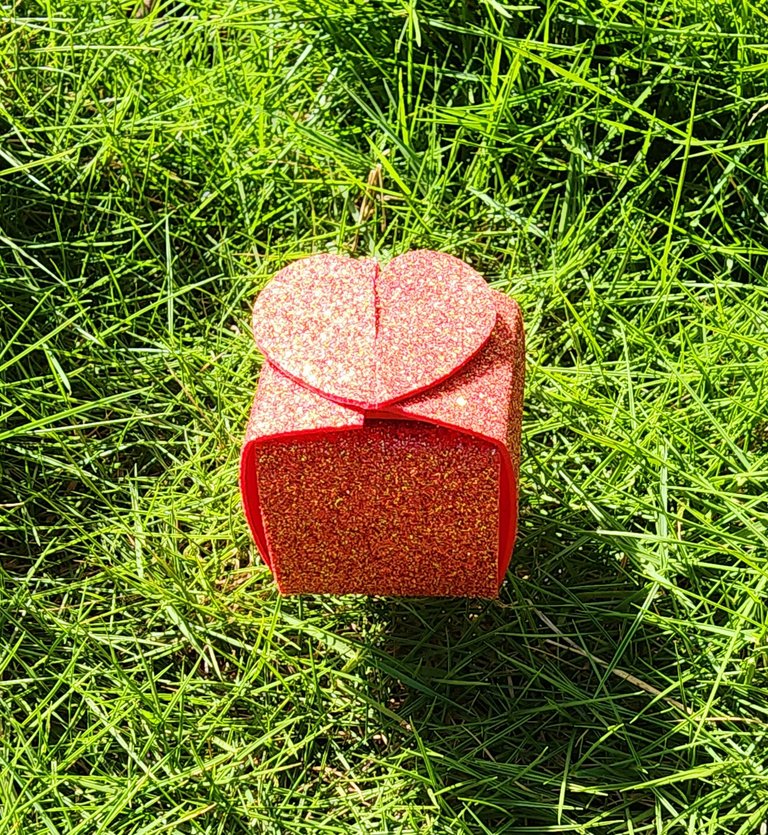
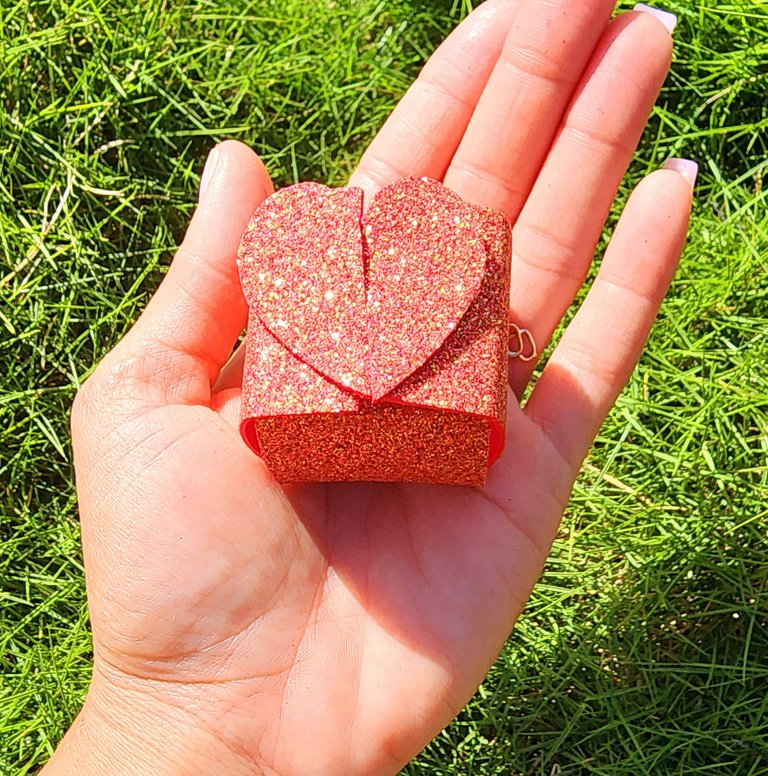
Y listo amigos, así de hermosa y tierna queda esta cajita, lo mejor es que es superfácil de realizar y utilizando muy poco material. ¿A mí como siempre me encantó, a mi amiguita también y a ustedes que les pareció? Los leo en los comentarios 😊.
Gracias de antemano por leerme hasta aquí 😁. Hasta una nueva publicación ✨️. Bendiciones, miles 🥰 y abrazos virtuales 🤗.
🎁❤️ English ❤️🎁
Hello to all the creative friends of this community, of the whole world and to all the lovers of crafts. I hope and wish that you are doing great, for my part I am great and thankful to God for a new awakening with my family, and with that we are winners.
As everyone who knows me knows, I love crafts and creativity, so every time someone close to me needs something related to it, they visit me right away, because here where I live is a little far from the city and they don't make these little handmade things.
For Valentine's Day a friend asked me to make her a small box to put inside a pulse and I love new projects and I came up with the idea of making this model of box that closes with a heart, I had never done it before, it is very nice and its small size makes it a very tender detail.
Today I want to share with you the step by step of how I made it for those who love miniatures in little boxes or for a small gift like my friend who wanted to place a pulse inside it.
🎁❤️ Materials ❤️🎁
- Red frosted Foami.
- Paper.
- Pen or pencil.
- Scissors.
- Ruler.
🎁❤️ Step by step ❤️🎁
1- First of all we make on a piece of paper this shape we see in the picture.
The length of the rectangle formed by the numbers 1, 2, 3, 4 and 5 is 17, 5 cm and the width is 3, 5 cm.
The length of the rectangle formed by the numbers 6, 7, 3, 8 and 9 are 17, 5 cm and the width is 3, 5 cm.
Each of those rectangles form the squares that are listed, where all their sides measure 3, 5 cm.
I cut out squares 6 and 9 in the shape of a heart.
2- Now we are going to mark this shape on the foami.
3- Now we have to cut out the shape already marked.
4- Now we are going to mark the squares with the tip of the scissors if you don't have anything to mark the foami with like I didn't have 😁.
5- Now we are going to make these cuts in the heart as seen in the photo, the one at one end at the bottom and the other end at the top.
6- Now we just need to close the box, first close the part that does not have the hearts and then the part with the hearts, since the cuts we made in the previous step is what allows us to close and open the box. 🎁❤️
And ready friends, this is how beautiful and tender this little box is, the best thing is that it is super easy to make and using very little material. As always I loved it, my friend loved it too and what did you think? I'll read you in the comments 😊.
Thanks in advance for reading me this far 😁. Until a new post ✨️. Blessings, thousands 🥰 and virtual hugs 🤗.
Recursos empleados
| RECURSO / RESOURCE | FUENTE / SOURCE |
|---|---|
| Edición / Edition: | @yunacrochet |
| Imágenes / Pictures: | Samsung Galaxy s22 Ultra |
| Translated / Traducción: | Deepl Translate |
Posted Using INLEO
Esta genial la cajita, me encanta el detalle del corazon y el color brillante que elegiste, justo ideal para regalar algo especial jeje muy bonito diseño y ademas su tamaño es adorable 😘
Muchas gracias 😊, a mí también me encantó realizarla, me gustan mucho las cositas pequeñas así, hacen que el detalle quede más adorable 😍. Bendiciones 🤗.