Español
Reciban un cordial saludo todas las personas que hacen vida a las diferentes comunidades de esta gran y hermosa colmena HIVE; espero que se encuentren bien y les deseo un feliz fin de semana. La comunidad #hivediy; es una colmena que da la oportunidad que cualquier miembro exprese sus dones y a través de sus concursos animando y incentivando a todos para participar; en ésta oportunidad abrió un nuevo concurso con la técnica Decoupage, me encanta esa técnica y si la combinamos con otras técnicas el trabajo queda hermoso. Ya he realizado muchas manualidades con esa técnica y el resultado es excelente; también podemos realizarla en cualquier superficie como por ejemplo sobre vidrio,tela,madera, metal y plástico, es una manera muy conveniente para reciclar esos materiales👍😉. Voy hablarles un poquito de esta técnica por experiencia propia. La técnica de Decoupage es el arte de pegar cualquier recorte de papel con impresiones, periódicos, tela,papel de arroz y servilletas; éstas dos últimas las más usadas.
Consiste en decorar superficies (de todo tipo, desde céramica, madera, cartón e incluso jabones o velas) con imágenes de papel o de tela recortadas y que son fijadas a la superficie que se quiera decorar con un barniz. Es impresionante como ésta tecnica la podemos combinar con otras; como la técnica de decapado, moteado, relieve con stencil, envejecido...
Lo que más me motiva en las manualidades es como a través de ella podemos reutilizar, reciclar y restaurar🤗 cualquier objeto que van hacer desechados y no le dan una segunda oportunidad; además que muchos de los objetos que tiramos a la basura se pueden aprovechar y hacer cualquier manualidad que sirva para decorar y hasta artes, con la técnica de Decoupage podemos transformar cualquier objeto en arte y el resultado es hermoso. Así que acompañenme a realizar esta manualidad de hoy reciclando cajas de fresa, también le mostraré esa técnica en otros objetos.
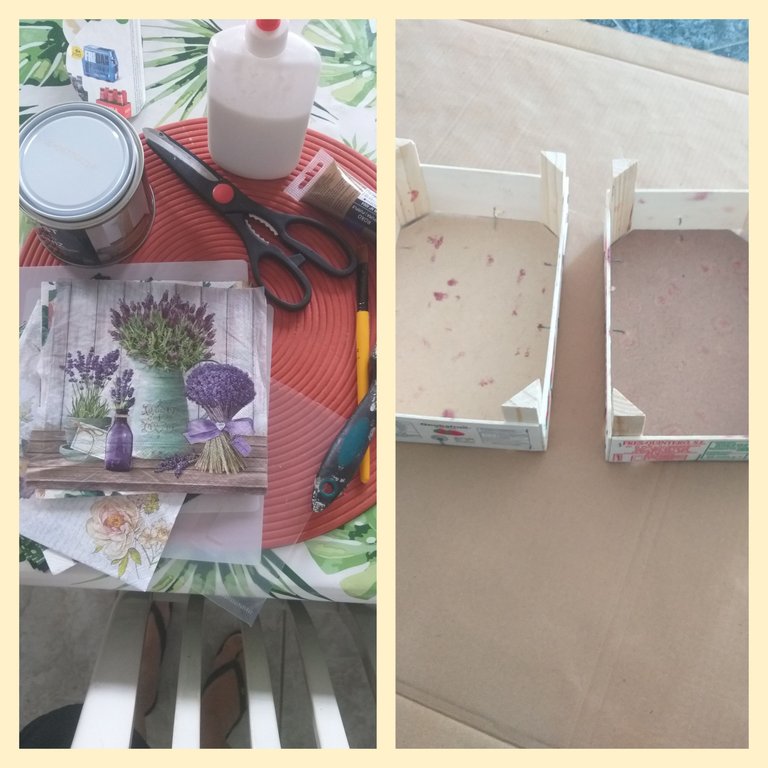
Los Materiales que utilizaremos para realizar estas cajas multifuncional son:
Dos cajas donde vienen las fresas( Madera)
Servilletas con motivos
Tijera
Cera en pasta o vela
Pintura especial para Decoupage o acrílica
Pinceles de celdas fino, gruso y chato o brocha pequeña
Un pedazo de tela o pañito
Un destornillador o pinza y un alicate
Cartón
Un pedazo de plástico (bolsa)
Agua y una taza de plástico
Barniz en spray o líquido
Lija para madera
Yeso o masa para tapar ranuras
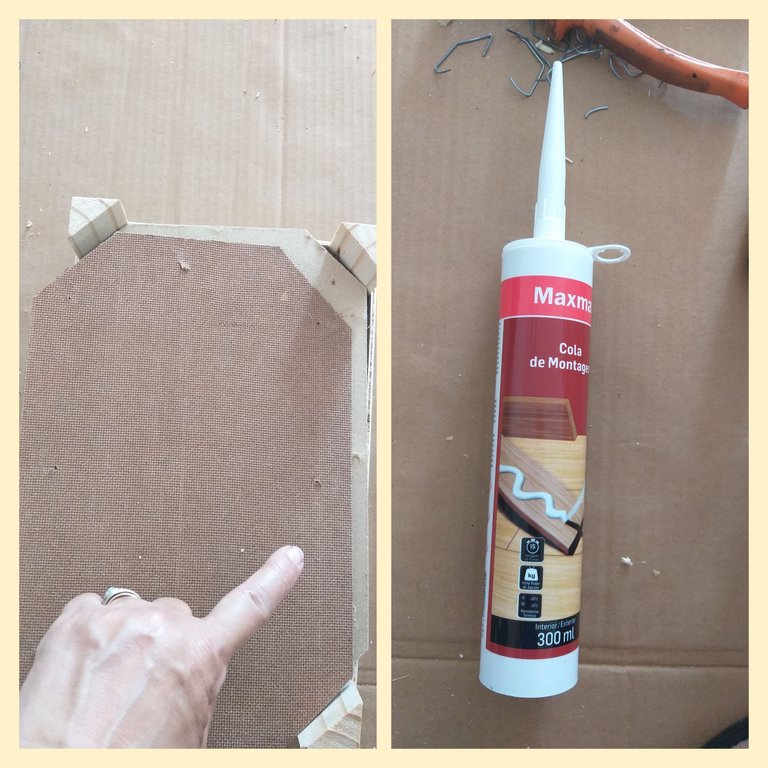
Pegamento para madera
Espátula
Pintura acrílica de color lila, azul claro y dorado
Tirro o cinta de construcción
Un pedazo de esponja y un envase plano.
Pasos para realizar la caja multifuncional
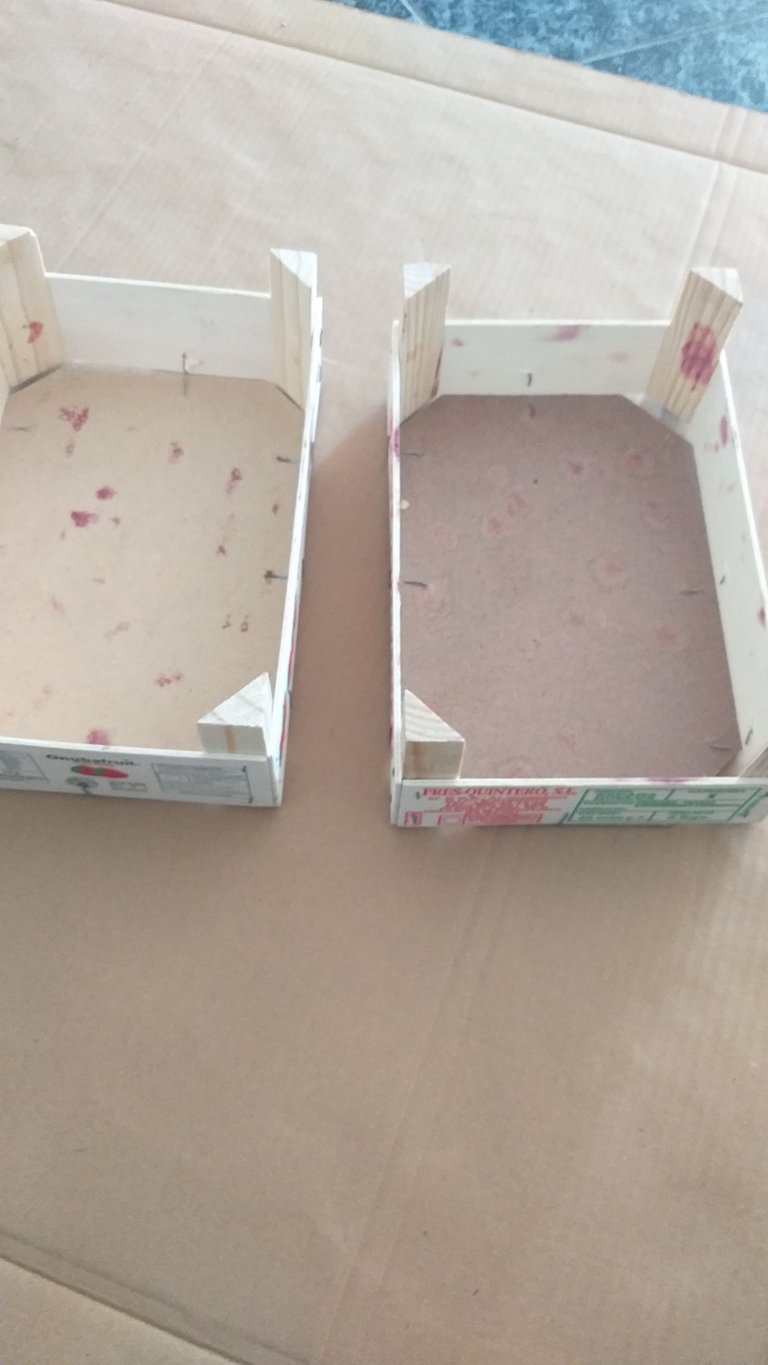
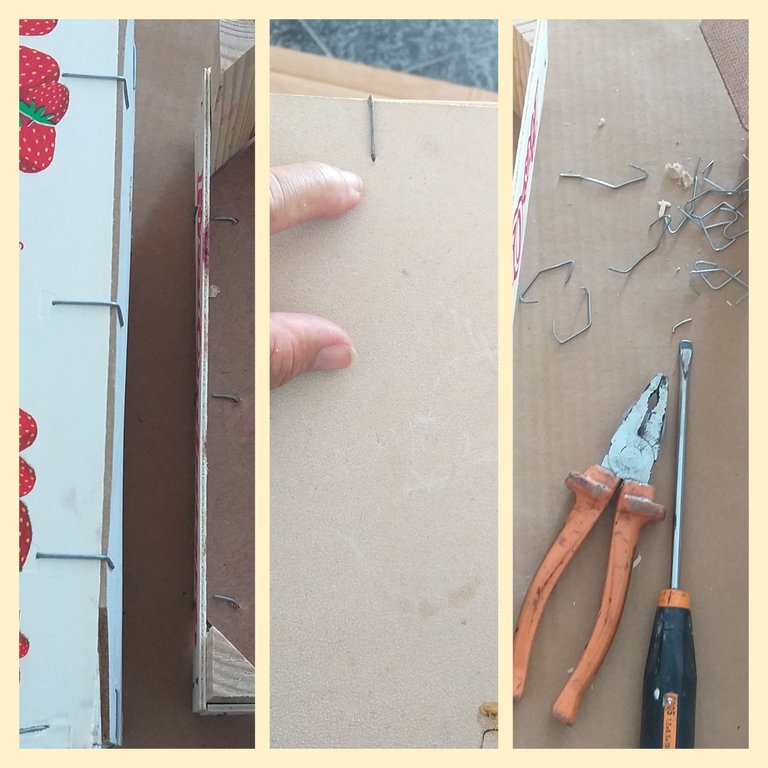
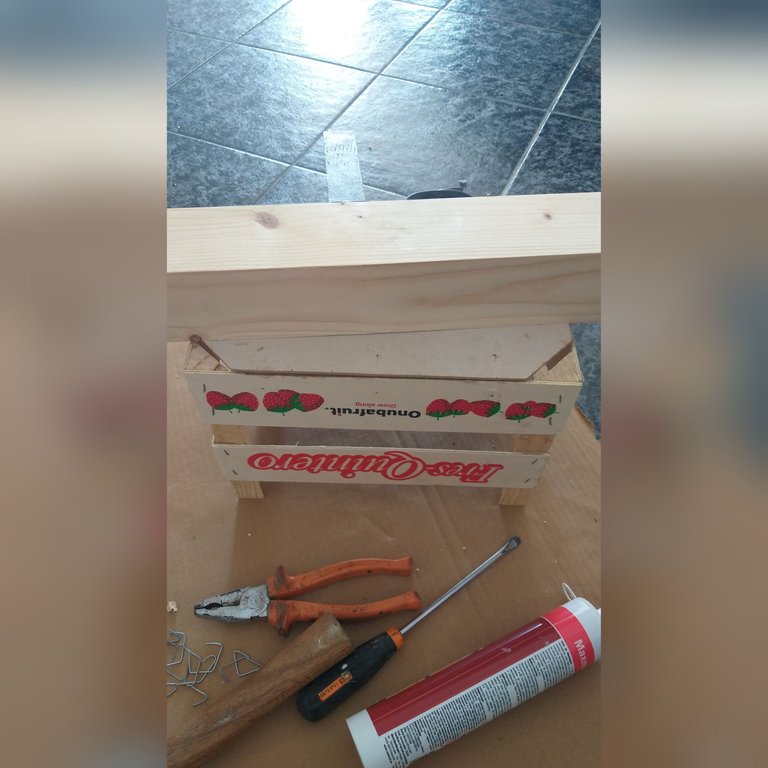
1👣. Lo primero que debemos hacer es limpiar con un paño de cocina el polvo o sucio de las cajas; en éste caso la caja estaban limpias, sólo con las manchas de fresa pero eso no importa porque lo pintaremos. Luego vamos a quitar las base de las dos cajas quitando las grapas que trae la tapas de las cajas, utilizando el destornillador o la pinza y el alicate.
2👣. Levantamos las grapa primero con el destornillador o la pinza y después la sacamos o cortamos con el alicate.
3👣. Luego de haber sacado las dos tapas de las cajas; las vamos a pegar ambas con el pegamento para madera.
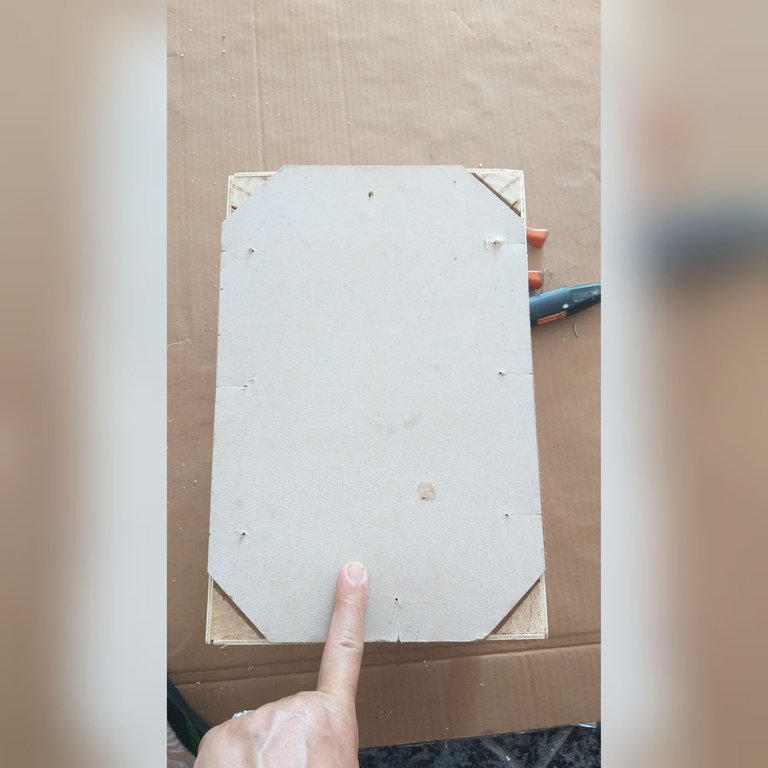
4👣. Luego las dos tapas pegadas; la pegaremos por la parte de abajo de una de las cajas, quedando las cuatros patas a la caja y dejaremos secar. Como pueden ver en la imagen le coloqué peso para que pegue la tapa uniforme.
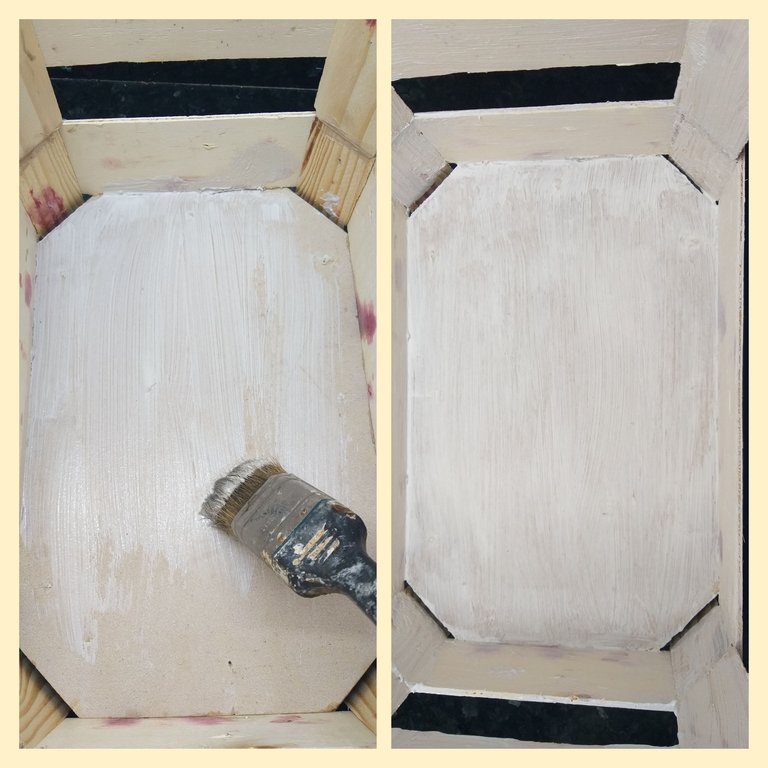
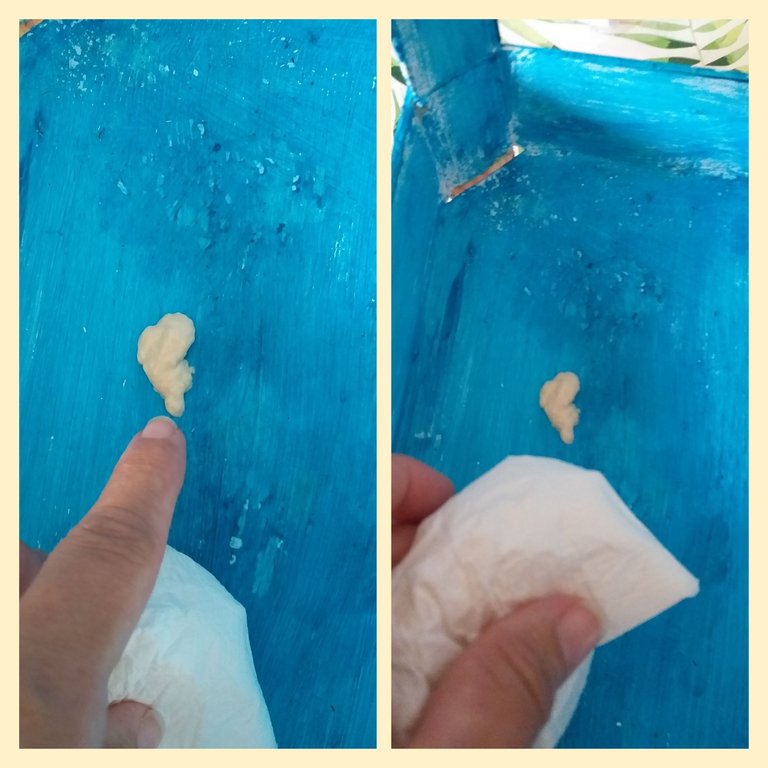
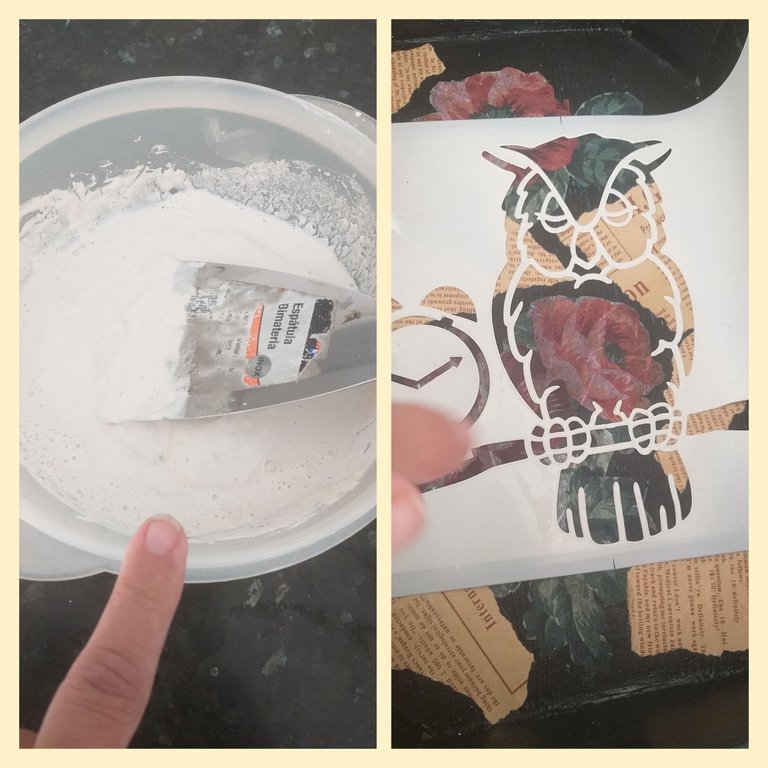
5👣. Preparamos el yeso o masa para tapar ranuras. En este caso se usó yeso en polvo y se mezcló con un poquito de agua, debe quedar como una pintura para que pueda cubrir todos los huecos de la caja.
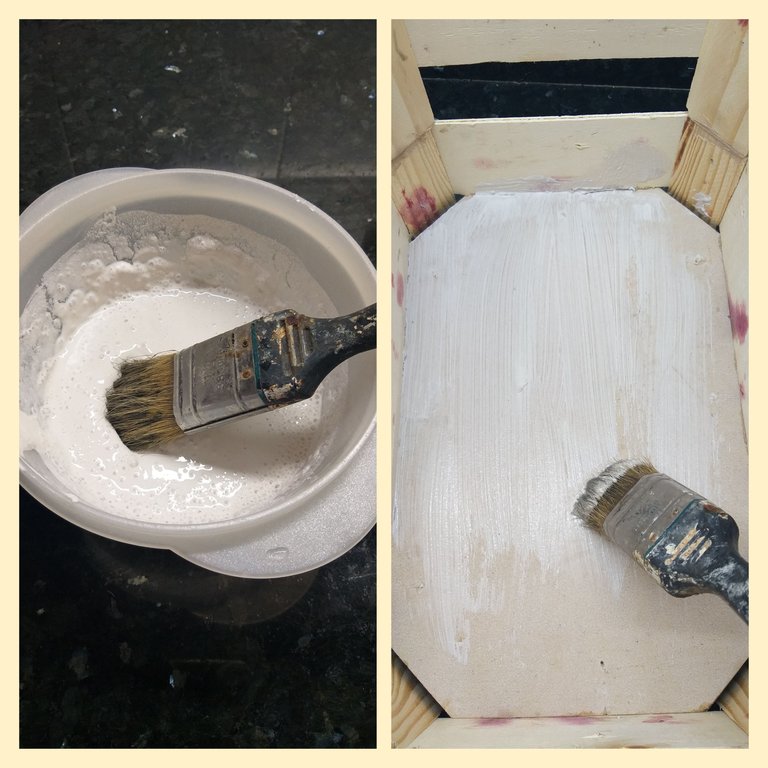
6👣. Luego que tengamos toda la caja cubierta con el yeso, dejaremos secar bien.
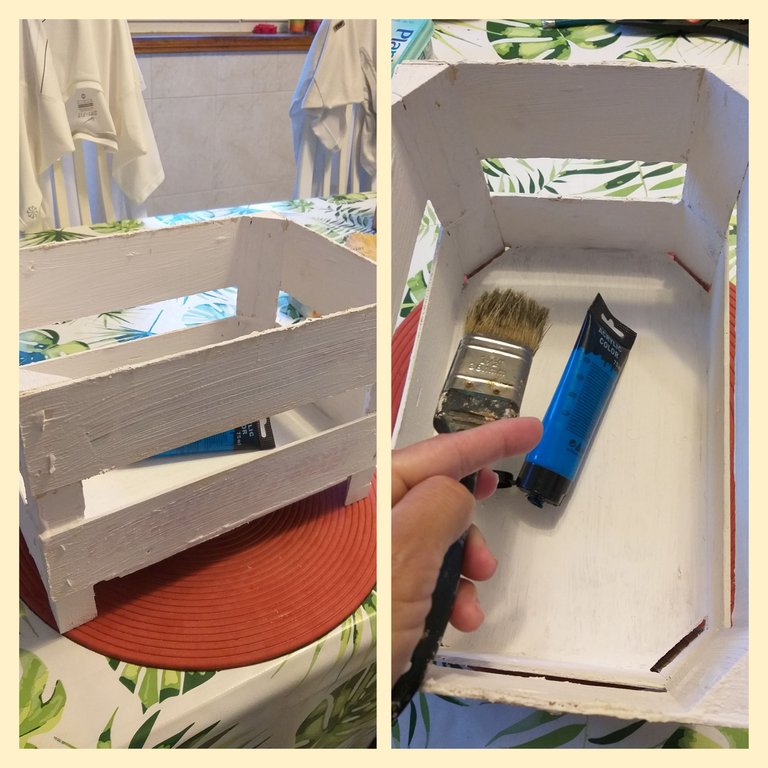
7👣. Después con la pintura acrílica de color azul claro pintamos toda la caja con la brocha pequeña y dejamos secar bien.
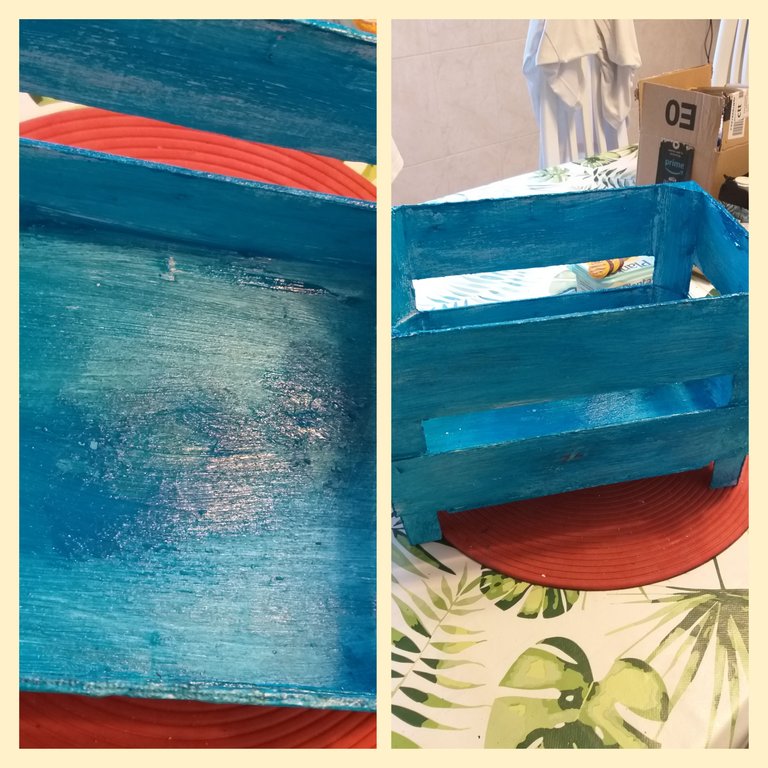
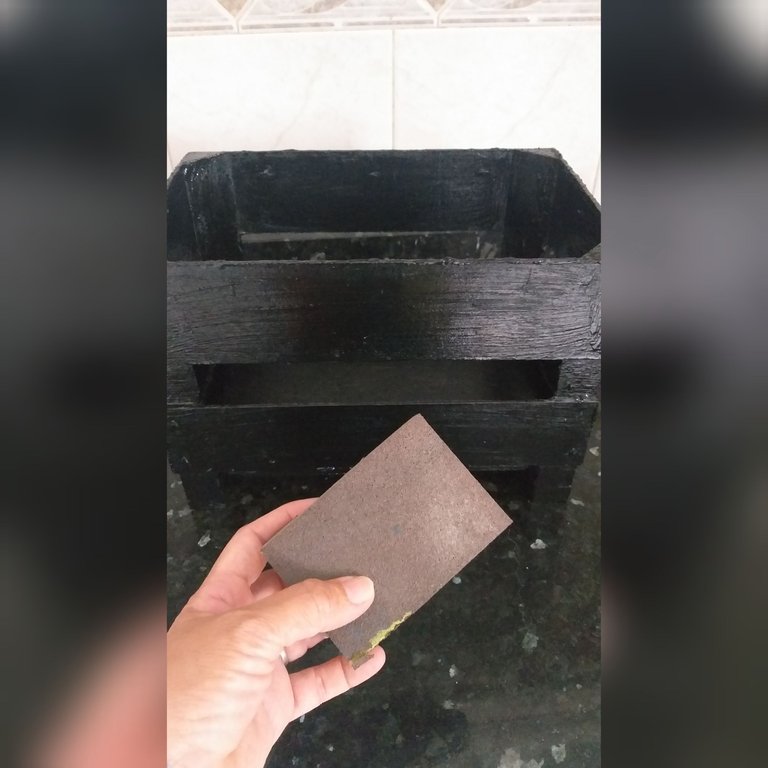
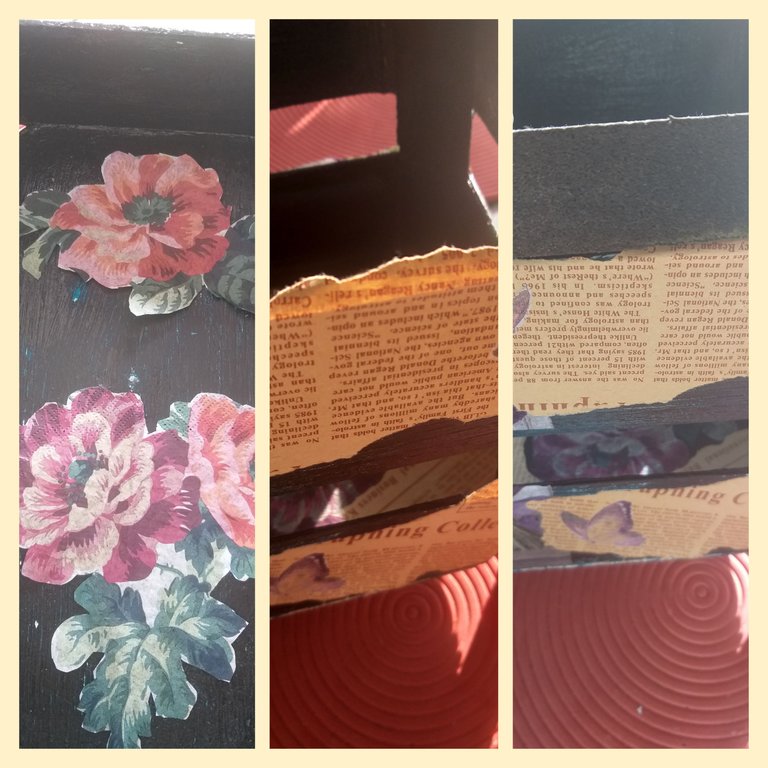
8👣. Ahora con un paño de cocina o una servilleta aplicamos la cera en los sitios que deseamos; es para aplicar la técnica del decapado que es que dejamos secar,lijamos y se ven las pinturas anteriores.
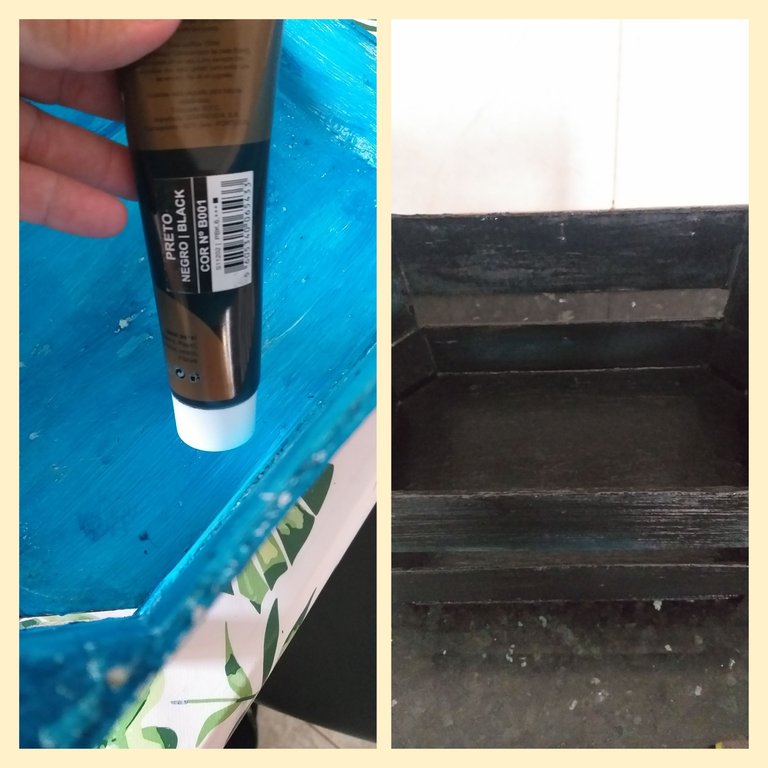
9👣. Luego que aplicamos la cera, pintamos de nuevo la caja con el color negro y dejamos secar bien y con la lija lijamos por las áreas donde le colocamos la cera.
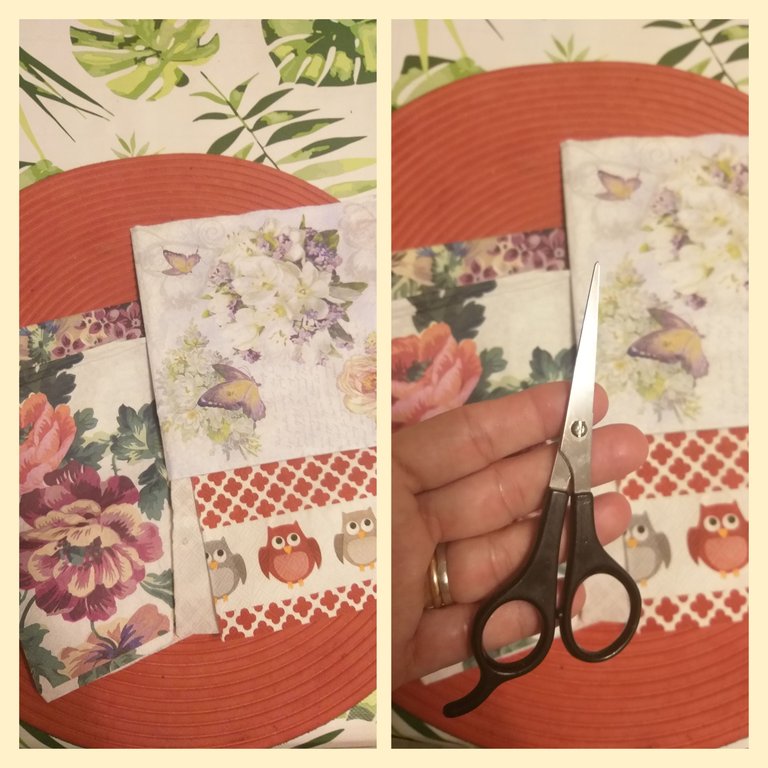
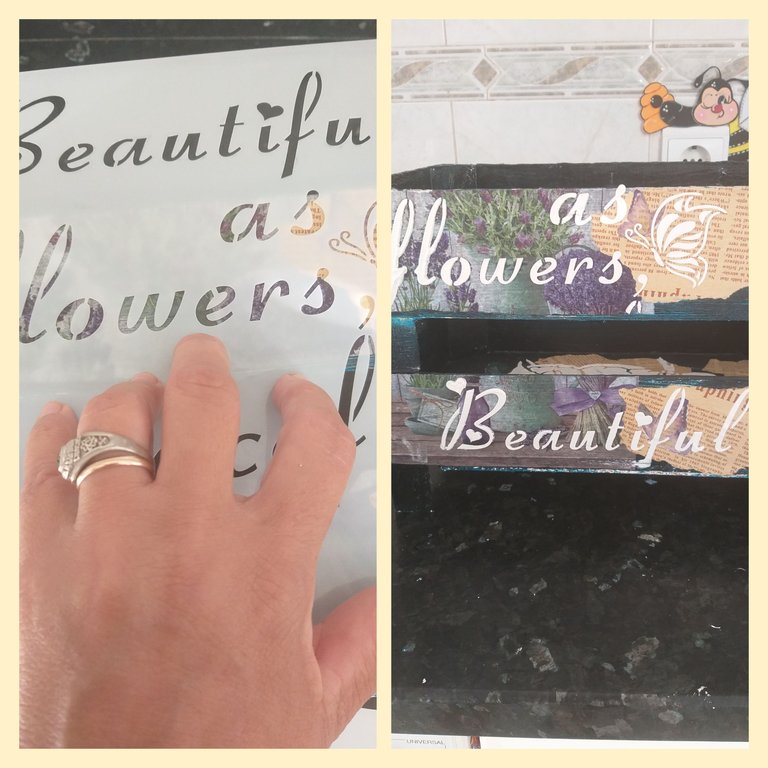
10👣. En este paso seleccionamos las servilletas que vamos a usar para la técnica de Decoupage y con la tijera recortamos las fíguras que utilizaremos
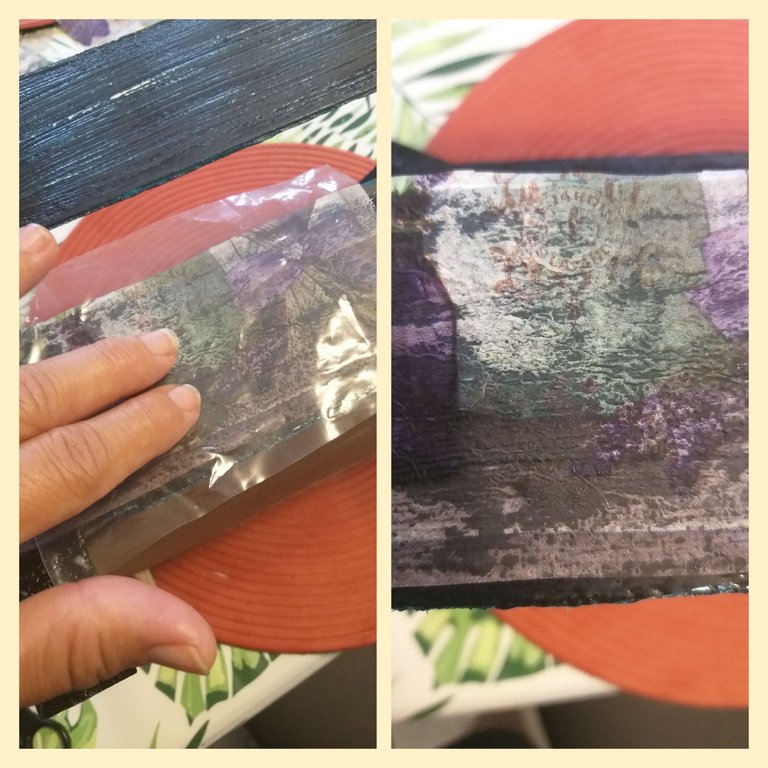
11👣. Con el pegamento blanco y un poquito de agua la mezclamos y con el pincel de celda chata o plana colocamos el pegamento y luego ponemos las figuras de servilletas. Deden quitar las capas blancas de las servilletas para trabajarlas. Lo primero que debemos hacer es colocar el pegamento en la caja y con la ayuda de un pedazo de plástico lisamos la figura del centro hacia los lados.
Las figuras las colocamos al gusto de cada quién.
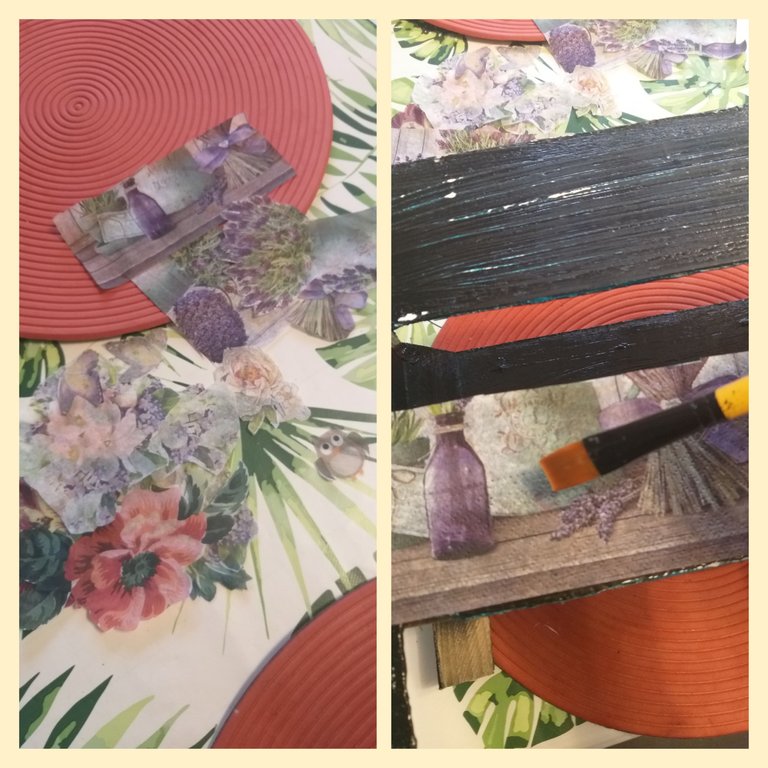
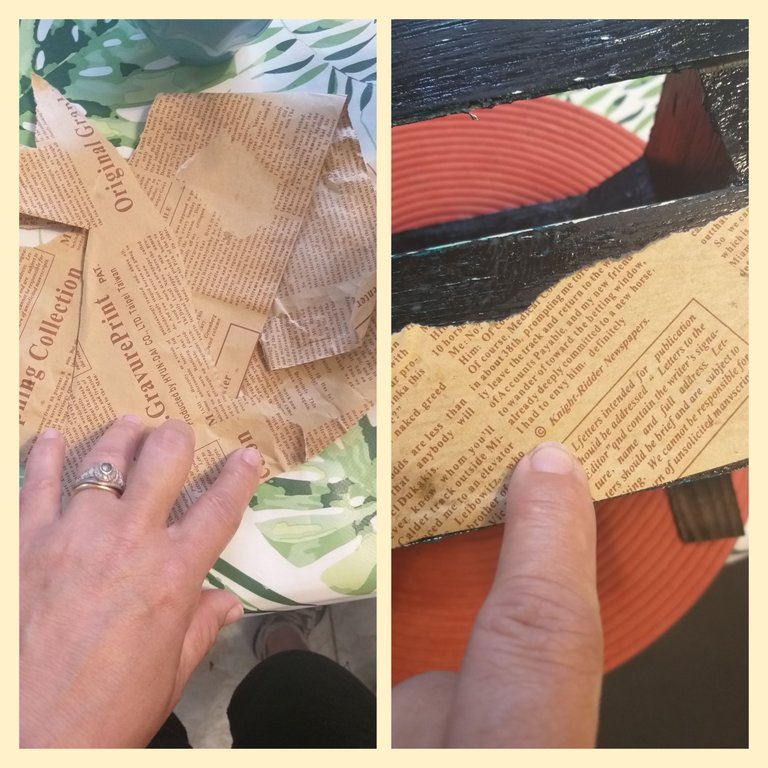
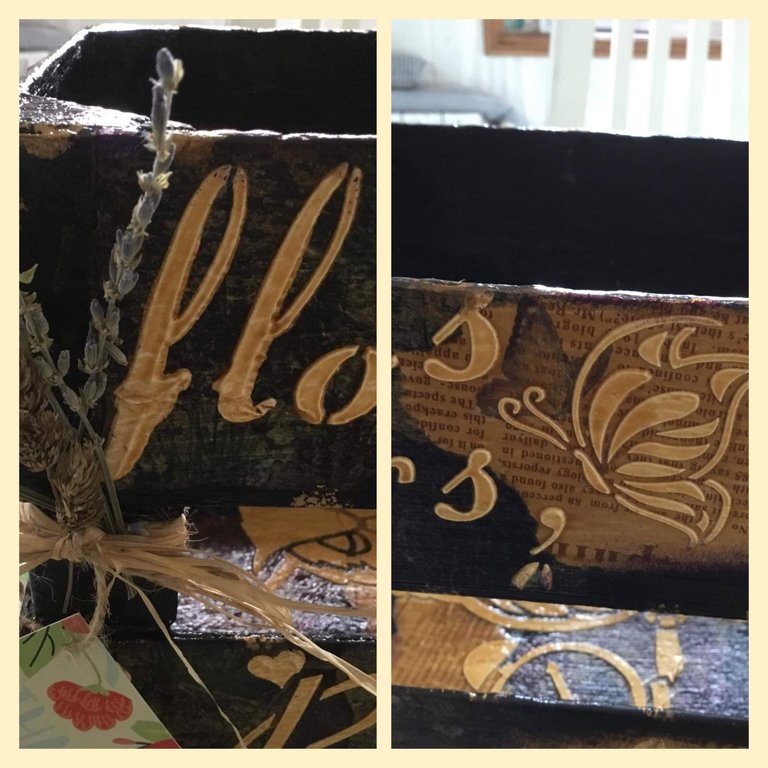
12👣. Además de las servilletas utilicé periódico tratado con agua de café y lavanda. Luego el período se rasga con la mano, al igual lo pegamos a la caja.
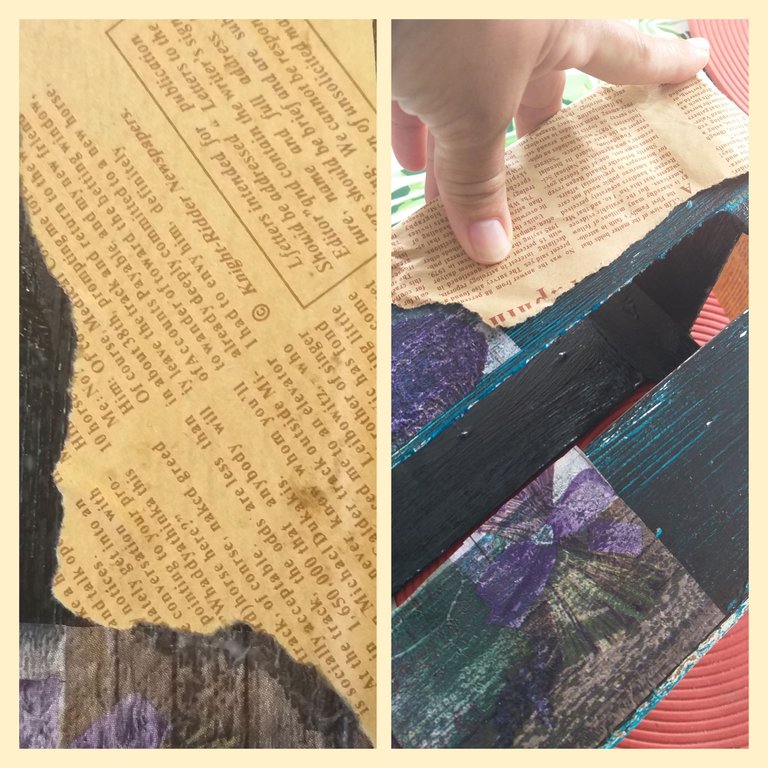
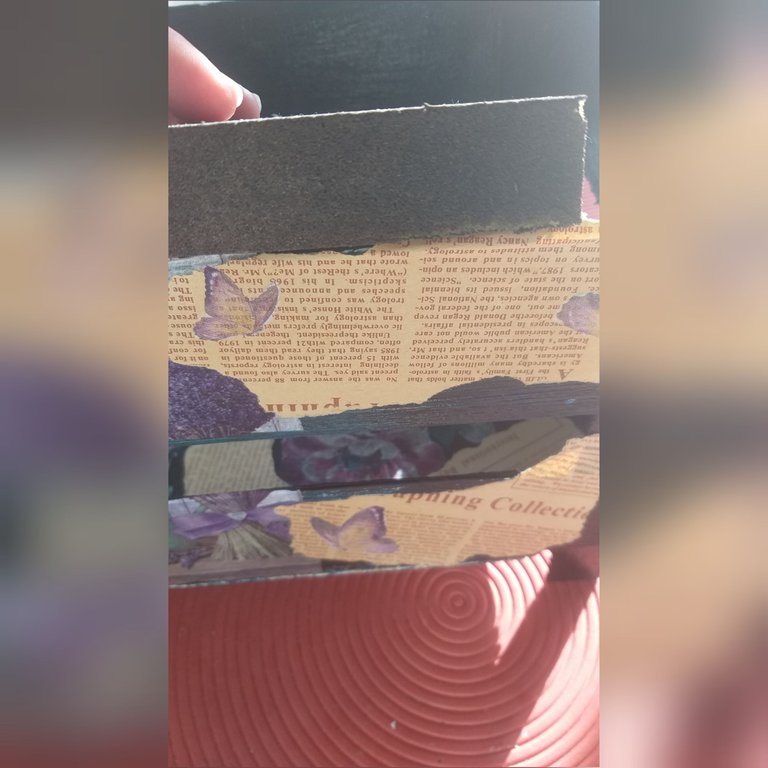
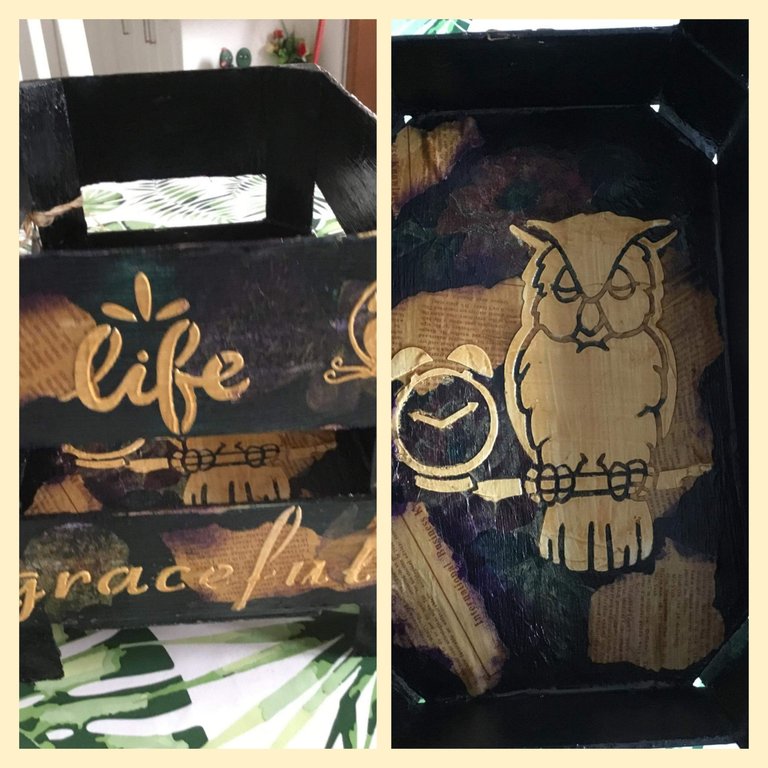
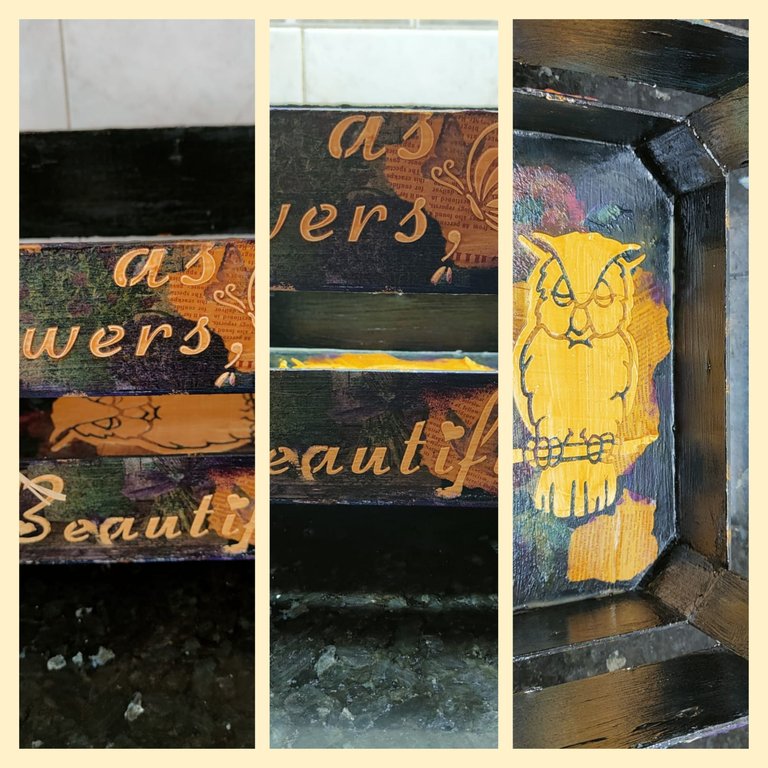
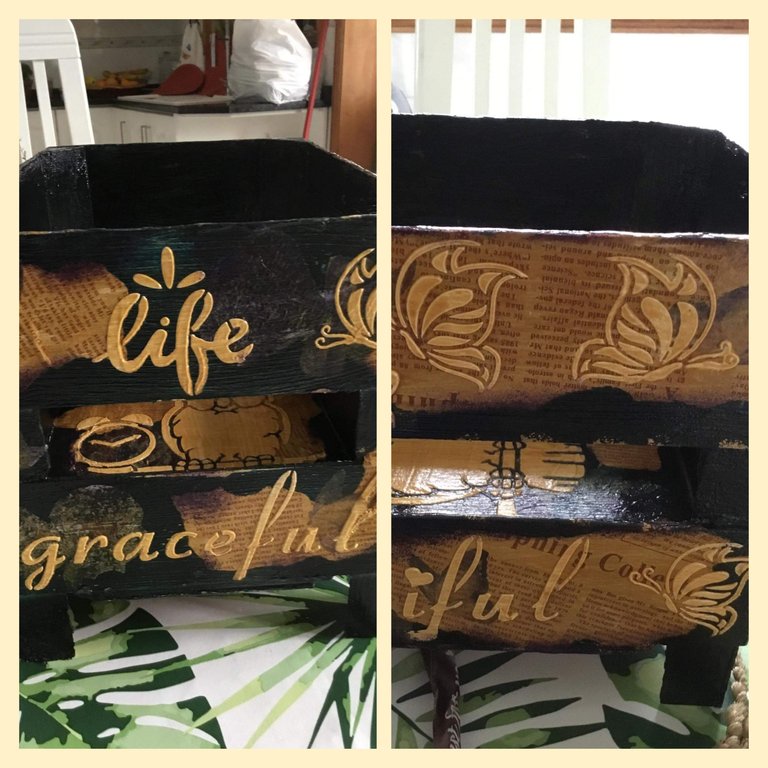
13👣. Pegamos mariposas encima del papel periódico y dejamos secar. También se decora la parte del fondo de la caja y todos los lados.
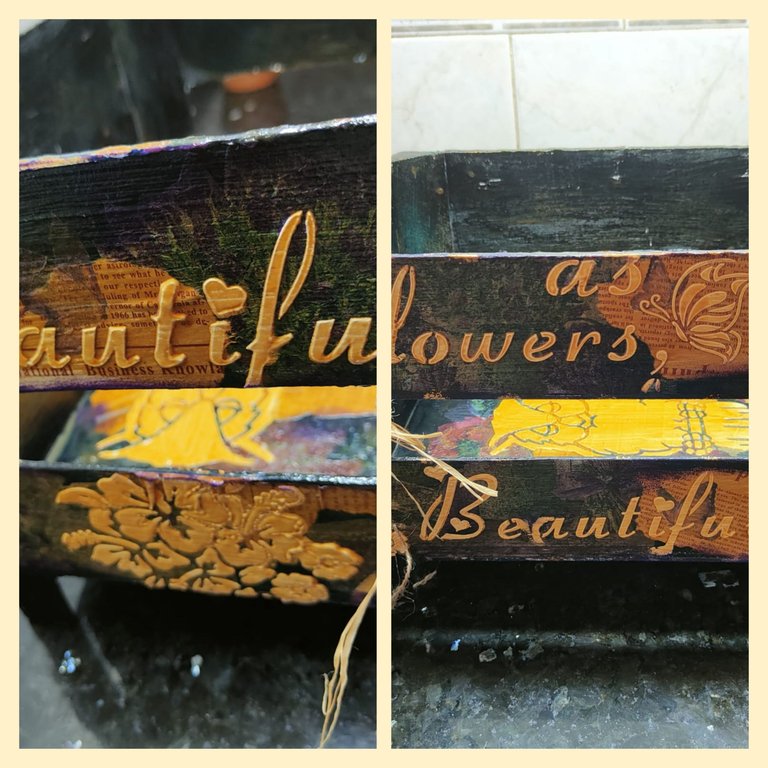
14👣. Con plantillas y la mezcla de yeso vamos hacer figuras con relieves. Fijamos la plantilla con tirro o cinta de construcción y con la espátula deslizamos la mezcla y después levantamos la plantilla. Podemos hacer varias figuras o imágenes con la plantilla por toda la caja. Una recomendación la mezcla no puede quedar ni aguada ni dura; debe ser manejable con la espátula.
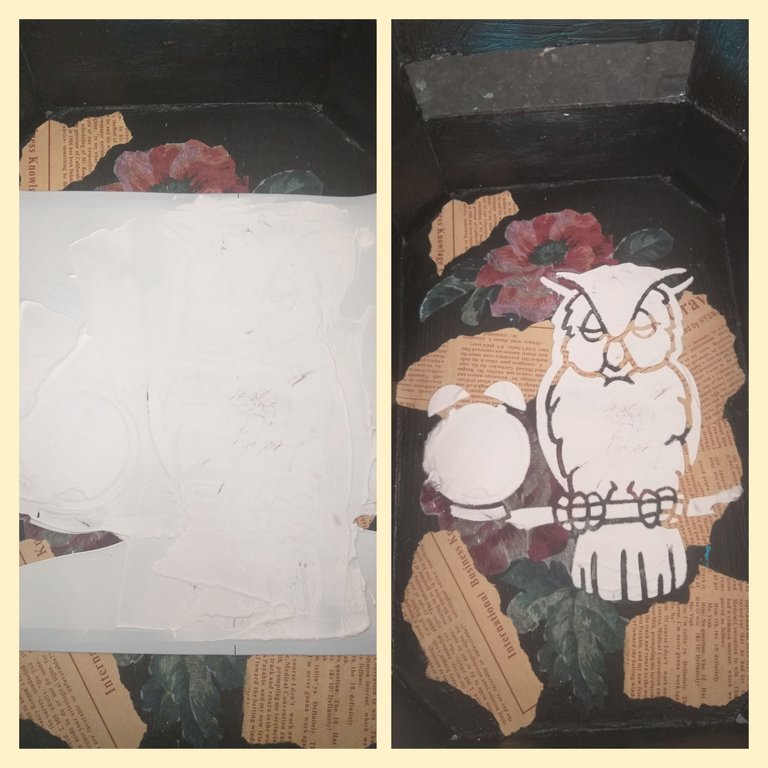
15👣. Luego que hemos colocado con las plastilinas las figuras que deseamos, se debe dejar secar bien.
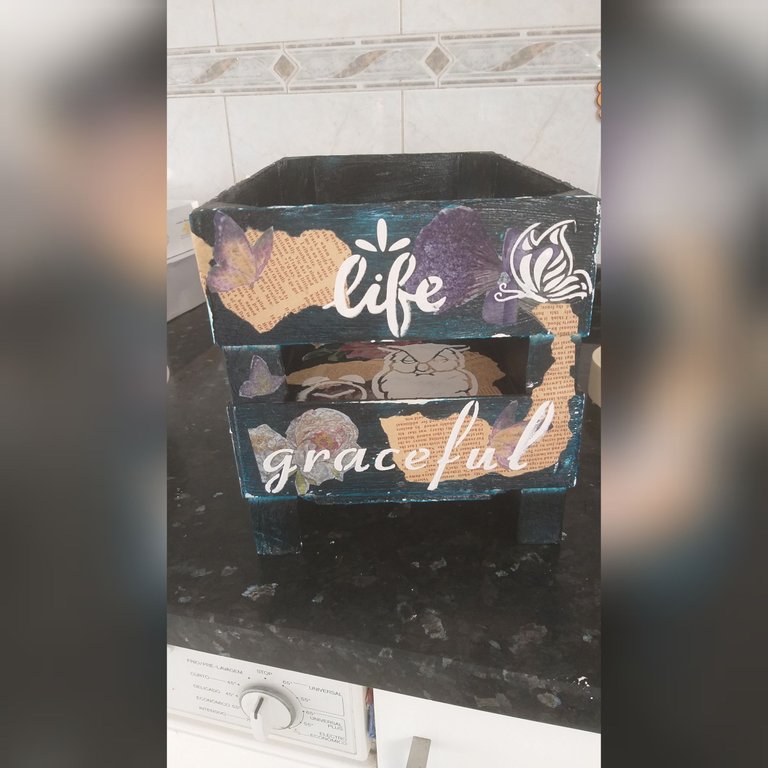
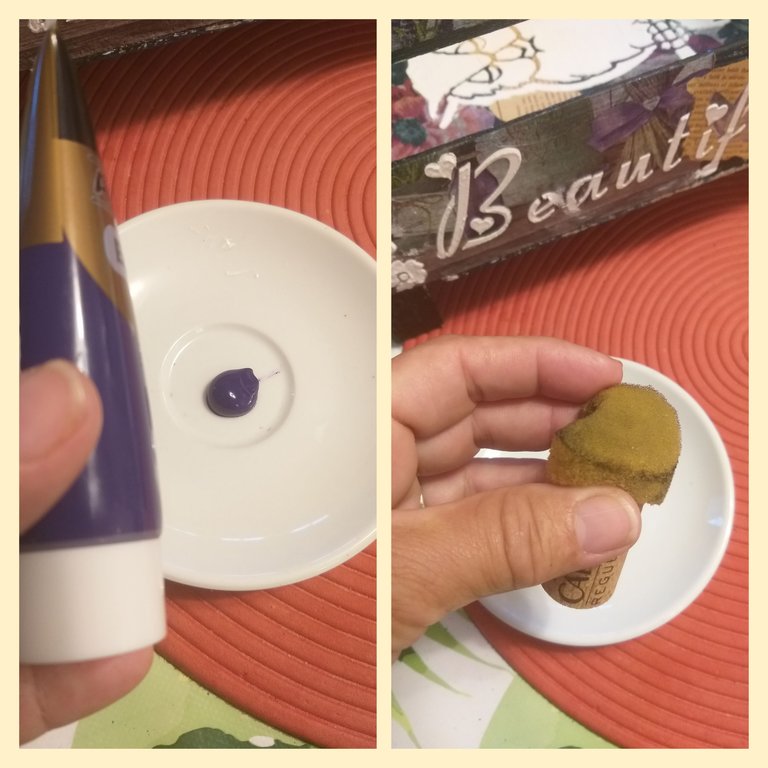
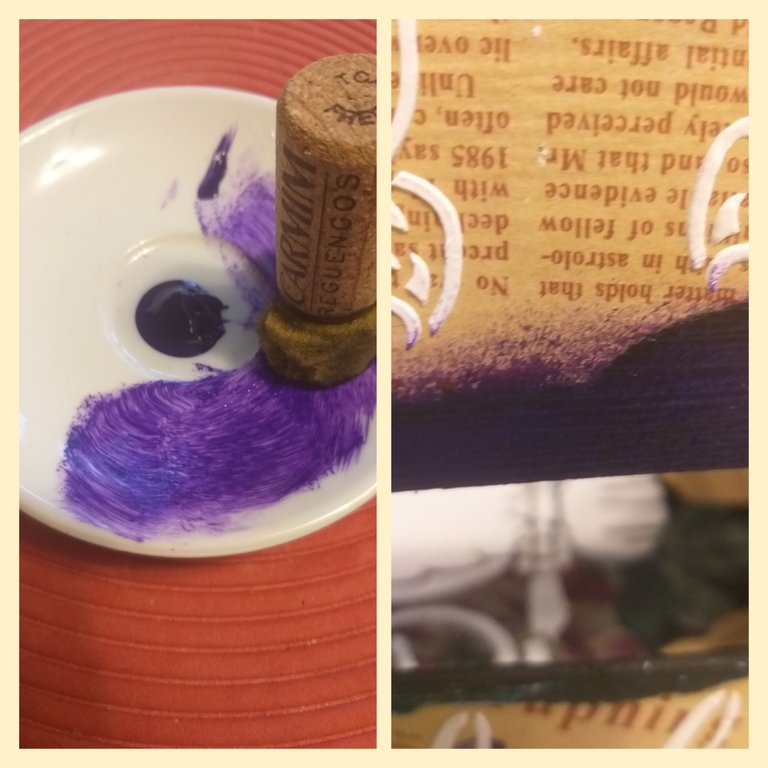
16👣. Ahora vamos a realizar la técnica del moteado por alrededor del papel y orilla de la caja con la pintura de color lila cargando y descargando la pintura y luego hacemos lo mismo con la dorada pero por los bordes y dejamos secar bien.
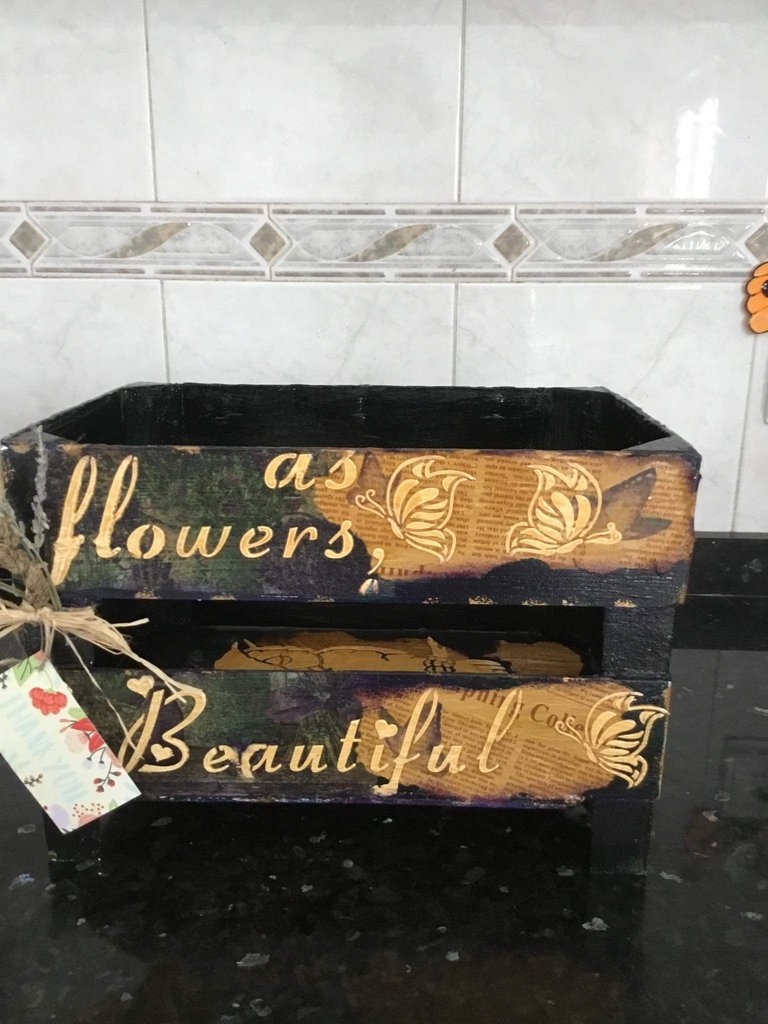
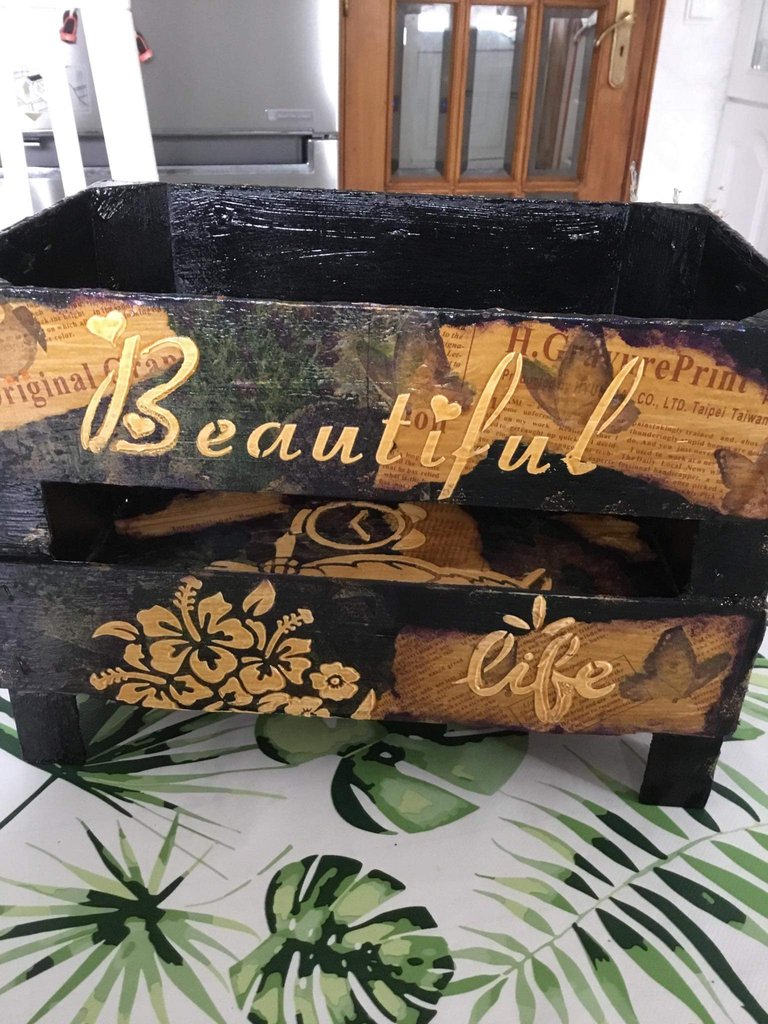
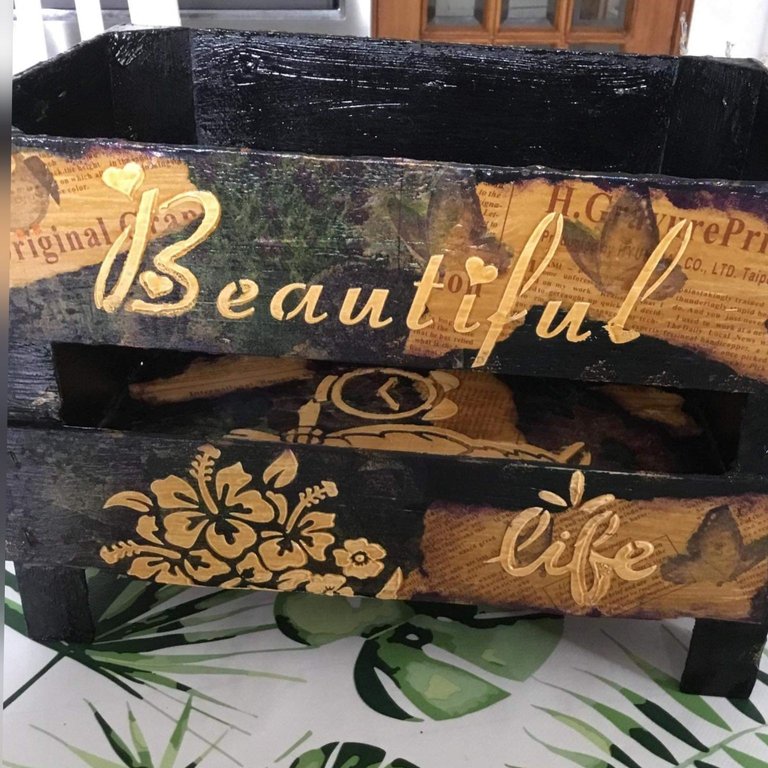
17👣. En éste último paso con la brocha colocamos el barniz. El barniz que se le colocó es de color pino que le dará un toque de envejecido.

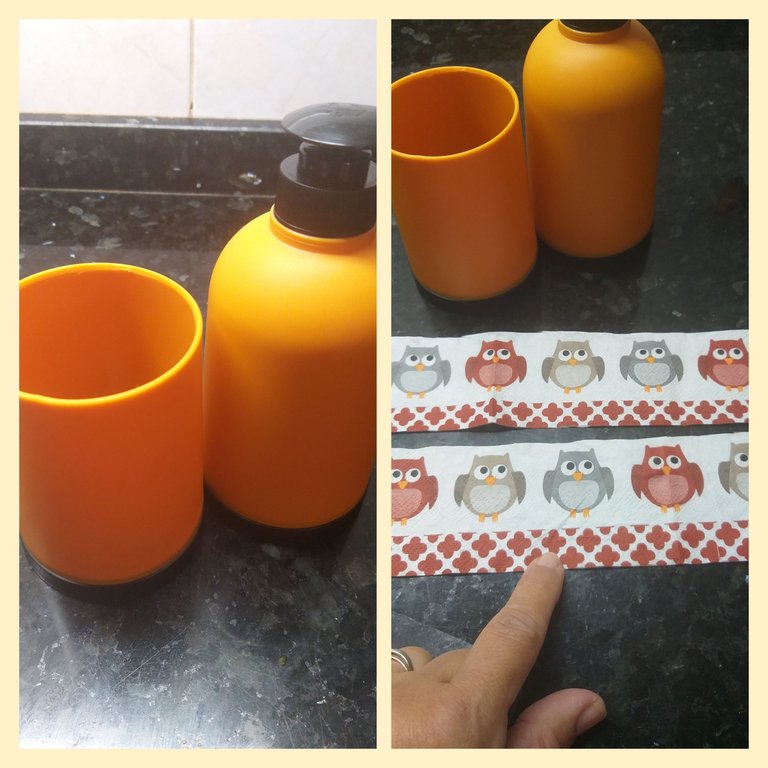
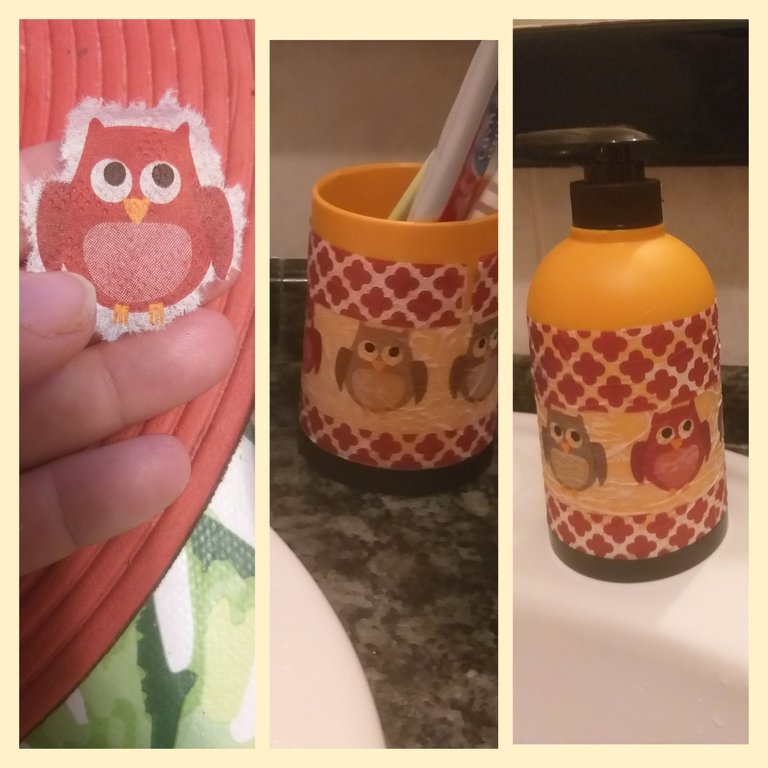
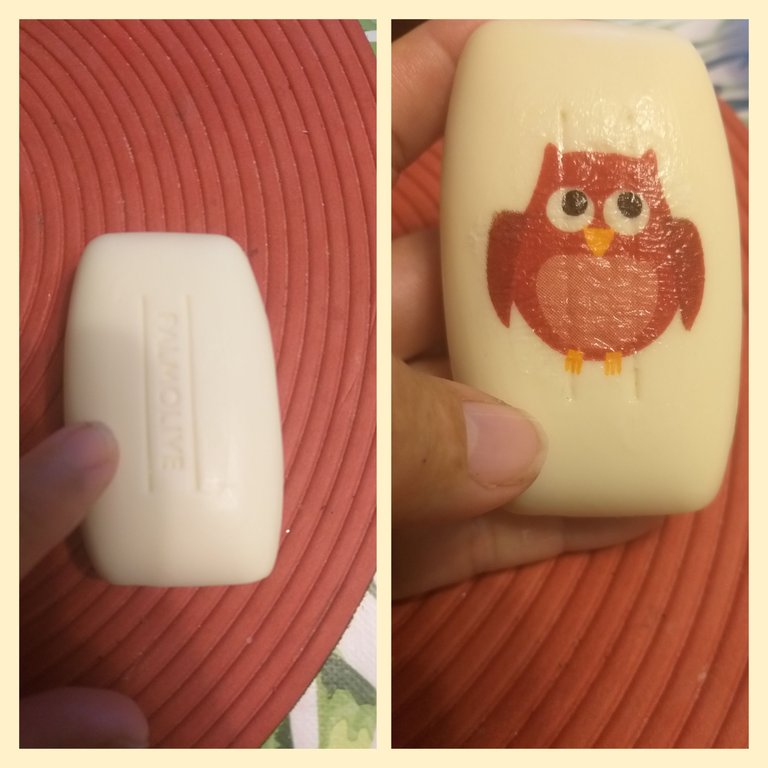
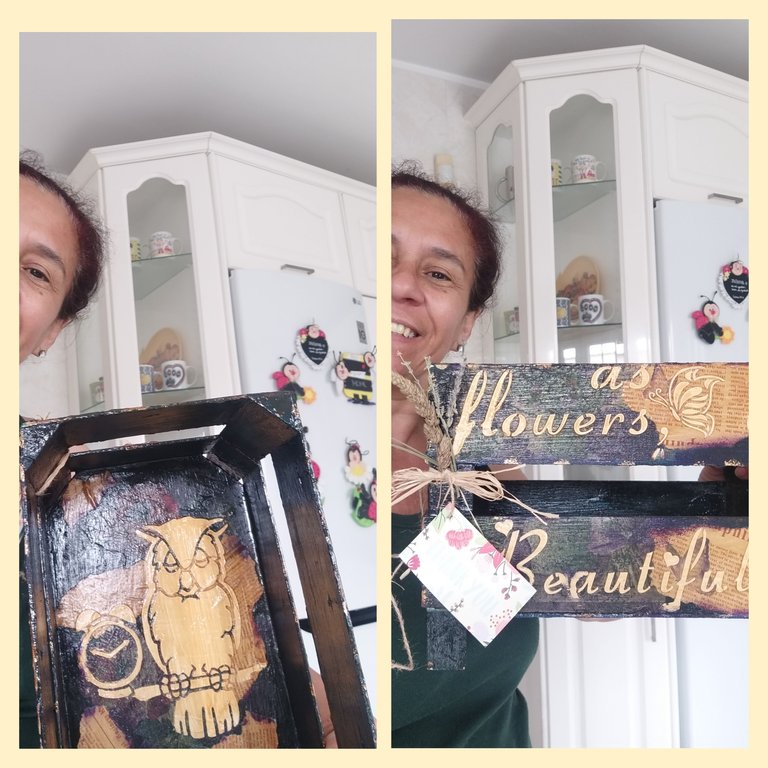
Vieron lo hermoso que quedan los objetos con ésta técnica. Podemos hacerla en muchos objetos como les muestro acá en un juego de accesorios de baño y hasta el jabón😉👍.
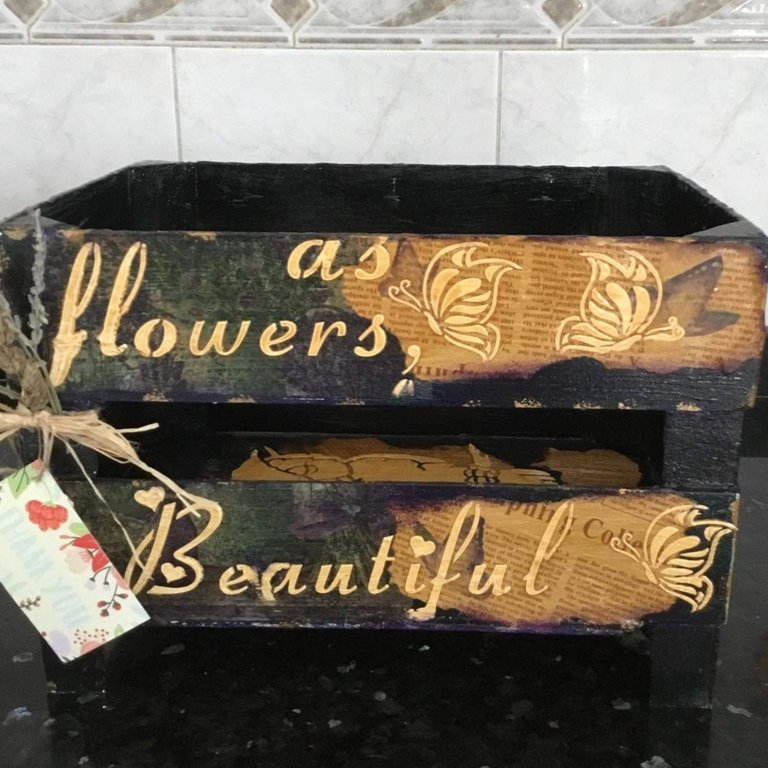
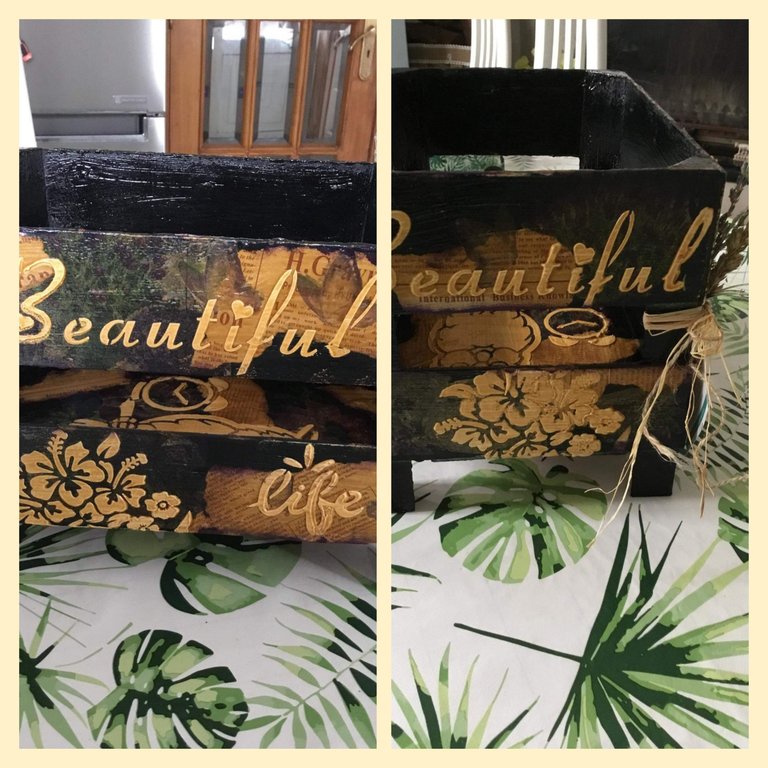
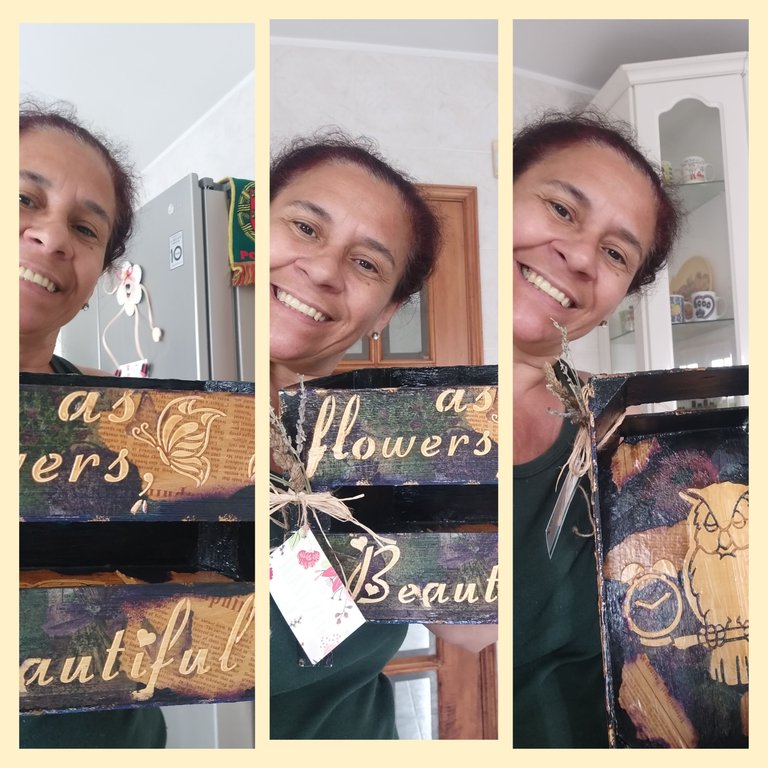
Resultado final
Espero amigos que le haya guste mi tutorial de hoy la caja multiusos que se realizó con material reciclado y la técnica de Decoupage y con otras técnicas. Gracias a todas las personas que me apoyan siempre y dejan hermosos comentarios; al igual que las distintas comunidades que también me apoyan, muy agradecida y Bendecido día.
Las fotos son tomadas de mi teléfono móvil Samsung Galaxy A6 y organizadas por la aplicación GridArt.

English
Receive a cordial greeting to all the people who make life to the different communities of this great and beautiful HIVE hive; I hope you are well and I wish you a happy weekend. The #hivediy community; it is a beehive that gives any member the opportunity to express their gifts and through their contests encouraging and encouraging everyone to participate; This time he opened a new contest with the Decoupage technique, I love that technique and if we combine it with other techniques the work is beautiful. I have already made many crafts with this technique and the result is excellent; We can also do it on any surface such as glass, fabric, wood, metal and plastic, it is a very convenient way to recycle these materials👍😉. I am going to tell you a little about this technique from my own experience. The Decoupage technique is the art of pasting any paper cutout with prints, newspapers, fabric, rice paper, and napkins; These last two are the most used.
It consists of decorating surfaces (of all kinds, from ceramics, wood, cardboard and even soaps or candles) with cut-out paper or fabric images that are fixed to the surface to be decorated with a varnish. It is impressive how we can combine this technique with others; such as the pickling technique, mottled, embossed with stencil, aged...
What motivates me the most in crafts is how through it we can reuse, recycle and restore🤗 any object that is going to be discarded and not given a second chance; In addition, many of the objects that we throw away can be used and make any craft that serves to decorate and even arts, with the Decoupage technique we can transform any object into art and the result is beautiful. So come with me to make this craft today by recycling strawberry boxes, I will also show you that technique in other objects.
The Materials that we will use to make these multifunctional boxes are:
Two boxes where the strawberries come (Wood)
Napkins with motifs
Scissors
Paste or candle wax
Special paint for Decoupage or acrylic
Fine, thick and flat cell brushes or small brush
A piece of cloth or cloth
A screwdriver or pliers and a pair of pliers
Paperboard
A piece of plastic (bag)
Water and a plastic cup
Spray or liquid varnish
Sanding wood
Plaster or mass to cover cracks
Glue for wood
spatula
Lilac, light blue and gold acrylic paint
*Strip or construction tape
- A piece of sponge and a flat container.
Steps to make the multifunctional box
1👣. The first thing we must do is clean the dust or dirt from the boxes with a kitchen cloth; in this case the box was clean, only with the strawberry stains but that doesn't matter because we will paint it. Then we are going to remove the bases of the two boxes by removing the staples that the box lids bring, using the screwdriver or the pliers and the pliers.
2👣. We lift the staples first with the screwdriver or the pliers and then we remove or cut them with the pliers.
3👣. After having removed the two lids from the boxes; We are going to glue them both with wood glue.
4👣. Then the two covers glued; We will glue it to the bottom of one of the boxes, leaving the four legs to the box and let it dry. As you can see in the image I put weight on it so that it sticks the uniform cover.
5👣. We prepare the plaster or mass to cover slots. In this case, powdered plaster was used and mixed with a little water, it should be like a paint so that it can cover all the holes in the box.
6👣. After we have the entire box covered with plaster, we will let it dry well.
7👣. Then with the light blue acrylic paint we paint the entire box with the small brush and let it dry well.
8👣. Now with a kitchen cloth or a napkin we apply the wax in the places we want; It is to apply the stripping technique, which is that we let it dry, sand it and the previous paintings can be seen.
9👣. After we apply the wax, we paint the box again with the black color and let it dry well and with the sandpaper we sand the areas where we put the wax.
10👣. In this step we select the napkins that we are going to use for the Decoupage technique and with the scissors we cut out the figures that we will use
11👣. With the white glue and a little water we mix it and with the flat or flat cell brush we place the glue and then we put the napkin figures. Deden remove the white layers of the napkins to work them. The first thing we must do is place the glue on the box and with the help of a piece of plastic we smooth the figure from the center to the sides.
We place the figures to everyone's taste.
12👣. In addition to the napkins, I used newspaper treated with coffee water and lavender. Then the period is torn by hand, just like we glue it to the box.
13👣. We glue butterflies on top of the newspaper and let dry. The bottom of the box and all the sides are also decorated.
14👣. With templates and the plaster mixture we are going to make figures with reliefs. We fix the template with plaster or construction tape and with the spatula we slide the mixture and then lift the template. We can make several figures or images with the template throughout the box. A recommendation: the mixture cannot be watery or hard; It should be manageable with the spatula.
15👣. After we have placed the figures we want with the plasticine, it should be allowed to dry well.
16👣. Now we are going to do the speckling technique around the paper and the edge of the box with the lilac paint, loading and unloading the paint and then we do the same with the gold but around the edges and let it dry well.
17👣. In this last step with the brush we place the varnish. The varnish that was placed on it is pine colored that will give it an aged touch.
They saw how beautiful the objects are with this technique. We can do it in many objects as I show you here in a set of bathroom accessories and even soap😉👍.
Final score
I hope friends that you liked my tutorial today, the multipurpose box that was made with recycled material and the Decoupage technique and with other techniques. Thanks to all the people who always support me and leave beautiful comments; as well as the different communities that also support me, very grateful and Blessed day.
The photos are taken from my Samsung Galaxy A6 mobile phone and organized by the GridArt application.
Me ha encantado!! Te ha quedado muy hermoso amiga 💕. Nunca he usado esas técnicas, muchas gracias por compartirlas. Suerte en el concurso.
Saludos 🤗
Es un placer amiga compartir lo que hago y muchas gracias por tu apoyo. Bendiciones👏👏👏
Amiga te quedó bellísima me gustó mucho tu técnica
✨🌺👏🤗😊🌹🤩😍👍😬🥰✨👏❤️🤗😊🤩😍👍😬🥰✨👏❤️🌹🤩😍👍😬🥰🌺👏❤️🤩🥰😬👍😍✨👏🤗😊😊🤩🌹❤️👏🌺✨😍👍👍😬🥰✨🌺🤗👍😬🥰🥰
Gracias mi bella y me alegra que te haya gustado🤗. Bendecido día👏👏
La técnica del decoupage es una de mis favoritas, me gusta mucho el resultado que se consigue con ella. Tu trabajo quedó hermoso y muy original, felicitaciones. Mucha suerte en el concurso. Saludos, @zullyarte
Muchas gracias amiga sí es una técnica hermosa y me alegro que te guste el resultado🥰 de mi trabajo. Bendiciones amiga👏👏👏
Tienes una gran técnica en decoupage, te extrañábamos, gracias por participar y otórganos tus conocimientos. Quedó demasiado demasiado pero demasiado lindo.
😊Gracias corazón. Es un grato placer para mí compartir lo poco que sé con éste hermoso grupo de gente talentosa 🤩. Muy agradecida mi bella por tu apoyo ❤🤗. Mil bendiciones👏👏.
Que hermosura amiga @zullyarte. Sabía que nos sorprenderías con algo bellísimo, digno de tus maravillosos trabajos. Felicidades.
Mucha suerte en el concurso.
Abrazos, y muchas bendiciones 🤗✨😘🥰💗💐
El honor es mio mi bella amiga por estar en éste hermoso grupo con grandes talentos y una de esas personas eres tu❤🤗 Bendecido día para Ti también amiga👏👏👏
Te ha quedado hermosa
Muchas gracias por tu apoyo ❤🤗 y Bendecido día
Maravillosa idea @zullyarte , me encanto el resultado final 💓 💕 💜 ¡Éxitos y buena suerte en el concurso amiga! 😉
Que emoción para mí que me digan que le ha gustado mi trabajo😍. Gracias por tu apoyo y Bendecido día
Thank you for sharing this amazing post on HIVE!
Your content got selected by our fellow curator @priyanarc & you just received a little thank you via an upvote from our non-profit curation initiative!
You will be featured in one of our recurring curation compilations and on our pinterest boards! Both are aiming to offer you a stage to widen your audience within and outside of the DIY scene of hive.
Join the official DIYHub community on HIVE and show us more of your amazing work and feel free to connect with us and other DIYers via our discord server: https://discord.gg/mY5uCfQ !
If you want to support our goal to motivate other DIY/art/music/homesteading/... creators just delegate to us and earn 100% of your curation rewards!
Stay creative & hive on!
Te ha quedado muy linda amiga , saludos ❤️
Saludos para ti también y gracias por tu apoyo y Bendiciones amiga👏👏👏
Hola mi querida prima, tus cajas te quedaron realmente preciosas, me gustaron mucho esos colores y también me encantó que utilizaste esas cajas de fresas para convertirlas en algo super lindo. Suerte y un fuerte abrazo 🤗.
Un trabajo precioso y muy fino amiga...te felicito por la creatividad. Un abrazo 😘💜
🎆🎇🎉🎊🌧️💐✨🌾🌱🌹🌙🌿🍃🥀⚡🌺☘️🍀🌈🌷⭐🪴🌵🌸🌟💮🌴🌳💫☀️💮☔🌲🌳🌍🌌🌠☄️🏵️🐝🌻🌼🍄🐞🦋💙☕💜🍍🎆🎇🎉🎊
Soberbio todo el proceso querida amiga, quedó genial, el estilo me gustó muchísimo! Espero verte entre los ganadores!