
🔸Sin más que añadir, a continuación los dejo con el paso a paso:
🌿Good afternoon, holozing friends!🌿 I hope you are feeling great today and are having a nice week. For my part, I am happy to stop by here again to share with you a cute bookmark inspired by the forest healer. I am glad that you liked my previous post so much, because I was a little hesitant to share with you content that I had not shared before in this community, that is why I thought of another nice idea that I am sure you will like, because I loved it haha and I am proud of this beautiful result.
🔸Without more to add, then I leave you with the step by step:
♥️ESPERO QUE TE GUSTE,
¡Empecemos!
♥️I HOPE YOU LIKE IT,
Let's start!

✂️ MATERIALES | ✂️ MATERIALS
- Cartulina corrugada
- Foami verde, piel y marrón.
- Foami escarchado, verde, dorado,
rosado y morado. - Estambre verde.
- Pinturas.
- Marcadores.
- Hoja blanca.
- Corrugated cardboard
- Green, skin and brown foami.
- Frosted foam, green, gold,
Pink and purple. - Green stamen.
- Paintings.
- Markers.
- White sheet.
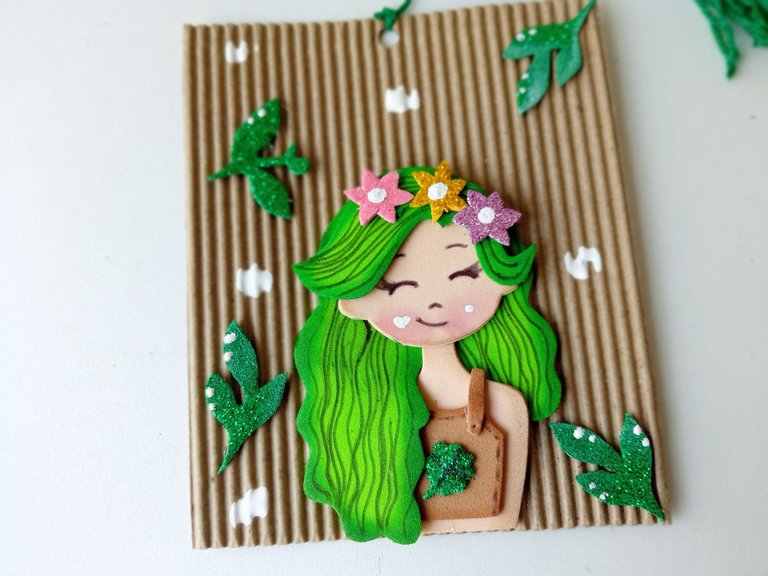
🌿 PROCEDIMIENTO | 🌿 PROCESS
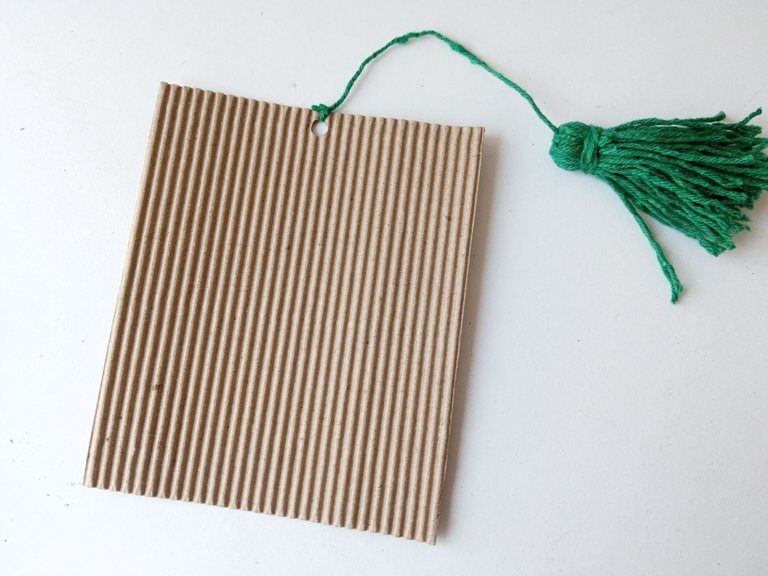
- ✨ PASO 1:
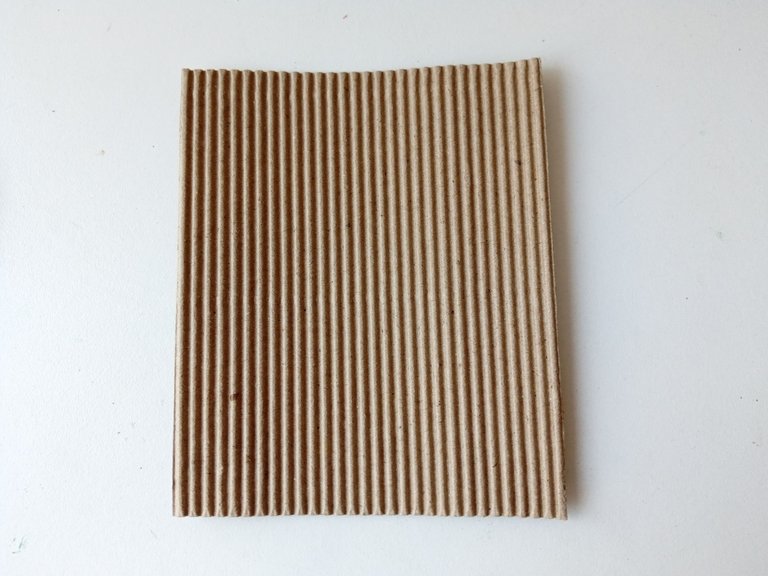
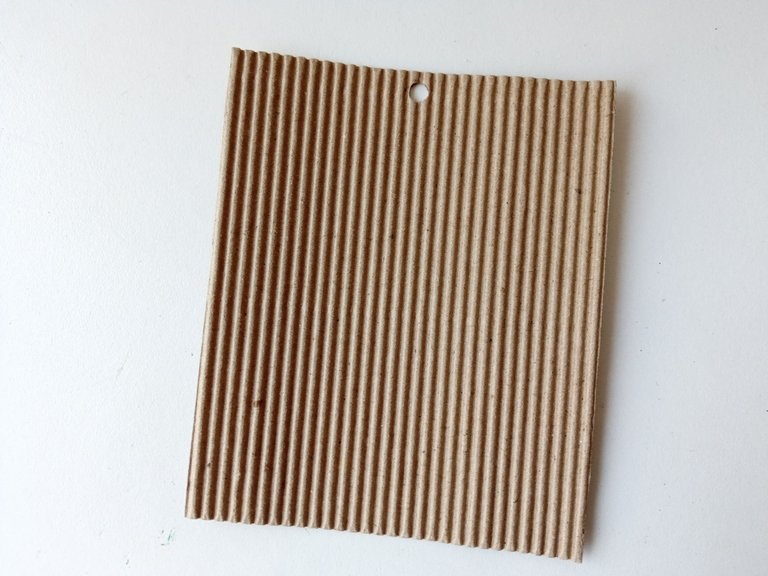
Lo primero que hice fue medir y cortar un rectángulo en cartulina corrugada de 12 cm x 9 cm. Luego, le hice un agujero centrado en la parte superior.
- ✨ STEP 1:
The first thing I did was measure and cut a 12cm x 9cm rectangle out of corrugated cardboard. Then, I drilled a hole centered on the top.
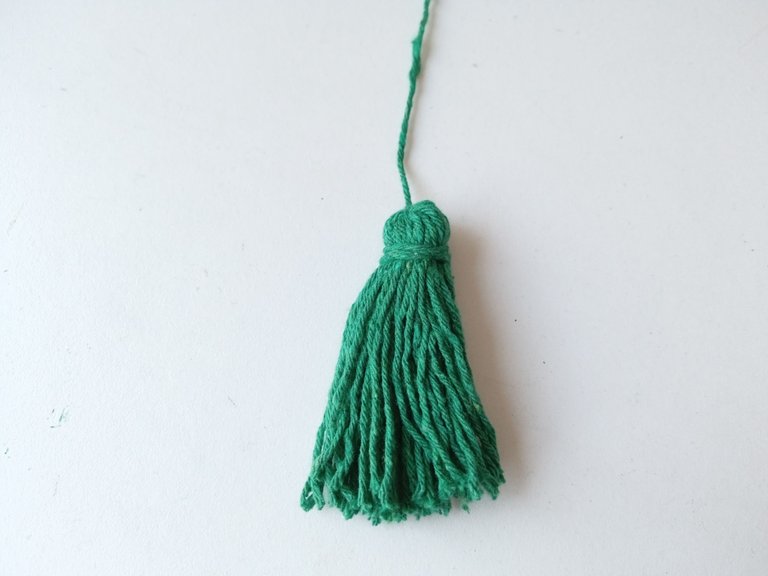
- ✨ PASO 2:
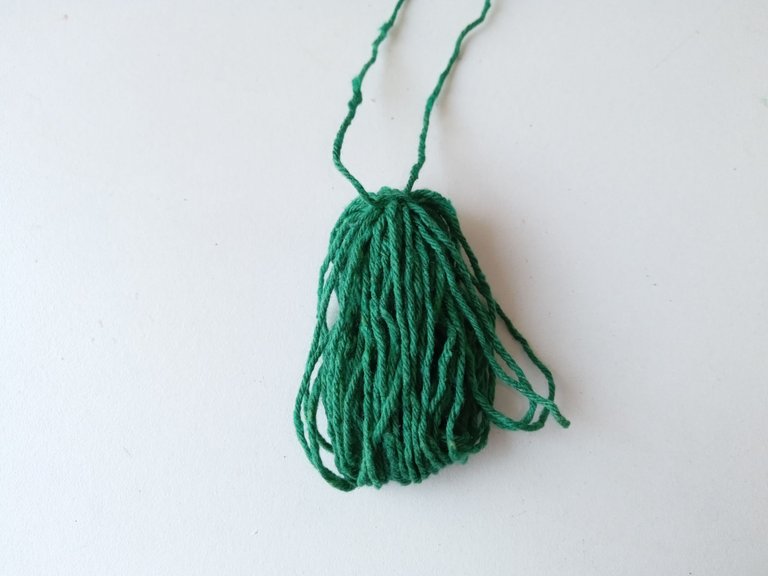
Seguidamente, comencé a elaborar la borla de la siguiente manera: comencé a pasar el estambre sobre mis cuatro dedos, que no quedara muy ajustado para que al momento de retirarlo fuera más sencillo. Al pasar varias vueltas de estambre, retiré de mis dedos e hice un nudo con una tira larga de estambre en medio dando a la parte superior. Luego, tomé una de las dos tiras del nudo y la enrollé un poco más abajo de donde hice el nudo. Por último, recorté en medio de la parte baja y con el restante de la otra tira del primer nudo, hice otro nudo en el agujero de la cartulina corrugada.
- ✨ STEP 2:
Next, I began to make the tassel in the following way: I began to pass the yarn over my four fingers, so that it was not too tight so that when removing it it would be easier. As I passed several wraps of yarn, I removed my fingers and tied a knot with a long strip of yarn in the middle leading to the top. Then, I took one of the two strips of the knot and wound it a little lower than where I tied the knot. Finally, I cut out in the middle of the bottom part and with the remainder of the other strip from the first knot, I tied another knot in the hole in the corrugated cardboard.
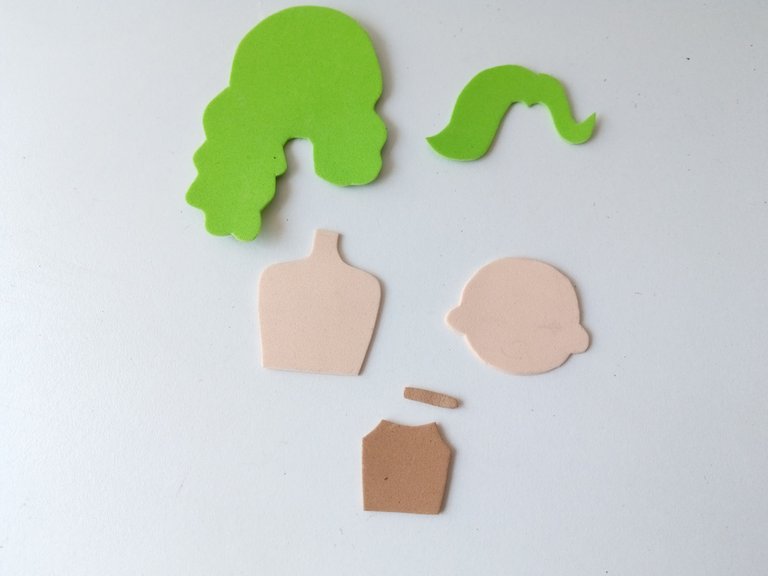
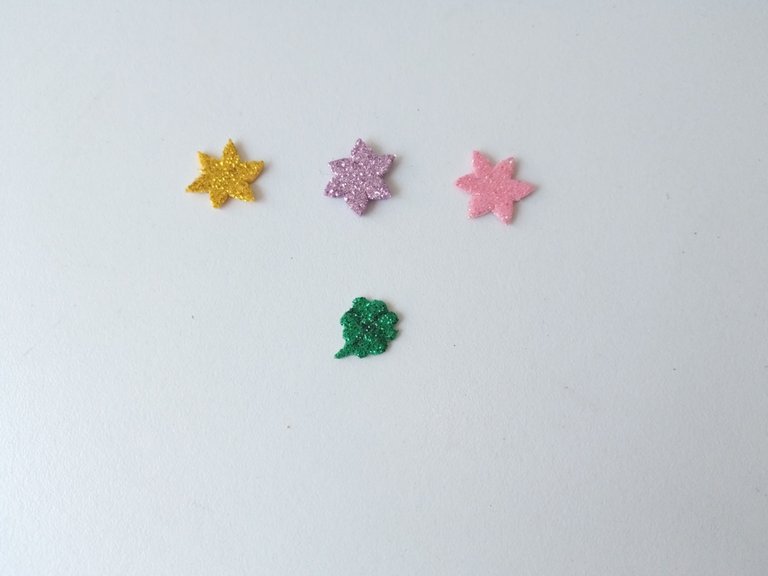
- ✨ PASO 3:
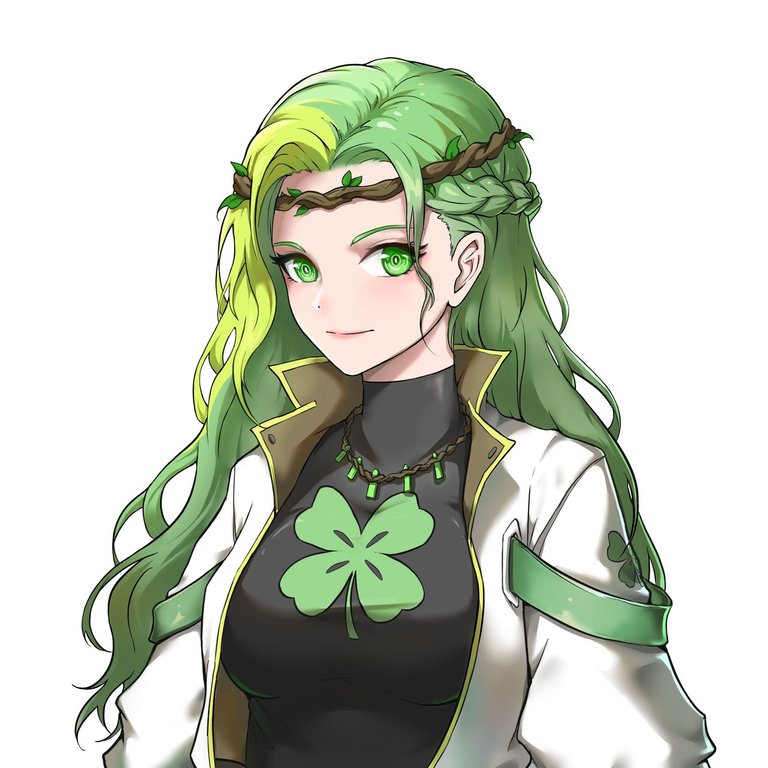
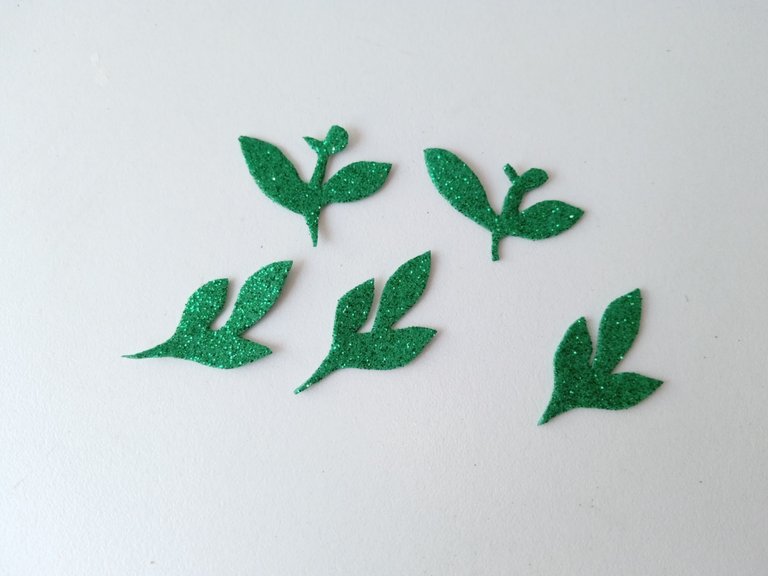
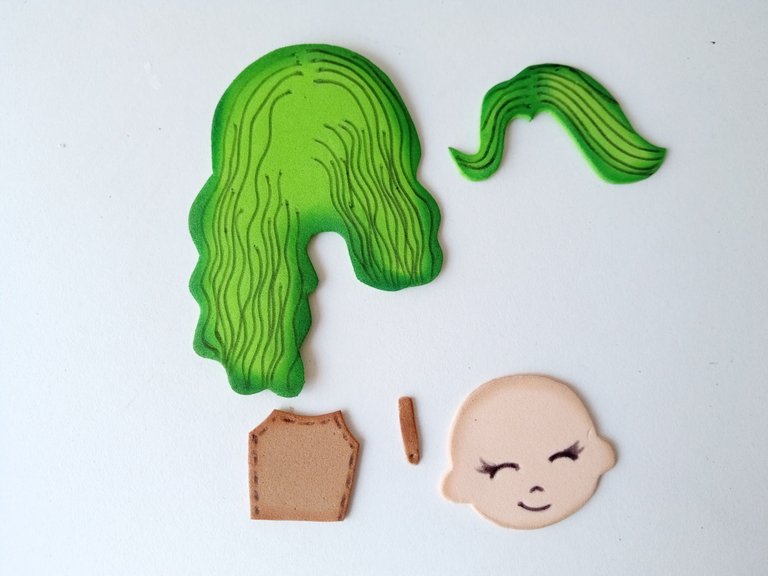
Ahora vamos con la decoración, así que comencé dibujando el patrón o dibujo de la sanadora del bosque a mi manera para luego, transferirlo a los colores correspondientes de foami de la siguiente manera: el cabello en verde, el cuerpo en color crema, la vestimenta en color marrón, el trébol en escarchado verde y las flores en distintos tonos de foami escarchado. Por otra parte, dibujé algunas hojas para el fondo y por último, recorté todas las piezas.
- ✨ STEP 3:
Now let's go with the decoration, so I started by drawing the pattern or drawing of the forest healer in my own way and then transferring it to the corresponding colors of foam as follows: the hair in green, the body in cream, the clothing in brown, the clover in frosted green and the flowers in different shades of frosted foam. On the other hand, draw some leaves for the background and finally, cut out all the pieces.
- ✨ PASO 4:
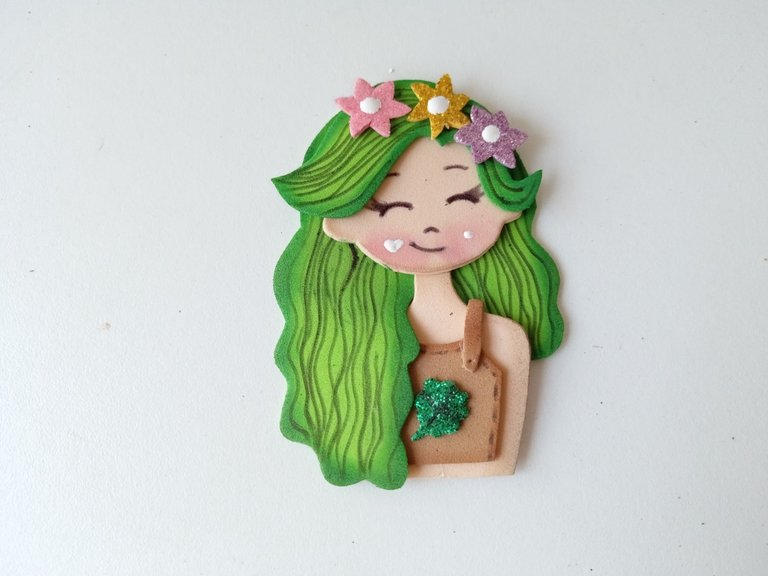
Al estar listas todas las piezas, di un poco de color a los bordes, utilizando un tono más oscuro de pintura o que contrasté con cada una de las piezas. Luego, di más detalles con un marcador a la blusa, cabello y rostro. Después, pegué todas las piezas y di detalles con pintura blanca a las flores y mejillas.
- ✨ STEP 4:
When all the pieces were ready, I gave a little color to the edges, using a darker tone of paint or one that contrasted with each of the pieces. Then, I gave more details with a marker to the blouse, hair and face. Then, I glued all the pieces together and gave details with white paint to the flowers and cheeks.

- ✨ PASO 5:
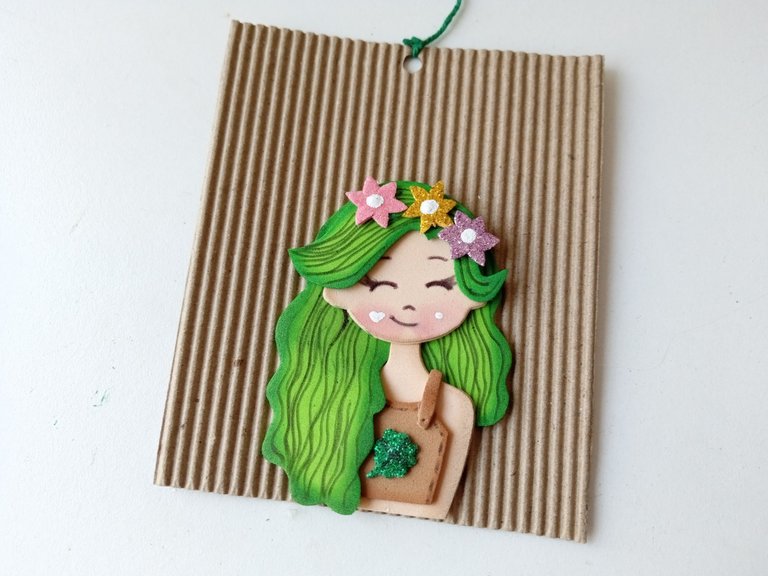
Para finalizar, pegué al personaje en medio del marcalibros, en el fondo pegué las hojas de forma desordenada y, por último, di toques de luz en las hojas y algunas manchas del mismo color en el fondo. Dejamos secar y ya estaría listo para comenzar a marcar las páginas de nuestros libros.
- ✨ STEP 5:
To finish, I glued the character in the middle of the bookmark, in the background I glued the leaves in a disorderly manner and, finally, I gave highlights on the leaves and some spots of the same color in the background. We let it dry and it would be ready to start marking the pages of our books.
❤️ Hasta la próxima publicación.
❤️ Until the next post.


Todas las fotografías son de mi propiedad.
Separador y Fotos editadas en Canva
All photographs are my property.
Photos edited in Canva
Ami pero que belleza esto, con este adorno si que te pasaste, está demasiado bello 😍😍😍 La muñequita te quedó linda y se ve tan delicada. De todas tus creaciones sobre Holozing esta es sin duda mi favorita 🥰
Amiiiiga pero que cosita más preciosa, ame cada detalle y el resultado ni hablar..
Perfecto 🌷✨✨✨✨
Demasiado hermoso 😍
Hola amiga, que bonita esa manualidad que nos compartes, donde es increíble como fuiste armando y colocando cada una de las piezas para armarlo completamente. Los detalles del cabello con perfectos y permite que sea muy llamativo.
Que boniiito me gusta mucho la carita esta muy tierna
Ami, te quedó demasiado bello este marcalibros, me encanta el trabajo con el foamy, precioso!!
Muy bonito amiga
Pero que belleza amiga, me encantó🥰🥰
Congratulations @valenpba! You have completed the following achievement on the Hive blockchain And have been rewarded with New badge(s)
Your next target is to reach 8000 replies.
You can view your badges on your board and compare yourself to others in the Ranking
If you no longer want to receive notifications, reply to this comment with the word
STOPCheck out our last posts:
Meee encantaaaa como todo lo que haces 😍😍