🔸Sin más que añadir, a continuación los dejo con el paso a paso:
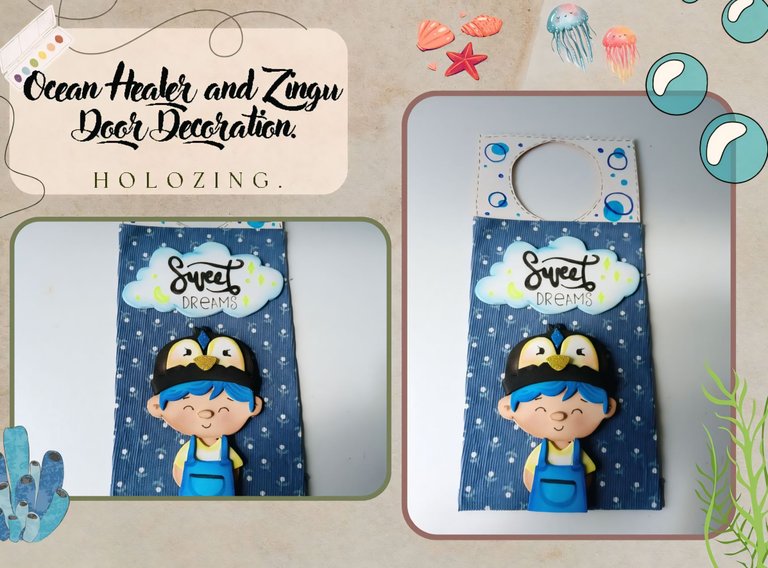
✨Good afternoon, holozing friends!✨ I hope you are all doing well and having a great week. As always, I'm happy to stop by here again to share a nice idea to decorate the door with the theme of the Ocean Healer and Zingu. Well, what can I say? I'm super happy with the result of this cute craft, because my idea was to make a Healer with a hat that had the face of one of the creatures and, obviously, Zingu was the perfect complement or companion on this occasion. Also, it's an excellent idea for the little ones' room. And since I loved this result so much, I'll try to do the same with the rest of the healers later.
🔸Without more to add, then I leave you with the step by step:
♥️ESPERO QUE TE GUSTE,
¡Empecemos!
♥️I HOPE YOU LIKE IT,
Let's start!

✂️ MATERIALES | ✂️ MATERIALS
- Cartulina blanca.
- Tela con diseño de preferencia.
- Foami crema, azul, blanco y negro.
- Foami escarchado dorado y azul.
- Pinturas y marcadores.
- Hoja blanca.
- Pegamento.
- Tijeras.
- Regla.
- Lápiz.
- White cardboard.
- Fabric with a design of preference.
- Cream, blue, white and black foam.
- Gold and blue frosted foam.
- Paints and markers.
- White sheet.
- Glue.
- Scissors.
- Ruler.
- Pencil.
✨ PROCEDIMIENTO | ✨ PROCESS
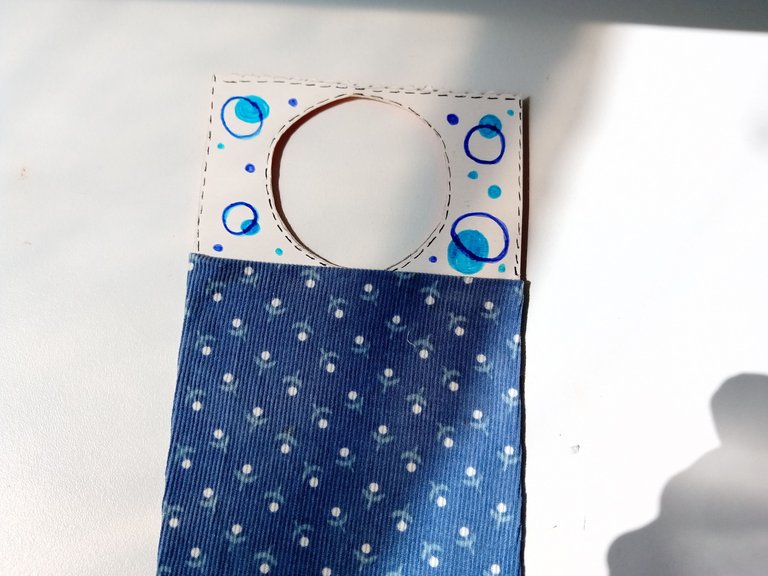
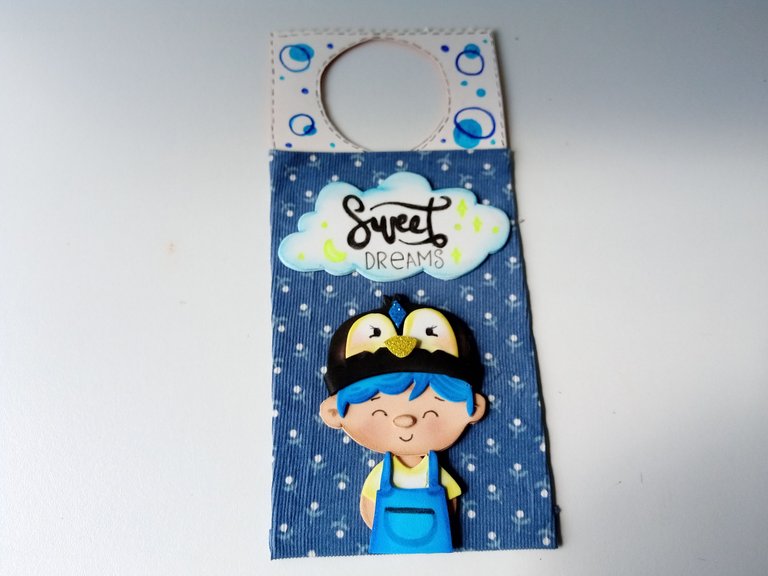
✨ PASO 1:
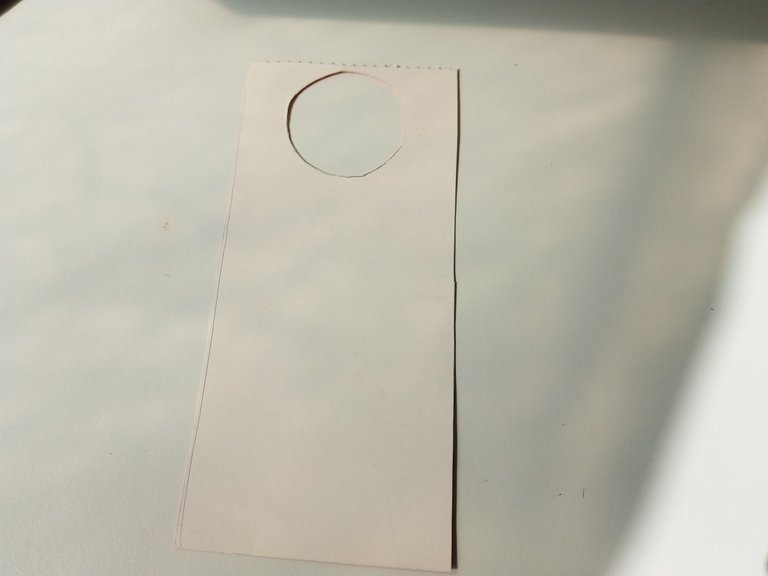
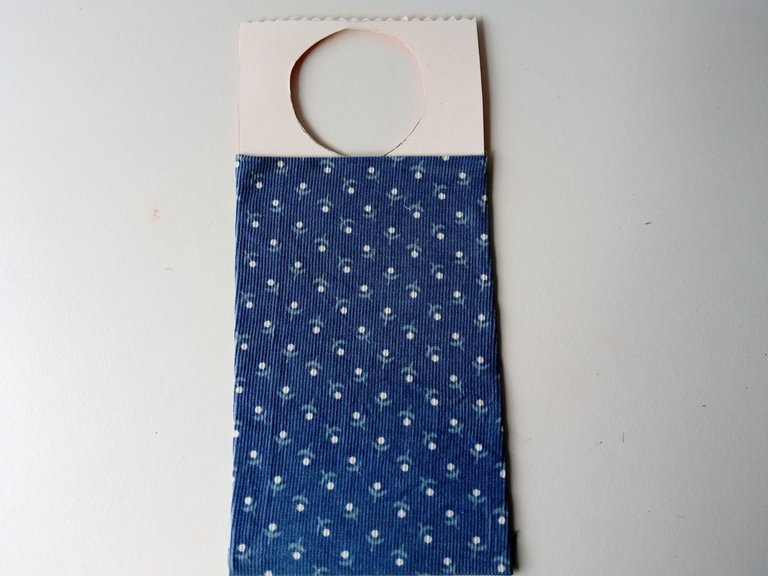
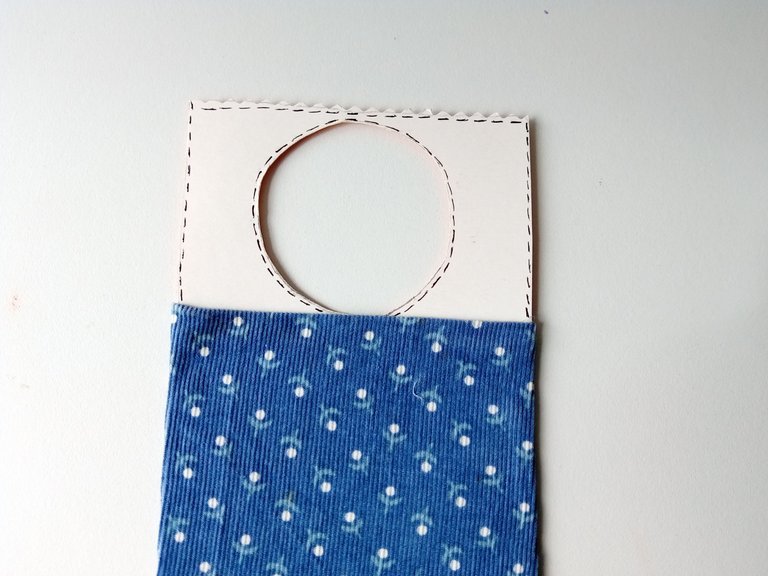
Lo primero que hice fue la base para colgar a la cerradura de la puerta, así que tomé la cartulina blanca y recorté una pieza de 21 cm x 10 cm. Seguidamente, recorté una circunferencia centrada en la parte de arriba, pero esto depende mucho del diseño o tamaño de la cerradura de cada uno; sin embargo, la mía es de 5.5 cm de circunferencia. Luego, tomé la tela y pegué por debajo de donde irá la cerradura.
✨ STEP 1:
The first thing I did was the base to hang on the door lock, so I took the white cardboard and cut out a piece of 21 cm x 10 cm. Next, I cut out a circle centered on the top, but this depends a lot on the design or size of each person's lock; however, mine is 5.5 cm in circumference. Then, I took the fabric and glued it underneath where the lock will go.
✨ PASO 2:
Para que no quedara vacía la parte de arriba, tomé marcador negro y por el borde tracé líneas pequeñas separadas unas de otras. Seguidamente, tomé dos tonos de marcador azul e hice círculos de distintos tamaños.
✨ STEP 2:
So that the top part would not be empty, I took a black marker and along the edge I drew small lines separated from each other. Next, I took two shades of blue marker and made circles of different sizes.
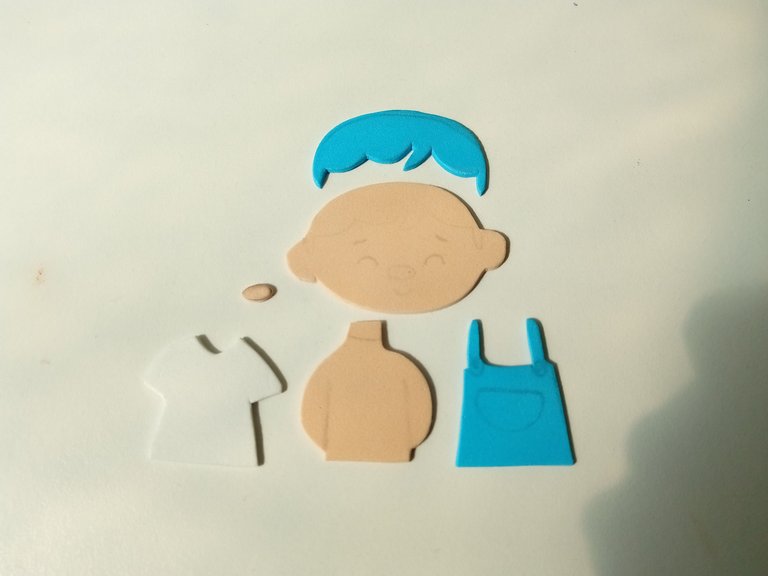
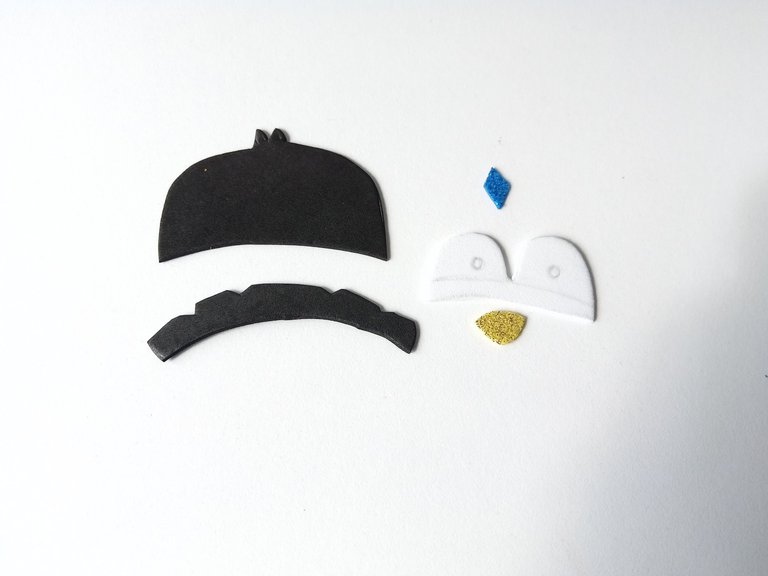
✨ PASO 3:
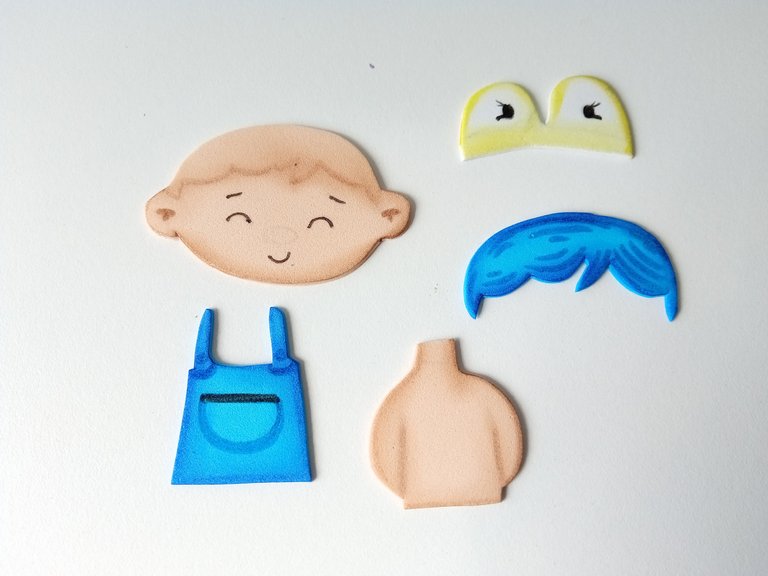
Al estar lista la base, comencé elaborando el dibujo en una hoja blanca y luego pasé cada una de las piezas a los colores correspondientes de foami como explico a continuación:
✨Cuerpo y cabeza en color crema.
✨Cabello y overol en color azul.
✨Franela y ojos de zingu en foami blanco.
✨Piezas del Gorro en foami negro.
✨Pico en foami escarchado dorado.
✨Cristal en foami escarchado azul.
✨ STEP 3:
When the base was ready, I began making the drawing on a white sheet and then I transferred each of the pieces to the corresponding colors of foam as I explain below:
✨Body and head in cream color.
✨Hair and overalls in blue color.
✨Flannel and eyes in white foam.
✨Pieces of the Hat in black foam.
✨Beak in gold frosted foam.
✨Crystal in blue frosted foam.
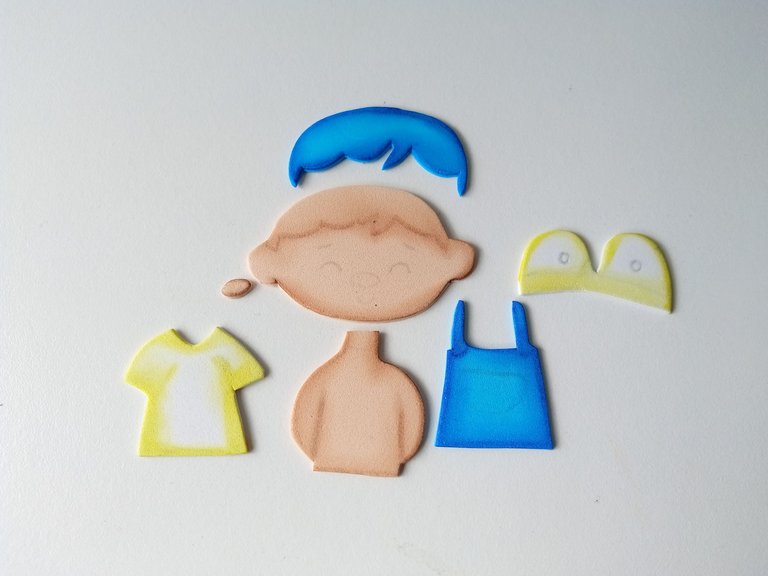
✨ PASO 4:
Una vez recortadas todas las piezas, es momento de dar color a los bordes con pinturas o marcadores y seguidamente, al estar secas las piezas, comencé a dar detalles más precisos como rostros, cabello, bolsillo, costuras y botones con los marcadores.
✨ STEP 4:
Once all the pieces are cut out, it's time to color the edges with paints or markers and then, when the pieces are dry, I started to add more precise details such as faces, hair, pockets, seams and buttons with the markers.
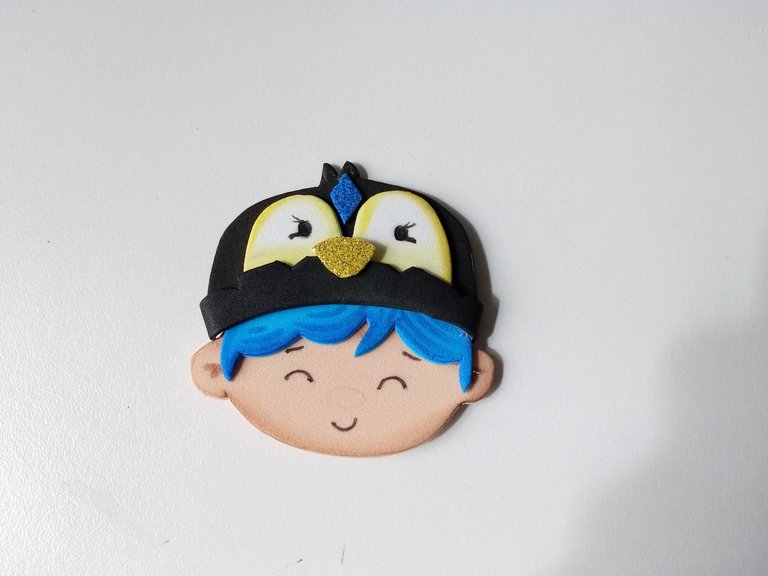
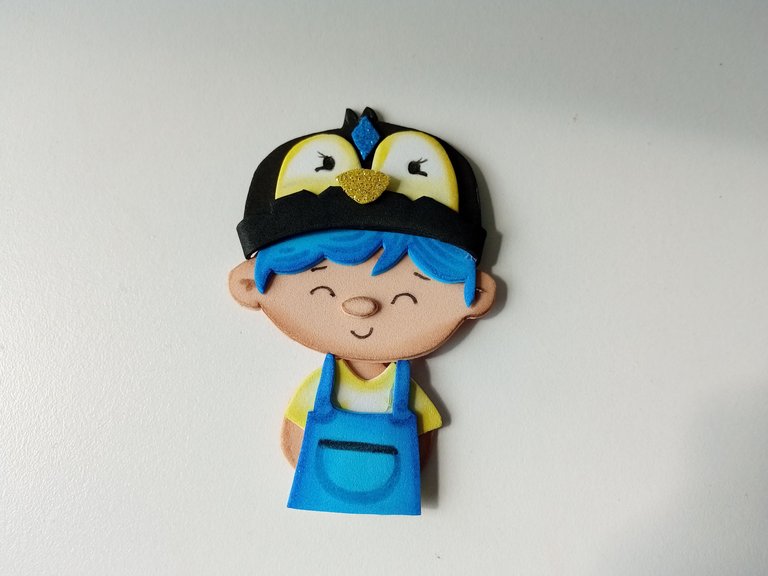
✨ PASO 5:
Seguidamente, es momento de ir pegando poco a poco las piezas, en este caso comencé con el rostro del Sanador del Océano, seguido del gorro de Zingu y por último el resto del cuerpo.
✨ STEP 5:
Next, it's time to gradually glue the pieces together. In this case, I started with the face of the Ocean Healer, followed by Zingu's hat and finally the rest of the body.
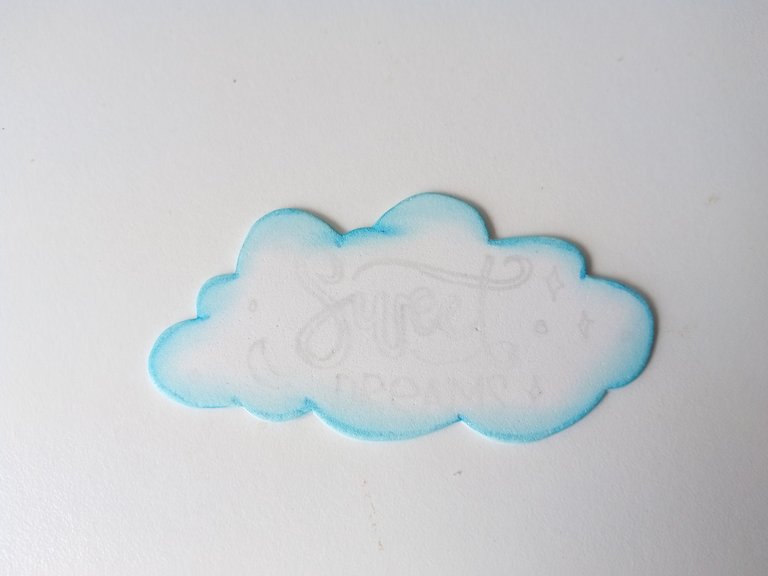
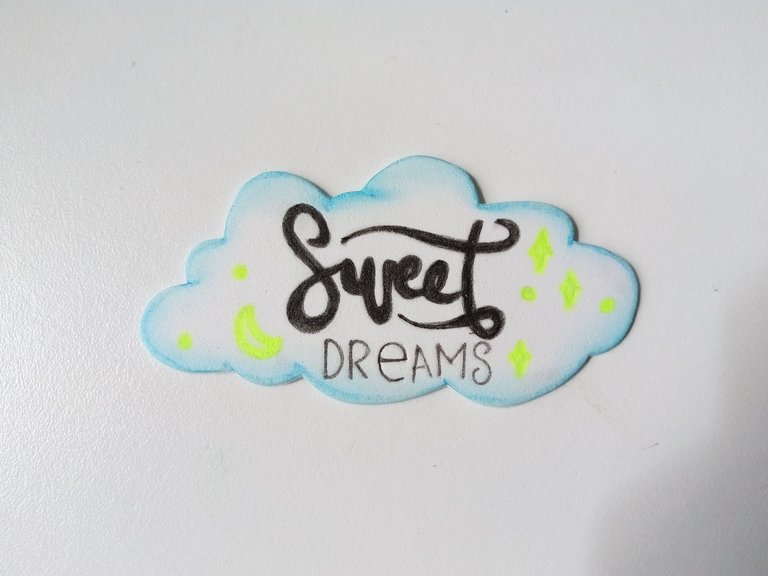
✨ PASO 6:
Además, quise agregar una nube en foami blanco, a la cual le escribí “Sweet Dreams” y remarqué con marcador negro. Adicionalmente, di color a los bordes con pintura azul, remarqué las letras con marcador negro y dibujé algunas estrellas y luna con marcador amarillo. Finalmente, pegué las decoraciones en la base, dejando la nube en la parte superior y al personaje debajo.
✨ STEP 6:
In addition, I wanted to add a cloud in white foam, to which I wrote "Sweet Dreams" and outlined with a black marker. Additionally, I colored the edges with blue paint, outlined the letters with a black marker and drew some stars and a moon with a yellow marker. Finally, I glued the decorations to the base, leaving the cloud on top and the character underneath.
❤️ Hasta la próxima publicación.
❤️ Until the next post.

Todas las fotografías son de mi propiedad.
Separador y Fotos editadas en Canva
All photographs are my property.
Photos edited in Canva
Posted Using INLEO
This healing ocean turned out beautifully, you are very detailed with every piece you do to bring your work to fruition.
Thank you very much! I really put a lot of love into my creations. I'm glad you liked it. Greetings 😊✨
Congratulations, your post has been curated by @dsc-r2cornell. You can use the tag #R2cornell. Also, find us on Discord
Felicitaciones, su publicación ha sido votada por @ dsc-r2cornell. Puedes usar el tag #R2cornell. También, nos puedes encontrar en Discord
Muchas gracias por el apoyo amigos 💕
¿Y como no te va a encantar ami? 😍 te quedó bellisiiimooo
Me encantaron los colores ami, te quedó super bello😍😍
Que linda decoración amiga, no tengo idea de quien es el sanador del océano y mucho menos Zingu, pero se ve tierno 😍
Awww que cosita más cuchiii ami, te quedó demasiado precioso. Me encantaron los tonos 😍😍😍
Gracias mi Vane! Me alegra que te haya gustado bella 💕