
If you have played this game before and are going to say that there's an even harder extra difficulty, then let me tell you that I know...but you have to unlock it. And I definitely didn't achieve beating the arcade mode without continuing on this run to have got it from this.
But let me tell you that playing in Level 8 difficulty, the default highest the game lets you use without touching the extra modes menu, was already enough to pin me down for a whole hour with this game.
And yes, I was playing on a real PS2- why else would I only have off-camera screenshots?
Stage 1-4: By a close hair
The first three stages showed some difficulty, but I don't remember much of them with how they were relatively easy compared to what came later.
Except for Stage 4: Stun had me sweating bullets with how he's the grappler of the game, and he has throw chains a la King where he can follow up with two more throws if you can't break them.
Of course I didn't know how to break them.
I just barely managed to beat him on the first try. But the rest? Not so lucky.
Stage 5: Getting whacked by a mole
You know, I think I never had fought a Bakuryu like this before...mainly because I never had fought one online before. I definitely had my run in with some ferocious Stun players in BREX and BR2, and a tough Shenlong too, but definitely not Bakuryu.
I started feeling how it could be annoying to deal with this guy if someone was quick enough to always try and punish you with little ninja jabs.
This sent me to my first and definitely not last continue against him. And I actually hadn't been recording my attempts until...I don't know if it were after 3 or 5 defeats, but at one point it was where I actually thought on placing the camera to record when I could finally get over this guy.
I hadn't learned well how to do the dodge yet, which is virtually like a parry by pressing Forward and Guard...and while it is a bit more lenient feeling than SF3, specially with how you could start dodging things if you recognized a certain string coming, it can still be risky if you don't time it well or you get mixed up with a different string and throws off your timing.
Would have been pretty useful to weave between this rascal's attacks, but alas.
What I had to resort here is to play it safe- play it solid with true combos...and most strings here aren't exactly true combos.
See, a true combo in this game is something that's guaranteed to land as long as you hit the first thing.
Most strings in this game aren't actual true combos, which means that they can be blocked at some point midway through. There's some sauce on getting true combos through launches or untechable stuff, but overall these can have a different kind of utility if you are in high level gameplay and can't just throw the whole things without getting blocked/evaded and punished.
Oh yeah, I almost forgot that the AI here starts dodging your attacks a lot. Like, Ultra Instinct dodging- that parry mechanic I mentioned leaves you with no recovery and instantly ready to attack, so you can guess how many times I got punished mercilessly because of it.
So I had to rely on Yugo's most basic true combo...press Punch three times. You can press it four times, but the fourth one is delayed so it isn't a combo. But the PPP string not only starts very quickly as the basic jabs they are, but also can definitely add up in damage over time if you stay alive, especially if you are transformed and your opponent isn't.
And eventually...Bakuryu was done for.
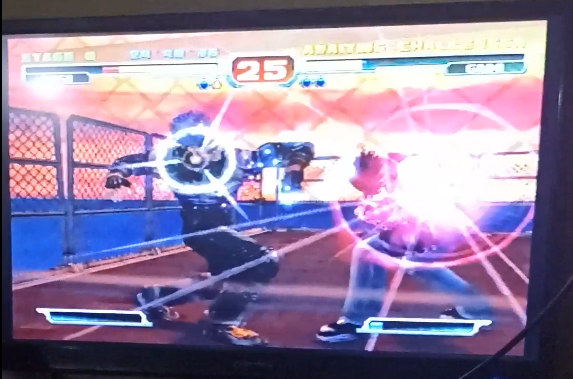
Stage 6: The chances of a lion attacking you is low...but never zero.
And you never want to be on the side of getting bitten down by one.
Too bad that I had to fight a giant ex-soldier that also turns into one.
THIS fight is where I really lost my time to, as almost all of the matches I kept losing 0-2 as he either interrupted my string attempts with jabs, hammered me with some of his own, or even had some miracle punishes that really destroyed my healthbar.
It was here where I was forced to actually look up the dodge thing- in Primal Fury/Extreme it only takes a single Guard button press to execute, but until this fight in this game, I had totally forgot that the input was Forward+G here.
Things were easing up but only by a bit- I could get a handful of single rounds off him when I could time well my dodges and punish with the PPP, but sometimes I started missing the dodges and dying for it, and sometimes I randomly happen to accidentally let myself getting hit with a clutch comeback from the AI.
The most insane case was of waiting for his slow kicks to dodge them and punish with a one-button Beast Drive...
...but he managed to hit me before I could land it. And then I proceeded to lose both rounds.
Hardest loss with how a simple choice of trying to be flashy lost me a round that could have been the end of it.
But eventually, after three more attempts [and 14 attempts total just in this fight], I got one round off with combining that tactic with some good ol' go backwards and then shoulder tackle in, and the second one I got lucky to end it with a Beast Drive.
Stage 7: Oh hey, the circus animals
Shenlong took me three to four attempts but my initial impression was that he was pretty readable for the most part- it was not a good idea to let up your guard as some of his strings have some funky timings and he definitely has his ways to jump to your face in a dime. I eventually caught him lacking in the first round to punish him repeatedly, and being cornered in the last chance I had to win, I used the ol' trick of Yugo's second Beast Drive.
As that Beast Drive has a brief moment of invlunerability when starts, sometimes it happens to be a functional panic button when I know that sometimes the AI tries to throw attacks and can get caught into it.
I definitely used it with panic against him as he activated his Hyper Beast form when both of us were low on health, but thankfully it worked out.
Busuzima on the other hand was literally an one and done deal. I was still playing relatively safe knowing what the previous fighters did to me, but it was a surprising no-continue fight.
The final stretch was just ahead, and with that said...
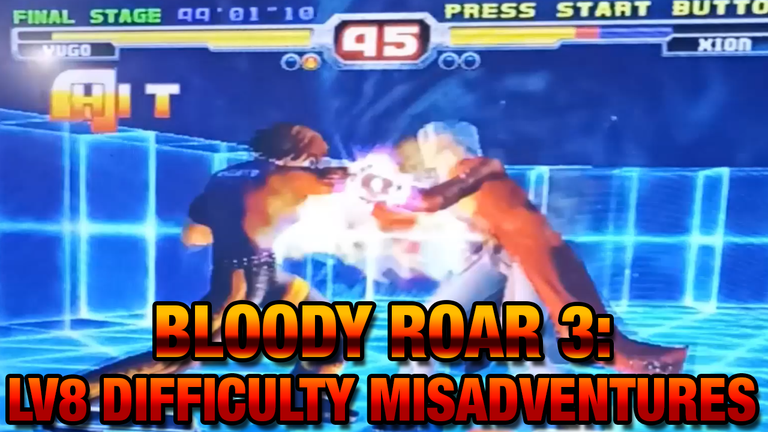
Final Stage: Let's get this guy outta here
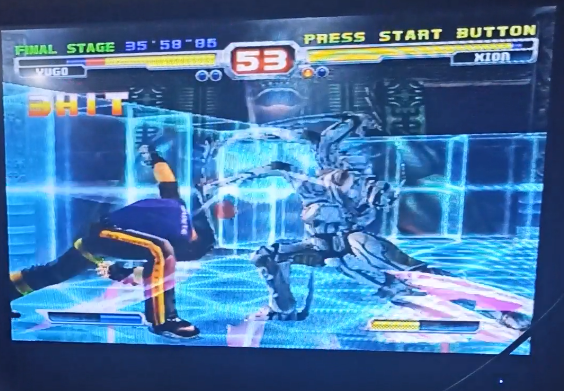
Xion got me many times with his grabs, beast drives, and even two times he unleashed his Hyper mode in the last round, which gives him a big boost in abilities for 12 seconds at the cost of his beast gauge for the rest of the match...and in the second one he managed to kill me in less than 10 seconds when I slipped up my guard with a bum rush combo. It took me over 6 attempts to beat him...
However, my winning attempt felt like a funny fluke from the AI: I kept shutting him down with patient PPP jabs as he wasn't throwing as many fast attacks as he used to, and I managed to hit a Beast Drive in the second round on his human form, leaving him with a sliver of health.
...Which I could get rid of by dashing in and kicking him on the floor.
So it's funny that his reign of terror not only didn't last as long as the lion, but also that it ended with a soccer kick instead of a strong attack or even a beast drive, even if he was right on the edge of death because of one.
And...that's it?
That's it.
I don't know if it would save times if you messed with the rounds and attack levels, but it was funny to see how my 44 minute run was still valid on the record table- only taking that long because of the Level 8 AI. But hey...mission complete.
Definitely the longest time I had spent with Bloody Roar in a while. Except for the fact that I felt like trying this in the first place because of how around a week ago I had played the game with THREE other players in-person. The first two being on a place that had a chunky CRT as intended.
Thanks for reading!

Spanish translation with DeepL. All screenshots were captured by myself.
Español
Si ya has jugado antes a este juego y vas a decir que hay una dificultad extra aún más difícil, déjame decirte que lo sé... pero tienes que desbloquearla. Y definitivamente no conseguí superar el modo arcade sin continuar en esta carrera para haberlo conseguido con esto.
Pero déjame decirte que jugar en dificultad nivel 8, la más alta por defecto que te deja el juego sin tocar el menú de modos extra, ya fue suficiente para inmovilizarme durante una hora entera con este juego.
Y sí, estaba jugando en una PS2 de verdad, ¿por qué otra razón sólo tendría capturas de pantalla fuera de cámara?
Fase 1-4: Por los pelos
Las tres primeras fases mostraban cierta dificultad, pero no recuerdo mucho de ellas con lo relativamente fáciles que eran en comparación con lo que vino después.
Excepto en la fase 4: Stun me hizo sudar la gota gorda, ya que es el grappler del juego y tiene cadenas de lanzamientos a lo King, que puede seguir con dos lanzamientos más si no consigues romperlas.
Por supuesto, yo no sabía cómo romperlas.
A duras penas conseguí derrotarle en el primer intento. ¿Y el resto? No tuve tanta suerte.
Etapa 5: Ser golpeado por un topo
Creo que nunca había luchado contra un Bakuryu así... principalmente porque nunca había luchado contra uno en línea. En BREX y BR2 me topé con algunos jugadores feroces de Stun, y también con un Shenlong duro, pero no con Bakuryu.
Empecé a sentir lo molesto que podía ser enfrentarse a este tipo si alguien era lo bastante rápido como para intentar castigarte siempre con pequeños golpes ninja.
Esto me envió a mi primera y definitivamente no última continuación contra él. Y en realidad no había estado grabando mis intentos hasta... no sé si después de 3 o 5 derrotas, pero en un momento dado fue cuando realmente pensé en colocar la cámara para grabar cuando finalmente pudiera superar a este tipo.
Todavía no había aprendido a esquivar bien, que es prácticamente como parar pulsando Adelante y Guardia... y aunque es un poco más indulgente que en SF3, sobre todo porque puedes empezar a esquivar cosas si reconoces que viene una cuerda determinada, puede ser arriesgado si no lo haces bien o si te confundes con otra cuerda y te desconcentras.
Habría sido muy útil entrelazar los ataques de este bribón, pero por desgracia...
Lo que he tenido que hacer aquí es ir a lo seguro: jugar sólido con combos reales... y la mayoría de las secuencias no son exactamente combos reales.
En este juego, un verdadero combo es algo que está garantizado siempre y cuando aciertes a la primera.
*La mayoría de las secuencias de este juego no son verdaderos combos, lo que significa que se pueden bloquear en algún momento a mitad de camino. Hay algo de salsa en conseguir verdaderos combos a través de lanzamientos o cosas no tecnificables, pero en general pueden tener un tipo diferente de utilidad si estás en un juego de alto nivel y no puedes simplemente lanzar las cosas enteras sin ser bloqueado/evadido y castigado.
Ah, sí, casi se me olvida que la IA empieza a esquivar mucho tus ataques. La mecánica de parry que mencioné te deja sin recuperación y listo para atacar al instante, así que puedes adivinar cuántas veces fui castigado sin piedad por ello.
Así que tuve que recurrir al verdadero combo más básico de Yugo: pulsar Puñetazo tres veces. Puedes pulsarlo cuatro veces, pero la cuarta se retrasa, así que no es un combo. Pero la cadena PPP no sólo se inicia muy rápidamente como los jabs básicos que son, sino que también puede sumar daño con el tiempo si sigues vivo, especialmente si estás transformado y tu oponente no.
Y finalmente... Bakuryu estaba acabado.
Etapa 6: Las posibilidades de que un león te ataque son bajas... pero nunca nulas.
Y nunca quieres estar en el lado de ser mordido por uno.
Lástima que tuve que luchar contra un ex-soldado gigante que también se convierte en uno.
Fue en este combate donde realmente perdí el tiempo, ya que casi todos los combates los perdía por 0-2 porque él interrumpía mis intentos de encadenamiento con jabs, me machacaba con algunos de los suyos o incluso tenía algunos castigos milagrosos que destrozaban mi barra de salud.
En Primal Fury/Extreme, basta con pulsar el botón de guardia para ejecutarla, pero hasta este combate en este juego, había olvidado por completo que la entrada era Forward+G aquí.
Las cosas iban mejorando, pero sólo un poco: podía conseguir un puñado de asaltos sencillos cuando conseguía sincronizar bien mis esquives y castigar con el PPP, pero a veces empezaba a fallar los esquives y moría por ello, y a veces me dejaba golpear accidentalmente con un contragolpe de la IA.
El caso más loco fue el de esperar sus patadas lentas para esquivarlas y castigar con un Beast Drive de un solo botón...
... Pero se las arregló para golpearme antes de que pudiera aterrizar. Y luego procedí a perder ambas rondas.
La derrota más dura con cómo una simple elección de tratar de ser llamativo me hizo perder una ronda que podría haber sido el final de la misma.
Pero al final, después de tres intentos más [y 14 intentos total sólo en esta pelea], conseguí acabar un asalto combinando esa táctica con un buen retroceso y un placaje al hombro, y en el segundo tuve la suerte de acabarlo con un Beast Drive.
Etapa 7: Oh hey, los animales del circo
Shenlong me llevó de tres a cuatro intentos, pero mi impresión inicial fue que era bastante fácil de leer en su mayor parte. No era buena idea bajar la guardia, ya que algunas de sus cuerdas tienen tiempos extraños y sin duda tiene sus maneras de saltar a la cara en una moneda de diez centavos. Al final le pillé falto de tiempo en la primera ronda para castigarle repetidamente, y al verme acorralado en la última oportunidad que tenía de ganar, usé el viejo truco del segundo Beast Drive de Yugo.
Como ese Beast Drive tiene un breve momento de invlunerabilidad cuando arranca, a veces resulta ser un botón de pánico funcional cuando sé que a veces la IA intenta lanzar ataques y puede quedar atrapada en él.
Definitivamente lo usé con pánico contra él cuando activó su forma Hiper Bestia cuando ambos estábamos bajos de salud, pero afortunadamente funcionó.
Busuzima, por otro lado, fue literalmente un trato de una vez por todas. Yo seguía jugando relativamente a lo seguro sabiendo lo que me habían hecho los luchadores anteriores, pero fue un combate sin continuación sorprendente.
El tramo final estaba justo delante, y dicho esto...
Etapa Final: Saquemos a este tipo de aquí
Xion me pilló muchas veces con sus agarres, beast drives, e incluso dos veces desató su Hyper mode en el último asalto, que le da un gran boost de habilidades durante 12 segundos a costa de su beast gauge para el resto del combate... y en la segunda consiguió matarme en menos de 10 segundos cuando me descuidé con un combo de bum rush. Me llevó más de 6 intentos vencerle...
Sin embargo, mi intento ganador me pareció una graciosa casualidad de la IA: seguí cerrándole el paso con pacientes jabs PPP, ya que no lanzaba tantos ataques rápidos como solía hacer, y conseguí acertar un Beast Drive en el segundo asalto en su forma humana, dejándole con una pizca de salud.
...De la que pude deshacerme corriendo y pateándole en el suelo.
Así que es curioso que su reinado de terror no sólo no duró tanto como el león, sino que también terminó con una patada de fútbol en lugar de un ataque fuerte o incluso un Beast Drive, incluso si estaba justo al borde de la muerte a causa de uno.
Y... ¿eso es todo?
Eso es todo.
No sé si se ahorrarían tiempos si se jugara con las rondas y los niveles de ataque, pero fue divertido ver cómo mi carrera de 44 minutos seguía siendo válida en la tabla de récords -sólo tardaba tanto por culpa de la IA de nivel 8-. Pero bueno... misión cumplida.
Sin duda, el mayor tiempo que había pasado con Bloody Roar en mucho tiempo. Excepto por el hecho de que me apetecía probarlo en primer lugar porque hace una semana había jugado con TRES jugadores en persona. Los dos primeros siendo en un lugar que tenía un CRT chunky como se pretende.
¡Gracias por leer!
Traducción al español hecha con DeepL. Todas las fotos capturadas por mí.
Bloody okay!🙂