
Welcome to the 12th episode of the series, we are getting close to the end of the intermediate guide to chess mastery. It has been fun so far from lesson 1 and now down to lesson 12. This shows our devotion to improving our chess understanding and gameplay. Thanks for the feedback I've been getting and progress.
In this lesson, we are going to be looking at when to sac a piece for something better. Sacrificing in chess means making a piece sacrifice in exchange for something better like a mate or gaining a bigger piece or even a draw.
So let's get right to it immediately.
Sac 1 for a bigger piece
The first sac you should know about is sacrificing a piece to get something bigger. And bigger in this case I mean a bigger piece.
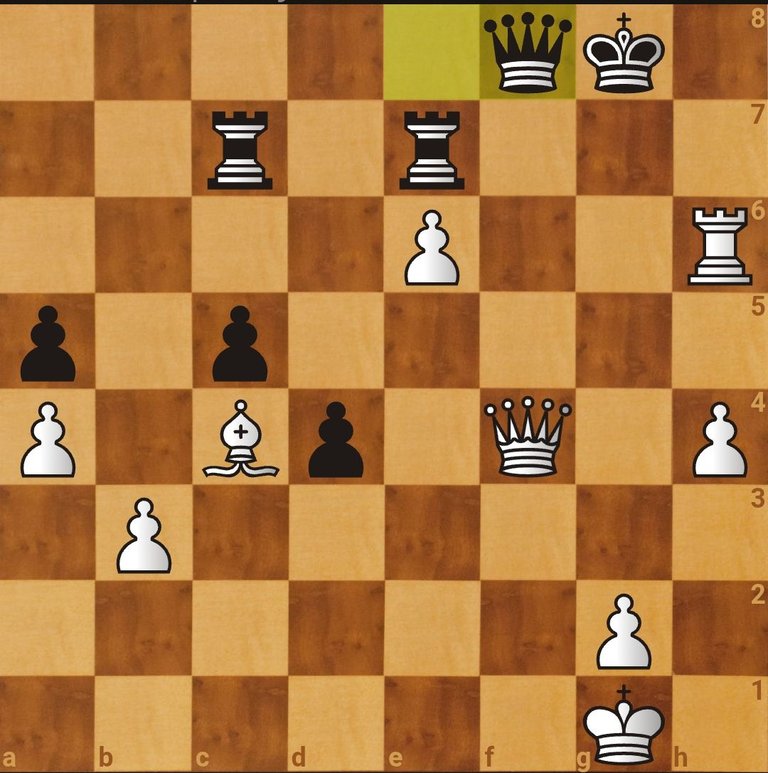
From this position, there is a sac that comes next to gain a bigger piece. Can you find it?
Take your time and look for a sacrifice that can be made with your white piece to gain a bigger piece.
Yeah, if your answer is Rh8 with a check on the black king,
Then you are on the right stuff, this move allows you to gain the black queen after Kxh8. Then white moves in with Qxf8, taking the back queen free of charge.
Let's move on to the next time to sacrifice.
Sac 2 for mating attack or checkmate.
This is one of the sacrifices you have to pay attention to when playing a chess game. They can be easy to miss but truly satisfying when you get them correctly.
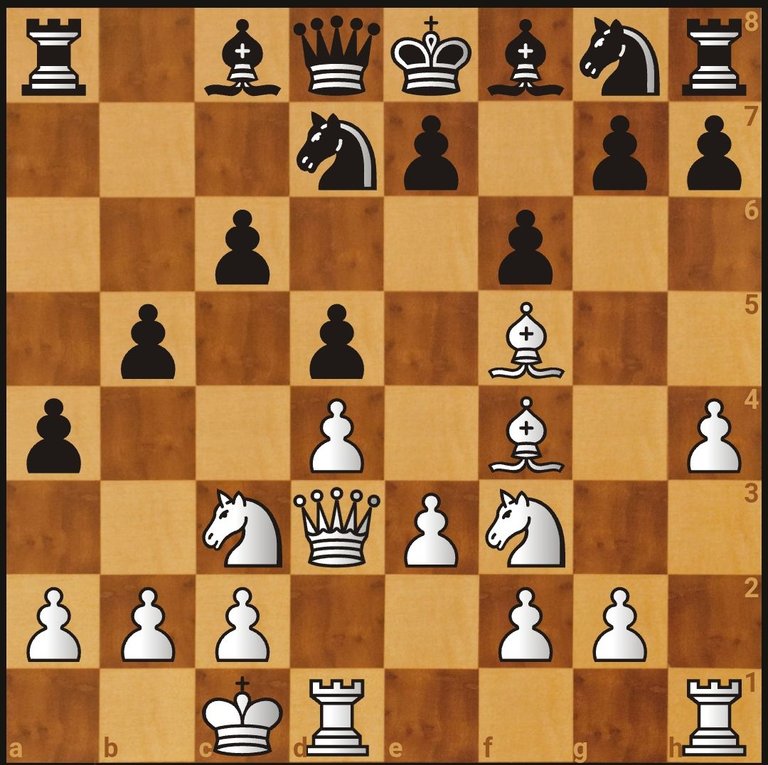
As usual, take your time to see if you can spot the sacrifice which leads to a checkmate. From this position, it is obvious the black king is in an uncomfortable position, more like it is stuck in the center. But you have to find the winning move that ends the game on the next move.
Bg6+
And that's the move that seals black's fate. With this move, black only has to respond by capturing the bishop with the black pawn on h7 but what comes next is a mate. Qxg6# mates the black king.
This is how you sack for a checkmate. Also, bear in mind that some positions may require more moves before getting to checkmate, so try to visualize what the checkmate will look like before sacrificing your piece.
And lastly Sac 3 for a draw
The last sac we will look at is sacking for a draw. The same way you can sac for a win, you can also sac for a draw, most times when you are losing or when you don't have anything better to play. A draw is still half a point compared to a loss.
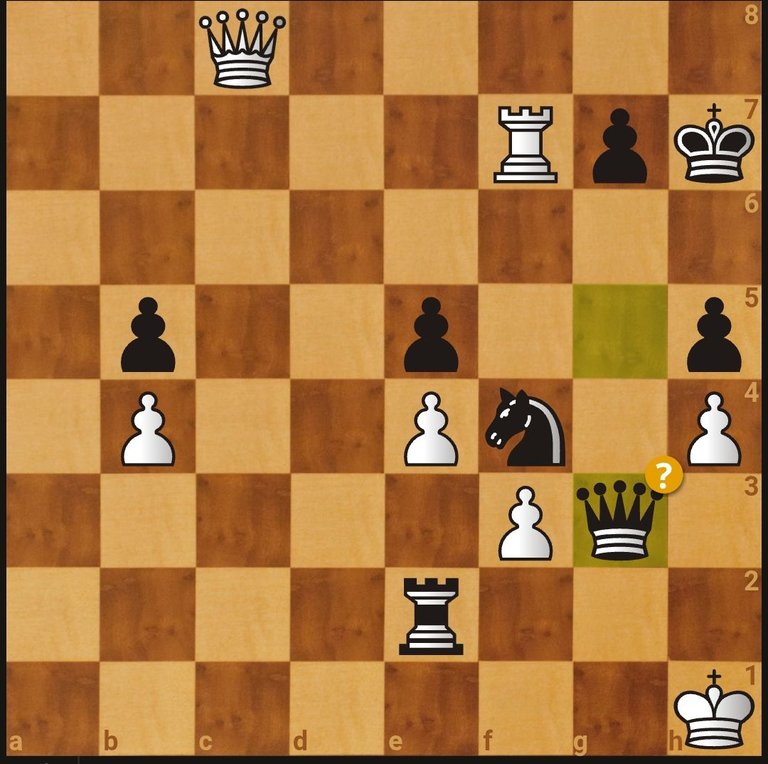
This is going to be a bit harder than the previous position but I believe you can get it right if you try. Can you spot the sacrifice that leads to a draw?
I know right it's a bit difficult than usual. Honestly, it took me a while before I found it, Qg8+
Why sacrifice the queen, you may ask? But what comes next, leads to the draw for white. This is because anything else leads to white getting checkmated by black's pieces.

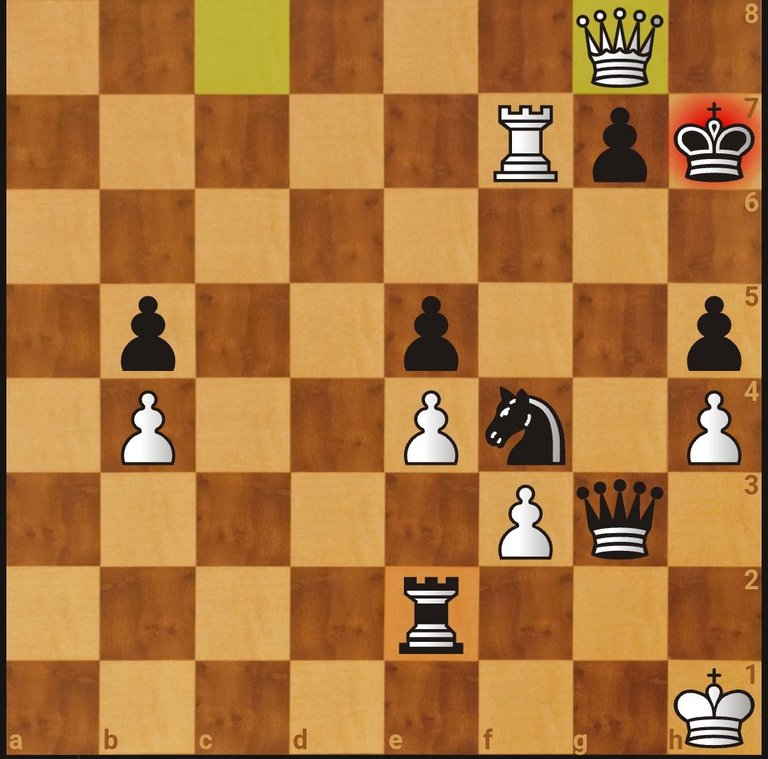
After black captured the white queen on g8, black went for the final blow. Rxg7+ forces black to respond. If black captures the white rook with their king or queen, then the game ends in a stalemate since white has no legal move to make on the board. And if black moves away to any square, white keeps checking on the 7th rank. So painful to be black in this position.
Well, that's a wrap for this lesson, see you in the next one as we draw closer to the end of the series.


I am @samostically, I love to talk and write about chess because I benefited alot from playing chess and I love writing about chess.
♟♟♟♟♟♟♟♟♟
Congratulations @samostically! You have completed the following achievement on the Hive blockchain And have been rewarded with New badge(s)
You can view your badges on your board and compare yourself to others in the Ranking
If you no longer want to receive notifications, reply to this comment with the word
STOPLast one for a draw is nice
Good examples
Super lesson