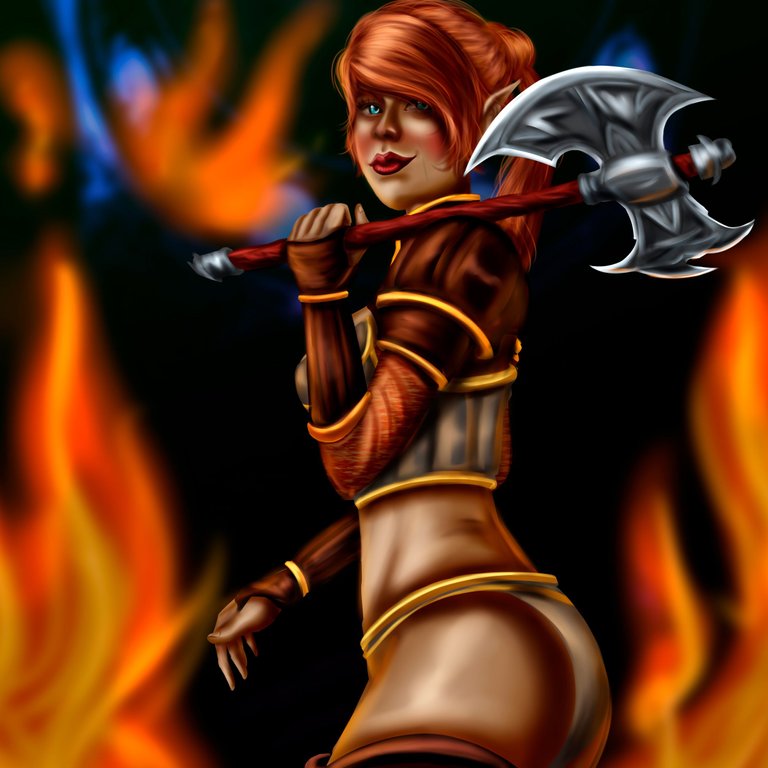
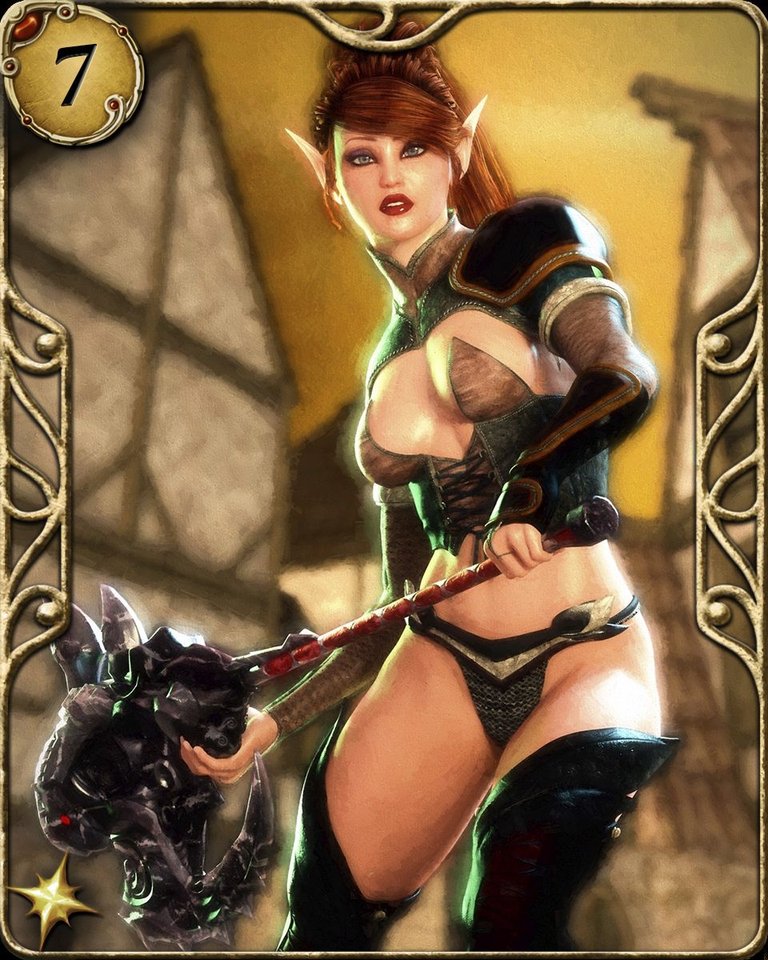
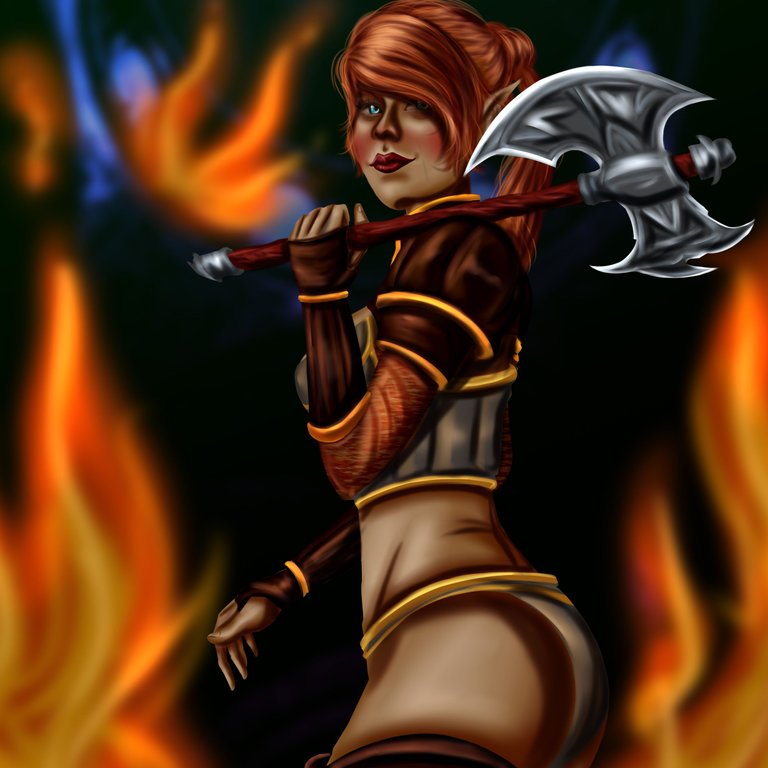
Good afternoon my dear readers, how are you? I hope you are doing great and as always it is a pleasure to welcome you once again to my artistic blog, where I share my drawings, illustrations, in short, everything related to art; this time I come to share with you what would be my entry or participation for the new dynamic of the community of 8th Edition's Rada Quest Fan Art Contest, which as many of you already know is to make a representation of some of the fabulous and varied characters of their card game. This time I decided to choose the character of Alaya (TrueAxe), which as we can see is a Warrior Nymph with a pretty tough and intimidating appearance, and also carries as a weapon a Great Axe with which is able to break in half even the hardest wall; every time I like to represent these characters of the game as I am very very fan of everything related to combat and warrior characters so you can imagine the special love I put into this work.... I hope you like it a lot and I leave you with the process here below:
Muy buenas tardes mis queridísimos lectores y lectoras, como están? Espero que super bien y como siempre es un gustazo darles la bienvenida una vez más a mi blog artístico, donde compartir mis dibujos, ilustraciones, en fin, todo lo relacionado que hago sobre el arte; en esta oportunidad vengo a compartirles lo que sería mi entrada o participación para la nueva dinámica de la comunidad de 8th Edition's Rada Quest Fan Art Contest, la cual como muchos ya conocerán se trata de hacer una representación sobre algunos de los fabulosos y variados personajes de su juego de cartas. En esta oportunidad decidí elegir al personaje de Alaya (TrueAxe), la cual como podemos apreciar se trata de una Ninfa Guerrera con una apariencia bastante dura e intimidante, y que además lleva como arma una Gran Hacha con la cual es capaz de partir a la mitad hasta la muralla más dura; cada vez me gusta más representar estos personajes del juego ya que soy muy muy fan de todo lo relacionado con los combates y personajes guerreros así que podrán imaginarse el especial cariño que le puse a esta obra….ojala les guste mucho y los dejo con el proceso aquí abajo:
REFERENCE
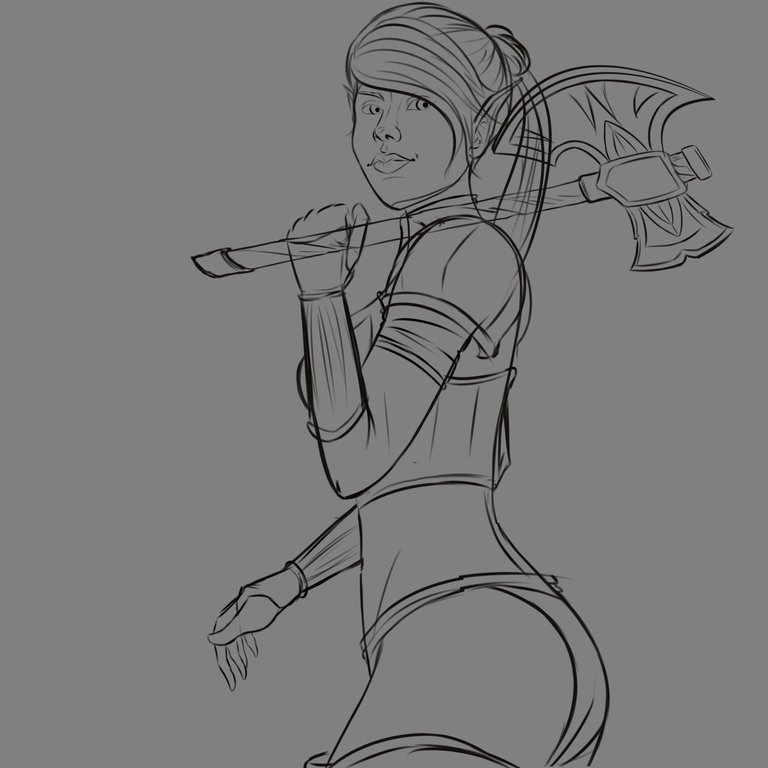
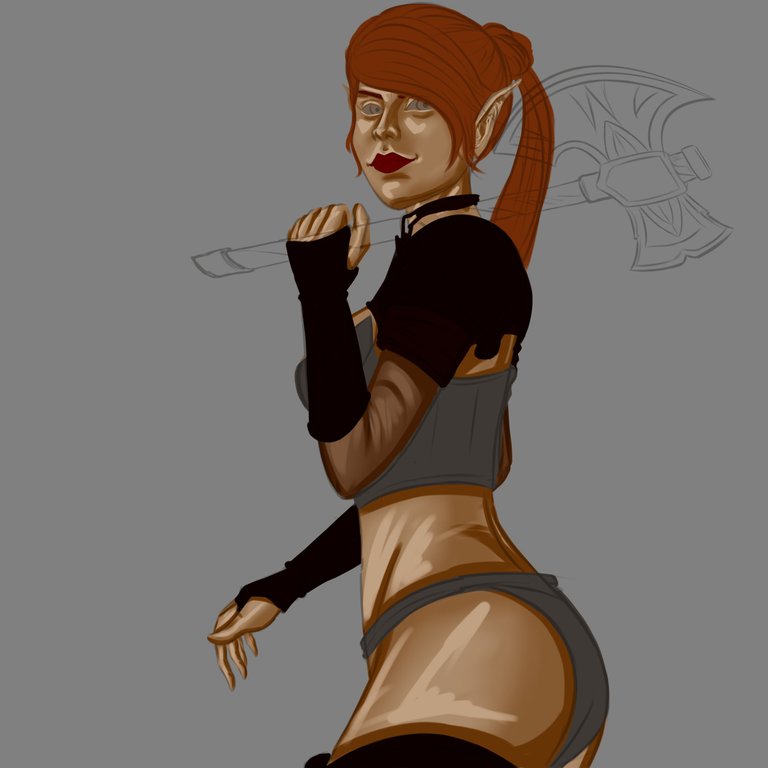
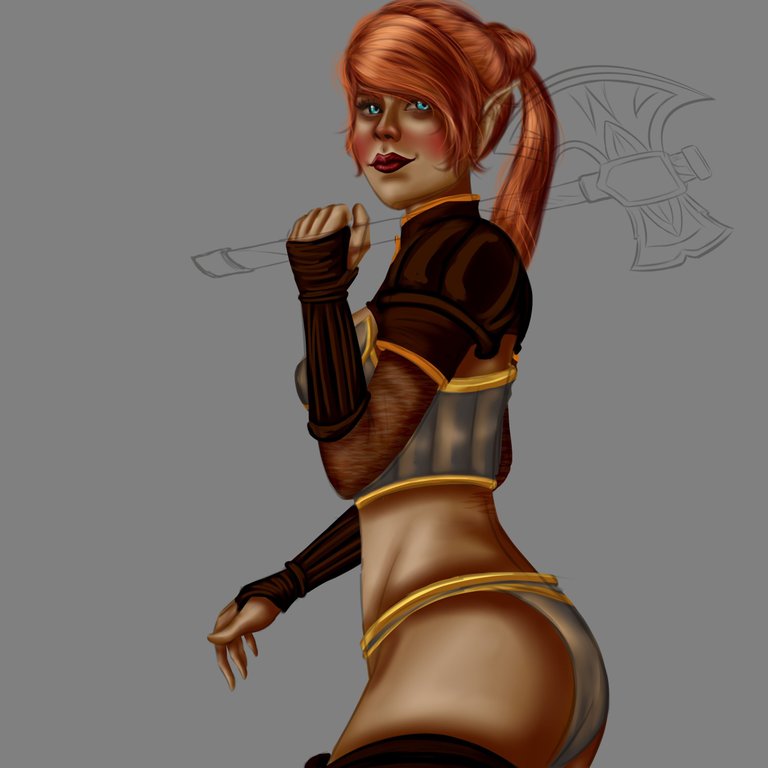
Well the first thing to do when creating any work is to capture the idea of the pose and body structure and for this I always like to start drawing a good sketch or line art with my graphite pencil, in this case for Alaya (TrueAxe) I decided to draw her in a half side pose as if she was turning to the front of the canvas with a smiling and terrifying expression on her face while carrying on her shoulders her big and powerful Axe with which she is able to cut anything and make unimaginable havoc; Once the line art is ready the next step is always to choose very well the colours that will give shape and life to my characters, for the case of the skin I took tones like a light yellow, soft peach, medium red and a bit of purple, all these tones I like to apply them in 2 parts, first with the airbrush and then with my watercolour brush to mix them in a softer and more subtle way forming a much more uniform and realistic skin.
Bueno lo primero a la hora de crear cualquier obra es plasmar la idea de la pose y estructura corporal y para esto siempre me gusta empezar dibujando un buen boceto o line art con mi lápiz de grafito, en este caso para Alaya (TrueAxe) decidí dibujarla como en una pose de medio lado como si esta estuviese volteándose hacia el frente del lienzo esbozando en su rostro una sonriente y aterradora expresión mientras carga sobre sus hombros su gran y poderosa Hacha con la cual es capas de cortar lo que sea y hacer estragos inimaginables; ya con el line art listo el siguiente paso siempre es elegir muy bien los colores que darán forma y vida a mis personajes, para el caso de la piel tome tonos como un amarillo claro, color durazno suave, rojo medio y un poco de morado, todos estos tonos me gusta aplicarlos en 2 partes, en la primera con el aerógrafo y luego con mi pincel de acuarela para mezclarlos de una manera más suave y sutil formando una piel mucho mas uniforme y realista.
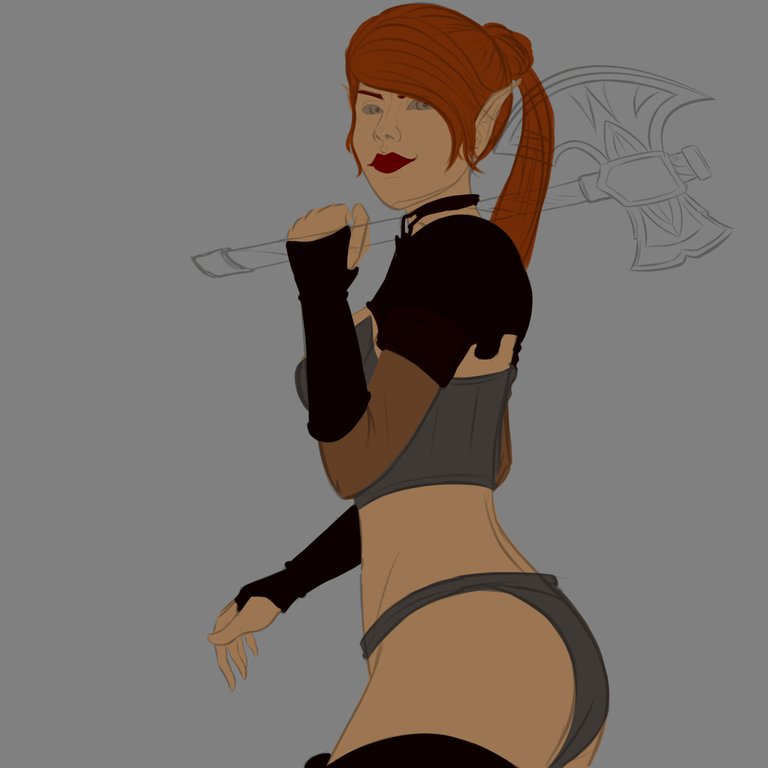
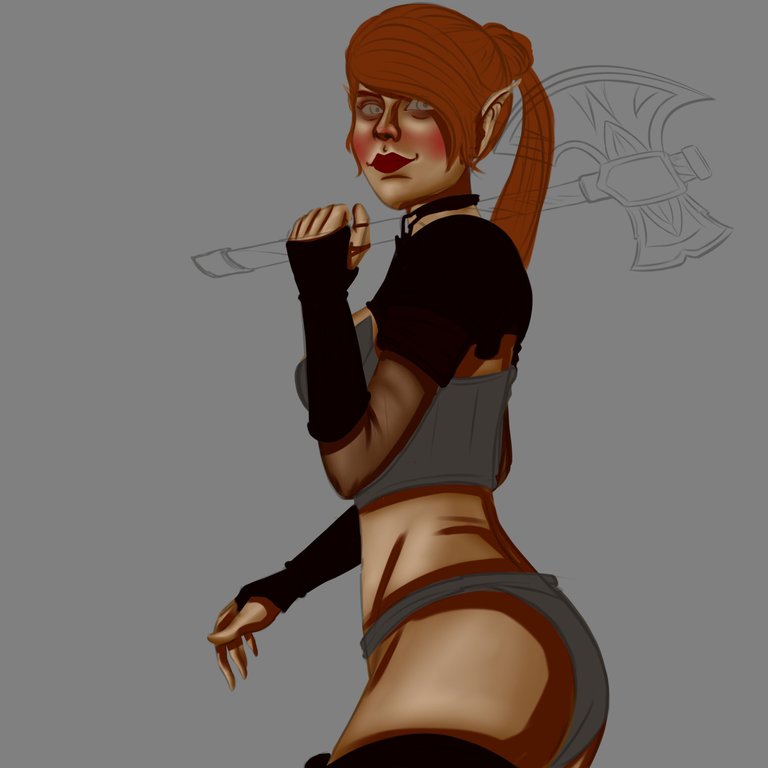
In the 2nd step I gave life to what would be the expression of his face, as I decided to make a smile and look quite intense as I thought I should use very intense colours but of course respecting the original essence of the character, in the case of the eyes I worked the base with greyish brown tones, and for the inner iris and the pupil I mixed some blue tones with medium greys and a little white so that the look had that cold and icy appearance that I was looking for; then for the lips I wanted to print a more sensual touch and for this I used a range of intense red tones that I liked a lot. With the face finished the next thing in the painting process was the creation of the hair, in this case the character would have her hair gathered towards the back of her head with a big fringe going through her forehead to the sides of her ears, for the basic shape and the relief of the hair I used airbrush, softening and at the same time applying strokes in upper layers; something I regularly do for the hair and eyebrows is to take my 3-tip brush and create a bit of a random surface texture of highlights, going a bit off the base colour to give it a bit more life.
En el 2do paso di vida a lo que seria la expresión de su rostro, como decidí hacer una sonrisa y mirada bastante intensa pues me pareció que debía usar colores muy intensos pero claro respetando la esencia original del personaje, en el caso de los ojos trabaje la base con tonos marrones grisáceo, y para el iris interno y la pupila mezcla algunos tonos azules con grises medios y un poco de blanco para que la mirada tuviese esa apariencia fría y helada que yo buscaba; luego para los labios si quise imprimir un toque algo mas sensual y para esto me base en una gama de tonos rojos intenso que me gustaron bastante. Con el rostro terminado lo siguiente en el proceso de pintado fue la creación del pelo, en este caso el personaje tendría el cabello recogido hacia la parte de atrás de su cabeza con un gran flequillo pasando por su frente hasta los lados de sus orejas, para la forma básica y el relieve del pelo use aerógrafo, suavizando y de una misma vez aplicando trazos en capas superiores; algo que regularmente hago para el cabello y las cejas es tomar mi pincel de 3 puntas e creando una textura de mechones superficiales un poco aleatorias saliéndome un poco del color base para dar un poco mas de vida.

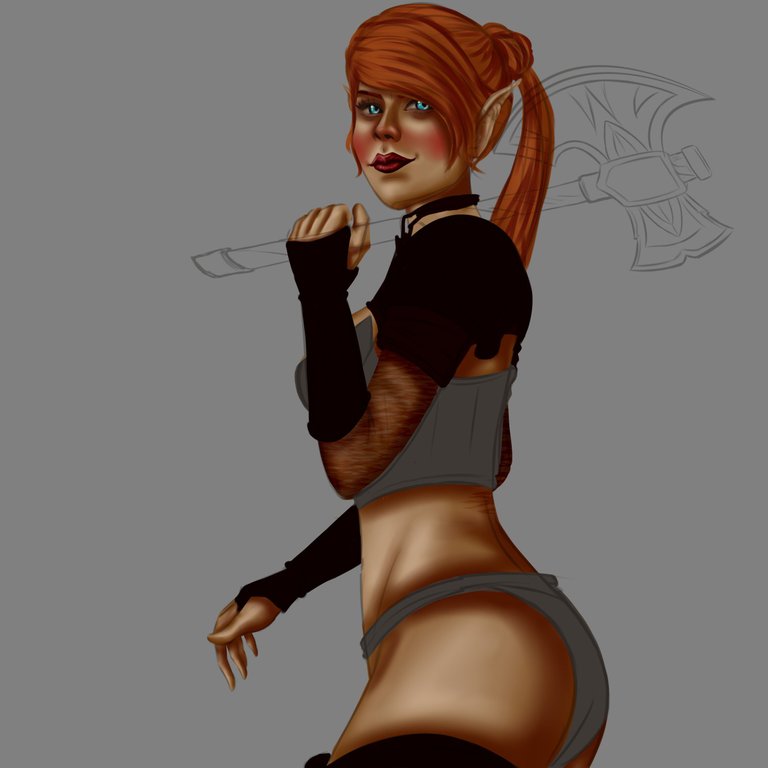

In the painting of the character's outfit I proposed to create a very cool warrior outfit, something like the valkyrie's outfit in ancient mythology, I created a suit that would be like a kind of bikini of thick fabric very similar to the fabric I also created for the torso, in this part I first focused on the rough and rigid texture of the suit and then in a separate layer I added yellow lines on the edges to give a very elegant appearance to the outfit; For the arms area I created a kind of sleeves made of a more transparent fabric with a small pattern of brown lines that I thought would look great as a complement. After finishing with the suit that would be adjusted to the body the following thing was to work with the armour and protectors that the character wears in his arms and shoulders, here I based a little more on a range of dark brown colours and I used brushes with flatter paint and high opacity since I was looking for a difference between these garments with respect to the others; for the area of the arms, shoulders and legs I created at least 3 layers and in each one I scaled the brown colours until getting a texture and a very thick and rigid appearance.
En el pintado del atuendo del personaje me propuse crear una indumentaria de guerrera muy genial, algo así como la vestimenta de las valkirias en la mitología antigua, cree un traje que seria como una especie de bikini de tela gruesa muy similar a la tela que también cree para el torso, en esta parte primero me enfoque en la textura rugosa y rígida de el traje y luego en una capa aparte fui agregando líneas amarillas en los bordes para dar una apariencia muy elegante al atuendo; para la zona de los brazos cree una especie de mangas de tela un poco mas transparente con un pequeño patrón de líneas pardas que me pareció quedarían geniales como complemento. Luego de terminar con el traje que iría ajustado al cuerpo lo siguiente fue trabajar con la armadura y protectores que lleva el personaje en sus brazos y hombros, aquí me base un poco mas en una gama de colores marrones oscuros y use pinceles con pinta mas plana y a opacidad alta ya que buscaba que se viera una diferencia entre estas prendas con respecto a las demás; para la zona de los brazos, hombros y piernas cree al menos 3 capas y en cada una escale los colores marrones hasta conseguir una textura y apariencia muy gruesa y rígida.
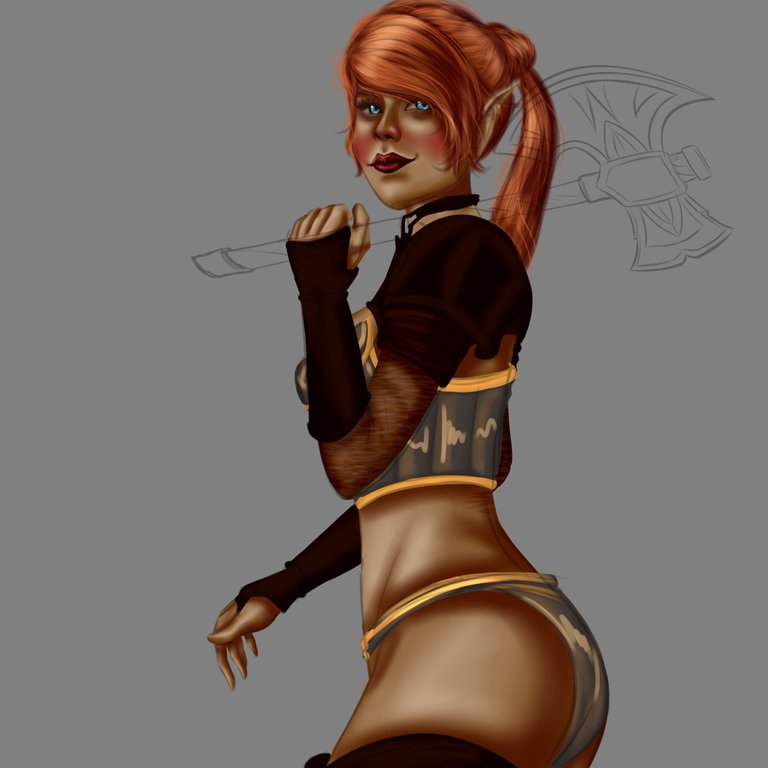
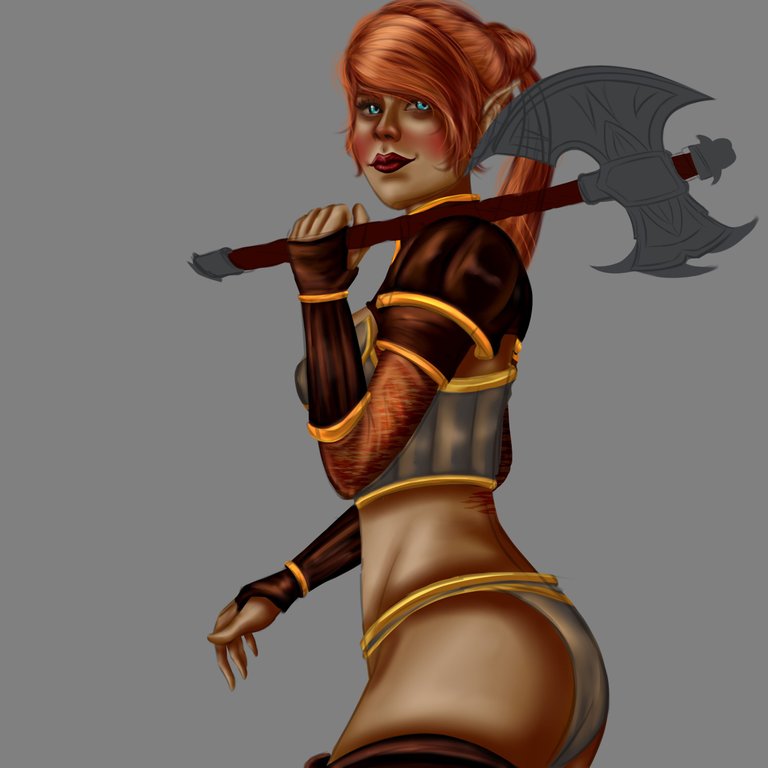
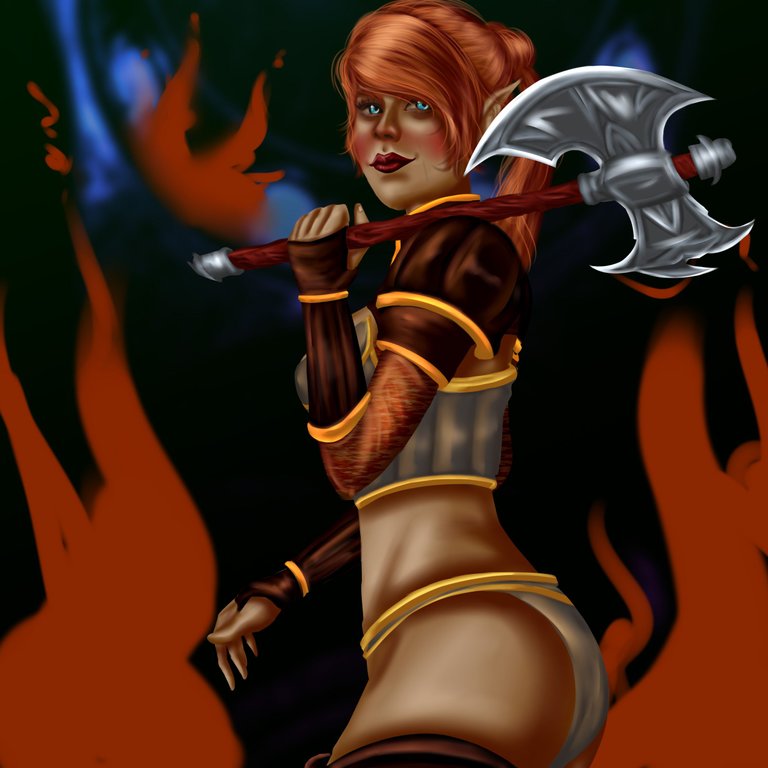
To create the axe I took a few minutes because I wanted to achieve a very realistic metal look, the first thing I did was to work a little bit the base of the axe with some grey tones between dark and soft using a flat brush, then with the watercolour I mixed several times this tones and repeated the process at least 2 times until the axe took the shiny metal look that I wanted; Now with the axe shape completely finished the last thing I had to do was to work on the edges and give it that characteristic edge that these weapons have, for this I created a new layer in sine mode and with a small and fine brush I created strokes on the edges. As scenery for my drawing I decided to create a kind of castle and building almost destroyed and covered by huge flames due to the battle that has just developed, to create this fire first use a flat brush and paint orange lines open upwards to represent the flames, then from inside with a lighter orange colour along with some yellow tones I worked the fire from the inside out while blurring the colours; finally to achieve that effect of heat in the fire I used the airbrush and painted soft strokes on the edges with a super saturated orange.
Para crear el hacha me tome unos cuantos minutos ya que quería lograr una apariencia de metal muy realista, lo primero fue trabajar un poco la base del hacha con algunos tonos grises entre oscuros y suaves usando un pincel plano, luego con el acuarela mezcle varias veces esto tonos y repetí el proceso al menos 2 veces hasta que el hacha tomo la apariencia brillante del metal que yo deseaba; ya con la forma de hacha completamente termina lo último que me faltaba por hacer era trabajar los bordes y darle ese filo característico que tienen estas armas, para esto cree una nueva capa en modo sine y con un pincel pequeño y fino cree trazos en los bordes. Como escenario para mi dibujo decidí crear una especie de castillo y edificación casi destruida y cubierta por enormes llamas debido a la batalla que se acaba de desarrollar, para crear este fuego primero use un pincel plano y pinte líneas naranjas abiertas hacia arriba que representaran las flamas, luego desde adentro con un color naranja mas claro junto con algunos tonos amarillos trabaje el fuego de adentro hacia afuera mientras difuminaba los colores; finalmente para lograr ese efecto de calor en el fuego use el aerógrafo y pinte brochazos suaves en los bordes con un naranja super saturado.

MATERIALS / MATERIALES
- Sai Paint Tool Program
- Huion inspiroy h610 v2 tablet
- Programa Paint Tool Sai
- Tableta Huion inspiroy h610 v2
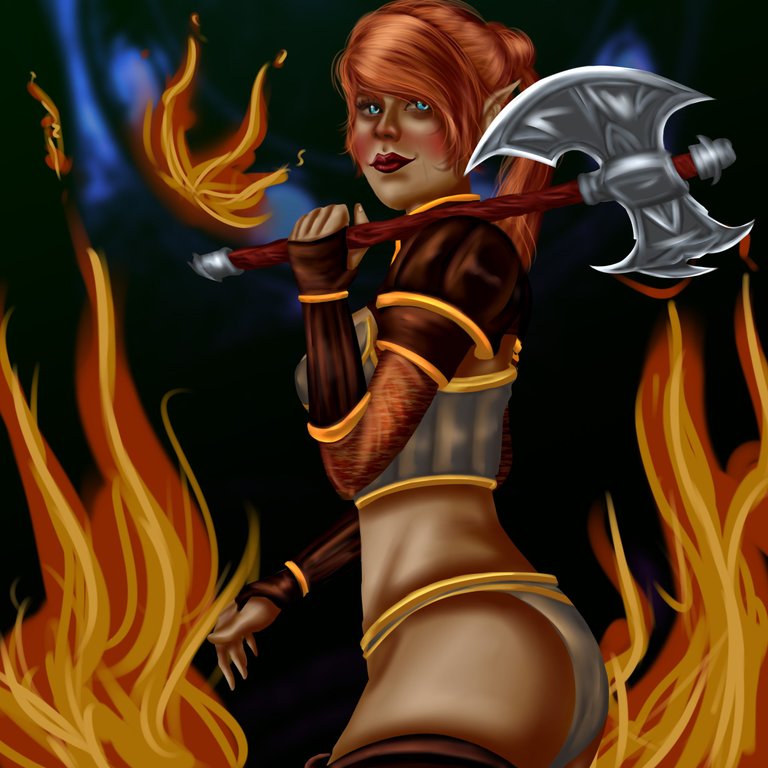
Well my people thank you very much for coming this far, for reading all my post and for watching the process of creating my drawing, I really hope you liked it a lot and if you did please let me know below in the comments; that's all for today, I send you a big hello and a hug and we'll see each other again in a next post...until next time!🤠🖖🏽.
Bueno mi gente muchas gracias por llegar hasta aquí, por leer todo mi post y por ver el proceso de creación de mi dibujo, espero realmente que les haya gustado muchísimo y si fue así por favor háganmelo saber abajo en los comentarios; esto ha sido todo por hoy, les mando un gran saludo y un abrazo y nos volveremos a ver en un siguiente post…hasta la próxima!🤠🖖🏽.
Buen trabajo! Gracias por tu participación y suerte!
Gracias 🤓✌🏽