Whenever I finish a TV or movie series, I fill the sudden void of emptiness by watching behind-the-scene extras. Part 5 is my behind-the-scene extra for my Japan Adventures series.
I’ve mentioned that my most sought-after part of a trip is actually the planning stage. This was all a DIY trip because we were on a tight budget and we wanted to be in control of our pace. I didn't plan this all by myself. I planned it with 3 of my closest friends, cause somehow I convinced them to go with me. We have been friends since our freshman year in college.
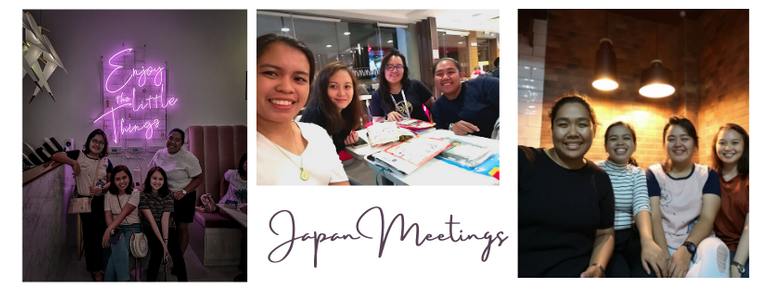
I was quite impressed with how efficient we were in planning out this whole trip. We’ve had so many meetings, online and face-to-face. We broke down all the specifics into 4 parts: Itinerary, Bookings, Budget, Visa Processing.
Budget
The actuality of every planned trip boils down to your budget. This was the most crucial and sensitive subject for all of us. We are all millennial chemical engineers working in different fields. Contrary to what was fed to us in our college days, the salary is not that appealing in real life. I could go on much further about how underappreciated young engineers are in our country, but that story is for another day. Going to Japan with our pay grade was ambitious. But we all know millennials have ways of traveling on a tight budget.
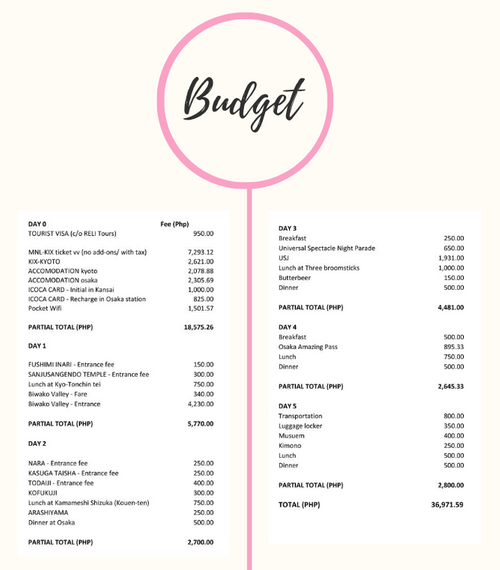
My budget for this trip is PHP 40,000. Was it enough in actuality? I’d say yes, but that’s because our food budget was not from my wallet. If I was on my own, I’d go for much cheaper alternatives and maximize the attractions. But aside from the food choices, I’d say my budget was enough. If you’re planning to buy pasalubong, prepare more. The estimated expenditures were incorporated later in the Itinerary section.
Bookings
Airplane Tickets
It wasn’t easy finding the ticket with a specific date and destination. But after some prayers and the fast hands of April, we got cheap tickets around PHP 7,000, roundtrip (VAT inc), no add-ons.
I think this is already known to most people, especially if you’re a frequent traveler. But I’d still share these tips:
- Be specific with either the date or the destination.
If you have a destination in mind, hold that place and set doable dates that you’re available. Or, if you have a specific date in mind, stick to it and just browse through the applicable destinations. In the height of excitement, your decision-making tools are hazed out by your emotions. We’ve missed even cheaper tickets because we couldn’t decide between Tokyo or Osaka. When we made the decision, seats were already sold out. Keep your eye on the prize. - Save all your and your companions’ personal details in your account.
Not only the assigned person for bookings but every single one. Everyone must be on the lookout. Also, each of us had consent to be called in the middle of the night in case. - Set a price threshold limit.
Work your decisions around this limit. How cheap is cheap? As for us, we considered our threshold limit to be PHP 5,000. Indeed, the base fare that we purchased was around that price. For the most part, keep your decision factors black and white. - Book simultaneously with the web browser and mobile app.
Some cheaper seats are available in one but not on the other. - Subscribe to airline alerts for seat sales.
Usually, they happen in the wee hours of dawn. We had many sleepless nights invested before we got ours. Just accept that you have to burn your eyebrows because seat sales don’t come to you. You have to chase them.
Accommodations
For Kyoto, we spent our nights in K’s House Kyoto Backpackers Hostel . We preferred AirBnB houses, but they were quite pricey. Room accommodations were cheaper. Because of the association with backpackers in the name, you would think that the place is small, dirty and noisy because it’s cheap and anyway, it’s just for a few nights. But we really had a good comfortable experience with their facilities. First of all, the location was within 8-min walking distance to the Kyoto station. The receptionists were fluent in English and very cheerful to assist you. The shared bathroom separated by gender was decently clean. The toiletries were all provided. I have high praise for their shampoo! I don’t know if the cold weather mainly influenced it, but I believe I had good hair days because of their shampoo. I was tempted to bring home some but I didn’t have a container. Lol.
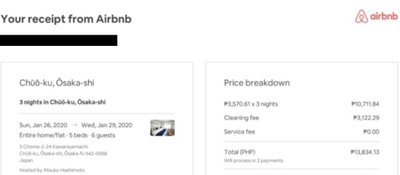
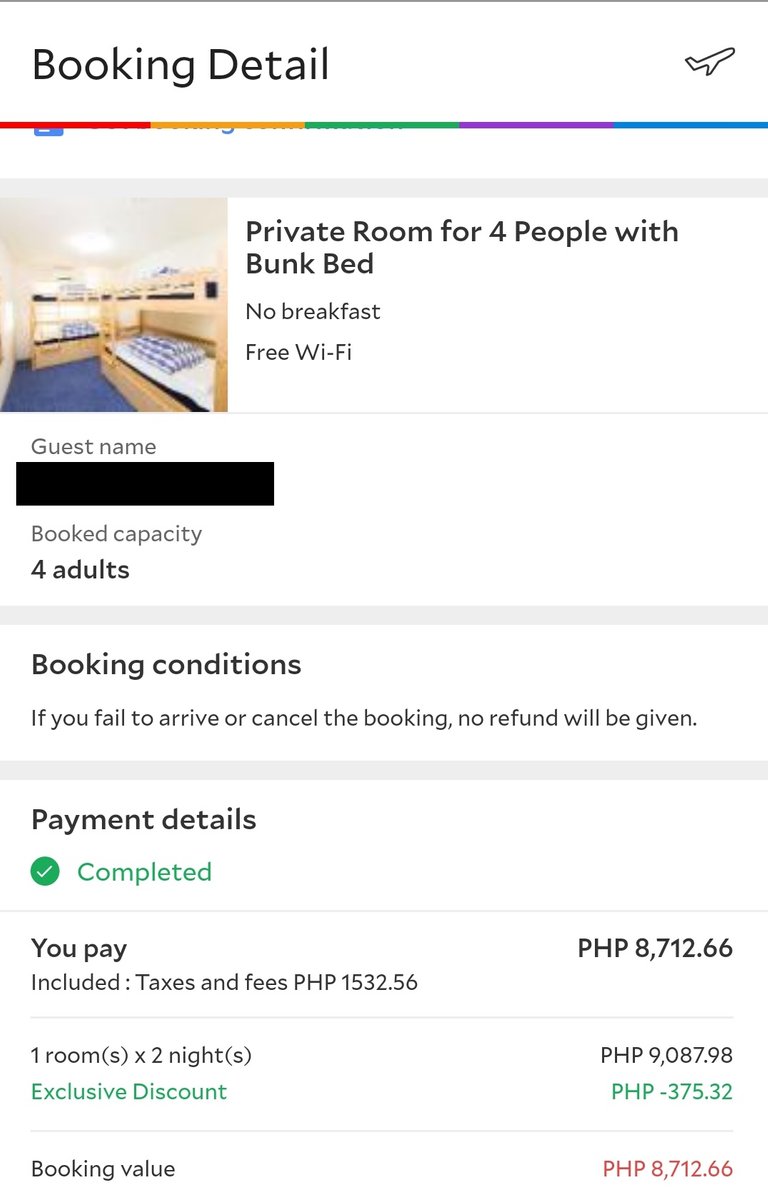
In Osaka, we encountered problems with locating the house. I opted for an Airbnb house because there were supposed to be 6 people on the trip. It was much cheaper to share the whole place than get individual hotel rooms.
The place we got was one of Atsuko’s properties. Despite the pin location in the Airbnb, the house was located far away from the nearest train station, around 20 minutes of walking. Although, Atsuko communicates very well with us as she answered our questions, even during that late-night decoding fiasco. As soon as you've booked, she sends a file where instructions are laid out. To her defense, she mentioned that the location used in the Airbnb app was not accurate. I just forgot that information when we arrived 😅 Also, the apartment had no elevators (Atsuko informed us about this also) so we had to carry our heavy luggage up 3 flights of stairs. The beds were very spacious. There were a TV set and some kitchen appliances. Our main issue there was the slow wifi connection and the teeny tiny shower room.
Tourist Attractions
For the tourist attractions, we booked the USJ ticket and the Osaka Amazing Pass through Klook. Those were the only attractions that we made prior bookings. Also, train fares are pricey, so it’s really better to buy all-day passes or prepaid cards to save some yen. As for us, we purchased JR West 3-day pass tickets through Klook. The Osaka Amazing Pass already includes train passes in the package. For railways not covered by both tickets, we prepared a prepaid ICOCA card. These can also be used in buses and shopping centers.
Concert Ticket
Another thing that I did on my own was to buy my concert ticket. Getting hold of concert tickets in Japan is a tedious process. For a first time concert-goer in Japan, it can get overwhelming.
First of all, there’s a language barrier. Unless you can read Japanese or have an acquaintance in Japan to do it for you, you’re on your own. When I accepted that I can’t do this by myself, I bought it through a concert ticket agency, Ticket Japaaan. I had my doubts especially when the owner, Mr. Jun Tanaka, requires you to give the full payment first. But, I only have high praise for him! He assists you every step of the way, explains the process clearly, and patiently answers all your questions. Most importantly, the email communication was constant. He will update you every step of the way during lottery results, up until you get your ticket. He even refunded some of the amount because he got me a cheaper ticket from the next available lottery (i told you it’s confusing). His service fee is around 4,500 yen.
Itinerary

We made the itinerary together, with Team Kaycee+April for Osaka and Team Justine+Glorie for Kyoto. Justine devised the rough draft of everything, while Glorie finalized it with corresponding budget details. I tell you, we could make a travel agency! Haha.
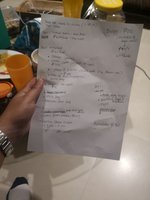
The itinerary we produced was too detailed to post here. However, deciding which ones will stay and which ones we’ll have to let go was a hard job. Our initial drafts were jam-packed with temples. But later, we decided to try places that are more into our interests. I understand that you want to go to all these places within five days as much as possible since you went through so much effort getting there, right? But the purpose of vacation would be nullified if you exhaust yourself of merely ticking the places in your itinerary. The itinerary is just a guide, don’t make it your religion. The important thing is, you have to have fun at your own pace.
Visa Processing
As I was based in Manila while my friends are based in Cebu, we submitted our visa requirements separately. As for me, I applied through RELI Tours & Travel Agency.
These are their requirements:
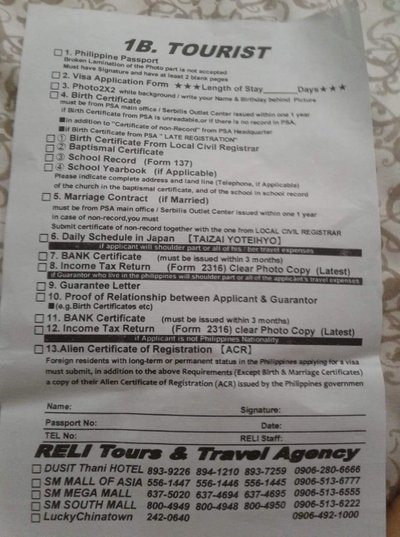
I was very eager to make this trip possible so I complied with everything and even added some more:
- Pocket money (show money as well) was around PhP 40,000 for a 5-day stay
- Statement of Account for my mutual funds (>PhP 30,000)
- Certificate of equities owned
- Booking confirmations
- A heart-wrenching cover letter 🙏
I received my approved visa in less than 3 days!
Remember when I said I felt invincible and that everything will go according to plan? Well, the Japan Embassy wasn’t onboard.
Sad to say, the rest of my friends were not given a Japanese visa. The result came 10 days before the trip. So, that was really a bummer. Instead of getting excited because the trip was getting nearer, it gutted me that we couldn’t do this vacation together. We put so much effort into it. I’m still sour about this topic, really. I made a letter of appeal to the embassy but their decision was final. These were our learning points that could hopefully help some of you:
Build your travel history first to add credibility that you are just a tourist.
I have been to around 4 countries (all visa-free). My parents were also coming, and they have travelled abroad countless times already. On the other hand, Justine has been to Taiwan (visa-free), Glorie has been to South Korea, while April has none.As a rule of thumb, prepare a show money of at least PhP 10,000 per travel day.
This is not required and not official. There’s no specific amount established by the Japanese Embassy. Also, make sure to accumulate your funds gradually so as not to cause suspicion. All travelers will only tell from experience because the Consul does not disclose reasons for rejection. They will just simply tell you to reapply after 6 months.Attachment of booked confirmations is NOT a guarantee for an approved visa.
In fact, the travel agency will tell you not to include them in the requirements. However, I insisted. I’m gonna take all my chances. We submitted the same set of booked confirmations, but had different results.As much as possible, get a guarantor.
Especially if you are not confident on your own. Aside from my account statements, I still listed my father as a guarantor. Glorie need not submit her bank certificate because she had a guarantor. Justine and April funded themselves for around PhP 60,000 each.Considering you get an accredited travel agency, it doesn’t really matter what particular agency to go to.
My father and I submitted together in Manila through RELI Tours & Travel Agency. My mother submitted hers separately through JTB Philippines because she was in Cebu. My friends submitted together through JTB also.For group applications, get a feel which among you have greater chances for visa approval.
All along in the planning, we were scared that not all of us will be approved. Honestly, the worst-case scenario was that Glorie would be approved because she has a guarantor and she has been to a visa country before. Never did we think that all 3 of them will be rejected. It was just our hunch that Glorie was dragged down by the group.

This may sound over-the-top, but when we knew that not all will be coming to the trip, it was soul-crushing. I must admit, it was partly my fault because I convinced them to come with me even though all of us had our fears. But, I think I can speak for everyone when I say, it showed us how we can work efficiently with each other. In our next trips, when COVID-19 goes away, we’d easily go back to our roles in the DIY process.
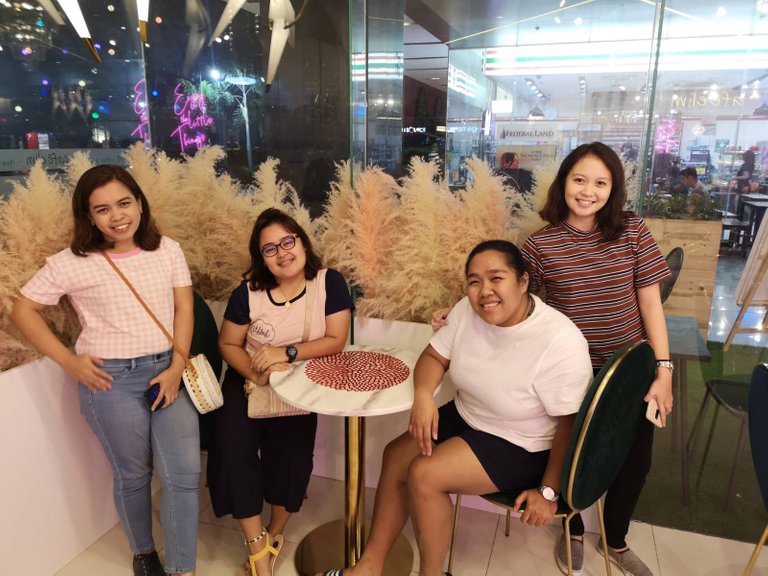
In the days leading to the trip, I was anxious. I was depending on them on the itinerary details. I had to start familiarizing myself with it because I’m the only hope for my parents lol. But all’s well because we had a send-off meeting at Cafe Elim where they also briefed me about other aspects of the trip.
Planning a DIY trip is not for everyone. It demands time for research and organizing. If that’s not your thing, then you could avail of travel packages. Just sit back and relax; you have people to handle all the arrangements for you. But if you want to be more adventurous and hands-on, hopefully, my experiences would be a good reference for your future trips.
All I can say is, Japan is too beautiful. Going once will never be enough. The culture is mesmerizing, and the people are very accommodating and respectful. I could only dream how progressive my country would be if we both had discipline from the citizens and good leadership by the government. It really does take two to tango.
Hopefully, as we travel to other countries, may we not just take our experiences to memories or save pictures for Instagram. Let’s also apply the good things that we observe in other countries, and start applying them when possible in our home countries. Let’s copy the good practices of each other.
✨End of series✨

Part 1: Travel Paranoia / 25 on 25th / Part 2: Hello, Deer / Happy Muggle / Part 3: I Saw Her Majesty / Part 4: Amazing Race: Lost Passport Edition

@tipu curate 2
Upvoted 👌 (Mana: 9/45)
Shared to Twitter:
Congratulations, your post has been added to Pinmapple! 🎉🥳🍍
Did you know every user has their own profile map?
And so does every post as well!
Want to have your post on the map too?