Усім привіт! Цього разу я вам розповім, як можна зробити ремонт дома, не інвестуючи багато коштів.
| История одной стены | The story of one wall |
|---|---|
| В свою бытность у нас нелегкое время было – пришлось взять жильца. Вот и жил у нас в квартире квартирант – снимал комнату. Ничего плохого не могу сказать о нем – нормальный работящий парень. Но тема не о нем, а о ремонте. Как-то подходит он ко мне и говорит: | During our time we had a difficult time - we had to take a tenant. So a tenant lived in our apartment - he rented a room. I can't say anything bad about him - a normal hard-working guy. But the topic is not about him, but about the repair. Somehow he comes up to me and says: |
| - У меня на стене в комнате обои начали отходить – смотрятся довольно-таки паршиво. Придумай что-нибудь, пожалуйста, или сделай ремонт. Жить-то хочется в удобствах… | - On my wall in the room, the wallpaper began to recede - it looks pretty lousy. Think of something, please, or make repairs. I want to live in comfort ... |
| А в комнате, надо признаться, на одной стене, действительно, обоям был полный швах… | And in the room, I must admit, on one wall, indeed, the wallpaper was full of seams ... |
| На тот момент, к сожалению, финансов не хватало для полноценного ремонта и я решил что можно сделать «точечный» ремонт, то есть переделка одного участка стены. | At that time, unfortunately, there was not enough finance for a full-fledged renovation and I decided that it was possible to make a "spot" repair, that is, alteration of one section of the wall. |
| А надо сказать, что я как раз работал в сфере строительства и тоже осуществлял ремонты под заказ. Но, как говорится в известной пословице – сапожник без сапог. | And I must say that I just worked in the construction industry and also carried out repairs on order. But, as the famous proverb says - a shoemaker without boots. |
| Почесав в затылке, пришлось лезть в кладовку и разыскивать остатки старых обоев, которыми была обклеена эта комната. Остатки, естественно, нашлись. Но состояние обоев, конечно, оставляло желать лучшего, а в частности их края. За неимением более выгодного варианта и явной нехватки обоев, пришлось выдумывать что-то новое и обыгрывать стену. Об этом ниже. | After scratching my head, I had to go into the closet and look for the remnants of the old wallpaper with which this room was pasted over. The remains, of course, were found. But the condition of the wallpaper, of course, left much to be desired, and in particular their edges. For lack of a more profitable option and an obvious lack of wallpaper, I had to invent something new and beat the wall. More on this below. |
| В первую очередь надо было очистить часть стены от старых обоев. Взяв правило и монтажный нож, я сделал разрезы на обоях. Далее, смачивая старые обои валиком, я потихоньку очистил необходимую для дальнейшей работы поверхность. После этого требовалось прогрунтовать рабочий участок и приклеить багеты. На багеты и дальнейшие расходы деньги выделял квартирант, так как моя идея ему понравилась. | First of all, it was necessary to clear a part of the wall from old wallpaper. I took the rule and the edger knife and made cuts in the wallpaper. Then, wetting the old wallpaper with a roller, I slowly cleaned the surface necessary for further work. After that, it was required to prime the working area and glue the baguettes. The tenant allocated money for the baguettes and further expenses, as he liked my idea. |
| Так вот, я расчертил стену и приклеил багет. Предварительно я набросал на листике его расположение и рассчитал все размеры. После этого его необходимо было покрасит его, что я и сделал. Всё это заняло у меня в общей сложности 5-6 часов. Еще надо было пройтись вторым слоем краски – вот поэтому и получился такой большой временной промежуток. Также пришлось потратить время на поездку и покупку материалов, но это уже не считается. | So, I painted the wall and glued the baguette. Previously, I sketched its location on a leaf and calculated all the dimensions. After that, it was necessary to paint it, which I did. All this took me a total of 5-6 hours. I also had to go through the second coat of paint - that's why we got such a long time period. I also had to spend time traveling and buying materials, but this no longer counts. |
| Фото 1 и 2. | Photo 1 and 2. |
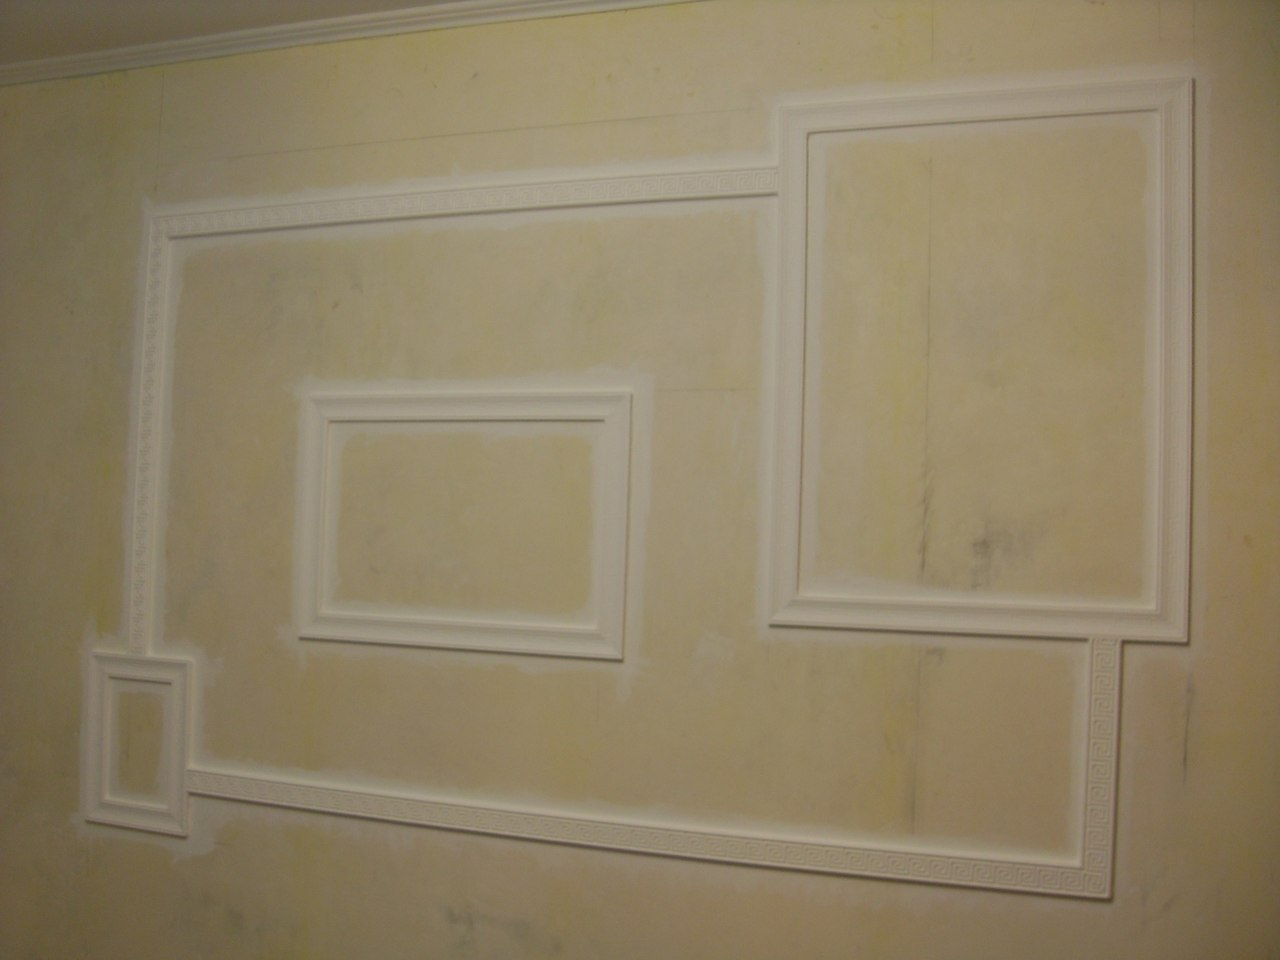

| Для полного высыхания краски и монтажного клея, с помощью которого клеились багеты, был взят перерыв на одни сутки. Также, следует отметить, что багеты брались двух видов, чтобы не смотрелось наляписто. | To completely dry the paint and assembly glue, with which the baguettes were glued, a break was taken for one day. Also, it should be noted that the baguettes were taken of two types so as not to look clumsy. |
|---|---|
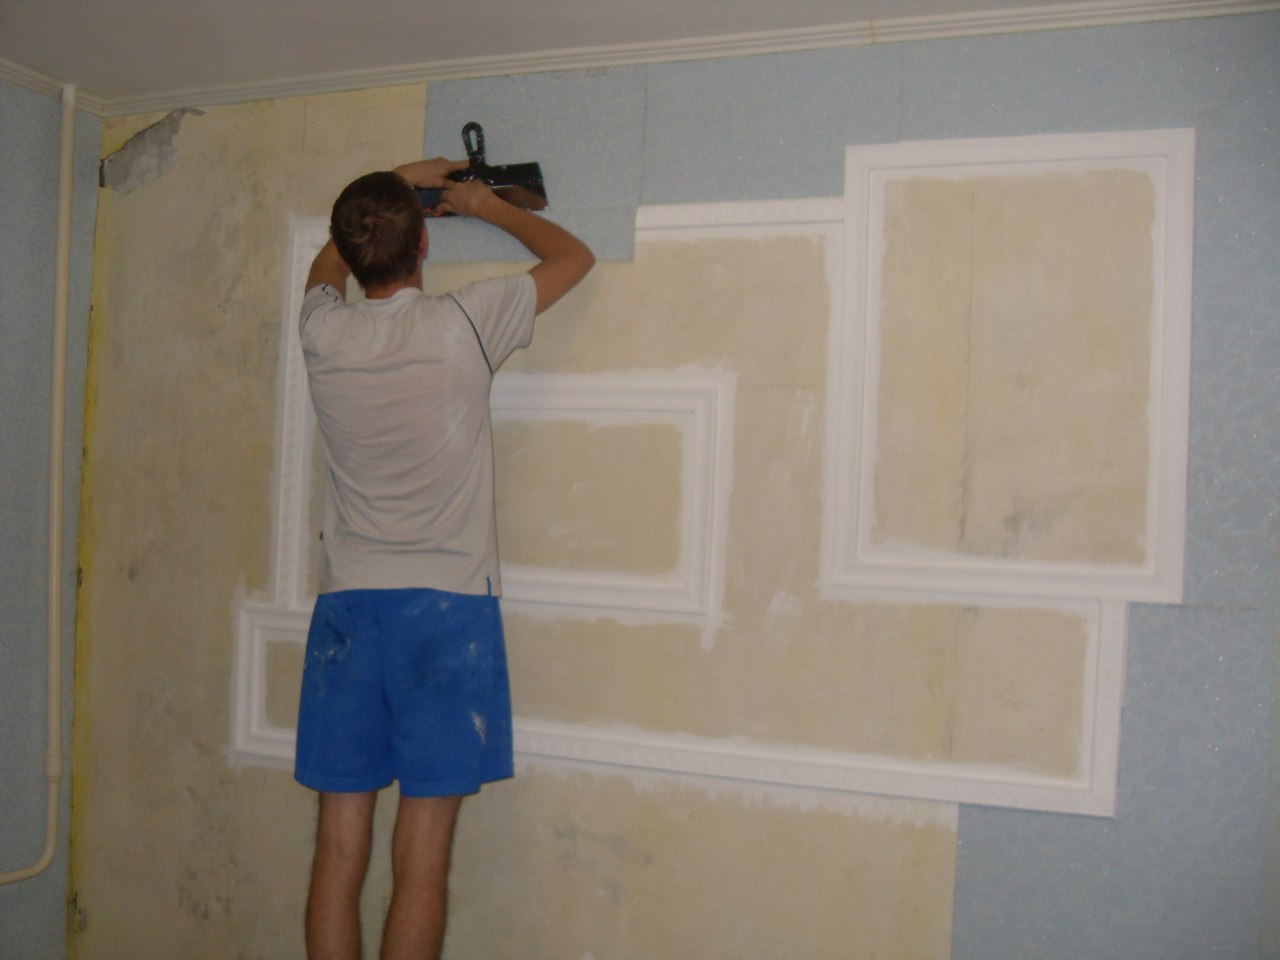
| На следующий вечер я приступил непосредственно к самой поклейке обоев, потратив немало времени и нервов на выбор более-менее подходящих кусочков. Но даже у них все края были безнадежно обтрепаны... Снова почесав затылок, я принял решения клеить их, используя "технологию" вставок. Это когда один кусок обоев приклеивается поверх другого, а после этого, вооружившись монтажным ножом с острым лезвием, делаются резы по обоям сквозь оба слоя. Причем, отрезать кусочек обязательно требуется больше, чем первый слой обоев. В моем же случае сложность заключалась в том, что врезку приходилось делать на всю высоту стены с обеих сторон. Должен сказать Вам, работка еще та… Но, как говорится, терпение и труд все перетрут. | The next evening I proceeded directly to gluing the wallpaper itself, having spent a lot of time and nerves choosing more or less suitable pieces. But even their edges were hopelessly frayed ... Scratching the back of my head again, I decided to glue them using the "technology" of inserts. This is when one piece of wallpaper is glued on top of another, and after that, armed with an assembly knife with a sharp blade, cuts are made along the wallpaper through both layers. Moreover, cutting off a piece necessarily requires more than the first layer of wallpaper. In my case, the difficulty was that the inset had to be done to the entire height of the wall on both sides. I must tell you, the job is still the same ... But, as they say, patience and work will grind everything. |
| Дойдя обоями до багетов тоже пришлось занимать вырезкой обоев. Аппликация делается на порядок легче – смею Вас уверить. Самыми легкими моментами были приклеивание кусочков обоев от потолка к багетам и, соответственно, от багетов к полу. Но на самом деле, аккуратно работая шпателем и монтажным ножом, можно сделать очень многое. В этот вечер я не успевал полностью поклеить обои и, зашпаклевав участок в левом верхнем углу, решил перенести все на следующий вечер. | Having reached the baguettes with wallpaper, I also had to occupy the cutting of wallpaper. Application is much easier - I dare to assure you. The easiest moments were gluing the pieces of wallpaper from the ceiling to the baguettes and, accordingly, from the baguettes to the floor. But in fact, a lot can be done by carefully working with a spatula and a knife. That evening I did not have time to completely glue the wallpaper and, having putty the area in the upper left corner, decided to postpone everything to the next evening. |
| Фото 3. | Photo 3. |
| На следующий вечер обои доклеить не получилось тоже – мы с квартирантом ездили распечатывать фотографии на цветном ризографе и провозились с этим до позднего вечера. | The next evening, the wallpaper could not be glued either - the tenant and I went to print the photographs on a color risograph and carried around with it until late at night. |
|---|---|
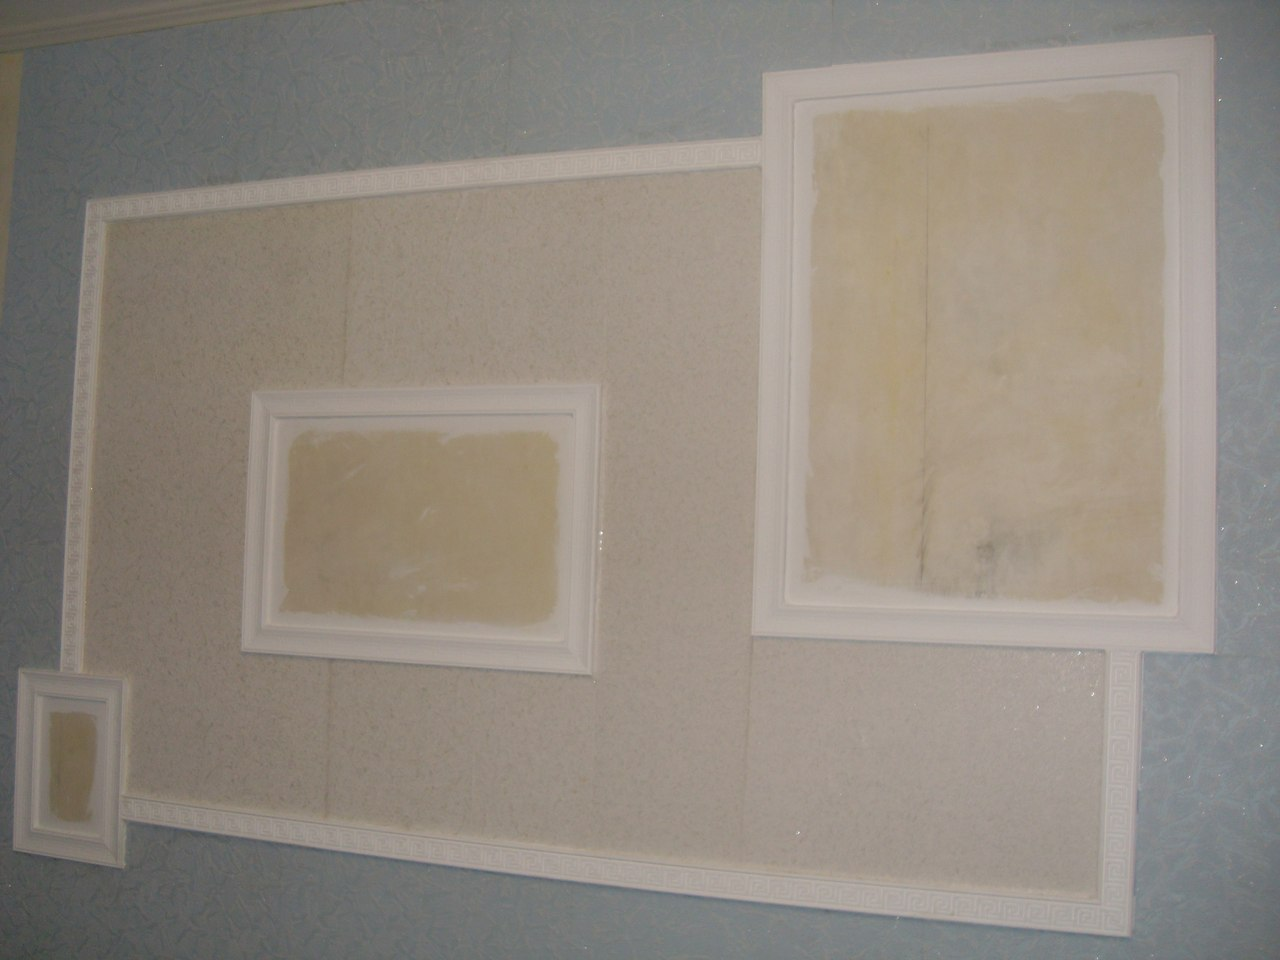
| Но за то на следующий день я за час закончил поклейку обоев и принялся за фотографии. | But for that, the next day I finished gluing the wallpaper in an hour and began to take pictures. |
| Фото 4. | Photo 4. |
| И вот тут я понял, что все, что я до этого делал – были просто детские шалости, по сравнению с поклейкой фотографий! Это очень неудобный материал и требует предельной осторожности и аккуратности. В противном случае, пришлось бы перепечатывать. Провозился я в тот день до поздней ночи. Зато в результате получилась вот такая обыгранная стена. | And then I realized that everything I had done before was just childish pranks, compared to sticking photos! This is a very inconvenient material and requires the utmost care and accuracy. Otherwise, it would have to be reprinted. I spent that day until late at night. But the result is such a beaten wall. |
|---|---|
| Фото 5. | Photo 5. |
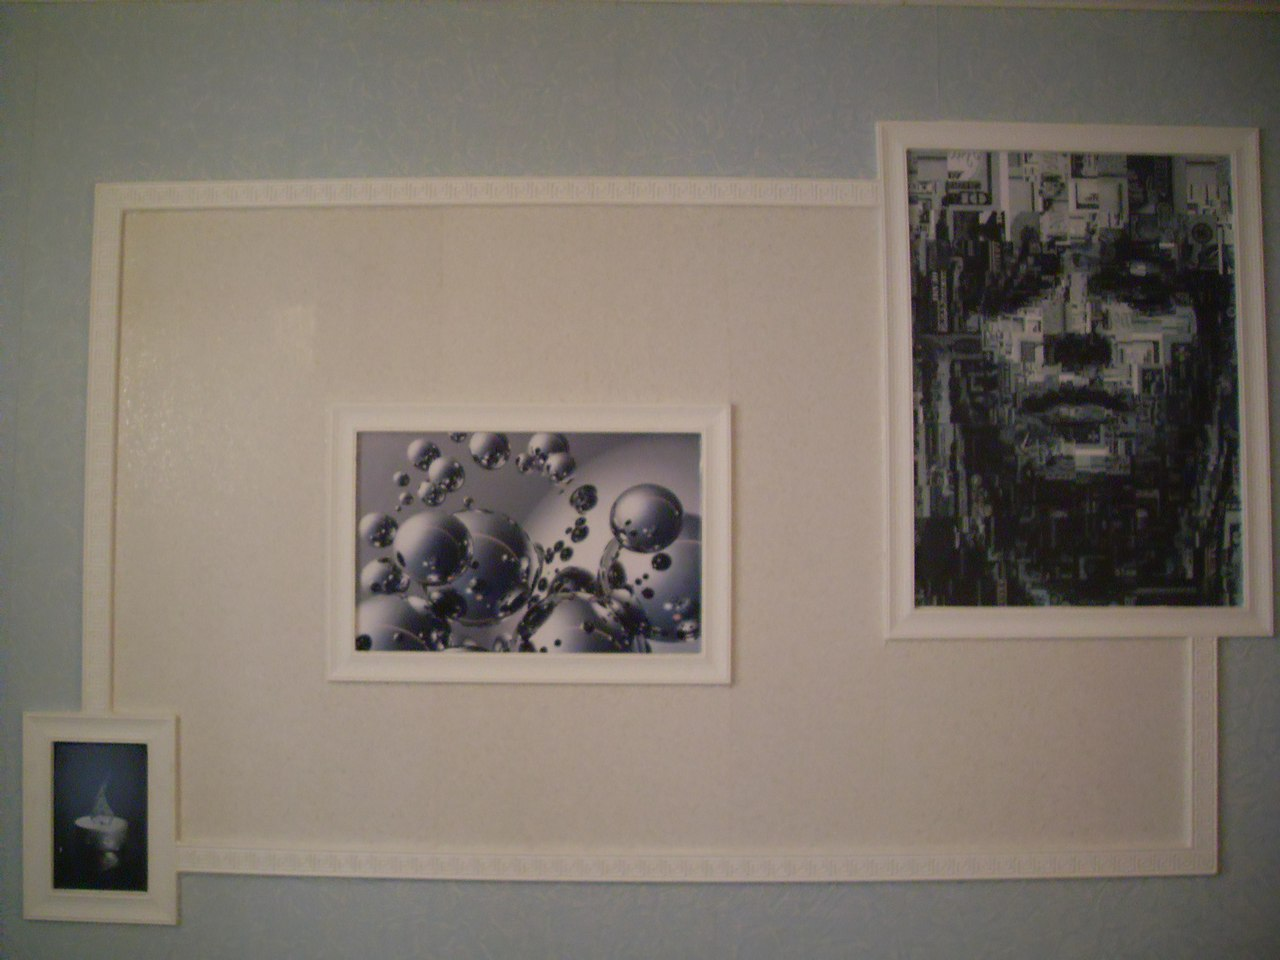
| Как всегда, пытаясь сделать что-то очень хорошо, получается так, что лучше было бы и не браться совсем за дело. Но, не смотря на то, что в проделанной работе и были небольшие «косяки» общий вид получился очень даже ничего. | As always, trying to do something very well, it turns out that it would be better not to get down to business at all. But, despite the fact that in the work done and there were small "shoals", the general view turned out to be very even nothing. |
|---|---|
| Вот таким образом, имея на руках только старые остатки обоев, немного фантазии и пару-тройку сотен гривен, можно совершенно изменить вид комнаты. | In this way, having on hand only the old remnants of wallpaper, a little imagination and a couple of hundred hryvnias, you can completely change the look of the room. |
P.S. Для деяких читачів голі стіни - теж вариант НЮ )))

А между картин - белое, это что? Краска/грунт?
Не было идеи его сделать не белым однотонным?)
Это старые обои, дружище... они даже нормально не отрезались... (((
Даже со врезками было проблема.
Congratulations @polyideic! You have completed the following achievement on the Hive blockchain and have been rewarded with new badge(s) :
You can view your badges on your board and compare yourself to others in the Ranking
If you no longer want to receive notifications, reply to this comment with the word
STOPDo not miss the last post from @hivebuzz: