Today, I'm going to briefly go over how digital signatures work, how to use them to authenticate messages, and then providing an example using Schnorr Signatures in Rust. The reason for covering this information in this blog post is that I'm currently in the process of adding message authentication to the decentralized application protocol I'm developing described in the prior post here.
While authentication can be a pretty heavy topic in cryptography to maneuver through, the basic idea can be boiled down to a single idea. We want to be able to verify that any agent (a user, a process, a program) is who they claim they are. Verification is typically done with some sort of evidence and in cryptography is done with some cryptographic "proof".
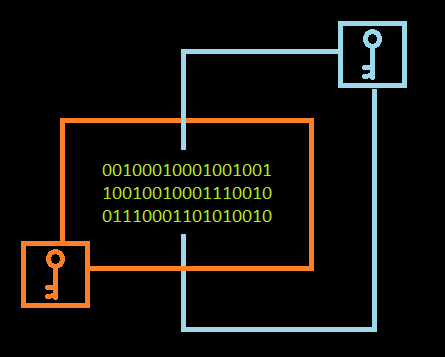
Analog signatures are examples of a means of authenticating some official document. They provide evidence of approval of the signing party. Digital signatures work the same way but that evidence comes in the form of some cryptographic proof which is arguably much stronger than say a signature written with a pen.
Modern cryptography itself relies on a basic set of assumptions that fundamentally revolve around the idea of that certain mathematical problems are intractable. What this means is that the mathematics behind solving such a problem requires so much computational power given the current known means of solving that problem that it is completely impractical to solve such a problem without wasting massive amounts of computational resources. However, cryptography algorithms also usually have the property that they are rather easy to verify given some known secret. As long as the secret is shared only with those parties who are supposed to have the secret, cryptography provides us certain guarantees and can be used as proof of certain pieces of information.
For digital signatures, we are trying to authenticate the signer and this is usually done with the digital signature serving as the proof verifying the signer. The signing and verifying processes are done with asymmetric keys. Such keys are different from each other and are used to perform different functions.
There are two types of keys: public and private. The obvious difference is that a public key is out in the open available to the public (or some subset of the public) and the private key is typically hidden to all except the owning party which in our case is the person whose identity we are trying to verify. This is useful in that such a method doesn't require a shared secret, but rather trusting that a public key belongs to a specific user.
Digital signatures work by taking some piece of data and encrypting that data with the private key. This encrypted message becomes the digital signature and is passed with the original data to the verifying party. It can also be combined with other cryptographic schemes and objects to enhance privacy and make other guarantees about the data. But for our purposes, we'll assume that data is not private. Anyone then can take the associated public key and decrypt the signature to get the original data. Assuming there is a match, this verifies that the user with the private key was indeed the entity that sent the message.
Schnorr signatures are one of many digital signature algorithms that can be used to perform data authentication. These signatures are in vogue lately in the crypto community due to the efficiency of the algorithm and the length of the signatures generated. I'm going to be using the Rust schnorrkel library maintained by the Web3 Foundation the folks behind the Polkadot project. It's good to see organizations support libraries like these because blockchains are only a part of helping to build the decentralized future and better cryptography and other tools always help.
So, first things first, let's setup our Rust project. Assuming you have Rust downloaded and are using a Unix shell / terminal (because Windows sucks) we'll need to setup a project. Rust has an awesome package manager, cargo, that helps us do this. We'll specify our project as an executable binary (as opposed to a library) with the --bin flag.
cargo new --bin sigs
This command generates a new executable project called "sigs". Next, to setup the project, we'll add the schnorrkel and rand libraries as dependencies. The rand project is used to help generate the keys used for the digital signature. This can be done by adding these libraries to the Cargo.toml configuration file. Add these two lines under the dependencies section of the file:
[dependencies]
rand = "0.8.3"
schnorrkel = "0.10.1"
Lastly, inside this main file, we'll write a simple program to generate the public and private keys, sign a message, and verify that the message was signed by the private key with the public key. Copy the following program into the main.rs file inside the src file. I'll go over each section in detail explaining what it's doing and showcasing some of the features of Rust and the schnorrkel library in context of creating digital signatures.
use rand::rngs::OsRng;
use schnorrkel::{Keypair, signing_context};

fn main() {
    // Setup pair of keys, message, and signing context
    let keypair = Keypair::generate_with(OsRng);
    let message = String::from("Hello, world!");
    let context = signing_context(b"Role signature plays in protocol");

    // Signature generation
    let signature = keypair.sign(context.bytes(message.as_bytes()));

    // Signature verification
    let public_key = keypair.public;
    public_key
        .verify(context.bytes(message.as_bytes()), &signature)
        .expect("This program crashed due to signature mismatch");

    // Console success output
    println!("Signature verified");
}
If you run the program, it should compile and output the "Signature verified" message to the console if everything is written and setup correctly. It may take a little bit the first time since cargo needs to download the different dependencies locally first. To run the program use the following command:
cargo run
If everything worked correctly, congratulations, we just used cryptography to sign a message and verify the message with a public key. Just like that. So, let me explain the program and little bit about how Rust works.
The first two lines of the program are used to import different modules from the external libraries that we are using to build this program. We are then specifying which specific structures and functions we want to use in our program.
use rand::rngs::OsRng;
use schnorrkel::{Keypair, signing_context};
The next line is the main function. This is pretty common place for a lot of languages and is found in C, C++, Java, etc. This function is used as the starting point for all programs written in Rust.
fn main() {
The next relevant line is where we generate the private/public key pair. We generate this key pair by passing in the OsRng structure into the generator function that is associated with the Keypair structure.
let keypair = Keypair::generate_with(OsRng);
Some key notes about Rust here. Rust is a strongly typed language that is complied into a binary executable file. This means that all of the checking of validity of the program happens prior to running the code. This is in contrast to interpreted programs like Python which have interpreters that will complain about errors while the program is running. As a result, Rust programs are really fast like C/C++ programs but have some guarantees and a really bitchy compiler that make writing programs a little faster and safer. One of those neat features is type inference which is done in the line above. The compiler reasons that the keypair variable is a Keypair type without you having to write the type out explicitly. Which makes code faster to write while still retaining type safety. Pretty cool.
The OsRng structure is a random number generator that utilizes the operating system to generate random numbers. It is very important to have good random numbers to generate your keys as if these numbers could be produced consistently, adversaries could take that information and generate the private key for themselves. The end result of this function call is a Keypair structure that holds our private and public keys.
let message = String::from("Hello, world!");
let context = signing_context(b"Role signature plays in protocol");
The first line simply puts our message into a Rust String structure utilizing Rust's syntax for generating String types. In the next line, we have the signing context used in generating our signature. This feature is built into the schnorrkel library and is used to help differentiate unique elements of the protocol from each other while allowing those unique elements to utilize the same keys. It takes a binary string (thus starting with b) as an argument to generate the context structure.
Now we are finally ready for signing the message. We can achieve this by utilizing our keypair and signing the message with the private key as shown below:
let signature = keypair.sign(context.bytes(message.as_bytes()));
The keypair object here uses the private key behind the scenes and takes the message mixed with the context as an argument. The end result is the message signature. This signature would then be appended to the message itself and would be used as a comparison value to validate the authenticity of the sender of the message.
let public_key = keypair.public;
public_key
    .verify(context.bytes(message.as_bytes()), &signature)
    .expect("This program crashed due to signature mismatch");
Assuming the message was sent with the signature attached, we still need the public key to verify it. This would usually be performed ahead of time and either shared using some other cryptographic method or some trusted third party to validate the public key is coming from the owner of the correct private key rather than an adversary's private key. In our case, we'll just take the public key from the keypair for simplicity's sake.
Our last relevant line in the program has us calling the verification function passing in the function as well as the message with context applied to it. What we are essentially doing is verifying that the resulting decrypted message from the signature matches the context wrapped message passed in. Remember that only the public key associated with the private key that performed the initial signing will be able to perform this function successfully.
The last part of the line takes the Result of the verification function and unwraps it exposing whether or not it is an error. This special enumeration is a unique part of Rust that forces you to perform error handling (rather than ignore it) in order for your program to compile. While initially annoying, this feature is really nice in helping to create robust programs that gracefully handle errors. The expect function will crash the program and display the error message to the console. If you see this message instead of the final println! statement, it means that something in the verification process failed.
That's basically digital signatures in a nutshell without describing the specific algorithms like elliptic curves and discrete logarithms which power the algorithm underneath. In my current project, there was a clear lack of message authentication which is fine if you are okay with accepting any external request, but if you are trying to establish any channel of communication or you want to respond with data pertaining to a specific individual, it's a good idea to verify that the person you think you are talking to is the same as the one that sent the message.
That's all for this blog post. Thanks for reading and if any of this interests you, understanding concepts like cryptography and why it is useful is growing relevant everyday as we move into the digital (and hopefully decentralized) future.
Resources
Schnorrkel Library
Rust Language Homepage
Open Pond Protocol