Hello buddies! My journey to building on Hive has just begun. Yesterday, and the day before, I learned how to use the how to pull blog posts with the Dhivelibrary.to fetch blog entries yesterday and the day before. I literally grinned while working with the code throughout the course since I chose to use Javascript rather than Python to develop :).
The author suggested that after finishing the course, one might integrate hive blog articles on websites. And soon once I realized that this idea was perfect for me because I've always wanted to showcase my Hive blog pieces in my portfolio. So I commenced...
Installing The Needed Npm Package
Before the tutorial, I assumed javascript's Fetch method would be used to retrieve hive blog feeds. I was shocked to learn that this is not the case.
Fetching hive blog feeds would require one to install a package known as @hiveio/dhive
@hiveio/dhive is a JavaScript library for interfacing with the Hive blockchain. It provides a simple and easy-to-use API for working with Hive transactions, blocks, accounts, and other data.
Importing Dhive Client
This tutorial doesn't require a bunch of imports as fetching blog feed requires just the import below.
const { Client } = require("@hiveio/dhive");
Client alone doesn't have the ability to communicate with the hive blockchain as it expects a node URL. The tutorial stated that one could run their node to connect via WebSockets. But because I don't have any experience of such, I went with using the popular live node most of y'all might be familiar with https://api.hive.blog;
const client = new Client('https://api.hive.blog');
After declaring an instance of the Client with a node URL, we can now access every detail of a post using the client variable.
Understanding Fetch Aata And Format
I learned that condenser_api.get_discussions_by_* followed by the discussion type is a way to fetch a specific discussion type on the hive blockchain. Let's say we need to fetch a blog discussion, we have to do it this waycondenser_api.get_discussions_by_blog. However, Dhive package has a different way it accepts the discussion type. instead of the above style, we do it this way; client.database.getDiscussions("blog", query).
As you can see, we made use of the client variable declared before now to access the database, the getDiscussions(), which then accept discussion type, 'blog' in this case, and query which is an object.
As stated, the query is an abject with a tag, and a limit defined. For the tag, just as the name states, it's used to Get specific posts based on the tag provided. But in this case, we are using it to fetch for user's post. So, I passed in my username ('rufans'). The limit is the number of posts to fetch, as shown below.
 client.database
    .getDiscussions("blog", {
    tag: 'rufans',
    limit: 3
})
    .then((result) => {
console.log(result)
}
Writing Them In NextJs
Just in case you haven't noticed, the above code wasn't written in async await but rather in promise. Since I was going to fetch my post to my portfolio, I got the opportunity to rewrite the function the way I would like. I approached it with async await;
// connecting to hive blogchain
  const [posts, setPosts] = useState([]);
  const getUserPost = async () => {
    const post = [];
    const data = await client.database.getDiscussions("blog", {
      tag: "rufans",
      limit: 3,
    });
    data.map((postDetails) => {
      //   setPosts(postDetails);
      post.push(postDetails);
      setPosts(post);
    });
  };
Because I was using nextjs, a reactjs framework, I made sure to utilize the useState() hook, which is why I set the posts details inside setPosts(post).
Displaying And Formating the result
At this point, I was almost done with everything. It was left to map over my post because it's an array.
posts?.map((post) => {
          const json = JSON.parse(post.json_metadata);
          const postMarkDown = post.body;
          const htmlbody = markdown.render(postMarkDown);
          const postBody = stripHtml(htmlbody.substring(0, 200)).result;
          const postDate = new Date(post.created).toDateString();
}
I faced a little issue where the post body was still in markdown format. I had to install these libraries to convert the post to plaintext.
const markdown = require("markdown-it")();
import { stripHtml } from "string-strip-html";
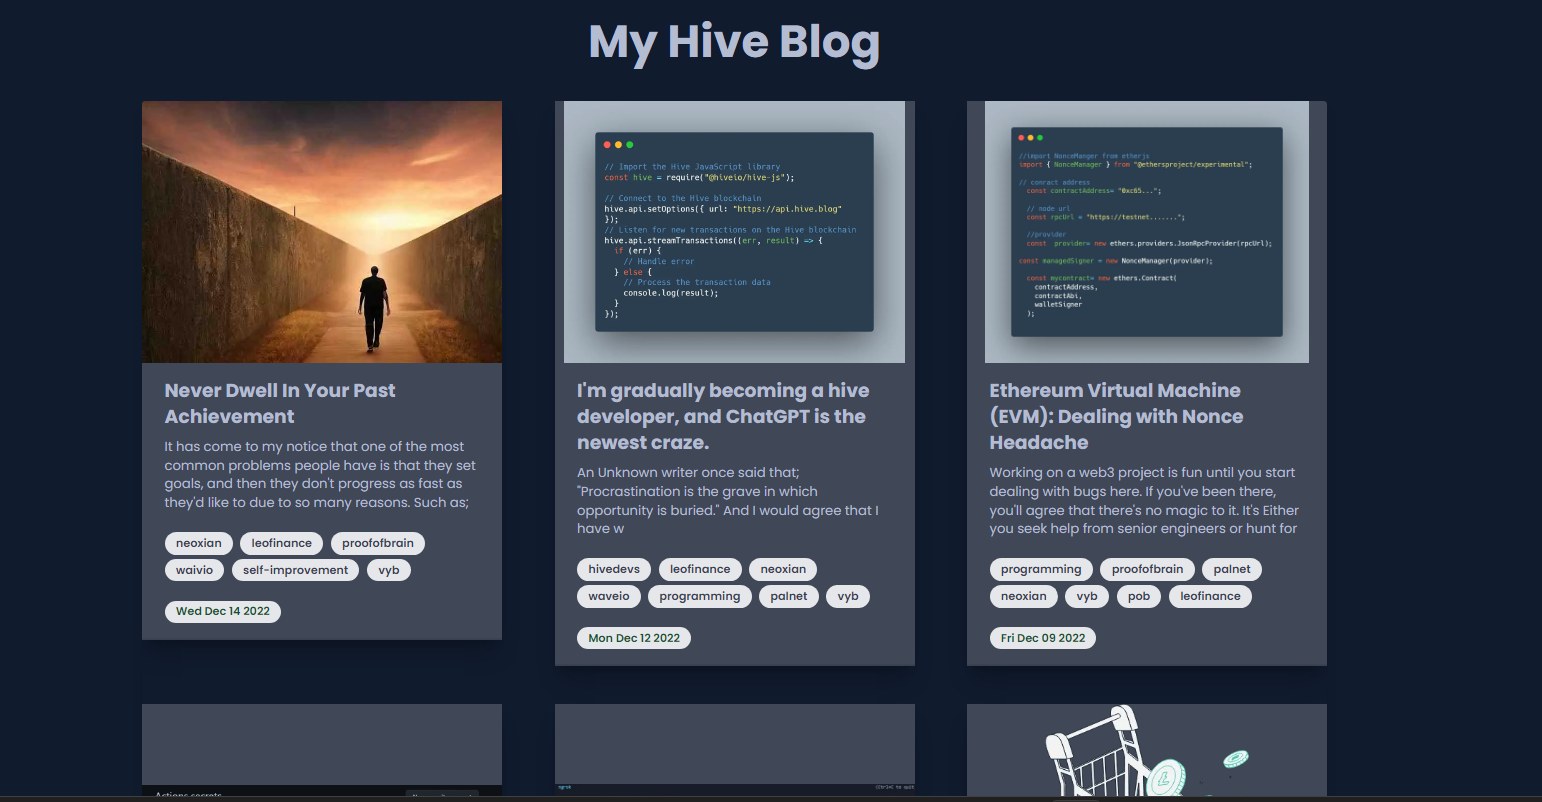
Finally, I had my posts displayed inside these cards. Each of the cards can be clicked which then navigates to the original post on hive.
That's all for this post. Next, I will be working on Hive authentication.
The rewards earned on this comment will go directly to the people sharing the post on Twitter as long as they are registered with @poshtoken. Sign up at https://hiveposh.com.
Thanks for your contribution to the STEMsocial community. Feel free to join us on discord to get to know the rest of us!
Please consider delegating to the @stemsocial account (85% of the curation rewards are returned).
You may also include @stemsocial as a beneficiary of the rewards of this post to get a stronger support.
Congratulations @rufans! You have completed the following achievement on the Hive blockchain And have been rewarded with New badge(s)
Your next target is to reach 20000 upvotes.
You can view your badges on your board and compare yourself to others in the Ranking
If you no longer want to receive notifications, reply to this comment with the word
STOPCheck out our last posts:
Support the HiveBuzz project. Vote for our proposal!