Introduction
Hello! My name is Hira Karmachela a.k.a BABE ODED. In this post I will share tips in making urban pixel art with 3D primitives on Clip Studio Paint. I'm sure all of you who are reading this article know very well about the advantages of CSP over other graphics software.
Based on my experience using CSP professionally, this software has completely fulfilled all my graphic needs both for drawing and designing. Not only that, CSP is also very capable in making webtoons, comics, and animations. It's all thanks to the support of a very active community in developing assets, materials and tutorials like this.
I hope this post will be interesting tips for those of you who are looking for tips to hack your work time to be more effective and efficient when using CSP.
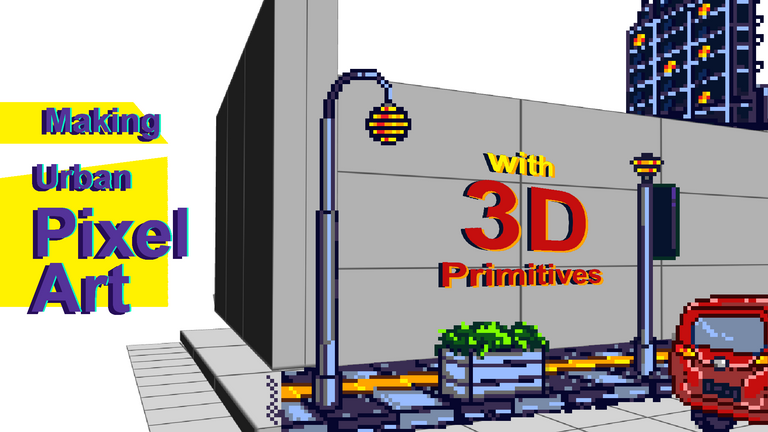
About Urban Pixel Art
Urban Art is a visual art that depicts the atmosphere of the city from various perspectives and styles. In this case, I used a pixel art technique to depict an urban atmosphere.
I find the difficulty in making urban art which is to determine the right perspective so that unwanted distortion does not occur. Luckily, CSP provides 3D primitives which are simple and easy to use.
The idea is to use 3D primitives to create layouts and define primitives like stacking blocks. After that, we can easily trace the 3D layout that has been arranged using a pixel brush.

#1 Setting Up File
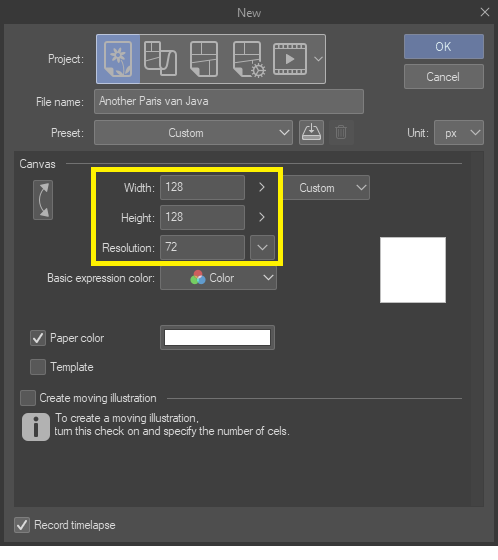
We start by creating a new file. In making pixel art, I usually use a canvas with a size of 128px by 128px with a resolution of 72dpi. This size is perfect for creating images that are detailed enough, not too narrow and not too wide to arrange pixels.
Go to File > New. Then a pop-up dialog box will appear.
The next important step in creating pixel art on CSP is setting up and displaying the "grid". Go to the View menu > Grid.
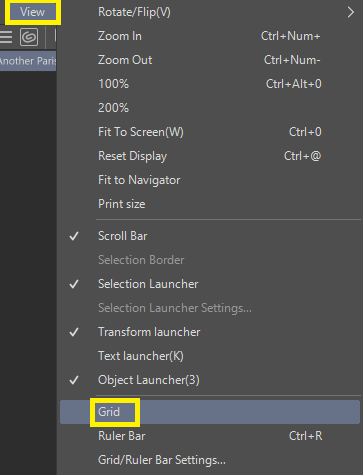
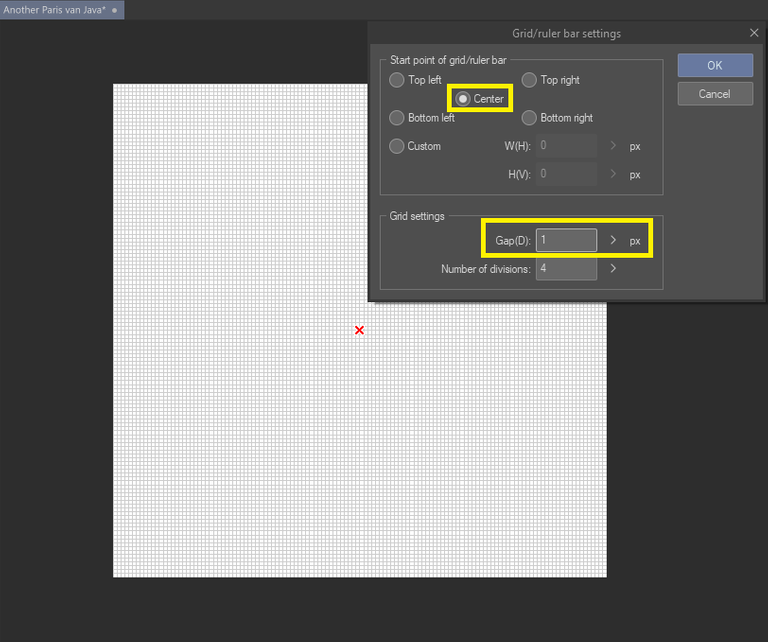
You will see grid lines on your canvas. However, the grid that appears does not match the pixel art needs. Therefore we need to adjust it first. Go back to View menu > Grid/Ruler Bar Settings...

A dialog window will appear. Set the starting point to center and set the Gap(D) to 1px. You will see grid lines on the canvas forming small squares on the canvas.
#2 Adding 3D Primitives
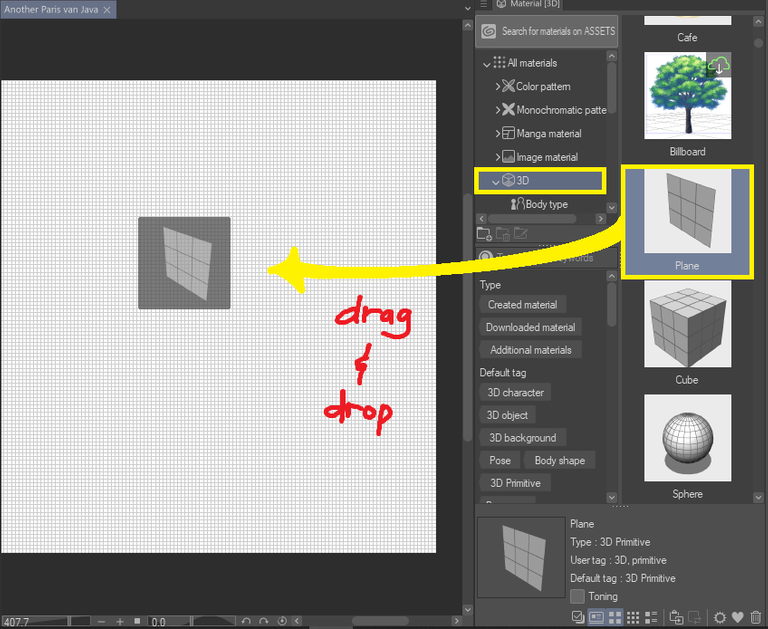
Once the canvas is ready, it's time to take the 3D primitive onto the canvas. You can find 3D primitives in the materials section of the panel to the right of the screen. In the beginning let's drag and drop the "plane" onto the canvas.
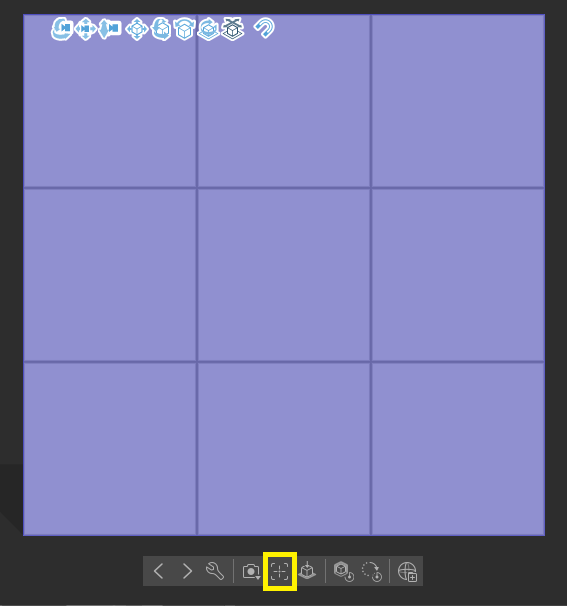
When the 3D primitive is placed on the canvas, its position will cover the canvas so we have to adjust it according to our needs. Click "Center object" on the property tab under the 3D object so we can see the 3D object right in the center of the canvas.
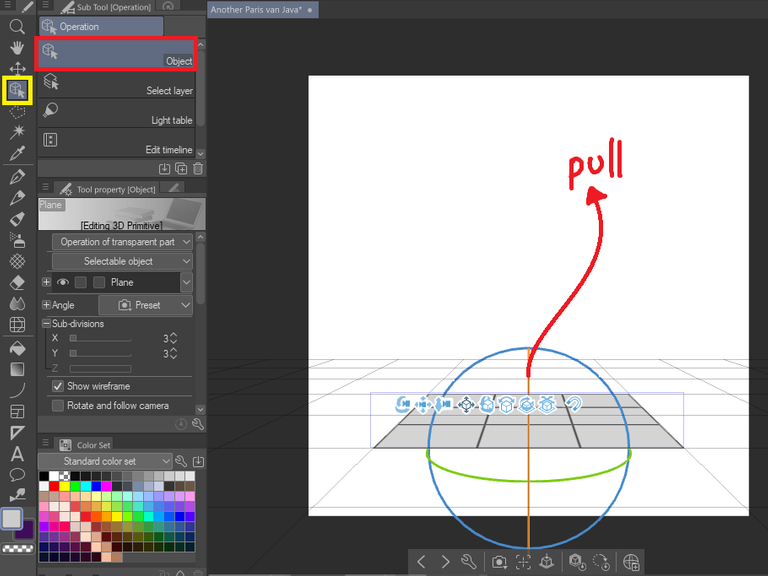
In this case, I want the "plane" to be parallel to the ground line. Use the Operation (Object) Tool and then click on the 3D object (plane) until the coordinate lines appear.
Pull the circular axis that extends in the middle until the object is supine parallel to the ground.
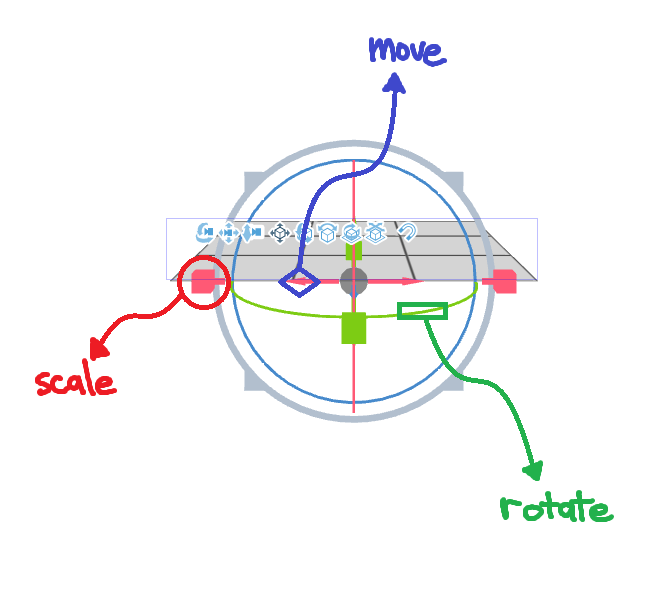
The axes on these 3D objects are amazing and work just like in 3D software. There are three types of axes which are the function is for object transformation.
The outermost axis has a cube-shaped arrow whose function is to scale the object. The second axis is in the form of circular lines whose function is to rotate the object. The deepest axis has a conical arrow whose function is to move the object.
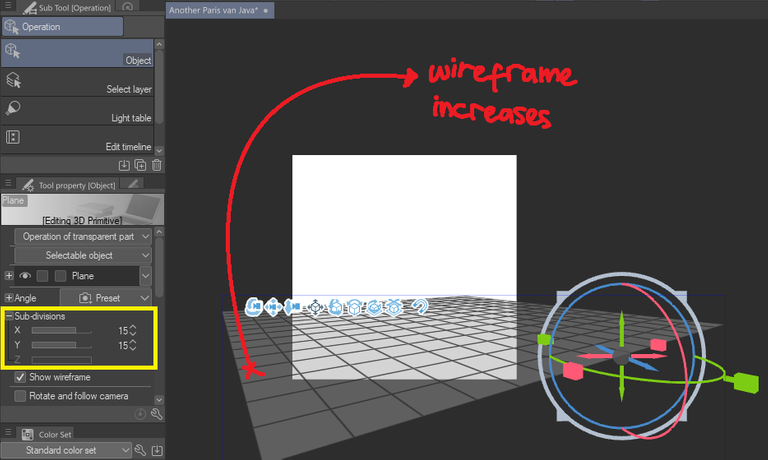
You can rearrange 3D objects and adjust their perspective. If you pay attention, there are cut lines on the surface of the object. This is called a wireframe. The number of wireframes can be increased in the "Sub-divisions" section of the Tool property [Object] in the left pane of the screen.
#3 Stacking 3D Primitives
The next step is to stack the 3D primitives like blocks. Don't think too complicated to make a detailed arrangement. At the beginning you only need to arrange cubes or blocks for the main layout.
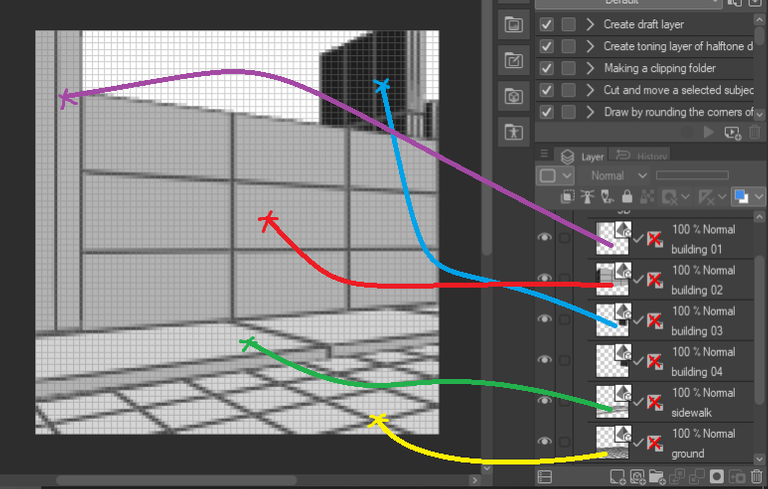
I turned the cube into a block and adjusted the perspective to make it look like a building. Arrange some blocks by adjusting the position of the layers.
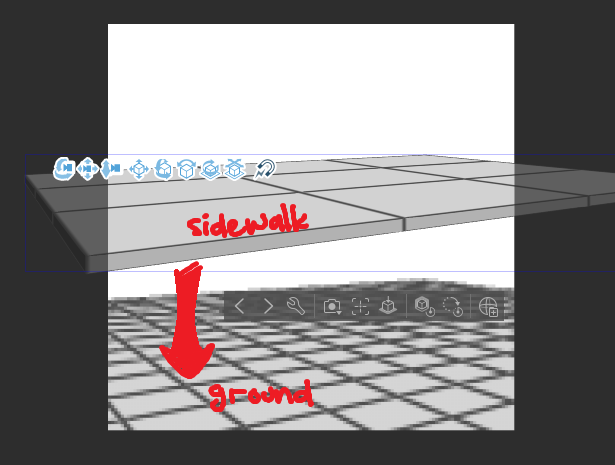
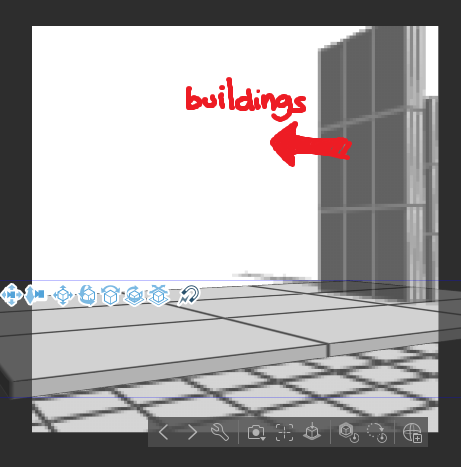
Once you have assembled some blocks for the background then reassemble some 3D primitives for the foreground objects. For example, I string together some blocks and tubes to form a car.
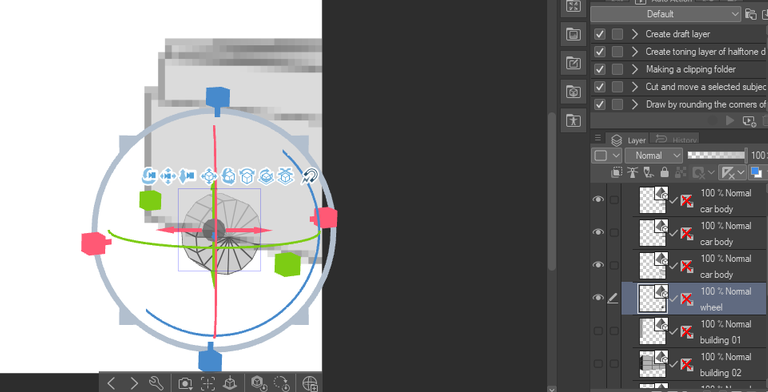
Then I also arranged prisms as poles and planes as banner boards that we usually find on sidewalks.
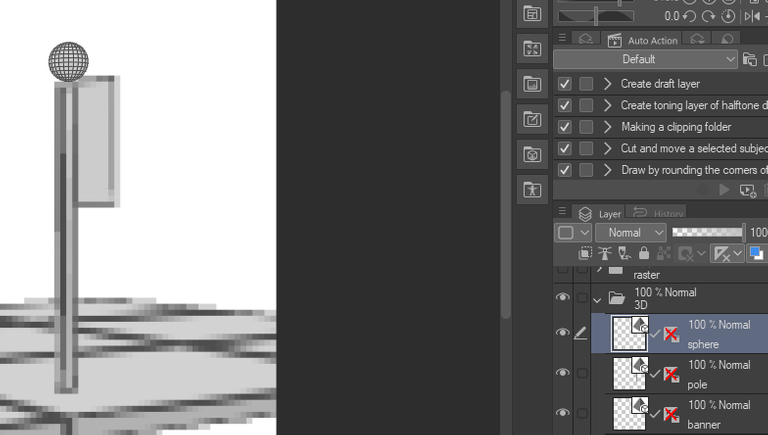
The rest you can add other 3D primitive sequences as per your requirement. In my work this is how I stack 3D primitives which I assemble to create a cityscape view.
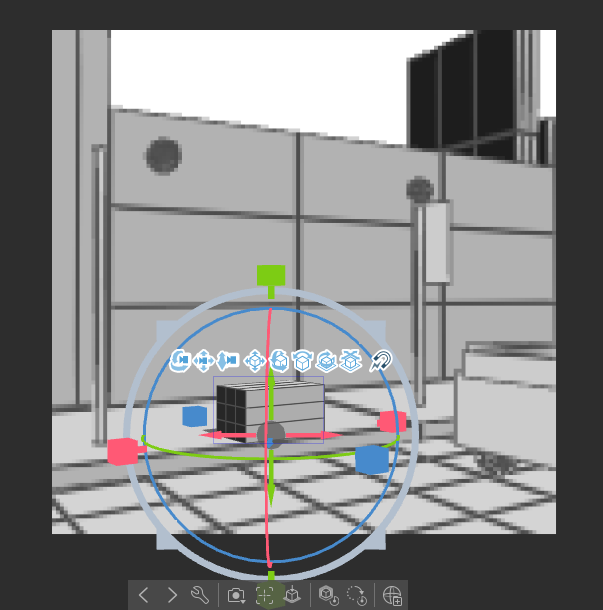
#4 Converting 3D Primitive to Raster Image
Once the stack of 3D primitives has been assembled into a layout, the next step is to create an image on a new layer on top of the 3D primitive layer. But, in this case I'm trying to directly convert a 3D primitive layer to a raster layer.
Select one of the 3D primitive layers then right click > Rasterize.
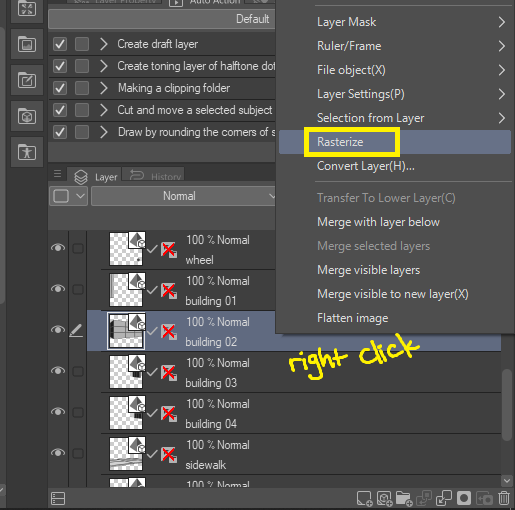
The result of the conversion will look like this on the canvas.
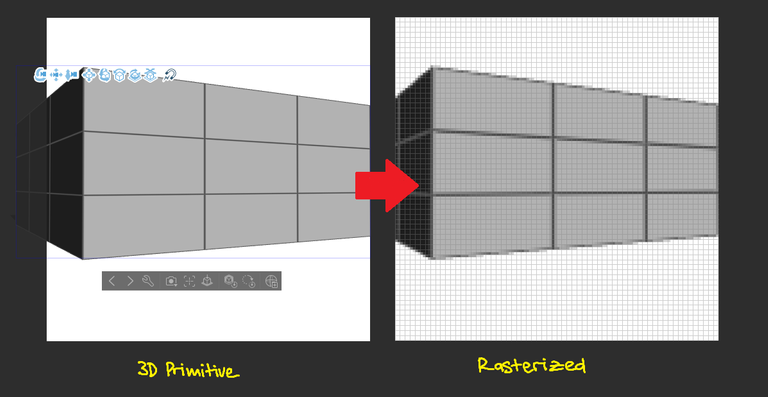
In this case I will keep drawing pixels to produce a more detailed image by utilizing the basic drawings that have been created using 3D primitives.
#5 Setting Up Tools for Pixel Art
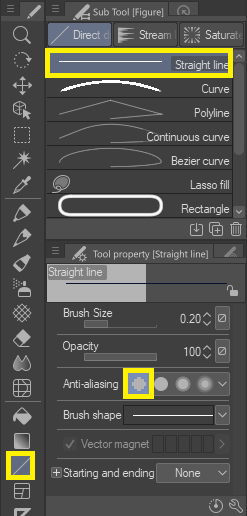
There are several tools that we can use to create pixel art with special settings. The first tool, we can use the "Figure Tool" such as lines, curves, and shape tools to create precise pixel objects.
To use the Figure Tool to create pixel art, we need to turn off the Anti-aliasing feature. Anti-aliasing is a feature that makes the edges of digital image objects look smooth by adding and manipulating the color of the sample pixels around them.
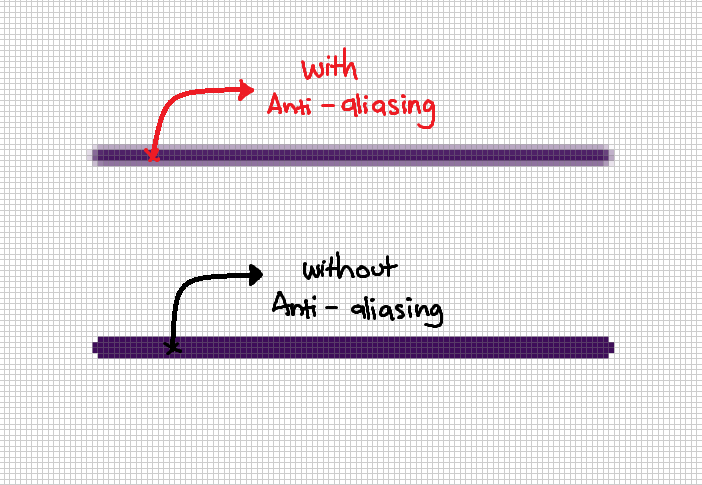
With Anti-aliasing of course pixel art won't look good. So, we have to disable this feature in the tool-property panel on the left. In the "Anti-aliasing" section there are several levels, select "None".
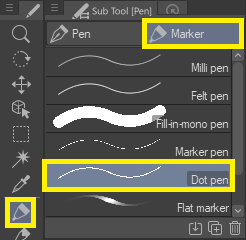
Second tool, we can use "Pen Tool" with sub-tool Marker and Dot Pen type. This type of pen will produce a line drawing with a thickness of 1px so that we can easily create organic pixel objects.
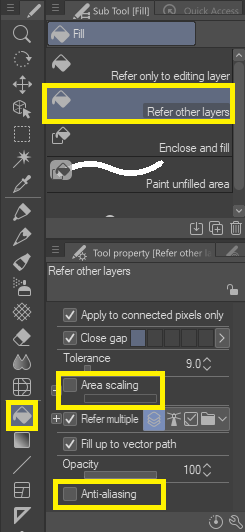
Third tool, we can use "Fill Tool" to fill in pixel fields easily. Select the Refer other layers type so that we can fill in the overlapping fields even though they are different layers. Then in the tool-property, uncheck "Anti-aliasing" and "Area scaling" (this feature is almost similar to Anti-aliasing which produces noise on pixel objects).
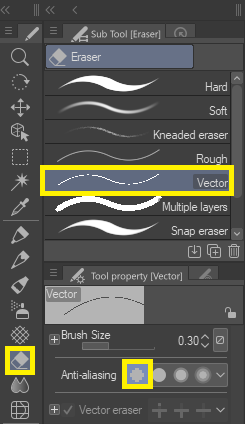
Fourth tool, of course, we need the "Eraser Tool" to erase unnecessary pixels on the work. Select the "Vector" type to erase the pixels without leaving a trace and in the "Anti-aliasing" section there are several levels, select "None".
The rest we can use other tools as needed.
#6 Drawing Pixels
Now let's have a pixel party. We start by developing an existing layout with colorful pixels. With a pre-made layout using 3D primitives, it makes the pixel arrangement process easier to create a certain perspective.
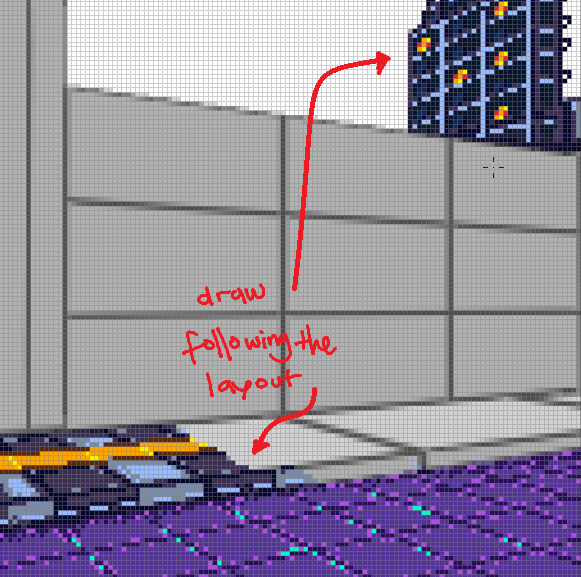
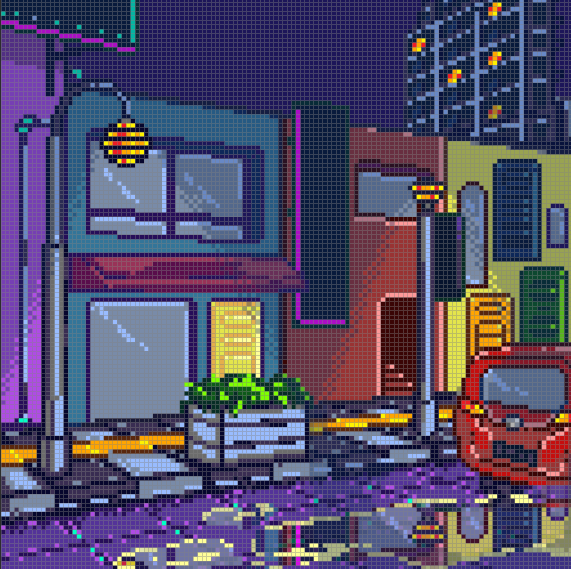
Like the example above, I just follow the existing layout lines to draw pixels to form the building and the sidewalk as the background.
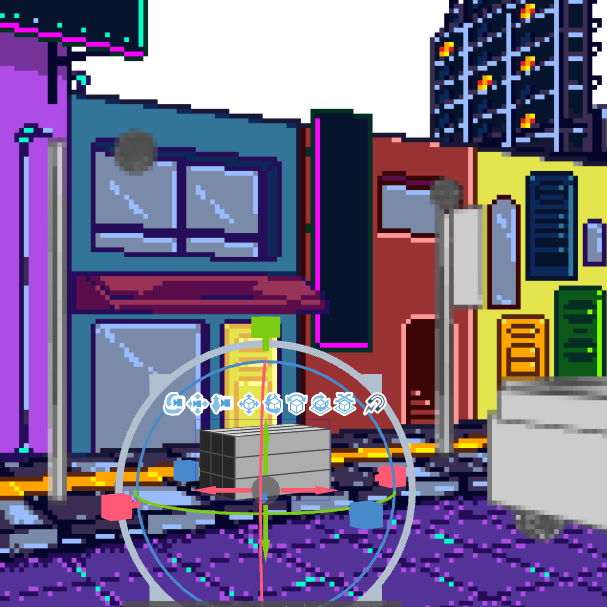
After drawing the background, continue to draw pixels for the objects in front of it. Set the color scheme by specifying the color of the shadows and light colors.
#7 Rendering
Before we render and publish this animation. Let me remind you that this animation has dimensions of 128px by 128px. So that if we render it right away, the result we can see will be this size.
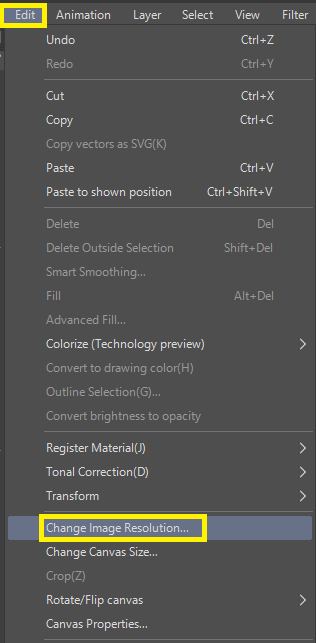
For that, we need to resize it first. Go to Edit > Change Image Image Resolution. The resolution setting window will appear.
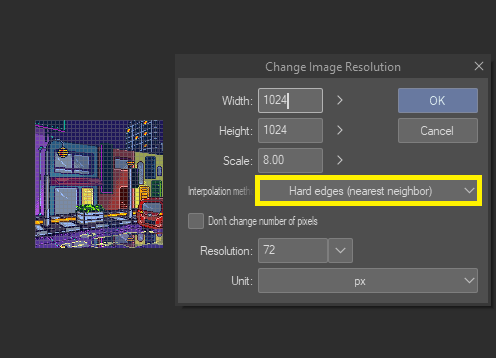
Change the width to 1024px and the height to 1024px. Then change the Interpolation method to Hard Edges. Then the image will be enlarged without destroying the pixel arrangement.
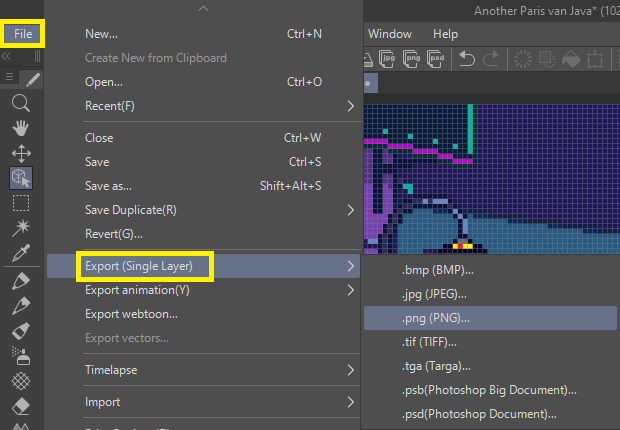
Now, render this image. Go to File > Export (Single Layer) > select the file format/extension you need. Specify a storage directory.
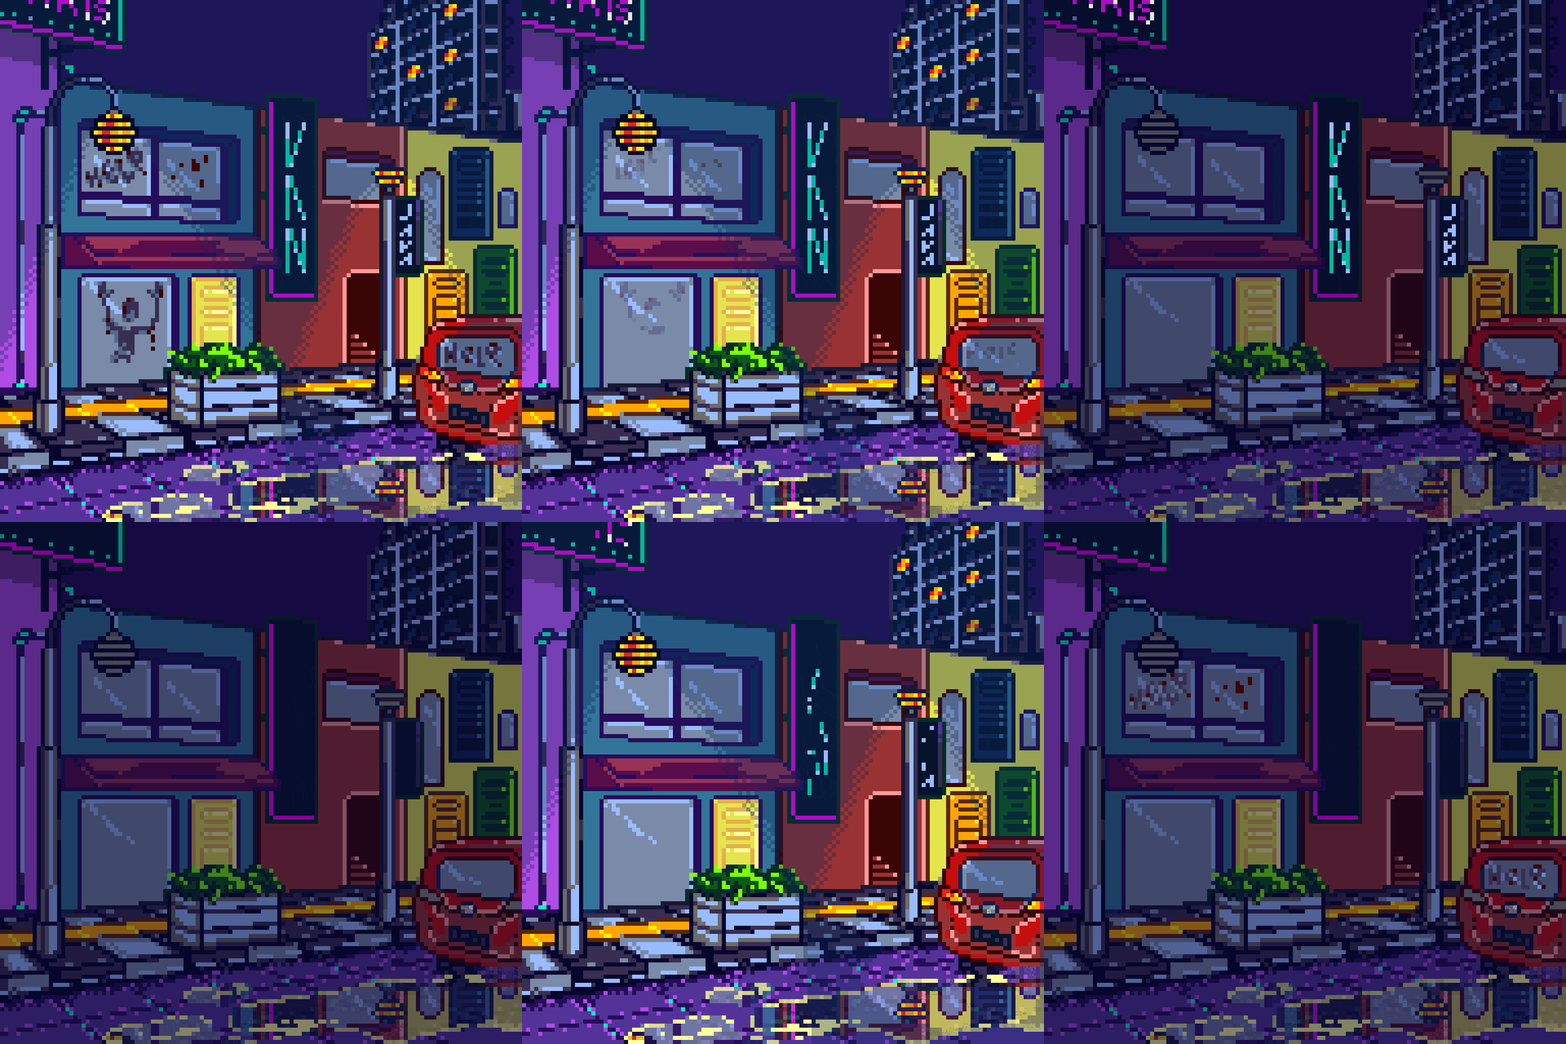
I try to continue to develop this work until it becomes an animation like the following.
OK! That's all I can share. Hope it is useful and please support me to make more tips.
Thank you for visiting this post. Look forward to my next works.
Visit My Gallery:
Twitter | Instagram | H=N | Opensea | NFT Showroom | Exchange Art

The rewards earned on this comment will go directly to the people( @karmachela ) sharing the post on Twitter as long as they are registered with @poshtoken. Sign up at https://hiveposh.com.